
Hello friends – once again, Rob has taser-goaded me out of my jungle lair to secrete the sweet nectar of Goonhammer content.
In particular, this taser-goading was prompted by a recent piece of terrain. As if to confirm that the universe did indeed agree with Rob and wanted a Narrative Forge article on the piece, someone commented this on social media:

In addition to being flattered that anyone would spank to my miniatures, this comment showed that the piece was indeed worthy of the “Narrative Forge” title. Between that very fitting comment and the agonizing taser goad, I agreed to write the article.
Now before we get started, you should be aware that there have been some charges of heresy leveled against this terrain piece. While this might cause some understandable balking in loyal Imperial citizens, I can assure you that the statue is appropriately garbed and the amount of skulls is Regimental Standard-certified.
This terrain piece started when I was visiting all-around stellar guy Brother SRM and saw a Duke Nukem statue on his shelf. I said it would make a hilarious Catachan statue, he said he regretted purchasing the game it came with and the statue was a painful reminder, and I offered to take it off his hands. At least that’s how I remember it… if it was any more coercive than that, Brother SRM, please send me an invoice for the statue and I will reimburse you.
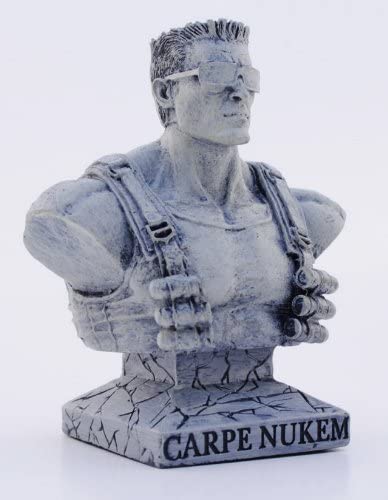
The Catachan are always portrayed as ferociously loyal Imperial warriors, but not particularly pious. For years I had the idea of a Catachan shrine to the Emperor which, instead of stained glass and candles, would have trophies from slain enemies of mankind laid as tribute. What greater worship of the Emperor is there than killing in his name? The only problem was that I could never find a cheap Emperor miniature. With the Duke in hand, I decided to take the same idea but put a Catachan “tomb of the unknown soldier” twist on it instead.
As with many terrain pieces that double as centerpieces or dioramas in their own right, I wanted to accomplish several conflicting goals:
- Include all the components needed to tell a story…
- BUT allow as much flat, open space as possible to place miniatures during games.
- Be large enough to serve as a centerpiece…
- BUT be small enough for practical storage.
- Include details and depth to make the piece interesting…
- BUT be study and durable enough for regular gaming.
Because you’re trying to find the Goldilocks zone between these warring goals, it behooves the hobbyist to plan ahead before committing to anything.
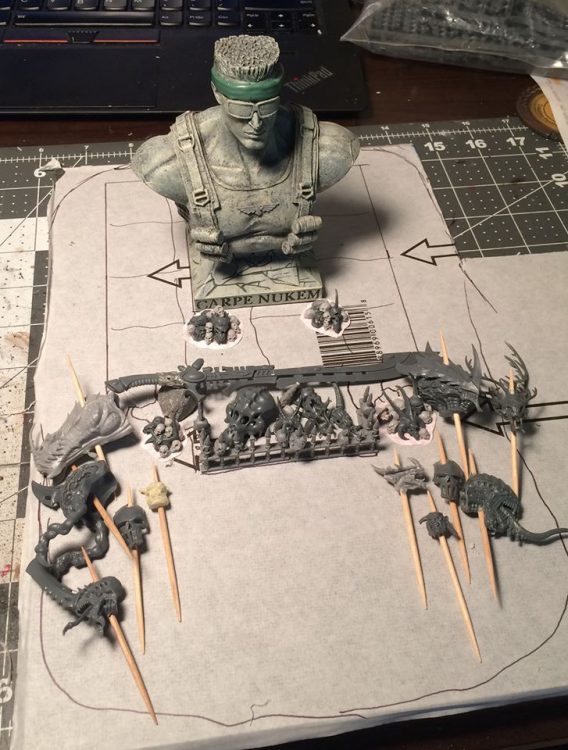
You will no doubt have already read and savored the “creating and basing terrain” article, so I won’t recap any of that here. Similarly, you should be very used to playing with your bits at this point and need no refresher. Needless to say, it was very helpful to have the necessary terrain materials and organized bits on hand when planning this project out. This made it easy to collect the bits I wanted to use, lay them out on the tile, and draw rough outlines in marker. Everything was spaced with gameplay in mind – the raised dais around Duke was drawn large enough to accommodate 40mm bases, while the central clearing can provide cover for a model as large as 100mm. You want to be sure to check this all before committing to a build, as there’s nothing worse than realizing your lovingly-painted Warlord on a 40mm base can’t pass through the hallway you just built!
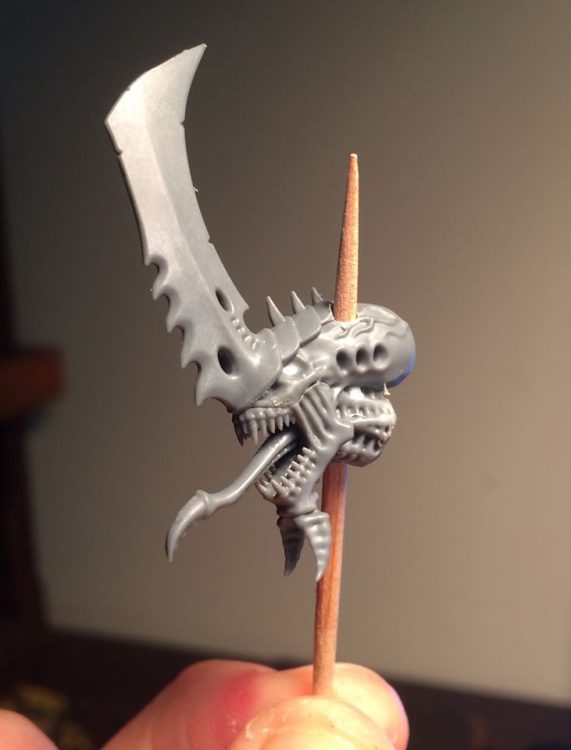
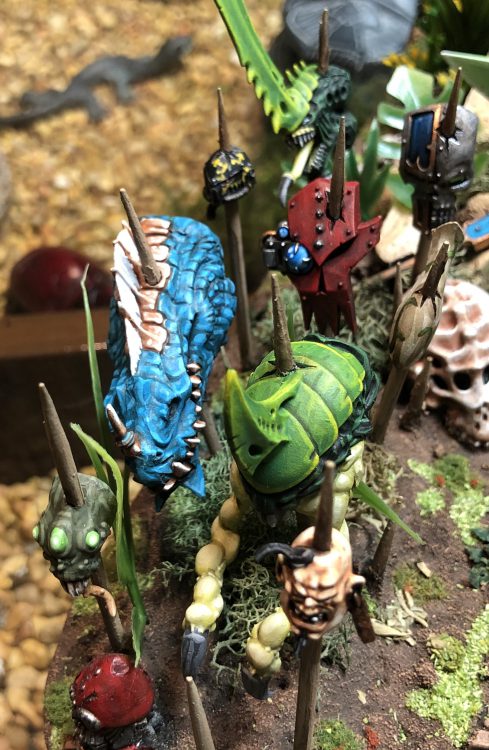
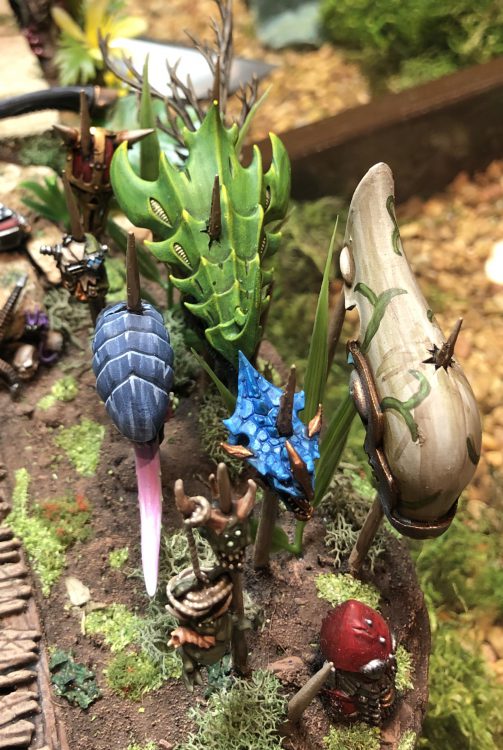
When hobbyists depict a character being run through by a weapon, they’ll often cut the weapon and glue piece a on each end to give the illusion of impalement. While this can work, being even the slightest bit off makes the whole thing look wonky. And even if you do it perfectly, it’s easy for things to snap off after gluing. Much better to do it right – in this case, power-drill a hole through each head and ram a cocktail stick through. What a rush! Almost like dispatching heretics yourself.
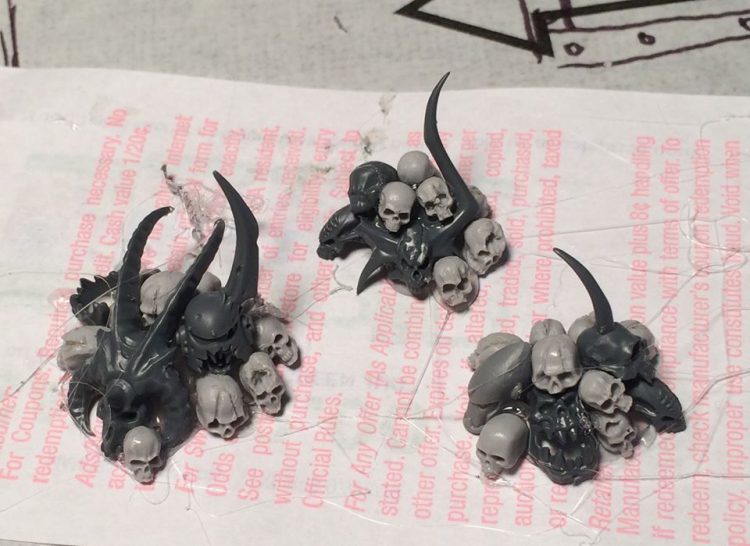
Each skull mound started life as a blob of hot glue deposited on a receipt via glue gun. Quickly, before cooling, the desired skulls and helmets were pressed into the blob. For larger mounds, a second blob was placed on top and a smaller second tier of skulls attached. Any gaps or open areas had additional skulls carefully placed with tweezers and a tiny dab of hot glue. Because hot glue has a short working time, it helped to have the skulls pre-arranged into the groups I wanted to assemble into mounds. If I was picking and deciding as I worked the glue would cool completely before I was done.
Hot glue is the perfect adhesive for this job for several reasons.
- Provides a strong structural component to each mound.
- Glue visible between skulls is rounded and gives the illusion of more skulls buried deeper inside.
- If any glue is visible where you don’t want it, simply cover with PVA glue and sand before priming.
I won’t lie, there was something supremely relaxing and satisfying about making these mounds. The ratio of human to nonhuman skulls, the artful crookedness of them, making each look carelessly heaped while still having a sense of composition to showcase the most interesting parts… I was sad when there were no more left to make!
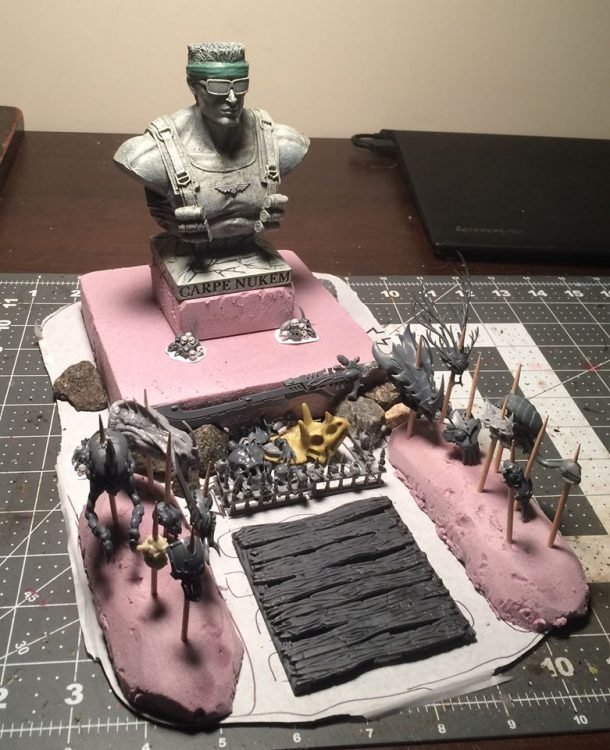
Once the skull mounds were complete, I cut out hunks of pink insulation foam and began roughly arranging all the components. Remember all the talk about repurposed toys in the “playing with your bits” article? My box turned up the wooden slats from an old mummy playset, which fit perfectly in the central area. This also implies that the area is frequently visited, so the soft earthen ground needs reinforcement to avoid being churned into mud. As a focal point to the piece, you can see where a soldier might kneel under the Duke’s mighty gaze.
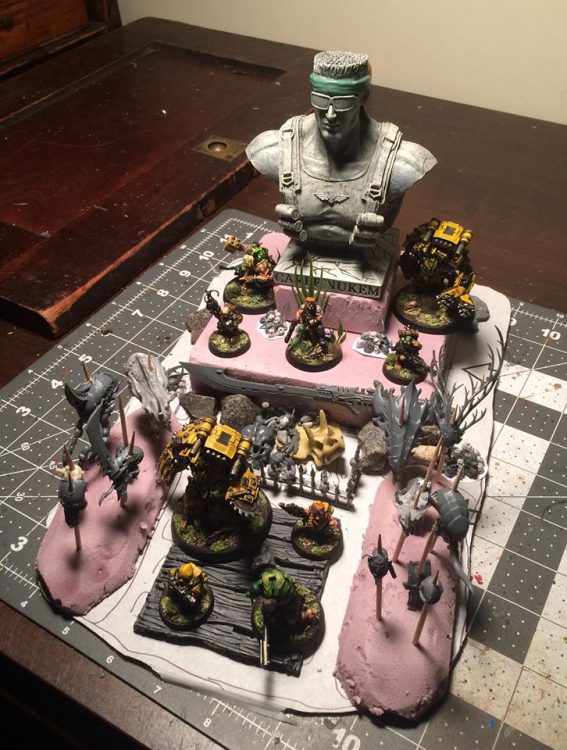
Before committing to glue, the spacing and model placement needed to be checked. A scattering of recently-painted models confirmed that there was plenty of space for exciting battles and model interactions once this terrain hit the tabletop.
A friend gave me a dwarven fence from the old Battle For Skull Pass starter set some time ago, and I decided this was as good a time as any to use it. In an admittedly contrived bit of narrative-forging, I figured something had to be keeping these impaled heads from decomposing, Necron heads from phasing out, and Daemon heads from returning to the warp. Placing a Squat icon on each corner of the terrain piece could represent stasis field generators, a generous gift from my Catachan’s erstwhile allies. Don’t be afraid to flex those narrative muscles if it lets you use some cool bits you’ve been itching to use!
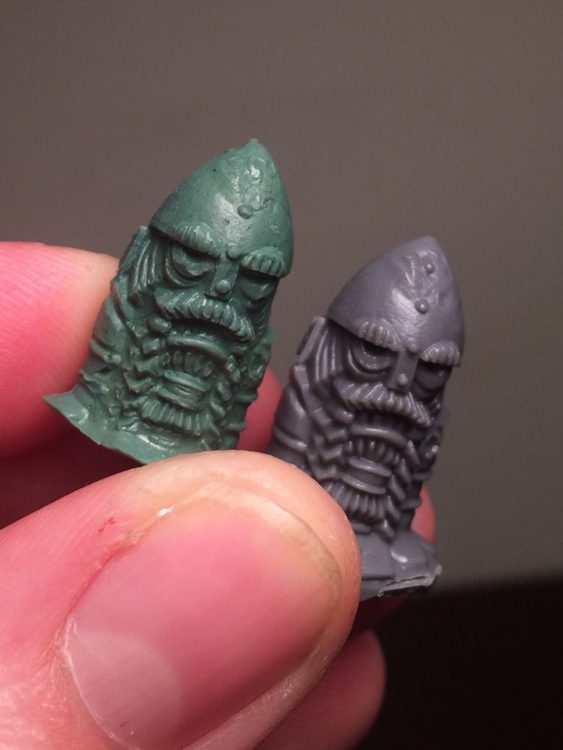
Because this plan required four Squat generators and I only had three, I needed to greenstuff-cast a fourth. In a stroke of luck that’s frankly rather spooky, I happen to have already written an article on that very subject. Greenstuff-casting bits is an invaluable hobby tool, so I highly encourage reading that article if you haven’t already.
“Enough stalling!” I can hear you screaming, pounding your enthusiastic little hobby fists on your desk. “Show us the damn finished terrain piece!”
Patience. I’m getting there.
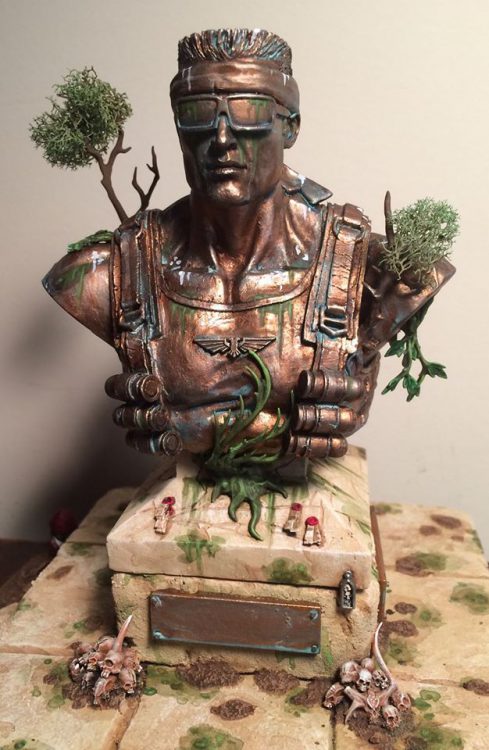
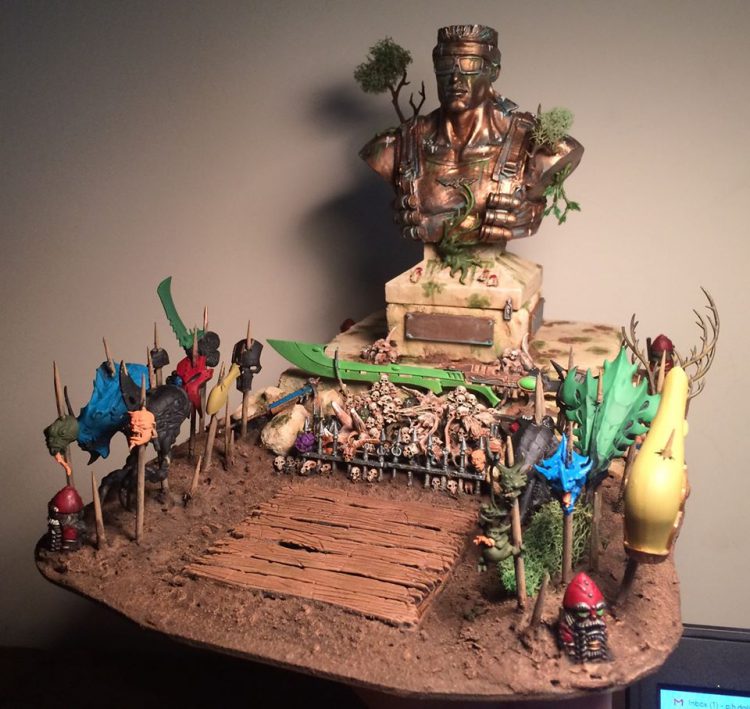
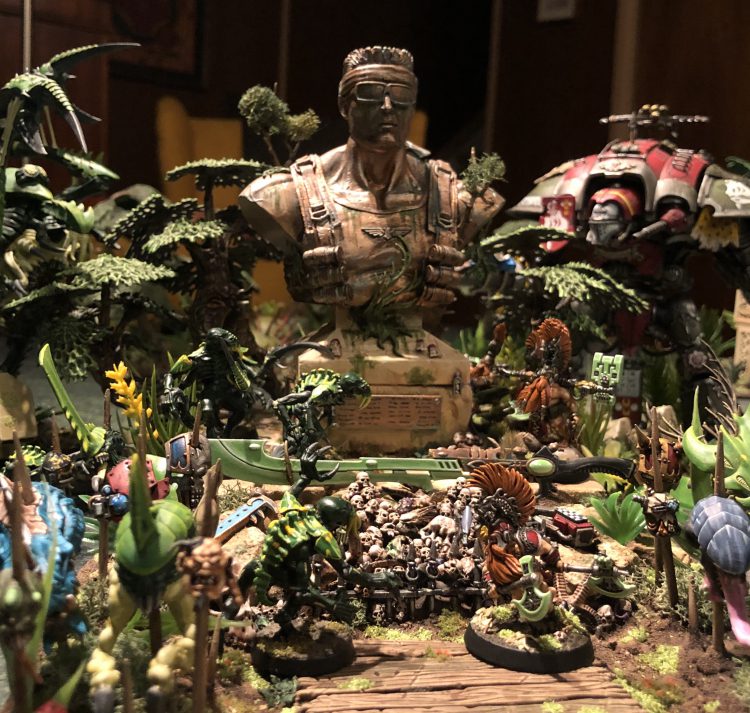
Clearly, in this terrain piece, the statue is the focal point. With the new greenstuffed bandana and Imperial Aquila, we can no longer call him Duke in good faith. I have rolled on the Kill Team Catachan Naming Table and it turns out that this was a fellow named Grytt (13 on a D66). His demeanor was Gung-Ho (10 on a D10), which is highly appropriate. Rest in Peace, Grytt.
Anyway, as the focal point, we want to paint Grytt first. Once Grytt’s colors are firmly established, we can start assigning other colors that work with him. I went with a bronze/copper statue look featuring verdigris, moss, bird poop, and other fashion staples of the jungle. Fun bonus for the horndogs: I just learned that googling “bronze statue” turns up a good deal of erotic art, some rather classy. Thank me later.
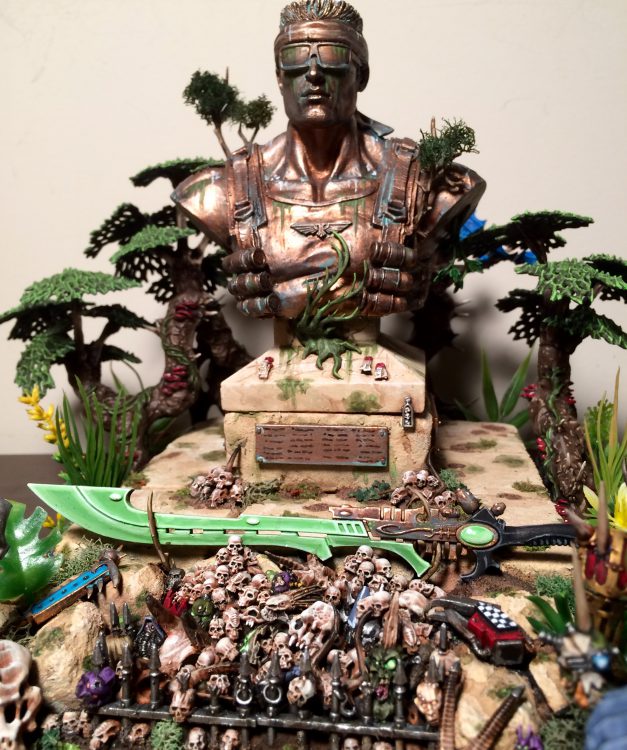
With Grytt’s colors in place, as well as the stasis generators painted to match my Squat army, I began selecting colors for the impaled heads. Blues, greens, tans and reds were all safe colors that were already established in the model, so I went with them to avoid the model looking too chaotic and “noisy.” Those broad selections also gave me enough latitude to accomplish another goal of the terrain… paint up as many of the heads as possible to resemble my common gaming opponent’s armies. Raise your hand if you saw that coming a mile away.
With the colors all chosen, it was time to finish up the painting.
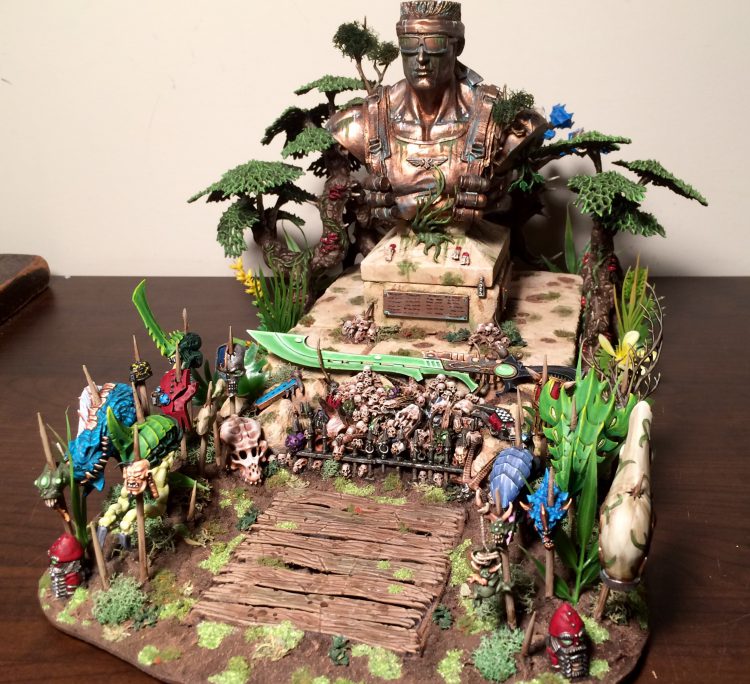
To show that I always go above and beyond for my good friends at Goonhammer, and to spare myself a future tasering, I took some diorama-style shots to give a sense of how battles might interact with this terrain piece.
What an exciting thing that is! Let’s have another.
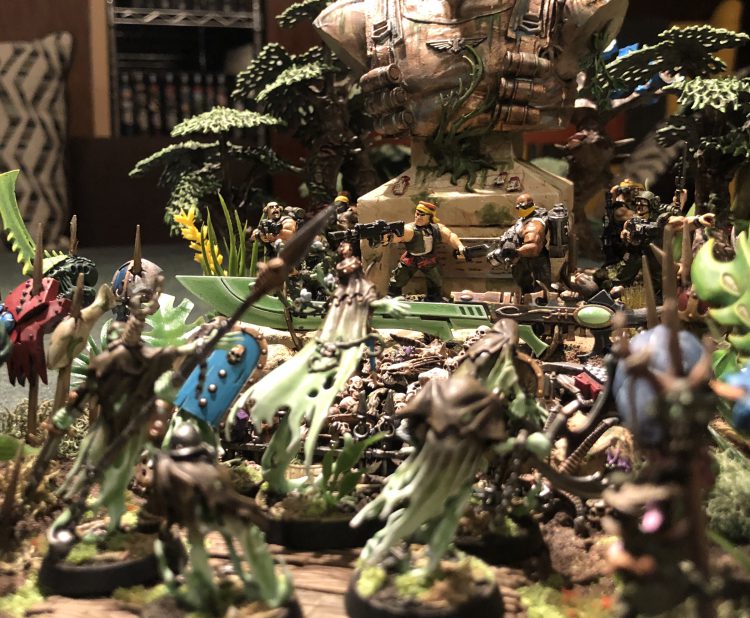
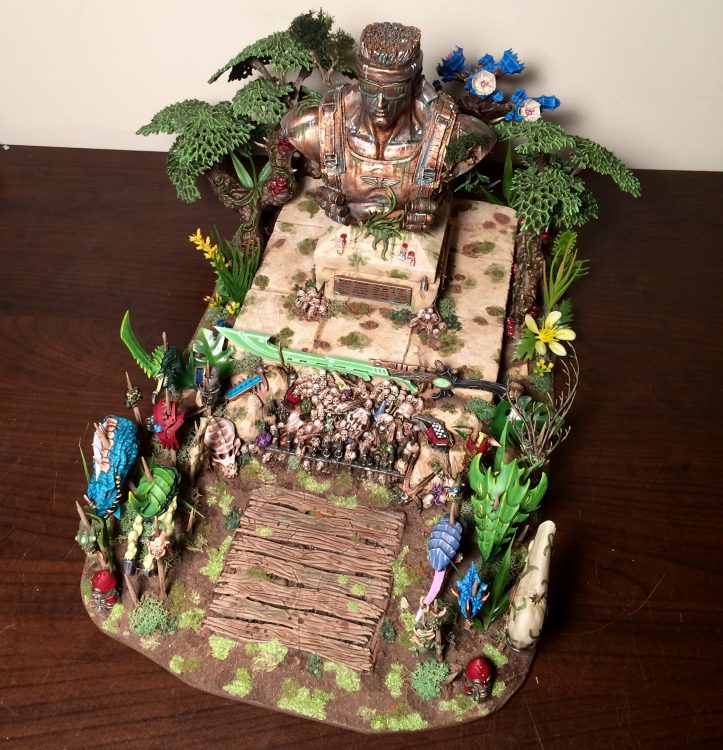
Positively ghastly! What else?
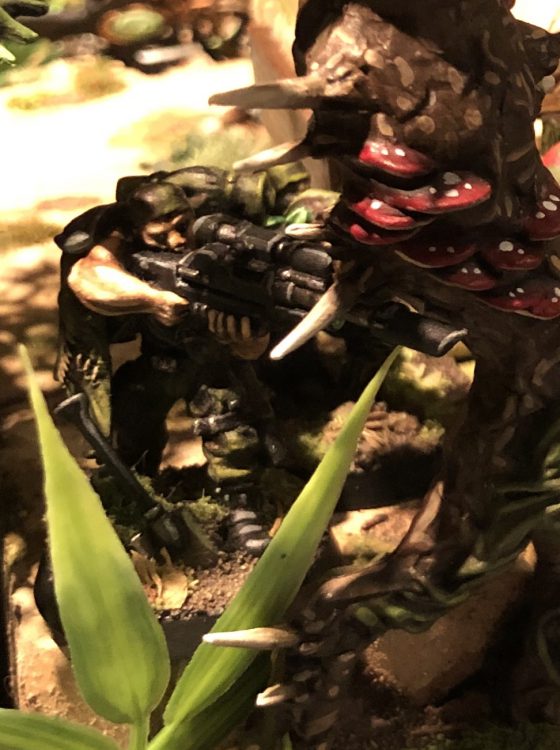
Chilling!
I hope this article entertained and inspired you, as well as serving to tie my previous articles into a cohesive – would it be too contrived to say narrative? Either way, I look forward to seeing what terrain pieces you come up with for your own armies. Once you start seeing terrain as more than LOS-blocking afterthoughts in your hobby, you’ll be opened up to a rewarding new dimension of creative fun.
You can always find BuffaloChicken’s latest model photos on Instagram.
