
Welcome back to Goonhammer’s series for aspiring Titan Principes. We here at Goonhammer’s own Collegia Titanica know that Adeptus Titanicus can seem intimidating to players unfamiliar with its particular quirks, but this series aims to equip you with everything you’ll need to play out epic clashes on the battlefields of the far future with your very own Titan Battlegroup. In this series, we’ll be taking a more in-depth look at the various Legios of the Collegia Titanica – exploring their origins and how to use them on the tabletop, from maniple selection and their loadouts, through to how to command them on the field of battle to secure ultimate victory.
This column’s usual authors took a week off to go repair their reactor dice (?) or whatever this game is about, so here’s Greg.
Greeting, reader, and here begins your extremely timely and well-planned Warlord Wednesday. Today we aren’t going to be talking about Titanicus, or about Titans. There might be some Titan-adjacent content, and if you’re into titanic feet, this is probably going to be a good week. We’re going to talk about basing, and why you should do it.
There’s two things about basing for Titanicus in particular that make it rock ass. First, the scale of the models, and their ground clearance, offers space to fit in entire tiny buildings or units of Epic-scale models, instead of a single tuft of weeds, allowing the particularly insane modeler to create individual dioramas for each base. Secondly, you only have to make like 6 of these for an average maniple, so you can afford to put a little more work into them, instead of being a bum. Unless, that is, you’re playing a knight household, in which case you should just treat these the way you would 40k bases, because that’s about the size and quantity you’re suddenly dealing with.
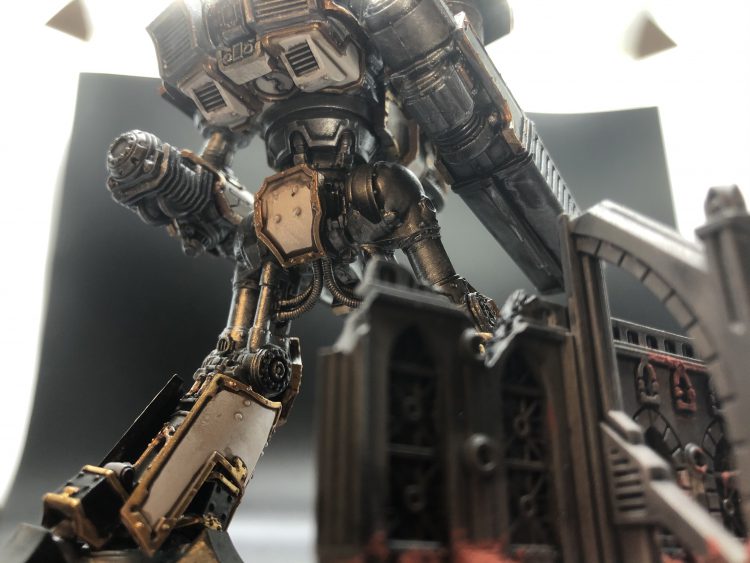
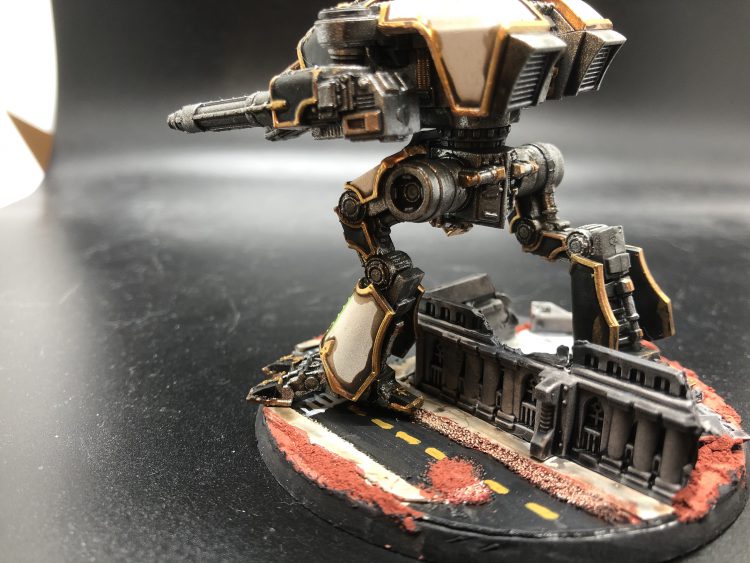
The thing about Titanicus, which you may be surprised to learn, is this: titans are very big, but the models are very small. Putting ruins or to-scale infantry on the base helps trick your idiot primate brain by giving it something familiar to scale the titan against. Plus it lets you take cool low-angle shots like this:
In order to get results like this, you first need to become a worse painter and modeler than you currently are, which means that only better outcomes are within your grasp, if you would but reach for them. What I’m saying is that this is very easy to do. So, the first step of this process is: believe in yourself.
Second, gather some materials. In general, some kind of terrain – either a GW kit, third party, or something custom 3D-printed is fine – along with some texture paint and/or basing sand, and finally some form of card stock or plastic sheet. I used the Games Workshop Civitas Imperialis terrain, Citadel Martian Ironcrust, and some old business cards.
I should point out there that I had built and painted my titans before I thought of this plan, let alone attempted to construct, and then attach, the bases. This meant that I had to do a lot of dry-fitting around the structures, to see where and how things would fit, and that I wasn’t able to do much in the way of dynamic “foot up on roof” posing. In retrospect, and for future maniples, I’d build the robot part and the flat part at the same time.
There is no creation without destruction, so this is where we grab the razor saw, snippers, and hobby knife, and proceed to hack up some terrain until it looks all busted. Anything goes: walls, corners, buttresses both flying and not, the world is your oyster. Probably don’t do fully-enclosed buildings, because it’ll be difficult to fit the Titans around them, but there are no mistakes here, just happy accidents: if you go too hog wild and the titan won’t fit, just chop up the building until it does. The average terrain kit contains so many more pieces than necessary for this project that it straight up does not matter how many you ruin, it is impossible to actually run out.
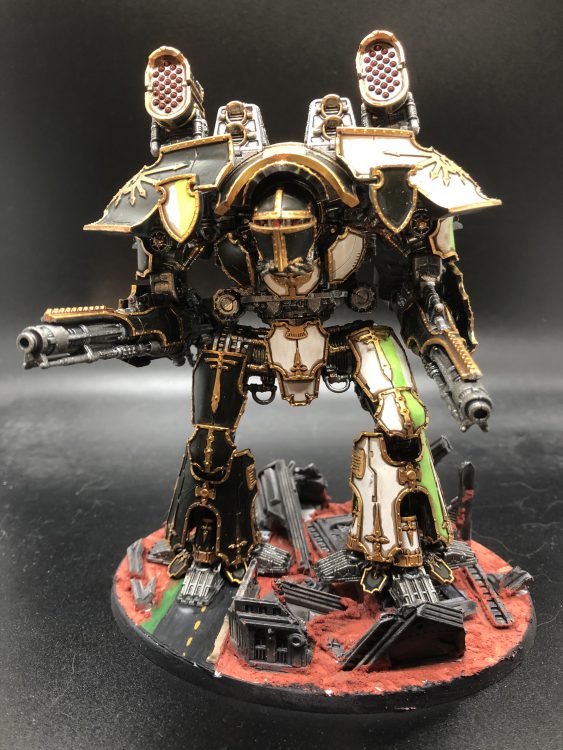
Once the buildings and the robot are pretty well sorted, get out the card and the scissors and throw in some roads, and start gluing stuff down. I put a second layer of card along the edges, a thin strip, to act a median/sidewalk, and cut little curves around the corners. Detailing!

Because there’s so few bases, and so much area to cover, I try to treat them as more than a regular 40k base, but somewhat less than a full diorama. I’m not quite to the level of “telling a story”, having duelling squads of marines or civilians having the worst day of their 6mm lives – though if anyone out there took a model railroad level approach to this, Warlord Wednesday would like to see your results in our inbox immediately. But I do try to aim for something more specific than “dust circle” or “biome: skulls”. Admittedly, “busted up martian city” isn’t the most creative locale in all of 40k, but it does allow for some fun details.
Anyway, once you feel like you’ve clogged up the base so much that the titan won’t fit, prime them, and drybrush/wash the buildings, but don’t do the texture paint yet.
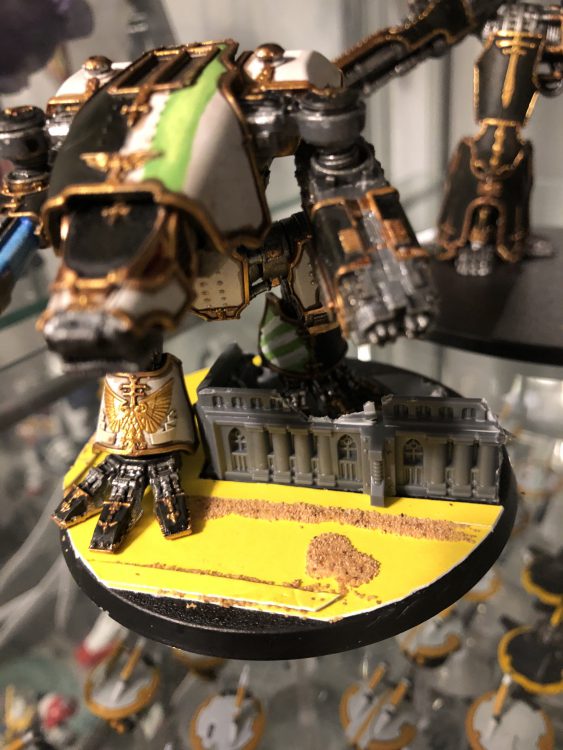
This brings us to my favorite part of the entire process: painting little stripes and stuff on the roads. I went for something semi-realistic but, surprising no one, did not overthink it. All of this is hand-painted, which is immediately obvious based on how you can tell that it sucks. The crosswalks and merge markers were fun, but my favorite detail is the green stripe on the Warlord’s base: it’s a bike lane. Why on earth did I make that?
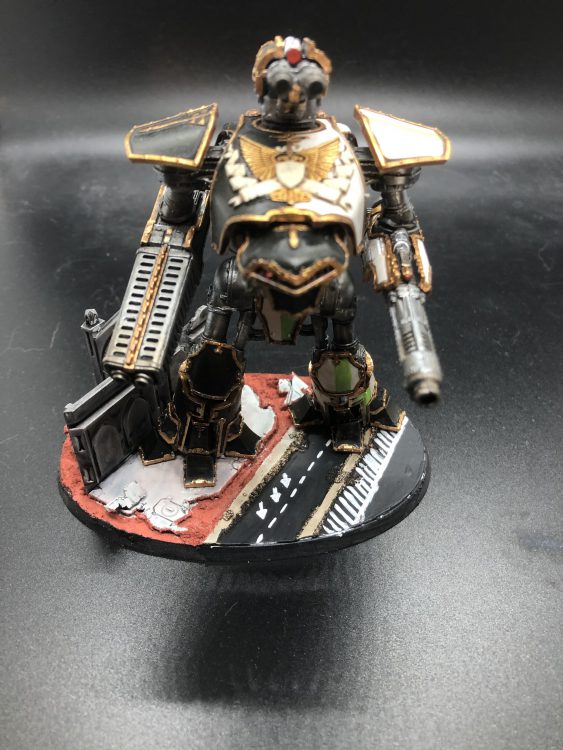
There’s some pretty bad planning on these, between the fact that I legitimately thought I was good enough to free-hand all those arrows and lines (god, the audacity) and that in at least one place I painted a very complex little cross-walk/stop sign intersection and then realized to my horror that it was directly beneath where I’d been planning to put a titan’s foot. The worst mistake, though, was when it came to attaching the bases. If you put down plastic floors in the buildings, or left big bits of open terrain and haven’t sand-or-texture-painted them yet, you can plastic cement the titan down. If you didn’t do that or, as in my case, decided that having an extremely exploded building was worth the hassle of only being able to glue a single foot down to painted card stock instead of plastic, it is time to pin. At any rate, this is where you attach one titan.
Then just cover all the open areas with texture paint, and call it done.

I’m happy with the result here, but I’d like to think that next time around I’ll put more work into them – painting more details on the buildings and trying to texture the roads, along with masking to get straighter lines on the signage, and detailing the pavement more, really try to evoke a sense of place, resulting in something closer to actual terrain than just basing.
I said that I like to think this, because I know that I’m just going to get bored of gluing my hands together and bash them out in an evening again, crooked lines and all. C’est la vie, or whatever. Play titanicus.
