
Welcome back to Goonhammer’s series for aspiring Titan Principes. We here at Goonhammer’s own Collegia Titanica know that Adeptus Titanicus can seem intimidating to players unfamiliar with its particular quirks, but this series aims to equip you with everything you’ll need to play out epic clashes on the battlefields of the far future with your very own Titan Battlegroup.
This week the UK contingent of the Wednesday Warlords went to a Horus Heresy weekender hosted by Greetings from the Warp, in lieu of our regular programming, read on to see how they fared.
The Event
The event told the tale of the Loyalists attempting to retake the hive world of Kemerova, which fell to the Traitors during the Horus Heresy. This was done via two narrative campaigns, one for Adeptus Titanicus – which we took part in and one using Horus Heresy.
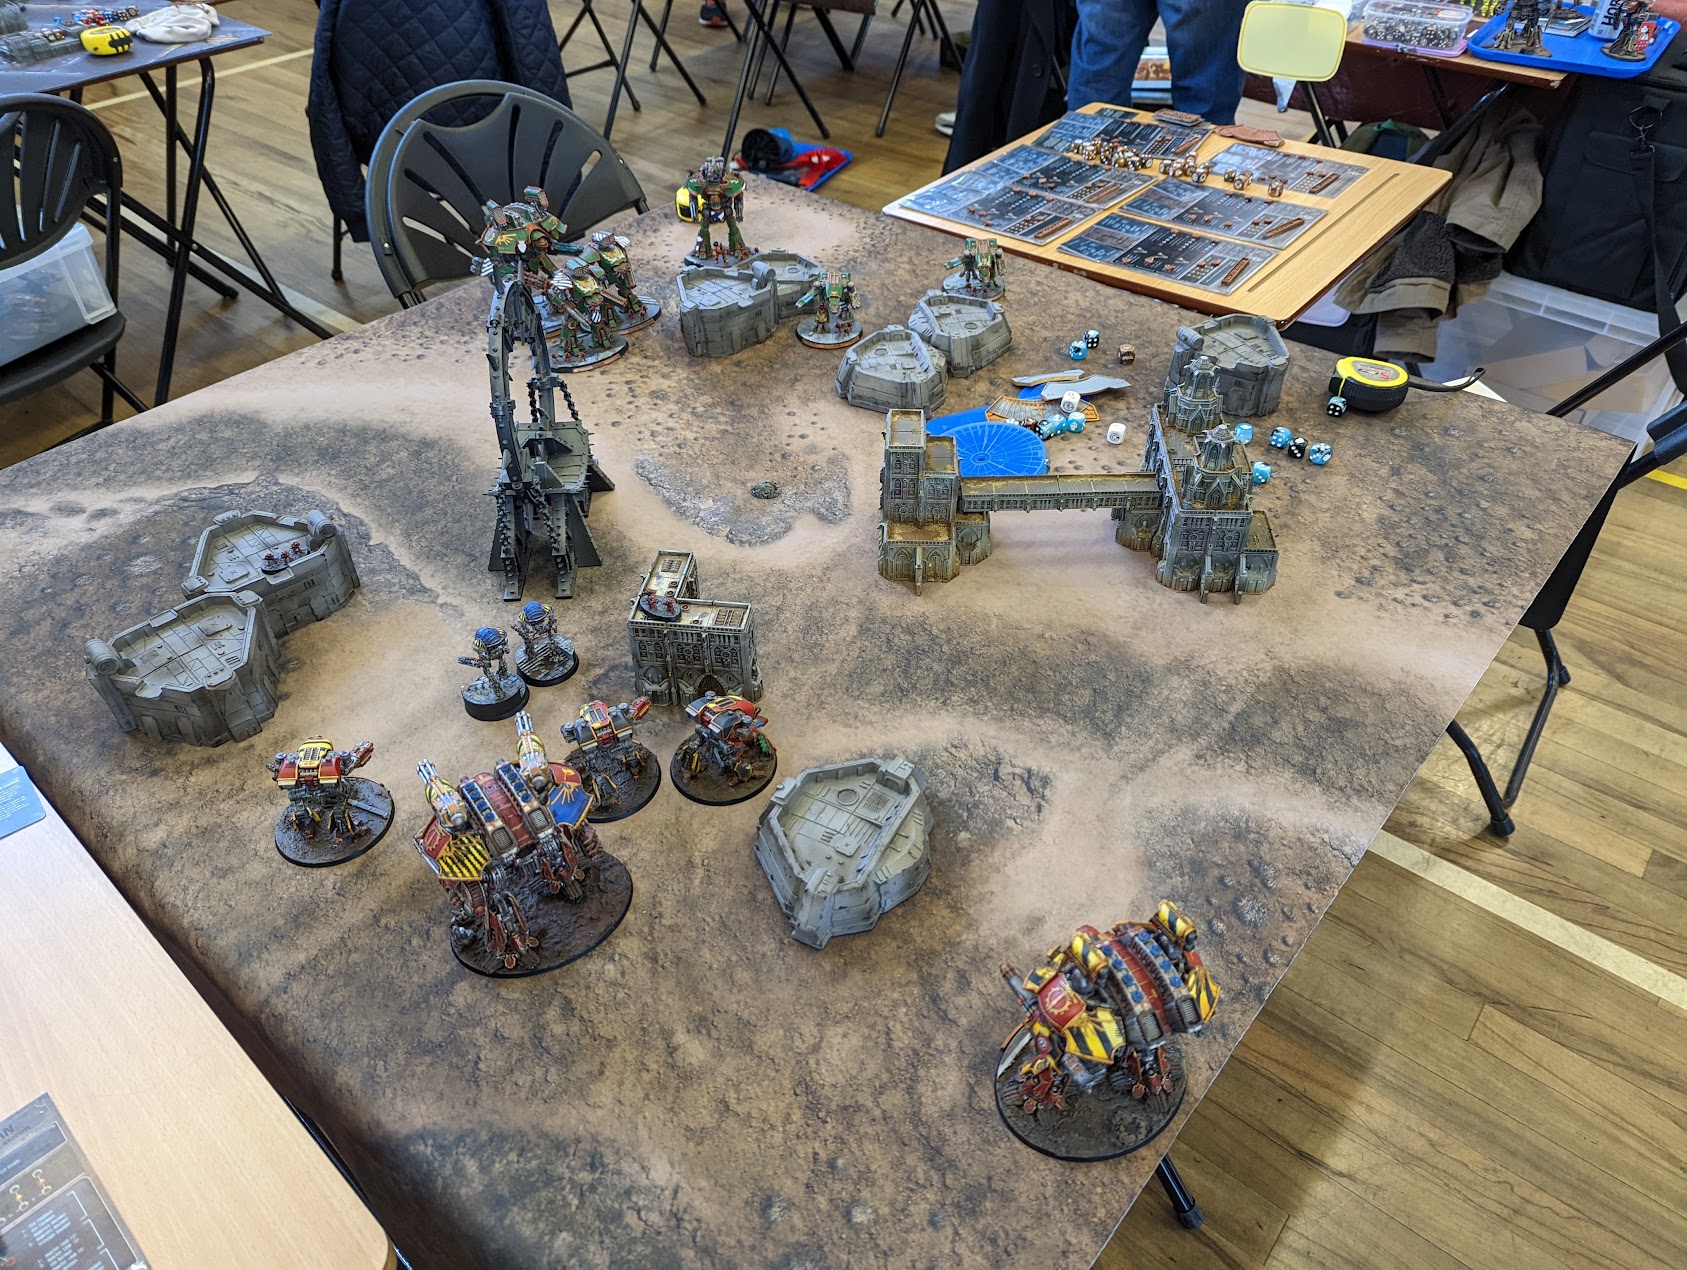
Soggy: Being a fully narrative event, the overall vibe this weekend was great – with people taking their most fluffy or best painted forces. The level of hobby this weekend was completely flooring
LordTwisted: I concur. The hobby standard was off the scale. Everything was beautifully painted, full tables of terrain, and endless inspiration.
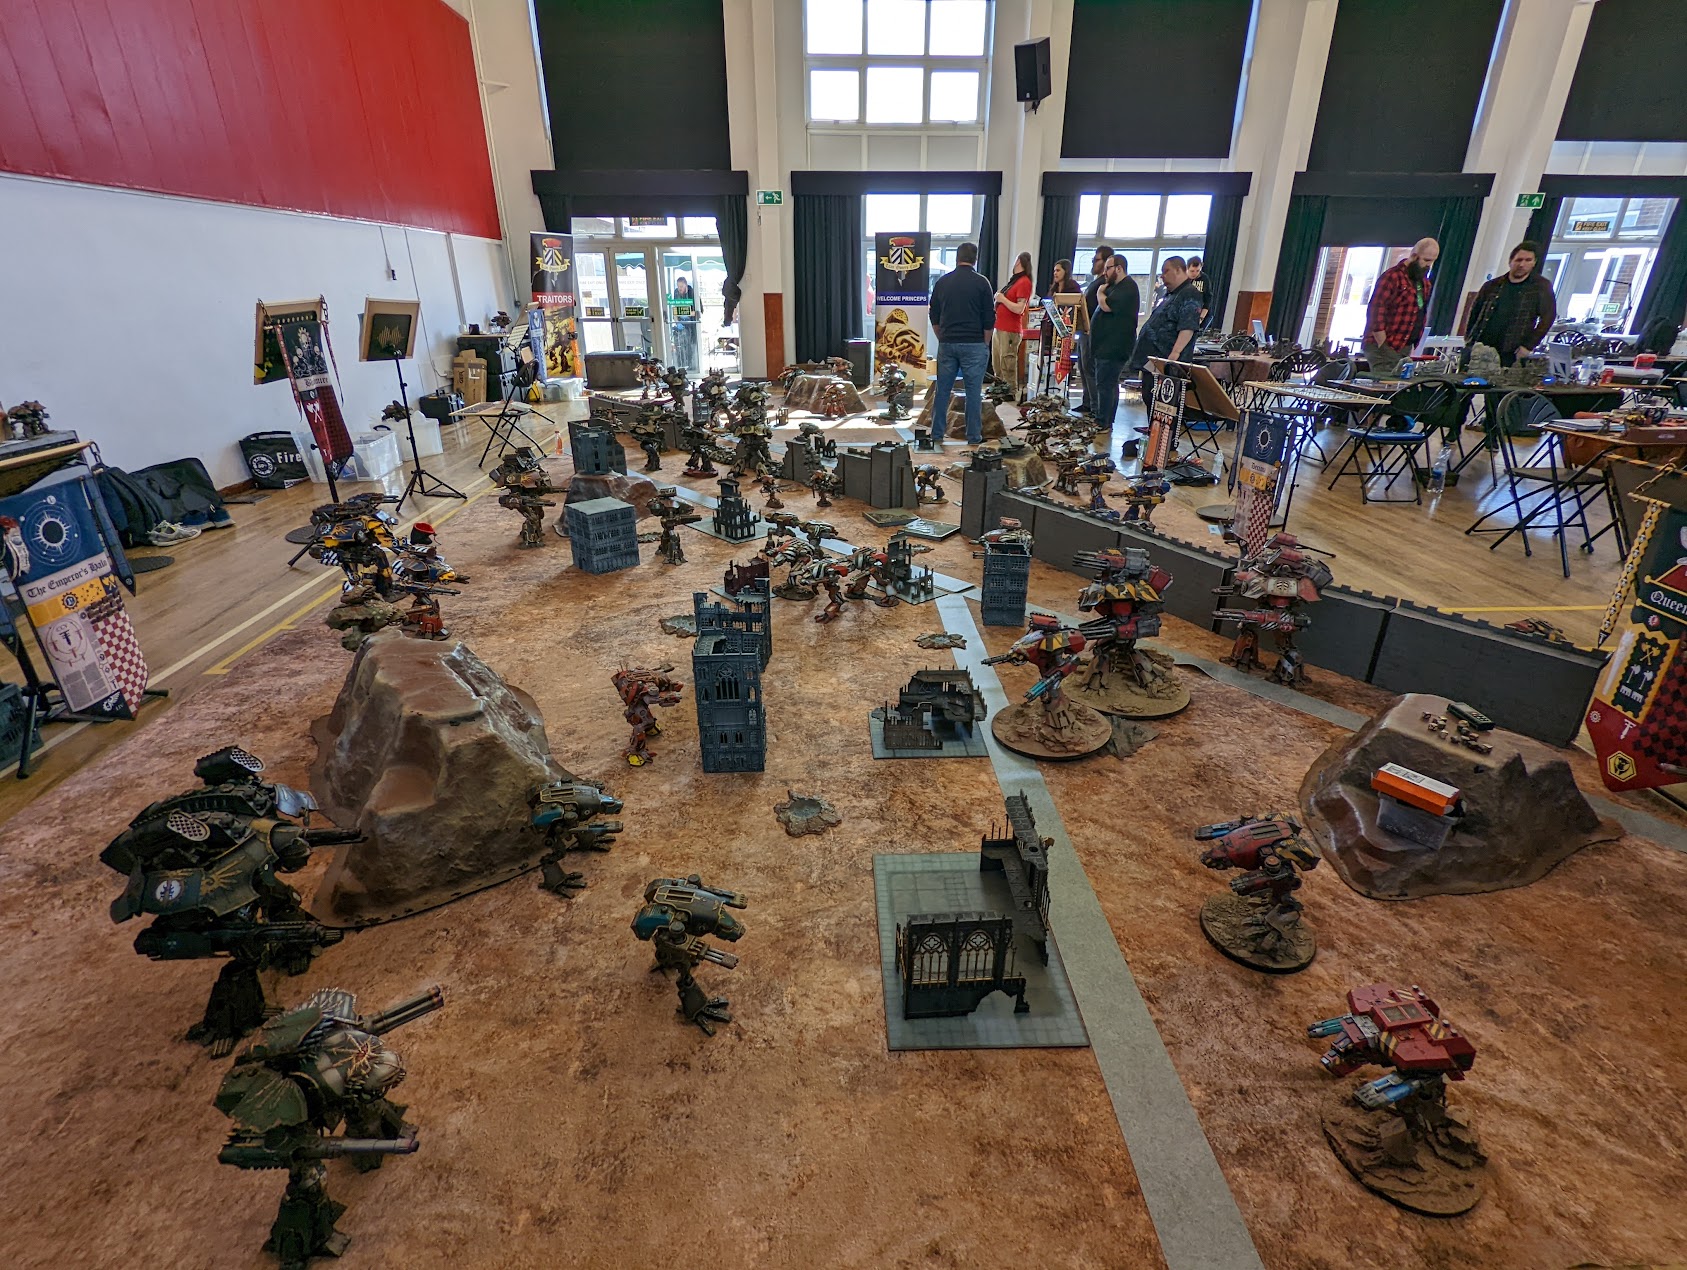
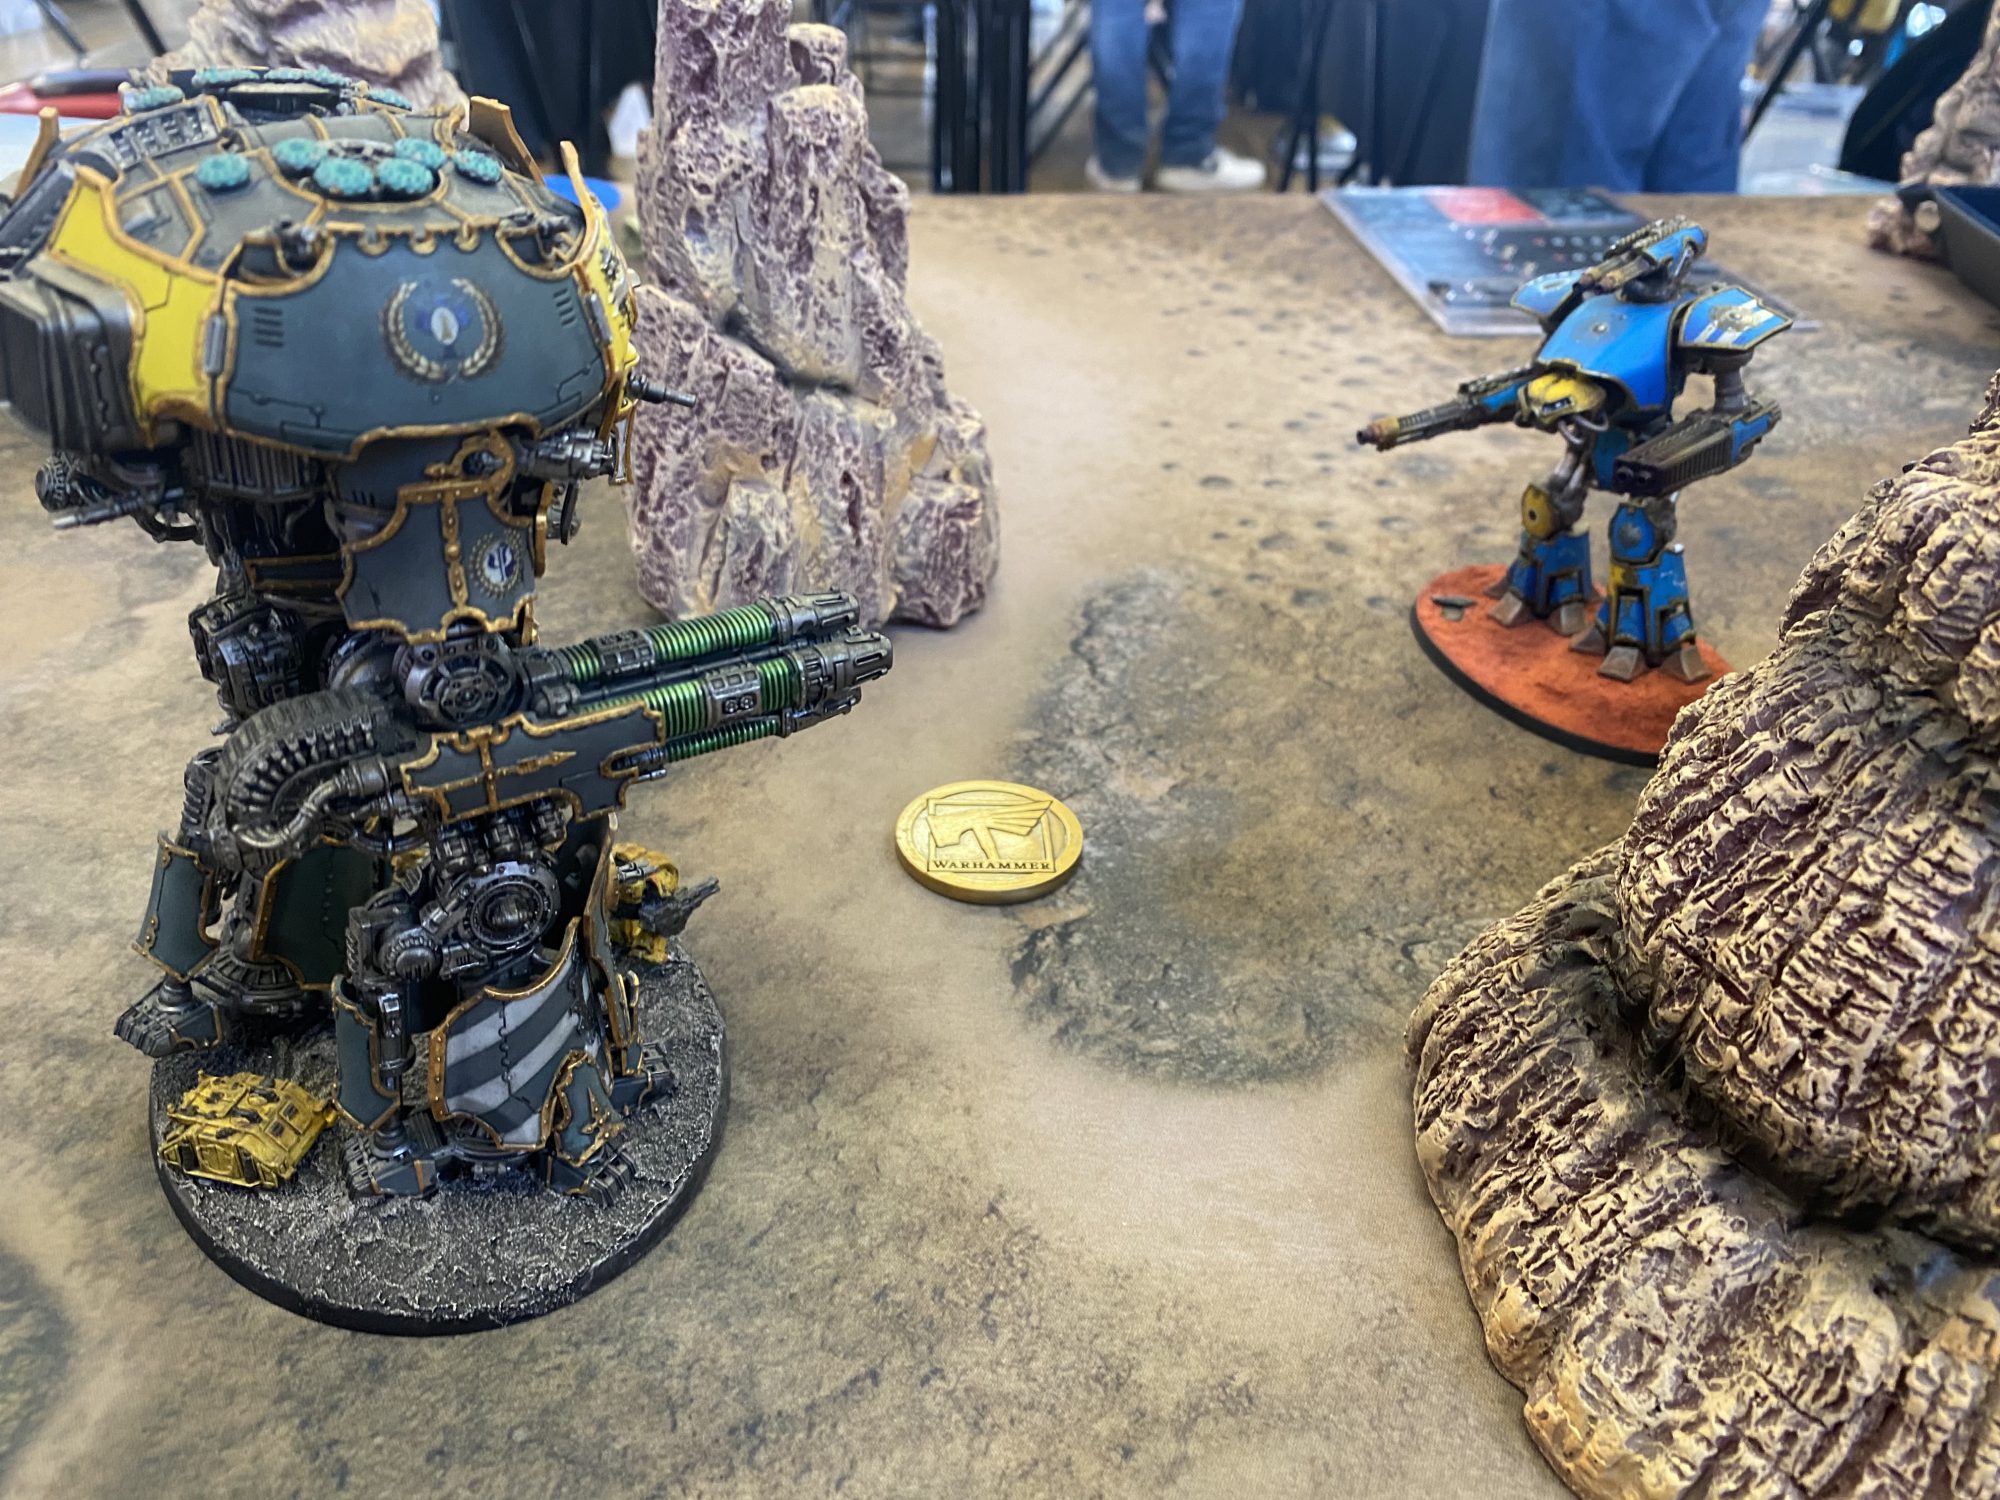
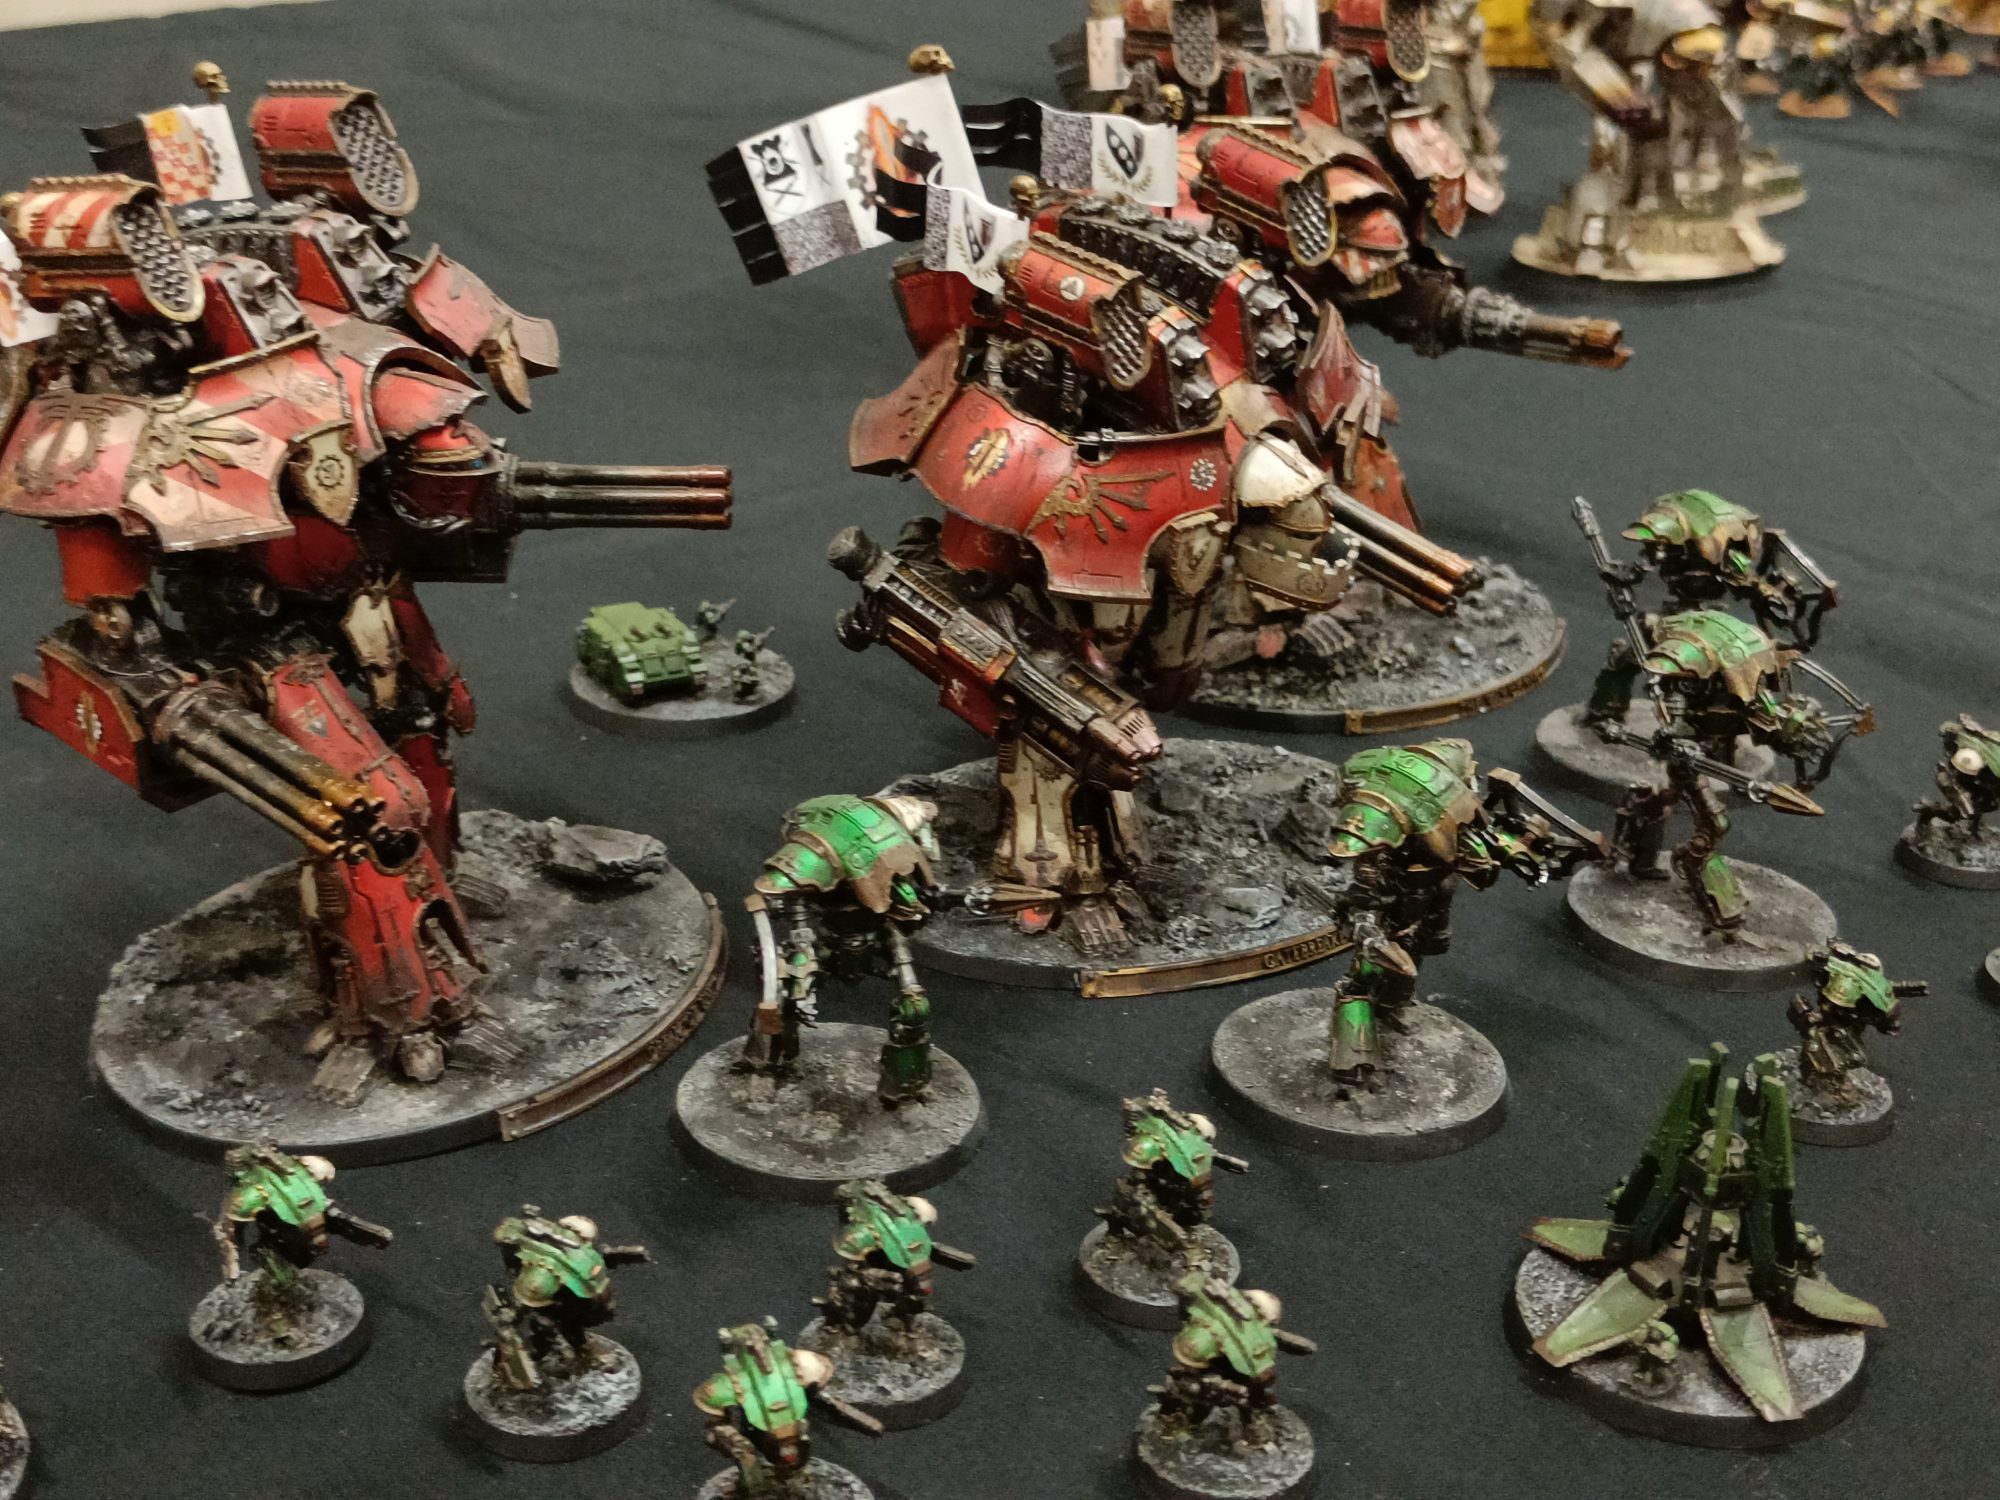
In addition to the campaign, there were painting sessions hosted by The Cult of Paint and the Titan Owners Club turned up well over 40 God-Machines and fought an apocalyptic battle in the corner, with yells of “ENGINE KILL” coming out with increasing frequency over the day. Not to mention the hall next door, which had around 30 Horus Heresy players duking it out over Kemerova as well! Of course, who cares about the ground troops – Engines win the war…
The Titanicus Campaign
The Titanicus Campaign for Kemerova used a map based system, similar to ones in other systems like Necromunda, where the owner of a territory would gain a unique buff if they were defending that territory each round. The territories ranged from major Hive Cities through the planetary defence array, each also worth a different amount of influence for deciding the overall victor of the campaign.
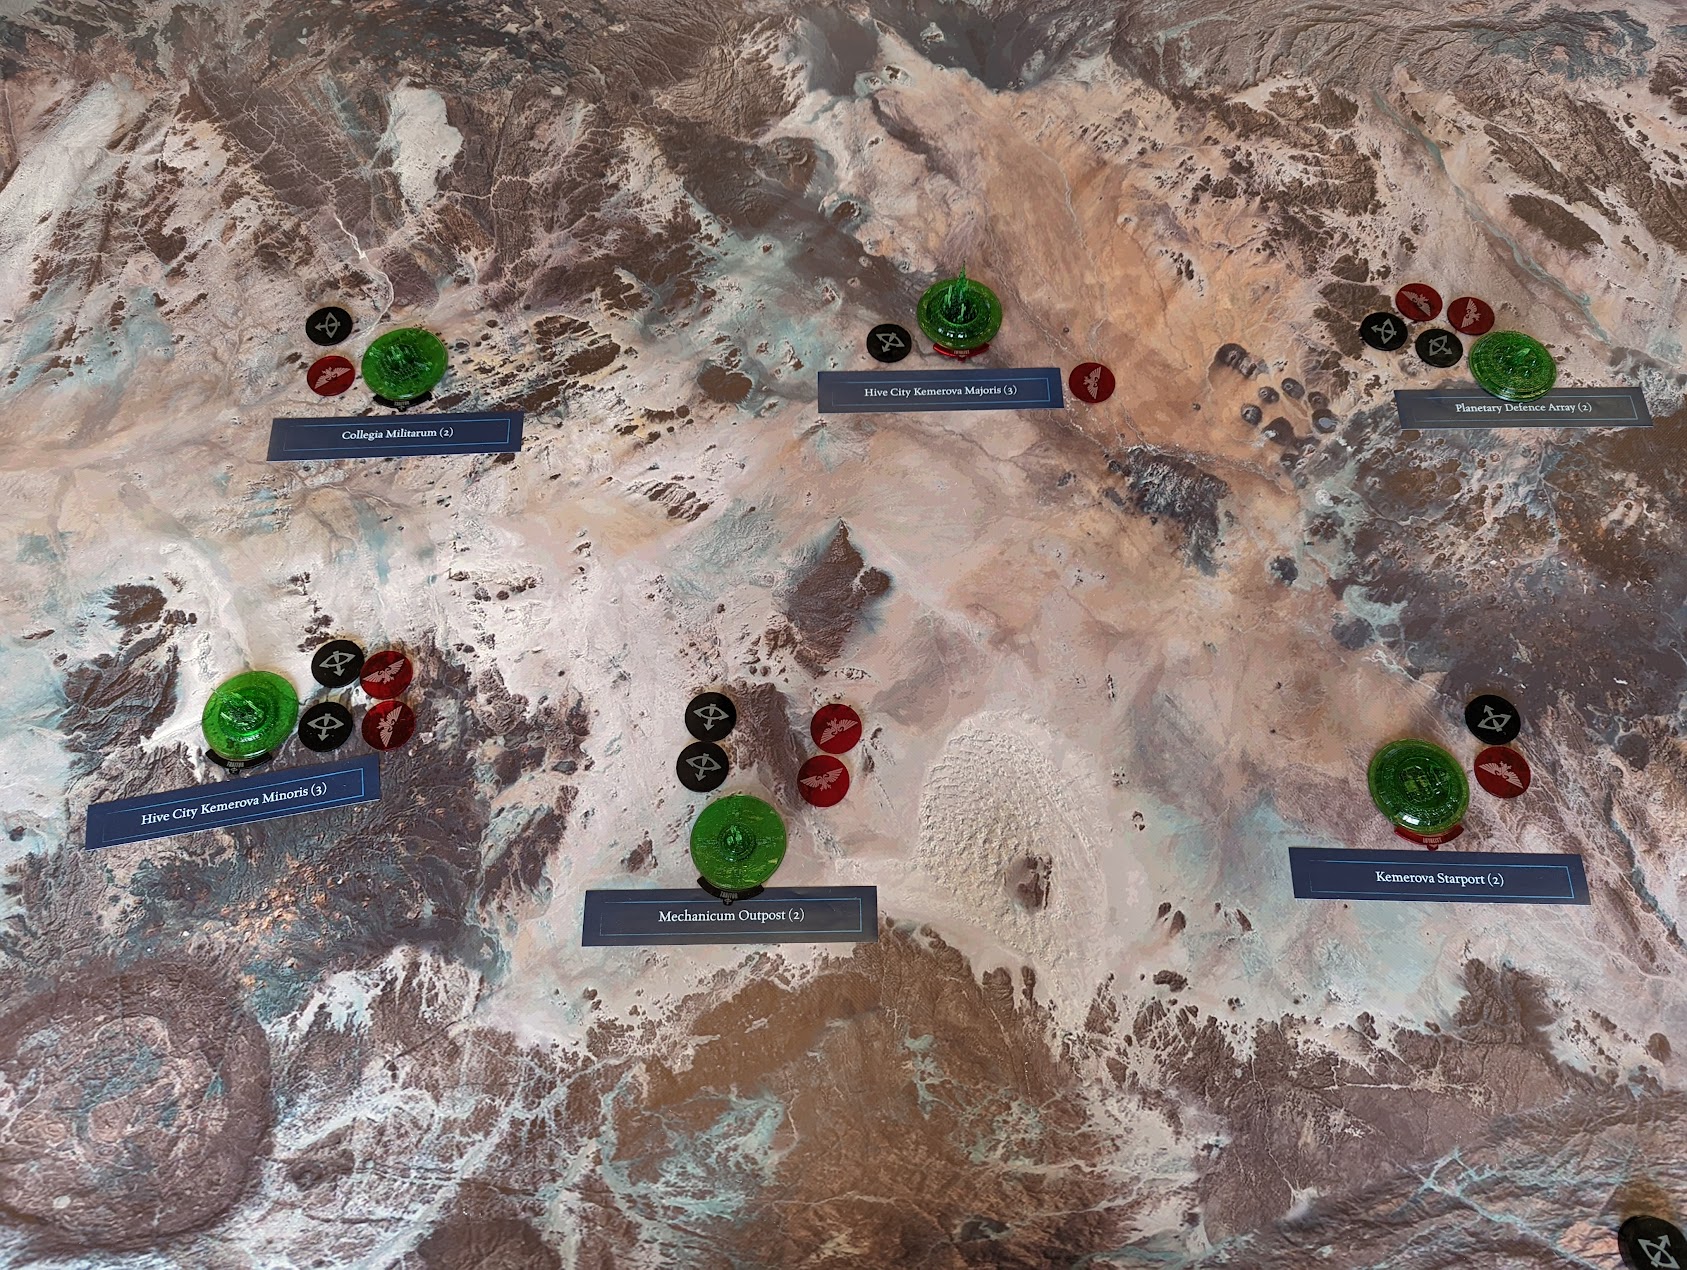
Each round, one faction would be on the defence and each player would place a token on a territory they would be defending, followed by their counterparts who would place a token on each territory they wanted to attack. Pairing then was done between the combatants in each region – meaning you never knew what you were up against.
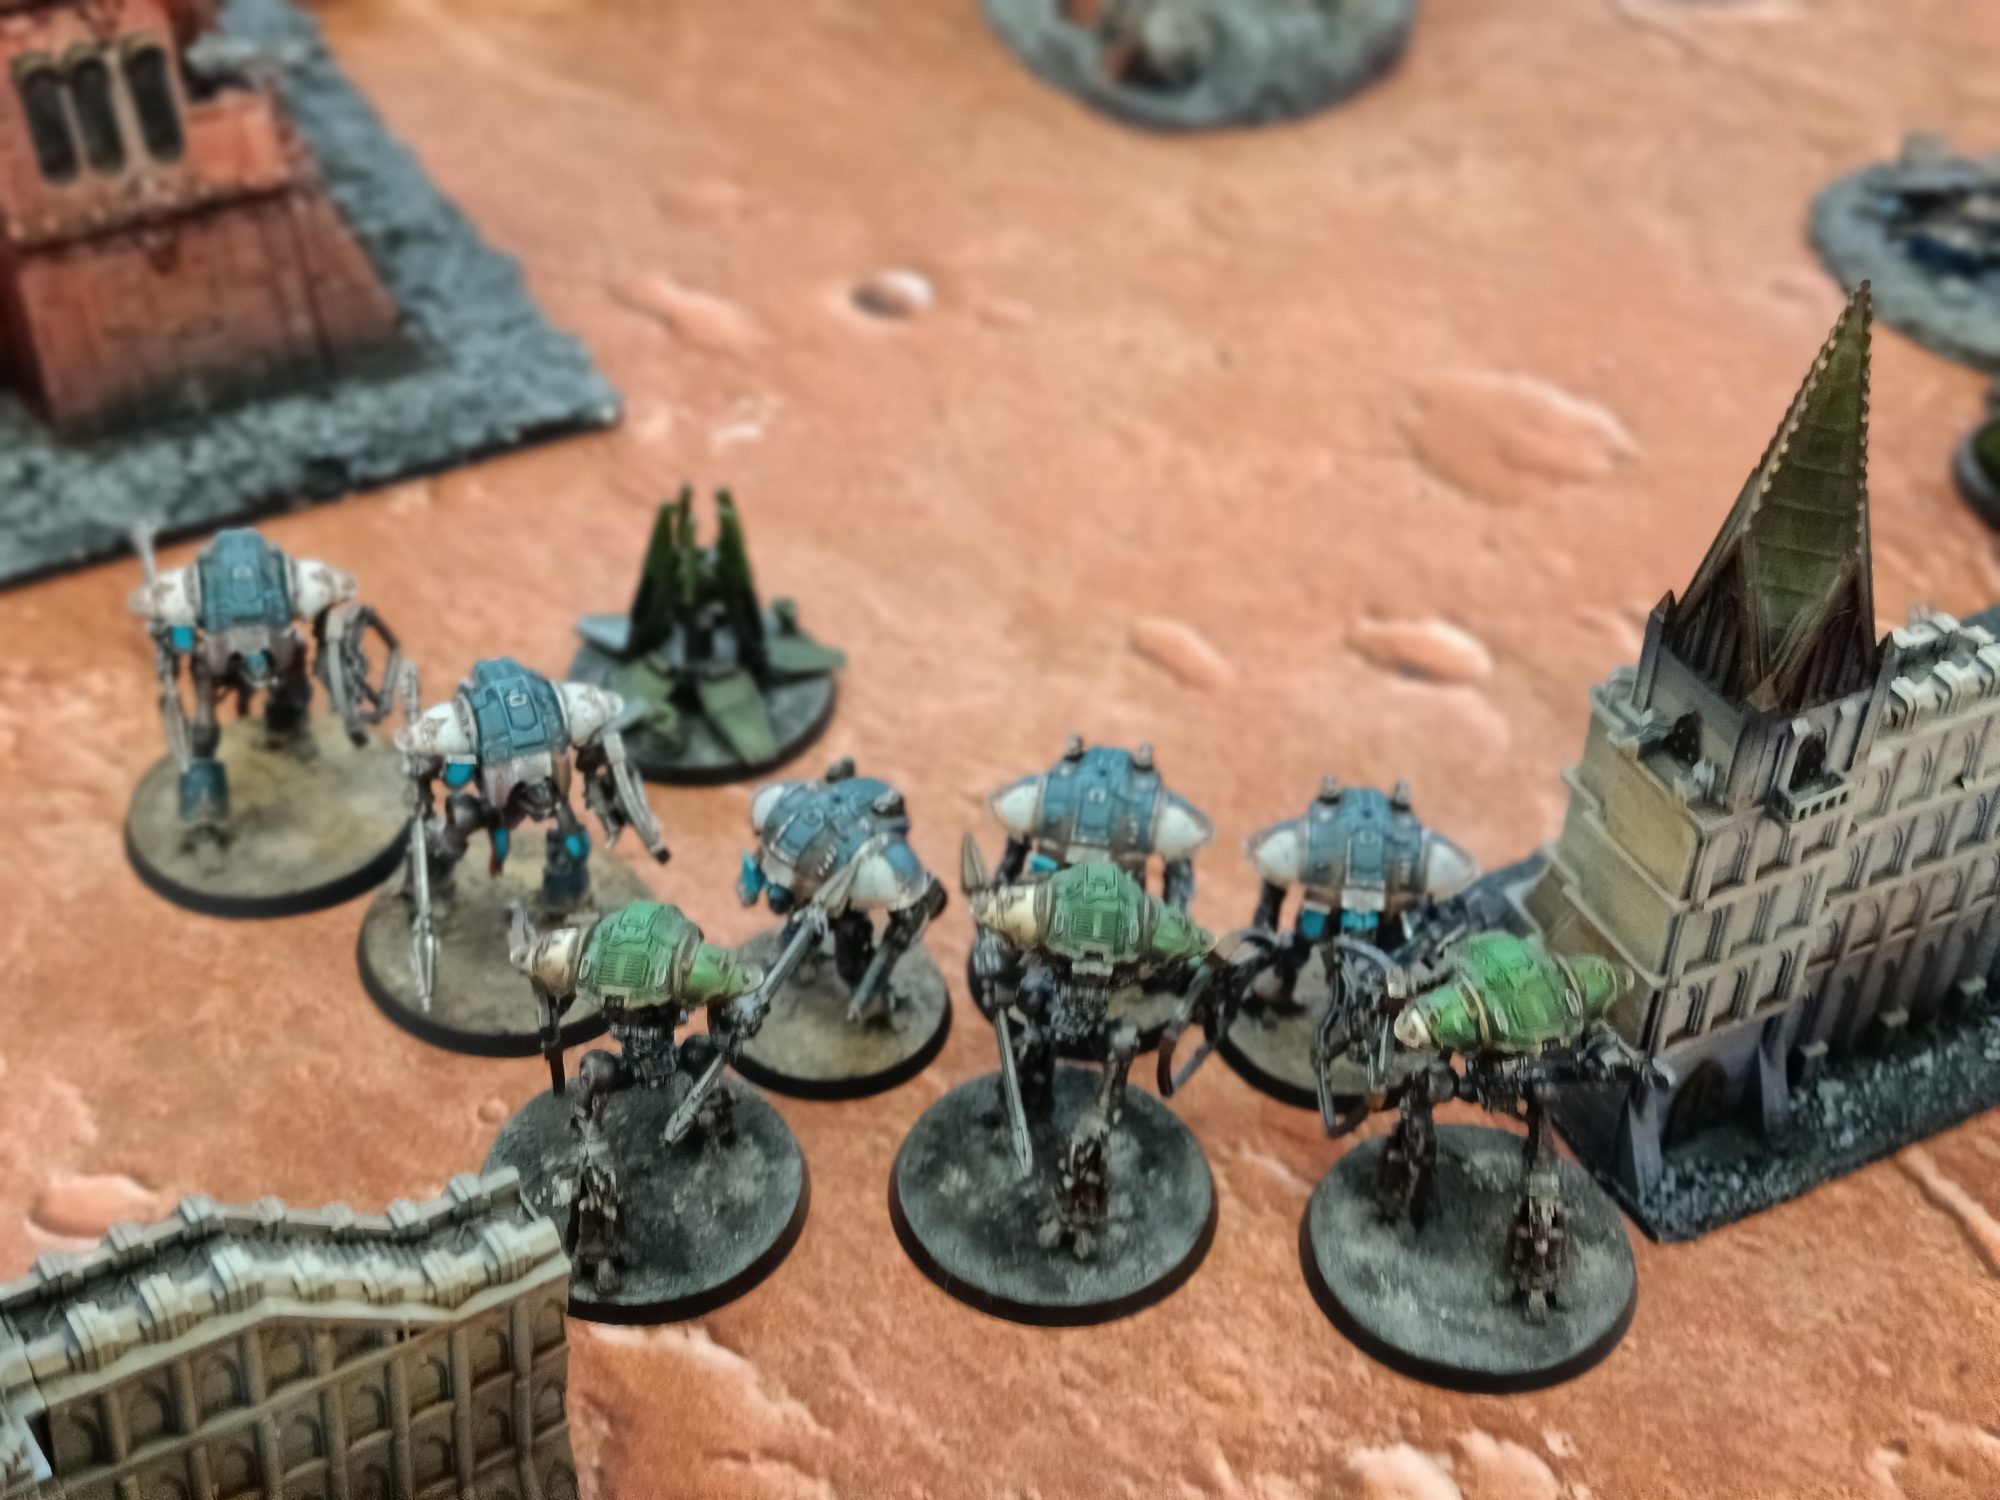
There were many different types of forces on display including a Knight Household, a Legio Audax force with nine(!) Warhounds, all the way through to battlegroups with Warmasters or Iconoclasts.
LordTwisted: Nine Warhounds makes for a game which is even more chaotic than the usual Titanicus fare…
There were a handful of other tweaks to make things interesting, like having to pick a set collection of stratagems which you could draw from over the weekend or gaining upgrade cards midway through the campaign to add even more flavour.
LordTwisted: The Stratagem limiter was interesting. It made you have to think a bit more about your force in the list building stage.
Bair: The limitation on stratagems was probably the only part of the weekend that I didn’t really care for. At 2,000 points you mostly expect to have 6 points to spend and make use of each game and some stratagems you’d never buy as part of your list unless you have the rare occasion to need it, so wouldn’t put it in but then really really wish you had it when you get to that table against that particular force.
Soggy’s Weekend

For assembling a battlegroup this weekend, I had two main considerations:
- I wanted my best painted models
- I wanted to take my most new painted and unused models or weapons
I did flirt with several different options on fitting a Warmaster within 2000 points, but I wasn’t feeling it. There were some questionable life choices I could have made such as taking a Warmaster and a Vortex Missile – but I didn’t want to be that guy at a narrative event. I was tempted to fit in the Armigers and Atrapos I had recently painted, but wasn’t happy with the options that it left me.
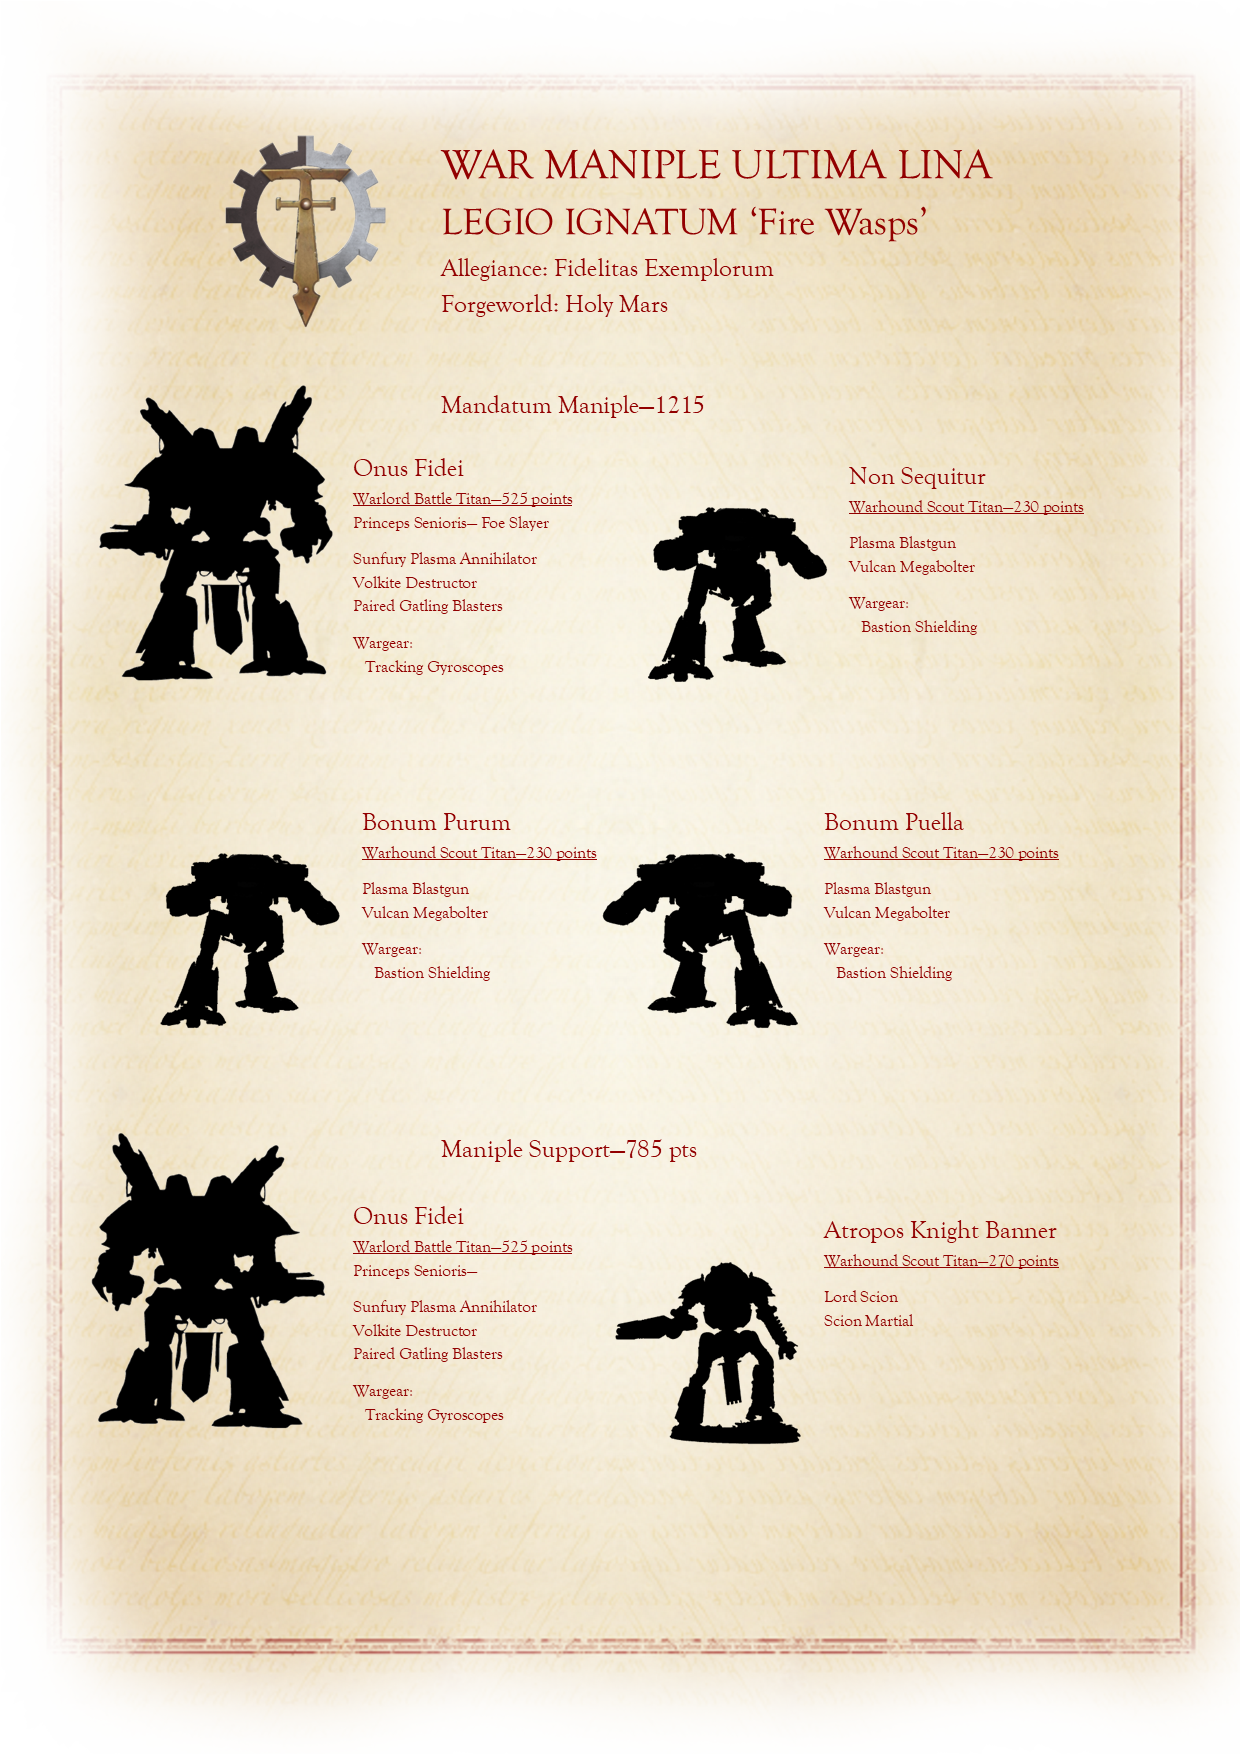
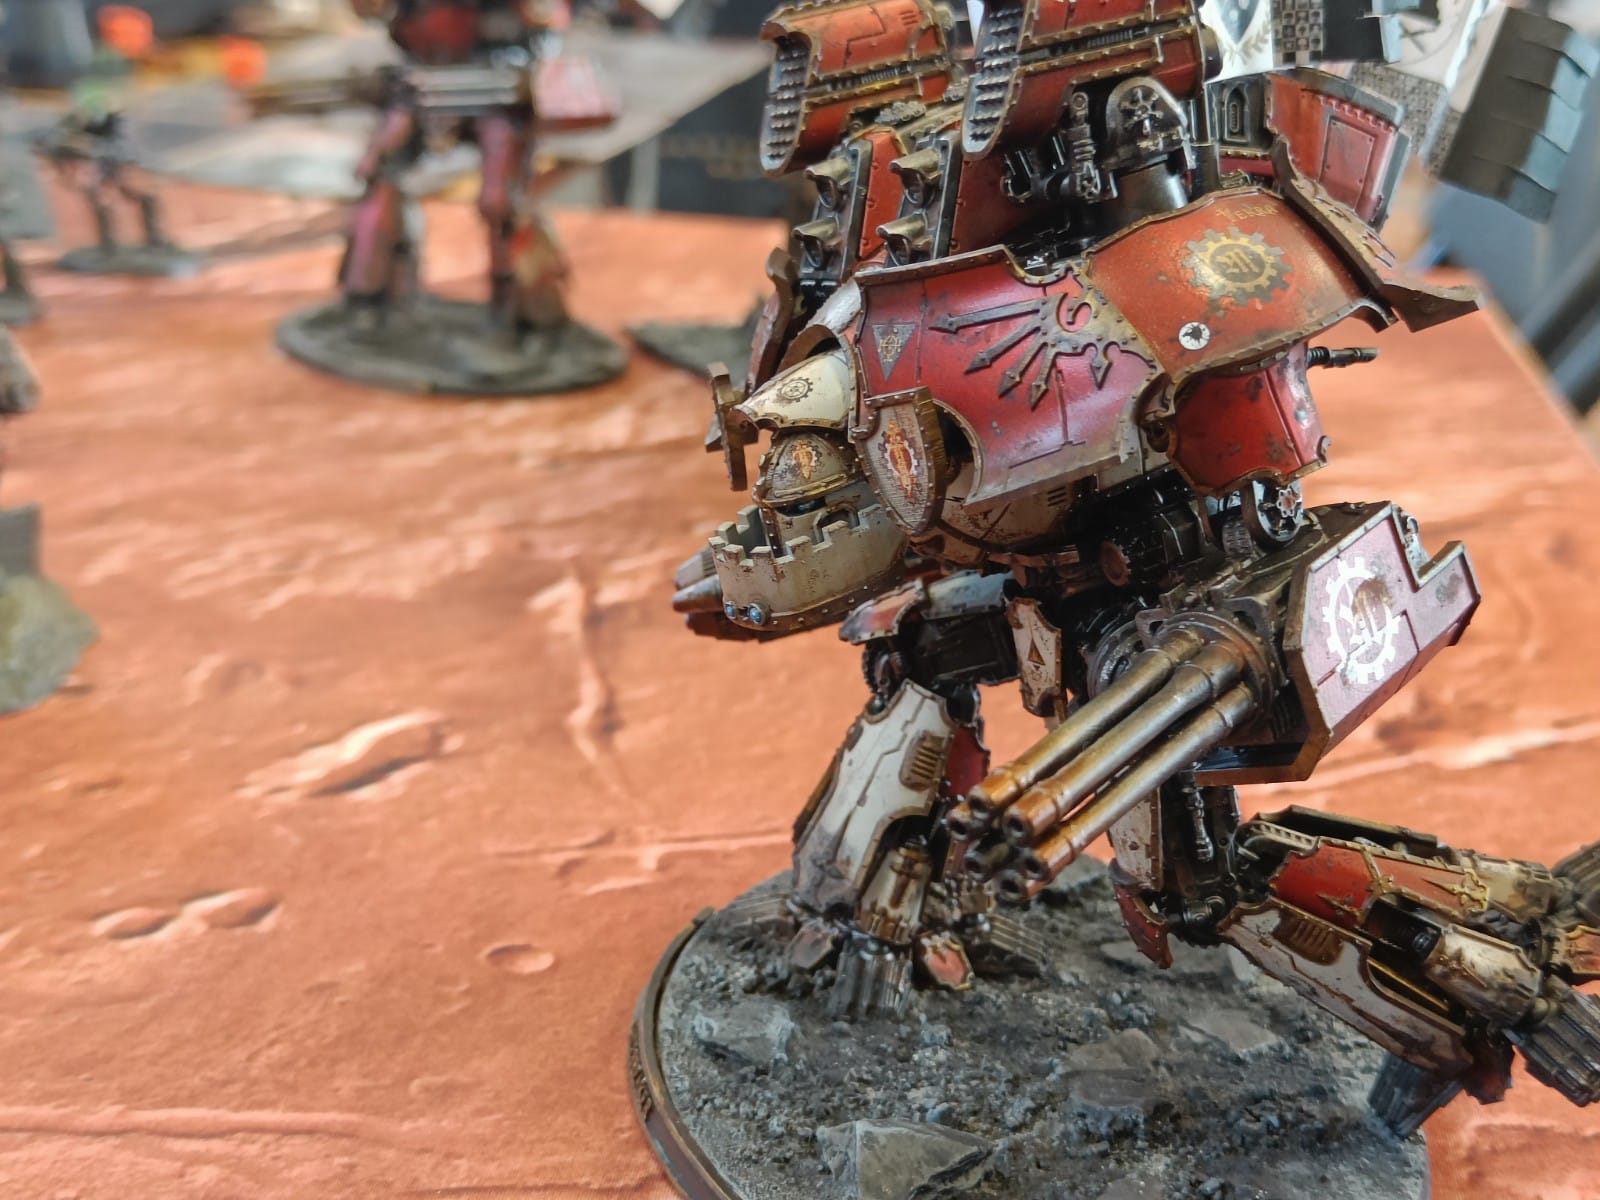
I opted for a Mandatum as my main building block, as I love having a brawler Warlord supported by hounds. I figured this would be a perfect time to try out the Volkite I picked up after the GHO last year, as it seems like a great opener against voids, as well as a fantastic finisher with its free called shots – particularly if paired with Foe Slayer to push it to strength 8. Using the Atrapos as a melee threat on their first outing left enough space for a fire-support Warlord to hold the backline and cover my flanks as needed.
One interesting mechanic this weekend was having to pick stratagems for the weekend in advance, picking a “hand” worth six SP, of which you could take four to each game. I picked:
- Overcharged Cannon – to go on the Sunfury each game for some serious anti-armour punch
- Iron Resolve – as this is easily the best strat in the game since the Vox Blackout nerf, and as it turns out I really needed it thanks to my dice
- Punish Their Folly – To overwatch with my Sunfury against melee Legios, which sadly never got used
- Long Retreat – In case I needed to pull back from melee Legios
- Obscuration Barrage – as a filler for the last slot, which I only took for one game but was vital in holding a flank on the first turn.
Game One
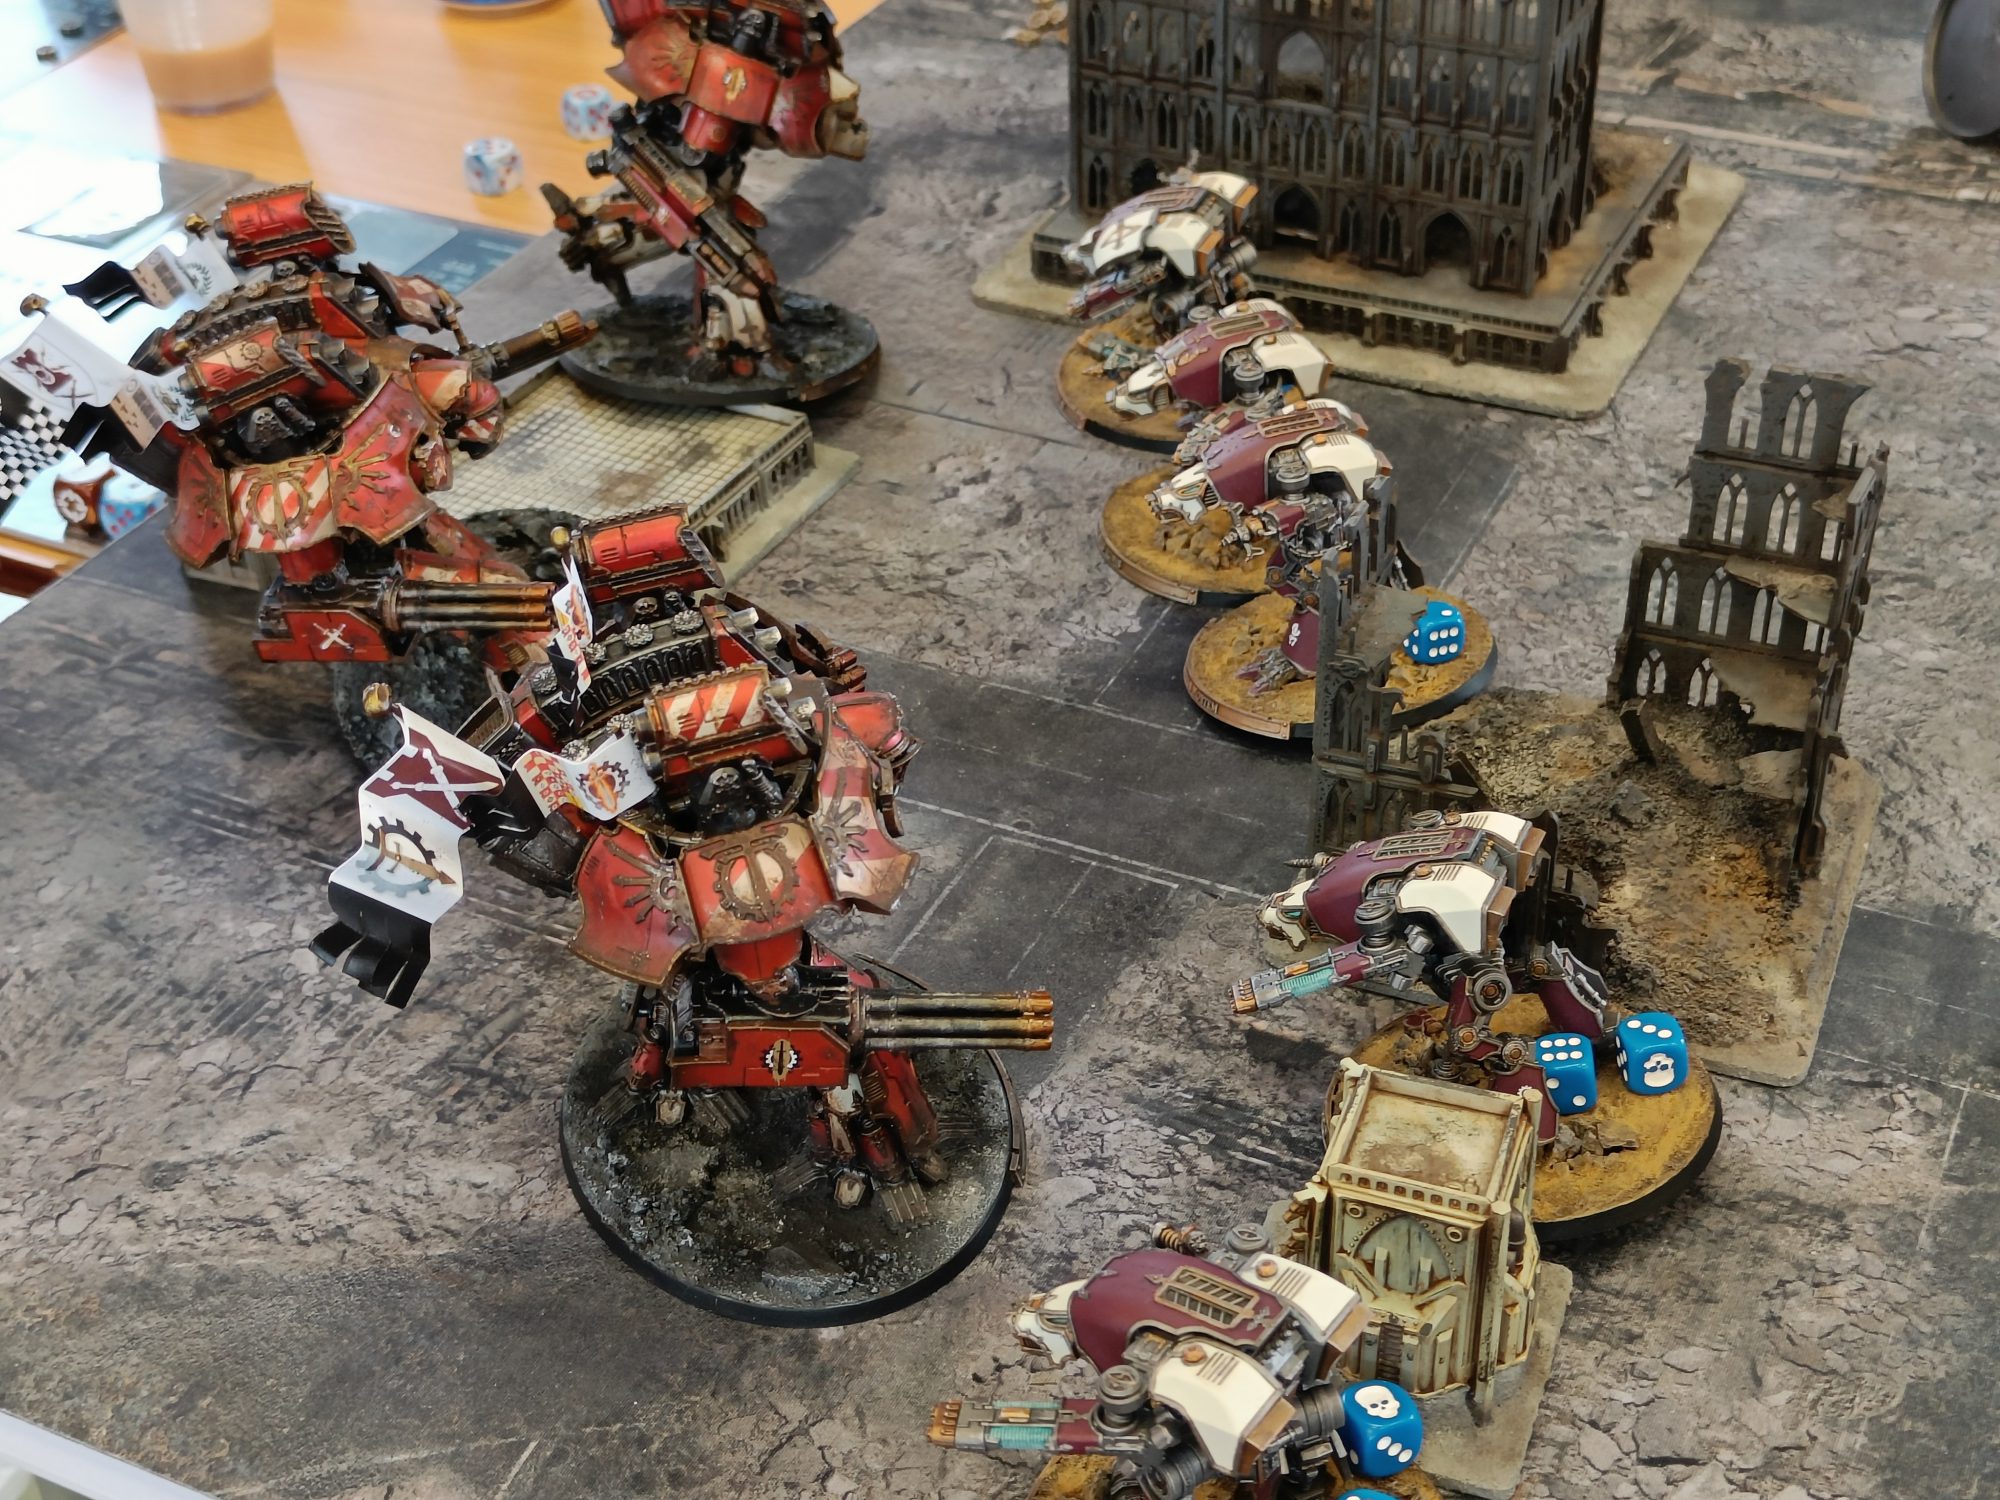
For the first round, the Traitors held all the territory so I figured I would try my luck on the most important map location, the Hive City Majoris of Kemerova. I paired with Lyle, who was piloting a Knight Household.
I was stoked for this game due to Knight Household players being unicorns at events and I had never had the chance to play against one myself. In Titanicus knights function as glass cannons (or chaff), so taking an entire battlegroup of them is a bold play.
Lyle’s battlegroup was made up of two lances:
- One with two Lancer Banners and a Questoris
- Another with two banners of Questoris and some Acherons
- A support banner for each Lance with two Acastus each – these four would prove to be a problem.
The mission objective for this round was for the Loyalists to push up as much as possible, which was the last thing I wanted to do with that many melee Knights staring me down. I deployed conservatively and hoped to thin out the numbers a little before pushing up. Sadly the Ignatum stratagem Punish their Folly doesn’t apply to knights, so I couldn’t rely on that party trick to vaporise a banner with my sunfury.
I attempted to give my fire support Warlord first-fire orders and rolled a 1 with my command dice, this would be the start of a pattern this weekend. Lyle’s first order was a Lance order to Full-Stride up his melee forces which also failed – sadly at this point we forgot that he got to roll two dice for command checks and keep the highest which would have slung him across the board entirely.
The first combat phase saw both squads of Acastus focus on my Warlord and drop it’s voids with ease. This was then followed by eight hits with their Magna Lascannons, which could have spelt complete disaster – but the Omnissiah made this hit a weapon, sadly my Overcharged Sunfury. I did manage to quake some of the Cerastus Lancers with my fire-support Warlord buying some breathing room, but things were looking a bit dire.
At this point I thought I was toast, my main Warlord had no voids and was out in the open without his Overcharged Sunfury – the one thing I had which could reliably kill the Acastus, along with multiple melee lance formations closing in. This turn would ultimately decide the game, critically I managed to get the Opus and seized the initiative for the turn.
The command phase would see me roll a one to repair my wounded Princeps Senioris, however Iron Resolve came to the rescue here, getting the Sunfury back online and one pip of voids. This was short lived, as one squad of Acastus got first fire orders and would ultimately strip them again immediately before the Warlord moved into cover to fight another turn. Lyle then ordered his Lances to charge and failed on two dice and would have to settle for walking them towards me.
One thing that Knight Households also tend to have a disadvantage is with activation advantage – Lyle had four activations and started pilling on my left flank as I had pulled my Warhounds back from the Lancers to try and hold my right flank. However, my fire-support lord was last to activate and pivoted to left, to hold the flank on his own*
*I’m not taking into account the two Atropos here, but they weren’t going to do much versus a whole lance

Moments before disaster 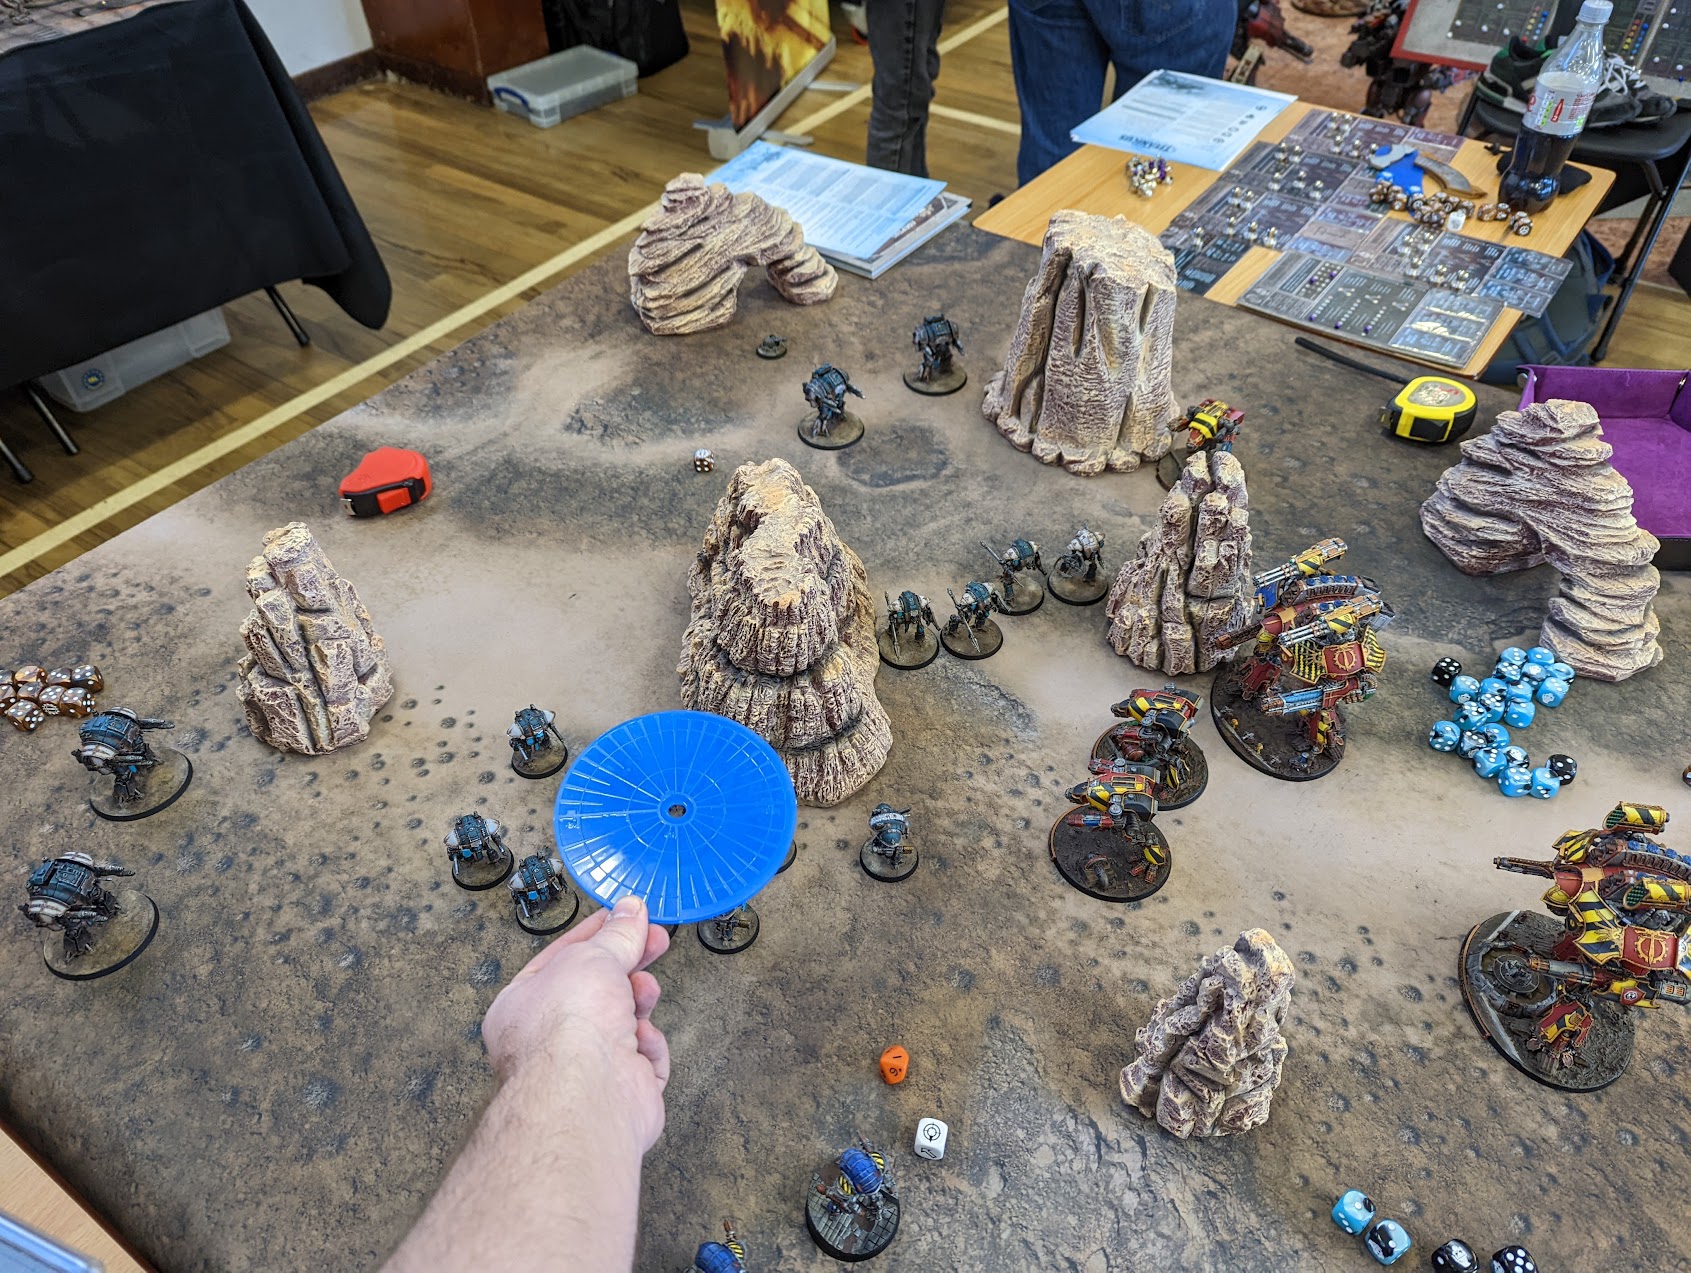
Spicy 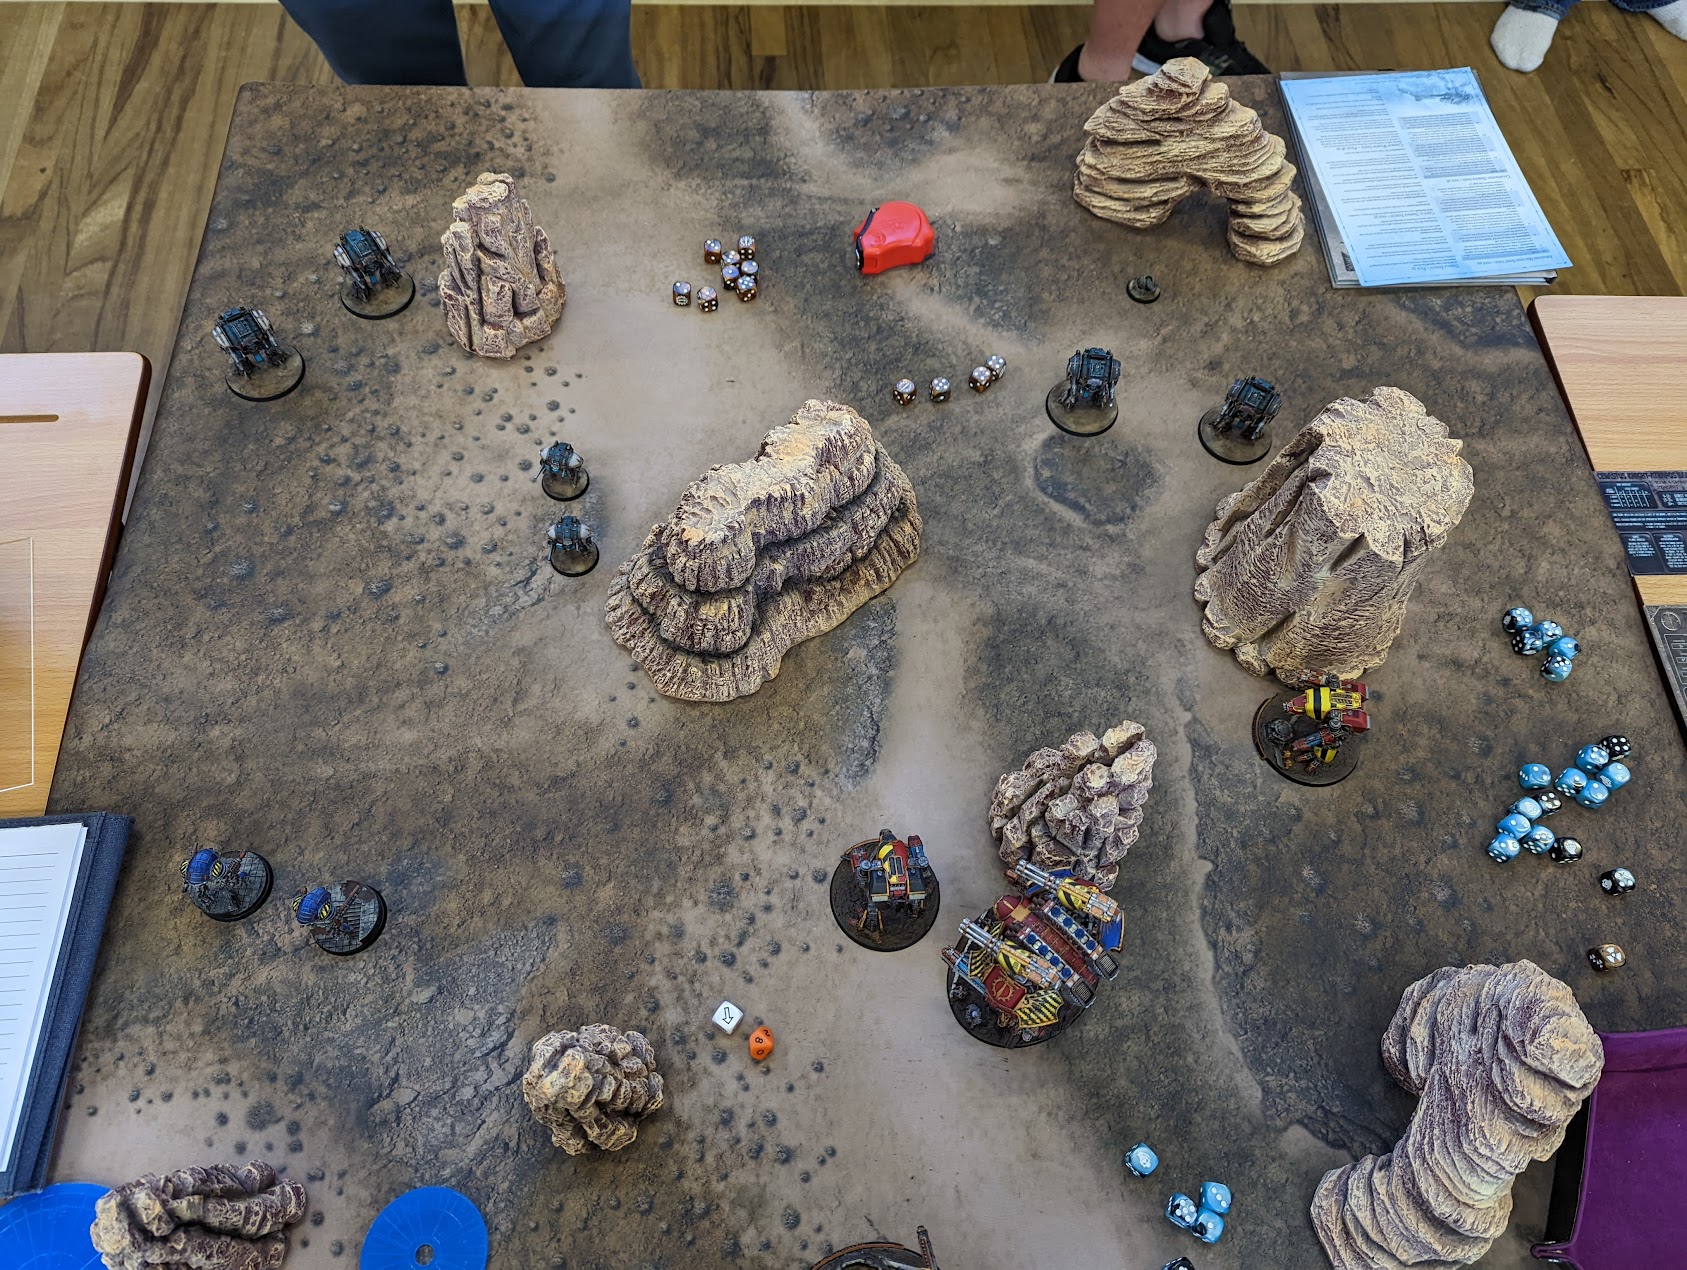

One combat phase later
The target-rich environment on the left flank was my first priority at the start of the combat phase and thankfully despite missing my quake shot, it deviated one inch and still hit everything. The Belicosa would follow and crit the leftovers. If this wasn’t enough, the Warhounds on the other flank went for gold with their plasma blastguns and removed the four looming Cerastus Lancers.
Being the first game I had taken them, we realised the Atropos could also apply Concussive and shook the Acastus on the left flank. In exchange for this bloodbath, I lost a Warhound and nearly lost voids on my fire support Warlord – a bargain price.
The following turns I failed my orders, but managed to hold on to the initiative. This allowed the Warlord to come out of the cover and use their Sunfury for revenge. The turnabout of turn two had won me the game.
Whilst giving my spiel at the start of the game explaining my rules, I mentioned I would forget my rerolls and made a point of highlighting it. I, of course, forgot it for the entirety of this game.
Game Two
Game two was against Greg (@ChildofFang on Twitter/IG) of The Imperial Truth and the Full Stride podcast, who had a Legio Praesagius Dominus Maniple. Upon hearing this I was stoked again – I *never* see people taking the Dominus (or Janissary) Titan/Knight based battlegroups, so I was very happy to play against it and see what it could do.
As it turns out, it can do loads in the right hands. As a reminder for others who don’t see this one often, if your Knights are near your Titans, the Titans get a -1 to hit and can pass off any hits to the Knights automatically. Three lancers will happily tank your standard void stripping weapons like Apoc missiles or megabolters all day long, which forces you to focus on them – while their Titans run about unchecked. If you’re running a melee force, the Knights serve a double duty acting as a screen and counter charge threat.
We deployed in a way that looked for a slugging match between our Princeps Warlords on one flank along with skirmishing elements on the other. I’ll be honest, Greg completely outplayed me and managed to get me to commit my squadron to thin air and the Lancers protecting the Princeps would not die at all.
Ultimately my Warhounds collapsed on my left flank, and my voidless Princeps Senioris managed to hold on for dear life as Greg managed to keep doing superficial damage with some truly awful dice rolls. The scenario had an interesting rule where Titans that didn’t cook off and melt down could randomly fire a weapon each turn until someone double tapped their remains, my Warhounds did more in death than they did in life and take out Greg’s Warhounds on the other side.
The mission had two aspects, for the Traitors to keep half of their forces alive (incredibly difficult on a good day) and to hold a secret objective. The final turn would see me ten inches away with my Firesupport lord, requiring a double-pushed Full stride. By this point I was so conditioned by seeing my command die roll ones that I required a double take to see that the result was a seven and not a one. This tipped the game in my favour for a very pyrrhic victory.
We realised later that Greg had forgotten to use Praesageus’ sleeper ability Against the Impossible which would have swung it back his way. Greg’s list and play was immaculate, I’d love to have another game to figure out how I could fare better.
Game Three
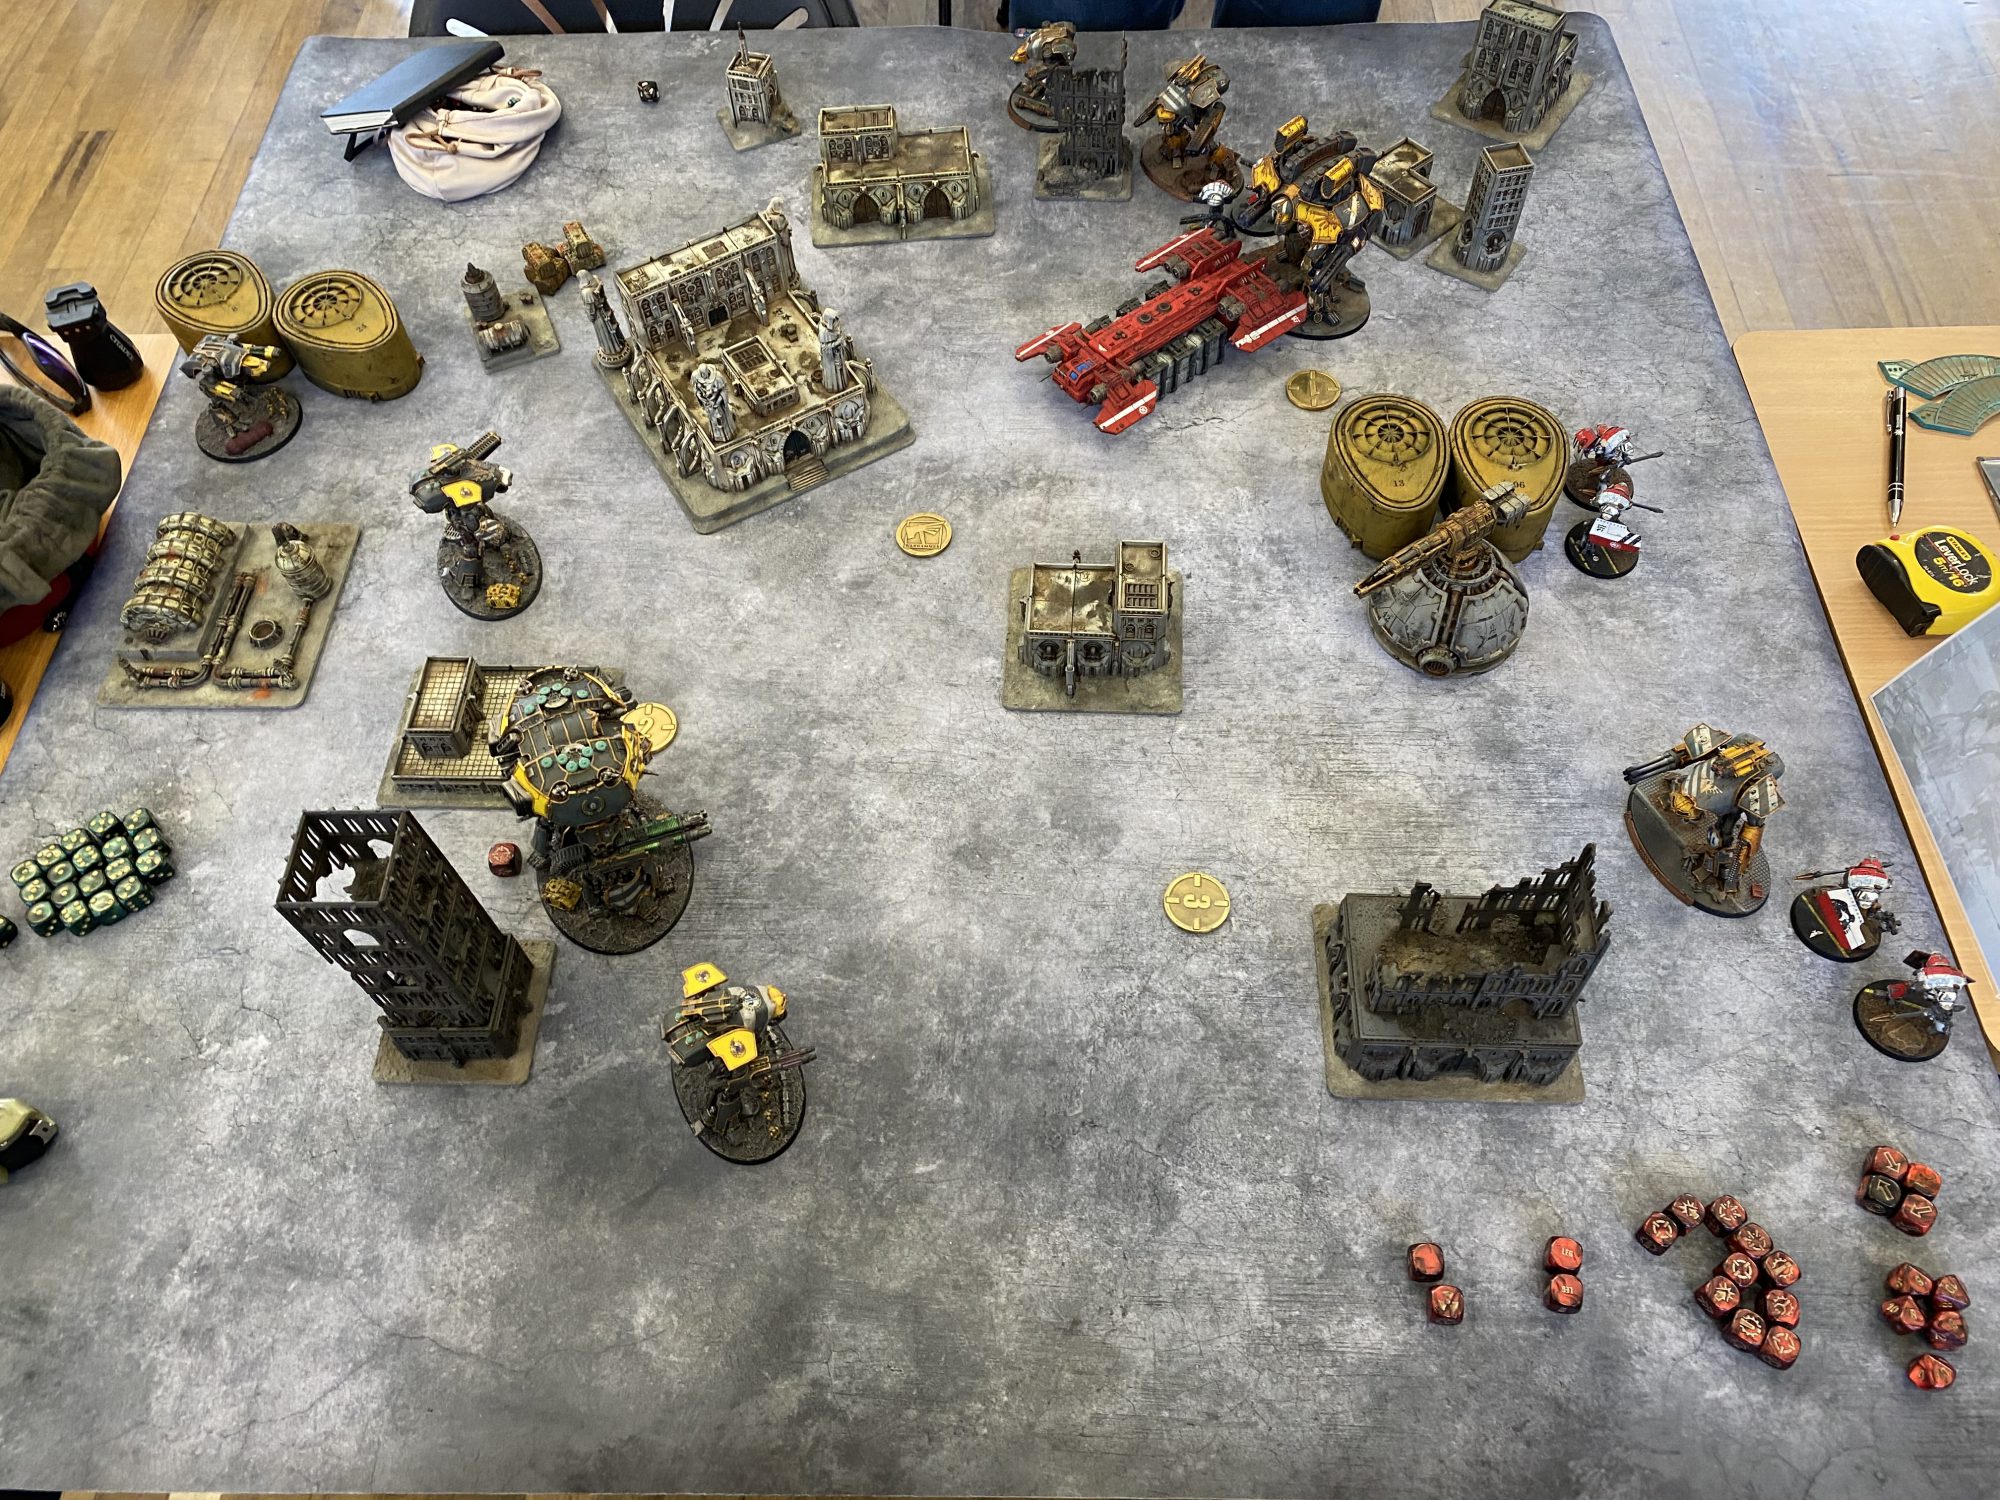
My third game was as narrative as it comes – the grudge match between Legio Ignatum and Legio Mortis. My reactor die knew something was up as it was rolling to test the machine spirit constantly in this game. My opponent for this game was Tom (@the.dark.prince.6 on IG) who was running minimum Corsair and Mandatum. This mission was straight up kill points and we were playing on Lord Twisted’s fantastic table you might recognise from our GrimdarkTerrain review, which forced the table into two halves. Corsairs are a pain to deal with, given their manoeuvrability and durability so my game plan here was to focus down the Mandatum and sweep left – hoping that the Corsair wouldn’t push up and would come to meet my advance.
LordTwisted: Stunning terrain on this one, I have to say.
A slugging match ensued between the opposing Mandatum maniples, sadly I wasn’t able to get the opening volley and lost my overcharged sunfury before I could return the favour. I managed to pick off the supporting Warhounds and pulled off a 12″ charge with my Atropos (my command dice had woken up, thanks to Mortis being present) into the flank of the Warlord and get a VSG burnout – setting up the killshot from the Princeps Senioris. The left flank held at first thanks to a Concealment Barrage in the gap of the wall.
This wouldn’t last, as the corsair started focusing down my remaining hounds and my fire-support Warlord on the final turn of the game. My Princeps managed to waddle back around the Forgefane for the final activation of the game and on the final die roll managed to kill one of his Reavers – tying up the game. The Legio Ignatum Vs Legio Mortis grudge will have to continue another day.
Game Four
My final match was against Shep (@simonshephard IG), who had Legio Astraman Fortis and Arcus battlegroups. The last mission was crazy, where all command checks had to be rolled twice (taking the worse result) and all blanks counted as machine spirit rolls – making it incredibly risky to do anything. The objective was king of the hill at the end of turn five, but if you were nearby the objective all weapons firing at you gained the blast trait. *sad trombone noises*
The deployment was corners, so I deployed aggressively to get around the side as quickly as possible avoiding the centre as that meant certain death. We had lined up a Warlord duel, with Ignatum Warhounds in position to provide assistance.

The first combat phase would decide the game, my dice running hot and Shep’s voids rolling twos. The Astraman Warlord magazine detonated, hitting all of it’s friendlies barring the distant hounds and would setup the engine kill on the front Reaver for my fire-support Warlord.
I continued to push on the flank with the brawler Warlord, whilst my fire-support Warlord prevented the Astraman Warhounds from crossing the centre and providing assistance. The highlight of this game for me was my Atropos getting fallen on not once but twice by the dying Reaver it had moved behind to finish off.
Summary
I had a blast of a weekend, playing a game against four great opponents with very different forces. There were plenty of memorable moments and despite not being the aim of the weekend, I was happy I somehow managed to pull out three wins and a draw – effectively negating Zach who had to swap to the other side.
Bair’s Weekend
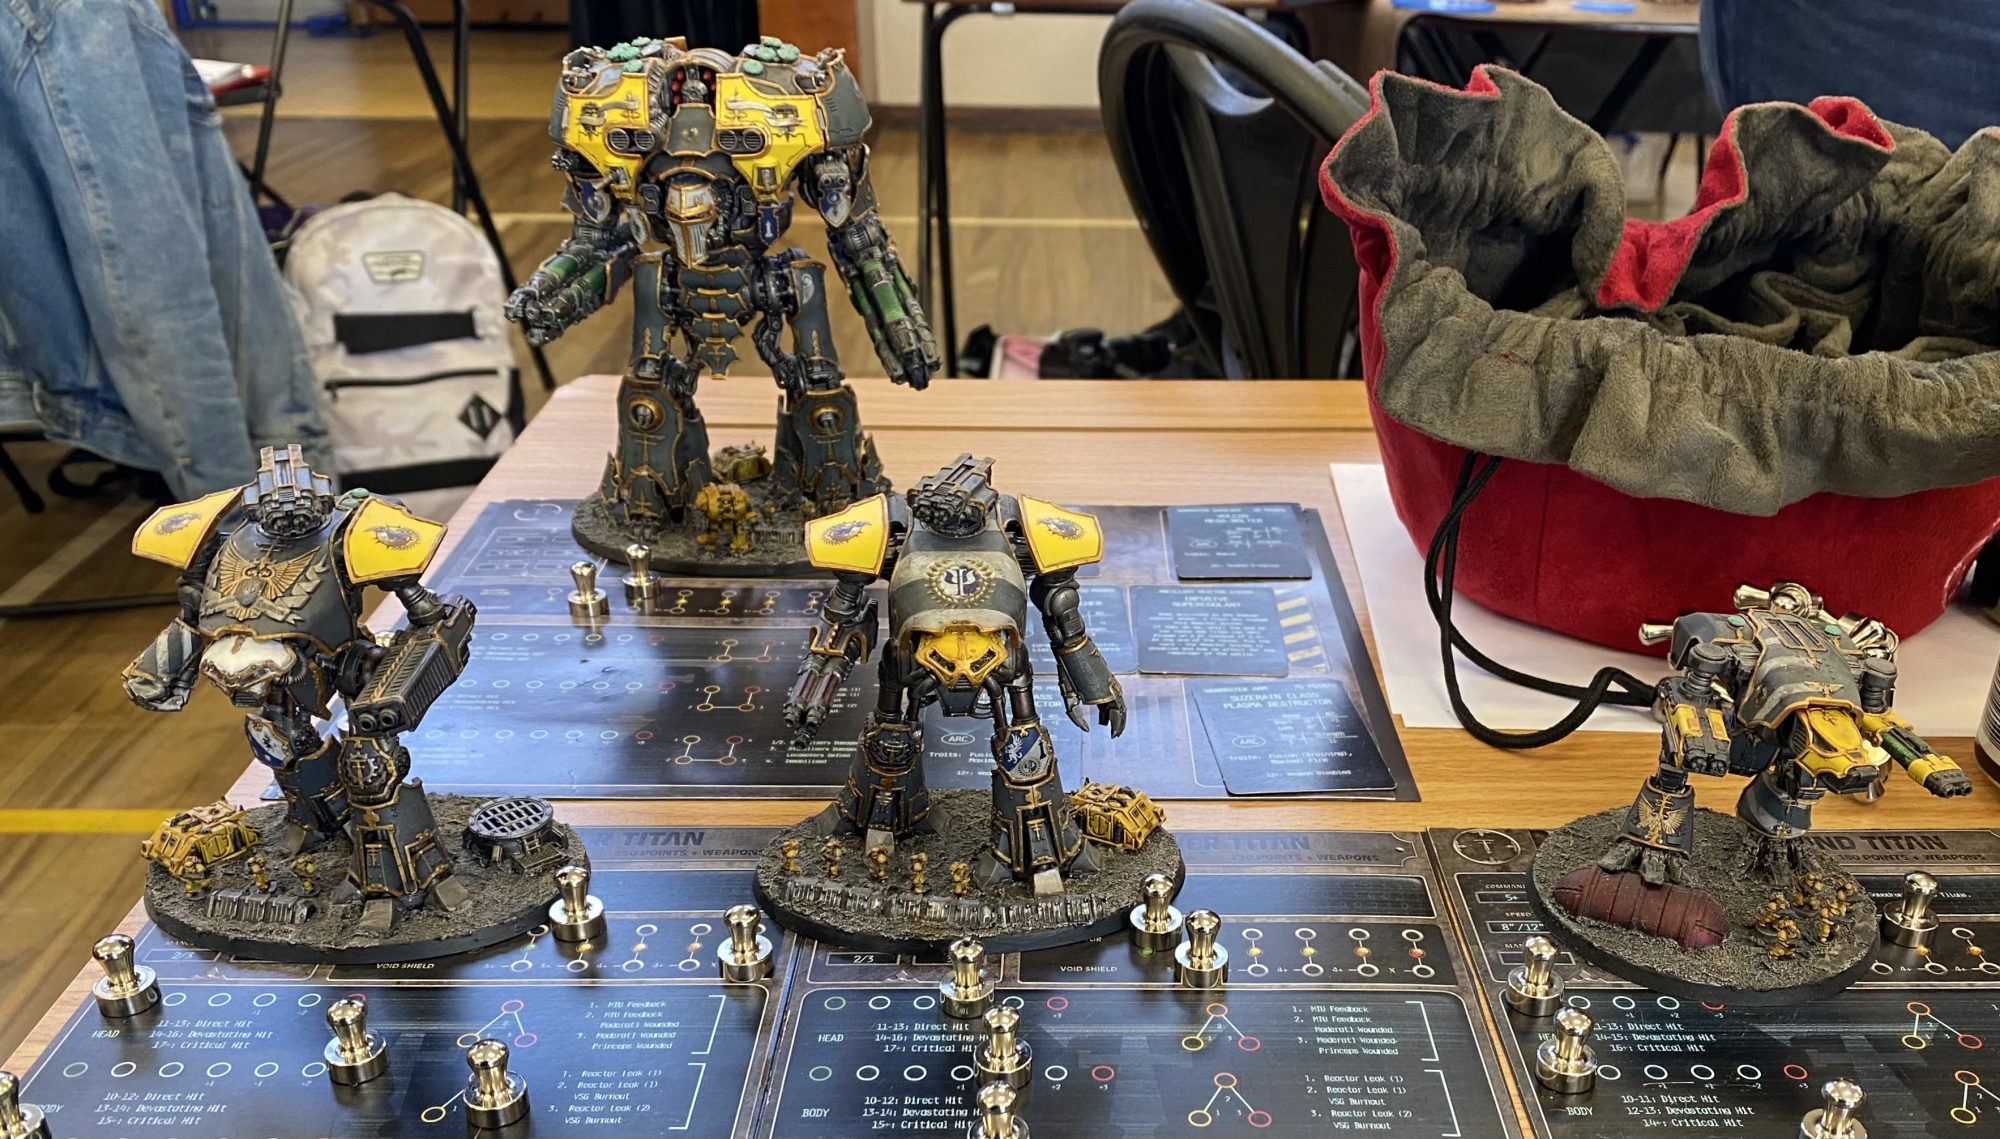
Similar to Soggy I wanted to take my best painted models for show but also since it was a 2,000 point event I wanted to let the Warmaster walk since it doesn’t get to often! My list was:
Ferrox Light Maniple – 890pts
Reaver Titan – 340pts
- Vulcan Mega-Bolter
- Melta Cannon
- Power Fist
- Motive Sub-Reactors
- Princeps Seniores – Reckless Maverick
Reaver Titan – 330pts
- Vulcan Mega-Bolter
- Laser Blaster
- Power Fist
- Motive Sub-Reactors
Warhound Titan – 220pts
- Vulcan Mega-Bolter
- Plasma Blastgun
Support Titan
Warmaster Titan – 1100pts
- Infusive Supercoolant
- Vulcan Mega-Bolter
- Plasma Blastgun
- Bastion Shielding
The main thought here was really just to get the Warmaster out with as many Reavers as I could fit with the Gryphonicus upgrades and weapons I still liked. The single Warhound actually did a surprising amount of work as well across the weekend including one shotting (very luckily) an enemy Warhound and making a 12″ charge to finish off an enemy Reaver later on.
I had planned on playing my Gryphonicus on the side of the Loyalists (even had a Spark of Vengange instead of Bastion Shielding on the Warmaster) but on arrival was asked if I could switch sides to help balance out the numbers…so…Traitor Gryphonicus for the weekend it was! We also had to choose 6 points worth of stratagems to use each game as part of our list and since my original had many Loyalist-only stratagems I changed this to be:
- Sabotage
- War Lust
- Last Ditch Effort
- Profane Blessing
Game 1
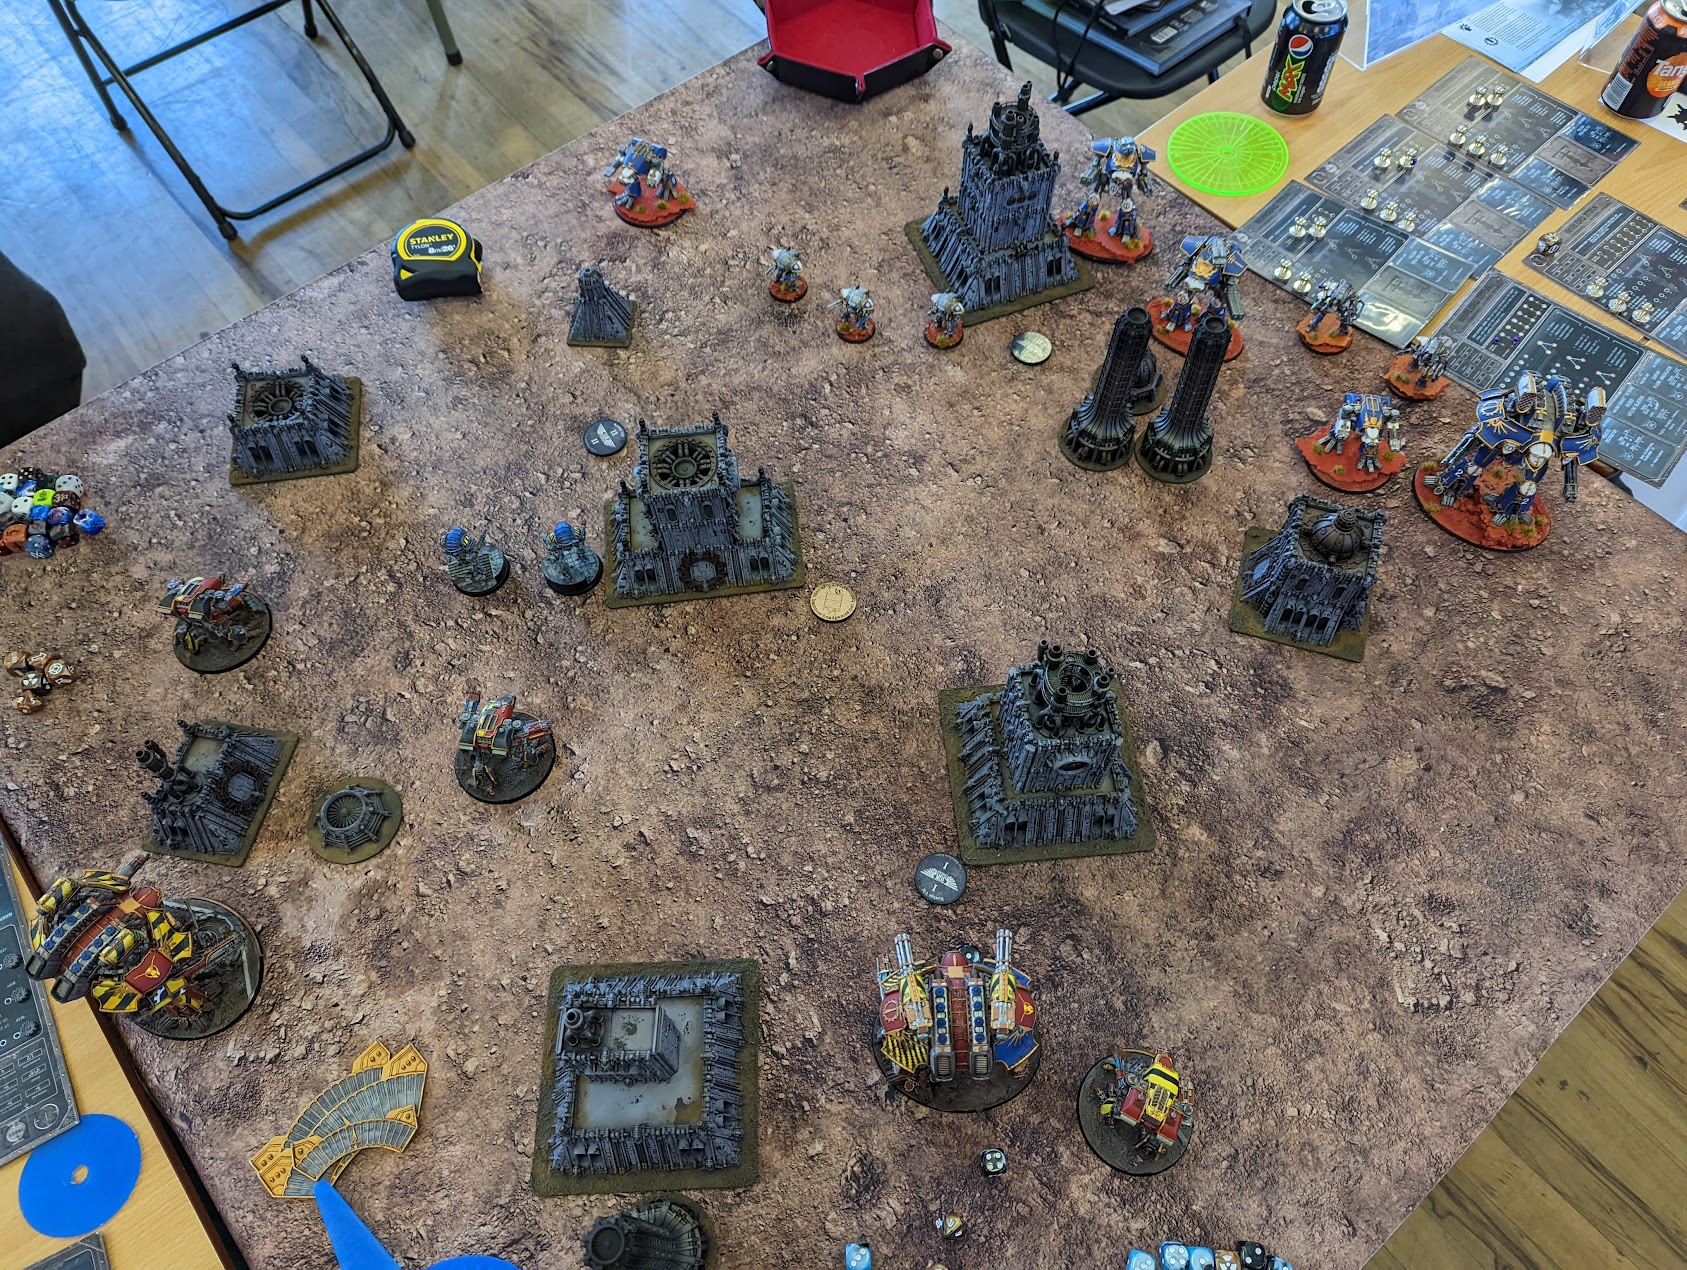
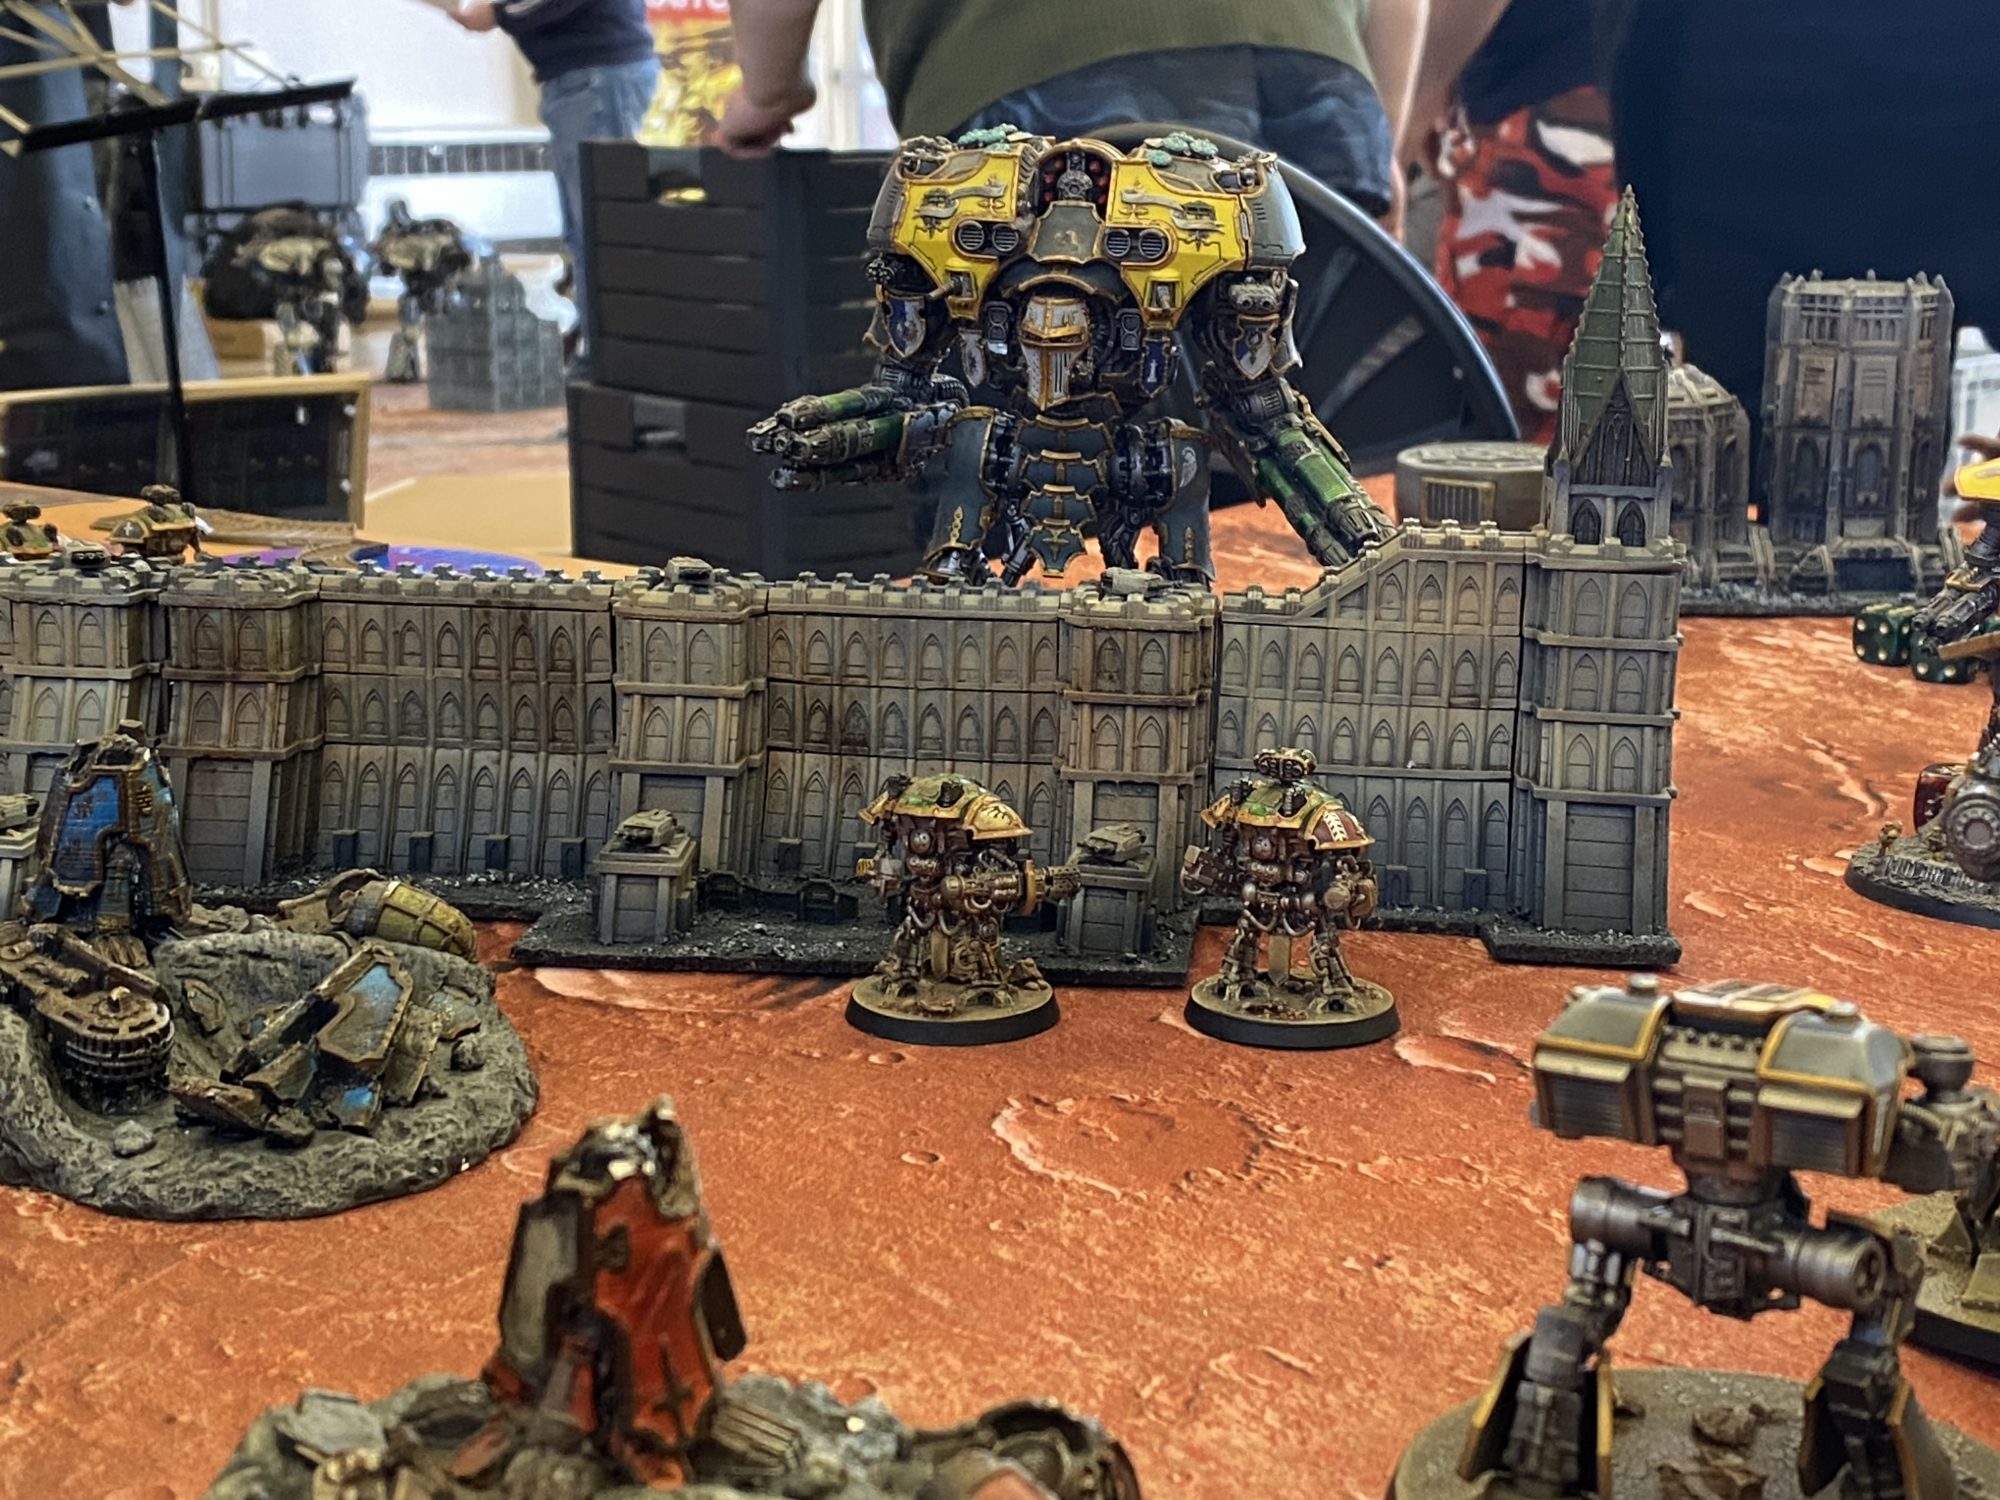
For the first game I had the chance to play against Dan (who took home best-sporting Loyalist, well deserved) with his Loyalist Gryphonicus force which just seemed extremely thematic! He had a fire support Warlord with twin Belicosa cannons and a Ferrox with 1 Reaver and 2 Warhounds alongside two banners of 4 Questoris knights with mostly battlecannons and rocket pods. They were a great looking force and a fun game to kick things off with the terrain on my table perfectly setting the tone. It was a hard fought game of Reaver charges, knight charges, and the Warmaster just tearing apart anything it got in its scope.
LordTwisted: Again, this terrain is off the chain.
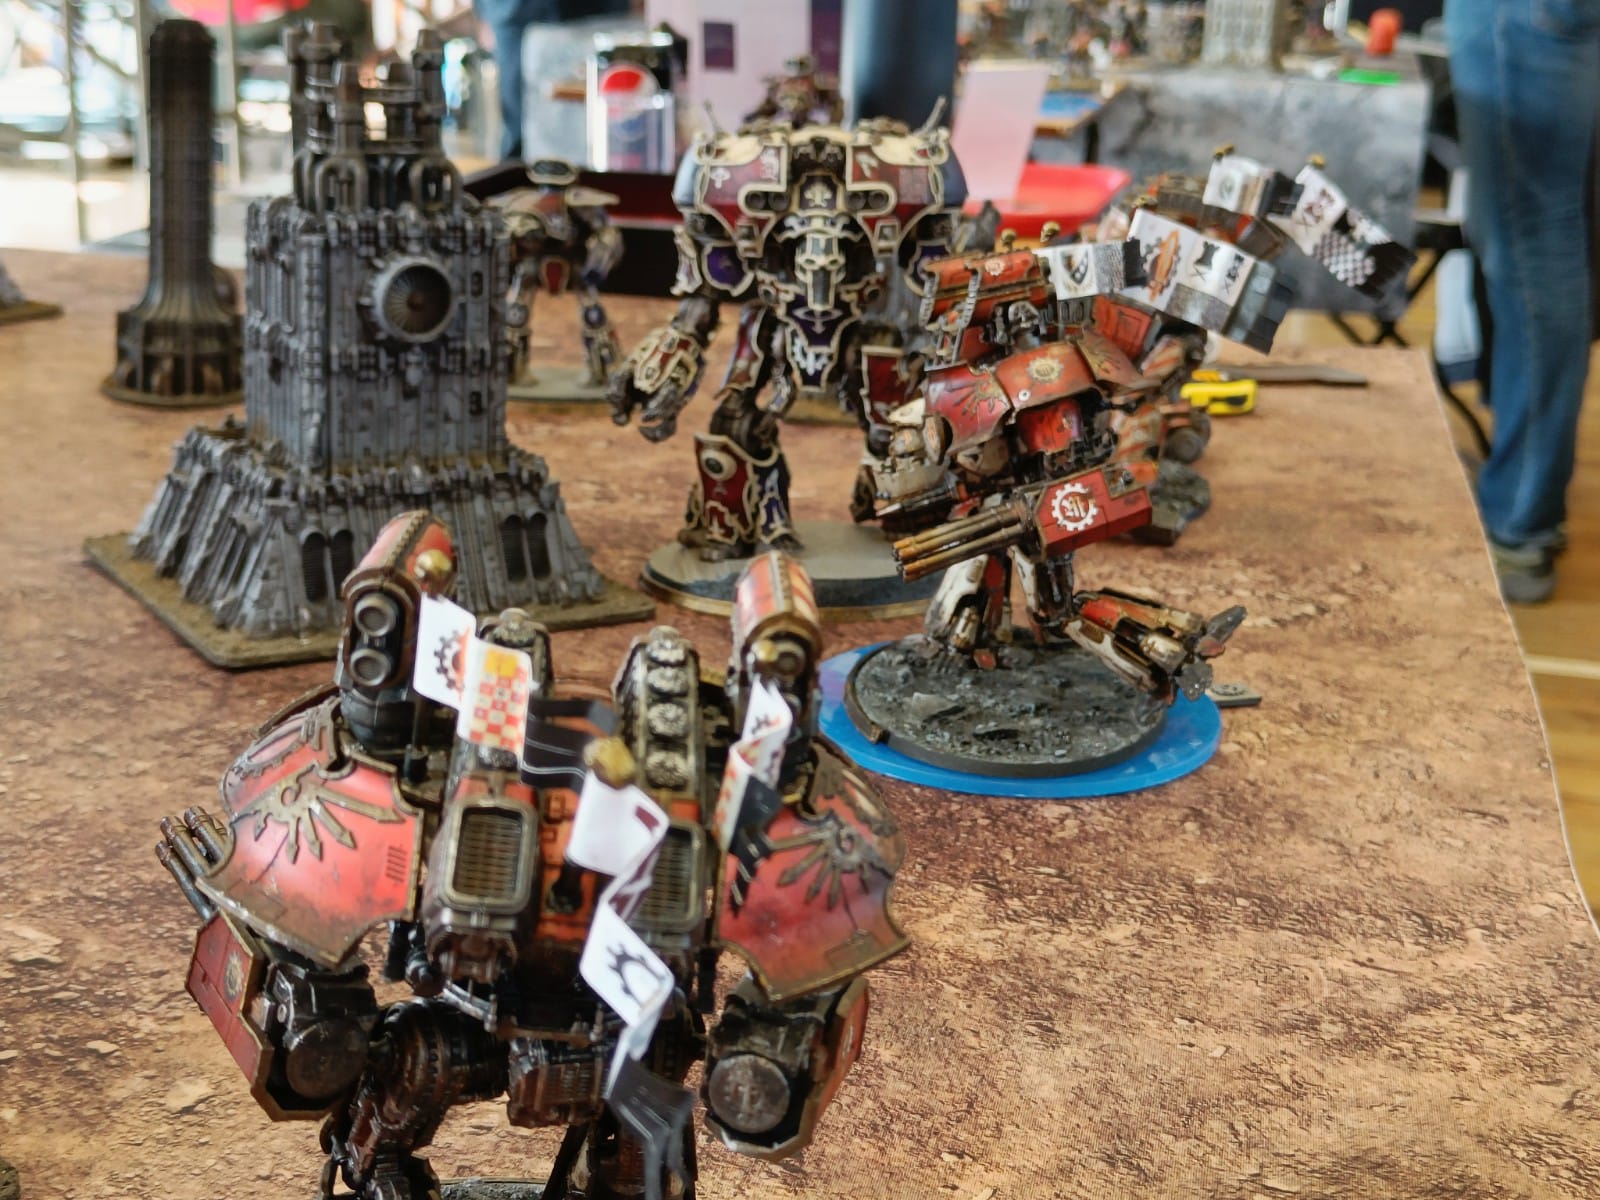
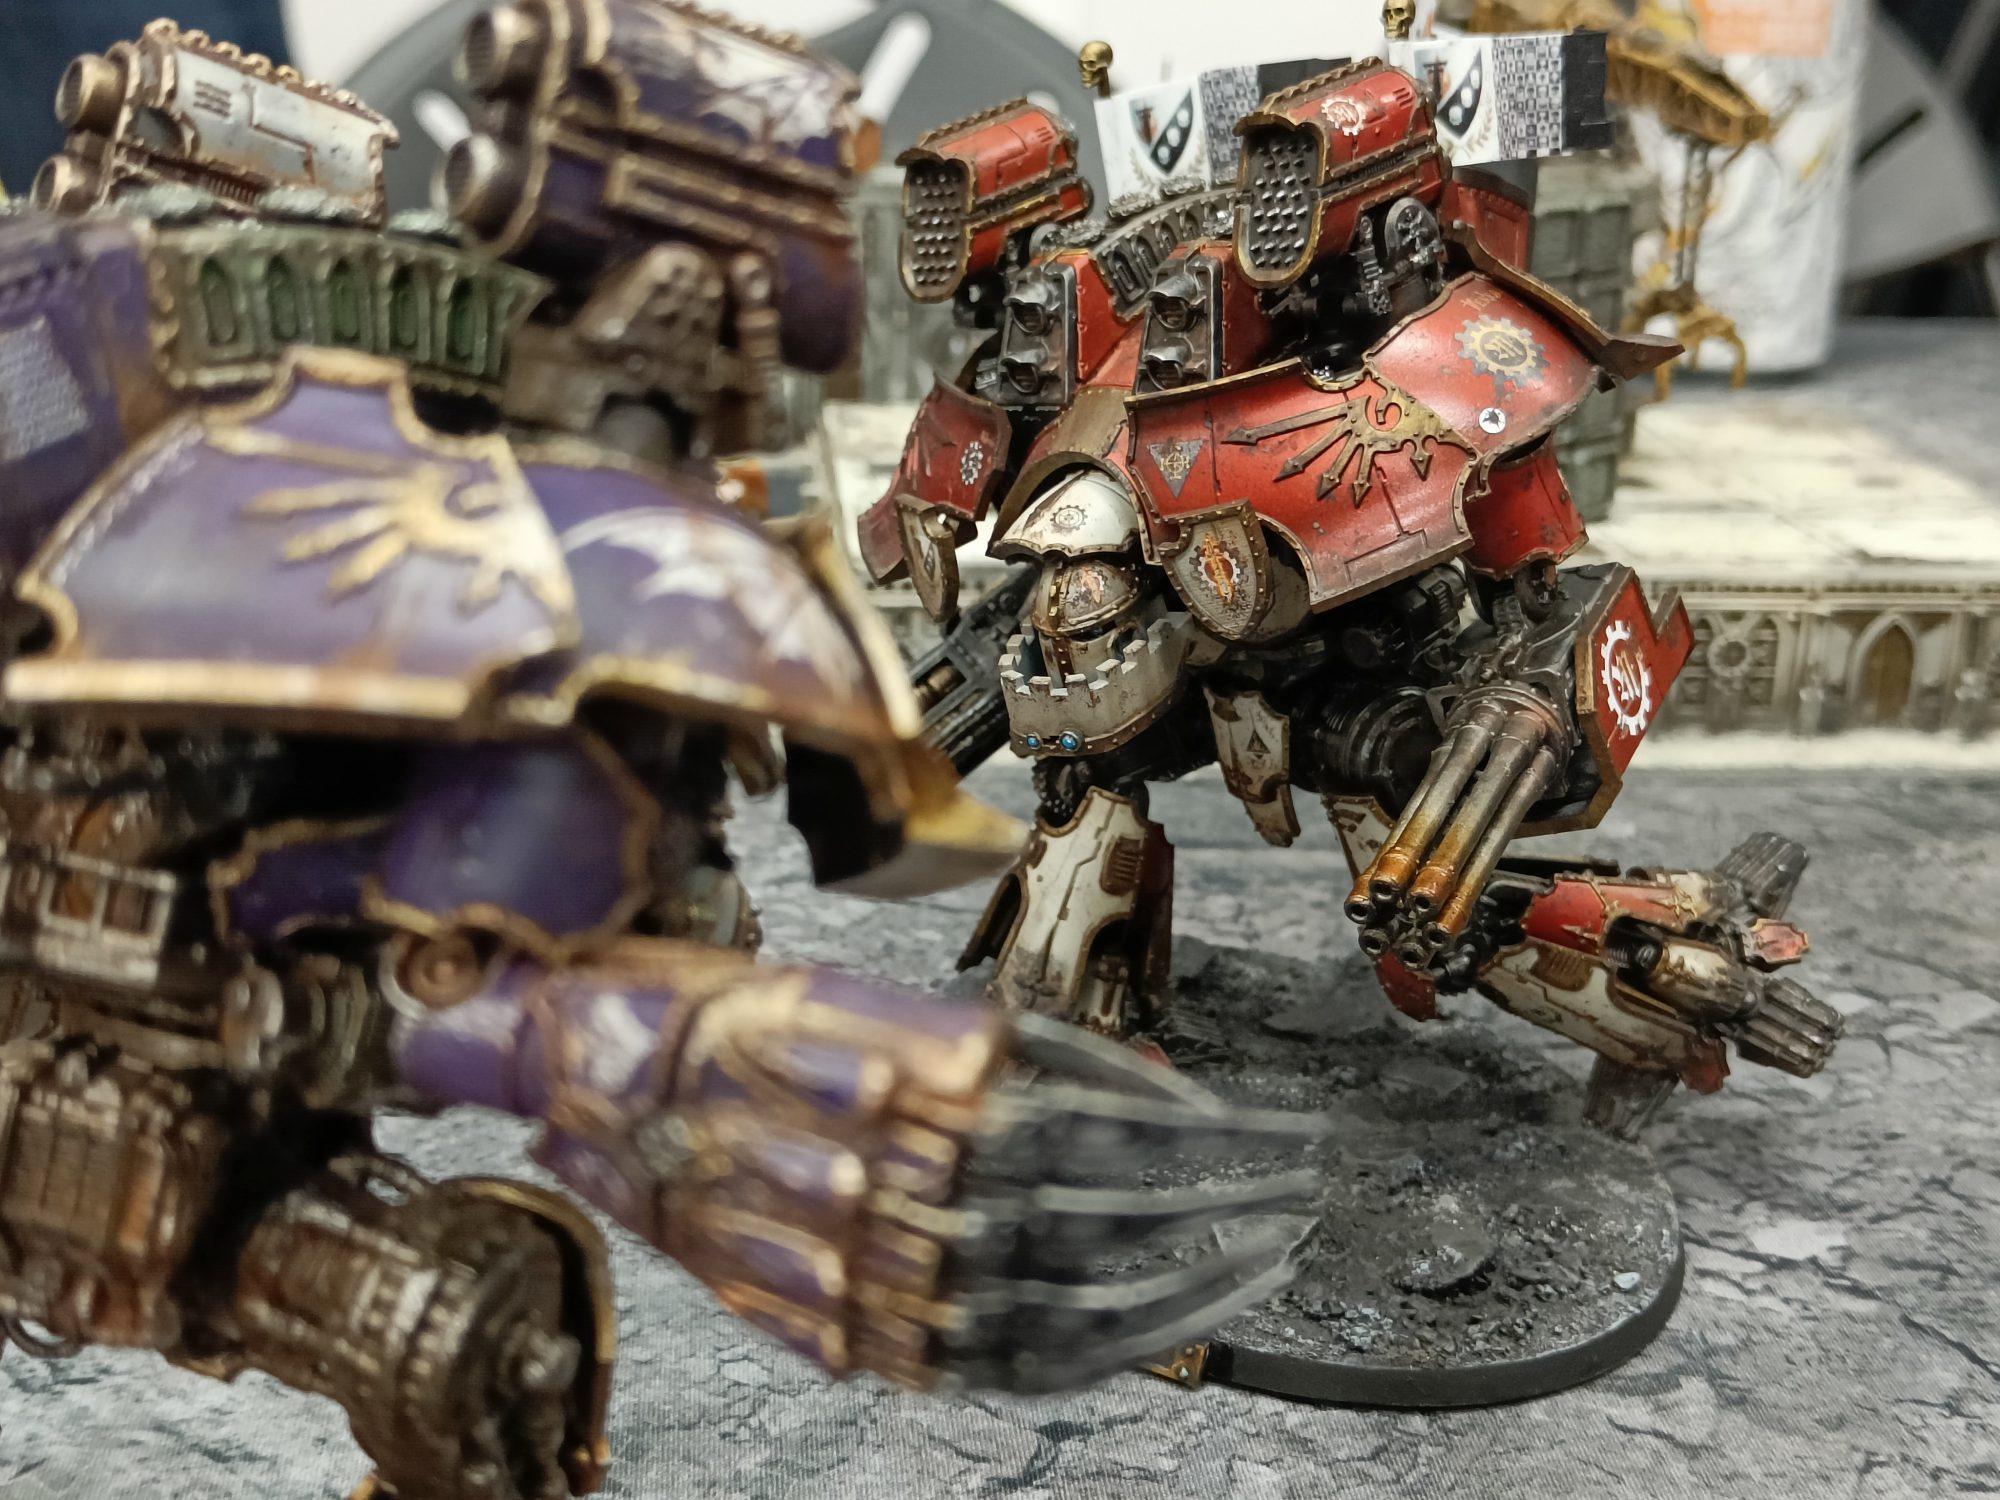
This was also by far my favourite photo from the event of my games (below) as the Warmaster towered over the walls and gates and enemy knights cowered behind, avoiding devastating plasma. A heavy loss for Gryphonicus as both sides saw many engines fall but in the end it was won by the Traitor Gryphonicus force, utterly destroying the loyalists.
Game 2
The second game (and final game of day 2 for the event) was against…another Loyalist Gryphonicus force! Really enjoyed being able to play the role of traitor and it just seemed so thematic to play against the loyal Gryphonicus forces. Colin’s force of great looking Gryphonicus fielded a support Warlord (plasma/gatling/apocalypse launchers) and a Ferrox (seeing a theme here, Gryph players?) with 2 Reavers and a Warhound, alongside 3 banners of 2 Cerastus knights, 2 of these were Lancers and the last were Atrapos. I also forgot to take any pics past just deployment, so enjoy that one. I promise a good deal of the terrain here was also taller than this picture makes it look, I’m not a professional photographer and this is an awful angle, apparently.
It happened. The thing that I’ve always wanted to happen playing Gryphonicus finally happened. My Princeps Seniores went on Charge orders turn 2 after advancing up, I played War Lust for extra movement and used the Traitor once-per-game ability for another +2″ move (up to 13″ movement) and +1 attack with all melee weapons for the round. The first charge target was an enemy Reaver which died immediately after taking only a few shots the turn before, barely touching shields and in its death didn’t stop my Reaver from activating a second time that round charging straight in the side of the enemy Warlord, my Seniores’ chosen target, hitting at an effective S12 (Ferrox+Side+Target) attacks needing only 4+’s to cause Critical hits to its body and destroying it in one fell swoop. However, my Reaver did take some serious hits to its body from the Warlord’s death throes, and the Reckless Maverick move pushed its reactor into the redline. He wound up not surviving through the damage control phase, but getting 2 engine kills in one movement phase with one Reaver was fantastic. Unfortunately for the Loyalist force, this didn’t leave enough on the table to be able to deal with the remaining Traitor force which resulted in a second Traitor Gryphonicus victory.
Game 3
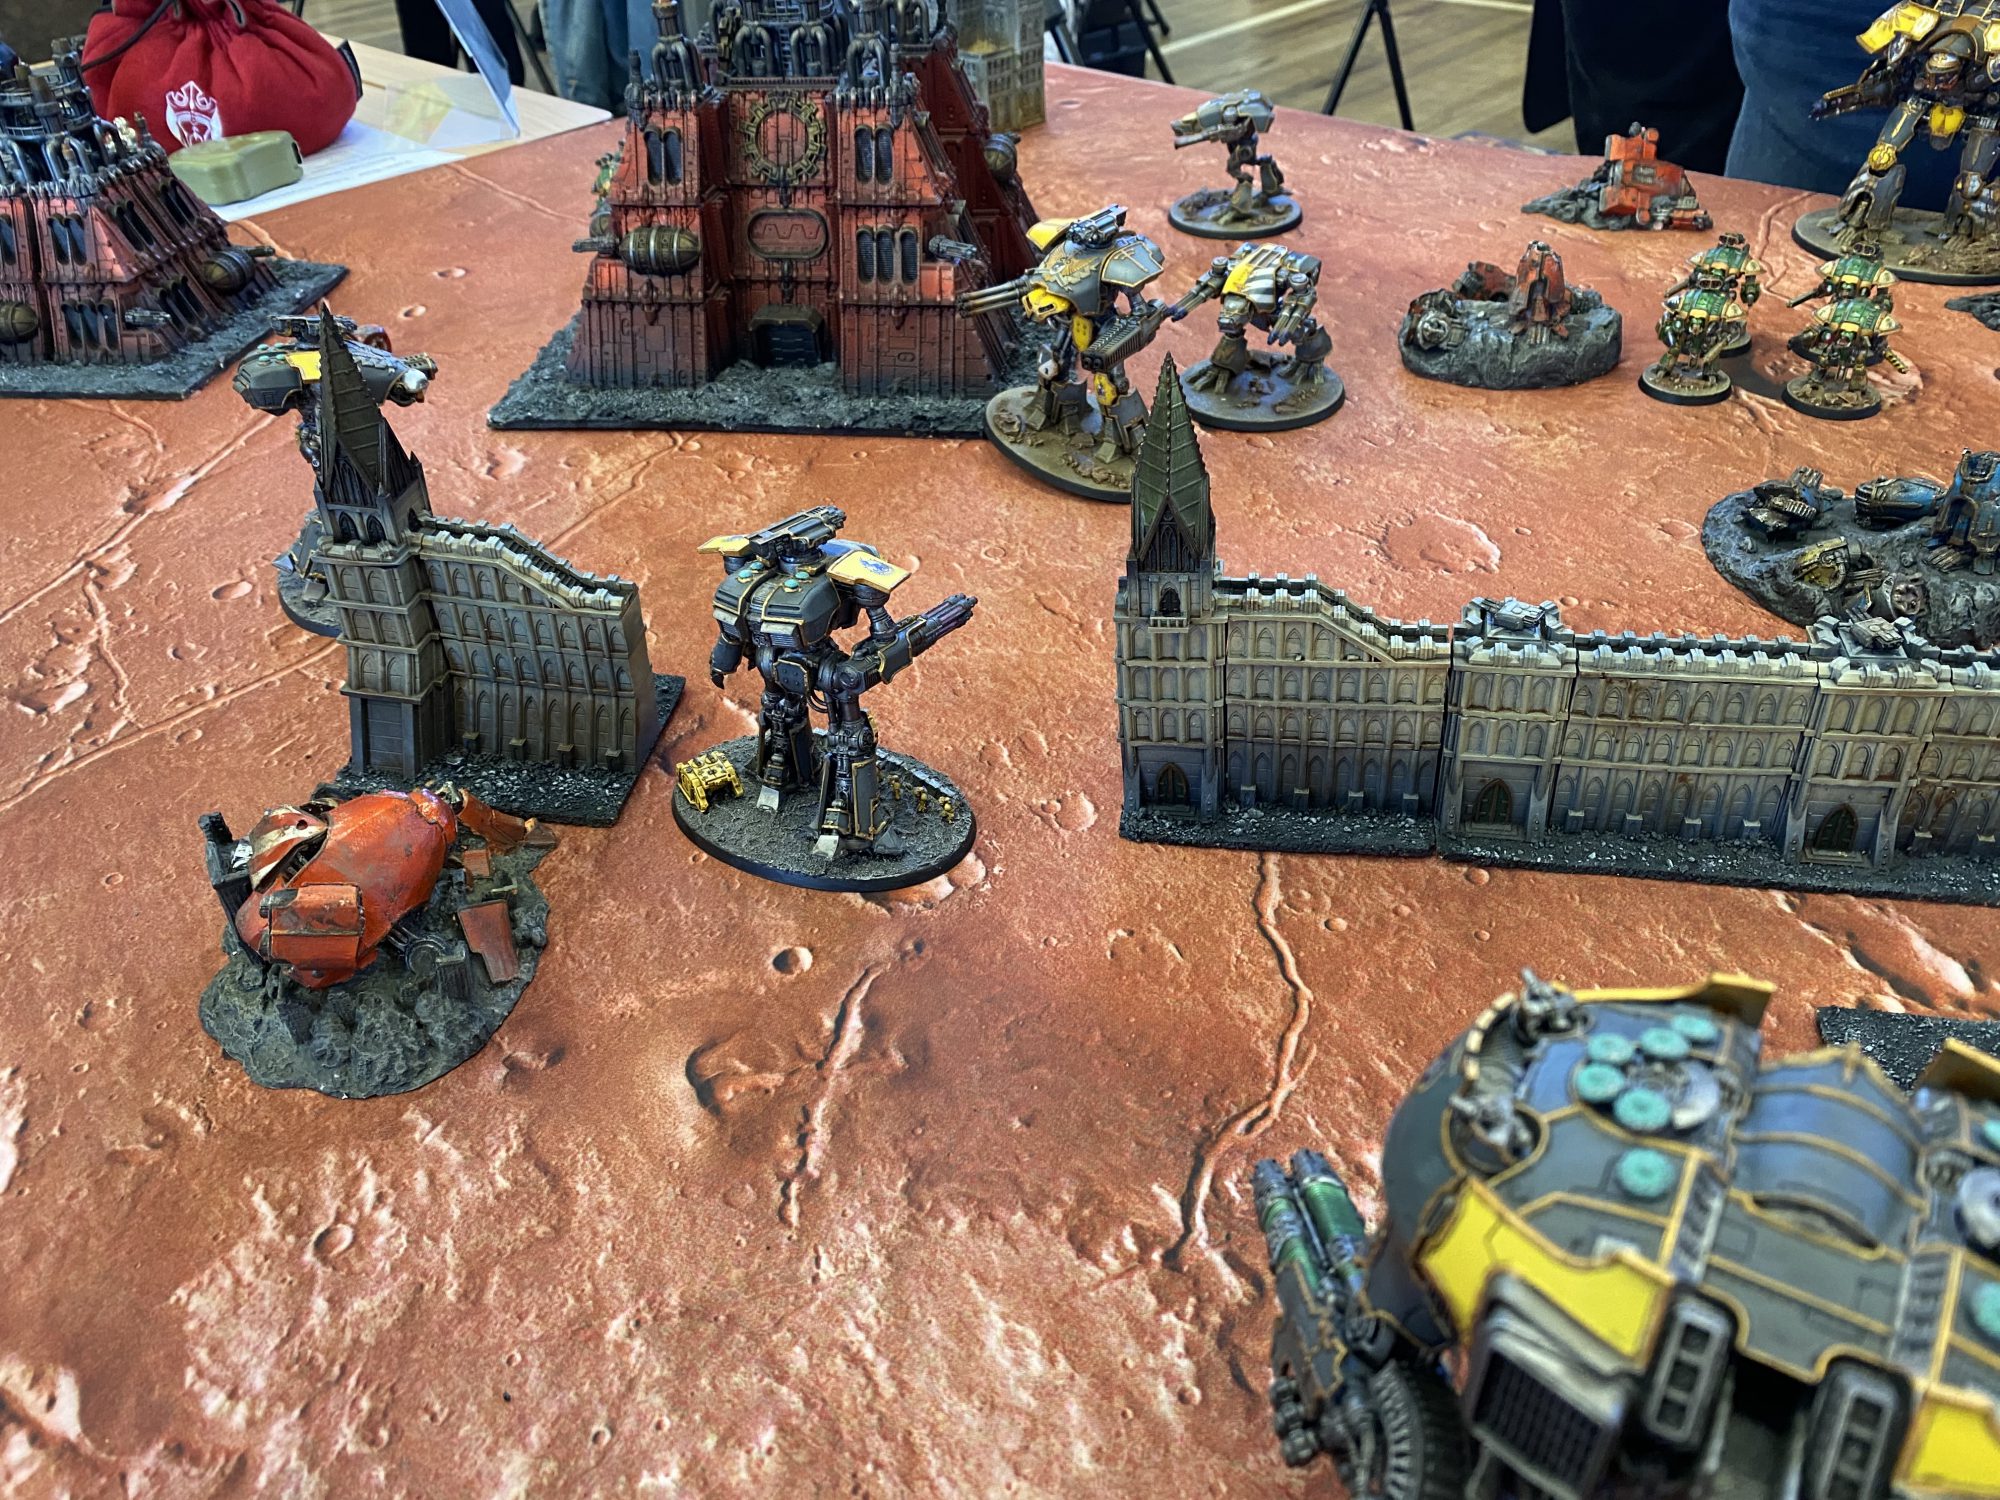
Ok. Day 2. First game against something other than Gryphonicus but still equally cool: Ignatum. Ben’s Ignatum looked great, and were set up as a double maniple: a minimum Arcus and a minimum Venator with a support Reaver to round it out. This force really made good use of Ignatum’s trait for re-roll 1’s to hit with fast Warhounds and a Reaver built for melee with chainfist and melta.
It was a hard-fought game, but I managed to stop the enemy melee Reaver’s charge before it would have hit my Princeps Seniores with a Sabotage, taking it off Charge orders and swapping it to Full Stride. He did make great use of the Loyalist ability though to change that Full Stride to a Split Fire, meaning it was still able to shoot in the ensuing combat phase.
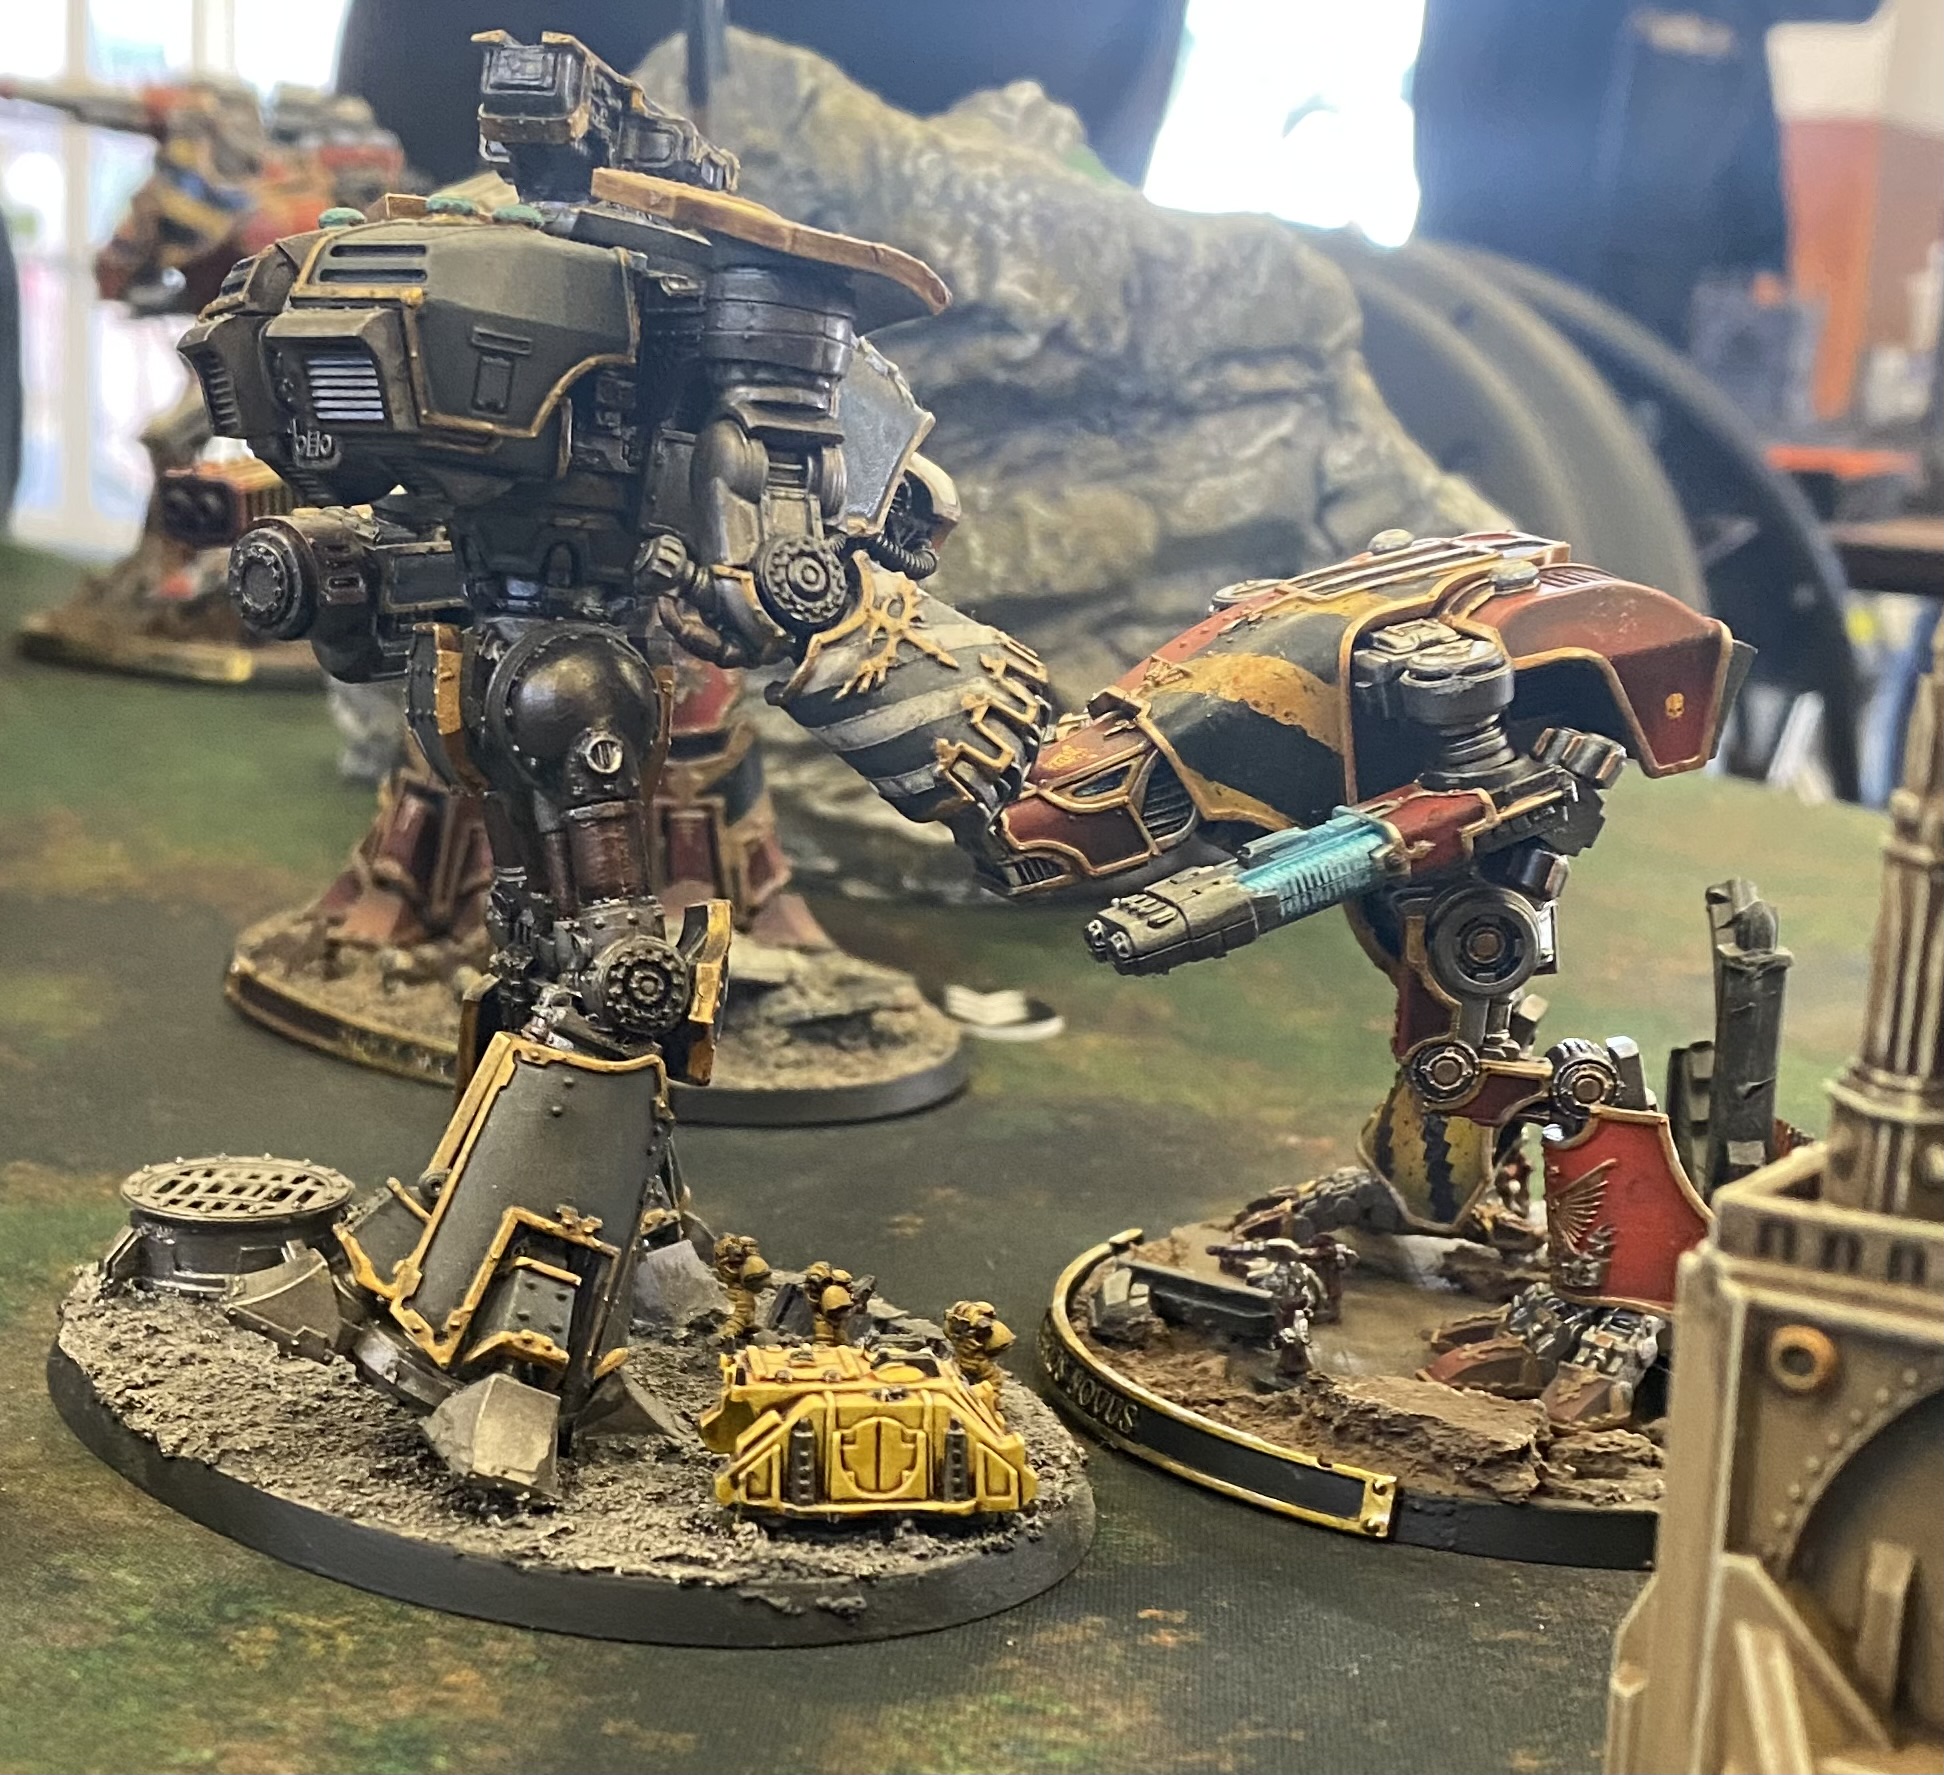
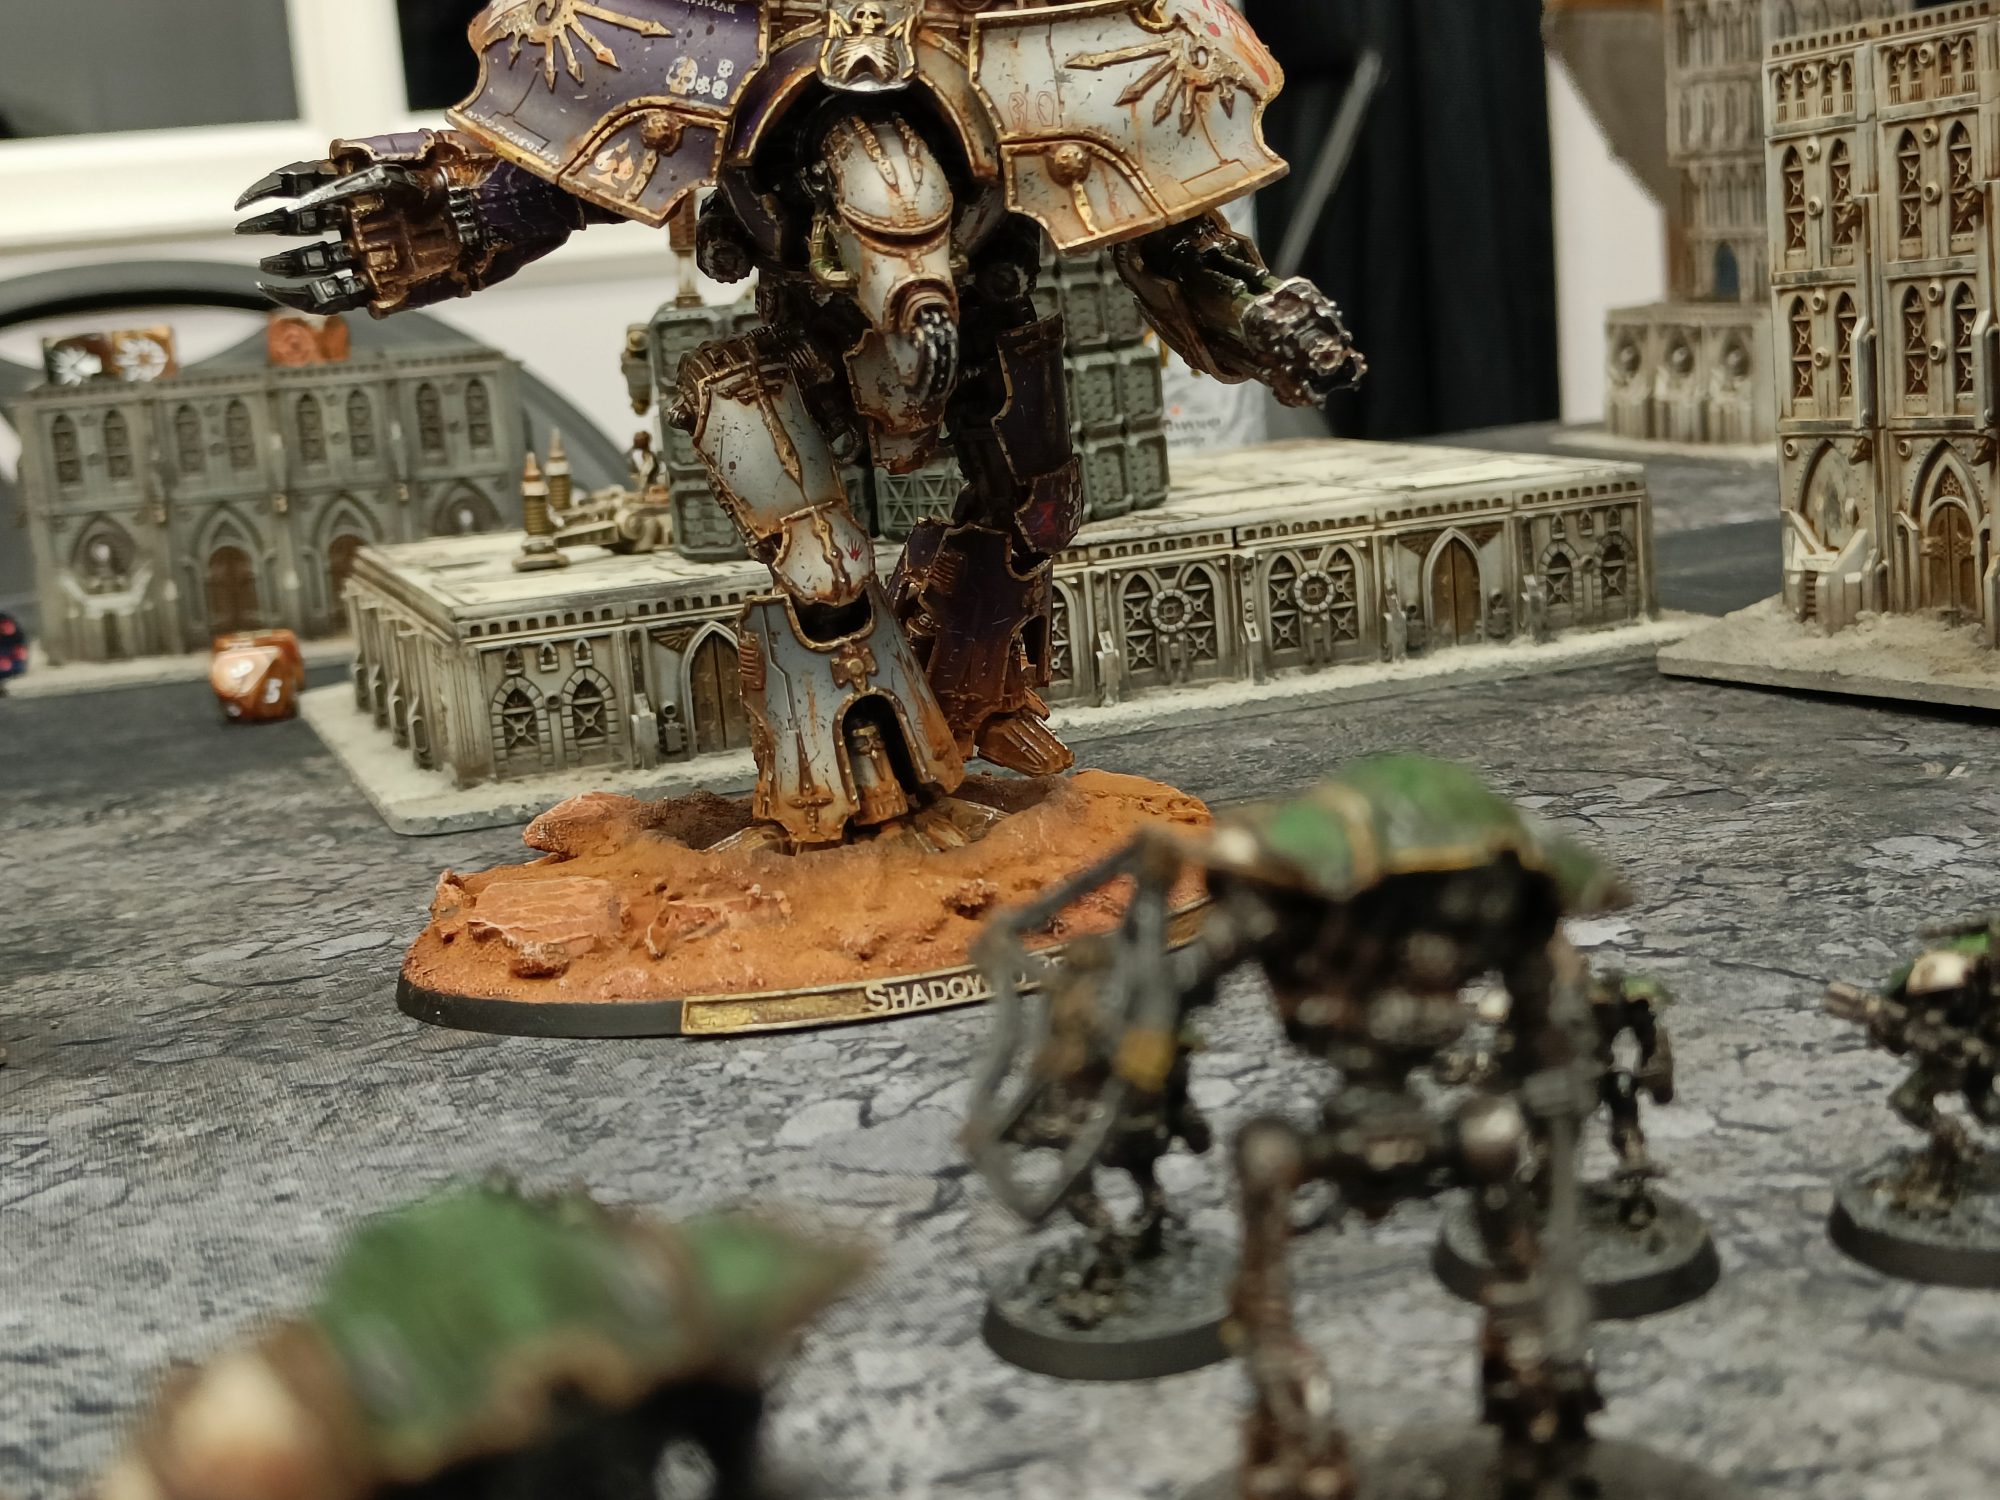
This is my second favourite pic of my games from the event, my Princeps Seniores about to punch the head in on a poor little Warhound (technically its Body, but who’s counting?). Another bloodbath of a game, the Warmaster continued to put in work and survived the battle with very little else living around it. Another win for Traitor Gryphonicus.
Game 4
Last game of the event with a really fun twist as Soggy mentioned above: all weapons hitting a target within 6″ of the middle gained the Blast 3″ trait. You also had to end the game within 6″ of the center of the table to score points. This created some potential hilarity with mass-fire weapons like vulcan mega-bolters picking up the Blast trait to double up on hits and scatter their misses, and even making Melee weapons Blast. It did mean though that you weren’t able to make any aimed shots at things within 6″, though, potentially making them much safer in certain situations. All in all, a pretty fun mechanic that my opponent, Paul, and I just kind of avoided.
Paul had a very sleek looking Astorum Corsair with a banner of 2 Cerastus Knight Lancers backing them up. To say that my Princeps Seniores put in his work in this game would be an understatement. He managed to shrug off enough shots to keep voids up and take minimal damage while single-handedly coring out 3 of the enemy Reavers turn after turn. It was nuts. One of the biggest threats to Titan melee is the ensuing carnage of titans dying and exploding, but he managed to survive each blast, his own reactor killing him instead after using Reckless Maverick and pushing it to the red pip, only fail the command check to go on Emergency Repairs and go up in the next damage control phase. The enemy Lancers did their fair share of work too, finishing off my damaged Reaver and Warhound one after another and making shield saves against an unreasonable number of strength 8 hits. In the end, it came down to a Warmaster vs a Reaver, but that Reaver’s shields just would not budge at all, leaving both in the centre with nothing else alive, scoring each of us the same number of points and ending in a draw!
Summary
This is easily the most fun I’ve had at an event. The organisers were fantastic, the map campaign element was fun, I was able to play against 4 different forces and meet great people. The food was also amazing on-site! The 4 game format was great at this larger points scale, none of the games were ever rushed, there was plenty of time to play a pickup game (which I did with Sean, one of the organisers, and lost horrendously) on the Friday evening and back home before 7pm after a 2.5 hour drive. It was also cool to play alongside the Titan Owner’s Club on the first day.
Definitely want to attend all Greetings from the Warp events in future.
Lord Twisted’s Weekend
I went for the mighty Legio Atarus for this weekend – once the runt of the litter, now a force to be reckoned with, thanks to Infernus Missiles!
I ran War Maniple: Gatebreaker – an Extermigus force of 3 Warlords (Gatebreaker, The Way of Kings and Dream of Unity), backed by a trio of Cerastus Knights, and some dinky Armigers! The Armigers, I note, are 3D printed – I’m not made of that kind of money. Shout out to Battlebling and Artisans of Vaul for some of the upgrade parts I used. The Salamanders bases are for objectives/stratagems.
The strategy was relatively straightforward – First Fire to open things up, and then improvise from there, with the Armigers able to outflank for 1 SP keeping things spicy. The main stratagem I kept up my sleeve was Last Ditch Effort, to direct a falling Warlord away from its fellows!
Game 1
Game 1 was against another Alex (excellent name) who fielded a fearsome Vulpa maniple led by a melee Warmaster Iconoclast. I felt a tingle of fear as I totted up how far he could hurl it forward with stratagems and Warp Displacement, before focusing on the objectives. The Loyalists were landing on Kemerova, and walking clear of their mass conveyors to bring the fight to the enemy – so I decided to outflank the Armigers and run my Knights up to seize his deployment zone while the Warlords engaged his Reavers and Iconoclast.
It went… about as well as you would expect. The Armigers got winged by a Reaver but limped into the objective zone with some damaged Cerastus, and I managed to rip apart the Reavers with Extermigus-level firepower. The Warbringer, however, effortlessly cleaved through three Warlords in four turns – with me holding it up for a round with a cunning Concealment Barrage to reduce its targets.
Hot Take: Do not let an Iconclast get into this position in your flank, when it is a Vulpa murderbeast
Great game – a win to the Loyalists!
Game 2
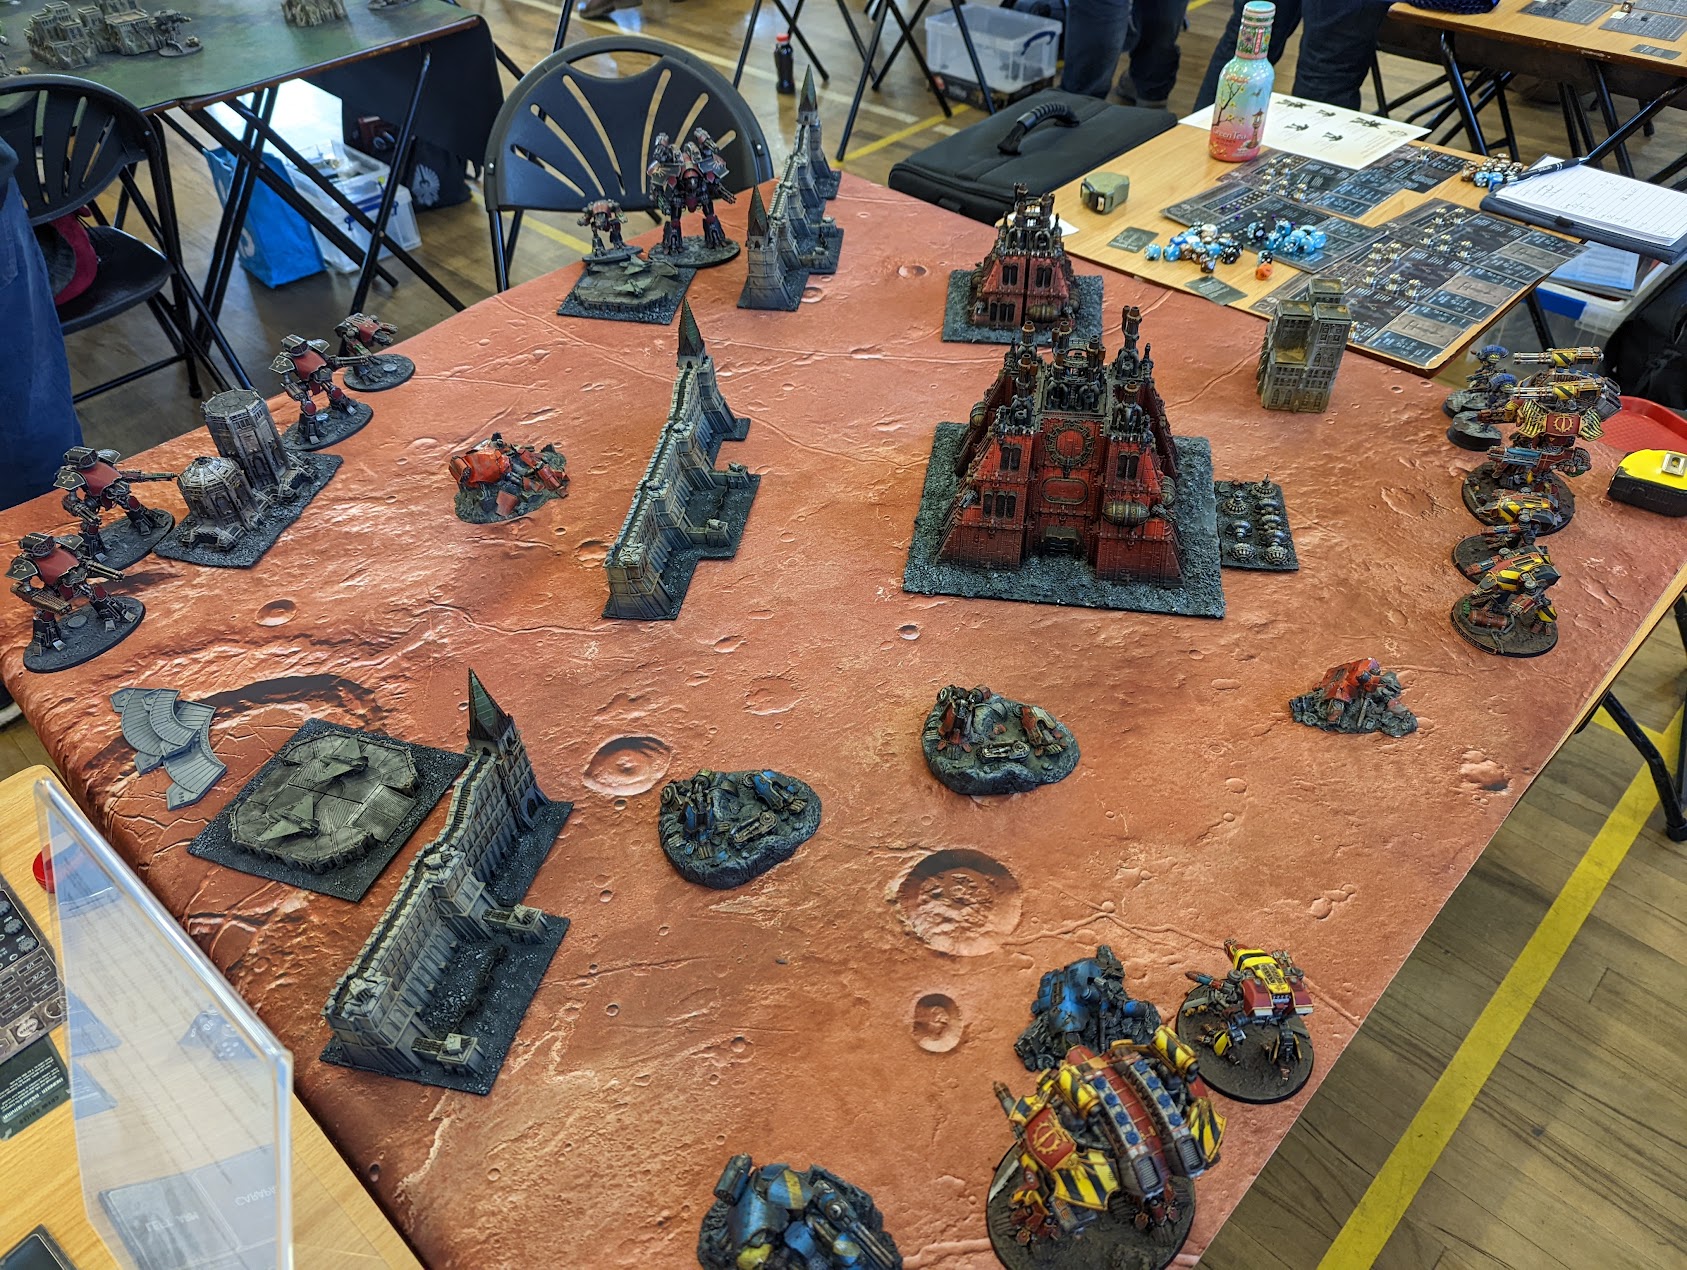
Game 2 was against Lyle’s Knight Household for control of Hive Majoris. On a stunningly painted table of terrain (if I do say so myself), it was David versus Goliath – but I had heard stories of the nasty Acastus…
And nasty they were!
The game was a cinematic masterpiece. My Cerastus moved into one of the “gates” between the walls and held them, 300-style, against a mass Lance charge, while another Lance lost many of their number hurling themselves at one of my Warlords – killing it on an epic 11″ charge! I then played my favourite stratagem, Last Ditch Effort, and fell on them all – killing 9 Knights in epic fashion.
The game went back and forth as I tried to move to the objectives, ultimately ending in a narrow win as a wounded Warlord tried, and failed, to finish off the last Acastus. A Catastrophic Meltdown had done the rest of my army in! A great game, and a fun one against Knights.
Game 2.5
I played a cheeky exhibition game in the evening against my old foe Nathan, the Flaymaster – who runs a dirty Damicium with Scruntalowda the Warlord, loaded up to the nines with upgrades. Every Corruption you can think of, turning it into a walking death-machine with 6 Servitor Clades, -1 to hit… the works.
I faced him on an Arid World in a Lightning Storm, which I turned into Cursed Earth, making my missiles Shieldbreaker 4(!!), and everything into a clusterfuck. Scruntalowda tried its best to Warp Displace into my lines, but the plucky Armigers blocked him off, and he fluffed his power claw hits, dying like a dog in my deployment zone…
Only to unleash Virulent Messenger.
Which won him the game.
God damn it.
Game 3
Game 3 was against Ewan, in an Atarus v Atarus battle for the spaceport. Ewan has a gorgeous Atarus force – but, of course, they were dirty traitors – and must die!
This was a real tough one, as the Traitors had a Theta Pulse, which they could use to blind all enemy Titans for a turn, at a serious cost to their reactors. I thought I had Ewan on the run, but the Theta Pulse neutered my shooting for a turn, and he made great use of Blind Barrage to absorb more shooting.
My Warlords maxxed themselves out in the heat track trying to get kills (we just had to slay one another), and it looked like I was winning… until the final shot of the game wound up the Titanicus Rube Goldberg Machine, and let rip.
His Warlord fired a Gatling Array at Gatebreaker, who at this stage was heavily wounded. The last shot finished it off, and I rolled a 10 on the D10 – Catastrophic Meltdown. The ensuring blast killed Ewan’s remaining Knights, and heavily injured The Way of Kings, as well as… killing Ewan’s Warhound, who was next to The Way of Kings.
The Warhound also rolled a Catastrophic Meltdown, going nuclear, and killing The Way of Kings. I promptly played Last Ditch Effort, and hurled it into Ewan’s remaining Reaver – who took 6 hits to the body and went up in flames. His Warlord was left, somewhat surprised. A draw! Brilliant game.
Game 4
The final battle for Kemerova Minoris… An Extermigus vs a Lupercal. Rob’s Audax pack was lovingly converted, and looked really nice. I knew 9 Warhounds would be fragile – but also fast and deadly. We were fighting over a promethium wellhead, and he knew if he strayed near it, endless blasts per Warlord would answer! Command rolls were tough due to vox distortion, and as the Traitors controlled Kemerova Minoris, Rob’s Command rolls were much more reliable than mine. A tough setup.
Rob played a blinder. He rushed his Warhounds up fearlessly, and I had to sacrifice the Armiger pack to block off a flank. They slagged a Warhound with their fusion guns, and he used Corrupted abilities to blow them apart with special warp tempests – allowing him to bring his guns to bear on the Warlords.
Two ‘hounds strayed too close to the Wellhead, and ate 40 Str 6 (Extermigus) missiles, getting blown to kingdom come, but not before they injured and killed some of the Knights. Still left six to deal with…
It was then tense as they come, with five Hounds bearing down on 3 Warlords. I thought I had it in the bag, before The Way of Kings managed to miss with its Quake cannon and hit itself, staggering it out of alignment. Rob pounced. His Shock Lances and Ursus Claws, carefully aimed… all failed, with re-rolls! Surely I had him now!
No. He siezed priority. First Fire. Two Warhounds – thanks to my Quake knocking me out of line – were now inside Dream of Unity’s shields. Coordinated Strike, side arc, Maximal Fire Plasma Blastguns…
Oh dear. Dream of Unity died, and I couldn’t even use Last Ditch Effort – it had Silenced!
The Way of Kings promptly suffered a burnout from overheating trying to kill the Warhounds, and shields failure. My plans crashing down around me, Rob used his Warhounds again to do a Coordinated Strike with the blastguns, slagging The Way of Kings in the side arc, and allowing me to use Last Ditch Effort to crash it into his ‘hounds. Two promptly went nuclear, knocking over Dream of Unity and sending it slamming into Gatebreaker!
My Knights charged in heroically to try to salvage the mess and wiped out two more Warhounds, but the end result was Gatebreaker heavily damaged in its legs, a single Knight left, and one of Rob’s Warhounds left with multiple criticals. The Knight and Warhound limped to the objective on the final turn, with Gatebreaker unable to stop his Warhound – a draw, and a very memorable game!
Fire the Ursus Claws!
Report Ends
Soggy: As you can imagine from above, I had a great time and will be back in a heartbeat for the next one. The tables of terrain this weekend were the best and most consistent I’ve seen at a Titanicus event. The campaign was run very smoothly and gave me a bunch of inspiration on things to for future Titanicus events at the Goonhammer Opens in the UK and US.
LordTwisted: Tightly run, thematic, a brilliant overview table… I had a fantastic time. The 30k side of things looked a blast, too. 2×2 games is a good style, as most of us had a third game anyway but in a much more relaxed fashion. We’ll be back for Kemerova, Traitors…
