Welcome back to Goonhammer’s series for aspiring Titan Principes. We here at Goonhammer’s own Collegia Titanica know that Adeptus Titanicus can seem intimidating to players unfamiliar with its particular quirks, but this series aims to equip you with everything you’ll need to play out epic clashes on the battlefields of the far future with your very own Titan Battlegroup. In this series, we’ll be walking you through how to build your battlegroup and command it to glory, including everything from which Titans to include and how to equip them, through to how to command them on the field of battle to secure ultimate victory.
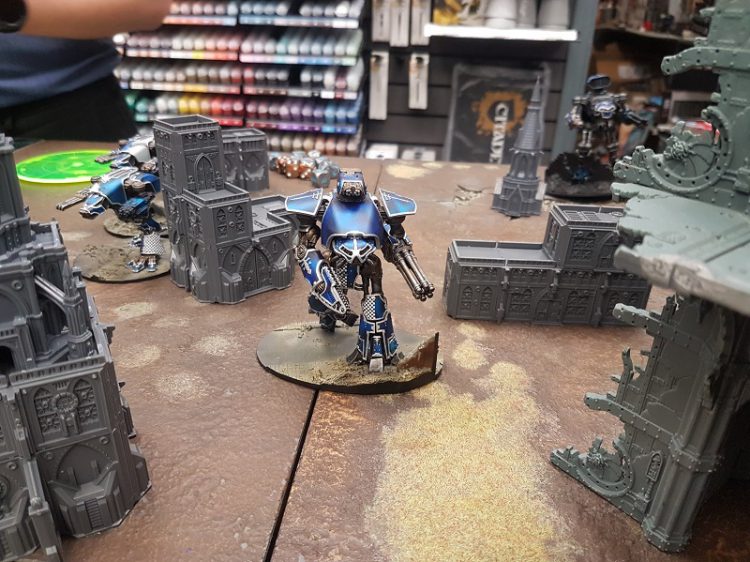
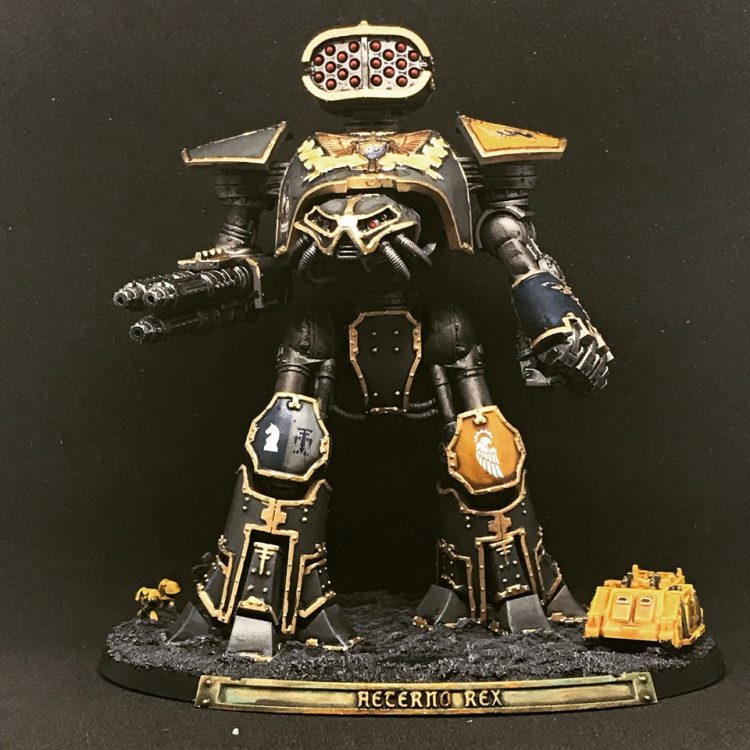
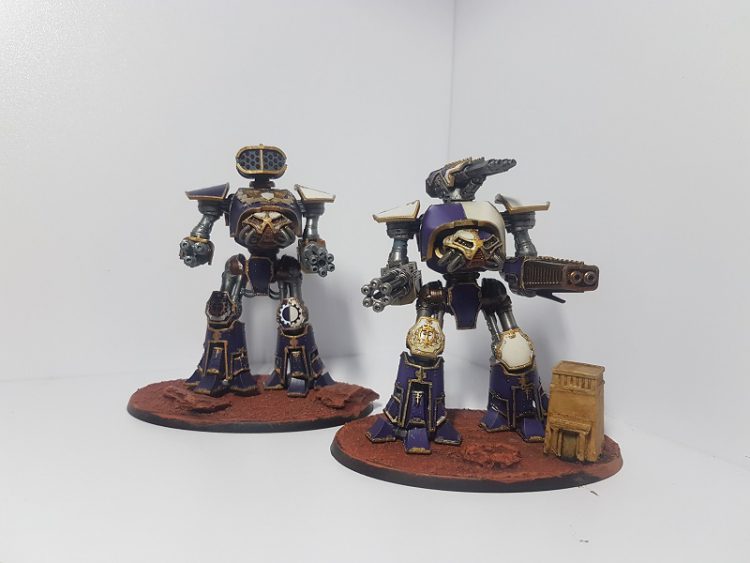
This week’s focus is on the venerable Reaver-class Titan. Nearly any battlegroup can find a role for a Reaver, and eight of the ten maniples on offer require you to bring at least one, so any aspiring Titan commanders will need to learn how to get the most out of them.

Reavers in a Nutshell
At first glance, Reavers are in an odd spot compared to the other Titans you can choose to field. They have a variety of solid weapons to choose from and have speed and manoeuvre values that will let them reliably bring them to bear, but most of their armory is relatively short ranged and they lack the durability you would expect from a dedicated front-line brawler. However, their variety of options and more forgiving reactor track let them fill a variety of roles and help you build your battlegroup in the way you want.
Strengths
- Jack of All Trades: The Reaver has the broadest set of weapon choices in the game, allowing you to kit out your Reavers in the way you like best. You can build fire support Titans with terrifyingly powerful ranged weapons, front-line units that can strip shields and finish off wounded enemies, or aggressive brawlers that outflank your opponents and tear them apart in close combat. Whatever your plan for your Reavers, chances are there’s a loadout that will let them execute it.
- Close Work: Reavers have a lot of weapons that let them shine if they can close with their opponents, including a pair of dedicated melee weapons that will make even a Warlord’s princeps sweat if you can get within range to use them. Their WS of 4+ also lets them bring their powerful weaponry to bear even within 2” of their target, making them more reliable than their larger prey in close. They’ve also got the speed and maneuverability to actually make use of it, especially with clever reactor management.
- Reasonable Cost: Reavers start at 250 points and your average weapon loadout will run you somewhere around 60 points, letting you kit out a Reaver for just north of 300 points – the most expensive build currently available is 340 points, but most will clock in around 310 or so.
Weaknesses
- Master of None: While your Reaver can be equipped with weapons that let it function well in almost any role, it generally won’t perform as well as a Warhound or Warlord in their respective roles. Don’t expect them to be able to slug it out toe-to-toe with a Warlord or outmaneuver a Warhound.
- Carapace Range: Reavers mount carapace weaponry which gives them added firepower, but at a cost – you can’t target Warhounds or Knights that are within 8” of a Reaver with these weapons. You can still hit other Reavers or Warlords, though.
- Thin Armor: Your Reaver’s defenses aren’t quite as paper-thin as a Warhound’s, but they’re not that much better, either. The extra point of void shields is great, and having 3 repair dice makes it much easier to keep them up, but once your voids go down your armor is only slightly stronger than that on a Warhound. You’ll need to play cleverly in the movement phase to get the most out of this Titan.

Piloting Your Reaver
In order to get the most out of your Reaver, you’ll need to develop a good sense for when to push your reactor for additional speed, turns, or durability. Thankfully, a bad reactor roll here or there isn’t as punishing as it would be for a Warhound since the Reaver sports not only an extra pip on its reactor track, but one fewer orange space to boot. This means that you won’t have to make reactor overload checks until you’ve racked up 4 points of heat, giving you the breathing room you need to squeeze every ounce of power out of your reactor.
And you’ll need that extra power. The Reaver only packs one more point of voids than a Warhound, and it’s not that much more heavily armored – only the legs are harder to get a direct hit on, while the body and head have higher targets for devastating and critical hits, respectively. Dodging fire arcs will still be your go-to method for staying alive, and you’ll often need the extra 3” of movement to make that happen. If you do happen to get caught out, the longer reactor track makes Voids to Full easier to use without risking a meltdown.
Weapons
Not only do Reavers have the most weapon choices of any Titan class in the game right now, the choices they have to draw on are extremely varied and fulfill a number of roles. Understanding when and how to use each weapon will be crucial in
- Arm Weapons:
- Melta Cannon: The Reaver’s most expensive and powerful weapon, the melta cannon is well worth it and seen in many builds. For 35 points you fire a strength 11 shot with a 3” blast that doesn’t even require you to push your reactor! The trade off compared to the volcano cannon here is the melta cannon’s mediocre range of 24”. You’ll want to play aggressive and move to within 12” where you can benefit from the Fusion trait, which lets you roll a d10 on armor rolls instead of a d6.
- Laser Blaster: An iconic weapon on the Reaver, the laser blaster is a great all rounder weapon at 25 points. With its 3 dice at strength 8, it can be used to open up armour on Titans that have just lost their voids, or can be used with the shieldbane trait to try and remove that last void on a target. It also has good range, reaching as far as 32”, although it suffers a -1 penalty to hit rolls for shots against targets beyond 16”.
- Gatling Blaster: Despite being the Reaver’s cheapest weapon at 15 points, the Gatling Blaster has loads of utility. With it’s 6 dice at 24”, it’s great for stripping shields so that you can follow up with a melta cannon or laser blaster shot, but can also flex into putting called shots into damaged Titans. While it suffers from a low strength of 5, that’s paired with the Ordnance trait, allowing it to reroll armor rolls of 1. Combined with bonuses from mounting structure damage and flanking, you have a decent-to-good chance of putting a point or two of damage into a wounded Titan and securing an engine kill.
- Volcano Cannon: Often overlooked in favour of the melta cannon, but you shouldn’t underestimate the power of a strength 10 3” template into a target without voids or onto an unsuspecting knight banner. With it’s 60” range, it nearly doubles the range of all other non-carapace weapons on the Reaver.
- Reaver Titan Power Fist: Sometimes, shooting hot laser death at Titans doesn’t really get your point across. Sometimes, you want to look the other princeps in the eye while tear their god-engine’s plasma core out by hand. This weapon gives you the hand to do that with. With 2 attacks hitting at strength 9, it hits hard, and its Concussive trait lets you knock your target around, potentially preventing them from being able to effectively retaliate and forcing them to waste movement or turns to get back on their gameplan.
- Reaver Titan Chainfist: Gains an extra attack and the Rending trait over the power fist and hits at +2 rather than +1, but loses a point of strength and the Concussive trait. Rending means that a roll of 6 on an armor roll all but guarantees a two-damage hit even against undamaged armor, and having 3 dice that will usually hit on a 2+ gives you a decent chance of making that happen. If your plan for your Reaver involves getting it within 2” of its prey, you’ll want one of these on it.
- Carapace Weapons: Keep in mind that the Carapace rule means that these weapons can only target Warhounds or Knights if the target is 8” or further away.
- Apocalypse Missile Launcher: One of the most commonly seen carapace weapons, the apocalypse missile launcher is fantastic for dropping shields on titans anywhere on the table with it’s 5 dice and barrage keyword. If you don’t know what carapace weapon to take, this is a good choice.
- Warp Missile Support Rack: The odd one out among Reaver weapons, the warp missile support rack gives you a once-per-game shot that ignores voids and deals damage straight to structure. This is an odd one to play around, and we don’t recommend taking it for your first game. If you want to bring it, leverage its +2 to hit rolls for shots beyond 20” to call a shot on a weapon you want to disable, or try to inflict that last point of damage on a wounded Titan. You’re guaranteed at least one damage if you hit, so make it count.
- Vulcan Megabolter: A carapace-mounted version of the Warhound’s weapon, this is an inexpensive option that can be a solid choice on a front-line Reaver. Just keep in mind that you won’t be able to benefit from the +1 to hit on Warhounds and Knights – they’re too short for this weapon to hit them in close.
- Turbo Laser Destructor: If you want to add a little more anti-armor punch to your Reaver, this is the option for you. 2 shots at strength 8 have a decent chance to cause structure damage, and the Shieldbane (Draining) trait makes this moderately effective into voids. This can be particularly helpful on a Titan equipped with a power fist or chainfist, letting your Reaver take a few shots while it’s closing to bring its melee weapons to bear.

Suggested Loadouts
All of those options above will let you build each of your Reavers how you want to field them. Think carefully about how you plan to win the game and where your Reaver might fit in that plan, then equip it appropriately. Just in case you’re stuck at the drawing board, though, here are a few suggested loadouts you might want to try.
All-Rounder
- Gatling Blaster
- Melta Cannon
- Turbo Laser Destructor
A true all-around threat, this is the build you’ll generally want to run if you don’t have any other specific goals. The gatling blaster and turbo laser destructor combine to do solid work against voids, and the melta cannon is one of the best weapons in the game for cracking open vulnerable armor. Once you’ve gotten a location opened up, the gatling blaster and turbo laser destructor will help seal the kill.
Close Support
- Laser Blaster
- Gatling Blaster
- Apocalypse Missile Launcher
Another solid all-around choice, this build is a good choice for your first Reaver as it can not only contribute reasonably well to all three phases of destroying a Titan, it can also be built using only pieces available in the “stock” Reaver box, letting you get the Reaver in your Titan Battlegroup box on the table without having to make any more purchases. Open up with the AML against a target with shields up, then follow up with the gatling for the extra shots if they’re still up, or the laser blaster for the increased strength if you managed to take them down.
Venator Support
- Volcano Cannon
- Laser Blaster
- Apocalypse Missile Launcher
While the “All-Rounder” build above will do fine in a Venator maniple, this build opts for some longer ranged options to ensure that you’ll be able to take advantage of the free shot from anywhere on the board while staying out of range of as much return fire as possible. The laser blaster and AML can both contribute nicely to pounding down shields, but are unlikely to collapse any target’s voids on their own. Consider using them with the split fire order in early rounds to put a few hits on your opponent’s Titans so that your Warhounds can more easily collapse those void shields for free shots, then take as many shots with the volcano cannon as you think you can get away with, or fire the laser blaster if you’re concerned about heat management.
Beta-Garmon Chainfist Massacre
- Reaver Titan Power Fist
- Reaver Titan Chainfist
- Vulcan Megabolter
This is a very “all-in” build that your opponent may be tempted to ignore as it advances across the table, but that’s probably a mistake – a Reaver at Full Stride can easily close within 2-3 rounds, and once this Titan is able to corner its prey, the results will usually be worth the wait.
You might be tempted to take this Titan with a pair of power fists to hit at strength 9 with both weapons, but resist that urge – a bad roll on its Concussive trait could push your target out of range at just the wrong moment, leaving you flailing ineffectively with your remaining arm trying in vain to land a hit. Instead, attack with your smash attack and chainfist first, then follow up with the power fist if the target is still alive.
Consider swapping the megabolter for a turbo laser destructor, especially if you’re taking this Titan in a Ferrox or have some other way to boost its WS. Not only will it make your called shots that much deadlier when they land, it will also make Wild Fire and Magazine Detonation results on the Catastrophic Damage table much more dangerous for your opponent if (when, really) they focus fire on this Titan and bring it down.
Legion Options
Reavers have a place in any list, but some legions have tricks that synergize particularly well with what they bring to the table. While any legion can make good use of a Reaver that’s kitted out to fit its preferred strategies, here are a few that make particularly good use of this class of Titan.

Legio Gryphonicus (War Griffons) – Core Rulebook, pg 89
It would be rude to talk about Reavers and Legios without mentioning Gryphonicus first. To represent their widespread use of the Reaver Titan, they may substitute a Warlord or Warhound with a Reaver in a maniple. If they replace a Warlord, they may use Gravatus Plating to improve its armour at the cost of some speed. The extra point of armor bumps your armor up to 11 on the body and 12 on the head and legs, which renders you impervious to strength 4 weapons and makes scoring a direct hit with anything less than strength 8 somewhat risky. It’s not an incredible upgrade, but not having to worry about catching stray damage from AMLs or gatling blasters is nice.
Where the War Griffons really shine is with the use of Motive Sub-Reactors, which for 25 points allow you to use your boosted speed and manoeuvre stats without pushing your reactor on a Reaver that has replaced a Warhound. This lets you close the gap and flank with near impunity. There is some risk here – if the Titan suffers a critical hit to its legs, its reactor track will increase by 1 unless you roll a 4+ on a d6. If you want to cross the table in turn one with your melee Reaver, Gryphonicus is the way to go. By picking the Legio Princeps personal trait of Reckless Maverick you can double move – at the cost of raising your reactor three times. With the Motive Sub-Reactor upgrade and full stride order you can move 24” across the table without going into the orange on your reactor. This can be improved with a Blind Barrage to give your Princeps -2 to hit to keep them safe from turn one shooting.Your Princeps will immediately draw the focus of your opponent, giving you the opportunity to get other assets into position.
Legio Astorum (Warp Runners) Titandeath, pg 19
The Warp Runners are great at playing aggressively in the first few turns, and Reavers will certainly benefit from the additional 2” of movement in the first two turns to close to where they can get the most use out of weapons like the gatling blaster or melta cannon. Veteran Princeps and the two stratagems will also help squeeze every last drop of durability out of your Reavers, letting them survive return volleys that Titans from other legions might fold under.
Legio Fureans (Tiger Eyes) Titandeath, pg 50
The Tiger Eyes’ Titans run hot, but they have the wargear and stratagems to take advantage of that. Thankfully, your Reavers have enough room on the reactor track to let you take advantage of their Machine Rage trait, and playing Offensive Surge with a melta cannon or two backed up by some gatling blasters and laser blasters will more often than not be disastrous for your opponent’s plans. And while you’re moving across the board, Hunting Auspex will let you hit reliably at long range even with laser blasters or when firing at targets behind cover.
Legio Vulpa (Death Stalkers) Titandeath, pg 55
Legio Vulpa excels in close, and the Reaver combines the ability to get there with the firepower to take advantage of it. A Legio Vulpa Reaver will have a WS of 3+ if it’s within 3” of an enemy, making shots it takes from inside its enemy’s void shields more reliable than most.
Don’t be afraid to use the Charge order even with Reavers that don’t have a dedicated melee weapon – following up a d3+2 dice smash attack with a melta cannon or called shots from a laser blaster or gatling blaster can be utterly devastating, and a lot of players won’t expect it. If you do have melee weapons, they’ll be expecting the charge, but it’ll hurt like hell, especially if you’ve got Disruption Emitters to make them even stronger.

Maniples
Almost every battlegroup has room for a Reaver, and nearly every maniple requires you to take at least one. However, if you want your Reaver(s) to be front and center in your battle plan, three maniples come to mind: Venator, Ferrox, and Corsair.
Venator (Core Rulebook, pg 61)
The Venator is a solid choice for a beginner maniple, especially if you haven’t had the chance to build more than one Reaver. You’ll want to be sure your Reaver has at least one powerful anti-armor weapon to take advantage of the free shots you’ll get out of your Warhounds tearing into your opponents’ voids – a melta cannon or volcano cannon are excellent choices. Take a laser blaster or gatling blaster for your other weapon to focus down locations that you’ve managed to open up, and consider an AML for your carapace weapon to soften up void shields with your Reaver’s earlier activations before your Warhounds can cross the board and really go to work.
Legio Gryphonicus can swap out one of the Warhounds in this maniple for a second Reaver, letting you choose which of the two gets to fire the free shot each time it’s triggered, though only one can fire each time you collapse a Titan’s voids. This will help ensure that you’ll have line of sight to whatever unfortunate victim your Warhounds track down, as well as letting you better manage the drain on your reactors from volcano cannons by spreading the shots over two different Titans.
Ferrox (Doom of Molech, pg 31)
Your gameplan for a Ferrox maniple is going to revolve around getting in close as quickly as possible, then taking advantage of the +1 to armor rolls and the ability to use your BS for hit rolls within 2” to absolutely shred your opponents. Power fists and chainfists do especially well here, hitting on a 2+ at an effective strength 10 and 9 respectively, but don’t fall for the trap of thinking they’re the only way to build a Reaver in a Ferrox – a melta/gatling Reaver ignoring voids and hitting on a 2+ is terrifying if you can close.
If you’re running Gryphonicus, Motive Sub-Reactors will make getting into knife-fighting range much more reliable and free up your reactor track for Voids to Full. And while Legio Vulpa has a bit of counter-synergy between their legio trait and the option to choose your BS or WS, combining their Disruption Emitters wargear with the other half of the maniple trait gives their melee and smash attacks a minimum +3 to armor rolls.
Corsair (Titandeath, pg 60)
If the Reaver happens to be your favorite Titan, the Corsair is the maniple for you. It consists of only Reavers and gives you the ability to do their full movement while sidestepping or moving backwards. This works very well with the Reaver’s great mobility to start with, allowing you to “moonwalk” out of your opponent’s firing arc with ease while lining up a punishing counterblow.
This is potentially a maniple for someone with a few games under their belt as you will need to build each Reaver for a specific role, knowing it well and capitalise on your extra mobility
This maniple is one of the most mobile forces in the game, as you can move any of your Titans at at their boosted speed as normal, or in any direction at normal speed. It is incredibly hard to play against and lets you dictate the terms of engagement and keep a stranglehold on the flow of the battle once you’ve grabbed it.
What’s Next?
Now that you know how to build and play your Reavers, the next step is taking the field with them and giving them a shot. At an average cost of around 310 points, you’ll be able to find room for them in almost any battlegroup, and their flexibility leaves them well-positioned to be a workhorse choice in many lists. The Reaver’s ability to mount some truly devastating weapons on a relatively inexpensive delivery platform with passable (if uninspiring) defensive capabilities means you should never sleep on what it can bring to the table.
Next week, we’ll be taking a look at the lumbering Warlord Titan, which mounts the biggest, baddest guns in the game and can absolutely demolish whatever it looks at, assuming it can keep its target in its sights. In the meantime, if you have any questions or comments, feel free to drop us a note in the comments below, or email us at contact@goonhammer.com.


