
Welcome back to Goonhammer’s series for aspiring Titan Princeps. We here at Goonhammer’s own Collegia Titanica know that Adeptus Titanicus can seem intimidating to players unfamiliar with its particular quirks, but this series aims to equip you with everything you’ll need to play out epic clashes on the battlefields of the far future with your very own Titan Battlegroup. In this series, we’ll be walking you through how to build your battlegroup and command it to glory, including everything from which Titans to include and how to equip them, through to how to command them on the field of battle to secure ultimate victory.
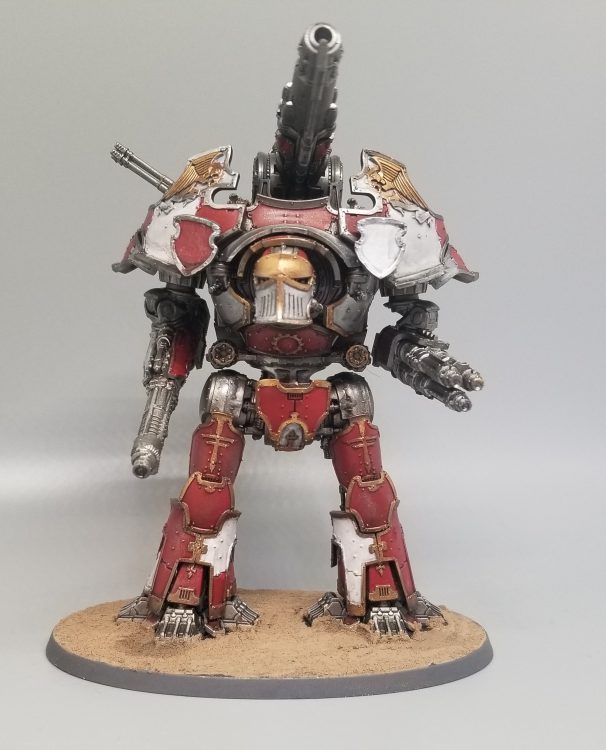
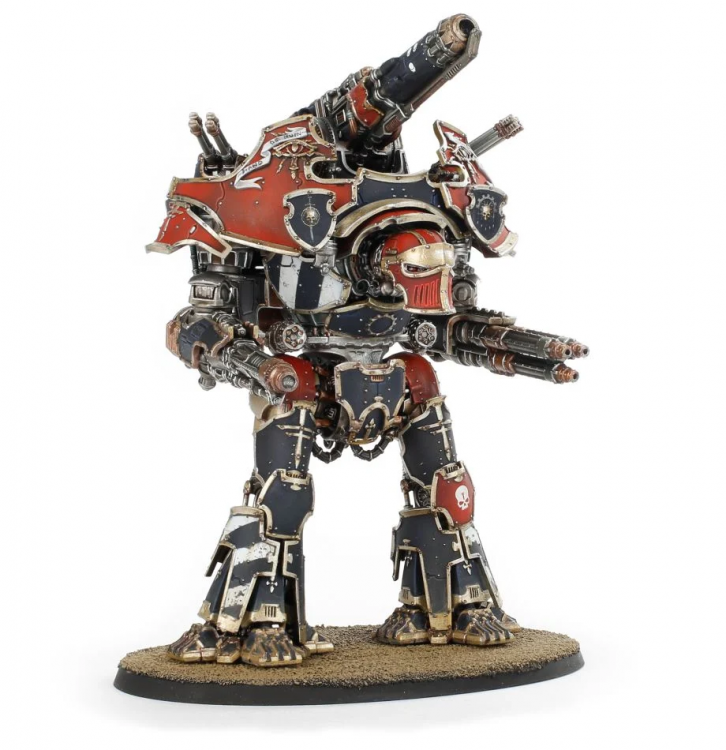
The new Warbringer-Nemesis Titan is an interesting one – it’s big, fairly tough, and mounts a Warlord-class cannon on its carapace that it can fire at range to bring the pain to whatever sucker is unlucky enough to find themselves in its sights. It can also bring Reaver arm weaponry, giving it access to some solid weapon choices to complement its giant cannon. This week, we’re looking at this newest addition to the Adeptus Titanicus roster to see if it’s worth bringing in your lists.
Warbringers in a Nutshell
Warbringers don’t do subtlety. They are powerful and durable fire support platforms that combine the manoeuvrability and lower cost of a Reaver with durability and overwhelming firepower that comes close to that of a Warlord Titan. With most builds coming in at around 400 points fully kitted out, it’s a more affordable anchor for your list that can still get around the table reasonably well.
Strengths
- Firepower: Warbringers have a prodigious amount of firepower that excels at anti-armour from afar, able to deal devastating damage to Titans or vaporize any unlucky Knight banners caught in its sights. With only a single weapon option at lower than strength 8, nearly all of its weapons can threaten to deal devastating hits to any target at any time.
- Durability: With the same amount of voids, hull points, reactor, and servitor clades as a Warlord, taking a Warbringer down will require some serious commitment. This combination allows you to push your Voids to Full! all day long allowing you to shrug off fire that would make any other Titan wither. However, keep in mind that it’s not as well-armored as a Warlord, so once your shields go down you’ll want to be careful.
- Speed (for its scale, anyway): 1″ may not seem like much, but the first time you play a Warbringer you’ll notice the difference in speed between it and a Warlord. It’s still not getting anywhere quickly, but as a dedicated fire-support Titan, you don’t always need it to.
Weaknesses
- Reliance on Carapace Weapon: Due to their main gun’s Carapace trait, Warbringers ideally want to keep their quarry further away than most, which is fortunate as they aren’t getting anywhere terribly quickly. Thankfully they have slightly more agility than a Warlord, being able to turn twice without pushing which makes them harder to flank without having to resort to pushing or Swift Killer as a Personal Trait. You’ll need the manoeuvrability to bring the carapace weapon to bear reliably, though. You’ll also want to make sure you’ve got other models on the board to screen for them – if a chainfist Reaver or banner of Knights can close to within 9″, your Warbringer is likely in serious danger.
- Cost: Warbringers will cost somewhere around 400 points, depending on which carapace weapon you bring. While that’s not quite as much as a Warlord, it’s still a good chunk of your force, and will limit what else you’re able to bring to the fight, potentially putting you behind in activations and making it easier to outmanoeuvre you.
- Poor Shieldbreaking Ability: While a Warbringer-Nemesis packs a powerful anti-armor loadout, it lacks weapons that will help it pound down shields at a distance. The gatling blaster does a decent job, but you’ll need to close to within 24” to even fire the thing, something you’d probably rather avoid with this Titan. Make sure you’ve got something else that can open up shields so your Warbringers can do what they do best.
Piloting Your Warbringer-Nemesis
The Warbringer-Nemesis is a dedicated fire-support platform. The reason you’re bringing one over a Reaver is for the carapace weapon, so you need to make sure you can use it. Unlike a Warlord, which can use its big guns in close in a pinch, you won’t be able to even fire this thing at Warhounds, Reavers, or Knights unless they’re more than 9” away. Make sure you keep your distance.
The carapace weapon has another limitation: its corridor firing arc. This isn’t as big of a deal as on the Warlord, though: a Warbringer’s 2/3 manoeuvre value lets it line up shots that a Warlord would need to push for, and push to bring its gun to bear on targets that a Warlord simply couldn’t shoot at without something like Swift Killer. Use this agility to make sure you’re firing your carapace weapon every turn.
Try to delay your Warbringers’ activation in the movement phase as long as possible. You really want to be firing your carapace weapon as much as possible, and if you try to line up a shot early, your opponent might just step out of the way. However, if your opponent presents you with an opportunity to First Fire your carapace gun, you should consider it – firing that combined with your arm weapons will let a Warbringer outshine a Warlord’s armorbreaking capabilities, even if it’s only for a turn.
You’ll find that the extra inch of movement and extra turn over the Warlord really come in handy, significantly reducing the number of times you need to push your reactor in order to make sure you’ve got a target lined up. You’ll find yourself pushing for movement less, giving room to either position a little more aggressively and rely on Voids to Full for defense, or fire your Draining weapons a bit more often than you might otherwise. Just keep on eye on the track so you don’t overdo it.
Finally, keep in mind that Warbringers aren’t generalist Titans – they are really good at cracking open armor, but struggle against void shields, especially against opponents who spread out across the board. Make sure you’ve got a few other Titans who can knock down those shields so your powerful carapace guns can go to work.
Weapons
- Arm Weapons: Warbringers can take any of the arm weapons available to Reavers, with the exception of the melee weapons.
- Volcano Cannon: You’re going to want one of these on most Warbringers – it’s not quite as powerful as a Belicosa, but it still packs enough punch to ruin anyone’s day. Its long range also works well with either carapace weapon, letting you hit just about anything you can see no matter where your Warbringer is positioned.
- Melta Cannon: Still a powerful choice, but limited by the fact that you want to be standing far enough back to fire your carapace weapon, making it tricky to line up shots where you can fire both a melta cannon and your carapace weapon. The melta cannon is a powerful weapon that will deal serious damage to whatever it hits, even if you’re too far away to get any benefit from its Fusion trait. Best paired with a belicosa so you can fire both weapons without a penalty to accuracy. As a bonus, it gives you
- Laser Blaster: With only two weapon options that don’t have Blast, it’s important you have a weapon to perform called shots to finish off targets or perform Void-breaking duties in a pinch.
The Laser Blaster is our preferred choice over the Gatling Blaster for a number of reasons. The longer range will help ensure your Carapace weapon doesn’t get denied by smaller foes. The higher strength goes a long way to follow up on the initial hit from your blast weapons so you can get bonuses to further armor checks as quickly as possible. And lastly, with your ample reactor capacity, Shieldbane becomes more affordable to attack voids in a pinch than it would be on a Reaver. Just be wary of its range penalty – called shots at long range will need a 6 to hit. On balance, though, having a few extra shots outside 24″ pairs well with the quake cannon, and it performs reasonably well across the board. - Gatling Blaster: While it’s an interesting choice on a Reaver, it’s not worth taking here. If you’re close enough to get the accuracy bonus, you’re likely to be unable to fire your carapace weapon at smaller targets, and if you’re mounting a mori you won’t be able to fire it at full accuracy if you’re in range for the gatling to fire. If you’re planning to play a little more aggressively with your Warbringer, this could be worthwhile, but you’re probably better served taking the melta if you’re going to close to within 24″.
- Carapace Weapons: “Nemesis” Titans are those that bring a weapon that would normally be mounted on a Titan of the next scale up. In this case, the Warbringer-Nemesis mounts either a Mori Quake Cannon or a Belicosa Volcano Cannon on its carapace. Unlike the Warlord, the Warbringer’s big guns get the Carapace trait and have a corridor firing arc, so you need to think carefully about positioning to get use out of them.
- Mori Quake Cannon: Our preferred choice, the Mori packs a decent punch at strength 9 and brings the Concussive and Quake traits, which help you control the battlefield and give a chance that an affected Titan will run into something and take more damage. While it is weaker than a belicosa, the difference in strength is less meaningful if you’re shooting at anything other than Warlords or Acastus. Also, one less weapon with the Draining trait will help keep the Warbringer’s admittedly long void shield track in the green and yellow a little easier.
- Belicosa Volcano Cannon: When you absolutely have to just kill something. Still incredibly powerful, and the Warbringer has the reactor capacity to support it. However, we generally prefer the mori against most targets as the Concussive and Quake traits are some valuable tools to have in your arsenal. However, if you’re planning to play your Warbringer more aggressively or expect your opponent to close quickly, its lack of an accuracy penalty at short range can come in handy.
- Ardex Defence Guns: Hopefully you never have to use these, if only because if you’re anything like Soggy you’ll forget to use them when that day comes.
Suggested Loadouts and Roles
Think carefully about how you see your forces working and where your Warbringers might fit in that plan, then equip appropriately. Unlike some of the other chassis, though, the Warbringer will normally fulfil the same role as either back-line or midfield fire support, making finding the loadout that works for you a bit more straightforward. Just in case you’re stuck at the drawing board, though, here are a few suggested loadouts you might want to try.
General Purpose
- Volcano Cannon
- Laser Blaster
- Mori Quake Cannon
The loadout found in the kit, this is a solid build that weighs in at a manageable 395 points. This loadout will pose some serious threat from the backfield, lying in wait until your other elements drop voids on your opponent. Remember to keep back to avoid the -1 penalty for firing the mori at short range. If you want to go all-in on blast weapons, you could consider swapping the laser blaster for another volcano cannon.
Armorbane
- Melta Cannon
- Laser Blaster
- Belicosa Volcano Cannon
Borrowing some weapons from other kits, this build wants to engage at mid-range on account of the melta cannon’s range. We’ve swapped the mori for a belicosa volcano cannon to avoid range penalties and make use of the reactor. This build comes in at 440 points and dishes out an incredible amount of anti-armor firepower.
Maniples
Unlike the other Titan chassis, at this point there are only two maniples that can fit a Warbringer-Nemesis: the Arcus and the Ruptura.
Arcus Battleline Maniple – Load up on blast templates and fire them through terrain using Warhounds as spotters. And even if you miss, the templates scatter d6” rather than d10”, making indirect fire a lot more reliable than you might think, especially with your carapace weapon’s 5” blast template. You’ll only be bringing one Warbringer in this maniple, but the Warhounds’ manoeuvrability will let them spot for it so that it can lay down punishing barrages from areas your opponent can’t even fire back at. Combine this with a few vulcan megabolters on the Warhounds and no one is safe.
Ruptura Battleline Maniple – This one pairs Warbringers with Reavers, giving you a free boosted move for one of your Reavers each round, and letting you take a full out-of-sequence move with a Reaver any time one of your Warbringers scores a kill. Use mid- and close-range Reavers to pound shields and help open up armor, then blow your enemies away with your big guns. Consider equipping your Reaver(s) with chainfists to pose a serious dilemma for your opponent: should they fire at the more well-defended Warbringers and hope they can bring them down before the Reavers close, or target the close combat Titans running at them and try to avoid the big guns’ firing arcs?
Warbringers also do very well as reinforcement Titans, bringing some powerful anti-armor capability to some lists. At 400 points, they fulfil the same role as a fire-support Warlord, but will fit in a few lists where the larger Titan might not, and they’re not as vulnerable to stray criticals as a Knight Acastus.
Legion Options
Legio Praesagius – The True Messengers’ Pinpoint Accuracy trait allows them to re-roll the location dice, allowing them to get more consistent damage to the body with their Blast weapons. This trait makes the Melta Cannon shine, as it is pretty easy to keep at long range compared to the Volcano cannon. It also makes laser blasters even better at converting those +1s and +2s into +3s, since you don’t need to call shots to have a reasonable chance of hitting the location you’d like. And any Titan that wants to keep its distance loves Precision Volley – just keep in mind you’ll probably need to use it turn 1 if you want it to work on your carapace weapon.
Legio Defensor – The Nova Guard can fire a weapon twice in the first battle round, which lets you get even more mileage out of your powerful carapace-mounted guns. Consider taking a Ruptura with 2 Warbringers supported by 2 Reavers – Reavers with apocalypse missile launchers will be able to fire them twice in the first combat round, then follow up with a laser blaster or gatling blaster, if they’re able to get close enough. Then, your Warbringers can unleash their powerful anti-armor weapons and start blowing some serious holes in your enemies’ armor.
Legio Mordaxis – The Deathdealers are able to upgrade 3” blast templates to 5” with Toxin Nodes. This costs 20 points, and also reduces the strength of the weapon by one – not the end of the world on melta cannons or volcano cannons. This becomes even better in an Arcus Maniple: all of a sudden your 5” pie plates only deviate d6”, making it more likely than not that you’ll at least clip whatever you were shooting at.
Legio Vulcanum – Legio Vulcanum has a few tricks which can make your Warbringers all the more potent. First, Twinned Machine Spirits allows you to squadron any two titans, letting you make coordinated strikes with your Warbringers. Firing a strength 10 quake cannon followed by a strength 11 volcano cannon will do some serious damage to whatever they look at, and that’s before the second Warbringer chimes in with its own weaponry. In addition, the re-roll they get whenever one of their Titans die is extremely useful in making sure your Warbringers’ big guns hit the right location. While this isn’t as easy to plan on having as other Legios re rolls, any re-roll is useful.
What’s Next?
Keep an eye out for room in your list for a Warbringer – its durability and reasonable cost combine to make it worth considering in a lot of lists. Plus, its improved maneuverability over a Warlord mean that it’s more likely to be able to bring its carapace weapon to bear. Next week, we’re back into Legion overviews, looking at how to combine the unique rules they offer with the other tools in your arsenal to bring the pain to your opponents.
Have any questions or feedback? Drop us a note in the comments below or email us at contact@goonhammer.com.
