
For those of you who read through the last article (Flying Solo Part 1: An Intro to Solo Play), got to the end, and said “that’s it? Where’s the violence? I came here for DOGFIGHTING, not dogged writing!” – this is the article for you. After digesting the new rules in Part 1, my stalwart wingmate and I decided to play three different games.
These three games were:
- Player vs. Solo AI in standard Solo scenario.
- Player vs. HotAC AI in standard Solo scenario.
- A perfectly symmetrical game of Solo AI vs HotAC AI, based on the standard Solo scenario.
If this sounds like a potentially time-consuming endeavor to you, then you’re correct – it was a lengthy proposition. That’s why we did it for you! Before going any further I do need to clarify that yes, we do understand how sample sizes work. One game in each of these scenarios won’t give us enough datapoints to make any bold and incontrovertible claims, but it should be enough to start weighing the different AI merits and seeing if initial predictions hold up. Which seems more dangerous? Which has more time on target? Which feels more like flying against a real opponent?
How does Solo AI work?
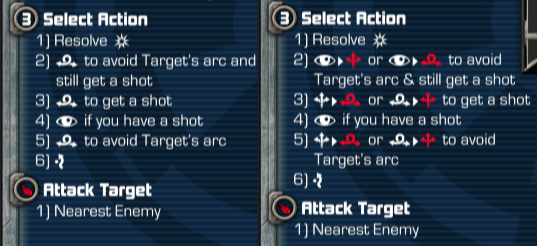
The last article focused on Solo AI’s tally selection and maneuver tables. Take a look back at the article to review that critical information before reading on if you need a refresher. With the maneuver selection behind us, let’s now dive into action selection.
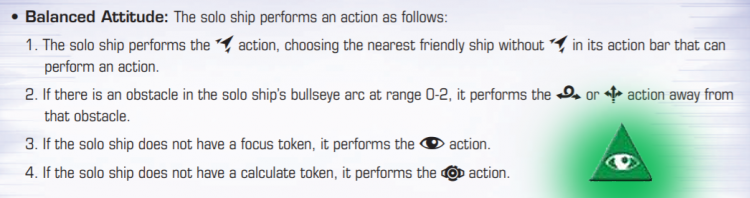
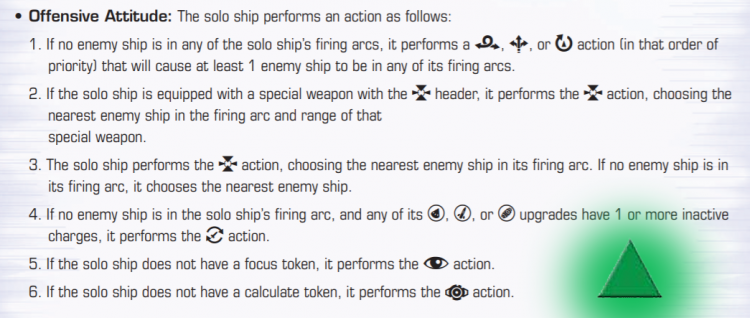
Determining the move for a Solo AI ship involves rolling one green defense die and one red attack die. If the ship has a stress token, the green die is changed to a focus result. The two results are then compared to a table of maneuvers, based on the firing arc containing the tally. After completing the maneuver, the ship moves onto action selection. The green die result of the maneuver roll determines the ship’s “attitude,” or its action selection AI. Read on to see what implications these pilot mood swings have.
How does HotAC AI work?
HotAC’s maneuver AI was also touched upon in the last article – each ship has a unique AI card with five arcs, and each arc has three maneuver tables (depending on if the tally is at short range, medium range, long range). Because each HotAC ship has a tailored AI, the action selection can be much simpler than with Solo. No need to include options for actions that a ship can’t mechanically do.
Useful Tools for Solo Games
I use a few tools to help with running HotAC games, and they work equally well with Solo. I highly encourage looking into acquiring these things to speed up your games and keep things organized.
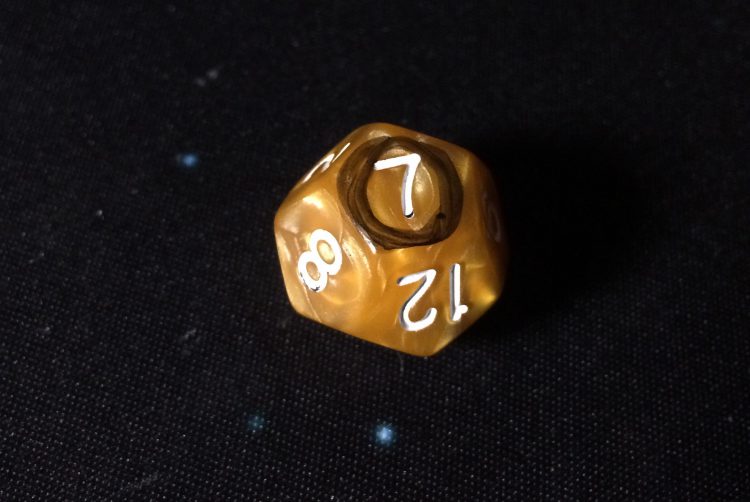
- D12 Die: Most missions cap out at turn 12, so a D12 acts as a perfect turn counter. If a mission has certain things happen on specific turns (like the introductory Solo Play scenario, which has reinforcements arrive on turns 4 and 7) I circle those numbers in dry-erase marker. This way rotating the die at the start of each turn allows you to keep count and reminds you of important triggers at the same time.
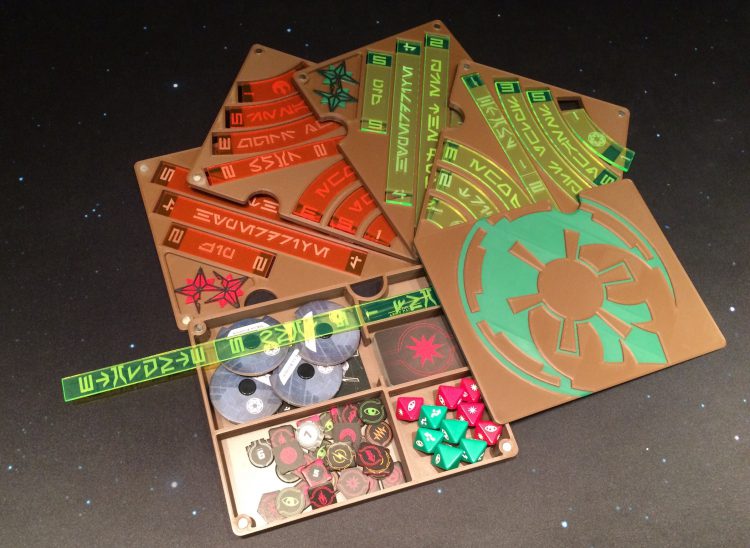
- Template Tray: Cooperative games are much quicker if multiple sets of templates are in play, but those templates can wind up wandering all over the table and getting mixed up. Nothing like wasting time searching for your one-straight in a messy template pile when it’s actually several feet away in another pile! I use trays from Lothal3Industries Etsy Store to keep the table neat. These are particularly great because the templates are arranged efficiently in two smaller trays rather than one large tray – that’s a big plus for tables that don’t have a lot of extra space around the gaming mat, where a larger tray would protrude off the table and risk being knocked off. Plus the stacking magnetic trays and custom lids look cool as hell, and I’m an extremely shallow person preoccupied with pretty things.
- Laser Line: If you can find a laser pointer that projects a solid line, it makes it much easier to check firing arcs at a glance – especially when you’re deep in a dogfight and placing a range-3 ruler would require moving ships. Since AI ships sometimes have to make decisions about ships beyond range 5, it can also be tricky getting those long arc checks without a laser line.
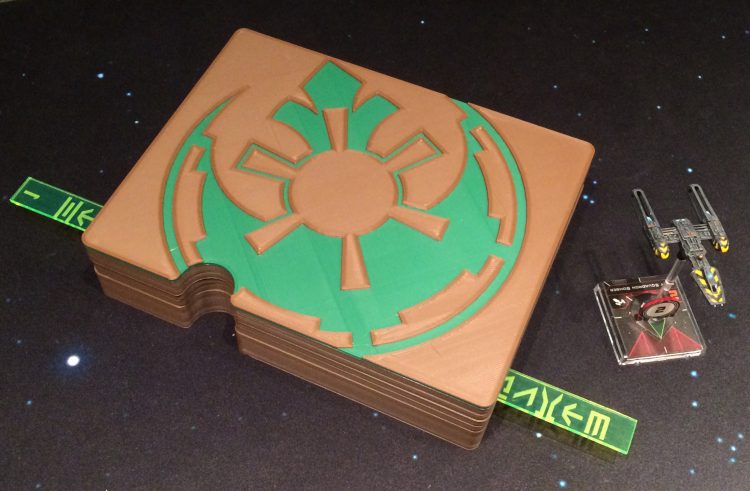
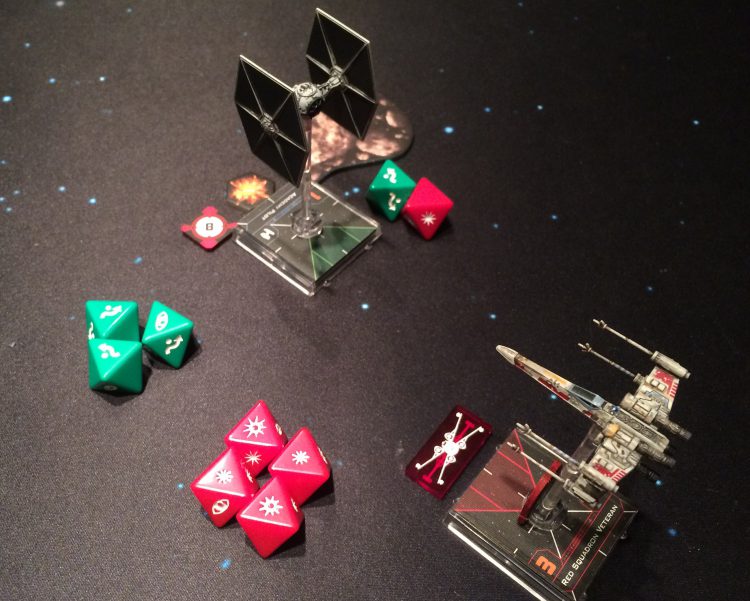
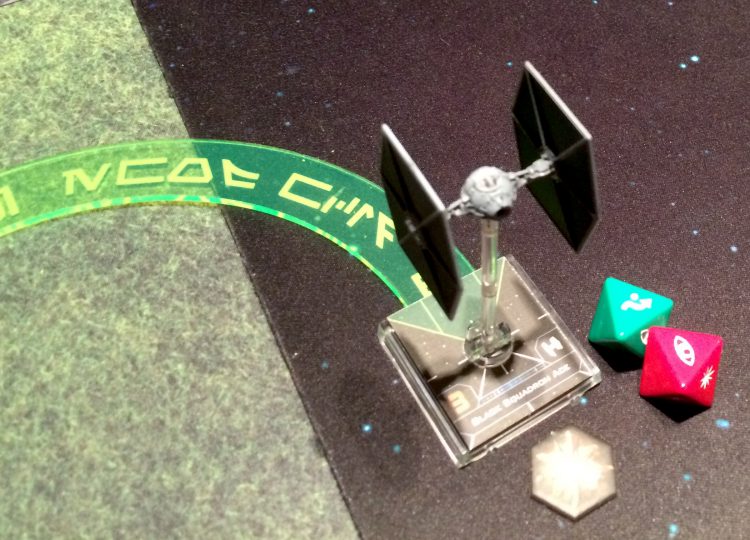
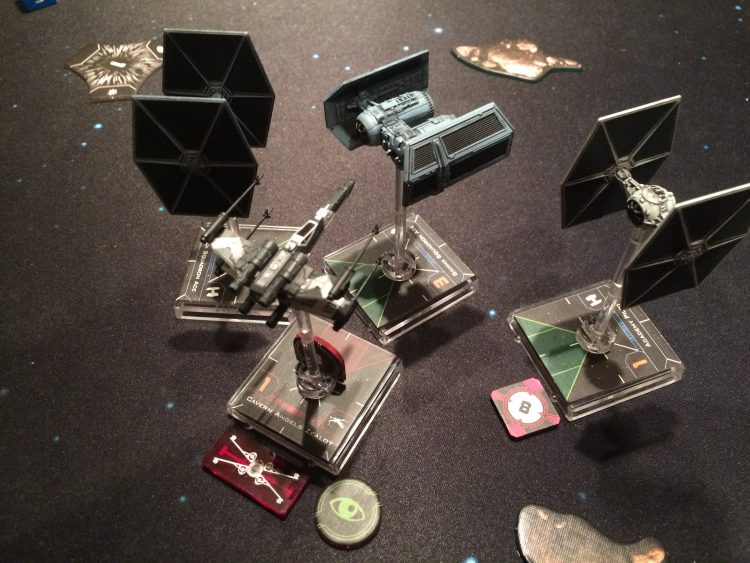
- S-Foil Tokens: In the photo above you can see a token by the X-Wing indicating that the s-foils are in attack position. These are particularly handy for older models that don’t mechanically open and close, but also useful if you have newer models – even if you like opening and closing the s-foils to show their status, the token is a great reminder to declare your s-foil configuration before placing a template. I often place the token in front of the ship, between the nubs, so it’s physically impossible to place a template without first confirming the s-foils. Many companies make tokens like this, but the ones you see in these articles are from Etsy store BuyTheSameToken.
Game 1: Solo
With the AI action tree reviewed and our tools collected, it’s finally time to dive into the first battle. How do I hold up against the brand-new Solo AI?
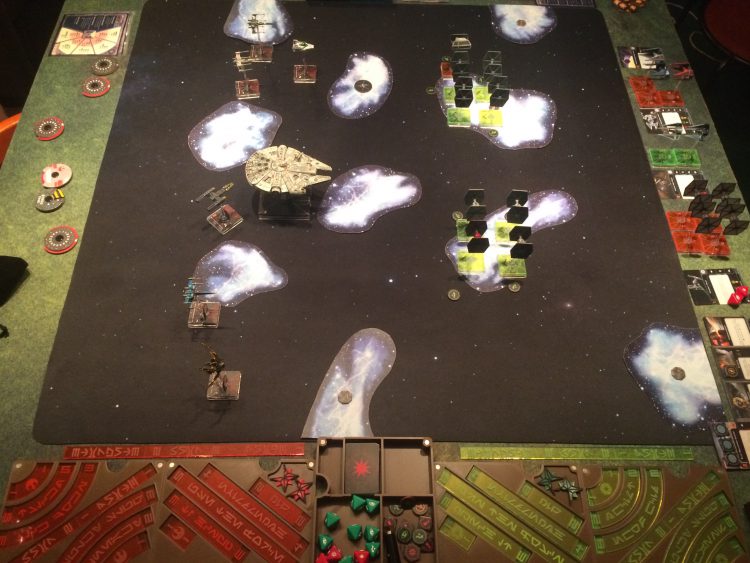
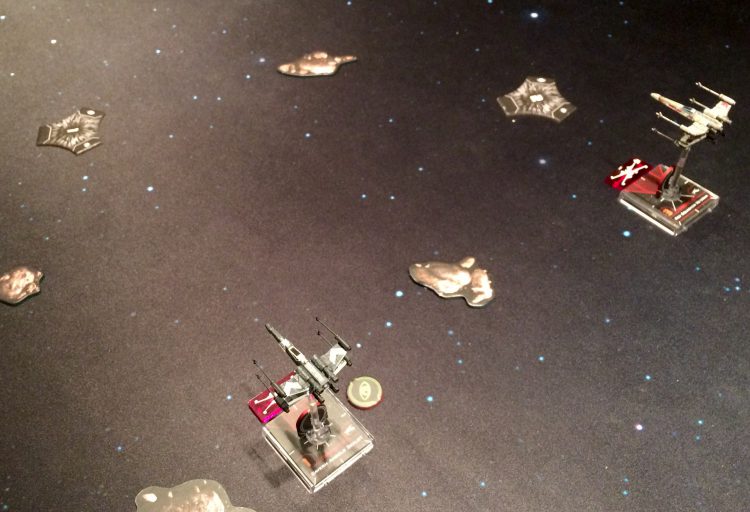
The standard scenario from the Solo Play document was set up, with my two T-65 (a Cavern Angels Zealot and Red Squadron Veteran) against six Imperials: two Academy Pilot TIE/ln, two Black Squadron Ace TIE/ln, a Saber Squadron Ace TIE Interceptor, and a Gamma Squadron Ace TIE Bomber with Proton Torpedoes.
Note that Solo AI has the player go first in player order, while HotAC has the AI go first. In theory this gives Solo AI a marginal edge, as their ships can reposition in response to player ships of the same initiative. For this matchup, the Cavern Angels Zealot would be sparring with the Academy Pilots at Initiative 1 while the Red Squadron Veteran dueled the Black Squadron Aces and Gamma Squadron Ace at Initiative 3. With so much shared initiative, the player order might be important in giving the AI a much-needed advantage against a human player.
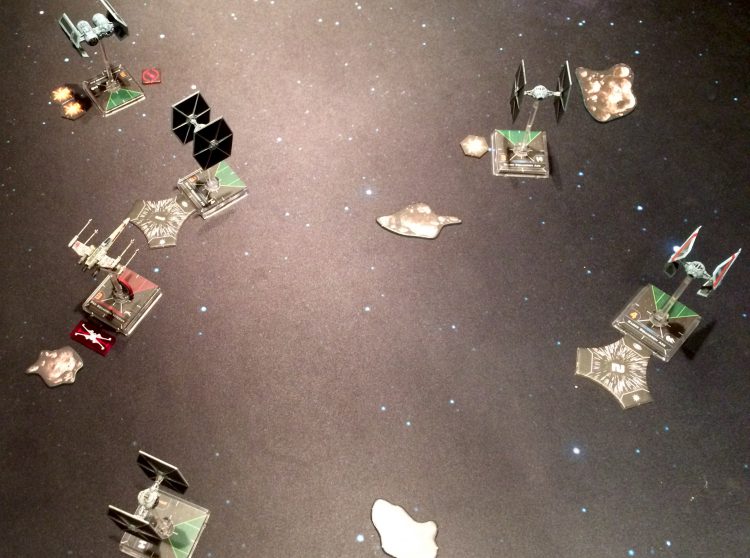
Any concerns about the canniness of my robot foe were immediately dispelled on turn one, as the first AI move of the game saw an Academy Pilot emerge from hyperspace directly into a rock. Asteroid collision right out of the gate!
The AI ships fumbled and bumped their way around, taking no defensive actions, and the X-Wings took them out with no trouble by turn three – leaving a table devoid of enemies.
On turn 4 the reinforcements arrived, and again on turn 7. Without going into a blow-by-blow battle report, the AI never posed too much of a threat. While the Cavern Angels Zealot eventually fell to some overlapping fire around turn 14, the Red Squadron Veteran neatly cleaned up the rest of the AI foes and was left, at the bottom of turn 18, with nobody left to kill and not a single point of hull damage. In keeping with the game’s opening, the last TIE Fighter died by smashing itself into an asteroid. It looked almost like it made a conscious decision to simply put an end to it all.

A few glaring issues with the new Solo AI were evident in the game, mostly mirroring the concerns voiced in Article 1 immediately after reading the rules. The main ones are listed below:
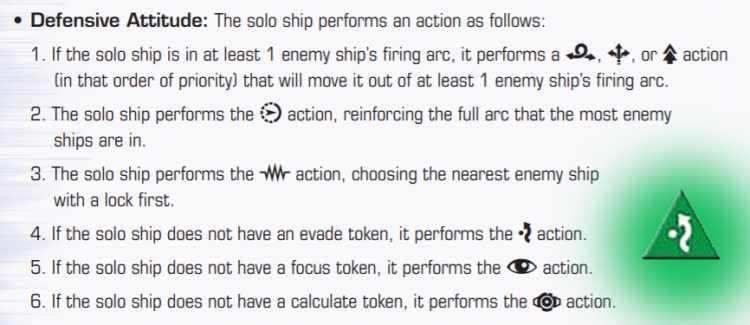
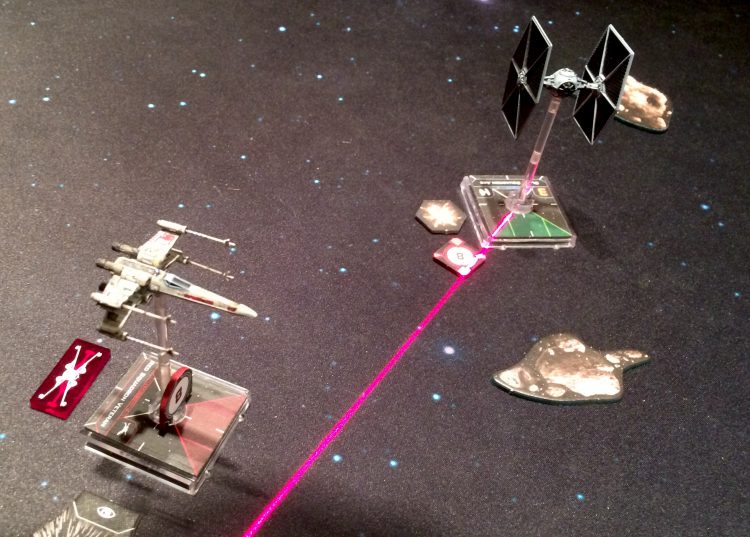
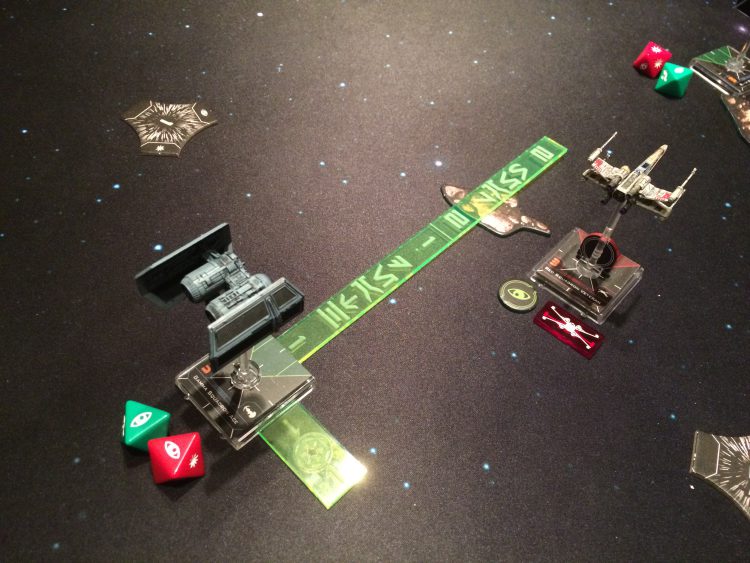
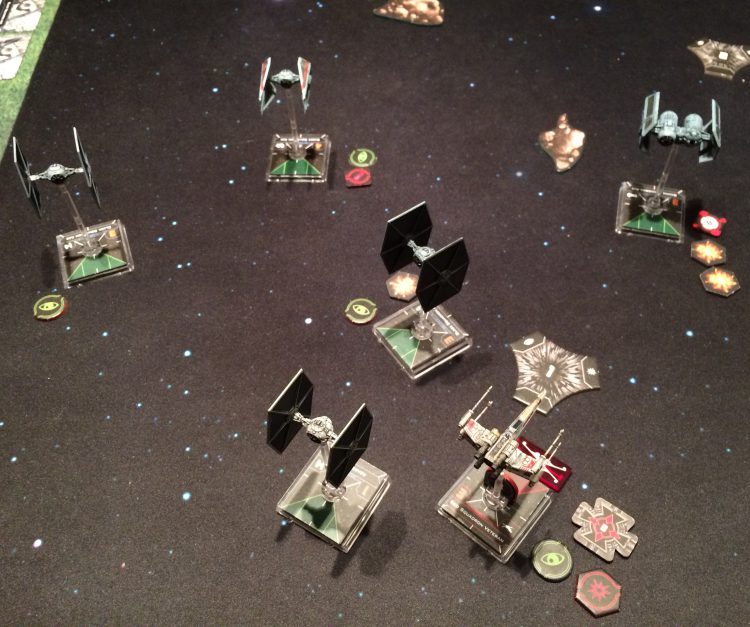
- As expected, the TIE Bomber had an extremely difficult time getting target locks. At one point, the Bomber (with balanced attitude) executed the following action sequence: “If there is an obstacle in the solo ship’s bullseye arc at range 0-2, it performs the [barrel roll] or [boost] action away from that obstacle.” That put it in the position shown below, where it should have been able to at least link into a stressful lock to get a torpedo shot at the fleeing X-Wing. The rules prevented it, however, since even linked actions must be done in accordance with the attitude – because the Bomber wasn’t exhibiting an aggressive attitude, and locks only occur in the aggressive attitude, it couldn’t link into the lock. This could be easily fixed by including the lock action way at the bottom of the “defensive” and “balanced” AI logic, below the focus action. That would preserve the intent of those attitudes while still allowing ships like the Bomber, E-Wing, s-foil B-Wing, etc. to link into locks after repositioning.
- Following up on that, repositioning away from any obstacle in bullseye at range 0-2 seemed overly cautious. Given how randomly the AI ships swerve, changing the AI to reposition “If there is an obstacle in the solo ship’s forward arc at range 0-1” seems like it would result in smarter obstacle avoidance.
- As for obstacle avoidance, the AI needs some mechanic to minimize crashing. An extremely simple suggestion – if the AI maneuver would overlap an obstacle that is not already at range 0, re-roll it. Use the result of the re-roll even if it would be worse. That still allows for plenty of crashing action, but gives an extremely simple “swerve” mechanic to allow some chance at dodging a collision. The closer the obstacle is, the less likely the swerve will be successful. Elegant and thematic!
- Some maneuver table results instruct you to do things like execute the “fastest blue bank or turn maneuver towards its Tally.” In this case, the TIE Interceptor’s fastest blue bank and turn are both speed two. Which maneuver to do in this ambiguous situation? The rules explain that “If multiple bearings are listed, the bearing which best satisfies the other requirements is selected” – in this case, we can probably assume that whichever option (bank or turn) brings us closest to the tally is the one to execute. But if that is the correct way to interpret it, the rules could be a little clearer – an additional sentence would resolve it.
- AI turn maneuvers toward tallies in the front arc often wound up missing their targets. Gentler bank maneuvers would make more sense in place of turns so that the AI’s firing arcs don’t blow right past the tally.
- As predicted in Article 1, having no AI accommodation for distance to the tally made maneuvers feel exceedingly random. Here’s a radical proposal – eliminate the words “slowest,” “average,” and “fastest” from the maneuver tables. Simply use “bank towards,” “turn away from,” etc. Then have the range band determine the speed – range 1 or range 2 (closing) you use “slowest,” range 2 (fleeing) and range 3 you use “average,” and beyond range 3 you use “fastest.” That would retain the universal simplicity of the current tables, but allow tally distance to play a factor.
- The “fastest move away from nearest obstacle” is the silliest of the maneuver options, and caused a TIE to fly off the board in the complete opposite direction from the only enemy on the table.
- The Solo Play rules say nothing about the order in which AI ships are activated. As any swarm player knows, the order in which ships of the same initiative are activated can massively change the outcome of a turn. We assigned number tokens to each ship and activated them in the same order (lowest to highest) each turn, which worked fine. A simple rule like this should be included in the Solo Play document.
The initial game went about as expected, with random-feeling AI behavior and an easy player victory. But what if we re-rack the game and play the exact same thing with a different AI?
Game 2: HotAC
The game was set up and the TIE Fighters were once again unleashed from their hyperspace kennels. Immediately, the HotAC AI was noticeably more keen – the ships honed in on my X-Wings like bloodhounds, and a potential asteroid collision was averted with the HotAC swerve mechanic (change maneuver bearing by 45 degrees to avoid an asteroid, changing speed by 1 if necessary based on ship dial).

Unlike the Solo AI, which sort of minded its own business (to the point where I almost felt bad about killing pilots), the HotAC AI was brutal and cunning. The Cavern Angels Zealot got cocky and was quickly boxed in, cut down by overlapping fields of fire on turn 6.
The Red Squadron Veteran kept a cooler head, and tried to play cat-and-mouse with the Imps. The Bomber was the main threat, as the HotAC AI was much more effective with its locks and torpedoes.
Not only did the HotAC AI beat me, but it beat me soundly. It took me out back and spanked me while the ghosts of the Solo AI ships nodded on in approval. It only took until turn 10 for both of my X-Wings to fall, and I was only able to take a TIE/ln off the table in return (with the Bomber only two hull from dying). While admittedly the dice went cold this game – I don’t think I rolled a single evade result – the difference in the AI enemies was incredible. I was straight-up outflown.
Takeaways
In the last article I said that flying against HotAC AI is “like dogfighting against an Ouija board, where the unseen spirits are setting dials and moving spaceships to blow you out of the sky.” In stark contrast, flying against Solo AI is like trying to swat a fly that keeps zipping in circles and bumping into the window. It may be unpredictable, which can make it tricky to pin down, but there’s no feeling that an unseen intellect is driving anything. If flying against HotAC is like playing tennis against a well-matched opponent, then flying against Solo is like whacking balls from one of those automatic launchers. Still diverting, still keeps you on your toes when you don’t have an opponent, but ultimately feels a little… soulless.
My beloved gamer-mate and robot test pilot pointed out that one of the attractions of flying against AI is that you can practice getting better at the game while by yourself. The problem is that for this practice to be useful, the AI ships need to behave like a person is flying them. Solo AI won’t make you much of a better player against human players, because it doesn’t act like a person would. HotAC, on the other hand, does fly much more like a living player.
As mentioned earlier, the two biggest problems with Solo’s AI are 1) the lack of tally ranges in the maneuver determinations and 2) the “attitude” action-decision trees. The attitudes are simultaneously too much information while also being too limiting. These attitudes need adjustment.

With those impressions fresh in our mind, we venture forward to the climax of this series – the Imperial AI Megabash, where mirrored forces of TIE Fighters under the control of competing AI brains duke it out for supremacy. My partner and I will be rolling and moving the ships, but we won’t be making a single decision after deployment: it’s all up to the dice and the AI programming.
Place your bets and join us next time!
