
Howdy, scummers! It’s Necromunday Necro release day. This week we are psyched to be reviewing the Cargo-8 Trailer with Promethium Tanks and 2x Promethium Tanks kits. Many thanks to Games Workshop for providing early preview copies of both sets.
The Kits

The options boil down to two variant kits:
- One kit with a Cargo-8 Ridgehauler trailer and one promethium tanks sprue.
- Another kit with two promethium tank sprues.
In addition to tanks, the promethium tank sprue has a bunch of scatter – crates, hoses, torches, and wrenches.
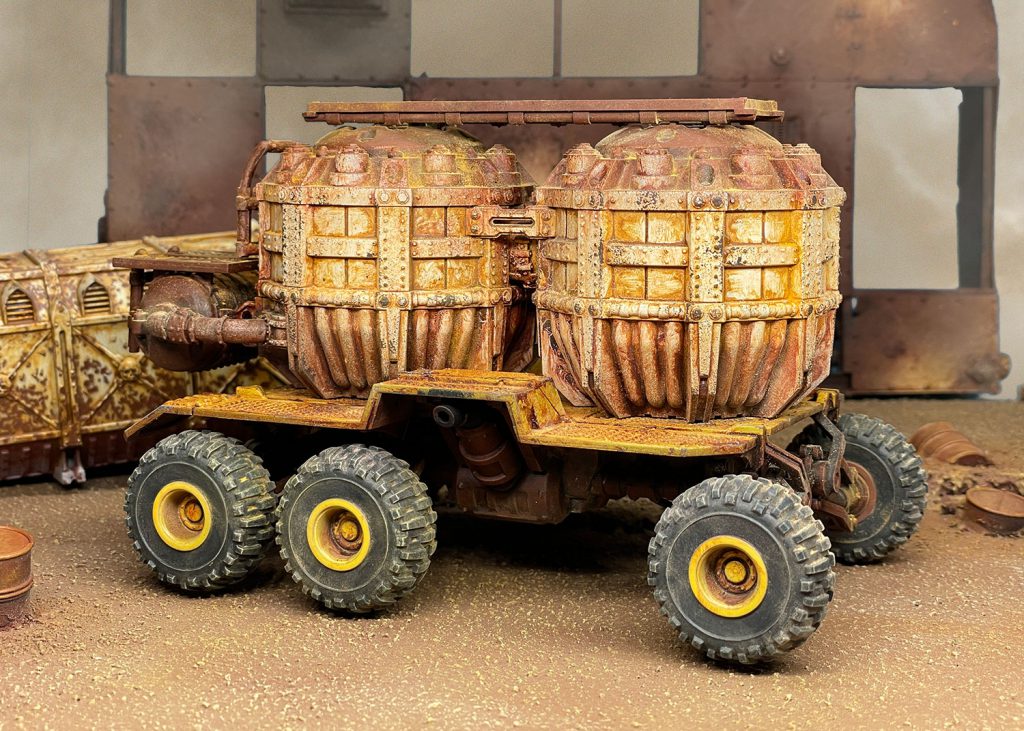
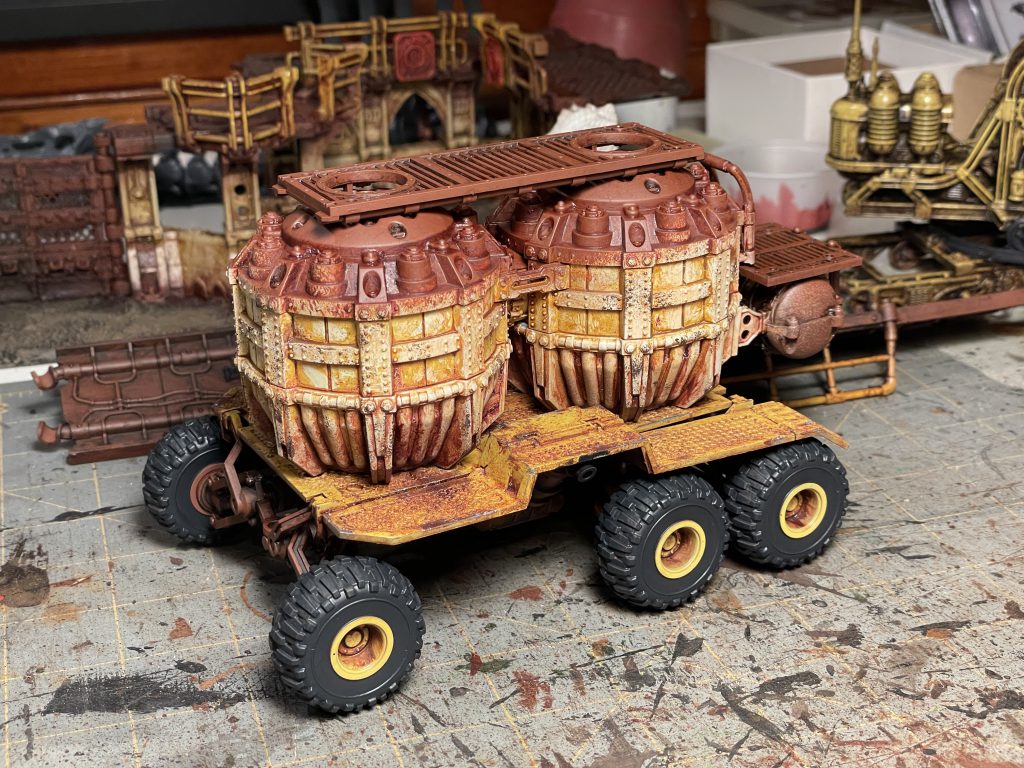
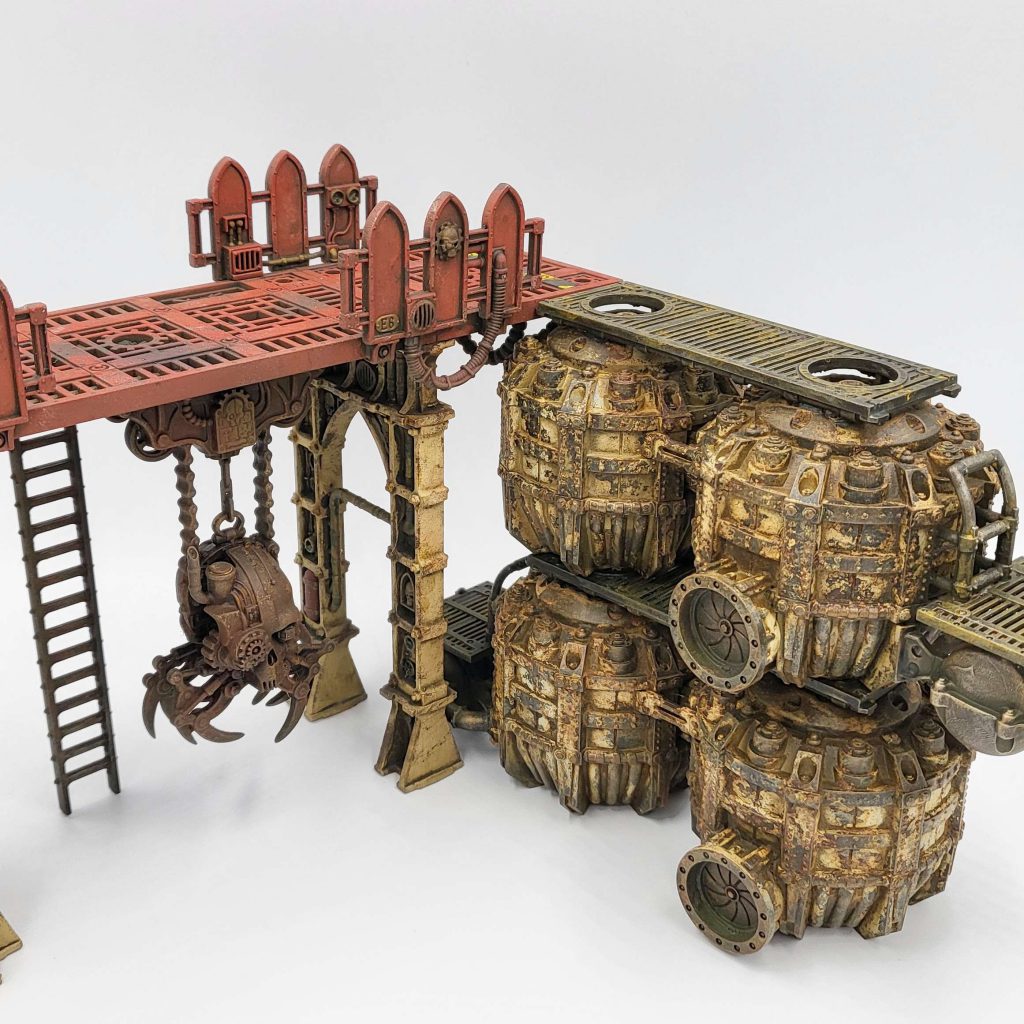
The Cargo-8 Trailer with Promethium tanks
Dylon: Let’s be honest – while these trailers are extremely cool, they’re a lot. Each pair of wheels is hung from its own suspension made up of 6 pieces. Now multiply that by how many axles you want and it gets tedious. I appreciate the thought on these though as you can see how the powerplant in the center of the trailer would actually drive the wheels through the driveshafts. The platform of the trailer is in three larger pieces that are held up by stanchions and I had some trouble getting them placed so that the running boards were in the right place. I left off the vertical container mounts so that swapping containers out would be easier.
I left the wheels off and sprayed everything with a coat of my usual Rustoluem Ruddy Primer. I cut masks on my Cricut for the wheels and sprayed the centers yellow. The trailer platform got a hefty spray of Aquanet hairspray first before I sprayed it yellow. Once dry I ran hot water over it and scrubbed vigorously with a stiff toothbrush to get my weathering.
Once dry, I used Burnt Sienna and Raw Umber water-based oils just like I would on my terrain, to finish painting them. At this point I stippled some areas with Burnt Sienna for heavy rust. After sitting for a few days, I sponged some silver paint in the areas where most of the paint had been rubbed off with the toothbrush.The wheel centers also received this, and once dry, the tires were painted with Corvus black.
At this point I glued the wheels on and added my finished touches. I drybrushed the wheels and some of the chassis with Ushabti Bone and then applied some weathering powders. I made these myself from a set of dry pastels using the same colors as I did on my Goliath Mauler. I applied these heavily to most surfaces and really like how dry and crusty if ended up.
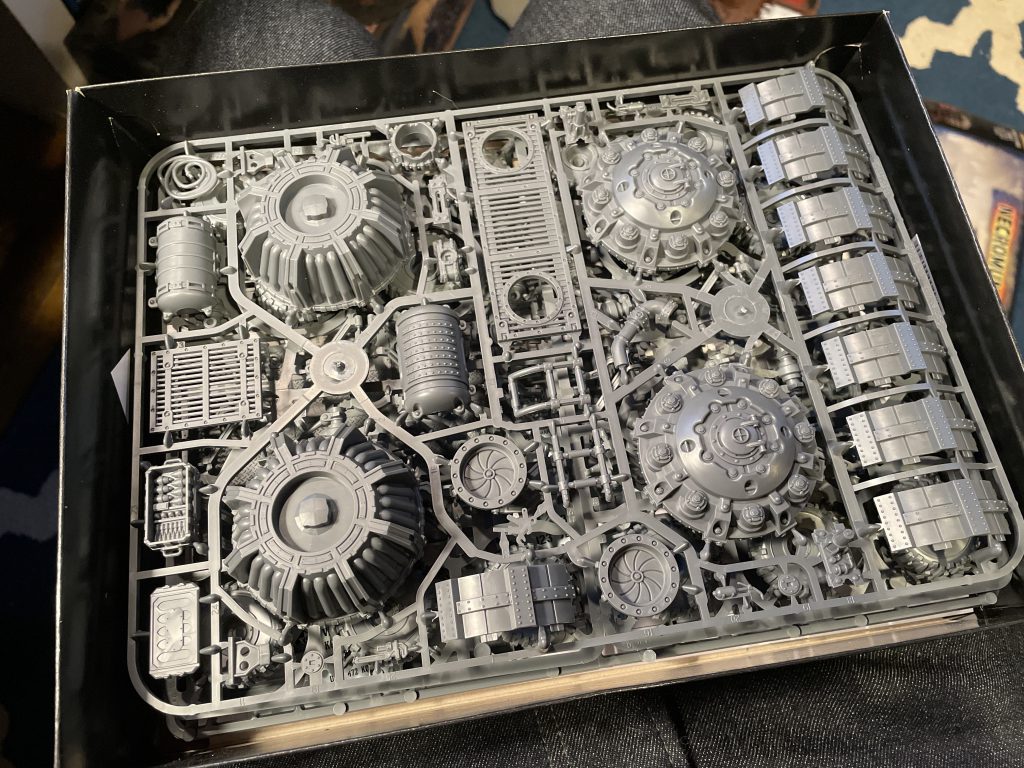
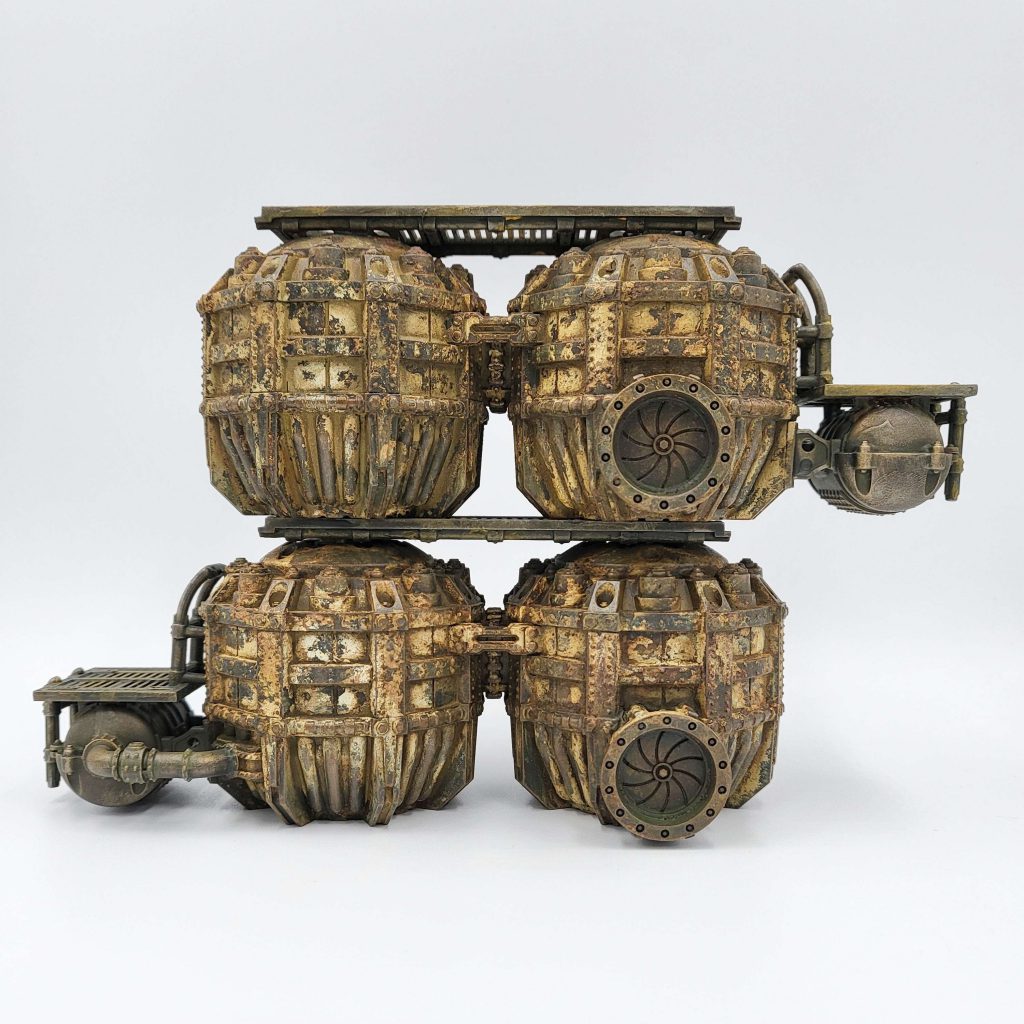
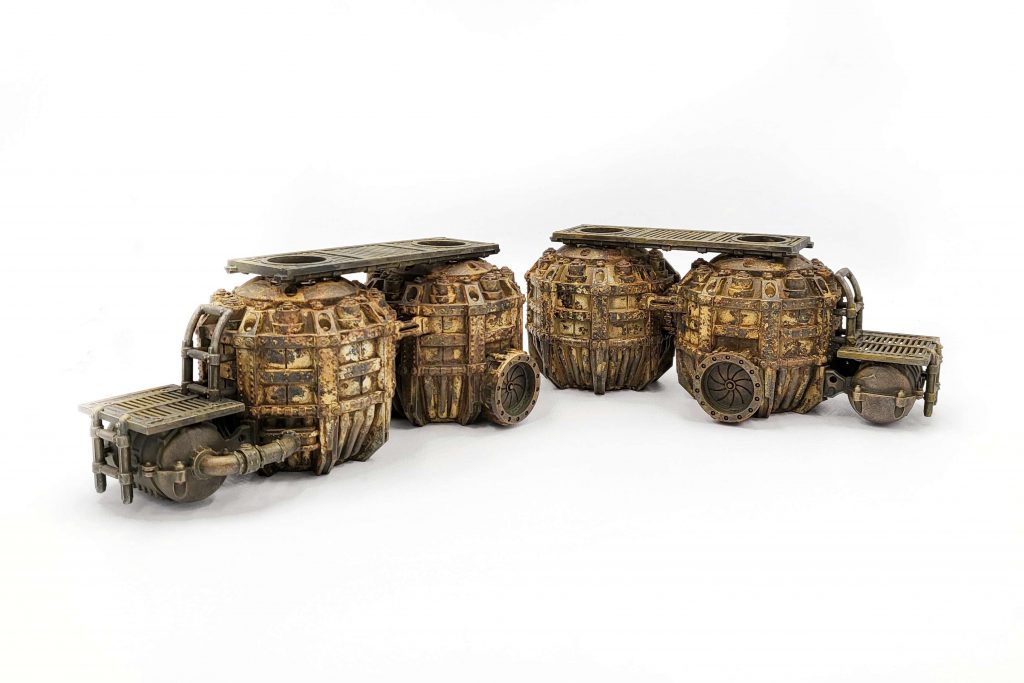
Promethium Tanks
Dylon: In spite of where the mold makers put the mold joints, I really like these things. About the size of a fat, little American 8oz soda can (ed note: or those little Disney Star Wars Coca-Cola bottles people were freaking out about for a hot second), the tanks are made of 6 pieces. Top, bottom and 4 parts to make the center. Adorably, you can stack multiple sets of the center panels to make a TALL tank. Aside from the mold lines running across seemingly every rivet on the top and bottom parts, these go together easily. There are some nice connectors that attach 2 tanks together, and the smaller tank for the end. I left off the two platforms for painting.
Fowler: As mentioned before, the moldlines are a bit of a bear here. Prepare for an involved build here – this is on par with recent Necro vehicle complexity and there are a surprising amount of pieces that go into the tanks (though the kitbashability is pretty cool.
Dylon: Things that I haven’t yet painted but are very excited about: the greebles in the kit. The coiled up hoses and spanners and oil cans; I love these sort of details and really appreciate the designers adding them to the sprues. These are the things that will find homes beyond the promethium tanks and I’m already thinking of places to add them in.
For paint, I treated these just like my Necromunda terrain, with a basecoat of Rustoluem Ruddy Primer and a spray of white on the tanks. I used Raw and Burnt Sienna oil paints for my weathering and added some sponge weathering with Dryad Bark over that. I used the same weathering powders that I used on the trailer here and applied them liberally all over to get the same dry, crusty feel. I felt like something was missing before I added them and am very happy with the end result.
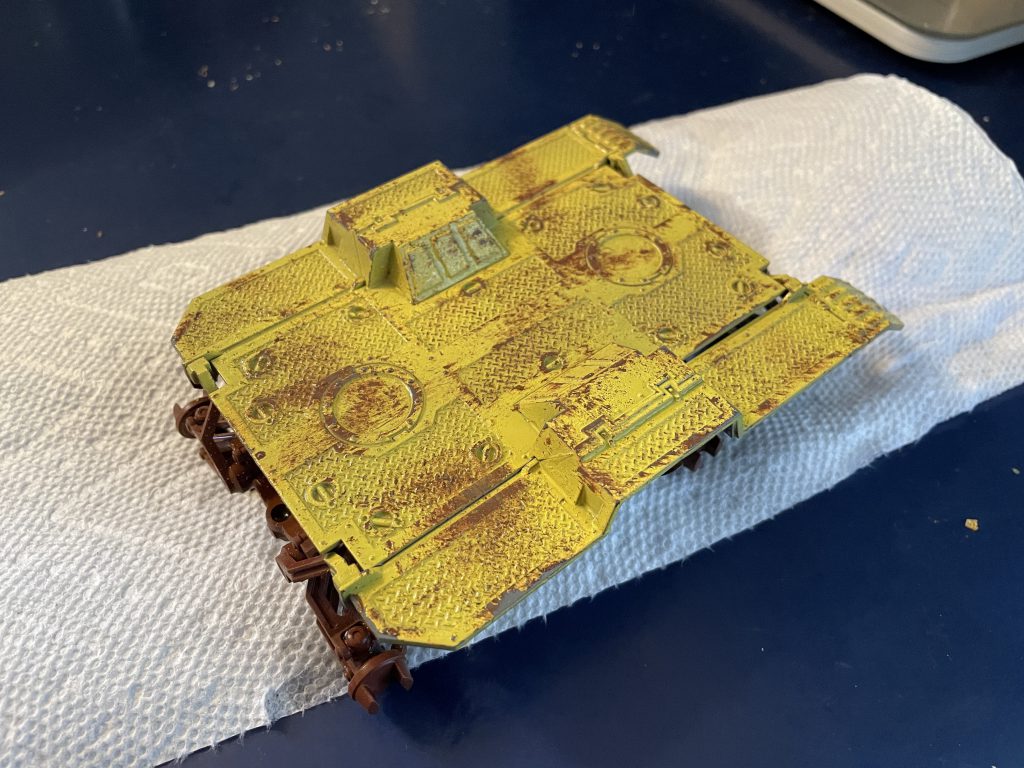
Fowler: Dear reader, do not do what I did. Let’s call this an experiment that went a bit sideways. I love the end result but boy did I add steps! I primed black and drybrushed the tanks with Rub N Buff Spanish Copper. You could get a similar effect (much simpler) with a basecoat of GW Warplock Bronze / Army Painter Rough Iron and a light drybrush of Brass Scorpion. At this point I applied Dirty Down rust – which is a great effect paint and absolutely has a place in Necro, but don’t use it if you intend to chip over it. As this layer doesn’t fully show through, you could sponge some light orange and dark brown around the model and be happy.
At this point I wanted to do some hairspray chipping. Dear readers – chipping involves water and water reactivates Dirty Down. I attempted to seal them with varnish, apply hairspray, airbrush a bone color and chip. This was a TRIP. Suffice it to say that every toothbrush stroke removing paint made the Dirty Down pop back through. Varnishing with an airbrush activated it more. The solution to bring things back under control was to use a rattlecan of varnish – which actually sealed the entire mess in. If you are following my not-bad version of this: varnish, apply hairspray, paint over with your to-be chipped color of choice (bone white is great here), chip with water and a toothbrush, and seal with varnish after.
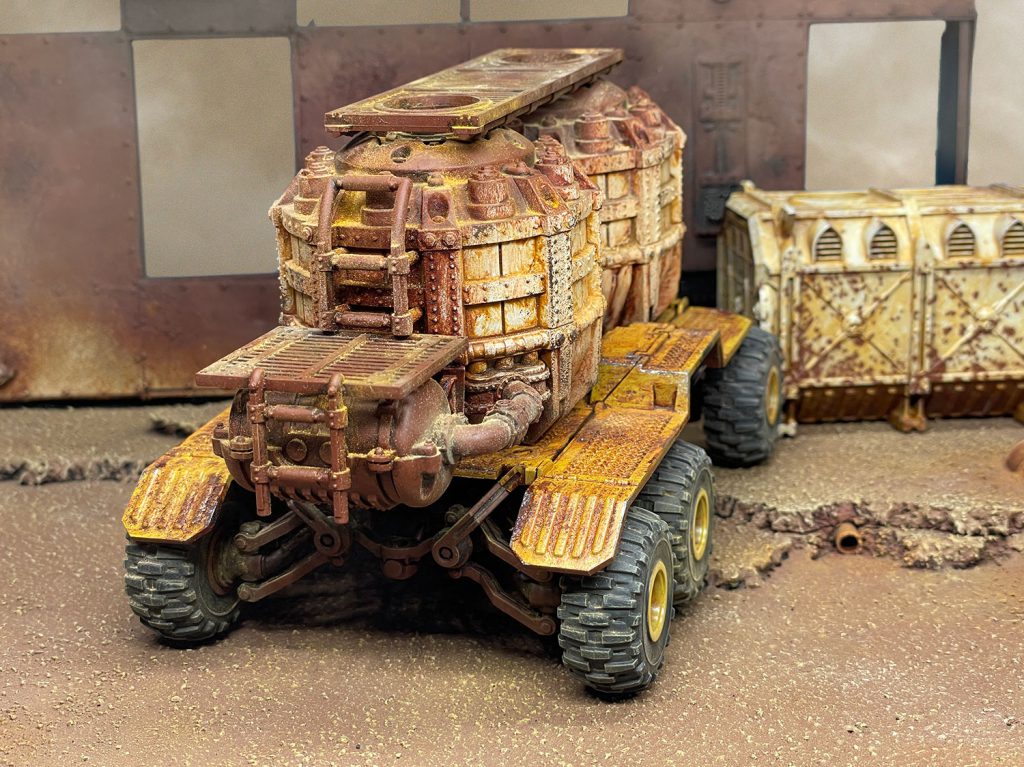
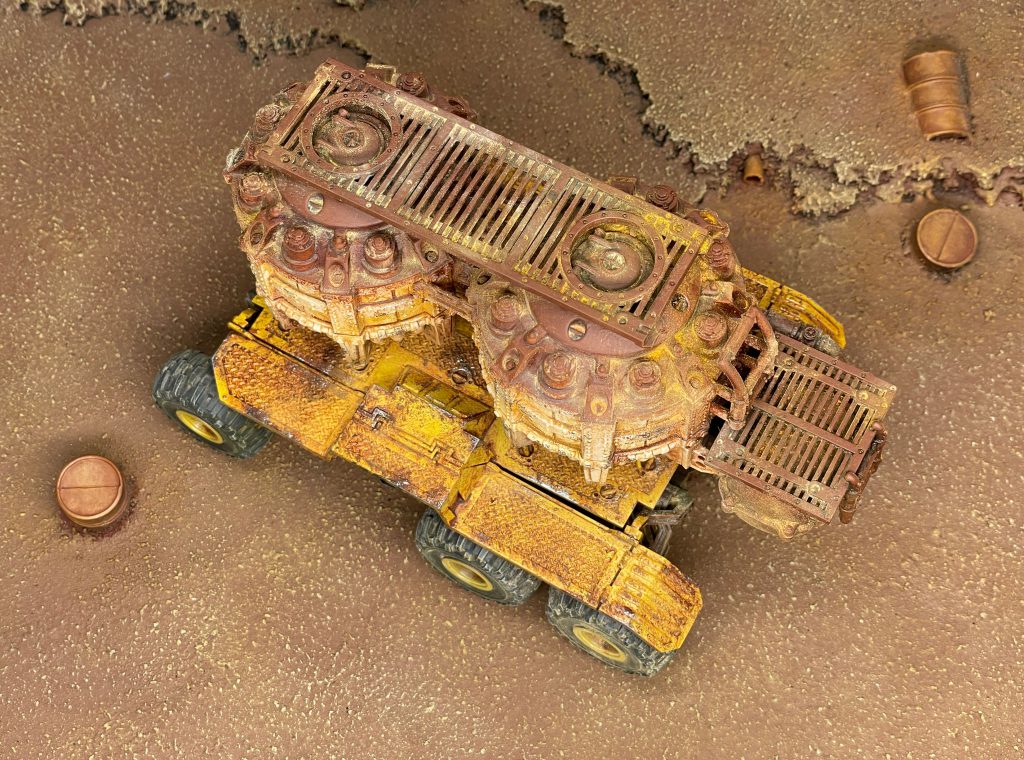
Here on out was smooth sailing. I painted the platforms and steel stuff with Vallejo Metal Color Gunmetal, and the little tank and pipes with Army Painter Rough Iron. All the metallics got a wash of Nuln Oil and Agrax Earthshade. Quick drybrush of Army Painter Silver on the steel stuff. Brassy stuff got some splotchy bits of Niliakh Oxide, then drybrushes of Brass Scorpion and Canoptek Alloy.
Then I doused it in Streaking Grime – along with some rust-color oils – and cleaned it up enough to have plenty of variation. After drying, hit it with varnish to seal in all that wonderful goodness.
Fun fact: the tanks are half the height of the standard 5″ GW terrain – so stacked two high they meet it almost perfectly.
And that’s it! While there was a lot of assembly work to be done here we love the end results – this is a fun a flavorful kit that adds a neat terrain piece along with some fun new scatter. We like this kit because: 1. it’s always great to see options in the book getting kits and 2. It’s a pretty cool set of scatter! We’re looking forward to the next release – Necro is absurdly well supported right now and we are psyched to see what books and gangs come down the pike next! As always, if you have any questions or suggestions drop us a line at Contact@Goonhammer.com.
