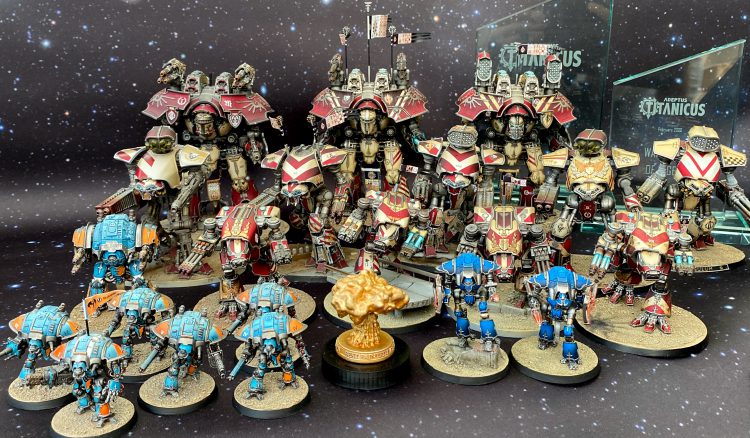
Building and painting are two pillars of the Warhammer hobby, and that holds true for Adeptus Titanicus as much as any other game. In our very first Battlegroup Showcase, our friend Peter has been kind enough to tell us about his hobby journey and how he came to start his collection of gorgeous Legio Atarus Engines.
In the beginning…
I’ve been in the hobby since nine years old, when the 1991 Space Crusade TV advert left me in awe. Father Christmas delivered the box set and GW had me hooked. While my journey into the world of Heresy-era titans lay a long way into the future, one illustration in the Space Crusade rule book really caught my attention – a succinct summary of the universe as it then stood was accompanied by a jaw-dropping depiction of a Titan striding over a rubble-strewn battlefield where marines skirmished amongst reinforced concrete ruins – this was a game I wanted to play! Despite this, it wasn’t until 1996 that a friend alerted me to the existence of the wider Warhammer World, and like everyone else I jumped right into collecting a Space Marine army that saw action through second and third editions. Living in a town without a Games Workshop meant that my painting improved slowly: in that world before online painting tutorials. An enthusiastic gaming club at our local scout hut gave me plenty of tabletop action, and I assembled third edition Ork and Imperial Guard forces before gradually drifting away from the hobby upon arriving at university in 2002.
Skip to November 2015, when I found myself with a Sunday morning to kill in Nottingham following a friend’s wedding. Did that Warhammer World place still exist, I wondered? Damn right it did, and two happy hours later I emerged clutching the Betrayal at Calth set and grinning ear-to-ear. I was back in the hobby!
Helped along by meeting fellow “returner” James (Cheesehammer40k) and by Neil and his friendly team at GW Exeter, I was soon creating an Astra Militarum army I was proud of, and pushing my painting skills and modelling skills further, incorporating a lot of the converting and fine-detailing work that I port over from my lifelong parallel hobby of historical modelling (principally 1/72 scale models and figures from WW2, see @172_ww2 on Insta).
With the release of Adeptus Titanicus 2018, I found a set of models and gritty, realistic background that I loved – not to mention an elegant ruleset rewarding planning and manoeuvre.
Legio Atarus
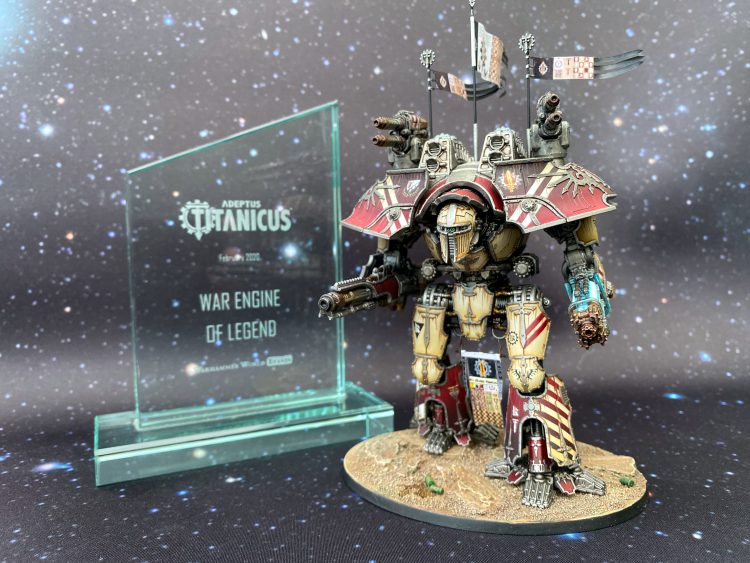
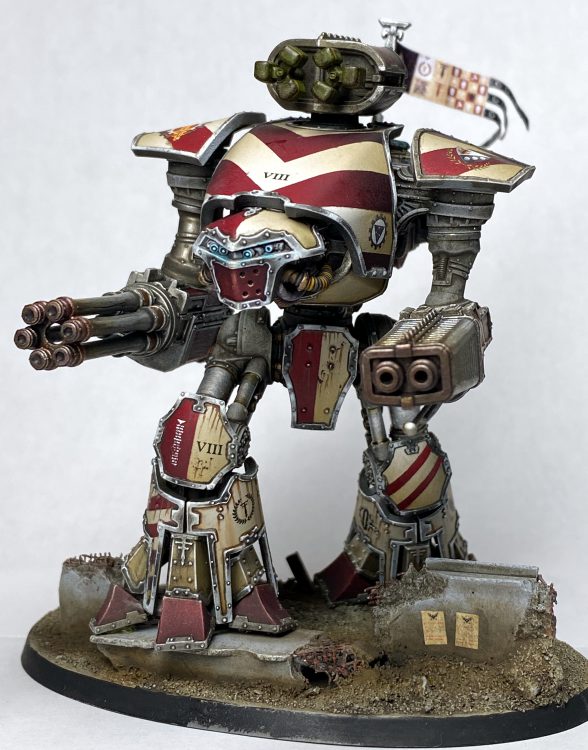
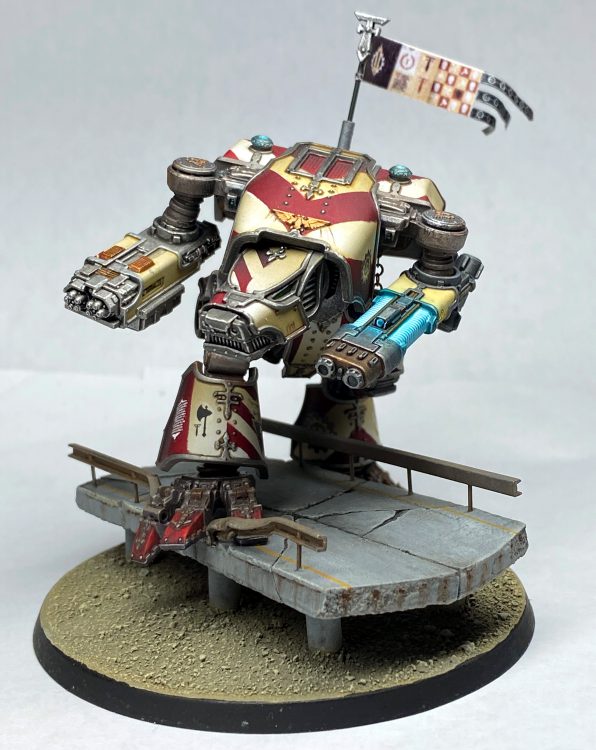
I chose Legio Atarus as I’m hopelessly loyal and wanted to paint something red! The image of a young, rebellious legion fighting for recognition against stale, arrogant senior legios appealed too. I felt the panel-by-panel paint scheme in the rulebook was a little dull so set about devising some variations on it, utilising stripes and chevrons to add interest whilst introducing gradients within each colour block to further break up the large panels.
Perhaps the most unusual feature of my titans is the banners mounted on the carapace. The first batch of these were done in something of a hurry as the first (and so far only) AT event at Warhammer World approached in February 2020. I’d added custom banners to my Tau kill team and a Blood Angels marine I’d created for GW Exeter painting competitions the previous year and really liked the sense of movement they conveyed. A square banner seemed insufficiently ornate for a piece of cloth the size of a tennis court flying from the top of a God-engine, so I mashed up some Atarus imagery in Paintbrush and carefully cut out the shapes with a scalpel blade, then wrapped these around a piece of wire in the manner of the sticky-backed banners of mid-90s Warhammer. Rather than glue these directly onto the Titan, I drill holes and insert a piece of Albion Alloys brass tube, blocking the deep end with a blob of superglue so that the banners can be slipped in and out of the tube for transportation. The only downside is having the banners spin around at the slightest breath of air!
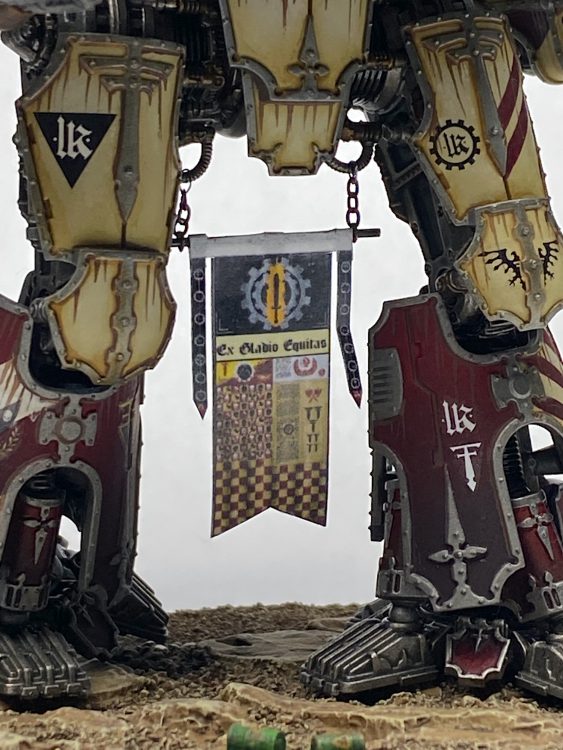
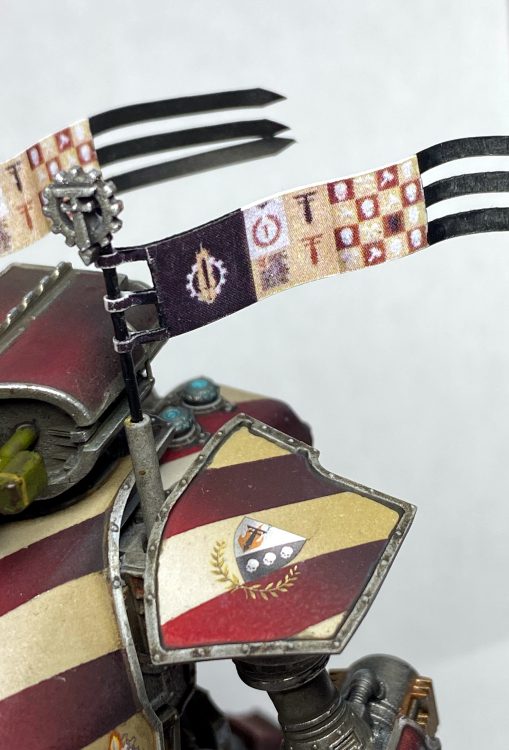
Along with a lot of last-minute painting, this went down really well at the WHW weekend event, and I was flattered to walk away with the handsome trophies for Best Loyalist Battlegroup and War Engine of Legend – the latter for the Sunfury-toting Warlord mount of my Princeps Seniores, Ex Gladio Equitas (Justice by the Sword).
Since then I’ve refined the painting technique further, trying to concentrate on improving my trim (making it take eeeeven longer), adding ever-heavier weathering and replacing most metallic paints with either dirty greys or NMM – essentially painting them to look like worn machinery, which I think really suits these colossal and ancient engines. The latest batch of new Reaver and Warhound engines formed the bulk of my force that won Best-Painted Battlegroup at the recent Reactor Meltdown event in Poole, the first event I’ve attended since lockdown ended.
Painting Recipe
This is always being refined and improved, but here’s how the latest batch were done:
Skeletons
- Halfords Grey Primer (Editors’ Note: For those of you not in the UK, you might have some trouble sourcing this. It’s worth the trouble, but if you’re on a budget, it’s an automotive grey spray primer. Rustoleum or Krylon grey will probably do fine in a pinch.)
- Drybrush white
- Flory Models Dark Dirt wash (a clay wash that you slap on, let dry and then gently clean off with a damp cloth – this creates a lovely dirty finish very easily)
Use metallic paints only for the moving, oiled parts like pistons and the articular surface of joints.
Panels
- Prime grey and identify where you want the dark and bright ends of the colour gradient to lie
- Spray a dull grey-brown like Zandri or Karnak Stone over the whole panel
- Airbrush Ushabti bone over the two-thirds of the panel at the brighter end, leaving a very feathered, blended edge
- Airbrush white and Ushabti over the brightest third
- Add a little white band at the very brightest tip
Now, mask off with tape of your choosing, then:
- Lay down a grey over the whole unmasked panel
- At the dark end of the gradient, airbrush a band of black
- At the light end, airbrush a white band leaving some grey in the middle to smooth the gradient
- Now airbrush slightly-thinned Fleshtearers Red contrast over the whole panel. The thinner leaves it a bit more transparent so that your black to white gradient shows through.
- Now varnish the panel gloss, ready to receive transfers
Trim
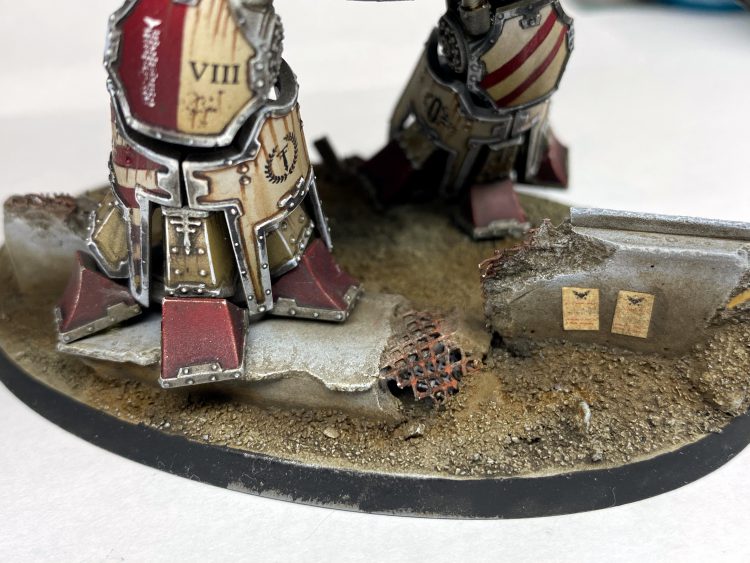
You won’t go wrong with a Leadbelcher > Nuln Oil > Stormhost highlight recipe, but my latest trick is to liquid mask the whole panel except the trim, then use a spray can to lay down base colour over the trim. I think it’s faster than painting the trim and it allows you to drybrush the trim with the mask still on, too.
Trying to get a wash into that groove between the trim and the panel is perhaps the fiddliest task of all – currently I use dull grey or red-brown enamel paints, as these can be thinned to run along the groove nicely, and then I can go back with a little thinner on a prickly old fine detail brush to feather the harsh edges. The Flory Models clay washes can also perform a similar role but are a little harder to feather without removing them entirely.
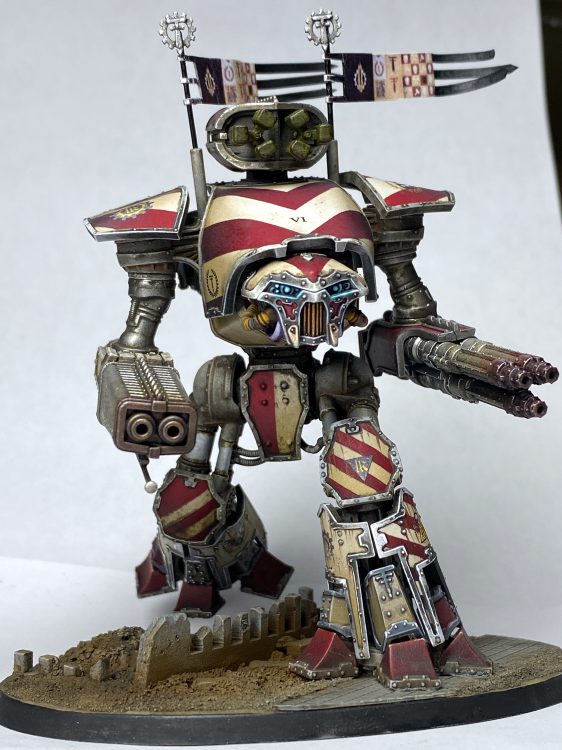
Weathering and Detailing Tips
Most of my lighting effects are blue, to contrast against the red of the main scheme.
- Try glazes of thinned Aethermatic Blue to build up a glow around eyes, plasma coils and void shields, laid down over drybrushed white where the glow would be most intense
- After transfers are applied and protected with a varnish, lay down a matt varnish to create a surface that can grip weathering substances.
- Use Rhinox hide sponging for chipping (great for hiding imperfections!), then apply super-fine white highlights to represent peeling paint
- Use a brown Humbrol enamel or a streaking rust wash to paint streaks of rust, rain, oil etc, then use thinner to feather the ends of the streaks smoothly
- Use Mig Engine Oil to make your silver-painted moving parts look oily and well-used
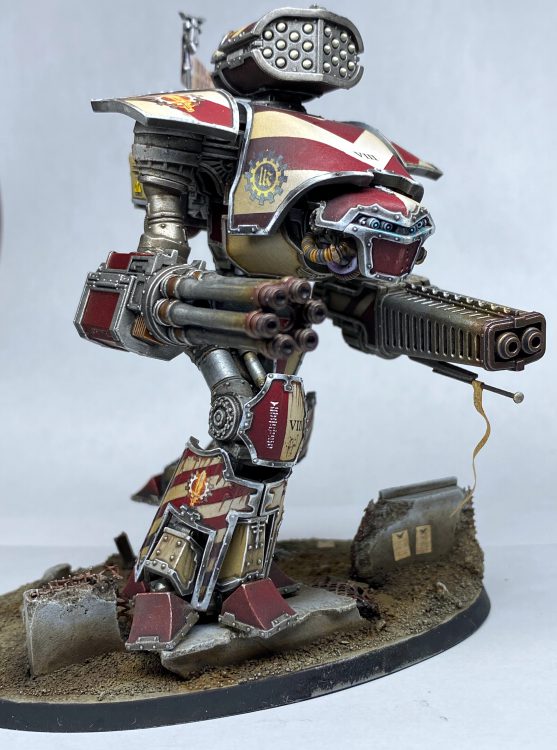
Thanks again to Peter for supplying us with these pictures of his amazing engines, and for talking us through his unique recipe on how to paint his down and dirty Atarus!
