
This week we continue our play-through of the “Totensonntag” Pint-Sized Campaign for Chain of Command. Previous episodes can be found here:
Part 1: Introduction to “Totensonntag”
Part 2: Let the Battle Begin!
Last time, we played through the opening scenario of the campaign, in which a platoon of German tanks from the 8th Panzer Regiment crashed headlong into the B-Echelon units of the 5th South African Infantry Brigade. Though the Germans are ahead 5 to 3 in terms of overall campaign Victory Point score, there’s still a long way to go!
The Mission
The next mission in the campaign ladder is “A Delaying Action,” which is scenario #4 from the basic Chain of Command rulebook. The description reads, “In this scenario, a somewhat disordered defender is attempting to blunt the advance of a stronger attacker.” That pretty much fits the bill of what was happening that fateful November day in the Libyan desert!
This mission is fought lengthways along the board, which in this campaign has the important ramification that generally speaking the South African support vehicles will have less distance to flee before leaving the board and escaping to safety. It is also unusual in that the attacker and defender have differing numbers of markers to used during the Patrol Phase. Like the last scenario, the attacker gets 4 markers placed in a single stack anywhere along their board edge, while the attacker gets 3 markers placed at least 6″ apart from each other (but still within an unbroken chain no more than 12″ from another marker) within the shaded area shown below.
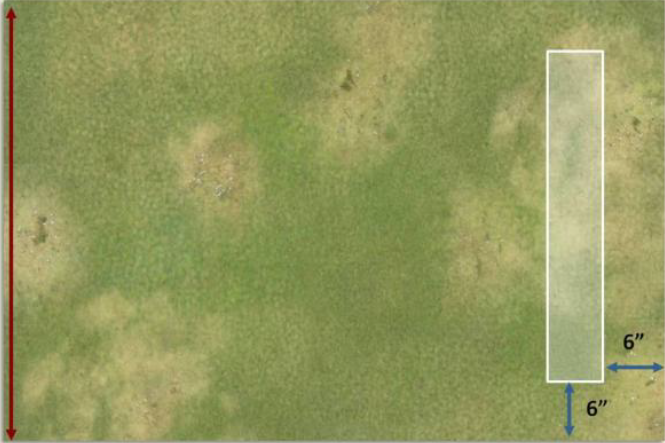
In this particular scenario, the defender uses their Patrol markers to place 2 Jump-Off Points as normal but places a third one anywhere in the shaded area. The attacker’s primary objective in this mission is to capture that particular JOP and end the Turn.
This mission is intriguing for the Germans because it really leaves the door open for a coup de main; provided the German player has a full CoC Die to end the Turn (one of the standard uses of that special resource) a headlong dash down the board to capture the objective JOP has the potential to make this a quick game. Further, if it can be done before the South African support vehicles can escape, they will count as being captured – potentially netting the Germans a bunch of campaign victory points!
Choosing Supports
Given the potential for a quick victory, this particular scenario is one in which the Germans may not actually need to bring infantry supports to capture enemy units. But like anything else, this approach has risks; unless the Germans get really lucky it will likely take four tanks on the table to get a maximum win (one to capture the objective JOP and one to force the surrender of each of the three South African support vehicles to prevent them from escaping). As seen last time, coordinating the movements of multiple tanks is difficult, which in turn means the German side will need to get Leutnant Krauss on the table quickly and keep his tank from getting knocked out. And given the likelihood of another South African pre-game barrage (which was fiendishly effective in the last scenario), that may be a tall order. Still, I figure it’s worth the risk, taking the following supports:
- A Panzer IV D (5 points)
- A Panzer II C (4 points)
- An Adjutant (1 point)
- A “Red Die” (2 points)
My thinking here is that the Pz II C has the “fast” attribute, which should help it race down the length of the field to be in a position to capture the objective JOP. Additionally, its 20mm autocannon is a fantastic weapon against AT guns. Similarly, the heavier Pz IV D of this era is armed with the short-barreled 75mm gun (which sports high-explosive shells). This makes it excellent in the anti-infantry role as well. Like last time, the Adjutant will mean that the Germans can deploy Leutnant Krauss on the field without suffering adverse deployment effects.
Finally, the Red Die: originally appearing in the Blitzkrieg 1940 supplement, this support option allows the force to roll an extra Command Die. However this die is special and marked with a different color, because it can only be used to activate units (i.e. results of 1-4) and cannot be used to accumulate pips towards a CoC Die or affect phase order (i.e. ignores all rolls of 5-6). It represents additional resources (messengers, radios, unambiguous temporary chains of command, etc) used to help ensure command-and-control of larger, mixed ad hoc forces. Ordinarily it can only be used if the force has three or more other deployable supports, but that requirement is waived for this particular campaign. The hope here is that between having the platoon’s Leutnant on the field (where he can activate other vehicles via radio) and having the extra Red Die, it will be easier to coordinate the German advance. Let’s see if this works out.
For the South Africans, the choices are no less difficult. In this second turn of the campaign, the Allied side gets an additional point of Support, giving it a total of 5. Given how effective the pre-game barrage was last time – and how narrow the board will be this time – this seems like a no-brainer to take again. This is doubly true because it won’t be long until it will cease to be an option.
But here’s where things get tricky. One of the South African player’s special Support choices is to “upgrade” part of their platoon from “green” to “regular.” They can do this to up to two constituent units of their core force per campaign turn, and any such upgrades are considered permanent (meaning they will be regular for all future campaign turns). This represents the German force progressively pushing through the B-Echelon units and into the brigade’s actual combat units. Early points spent here will pay dividends in the long term because it will free the South Africans from the curse of the “enforced deployment” campaign special rule. Unfortunately, if the South Africans upgrade the maximum two constituent units, that doesn’t leave enough points for any additional AT guns beyond the platoon’s organic Boys AT Rifle, which really limits the South Africans’ ability to slow down the enemy tanks. As such, after much hemming and hawing I choose the following:
- A pre-game barrage (2 points)
- A 2-lb anti-tank gun with 5 crew and Junior Leader (2 points)
- Permanently upgrade one Team, Section, or Senior Leader from Green to Regular (1 point)
For the upgrade, I choose the Boys AT Rifle Team. This is done for two reasons: first, it means that the South Africans can hold this team in reserve and deploy it using an Ambush if possible. Performed by spending a full CoC Die, an Ambush allows a team-sized unit to deploy, fire, and return to off-table reserves in one go (though enemy units on Overwatch do have the opportunity to fire before the ambushing team is put back into reserve). This game mechanism represents “shoot-and-scoot” tactics – where a small team takes a surprise shot and quickly relocates – and will be vital to keeping such a small, fragile team alive.
But secondly and perhaps just as important, in CoC a team-sized unit activates on a 1, which in this campaign can also be used to activate one of the support vehicles. By upgrading a team-sized unit, that’s one fewer 1 that the South Africans will have to waste on enforced deployment during the early phases. Every little bit that can be used to get those fragile support vehicles to safety before the Germans can catch them is worth it!
Set-Up
As before, we randomly place three burning wrecks on the table and randomly determine the wind direction. Like last time we roll a 2 for the wind direction, which gives us winds blowing from southwest to northeast.
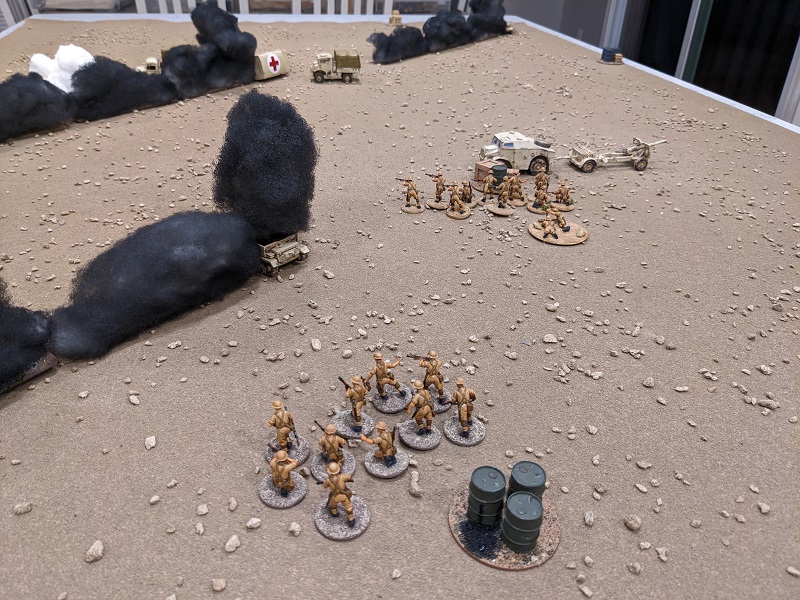
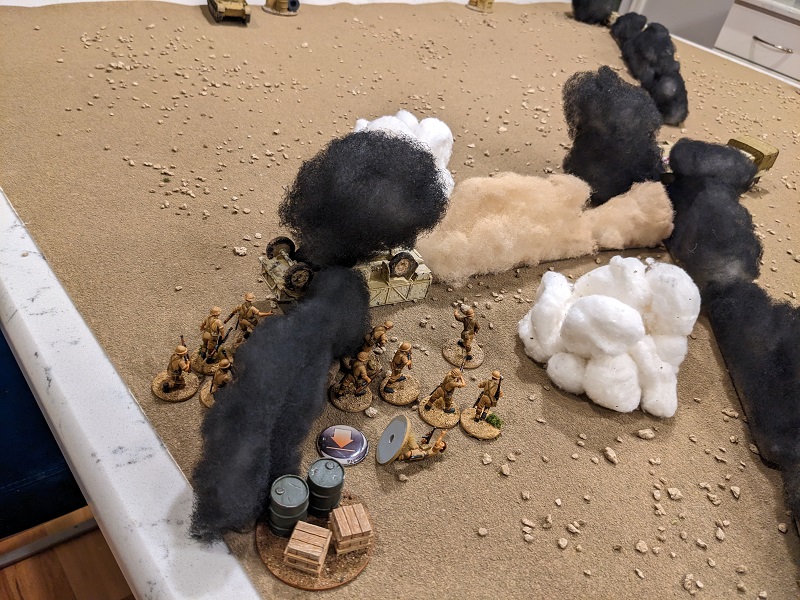
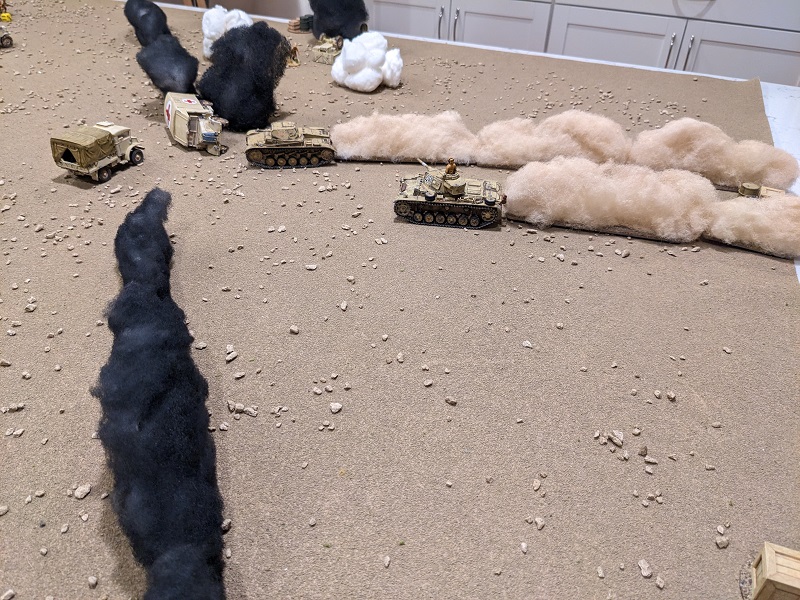
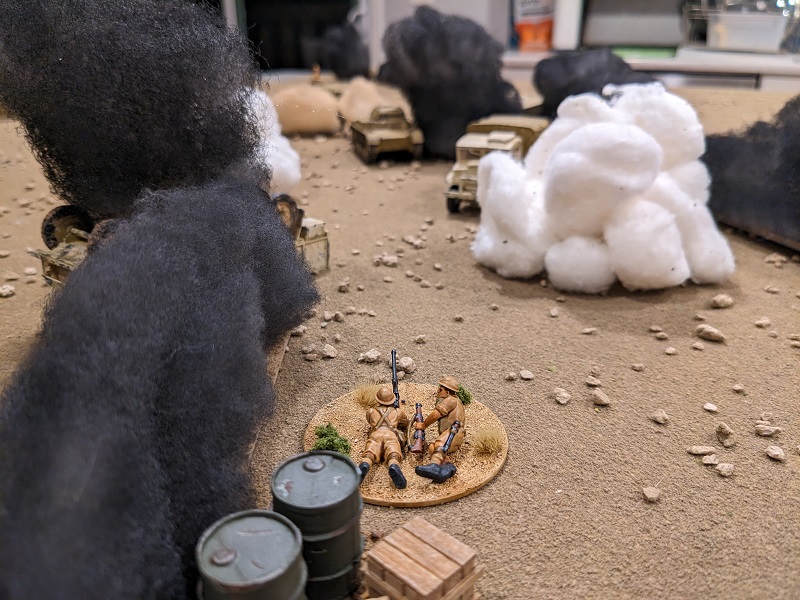
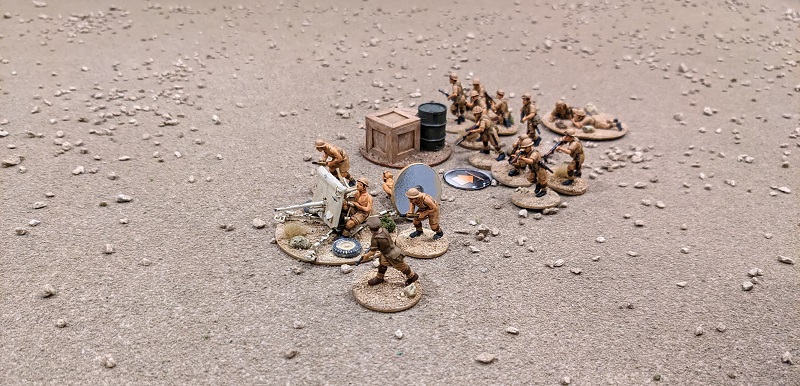
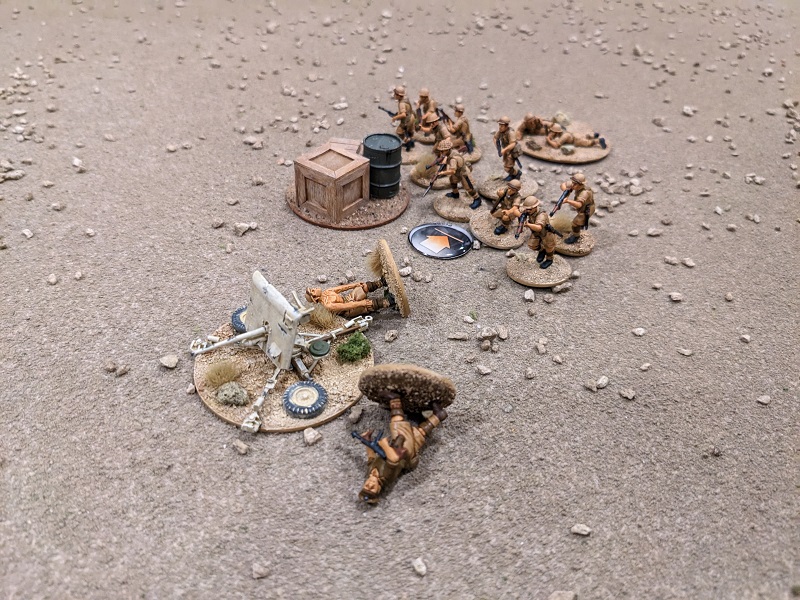
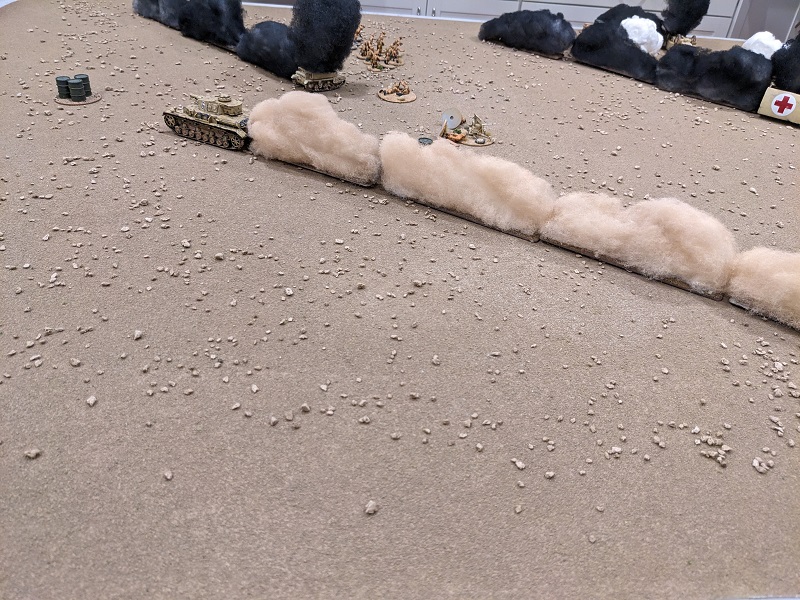
For the three support vehicles, I roll up another limbered artillery piece, a troop transport, and a supply truck. The initial locations of these are also generated, giving us the following starting board state:
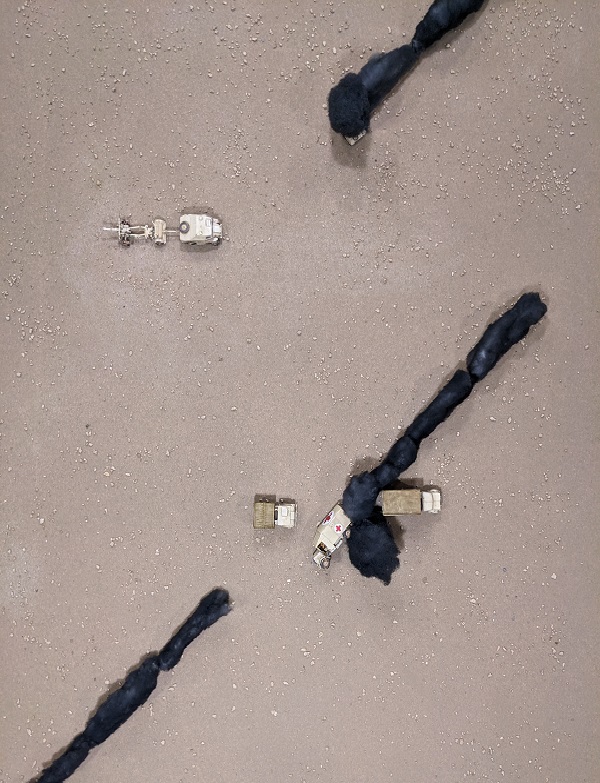
Along the length of the table, visibility was actually quite occluded. There’s only a relatively narrow gap between the plumes of smoke, and at game start there was a supply truck parked there. One thing was for certain, if the Germans wanted clean shots on anything, they’d need to do some driving.
Force Morale
Force Morale is generated as normal, but for the German side Leutnant Krauss’ infectious confidence gives a +1 modifier to the roll. It turns out that that’s good, because I roll a 2; that +1 modifier is all that’s keeping the Germans out of the minimum range (FM of 8) and gives them a starting Force Morale of 9. The South Africans as yet have no negative modifiers and also start with a Force Morale of 9.
The Patrol Phase
As mentioned above, the defender in this scenario has fewer patrol markers than the attacker. This is another really cool aspect of the Patrol Phase that may not be evident at first glance: having fewer markers means that the defender can advance their markers up the table faster (because they’re not dragging along as much of a “tail”), but it’s hard for them to spread out to keep their flanks secure. Conversely, the attacker can always spread their markers out wider than the defenders can cover, but may not make much headway while doing so. Also, with only three markers to lock, the defender can end the patrol phase very quickly once the two sides’ markers start closing with each other.
Another interesting aspect of this is that once all the markers are locked down and the Jump-Off Points are being placed, a friendly marker may only be used to determine the placement zone of a single JOP. This can often mean that using two markers to “pinch” the potential JOP placement area of an enemy marker can narrow your own choices for deployment as a consequence.
With tied starting Force Morale values, the two sides dice off to see which one starts the Patrol Phase, and in this case the South Africans actually win the toss. For the South Africans, the goal was once again to try to prevent the Germans from getting a JOP anywhere along the eastern edge of the table. Things proceeded more or less as one might expect, but at one point as the Germans I was again faced with a quandary: with two of three South African patrol markers already locked (and the third able to lock in its next move), I knew I would only get one more move of a German marker. The markers on both flanks were free, and I had to decide whether it was better to get a JOP closer to the southeast corner of the table (and in a slightly better position to maybe head off escaping vehicles), or whether it was better to advance a little farther up the western edge (and be slightly closer to the objective). In the end, I chose the latter.
In placing the JOPs, the important bit for the Germans was the placement of one a fair way along the western table edge. For the South Africans, I placed one right behind the Morris Quad towing the artillery piece and another fairly far up along the eastern edge. This position was a little bit exposed, but it would provide an opportunity to deploy a Senior Leader in a place where he could help keep the nearby trucks moving. Finally, for the objective JOP, I placed it in the open. This would give good lines of sight to any approaching German vehicles that might make a cheeky dash for the objective.
With that, it was once again time to start shooting!
The Battle
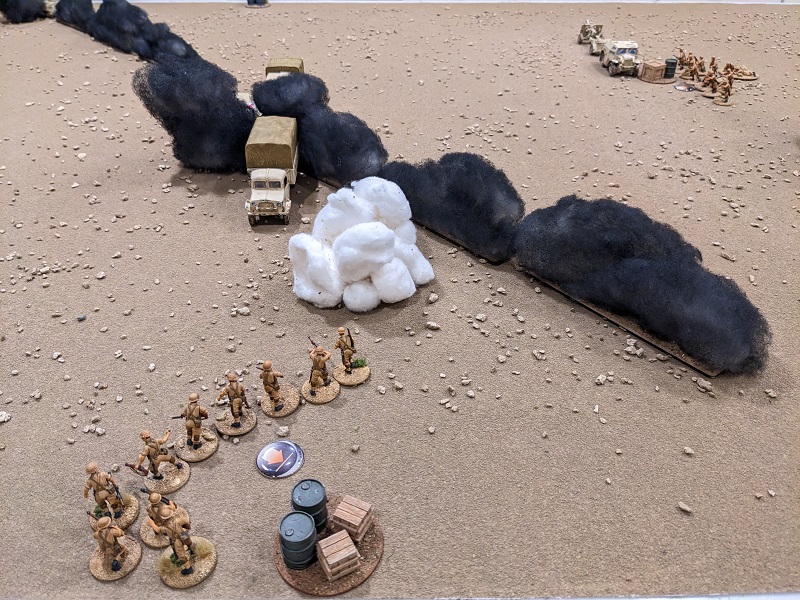
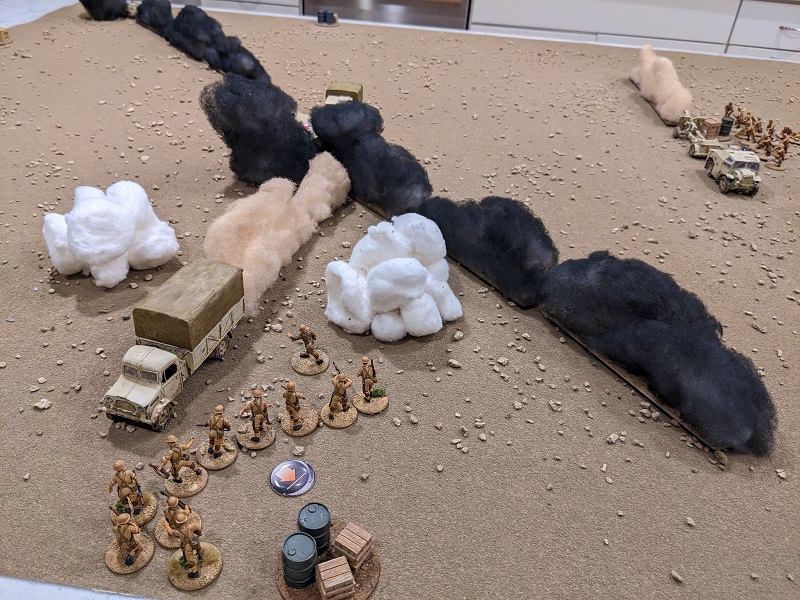
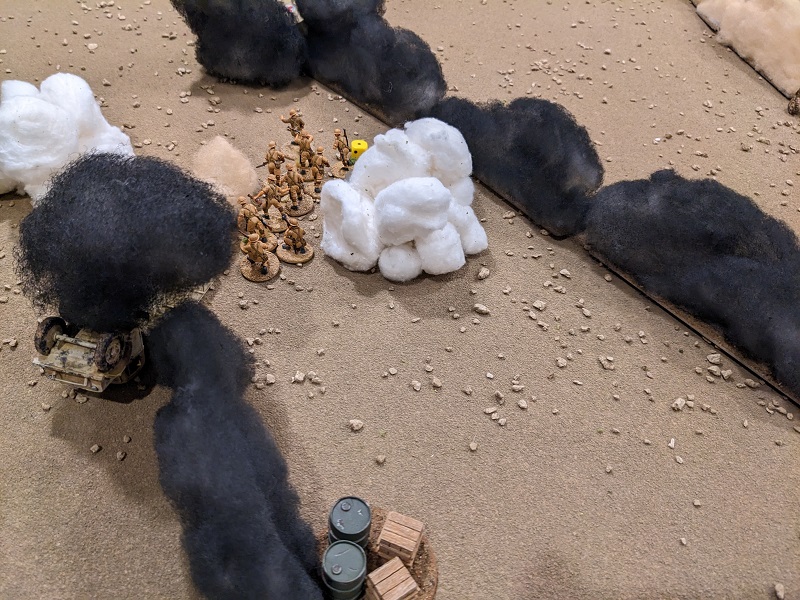
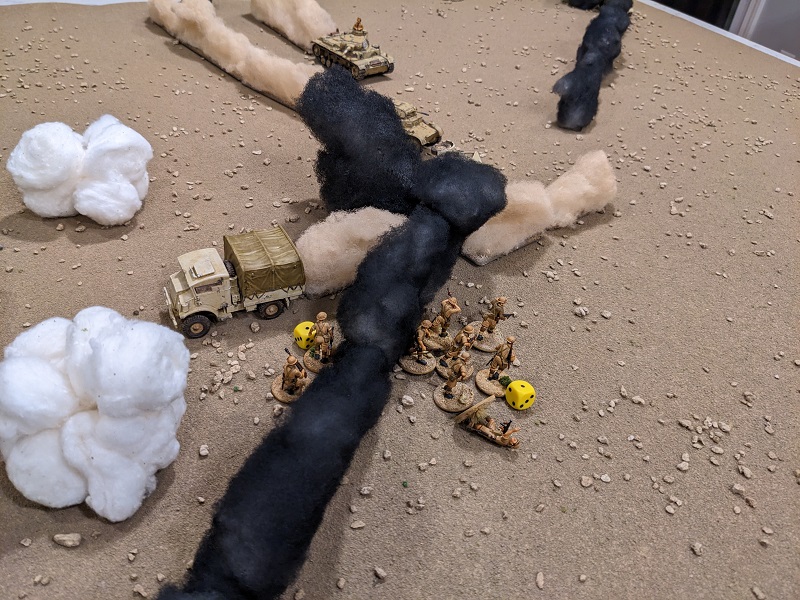
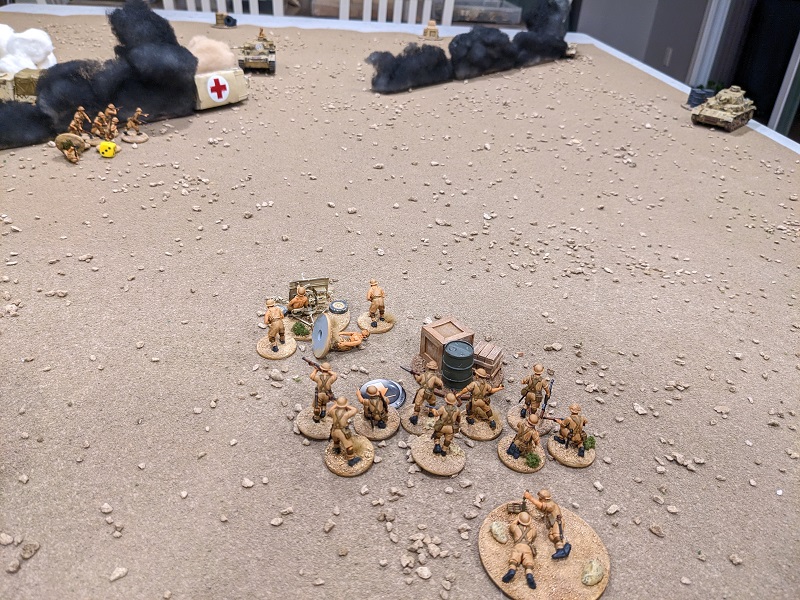
Turn 1, Phase 1 (South African): 63321 – Under the specter of enforced deployment, this roll of the Command Dice was almost a blessing, as it let me deploy all three sections and my 2″ mortar team in one go. 1st Section deployed near the central JOP and their lance-corporal put them in tactical stance. Similarly, 2nd Section deployed from the JOP along the eastern edge in tactical. These two sections were placed where they were primarily to protect any Senior Leaders who would be deploying in later phases. 3rd Section deployed at the objective JOP, but I knew they wouldn’t be staying there for long; the Germans would be sure to be gunning for it, and there was no sense leaving another green section out there for them to capture for free as they drove on the primary mission objective. Finally, the 2″ mortar team deployed, launching a smoke round down-range in an attempt to screen the troop transport truck. Just like last mission, these men too had clearly not trained on the tool – the shot drifted wide-left.
Turn 1, Phase 2 (German): 644322 – Once again I tried to deploy both a tank from the German core platoon using the 3 as well as Leutnant Krauss’ command tank using one of the 4s and failed both rolls required by the pre-game barrage. Oh boy, here we go again. At least the single 6 counted as a pip toward my CoC Die (per the “veterans” campaign special rule) so it wasn’t a totally wasted phase.
Turn 1, Phase 3 (South African): 64222 – And just like that, we have the dice to deploy both of the South African Senior Leaders. The platoon Lieutenant deployed with 1st Section and immediately expended a CI to get the artillery train moving. He then ordered the 2″ mortar team to lob another smoke round, but this time the shot fell short. Meanwhile, the platoon Sergeant deployed with 2nd Section and got the driver of the troop transport squared away, that vehicle racing 9″ closer to safety. Finally, the remaining 2 was spent to activate 3rd Section, which ran through the nearby smoke plume and away from the objective JOP. Given that this was a squad activation and not a leader activation, both the Bren and rifle teams picked up a point of shock in the process.
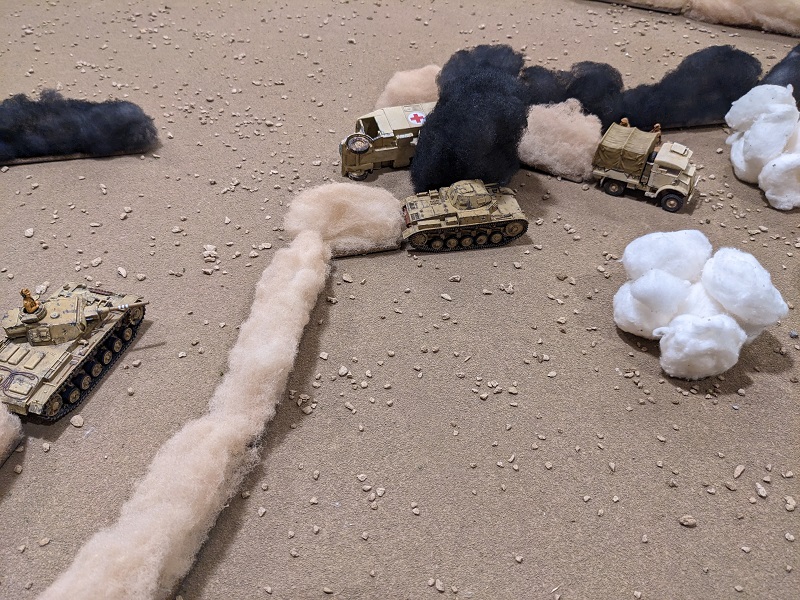
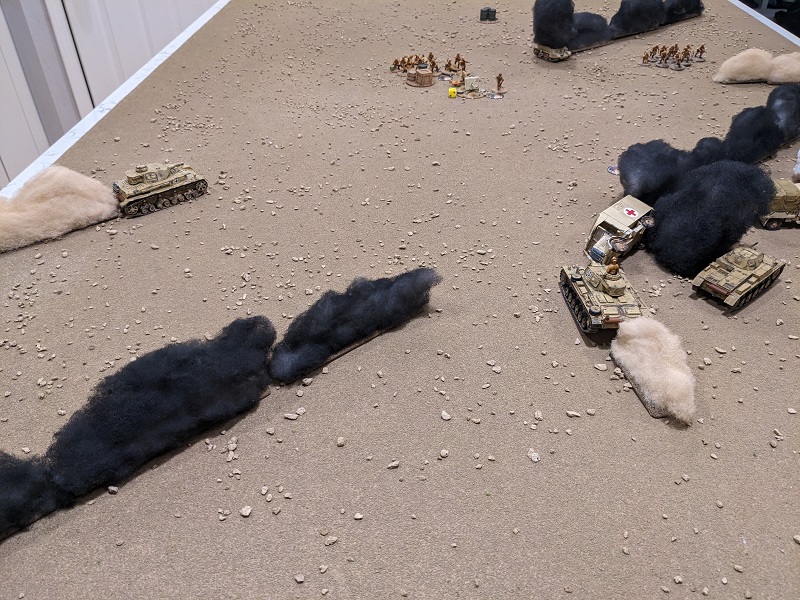
Turn 1, Phase 4 (German): 443211 – For a tank platoon, this was a decent hand of dice – I’d have three tries to bring tanks onto the table. But as I once again failed a roll to deploy the Pz IV D, this was beginning to look a lot like the last game. Fortunately, the roll to bring Pz II C was a success! With the South African transport truck already making a break for safety and without any way to interrupt its progress, I decided that it was my highest priority target. Unleashing the 20mm autocannon, the German tankers were surprised when the vehicle went up in a massive explosion. The nearby South African 2nd Section was caught in the blast radius; the Bren team picked up a point of shock and lance-corporal Templeton was struck by rather large piece of flying wreckage and knocked senseless (though South African Force Morale held steady). It’s a good thing the men of 3rd Section were already on their bellies in tactical, or this could have been a lot worse!
Capping off an already productive phase, Krauss’ command tank also made it through the barrage. The canny Leutnant placed his main and hull gunners on Overwatch such that they could react to whatever the South Africans had planned.
Aside: Why deploy here and why not take the shot immediately? I could have deployed Krauss’ command tank from the JOP on the western board edge and this would have given me a clear line-of-sight to the fleeing artillery train. But deploying in the open is a recipe for disaster, and losing your platoon lieutenant also means losing his precious radio (which can be used to activate positions in other tanks). Similarly, I could have taken the shot as soon as I deployed, but at this point I still held out hope that perhaps the Morris wouldn’t activate and could be stopped. Deploying and putting the main and hull guns on overwatch gave me more flexibility to adapt to the South Africans’ activation in the coming phase.

Turn 1, Phase 5 (South African): 64443 – Following in the path of the Morris Quad, the Lieutenant raced after it, gesticulating wildly to the driver to keep going. Clearly the driver saw this in his mirror, as the vehicle moved another 8″ towards safety. At this point Krauss’ gunner saw some movement through the smoke, springing his Overwatch. Alas, the artillery train had moved flat out and was heavily obscured by the wreckage of a burning vehicle – needing at least a 10 on 2D6 it was little surprise that the shot missed.
With the blast from the exploded transport truck still ringing in his ears, the Platoon Sergeant exhorted the men of 3rd Section to follow him as he raced towards the supply truck, which had not yet begun to move. He spent his remaining 2 CIs rallying off shock, keeping the men’s movement calm and orderly even as chaos erupted around them. Similarly, the lance-corporal in charge of 3rd Section had that group continue their movement eastward and away from the objective JOP at a less breakneck pace and rallied off a point of shock.
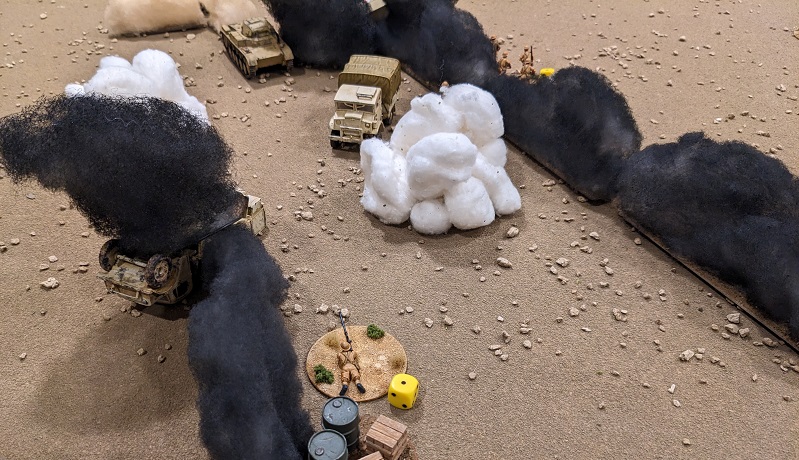
Turn 1, Phase 6 (German): 544211 – Krauss ordered his driver to advance at normal speed and trained the co-axial MG-34 on 2nd Section, inflicting a kill on each of the Bren and rifle teams. Via radio he spent his last CI ordering the Pz II C to advance flat out. The speedy little tank moved 18″ – which put it about a half inch shy of being able to force the surrender of the still stationary supply truck. Curses! Thanks to the Red Die there was a chance to bring on another tank here, but I of course failed the roll to make it through the artillery barrage.
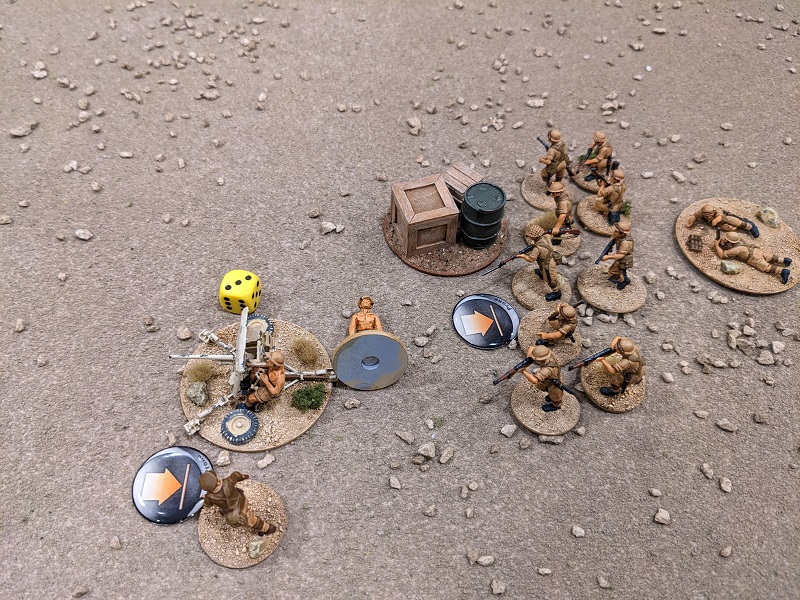
Turn 1, Phase 7 (South African): 43222 – The Lieutenant kept up his chase of the Morris Quad, continuing to make “keep going!” motions with which that vehicle’s driver happily complied. This officer’s motion actually brought him to within coherency distance of 3rd Section, where – probably between gasps of air – he rallied off a point of shock. Combining 2s into a 4, the Platoon Sergeant ran at the head of 2nd Section through the smoke. In that way that only senior NCOs are able, he got the supply truck moving by sheer force of verbal invective alone. Billowing dust, that vehicle shot forward 11″ and away from the dangerously close enemy Pz II. The Sergeant then rallied shock off the section’s Bren team. I thought about deploying the 2-lb AT gun here but decided to wait as I wasn’t sure which JOP I wanted to use. There was still a lot of smoke and dust blowing around.

Turn 1, Phase 8 (German): 655322 – This roll got the Germans to a full CoC die, but didn’t leave much in the way of activation. I once again tried and failed to deploy the Pz IV. Argh. At this point the Germans’ only hope of stopping the runaway South African supply truck here was the Pz II C, which Leutnant Krauss activated via radio. Were it a straight shot, the little tank would have been able to catch up without any problem. Unfortunately, it wasn’t a straight shot. Since chasing the fleeing truck required a 90-degree turn, the vehicle couldn’t move flat out. I also rolled the worst possible result on my movement, but the extra distance the Pz II C got from being classed as “fast” meant that it was just able to get close enough to force a surrender. Using the remaining CIs, the command tank’s hull and co-ax gunners opened up on 1st Section in the distance. This fire inflicted a point of shock on the Bren team and a kill on the rifle team.
Turn 1, Phase 9 (South African): 65321 – The 1 let me activate the artillery train, which got enough of a move to finally exit the table to safety (netting the South Africans 4 campaign Victory Points in the process). Lest the importance of the Allied Senior Leaders be understated, this was the first phase where I had the necessary Command Die score (a 1) to activate a truck on its own! Fearing I might not get another chance, I deployed the 2-lb AT gun from the central JOP (where 1st Section was still hunkered down) and took a heavily obscured shot through the smoke at the Pz II C. This was a risk – as I needed at least a 9 on 2D6 – but a hit would have been against that tank’s more vulnerable side armor. Alas, the shot a miss. With nothing spectacular to do with the remaining Command Die of 2, play passed the Germans.
Turn 1, Phase 10 (German): 655443 – Kind of a terrible roll, to be honest. With the Pz II busy covering the supply truck, I really needed another tank on the field. But yet again the pre-game barrage confounded my attempt to bring on the Pz IV. Krauss was going to have to do this the old-fashioned way. Ordering his driver to slowly advance and put the flaming wreck of an ambulance partially between his tank and the danger-close AT gun, he trained both machine guns on the AT crew. Even with the cover provided by the South Africans’ gun-shield this fire inflicted 1 kill and 1 shock on them.
Aside: For those of you familiar with CoC, you may be asking why the shots against the 2-lb gun crew weren’t shared with the teams of nearby 1st Section. Sadly for the AT gunners, 1st Section is still green and therefore the target number needed to hit them is different. As such, this allows a shooter to choose to focus its fire on one or the other – and for the Germans, taking out that AT gun has suddenly become their highest priority.
Turn 1, Phase 11 (South African): 66331 – a double-phase! This is a massive opportunity for the South Africans! Using A 3 to activate the gun-captain (who starts by rallying off a point of shock), the 2-lb gun takes a shot at Krauss’ command tank, now partially obscured behind a flaming wreck. Sadly, the shot is a miss. But there’s another good possibility here, which is the Boys AT Rifle, which you will recall has been upgraded from green to regular. The South Africans don’t have a full CoC Die to spring an Ambush here – so the team will remain deployed after firing – but placing them on the table near the easternmost Allied JOP gives a clear, unobstructed shot to the front of the relatively thin-skinned Pz II C. They easily score a hit, and while the shot doesn’t do any lasting damage it does draw the attention of the tank crew, who will be forced to stand still and engage the Boys team in its next activation.
This is great news for the South Africans for one simple reason – the Pz II C only has co-axial weapons in its turret, and that turret is currently trained on the surrendered supply truck. If the Pz II slews its turret away from the truck to engage the Boys team, then the supply truck is free to make a break for it! But the tank will have to activate first, so let’s not count our chickens just yet. This will all come down to timing.
With not much else to use the final 3 on, the lance-corporal in charge of 3rd section moves them closer to the Lieutenant, making it unambiguous that the officer has joined the section.
Turn 1, Phase 12 (South African): 6333 – Once again activating the 2-lb AT gun, this time the shot at Krauss command tank is a hit! Again the penetration and armor save rolls result in 0-net hits, but that’s enough to inflict a “halt and engage firer” result. Sadly, there’s no way to activate the Boys AT Rifle again.
Aside: Why did I only roll four Command Dice this time? One of the house rules we’ve adopted for CoC is the “dropped die” method, which means that in every successive phase taken by the same player one fewer Command Die is rolled. This helps mitigate the effect of long runs of phases, which while fairly rare can have an outsized effect on the outcome of a game.
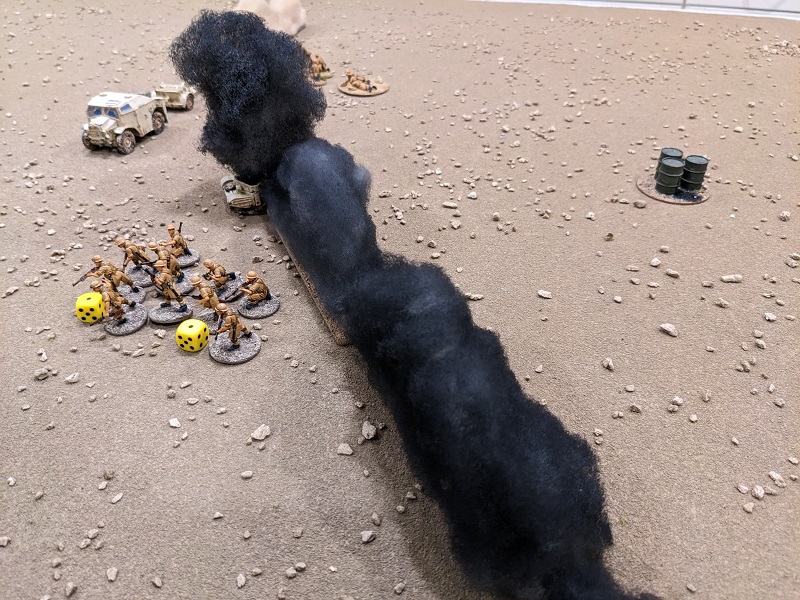
Turn 1, Phase 13 (German): 533221 – OK, this is a great roll but we have lots of mandatory stuff to take care of here. First off, Krauss’ command tank has to engage the 2-lb gun, which it does with its hull MG. This fire proves devastating, killing one crewman and knocking the gun captain unconscious – though again there’s no effect on the South African Force Morale. Next, Krauss orders the Pz II to engage the Boys team with its 20mm autocannon, satisfying its requirement to engage. This fire inflicts 1 kill and 1 shock on the 2-man team, putting them on the verge of breaking. Krauss’ third CI is spent slewing his own turret around to engage the Boys team. Through the dust at this range it takes a 6 to hit, but the fire generates a single hit which turns into a single point of shock. That’s enough to break the lone Boys gunner. Finally, this far into the game the South African Force Morale takes its first hit, dropping to an 8.
Next, the Pz IV finally makes it through the barrage. With great hopes its hull-mounted MG-34 and 75mm main gun fire on the 2-lb AT gun…and generate exactly zero effect. Argh. Thinking that my tanks need all the help they can get I use the other final 3 to try to bring on one of the Germans’ core platoon tanks, only to once again fail to navigate the barrage.
Turn 1, Phase 14 (South African): 64432 – Recall that the Pz II C’s weapons are no longer pointed at the South African supply truck. This roll gives the South Africans the ability to activate the Platoon Sergeant, who is close enough to the supply truck to activate it. Thus, as the Germans I am forced to burn my CoC Die to perform an Interrupt! and slew the Pz II C’s turret around and once again dissuade the supply truck’s driver from making any sudden moves. So instead the Platoon Sergeant rallies off two points of shock from 2nd Section and has them go tactical.
Aside: As the Germans, I really didn’t want to use my CoC Die here, as now I don’t have one on-hand to end the Turn and win the game (provided I can get a unit all the way up to the objective JOP, which at this point still feels miles away). Hopefully the Germans can build up another one quickly.
Meanwhile, without a conscious Junior Leader the 2-lb AT gun can only activate on a 1, which this hand of Command Dice did not provide. Groaning inwardly that he should have been a marathoner, the winded Lieutenant races 15″ back towards the 2-lb gun. He gets close enough to join them and orders them to once again fire at Krauss’ command tank (“Shoot at the one with the biggest antenna!”), though with a roll of 4 they miss by a wide margin. I guess that’s what happens when you have a logistics officer trying to call out range-to-target under fire.
Turn 1, Phase 15 (German): 644321 – The Pz IV D advances 7″ toward the 2-lb AT gun, its 75mm cannon once again belching out a high-explosive shell. This time is more effective, generating another kill and a point of shock. Krauss orders his own driver to advance while both his tank’s MG-34s rake the 2-lb crew. This inflicts a kill and 3 points of shock (they are now pinned), and things are starting to look bad for the South Africans. Finally, I once again fail to bring on another tank from the core platoon due to the confounding effects of the barrage.
Turn 1, Phase 16 (South African): 54321 – The Lieutenant rallies off 2 shock from the gun crew (which now consists of one man) and commands him to fire at Krauss’ tank. Sadly this too is a miss. Trying to salvage a bad situation, the Platoon Sergeant leads 2nd Section back through the smoke, where they confront the Pz II C with a pair of well-thrown grenades. Given the relatively thin armor on that tank, these both have effects. One yields “halt and engage firer” (which again has the potential to be great for letting the surrendered vehicle escape), but the other inflicts 1 shock on the tank’s crew and prevents the tank from being activated in the next phase. This has the unfortunate effect of postponing the mandatory engagement, which is not what the South Africans wanted here.
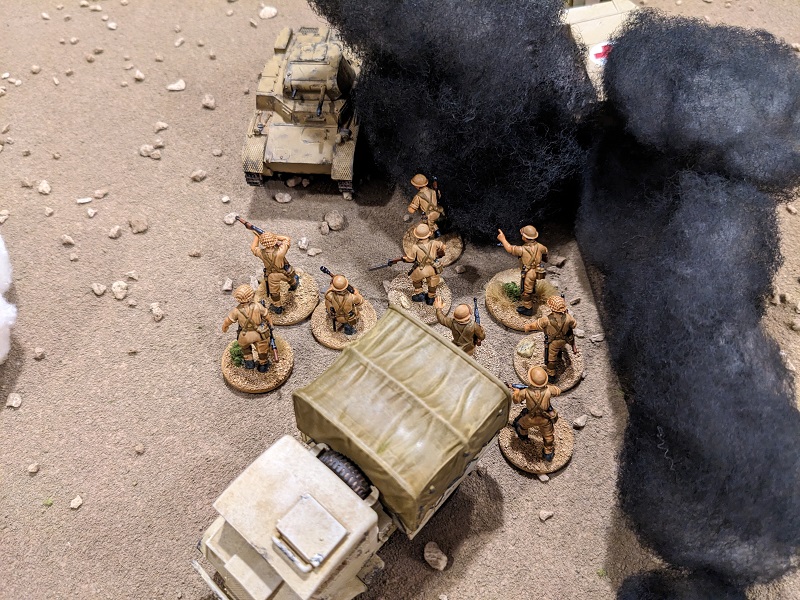
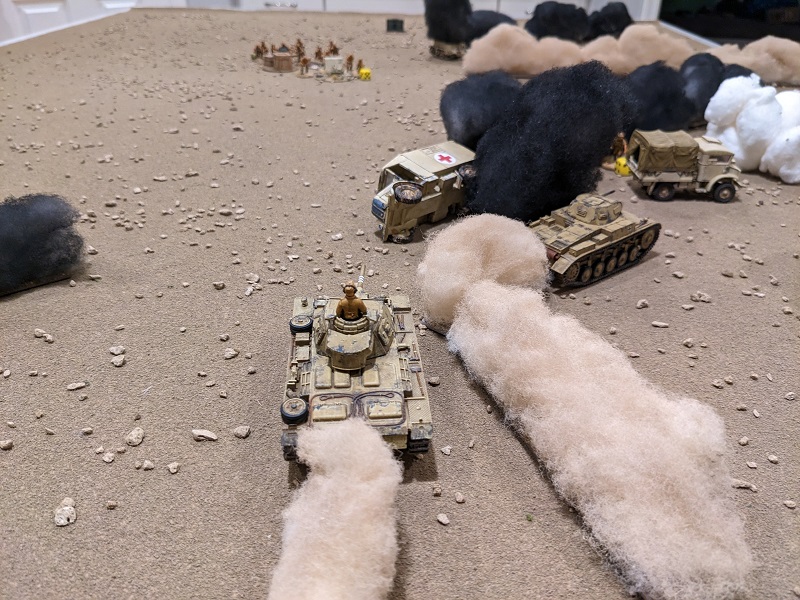
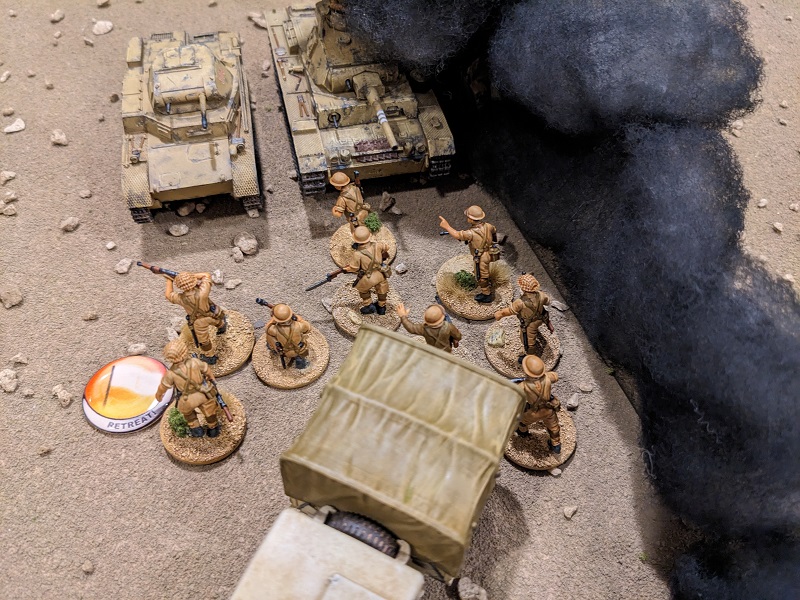
Turn 1, Phase 17 (German): 655522 – I only have the dice to activate Krauss, but since he has a radio this isn’t as bad as it might be. First, he orders the Pz IV D to keep firing, which it does. The 75mm shell is smack-on-target, inflicting 3 kills! This takes out the last crew member and inflicts hits on both leaders. The gun-captain takes another KO, but he’s already unconscious so this has no effect. Unfortunately the Lieutenant also suffers a KO, and this drops the South Africans’ Force Morale to 7. Next, in an effort to relieve pressure on the Pz II crew Krauss commands his driver to slew the tank around and advance. Moving 6″ through a thick pall of smoke, the tank comes to a halt right in front of 2nd Section. I can just see the panic on those men’s faces as this lumbering Pz III G pushes its way through the smoke. Reluctantly, the Platoon Sergeant and the men of 2nd Section put up their hands in surrender.
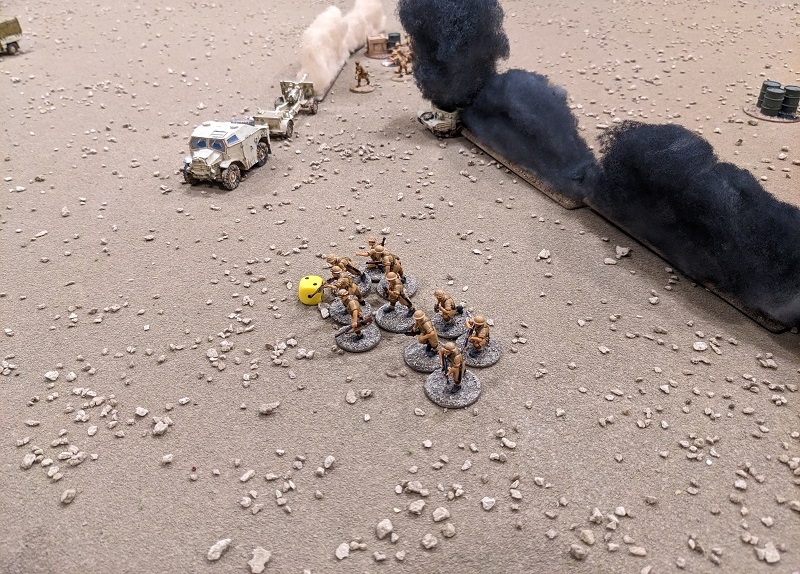
Turn 1, Phase 18 (South African): 65532 – With no operational AT assets left on the table, the remaining South African units are free to leave the table by the eastern board edge. The lance-corporal heading up the porters who comprise 1st Section has them pick themselves up and head east with all haste, covering 9″ before rallying the resulting run-induced point of shock off the Bren team. 3rd Section moves at a normal pace but manages only 2″.
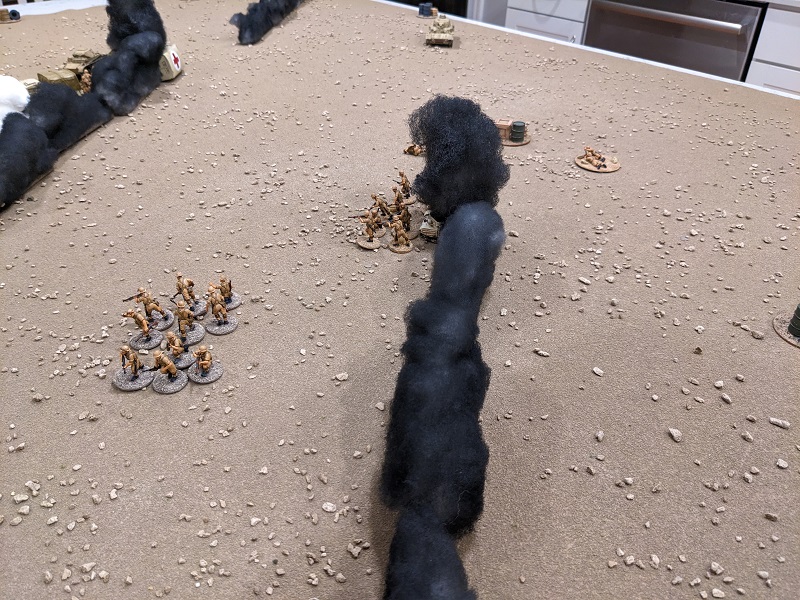
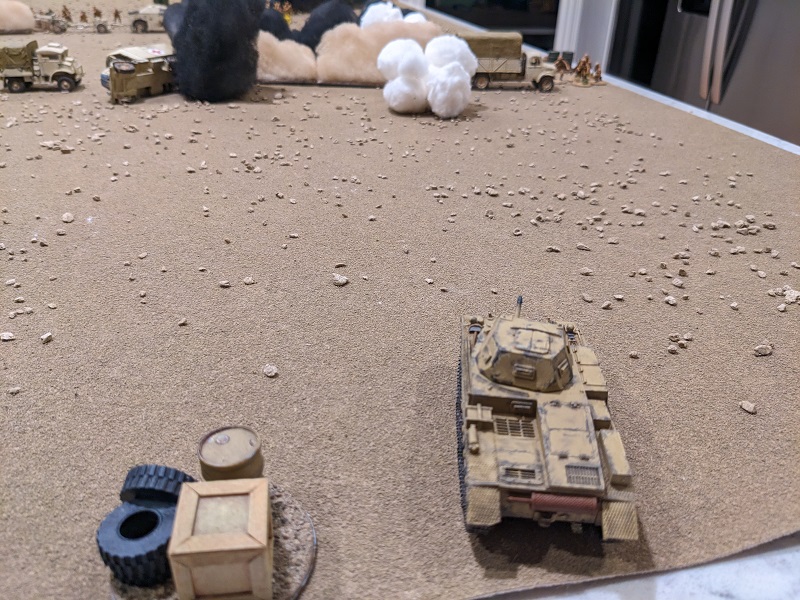
Turn 1, Phase 19 (German): 554221 – Krauss commands the Pz IV D via radio and that vehicles gunner punches it, gaining 16″ straight for the objective JOP. On a lark, I try to bring in another tank and fail. This phase also sees the Germans gain another full CoC Die, meaning they can end the game once they can get a unit in contact with the objective JOP.
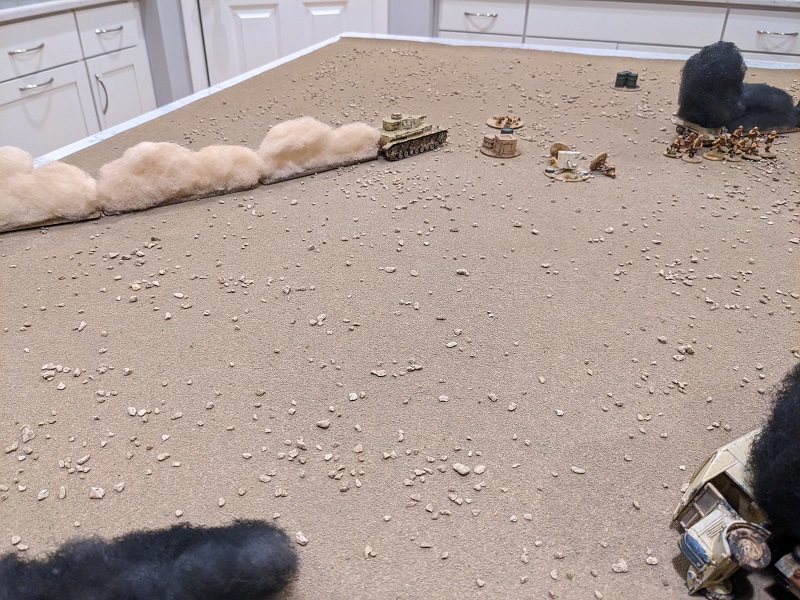
Turn 1, Phase 20 (South African): 65111 – The 2″ mortar team suddenly realizes they’ve been left behind. With no (conscious) nearby Senior Leader to rally shock off them, they move eastward at a walk – and still manage to cover 10″. This brings them pretty well away from the onrushing Pz IV D and in no real danger of being captured. 1st Section advances another 6″ to safety, putting it very close to 3rd Section.
Turn 1, Phase 21 (German): 664411 – With a double-phase, the likely ability to command the Pz IV D to continue advancing via radio in the follow-up phase, and a complete CoC Die to end the turn, this is the end of the game. I probably could have stopped it after Phase 17 but wanted to make sure that no more South African infantry was in imminent danger of being captured.
Postgame Campaign Stuff
The South Africans get 4 Victory Points in the campaign for the escape of the towed artillery piece, which is great news! The Germans gain 1 point for destroying the transport truck. Again, so long as the Germans win the game (either by completing the scenario objective or causing the enemy Force Morale to collapse) they also count any surrendered unit as captured. As a result, they gain a further 3 points for the capture of the supply truck, 2 more for the capture 3rd Section, and 2 more for the Platoon Sergeant. That brings the current campaign score to:
South Africans: 7
Germans: 13
The German CO’s opinion climbs +2 to a total of 4, which means that Krauss will enjoy 1 extra point of Support for the next game. That’s good, because it will help offset the increase in price of his infantry (which is lagging further and further behind the tanks). Similarly, the Men’s Opinion also rises to a 4, as the Germans suffered no casualties this mission. Finally, Krauss’ outlook remains unchanged (sociable), but between this and his men’s opinion the Germans will have +2 to the initial die roll to determine Force Morale.
For the South Africans it’s not as bad as it could have been. They suffered more men killed than the Germans, but overall casualties in terms of men killed was surprisingly light. This means we don’t have to roll for “heavy casualties,” and as such the Men’s Opinion for the South Africans only drops to -3. Still, that’s enough to see a -1 modifier to their Force Morale roll for the next scenario. As the remaining men of the 5th South African Infantry Brigade look to the southern horizon, they see an increasing number of plumes of oily black smoke climbing into the sky and get a sinking feeling that all is not well.
Debrief
The South African pre-game barrage continues to be a massive leveling influence. As a historical note it’s worth pointing out that prior to the attack, the area in which the Axis forces formed up was backed right up against a marshy area. This seems crazy in the middle of a desert, but with the terrain being so flat the water dumped by the raging thunderstorm that ripped through the area the night of the 18th had nowhere to go. That limited area heavily curtailed the Germans’ ability to get organized and meant that what artillery did get sent their way landed among more tightly-packed units and was proportionally more effective. We are certainly seeing that repeated in this play-through of the campaign. I failed 9 different rolls to deploy in this game alone.
Once the Germans advance to scenario 4, the situation switches over. At that point the tanks are too close to the artillery for it to be used in its indirect mode, but that’s when those same 25-lb guns can be taken in their anti-tank role. That’s right, artillery was fired at tanks over open sights during this engagement. And at those short ranges a 25-lb gun will pretty much delete tanks in short order. Fortunately for the Germans, that’s also about the point where the fighting progressed to within range of their own heavy artillery (sited far to the north atop a rocky rise called Belhamed), and the South Africans will have to contend with the pre-game barrage.
This mission also highlights why it’s so important for the South African player to invest in upgrading the units of their core platoon; not only is “enforced deployment” a ball-buster, but in this scenario the Germans were able to salvage the situation by capturing an entire section and a senior NCO. Had that not been the case, the number of Victory Points accrued by each side would have been a tie. That would have been disastrous for the Germans, as things just keep getting tougher for them as the campaign continues. Had I been thinking more clearly I’d have had the Platoon Sergeant send 2nd Section’s Bren team away to safety and make his rushing grenade attack against the Pz II C with just the rifle team. That would have deprived the Germans of 1 Victory Point, but would have reduced the number of grenades he could have thrown. I love that this game provides me with so many difficult choices!
A side note on grenades: In the original Chain of Command rulebook, the rule for grenades is that it takes a leader’s Command Initiative to order them to be thrown, but the total number of grenades is not tracked. However, any time a unit throws grenades in successive activations, they are considered “out of grenades.” Later, however, the Errata/FAQ changed this, effectively giving each leader a total number of grenades equal to their starting number of Command Initiatives. I dislike this change, as it’s just one more thing to track for leaders. But it’s easy to remember if you threw grenades last time you activated the unit, so I have chosen to use the original rule.
Further, there’s actually no rule for using grenades against tanks, but it was very much a thing that people did – especially desperate people who lacked heavy weapons. As such, so long as a grenade hits, I give it an AT value of 2. It’s not great odds and you’ll never outright destroy a tank that way, but you can sometimes get a “mission kill” out of it. In the case of the South Africans in this campaign, it’s a way to draw attention away from the support vehicles, which can be of crucial importance.
And this is again part of the asymmetry of the campaign – the South African forces aren’t intended to destroy every German tank they see. Frankly, for them destroying a tank is gravy. No, instead their job is to disrupt and delay, holding out just long enough to let their brethren escape destruction or captivity. And for as confident as Krauss and his men are right now, as the South African resistance stiffens the Germans are going to have their work cut out for them.
If you’ve made it this far, thanks for continuing on this journey with us! Check back in a few weeks for the next installment!
