Today we look at the new City States Promethean giant and how to paint it in a statue theme. But first, a thank you to Para Bellum for sending us one of the new dual kits for the Promethean and Hephaestian. If you’re not too familiar with Conquest we’ve been covering the game here, in short it’s a 38mm scale fantasy wargame with two ways to play: alternate activation rank-and-flank and a skirmish version of the game.
The Kit
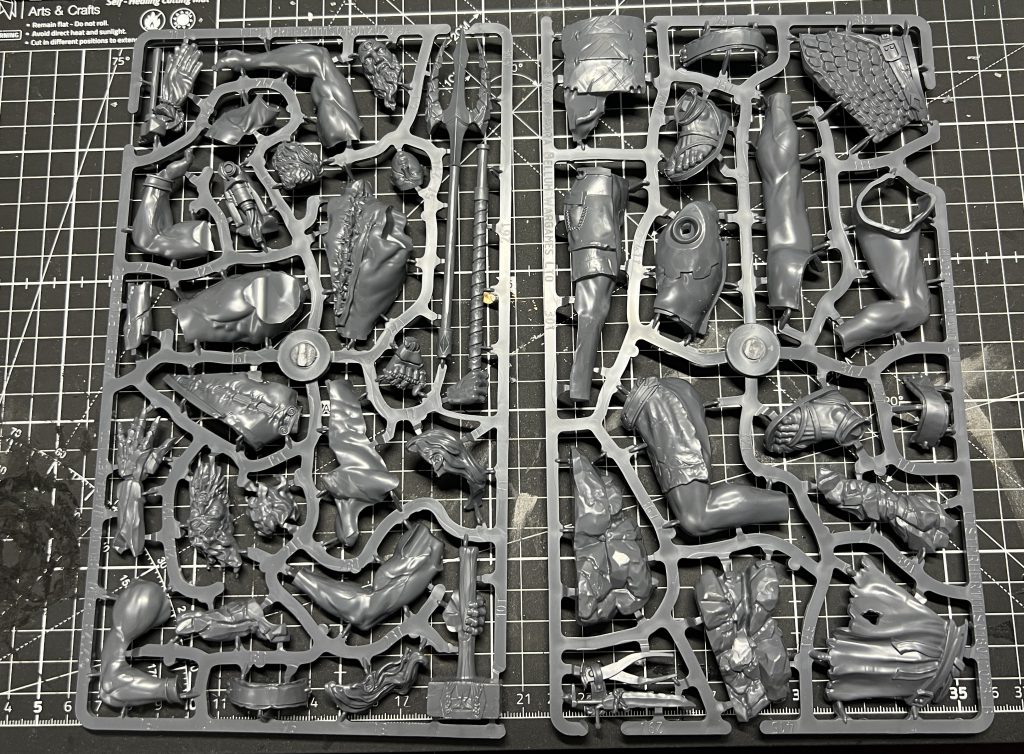
This is the first Monster for the new City States faction and the kit comes with the option to build either a Promethean or Hephaestian. The rules for either are, as always, free to view in the Para Bellum army builder so that you can choose which you want to build for your army. I went for the Promethean first because it’s terrifying in its own right but also casts spells to buff up your other units as well. Plus, I just really think it looks cool. It’s a very simple kit actually with just two sprues and a monster base in the box.

Now, with any dual kit I know that some of you will be dying to know if its easy to magnetise or not and the answer is: with a bit of work, yeah probably. The waist-down is identical between the two miniatures and the head swap will be very easy to change between. However you’ll need to make a choice for the spine piece which to use which determines the post the model is it, you’d be able to magnetise the right hand holding the weapon easily enough but you wouldn’t be able to magnetise between the two separate poses: the chest is shared between the poses so wouldn’t work. The weapon and head really are what differentiate it however, so as long as you’re happy with the pose with either weapon then go for it!
This guy is big too. With a space marine and Mountain Jotnar from the Nords range below for comparison:
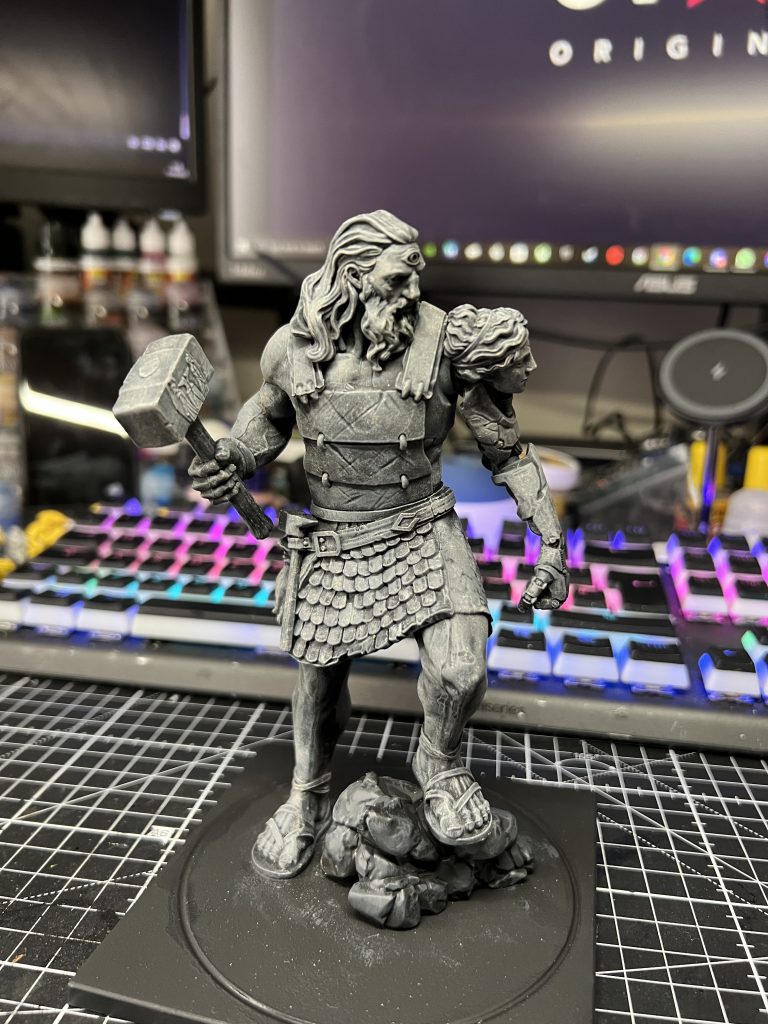
Whether you’re magnetising or not (I did not) the model really is a joy to work with, large pieces that fit together perfectly well and just a few gaps down the legs to fill in. To fill, I just spread across a bit more plastic glue to melt the sections together. There are some mould lines to clean up of course and you want to take time making sure that you clean up extra bits of sprue before gluing. Over all this, like the more recent Para Bellum kits, is a far cry nicer to work with than their first kits and I look forward to working on more City States units.
As for the base, I actually glued the round base into the larger square monster stand because I won’t be playing First Blood with this army. If you think you have any potential interest in playing First Blood then definitely do not glue the base in like I have; I simply prefer the more uniform look across the base since my City States are being used solely for The Last Argument of Kings (the rank and flank version of the game).
How to Paint
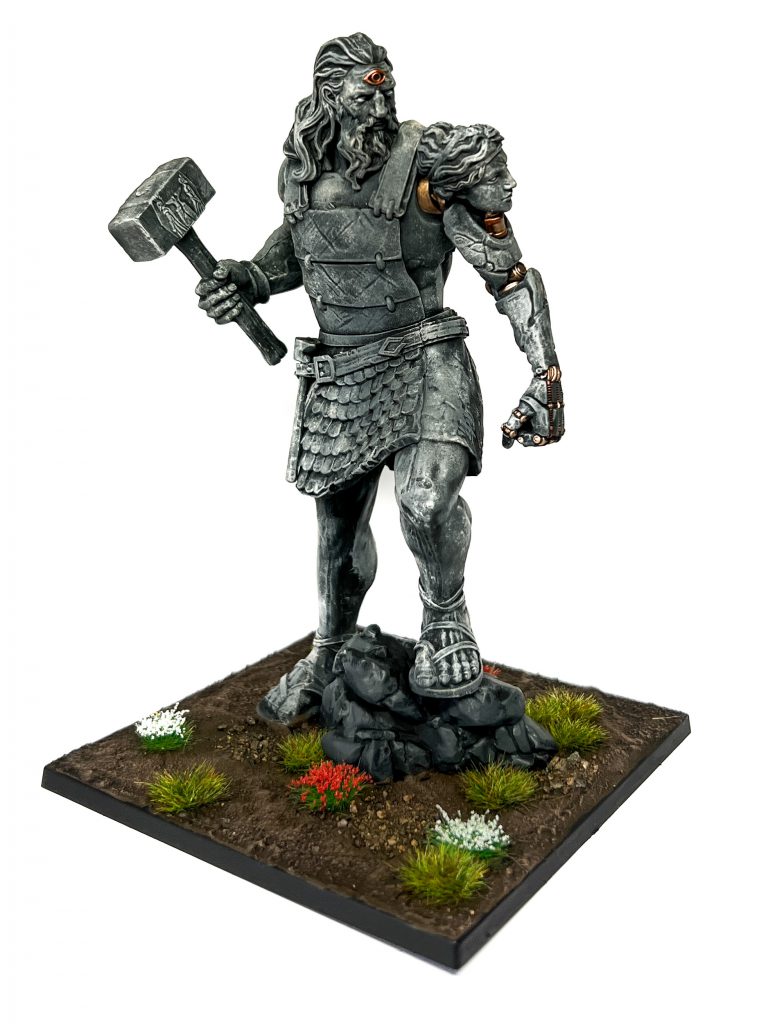
Instead of going for the flesh and blood version that Para Bellum have painted (as is fitting with the lore for these models) I went for a statue look. I’ll be doing my Minotaurs in the same way actually, with an army of very fleshy Hoplites backed up by animated statues, not by sorcerery however but by machinery!
This is achieved by undercoating in black and building up a number of grey and off-white tones across the model with drybrushing first and then stippling. Stippling is simply taking an old brush and essentially stabbing the model with paint so that you get small specks in areas that you want of the colour.
I use primarily Citadel Paints by Games Workshop for my painting, but you can use any mix of greys and off-whites that you like really for this effect.
- Colourforge matt black spray
- Dawnstone grey
- Skavenblight Dinge
- Wraithbone
- Celestra Grey
- Flayed One Flesh
- Rakarth Flesh
- Corax White (eyes only)
- Castellax Bronze
- Sycorax Bronze
- Screaming Bell
- Agrax Earthshade
- Gorthor Brown
- Scale75 Soilworks Spring Soil
- Some small rocks/rubble

Start by priming the model black and giving a heavy drybrush over with Skavenblught Dinge and then a much lighter drybrush of Dawnstone as above. I left the stone that he’s standing on at this stage so that it would be darker/different than the rest of the model.
Then, going from darkest grey/off white to lightest simply stipple across the model as you like to add that aged stone look. The very lightest tones such Rakarth Flesh or Celestra Grey are used very sparingly across the model and just in the highest points suich as around the shoulders or on the risen details on the chest. Play around with this step a bit and get a feel for how you want yours to look! There’s no wrong answer here and no two will look the same, stippling is fun technique that I’ll definitely be making more use of now.
For the metallic parts, silvers wouldn’t have shown up nearly so easily so I chose coppers and bronze tones to shine through the stone. All of the cabling along the back and in the finger section is done in Screaming Bell along with the head crest, The underlying mechanical parts in the arm were base coated with Castellax Bronze before being highlighted in Sycorax Bronze. Once those dry then apply a light wash of Agrax Earthshade, being careful not to spill across onto the stone. If you do then don’t worry and just stipple back over once it’s dried.
I really wanted the eyes to stick out so painted them over with Corax White to be just a bit lighter than any other part of the model.
Scale75 do a series of basing paints and materials called Soilworks that I’ve fallen in hobby-love with because they’re inexpensive (at least here in the UK) for large pots of texture paint that go on easily to give good earth effects. Once that dries I have a mix of rubble/small rocks that I have no idea where I got years ago, but glue on with Mod Podge in small areas just to give some variance of texture across such a large base. Once that’s dried then a quick shade over in agrax earthsade and a drybrush with Gorthor Brown. The tufts are simple grass and flower tufts that you can find from one of many different sellers and add a bit of colour to an otherwise minimalistic paint scheme.
And that’s it! You should end up with something similar to mine, but not exactly! We’ll be covering the rest of the City States and how to paint them in upcoming articles.

Remember too that you can get 10% off from the Para Bellum webstore when you use this link for USA/Canada or this link for EU/rest of world and use code “goonhammer” at checkout. You need to click the right link for your location AND use the code for it to work.
Have any questions or feedback? Drop us a note in the comments below or email us at contact@goonhammer.com.


You must be logged in to post a comment.