After a couple months of playing no Infinity at all, there was another tournament hosted in Shrewsbury, which at 45 minutes drive is as close as events usually get to me. This was another ‘Infinite Nerd’ event run by Chris, who runs the Monstrous Makings 3d design and printing service which makes some great conversion bits and gaming aids for Infinity. Some of the models I ended up bringing were proxies he’d printed for me. As before this was hosted at the Nerdy Coffee Co, which meant ready refreshments. Unfortunately the venue is in danger of closing (costs are rising for hospitality businesses across the UK, at the same time as cost of living and inflation affect peoples’ spending habits, so it’s pretty difficult running a board games cafe right now) which could endanger future events. Hopefully these regular Infinity tournaments bring them some business. If anyone reading this lives near Shrewsbury, they’ve got a nice place to play board games or wargames, in fact I believe Chris hosts Warmachine as well as Infinity tournaments there.
Table of Contents
The Lists & Mission Analysis
The missions for this event would be Rescue, Looting and Sabotaging, and Quadrant Control. Bit of a difficult set, in the view of some of my friends. Personally I don’t think L&S is that bad. [Note: this changed a bit after this event, I now have some thoughts] Rescue is an absolute pig of a mission to try and score highly in, but I don’t think it imposes that many unique list building restrictions either. It just really wants mobility and Orders, which are both universally good things anyway. Now I knew I would be using vanilla Nomads, because those were the most recent units I’d finished painting, and I wanted to get them onto the table. I’d also taken Imperial Service and Military Orders to my last 3 tournaments, and Corregidor to the one before that, so I was ready to rotate once again. I have pondered in the last year or so whether I would be a more successful tourney player if I adopted the scientific method used by some of the best players I know – choose a faction, ruthlessly practice with one list archetype, tweaking as necessary, until you get it right. Play with that list constantly, mission changes to the list are minimal, swap one or two units at a time but keep the overall structure. That seems to yield results for the best players. They get better and better at leveraging their list’s strengths. But it’s just not for me, I crave the variety of rewriting for the mission set every time.
Looking at vanilla Nomads’ tools, I thought that a lot of the best anti-materiel close combat weapons which would carry me through L&S were inappropriate for Rescue, since Impetuous units can’t Civevac. I am also a big fan of Nomads’ Infiltrating and Forward Deployment options, and Rescue has an exclusion zone. Rescue has a slight incentive for Specialists (they can enter a Civevac state with two civilians) while the others don’t. Accordingly, I decided to write one list specifically for Rescue.
List 1: Rescue
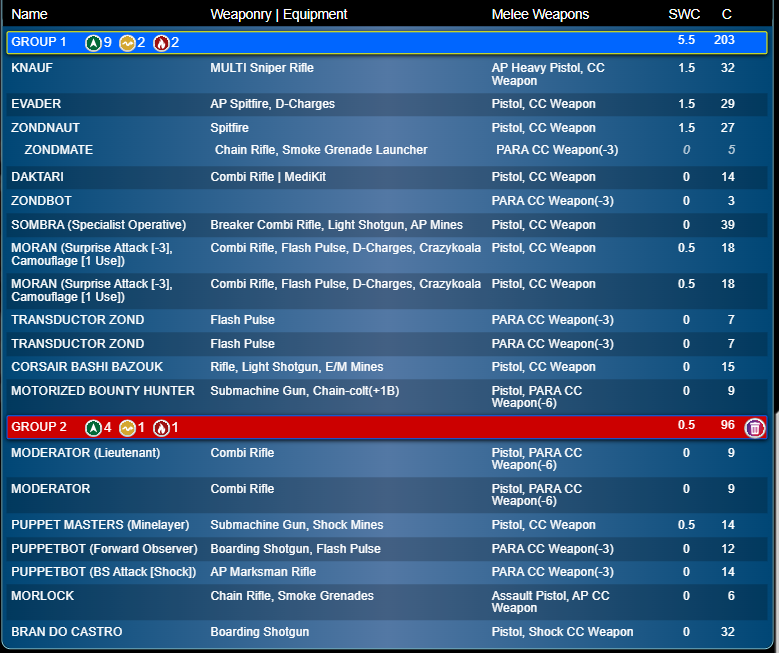
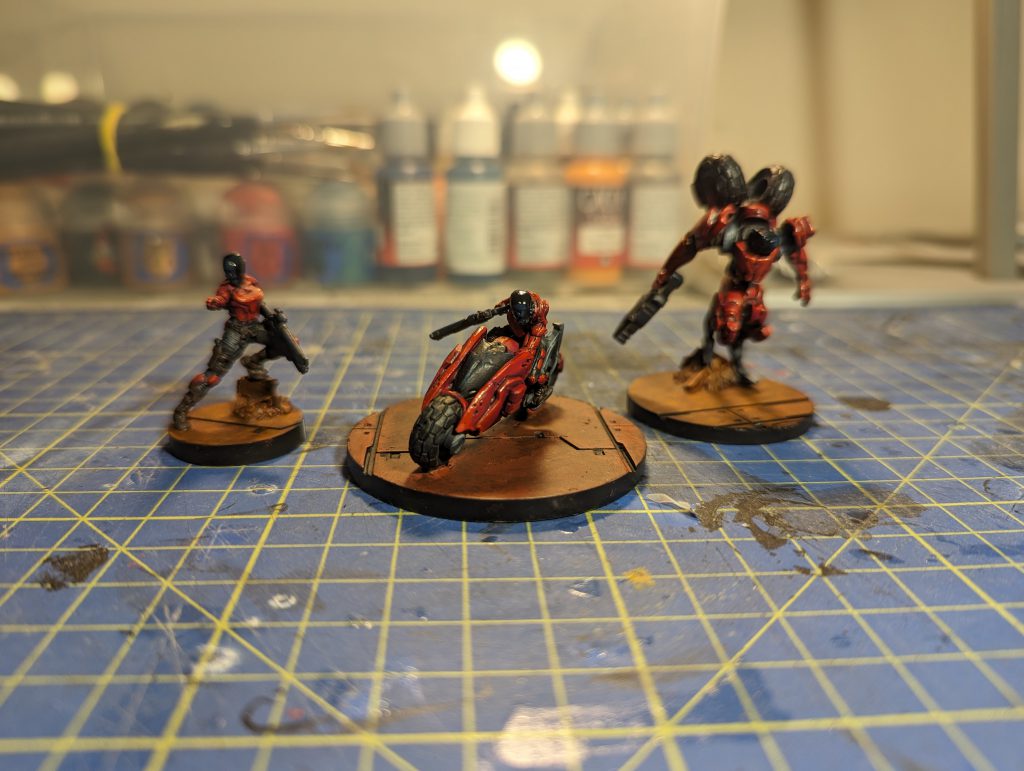
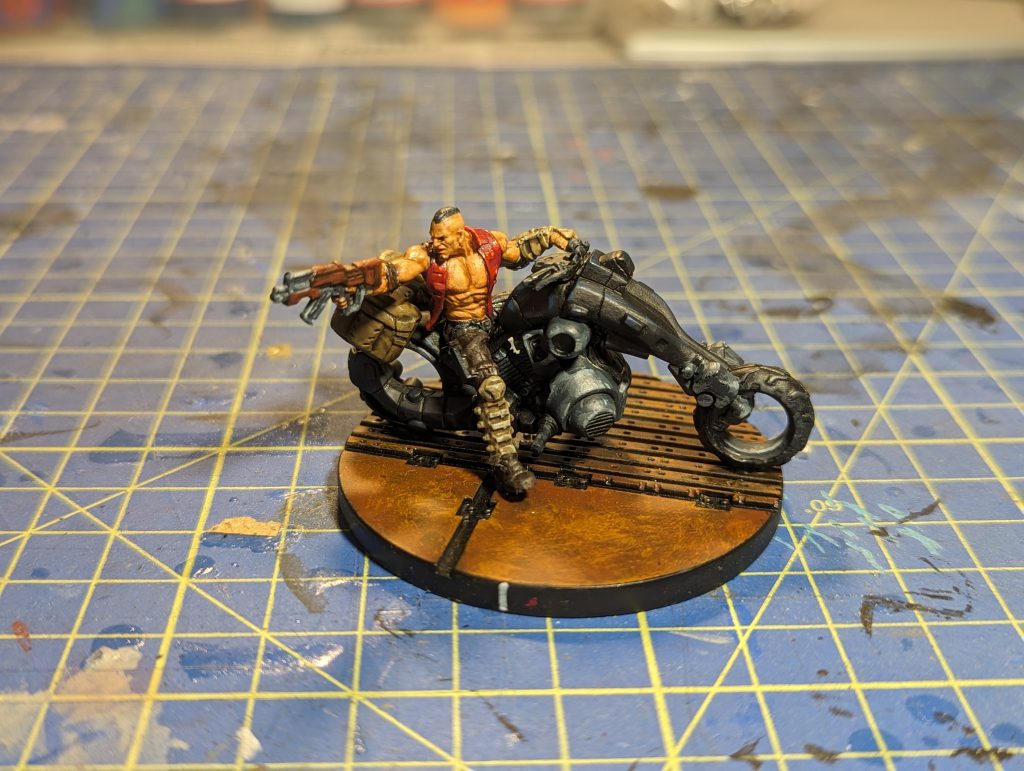
My goal, planning for Rescue, is I want to win big. I’m going to rescue all 4 of those damn hostages if it kills me. Every game I’ve ever played of this Mission has been decided by, at most, 2 civilians being held by the winning player. That’s a natural reflection of both how Order-intensive it is, and the natural strategy of competitive Infinity – you have to devote most of the game to smashing your opponent. There simply isn’t time or Orders to Civevac everyone after that. But I want to try! So my priority was to pick active models that were fast enough to cross the zone and return: motorcycles. Zondnautica and Motorised Bounty Hunter, straight in there. This would also give me an incentive to paint those models, which I ended up finishing two days before the event. Next I looked at things which could at least deploy on the edge of the Exclusion zone, and had the Terrain Total or Zero-G rules, which as a mission bonus, gives +1″ Movement on the first short skill of an Order. That seems minor but it adds up, and a lot of the time, depending on routes around terrain, it reduces by 1 the number of Orders the model takes to travel from the civilians’ starting location, back to your Dead Zone or Deployment Zone. This led to a Sombra breaker rifle Specialist and a pair of camouflage variant Moran Masai – even with an exclusion zone, they are too good to pass up. In a similar role I picked an EVAder AP spitfire. Not a normal choice for an SWC weapon carrier in vanilla Nomads, but I thought his ability to move 5-4, with Climbing Plus, and to potentially Civevac two civilians (due to being a Specialist Operative) after fighting into position could be handy. More importantly, I finished painting the model last month. My final definite mission pick was Bran do Castro. He got a major glow-up with the Bakunin rework, and I wanted to take him for a spin. Again, he’s a Specialist with 7-2 movement in this mission, and critically, if he passes his forward Infiltration roll he can deploy right next to the civilians. I figure that a good alternative to his normal alpha strike on weak targets, will be just grabbing two hostages and running back.
How to work this unformed melange into a list? I put most of the aforementioned active models into Group 1, then decided Bran would be the main active piece in Group 2, to keep his shenanigans resourced separately. I took the normal pair of cheap Transductor Zonds as filler and pair of Moderators as Lt and decoy, then I thought about what I was missing: defence and long ranged firepower. I picked Knauf as a ranged gunfighter. I figured he had less overlap with my Zondnautica and EVAder spitfires than an HMG, and he’s cheap. Looking at him and the rest of the list, I decided to add in a Daktari and Zondbot – I have a lot of mission critical 1W models here. That just left room to squeeze in a Puppetactica minelayer with two bots, who can’t Civevac but will make good speed bumps and secondary attack models, and a Morlock for smoke and a close combat solution.
I consider this something of a ‘for funsies’ list. I should probably build a better rounded offensive list, and am likely over-focussed on what could do the mission, not how the overall structure supports itself. Critically I have no hacking which limits reactive defence against heavy units (this is why I made the Moran’s camouflaged, rather than Repeaters). The weakest point is firepower >24″, which rests solely on Knauf, whereas for a tournament, when tables can be very open, I generally want 2-3 long range pieces. But if I go first, I at least have camouflage, including Bran, for anything Knauf can’t take head-on, and smoke. If I go second I have deployable weapons and the disposable Puppetbots covering my DZ and will just try to weather the storm.
The list also accomplished its secondary goal before dice was rolled – I had the motivation to paint the Zondnautica, Sombra and Motorised Bounty Hunter in the week before the event!
List 2: Looting & Sabotaging, Quadrant Control
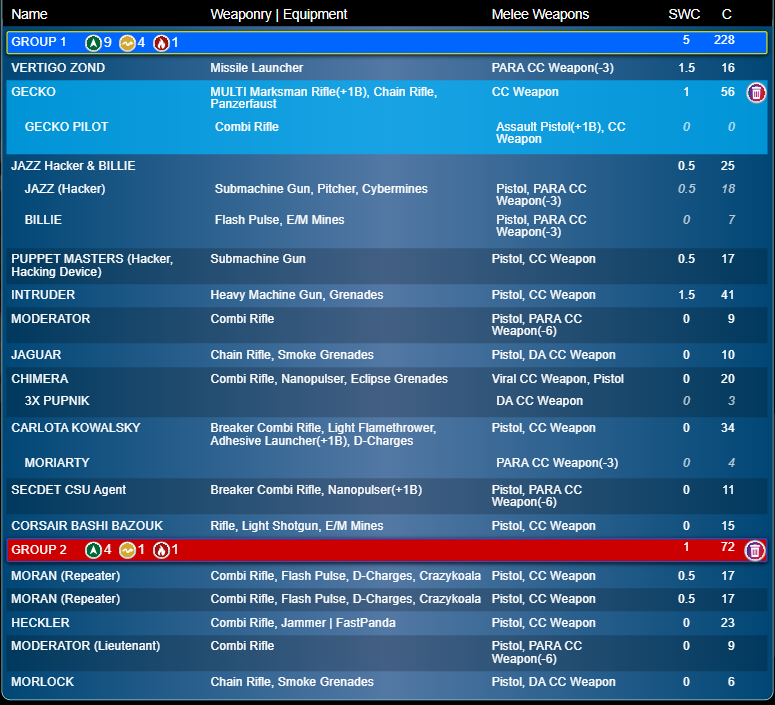
I kind of figured this would be my more serious, conventional list, and as well as the two Missions, I’d consider taking it against any hardcore opponent or bad match-up I faced. In other words, I sold my soul and took the core Nomad set-up of Jazz & Billie, 2 Morans, a Fast Panda Heckler and the Vertigo guided missile bot. I can’t not do it. I never claimed to be a good man. The actual Mission picks were a bit more interesting. I threw in the Uberfallkommando (another newly painted piece) and two Morlocks with their little-seen DA CCW profile, to give me options to attack the enemy objective and guard my own in L&S, as well as apply close quarters pressure to the enemy, which would be useful in Quadrant Control should the enemy try and claim quadrants in my table half. I initially planned to include a Stempler Zond, partly because Sensor can be useful in Quadrant Control, where some match-ups want to fill the midfield with Camouflage, and partly just because its Tactical Awareness under the ITS14 rules makes it a great deal. Critically I took Carlota Kowalsky, who I think is excellent in both missions – in L&S she can arrive 12″ away from the objective with D-charges, and in Quadrant Control she’s 30 pts in any zone and BS13 shots in your opponent’s back. I had a cunning plan to disguise her presence in L&S by deploying the Corsair Bashi-Bazouk on the table as another irregular model, making it appear as if I had the full 15 on the table. Hopefully this would misdirect my opponent into expecting a normal Corsair parachute attack, and not the Deployment Zone-entering abilities of Carlota.
For firepower, I decided on a Gecko and an Intruder. I think many Nomad players are defaulting to the Gator or Szalamandra these days. The latter plays well into Nomads’ strengths – it’s pure ranged firepower, the HRMC can level most ARO pieces, including the option to engage over 32″ at a relative advantage, and it stays safe behind a midfield repeater net. The former would have been my pick for the missions, as it is better equipped to attack and operate in the midfield. But for this event, I wanted the smoke shooting and Camouflage-defeating abilities of the Intruder. Possibly I was traumatised by my previous losses to Steel Phalanx. Given that, I couldn’t really afford a main battle TAG and fortuitously I did recently finish painting the Gecko! I rationalised that these would give me two fairly chunky (in terms of points) pieces to help take control of quadrants. I also thought Carlota could support the Gecko – I’ve learned the hard way that you should find the points for her Servant remote, as with any Parachutist doctor/engineer. It saves you having to decide between an attack run and receiving an ally.
All this left me a bit short of points, so my Puppetactica ended up being solely a Counterintelligence operative, without bots, and concerningly I only had room for 1 moderator Lt, with no decoy. I considered relying on positioning, my Corsair Bash Bazouk under Holomask (in L&S), and in the utmost extremis, against factions with good assassination tools, keep it as my server deployment. I was in the last stages of building the list here – finicking about with the minor pieces to try and find the right compromise. I ended up cutting the Stempler Zond for a decoy Moderator, reasoning that while it is useful, unless I ran into a camouflage-spamming army, it wouldn’t be a critical piece. Whereas an increasing number of armies have good ways to alpha strike Lts, and I find deploying a pair of Lt-candidates in opposite corners is a simple way of redirecting that alpha strike from the Lt, to other vulnerable models. With that in mind, I used the points saved to swap the Puppetmaster into a little-seen hacker variant. That profile normally sucks, because you don’t want to open the whole Puppetactica unit to being disabled by an enemy killer hacker. But here I could get a second hacker, mitigating the risk of Jazz as a single point of failure for the whole missile set-up, without using another trooper slot. I had a few points left to upgrade one of my two Morlocks into a Jaguar – Impetuous smoke is great, but I wanted the Regular Order more.
These are the kind of minor changes you can fuss about indefinitely, and I went back and forth a few times and tried different things. The Puppetmaster got dropped a few times, as Counterintelligence isn’t strictly necessary, at one point I had a Beasthunter minelayer in one of the cheap slots, that sort of thing. Ultimately you have to pick something and go for it. If I had a fixed core list archetype for any of my factions, that’s the kind of little tweak I’d experiment with in each successive game.
Game 1: Rescue
Pre-Game & Deployment
I drew against Ramah Task Force for Rescue, and my opponent won the roll, choosing to keep deployment, so I decided on taking the first turn. There’s a very slight potential second turn advantage in Rescue’s scoring, but not enough to make up for the chance to seize the initiative and control the game.
The table was somewhat bowl shaped with big building in opposite quarters. I set up broadly with my EVAder on my left, a Moran, Puppetbots, Zondnautica, the other Moran and Morlock across the centre, and the Motorised Bounty Hunter and Sombra on the right. All took positions where they were safe from long range shooting, but could move out quickly. I reasoned they were there to get the hostages, so didn’t worry too much about where my opponent was going to deploy – I held back Knauf and Bran do Castro as my reserves, to deal with any ARO pieces.
My opponent placed a Core team of a Zhayedan sniper, Ghulam HMG & Doctor, Leila Sharif, and a Naffatun downstairs in the big building on his right, where the sniper could see in a narrow band out the hangar doors across the table. He had a flash pulse bot and Hortlak Janissary in the centre, then Trail Mansuri leading a Khawarij doctor and HRL behind a building on his left. I deployed Knauf in the exact spot you’d expect, and where I’d telegraphed him with the Daktari’s Zondbot – right on top of the highest point in my DZ! He should be able to outrange anyone in Tarik’s team who tried to attack, and pick off the flash pulse bot.
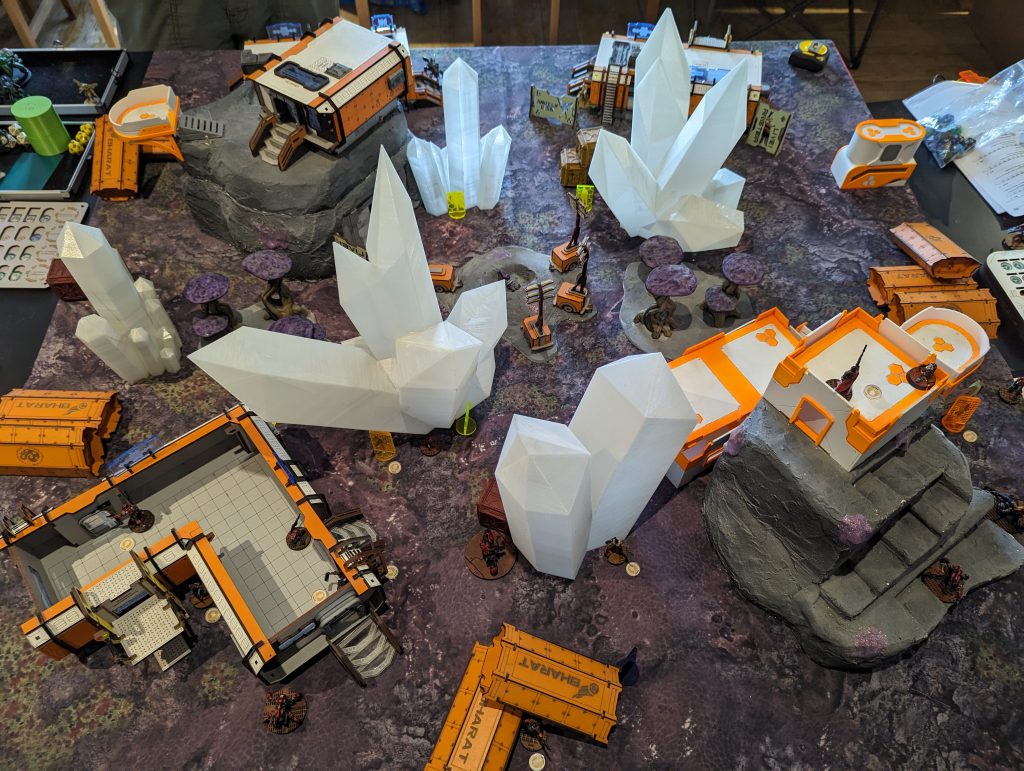
I decided to roll for Bran’s Infiltration into the narrow strip between the Exclusion Zone and the enemy DZ, right by his Core team – I could get the Zhayedan sniper and Ghulam HMG bunched up in a hallway. Fortunately, I passed my roll (16 or less). My opponent had a Hidden Deployment as his reserve, and we were off!
Round 1
I believe my opponent decided not to dock me an Order, due to Counterintelligence – fine with me! My Morlock didn’t Impetuous move because he would have crossed the Zhayedan sniper’s Loaf and been shot, and I chose for both motorcycle units to not be Impetuous, so that they were eligible to CivEvac. My first priority was definitely Bran do Castro, I thought with a tiny bit of luck I could cripple my opponent’s Core team and get out with the civilian that was in that big building.
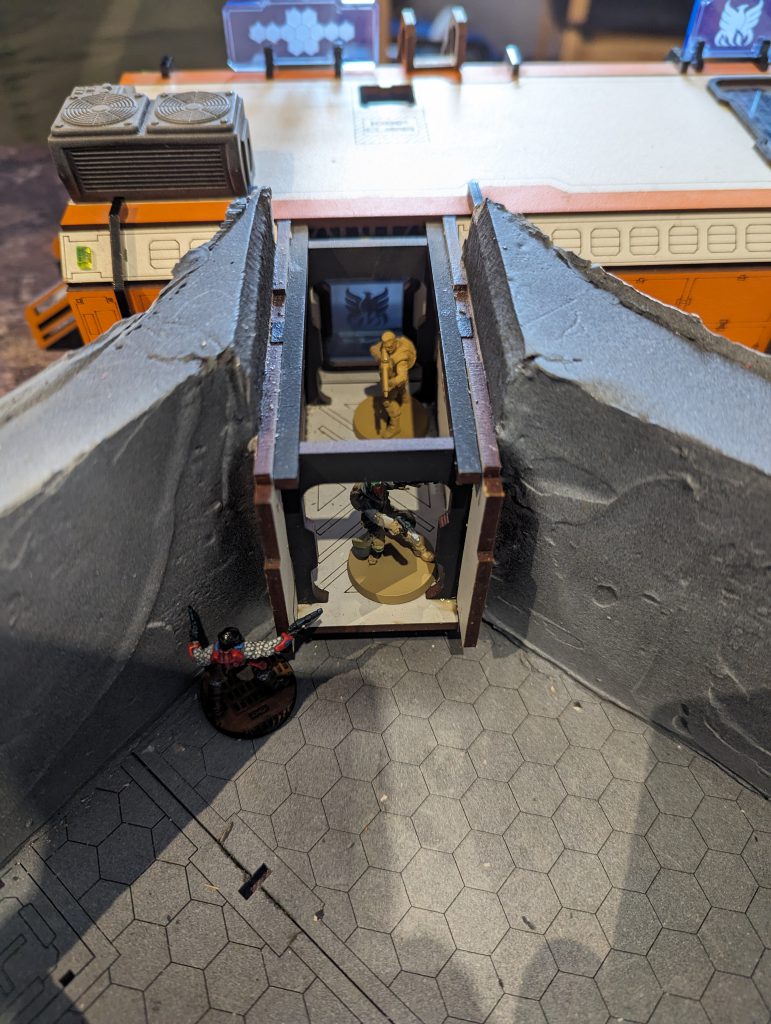
Bran was able to slice the pie to see only the Zhayedan, but lay his shotgun template across the Ghulam HMG as well. My opponent failed his Dodge with the Zhayedan and went down Unconscious, while the Ghulam passed and moved back, but couldn’t get out of the hallway. I was then able to cross the hallway with Bran, getting AROs from the Ghulam HMG and Ghulam doctor, who both chose to shoot in an attempt to stop the rampage. I laid the template again, my opponent was unlucky and missed all his shots, or I might have had to make one ARM roll agains the doctor’s shotgun, but in any case Bran survived unscathed and they went down, while the Zhayedan (who has Regeneration) thankfully died. I considered just sending Bran in to kill the other two, but the Naffatun’s flamethrower, and my goal to actually do the mission objectives, gave me pause, and I CivEvaced the hostage without trouble and moved back into a somewhat sheltered position outside the building (Bran is 7-2 move in this mission!)
So far so good, having Bran in the second pool had worked very well. I went to activate Knauf to pick off that flash pulse bot, and my opponent revealed his Tuareg sniper in ARO.
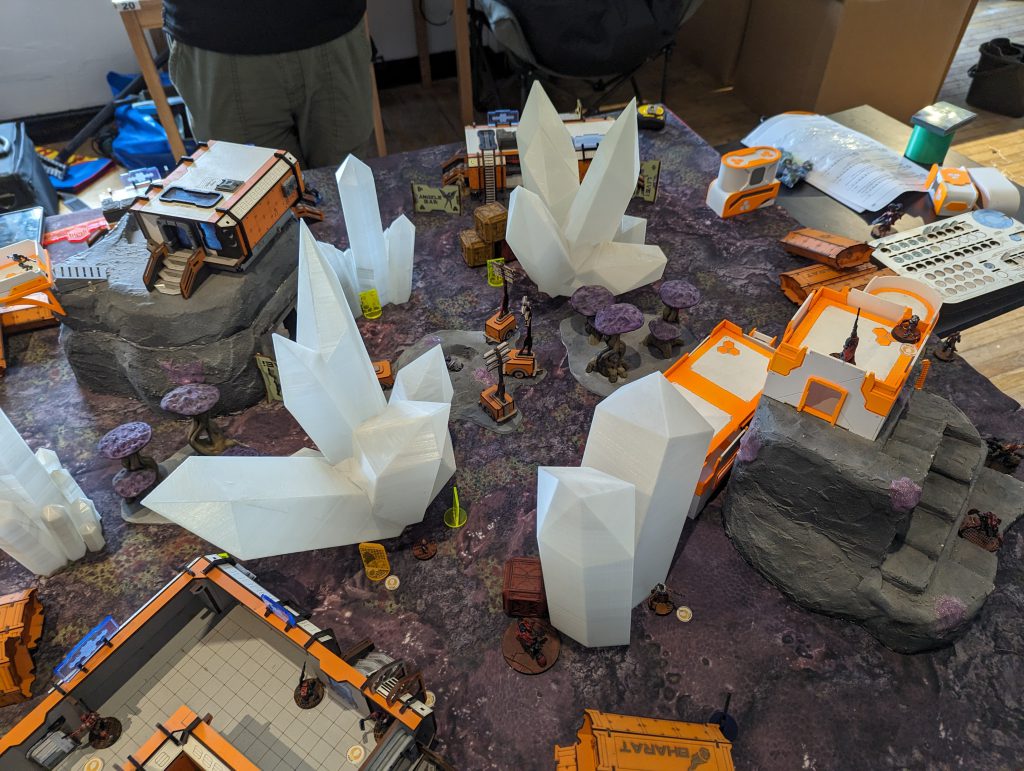
Now it’s easy to criticise in hindsight, but I’m sure this was a mistake. It would have been an OK fight in my opponent’s Active Turn, since the Tuareg would have B2 and Surprise Attack. But Knauf is an Active Turn monster with B3, and has higher BS than the Tuareg, while their Mimetism equals out due to his MSV1. I ignored the flash pulse bot, which was aiming for 4s to hit anyway, to put all my Burst against the Tuareg. I think we rolled equal dice the first time and had to go again, but the result was the Tuareg died and Knauf actually did get stunned and forced to drop prone by the flash pulse.
With almost all my main Order pool left, I looked for an attack option, and settled on the Sombra over on my right. It also has 5-4 Mov in this scenario and was able to cross into the enemy DZ with 2 Orders, while the flash pulse bot failed to discover it crossing open ground. I certainly didn’t want to reveal from Camo to take a shot outside 16″ at a 7pt, Mimetism-3 model in cover! With the third Order the Sombra was able to engage Tarik Mansuri at close range around the corner of a building. He wisely delayed and then chose to throw grenades in ARO, ending up at 2 dice on 10s vs my 3x 12s with a breaker combi rifle. Fortunately I won the roll and dealt 1W to the super-soldier. I had broken LoF during the Order, so next I snuck around prone to just outside LoF, and laid an AP mine where it would cover Tarik. Fortunately for me, he failed his dodge to reposition. One more FtF roll with the breaker combi – I think he chose grenades again rather than dodging, but I’m not sure – and Tarik went down Unconscious. I had a few Orders left and my opponent had his Khawarij Doctor standing by. I went for him as well and was fairly lucky to knock him out in one FtF.
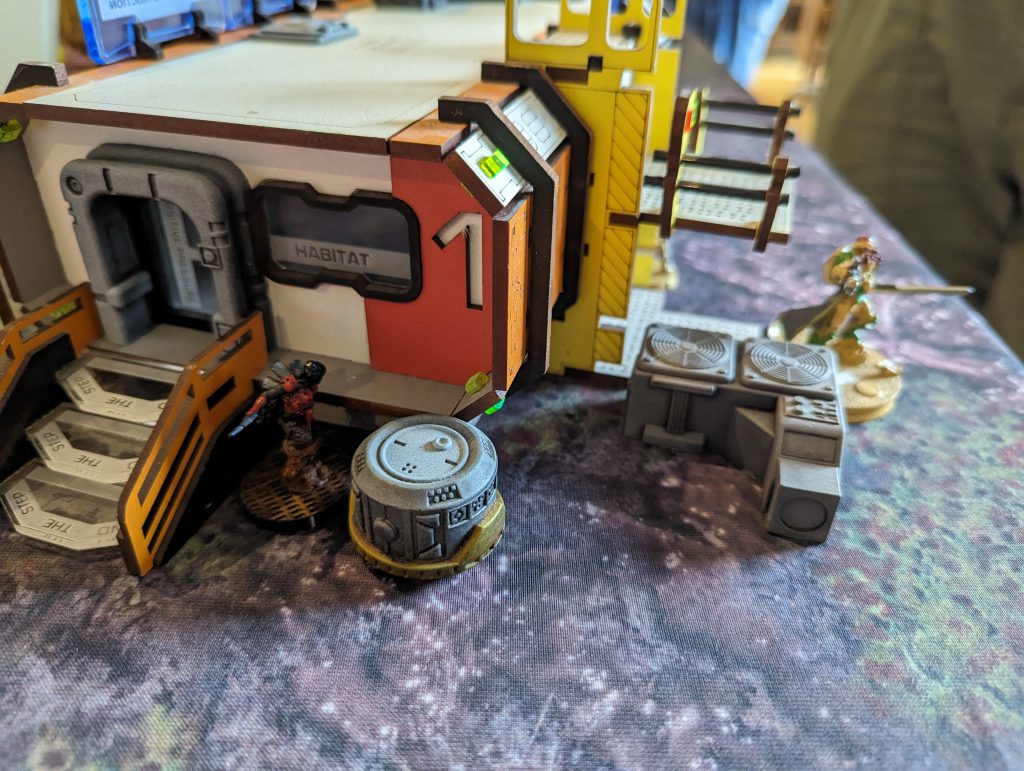
I ended by ensuring Bran was pulled back into cover, while I actually stood up and dodged with a stunned Knauf, in order to have him standing in ARO on my turn.
That was a really rough alpha strike for my opponent to be honest. He lost Tarik and the Khawarij Doctor on one flank, and his Zhayedan sniper, Ghulam HMG and Ghulam Doctor on the other, plus his Tuareg sniper. Tarik had been the Lt, but luckily his Hortlak Janissary was a Chain of Command model, so he wasn’t in Loss.
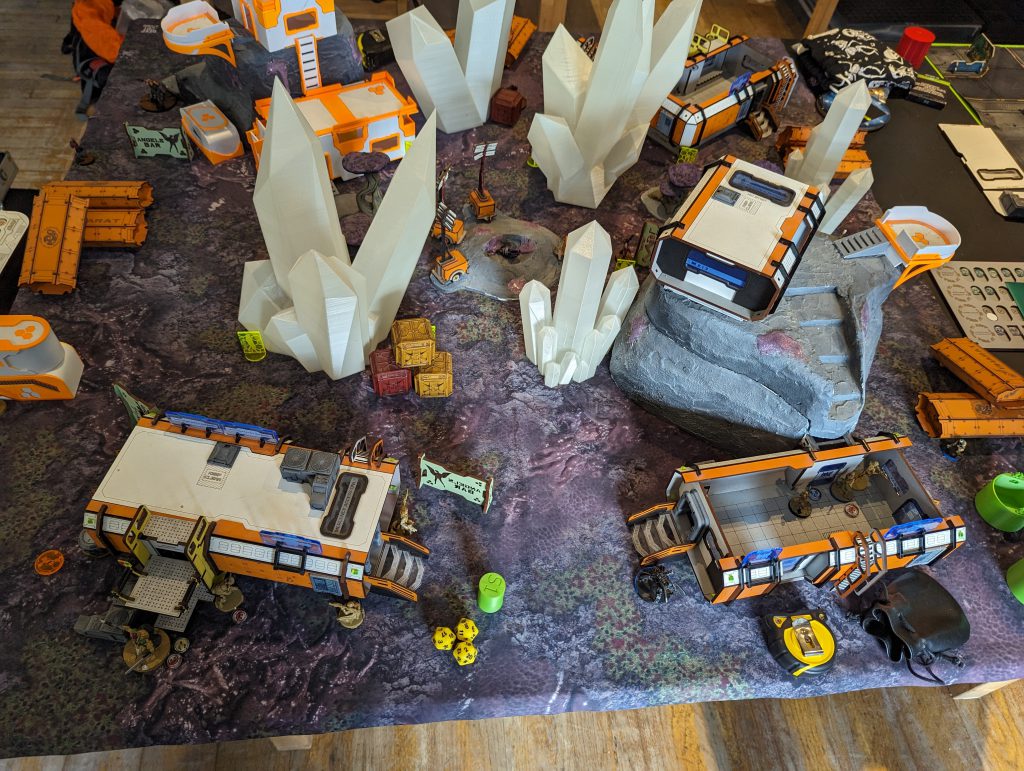
My opponent started with a nice bold play, bringing his Bashi Bazouk Corsair in on my left flank, right by my DZ. The nearest model was my EVAder, who failed dodges at -3 a couple times while the Corsair moved, but it turned out the pirate had another target in mind – he was gunning for Bran, sheltering outside a building with a civilian in tow. I managed to survive the first FtF roll, and while I did my EVAder pulled himself together and dodged to be able to present a second ARO to the Corsair. That left him in a bit of a fix and unlikely to down his target – it’s incredibly useful to Nomads that Bran has NWI now.
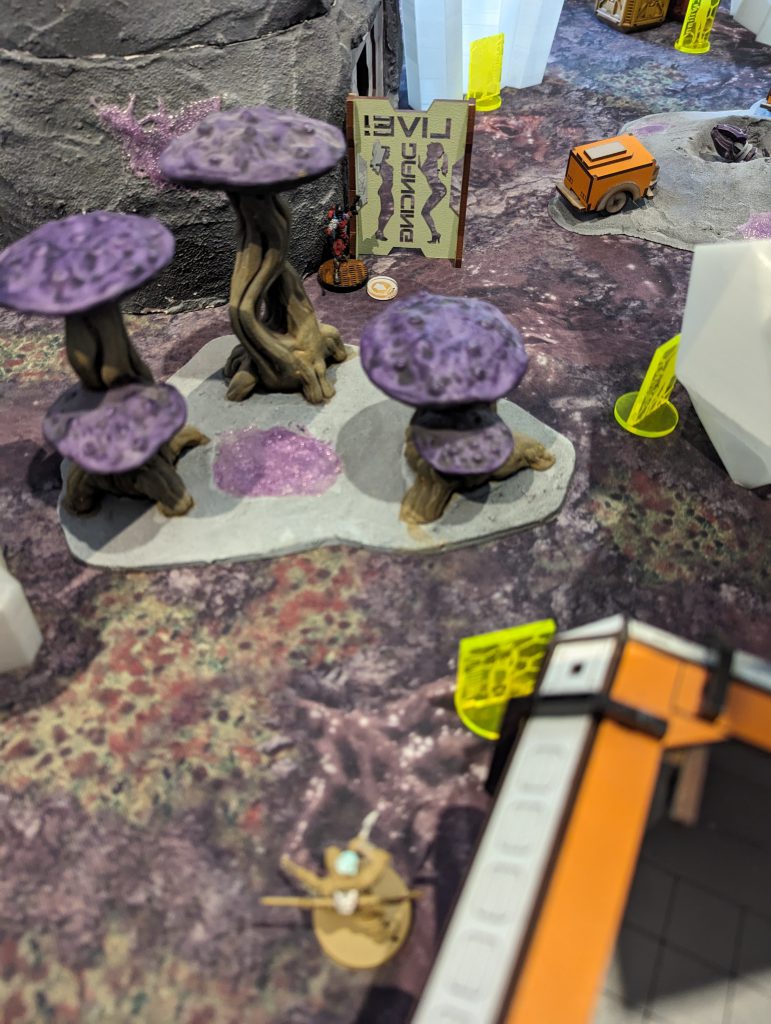
So his next option was the surviving Khawarij Heavy Rocket Launcher. This bio-engineered super-soldier promptly engaged Knauf from outside 32″, a very bad FtF, but survived, and was then able to move within 32″, so firing on two 10s against a 13, and burnt Knauf to a crisp. I think he took 4 wounds from continuous damage. Oof. The Khawarij then super jumped onto a roof in his DZ to see my EVAder, but again it was outside 32″ and my dodge saved me. That ran out my opponent’s Orders and he passed the turn. Going hard in my turn first definitely took the pressure off me there.
Round 2
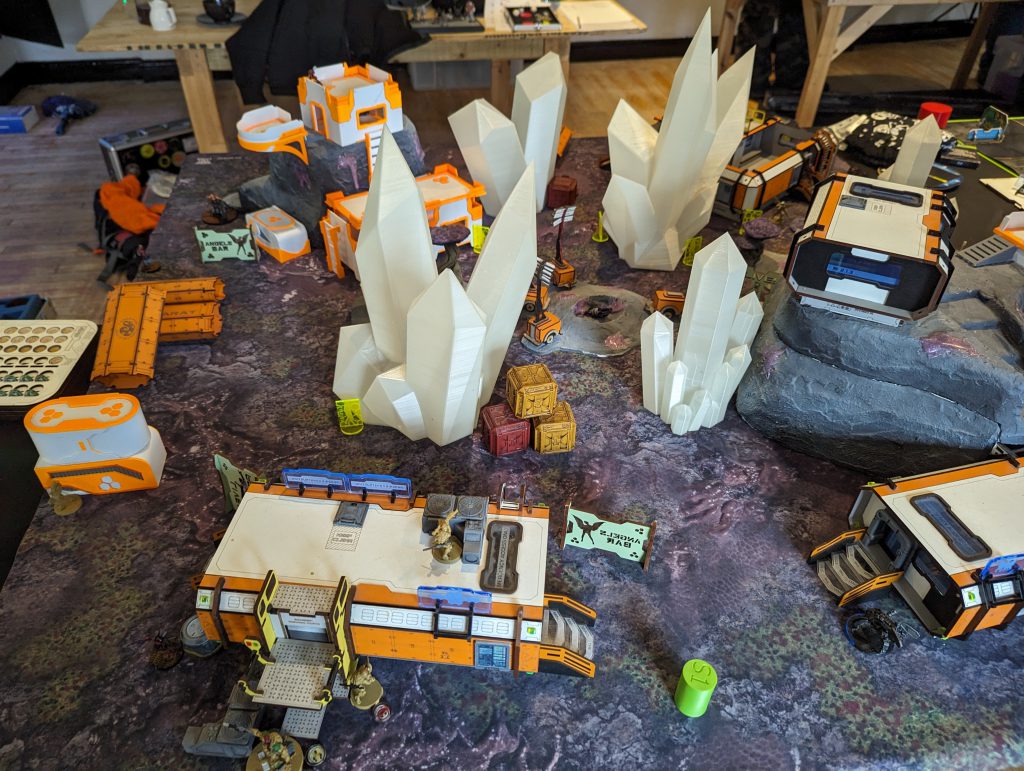
I knew my opponent was actually perilously close to retreat, but figured I could kill that Khawarij HRL without triggering it – and in any case I had to, he was watching most of the table! Fortunately my Sombra was lurking right by his building. I used Climbing Plus, popped up behind him (but inside ZoC) and out three breaker rounds in his back … the Khawarij passed all three saves. Fortunately, I tried again, managed to win the FtF roll again, and this time took him down. That let me advance a Moran toward the midfield, engaging and gunning down his Corsair before laying a Crazy Koala down to impede the enemy. With the way clear and secured, I ran Bran back to my deployment zone, and used the Motorised Bounty Hunter to run up, CivEvac the civilian on my right, and return almost to my dead zone, in total cover. Finally I moved the Puppetbots up to ensure AROs across the centre of the table. This left only my central pair of civilians unclaimed, and honestly pretty much locked in the game.
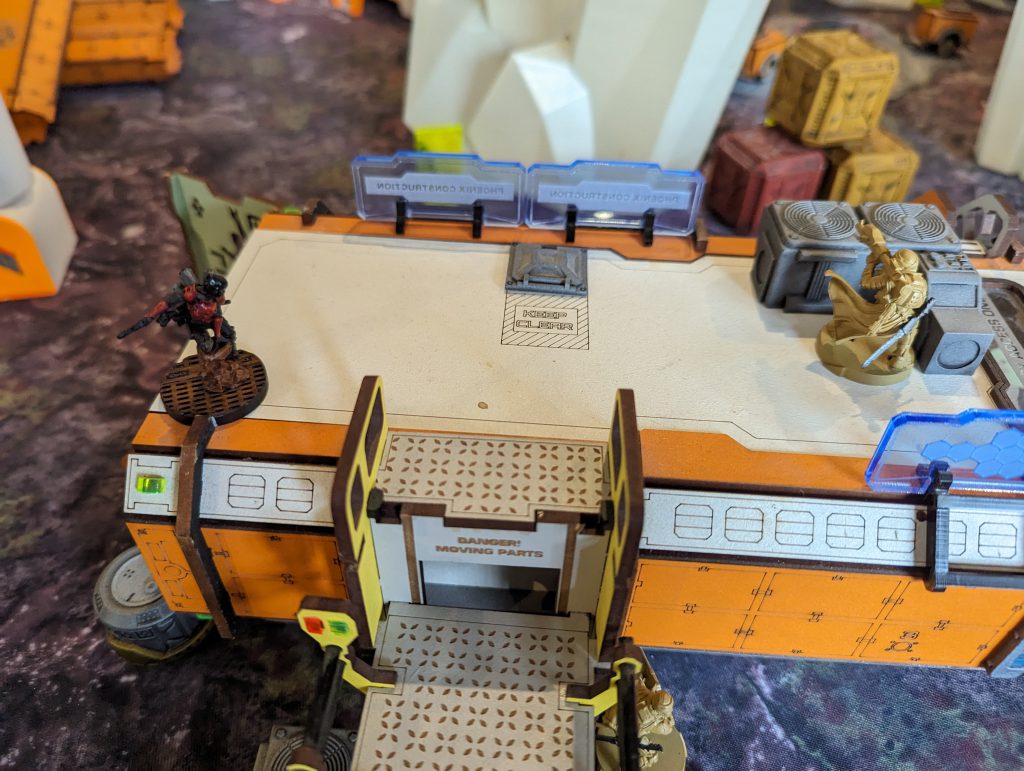
My opponent was down to 5 models remaining (a Najjarun engineer in a corner, his Core of Leila Sharif and a Naffatun, a heroic flash pulse bot, and his Hortlak Janissary, now Lt. He made a valiant push with the Naffatun, dodging the crazy koala and burning to death, in succession, two Puppet Bots while surviving their AROs. However he once again ran out of Orders, and the Naffatun went to ground prone in the centre of the table.
Round 3
First, my Impetuous Morlock dove forward, using smoke to thwart a flash pulse ARO, and I spent his Irregular Order immediately to assault pistol the Naffatun. He flamed away in ARO and both models went down – fine. My priority now was to ensure the two civilians I held were in the right zones, and then to try and secure the other two. Bran was already where he needed to be and the Motorised Bounty Hunter just spent his own Irregular Order and shifted to ensure the civilian was definitely in the dead zone.
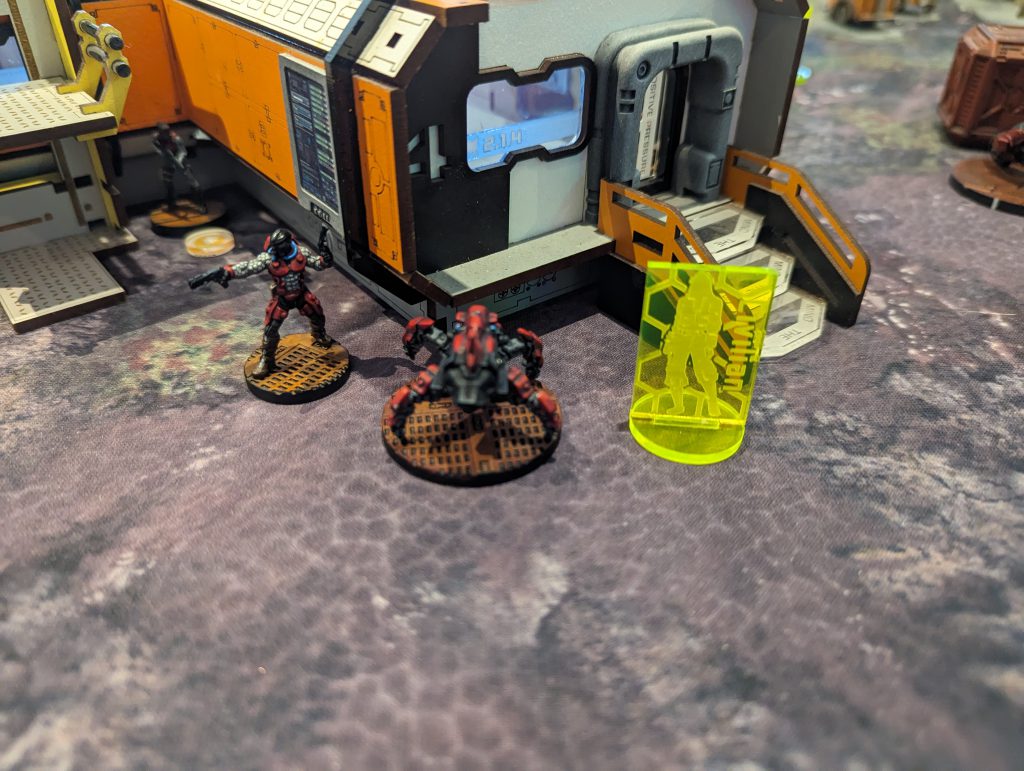
I then used my Zondnautica to move up through the centre, encountering an ARO from Leila Sharif but cutting her down with a B4 spitfire. I then coordinated movement to get the Zondnautica and Moran in the centre toward the remaining civilians, while the Moran on my right went toward the enemy HVT. The left Moran Civevaced one civilian successfully and his right hand counterpart Secured the HVT. This left me with just 2 Orders – if the Zondnautica could beat the flash pulse bot while moving forward, I could get that last civilian. I was rolling 4x 9s against a 13, so reasonably enough I lost and got stunned. That put the civilian out of reach, so I just moved up to guard it, splitting the AI motorcycle into the dismount Zondnaut and Zondmate remote.
My opponent was in Retreat, with just his Hortlak Janissary, Najjarun and flash pulse bot left. He did have two Command Tokens, and the Hortlak has Courage, so he was able to spend all 3 Orders normally on that model. In a gallant effort, he moved once, knocked out the Zondmate while passing his chain rifle ARM roll, and finally had a shot at my Moran Masai holding a hostage – my sloppy positioning, I could and should have put him further into total cover. Fortunately I rolled decently, won the FtF and survived.
Summary
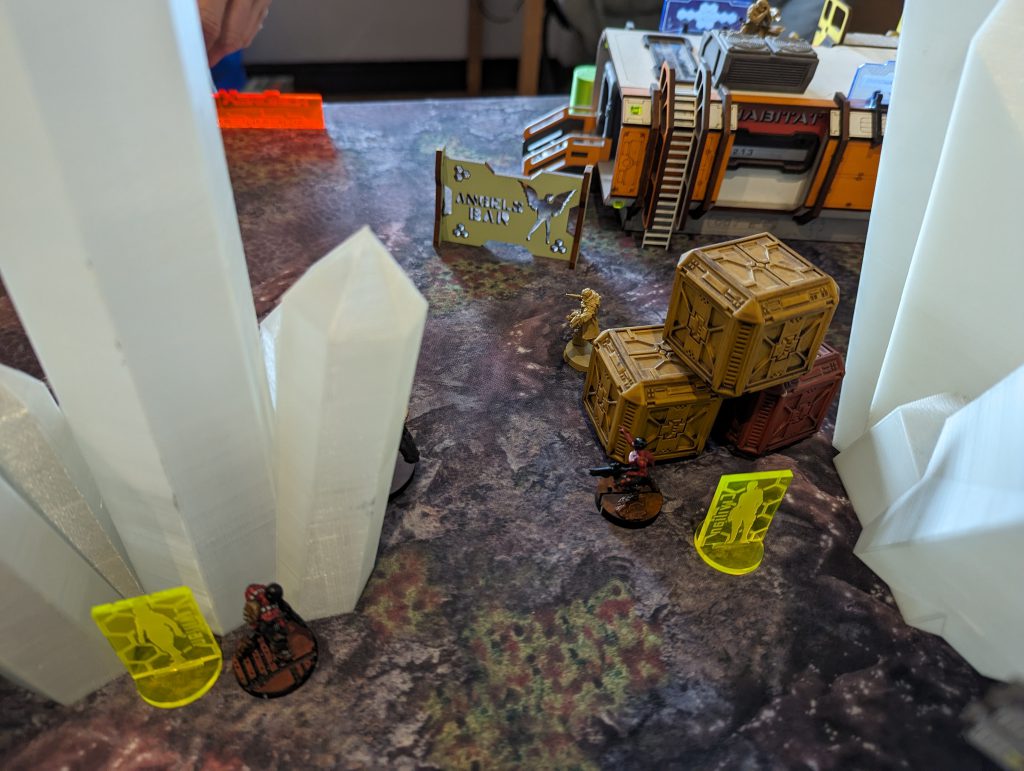
All this meant I held 3 civilians at the end of the game, with one in my DZ and another in the dead zone. With Secure the HVT it was 9-0 to me, with 230VP remaining to my opponent’s 54. Certainly the most successful game of Rescue I’ve ever had! I was very pleased with how my newly painted bikes and Sombra performed. The curse of the newly painted model appeared to have passed us by. Bran do Castro was also an MVP. I was lucky to get his Infiltration roll, and that my opponent didn’t have any important ARO crits or anything like that. Tarik, especially, could have held up the Sombra for longer with a bit of luck, and either saving him, or being able to revive him with the Khawarij Doctor, would have let me opponent get back in the game. As he admitted himself, he should have picked to go first. Yet again, the successful strategy for Infinity appears to be hitting your opponent hard first, then swooping in on the Objectives.
Game 2: Looting & Sabotaging
Pre-Game & Deployment
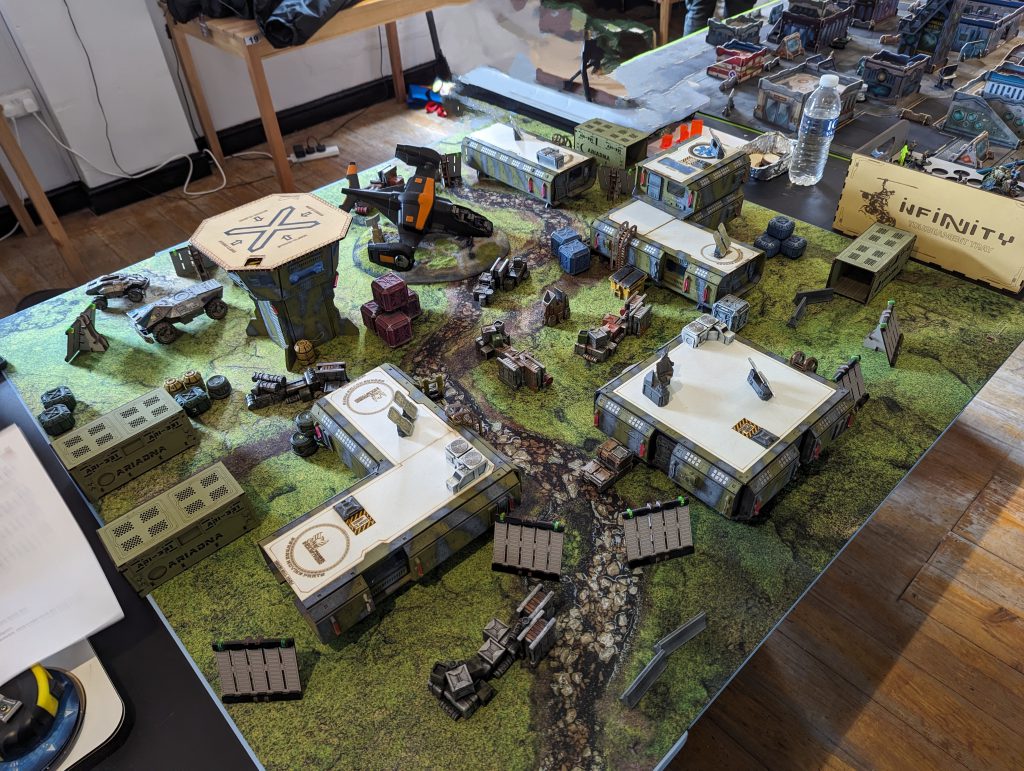
This game would be against Invincible Army, which I think is a rather good match up for Nomads – they are not a very flexible Sectorial, they can shoot, some of their models can fight in melee, but don’t have smoke to get there, and they are not as good as asymmetric options. My opponent won the Lt roll (looking for a 13, so not a Daoying Lt, very unusual) and picked to take the second turn. I thought at the time, and definitely think in retrospect, that this was a bonkers decision. No offence to my opponent, who played well, but I don’t understand why he did it. There’s no particular advantage to going second in L&S. I really should have got his views for this report.
I was therefore able to see his deployment, on the weaker table side, before setting up to attack it. He laid down a missile bot, EVO hacker bot and Rui Shi on his right flank, scattered behind small cover, and a really meaty 5 model Invincibles Core team on his left, stacked up behind a building with a Zuyong HMG provided limited overwatch down my right hand table edge. The other members were Krit Kokram, a Zuyong with Tinbot-6, his Zuyong Lt, and a Shang Ji hacker. So there was some infowar capability there which I would have to deal with, but my initial reaction was that this was a very juicy target for the tools I had in my list, when going first.
I set my Uberfallkommando up on the right to directly attack that Fireteam. The rest of my support troops were scattered across the DZ, trying to avoid a potential Liu Xing coming in hot and being able to attack more than one model. Just for fun I deployed my mission-bonus Corsair in the table as a Warcor, to try and disguise Carlota being in the list. It actually didn’t matter, if my opponent was even counting my models he didn’t ask or noticeably alter his planning. I placed the Heckler on my left, to try and enable options to attack his bots later on, and the Morans in two buildings, one on the left and one on the right – ideal positions, covering most of the board.
My opponent set up a camouflage marker, which had to be a Zhencha, in the central midfield behind some crates. I was able to make a rough assessment of his list and thought he was 30-40 points short, so there was a Liu Xing in reserve after all. I deployed my Intruder on a central roof, where the Morlock could smoke for him, and the Gecko on the right, ready for a combined arms strike with the Uberfallkommando.
Round 1
I immediately focussed on attacking that meaty pure Fireteam head-on. They would never be more vulnerable than when stacked up in his DZ and they were over 60% of the enemy force. To do that within my Order count, I thought the Gecko would be the right piece to beat down his overwatching HMG, and the Uberfallkommando the one to break through and kill the rest in melee. Accordingly, I spent a command token and brought the Gecko over to Group 2, so they could draw on separate Order pools. Very happy with that decision. My opponent spent a token of his own and docked the Gecko’s new group an Order.
I duly sent the Gecko against the Zuyong HMG. He was on 2x 16s against my 4x 13s, but I knew that I had a better chance of passing ARM rolls (needing 7s while he’d need 11s) and more STR. So I was content to brute force it – if things started to go badly, I’d be damaged before getting destroyed, and could reconsider. If I’d tried to work the Uberfallkommando forward with smoke, it would have been either too Order-intensive or too risky. My luck held and the Gecko knocked the Zuyong out on the second FtF roll.
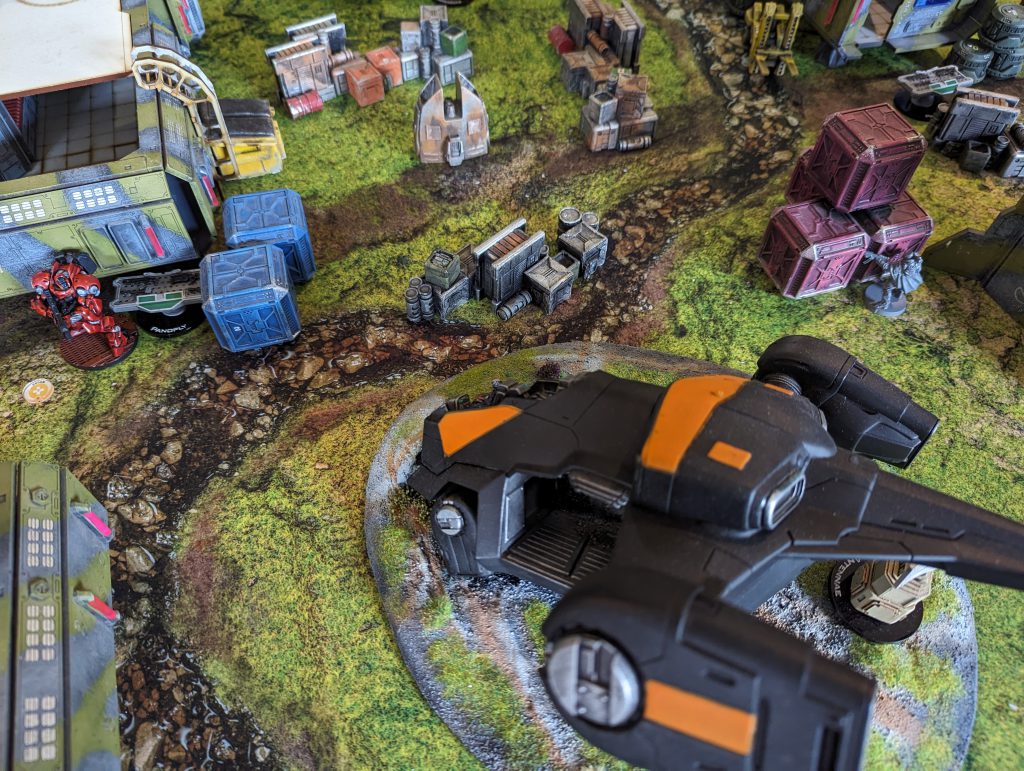
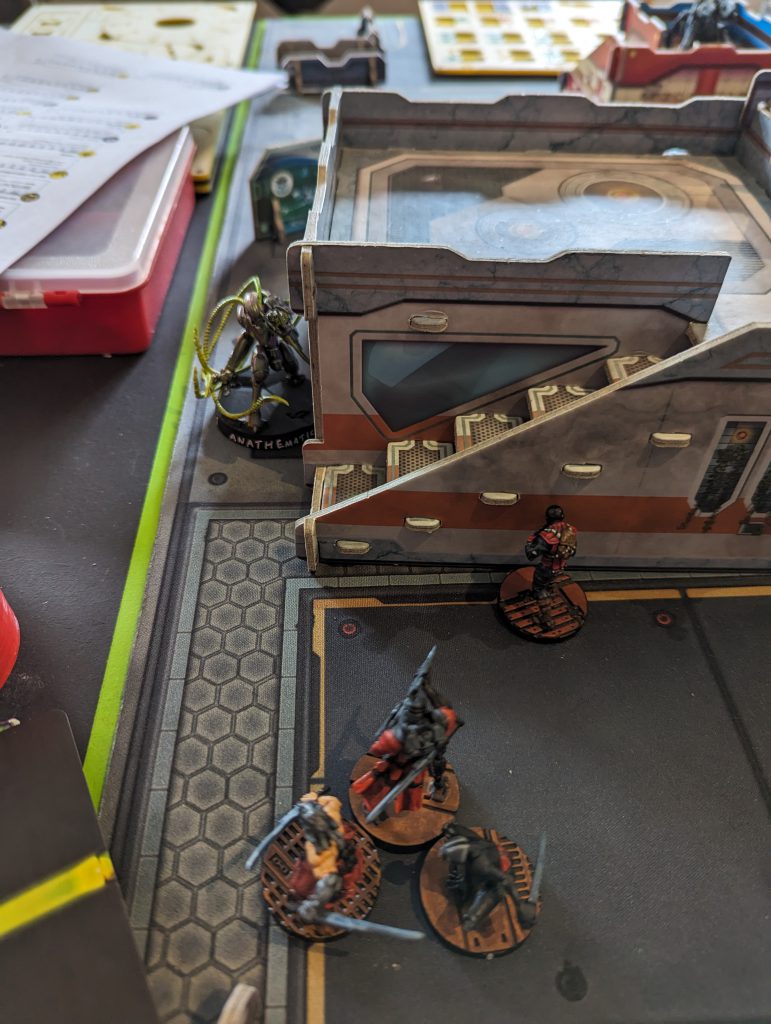
Send in the Pupniks! The Chimera and its pets blitzed forward, in fact I took my Impetuous Order at the start of the turn, even though it meant risking, and losing, one Pupnik, I really had to get up there quickly. Reaching the corner behind which were the 4 Invincibles, I landed Eclipse smoke, then walked into melee. Here my opponent dodged, and either because he couldn’t get his most valuable models out of the smoke to safety, and/or didn’t want to get eaten piecemeal, he dodged some models into combat with Pupniks. See the picture below, there was a real melee, in the fullest sense of the word.
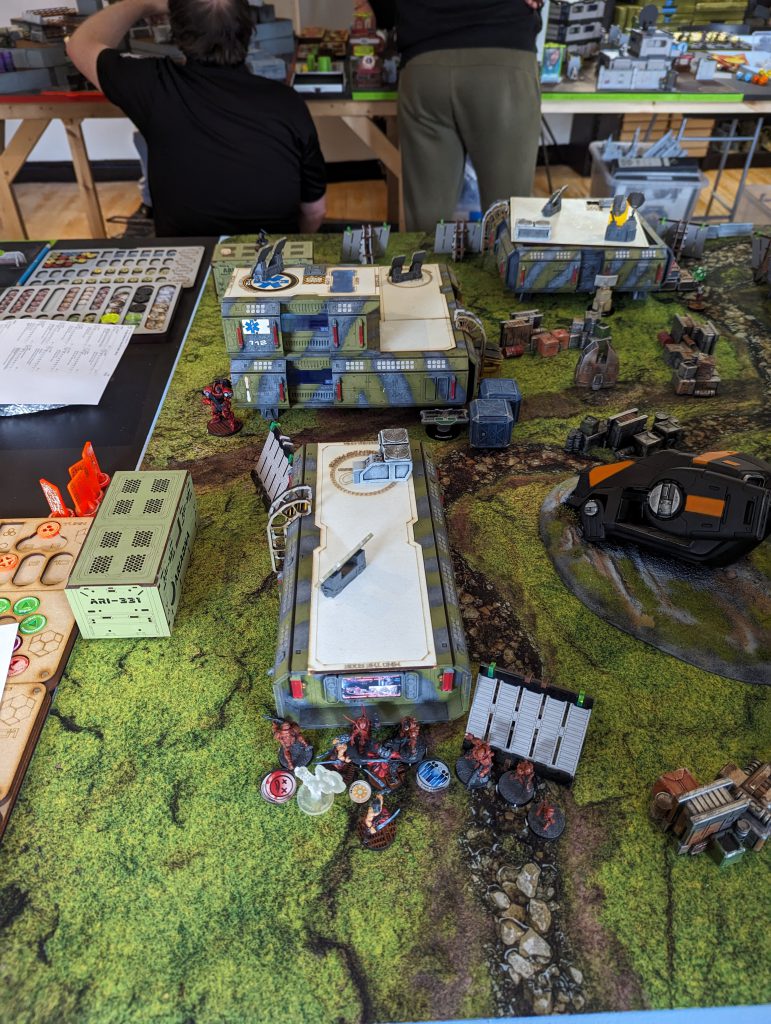
The Chimera and one Pupnik were engaged with Krit Kokram and the Shang Ji hacker. Another Pupnik was engaged in single combat with his Tinbot Zuyong. Now, here, and I said as much to my opponent, I felt rather confident. Frankly, I expected the Chimera to eat the whole team one by one and win the game singlehanded. Might well lose both remaining Pupniks, but who cares? As it turned out, the Chimera killed Krit Kokram, them fought the Shang Ji hacker, with a +1B advantage from still having her Pupnik in contact with the target. 2x 27s vs his one dice on a 16 (I thought). I rolled two very low dice, he rolled a 14 or 15, and the Chimera went down. One of the most painfully unexpected AROs in my experience. Even more gallingly, writing this report, I find Chimeras have CC Attack (-3), so my opponent would have missed and eaten 4BTS saves if I’d known my own army’s rules properly. Big oof.
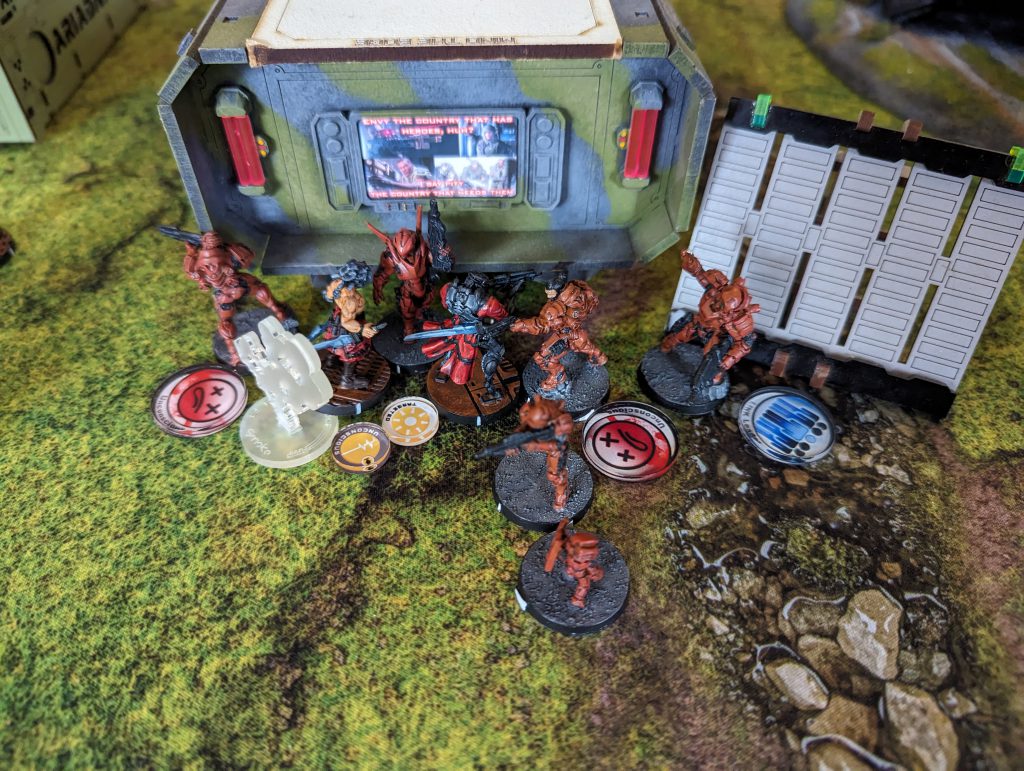
Well, this left me down most of my Orders for the turn, and while it was nice to remove the Zuyong HMG and Krit, my top priority really was that Shang Ji hacker. It is very important in the hacking game to try and close your opponent out entirely in the Active turn. I didn’t want to lose my Burst advantage and have that Shang Ji running around all smug behind his Tinbot Firewall-6! So I reinforced failure and sent my left hand Moran up to get repeater coverage. Here I made a mistake and told my opponent to take a Spotlight ARO on the grounds his Sixth Sense from the Core Fireteam let him ignore the Moran’s Stealth. In fact there were only 3 members left, so no Sixth Sense. Didn’t matter as he failed the roll anyway. I then used Jazz to Oblivion the Shang Ji, despite the Firewall, and he ARO’d the same program. I was on 2x 8s and he was on a 10, as we were both restricted by Firewalls, albeit -6 for me. This wasn’t a very good chance or a very well put together attack. I must have been tilting from losing the Chimera. In retrospect I could have just moved the Gecko away and shoot cross-board at his Remotes, hopefully leaving my opponent’s Fireteam too short of Orders to get me anyway. I he had tried Oblivion through my Repeaters it would have been an even worse attack, since I had two hackers, and he didn’t have any great way to extend his own repeater net.
Anyway, fortune favoured the stupid in this case, and Jazz managed to Isolate the Shang Ji. I rather pointlessly stood up my Intruder to remove the enemy Warcor, and foolishly left him standing there on the roof. I made another silly error, and instead of going prone again or re-camouflaging, I converted a last Irregular Order to put my Gecko in suppression fire, where he’d be able to resist any advance down my right flank from the Fireteam. I completely forgot that the mission gives a free Corsair Bashi-Bazouk, and indeed that I knew my opponent had a Liu Xing.
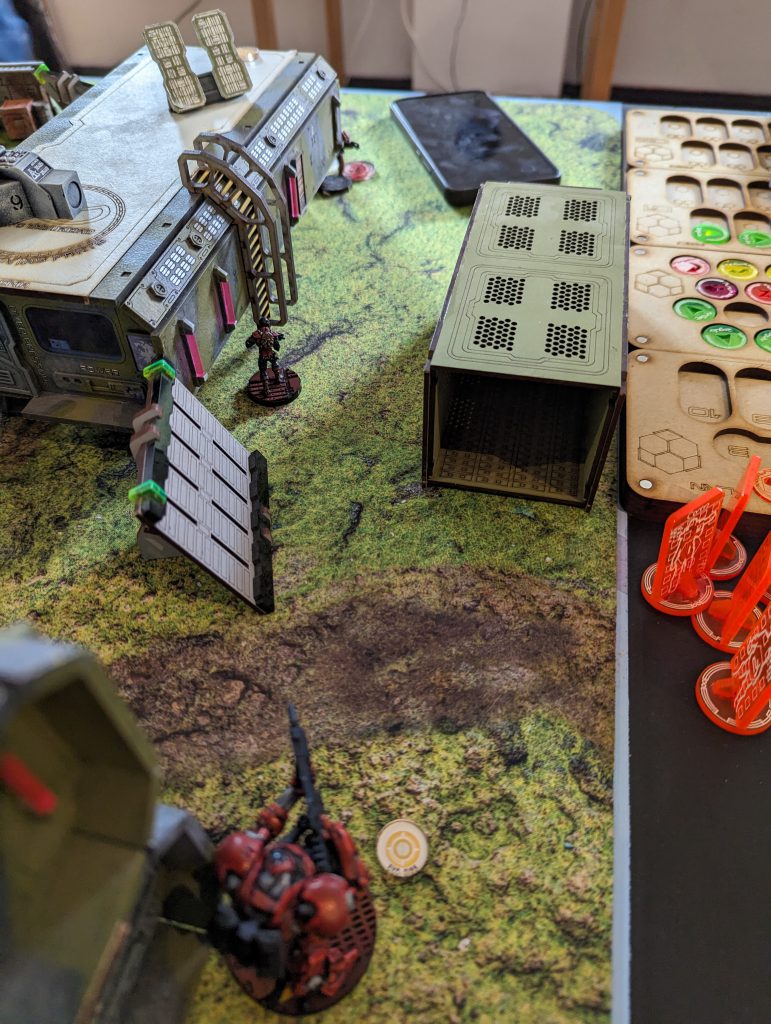
The Invincible Army was still on the back foot starting their first turn, with two important models down and one Isolated. But of course my opponent’s first move was to walk his Corsair on behind my Gecko, forcing me to try (and fail) to dodge to gain LoF, so I broke suppression. Wasted that command token for nothing! A further Order saw the Corsair drop an E/M mine covering the TAG, while this time it did dodge and gain LoF to try and at least impede further shenanigans. Now my opponent acted efficiently, using his Isolated Shang Ji’s one Order. That model gets Super-jump in this mission and it popped over a building, provoking AROs from both a Moran Masai, the Gecko, and both my hackers. The Shang Ji got Targeted, killed the Moran, and while the Gecko passed its ARM rolls, it did get Immobilised and Isolated by the E/M mine. Now here I played up the impact a bit, bemoaning my stupidity in leaving the Gecko so vulnerable to the Corsair attack. To some extent I was sincere – it was a genuine, unforced error – but I also didn’t want my opponent to guess that I had Carlota in reserve and could fairly reliably undo the damage.
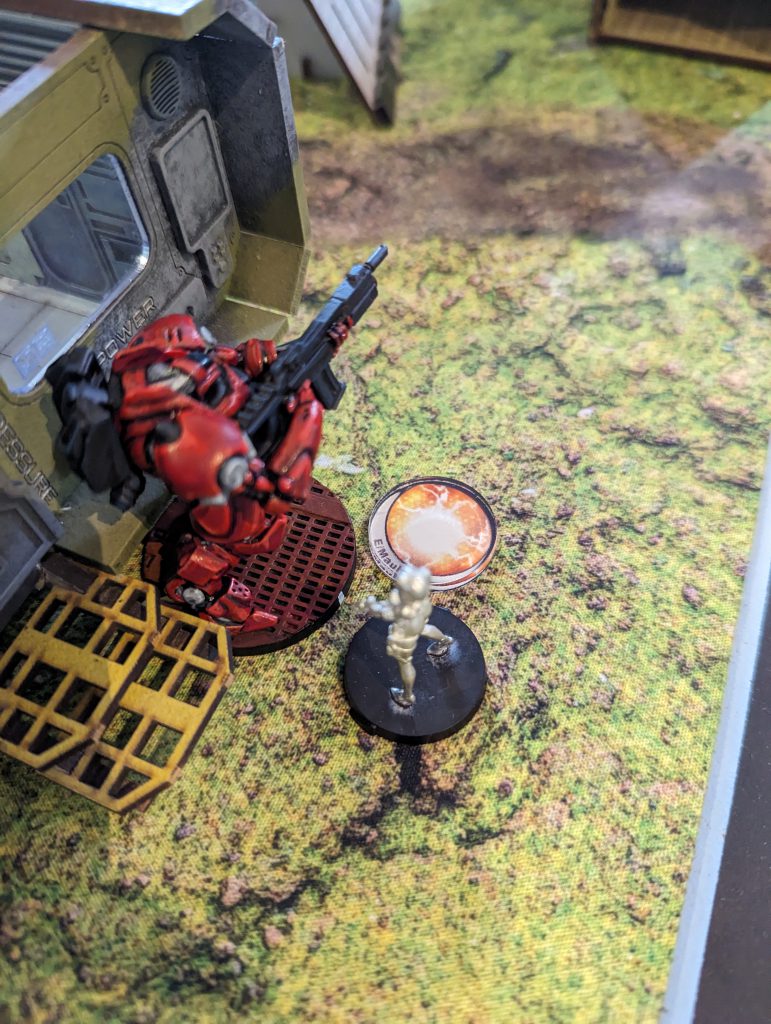
Next my opponent activated the Rui Shi on his right flank. He gained Marksmanship via the EVO bot and gunned down my Intruder and Morlock, and forced the Corsair Bashi Bazouk to stop pretending to be a Warcor, and Guts Roll into cover. It was another very sloppy play for me to leave that Intruder so exposed in the Reactive turn. I was losing as many models as my opponent, but at least I had more on the board to start with!
Round 2
I felt I had started to misplay a promising beginning to the game, but things were recoverable. First, a missile despatched the Shang Ji hacker. I then used a Moderator (my decoy Lt) to engage and knock out the enemy Corsair. That freed me up to bring Carlota on, at the left table edge, with her Servant on the right by the Gecko, and on the second attempt fix the damage. My next target was the Rui Shi, and I had a frustrating time. I laid a crazy koala tonforce a dodge, and shot at it with a Moran – beat all my shots with a good dodge. I bounced rounds off it with Carlota, the Gecko, and the Moran again – no luck at all. I don’t think I killed anything but that Shang Ji in the second turn. Intensely annoying and I wondered if I’d messed it all up.
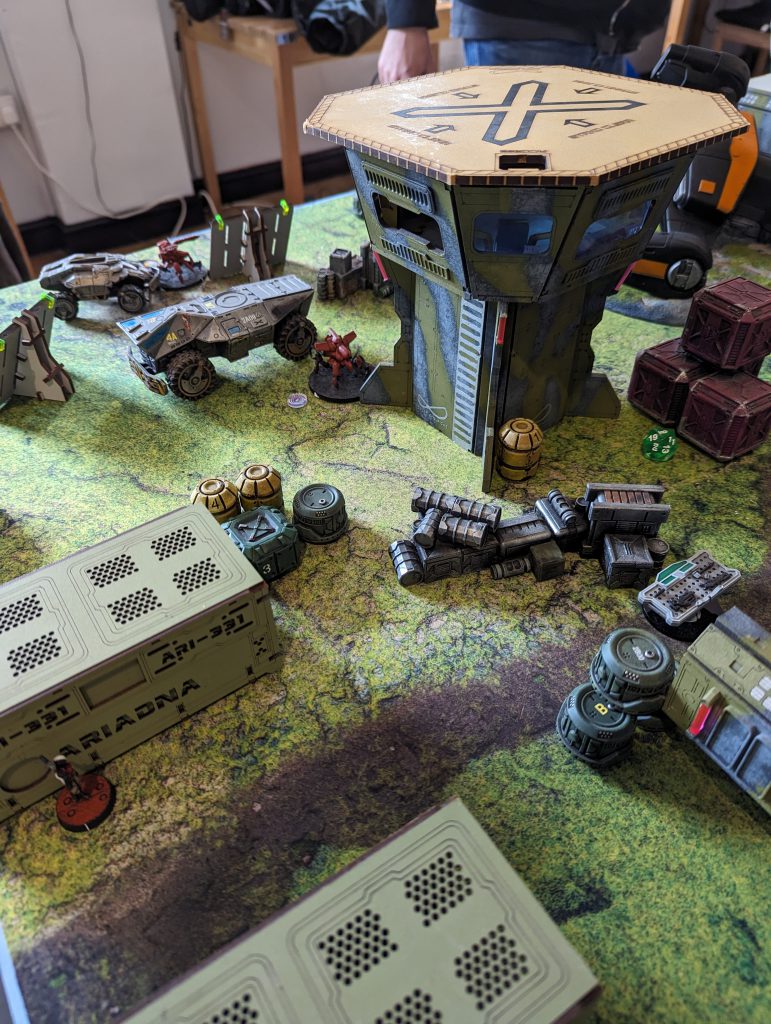
Fortunately, my opponent would have an equally frustrating time against my Gecko in his Turn 2. He walked on his Liu Xing, a hacker with boarding shotgun, and tried me with AP rounds. Unfortunately the Gecko’s chain rifle put him on NWI and it passed its own ARM roll. Next the Zhencha tried him in a straight up panzerfaust duel, in which I had Mimetism and Surprise going against me – but I rolled a crit, or maybe just beat him, and the Zhencha exploded. Really quite an influential stroke of luck for me. Then his Rui Shi came and had multiple shoot-outs with the Gecko, and also eventually went down. Finally the guided missile bot tried and met the same end. Honestly it sounds unbelievable to me reading this back – none of those are great ways to take out the Gecko, but to lose at all of them was exceptionally unlucky for my opponent.
Round 3
I was able to finish the Liu Xing off with my Gecko, taking a point of STR damage in return. That left my opponent with only two Invincibles hiding behind a building in a corner, and an unarmed EVO bot (and I did know it really was an EVO not, not a sneaky Lu Duan under Holomask, cause it has used Supportware earlier). So, confident of actually completing the mission, I walked Carlota over to the enemy AC2 objective, and declared I was deploying D-Charges. That was where we hit a snag.
My opponent was of the view that deploying D-Charges still required a cc attack roll, against the objective’s Automatic Defence System (ADS). For those not familiar, the objective ‘fights back’ at anyone trying to cc attack it. The objective counts as rolling an 8, and the attacker cannot use any material arts to lower that, or Berserk to avoid it being a FtF roll. If the objective wins the FtF, the attacker takes a hit with stun ammunition. This rule was apparently implemented because competitive players with prepared lists, including the right melee combatants, were completing the destruction of the enemy AC2s too easily. It is exceptionally irritating (and in my experience, widely disliked) because no matter what effort you put into getting a model into Silhouette contact with the AC2, or how well suited it is, there is a chance your manoeuvre simply won’t work. I was of the opinion that deploying D-Charges is not a cc attack and does not have to go FtF against the ADS. I actually am still confident that is the case, based on how it has been played at other tournaments, and asking knowledgeable people online after the fact. As it was, the TO agreed with my opponent and we played it that way. After all, so long as everyone in an event plays a mission the same way, it hardly matters.
Predictably, Carlota didn’t roll over a 7, and got stunned. I am trying to sound casual about it now, but you’d better believe I whinged at the time. I ran my Gecko over with some of my remaining Orders, and it failed to beat the ADS as well. Great. The enemy force was in Retreat, I was in full control of the table, and I simply couldn’t do the objective. I apologise to my opponent if I was too overtly salty about it. I ensured I was Securing the enemy HVT and passed the turn.
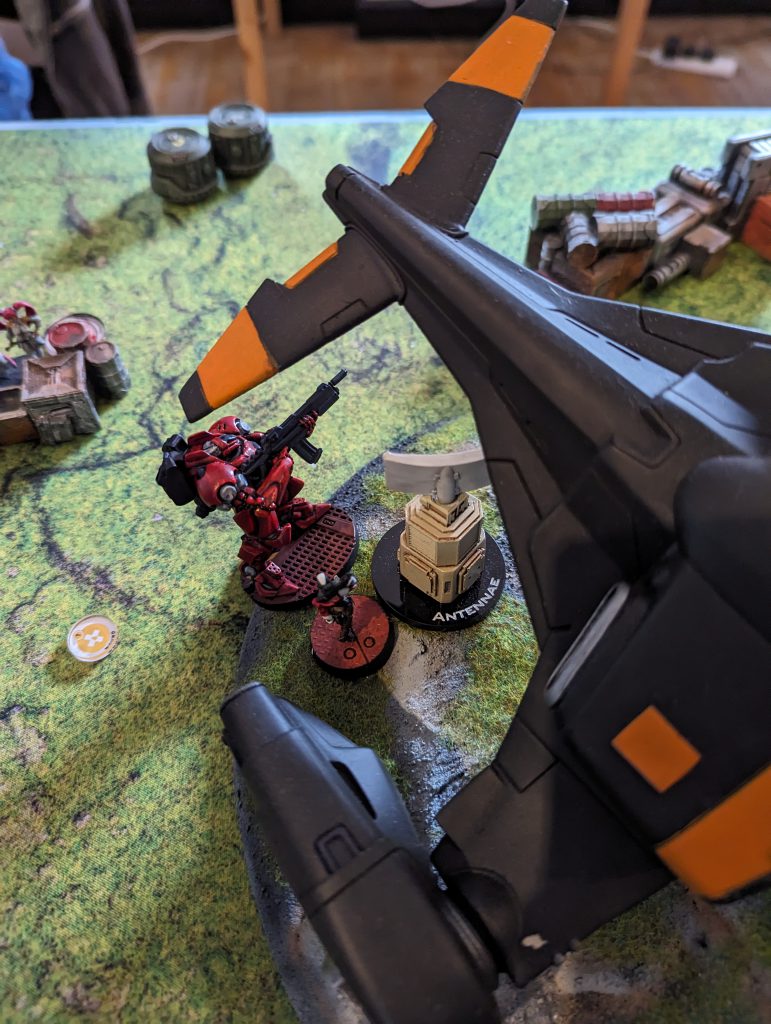
In Retreat and with only 3 Orders, my opponent gamely made a try to contest my HVT, but his EVO bot failed a dodge and went down.
Summary
The game ended 4-3 to me, because we both had undamaged AC2s and I had Secure the HVT. I had 216 VP remaining, to his 57. This was an odd game. I really thought after seeing deployment that I would roll my opponent’s army up in an alpha strike. Instead, I only dealt a partial blow, some of his models proved very stubborn to remove, and it was simple luck that let me dominate the table in the endgame. Realistically I should probably have lost the Gecko to the Zhencha , and then spent Round 3 trying to get near the AC2. The rules disagreement and inability to beat the ADS definitely left a flat feeling at the end of the match – and I really do apologise to my opponent if I spread that feeling to him. He played it to the hilt, and I think the only elements holding him back were his initial decision to play the second turn (why!?) and the poor faction/list match up. If he’d been able to get more on the front foot, the Nomad repeater net and hacking game would have really hampered his offense. As it was, I could attack all game and despite some very sloppy moves, he just ran out of models and Orders first. Playing an 11 model list is just hard mode in competitive Infinity, unless you have the kind of all-round utility of Steel Phalanx, and I just don’t think Invincible Army has anything like the same tools.
Game 3: Decapitation
Pre-Game & Deployment
I got the chance to once again play an old friend, since we were the only players who’d managed to win both our previous games. He is very much an old hand at this – I believe he has ITS tournament prize models going back to N2, and he didn’t buy them on eBay! He was using vanilla Combined Army, which I have played against a lot, both on Tabletop Simulator and in person. It has perhaps the highest competitive ‘ceiling’ of any army in the game so I was duly cautious going in. To make things worse, my opponent won the Lt roll, aiming for a 16, which made me suspect an Anathematic, which was almost bound to be the Hacker with Trinity +1B. He promptly close deployment and forced me into the much weaker DZ. This was the typical problem you see in tournament board where there is not quite enough terrain for a good table, so it has been set up starting in the middle, all looks fine, and then the edges are barren all around. Generally the table standard at these Infinite Need events is very good, this was just an outlier. Given those restrictions on deployment, I did not dare to pick the Second Turn, which would be an option for me normally in Quadrant Control. I’m fairly confident in my soft defence against some armies, and there really is a great advantage to going second in this mission. But in this match-up, the Anathematic would go through both my hackers quickly, and then I would really be on the back foot. If the first turn went particularly badly I could be crippled by missile strikes as well.
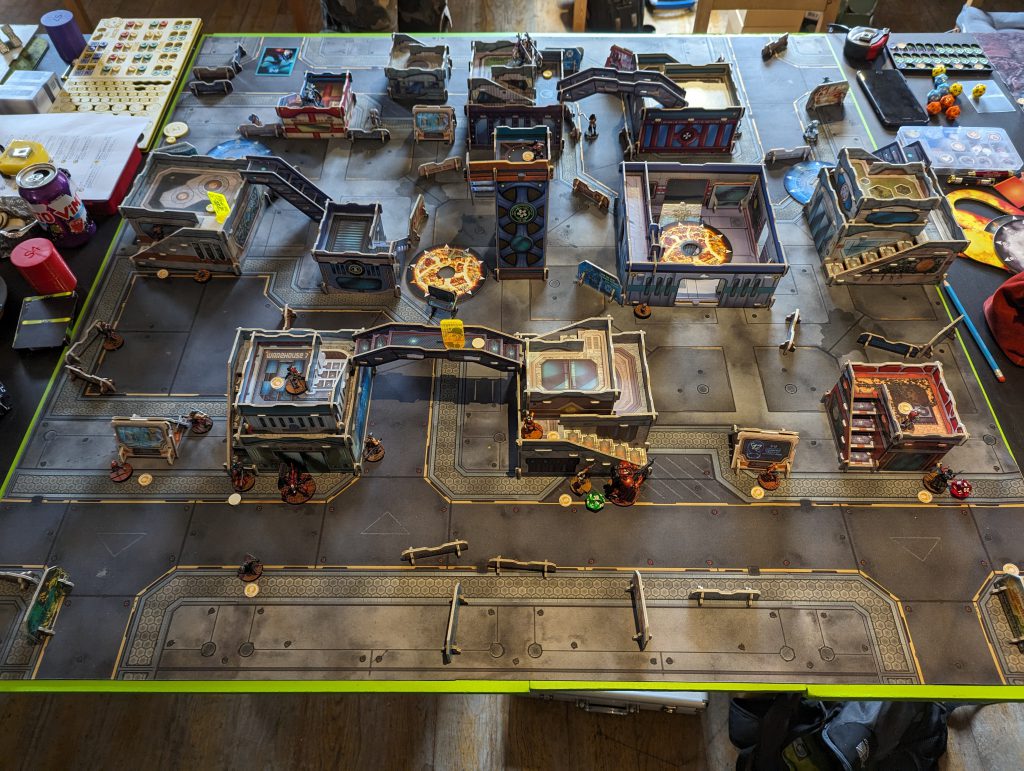
So I set my pieces up clustered against the cover available, which was mostly at the forward edge of my DZ. I deployed my Intruder prone on a bridge in the centre, where he had great scope to move laterally and gain angles around the table, and a Morlock below him to provide smoke. I placed my Morans forward to the left and centre, in their usual sort of rooftop positions, and held my Gecko and Chimera back as reserves.
My opponent placed his Anathematic on his far right, where it couldn’t be engaged except for at point blank range. He deployed a prone camo marker covering my left hand Moran Masai. His backup and utility pieces surprised me though – his missile bot and an Ikadron on my left, and a Daturazi, Preta and Taigha across the centre and right, were all quit exposed to long ranged fire. I thought he might be trying to bait things for a Noctifier or other Hidden ARO, but why? It seemed these models were being offered up on a platter. In discussing this afterwards, my opponent disclosed that he had simply forgotten Intruders were a thing; he also hadn’t had any practice or experience against guided missile bots, and didn’t realise that their value is overwhelmingly for Guided attacks, so most people only use them as AROs in Round 3.
I placed my Uberfallkommando on my far left, across from the Anathematic, and the Gecko in the centre. My opponent then placed his reserve drop, an Overdron plasma sniper. Critically, I think he made a big error here, and put it on top of a two storey building. So he gave up any ability to Guts Roll into total cover. These cavalier deployments would cost him during the game. We talked it through afterwards and ultimately the kind of units popular these days don’t match his experience, he is adjusting to the ‘new normal’ of N4.
Round 1
I kicked off the ball with an uncontested, successful Impetuous Order from my Morlock, landing smoke in front of the Intruder. This let him go to town, picking off the missile bot, Ikadron and Daturazi in just two Orders, although all were just Unconscious and my opponent did have Dr Worm and two servant bots hiding behind a building.
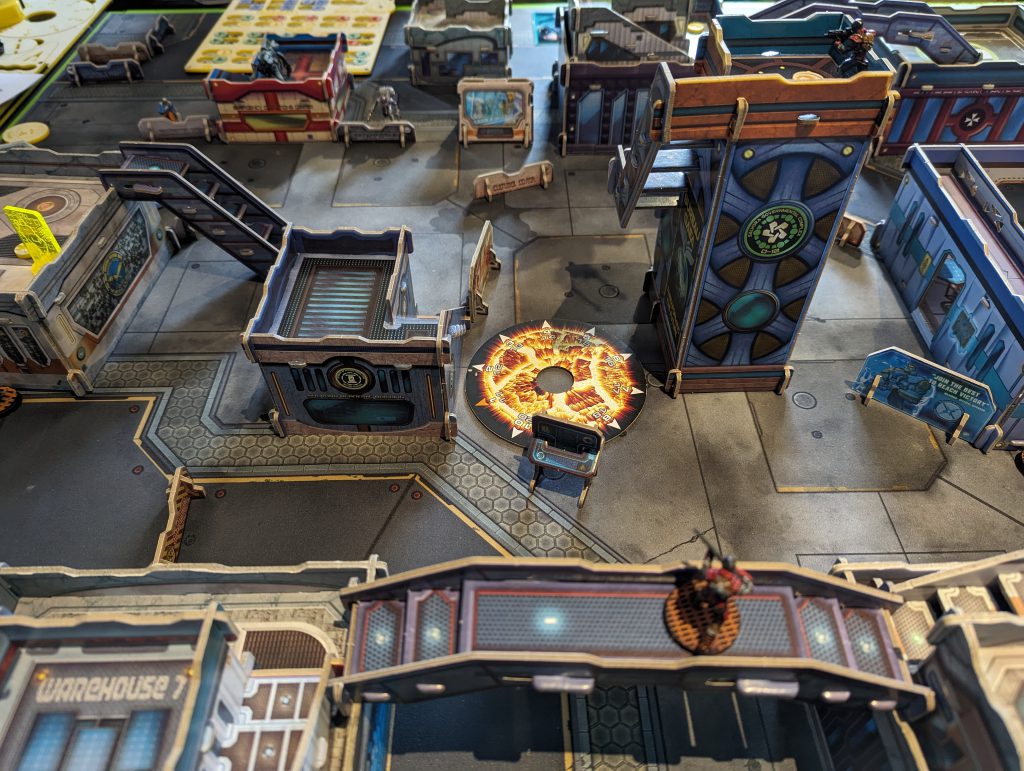
With those other AROs clear, I resolved to send my Gecko head-on at the Overdron. It would be a flat FtF of 13s all round, but I’d have 4 dice to his one. I predicted it would take a fair few Orders, but I’d get him eventually as with no valid Guts Rolls, the engagement would just continue. Neither of us had a weapon which was at all likely to oneshot the other model, so I figured if I did have a stroke of bad luck, I could at least reconsider. My Intruder would have had a better chance of winning FtF rolls, and much worse chances of getting through the ARM rolls – but what decided me against using him, was that one crit would probably lose me the model, with the Gecko I could plug away.
In the event, it took I believe 4 FtF Orders, but the Overdron went down. I promptly riddled it with bullets as I moved away, destroying it beyond repair, and the Gecko swept up the Preta and Taigha before coming to rest. I just had enough Orders to move and lay a koala with my left hand Moran, before declaring Discover-Shoot against my enemy’s camouflage marker. He decided to hold still, but I passed my WIP roll and riddled the Shrouded hacker with bullets, again taking it straight out.
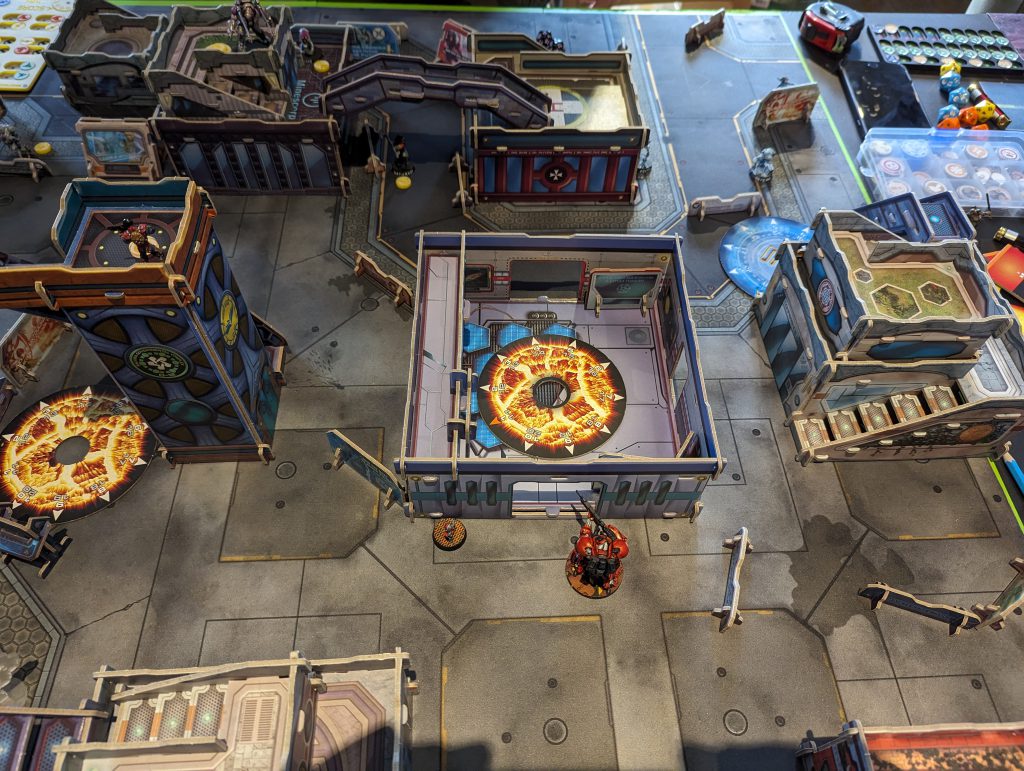
I had one final Irregular Order on my Uberfallkommando, and decided to move up the Pupniks, while keeping the Chimera safe. Technically I was repeating a simple error from the last game, and leaving my Intruder swinging in the wind, I should have converted the Order and put him back prone. My opponent then revealed a Noctifier ML and blew one of the Pupniks up. He would have liked to place the template where it would clip my camouflaged Heckler (sloppy play on my part, as I suspected a Noctifier). But he rolled a 15, which would have been a crit against the Pupnik at over 24″, we measured and the only spot which he could target to clip the Heckler was within 24″, which would have been a miss. We decided the fairest thing was to take the crit against the Pupnik and count the Heckler lucky.
One dead Pupnik was a small consolation for a pretty devastating alpha strike against my opponent; he’d lost 7 models including a TAG. I think he was looking for a way to ARO my Gecko, but the spot I engaged the Overdron for was just blocked by a building. I did not try to hold either of the quadrants nearest my opponent’s DZ during the first round, I decided that for 1OP across the game, it wasn’t worth the risk of overextending any models.
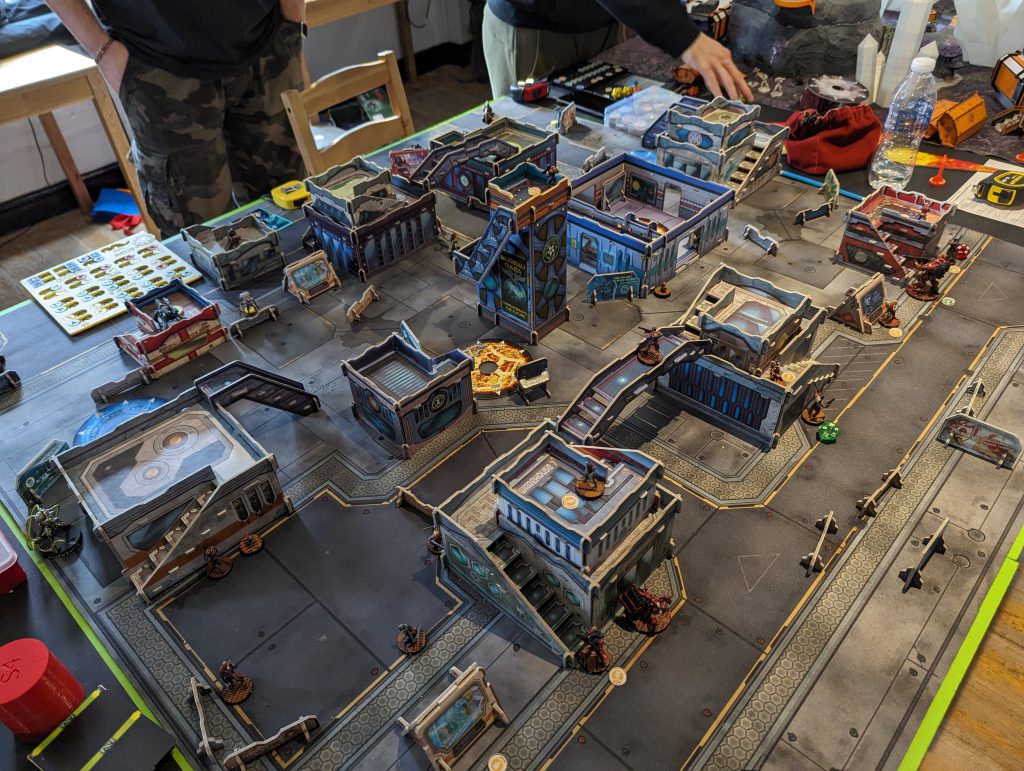
My opponent devoted most of his Turn 1, starting with only 6 Orders, to reviving units with Doctor Worm. He managed to get his Daturazi back up, but lost a slave drone trying to get to his missile bot. This did let him move Dr Worm into his near left hand quadrant to secure it. He then tried his Noctifier against my Intruder, but was on a single 9 against my 12. Nothing happened for one or two Orders, then the Noctifier took a bit, failed its ARM roll and dropped Unconscious. I thought my opponent should have left it Dogged and simply tried the Intruder one last time, on the basis he now has nothing to lose. But he preferred to keep the technical possibility for Dr Worm to revive it, fair enough. With only one or two Orders left, he dove the Anathematic forward to hold his near right quadrant, first moving his Secdet CSU to try and clear a koala, but rolling badly and losing it in the process. This brought the Anathematic into range of a crazy koala and the Moran’s repeater, as well as provoking an ARO from my Intruder. I opted to Discover and the Anathematic tried Trinity against Jazz. He was a bit unlucky and took a wound from the koala while Jazz passed her BTS roll. With a final Order he tried again (purely hacking as he was now outside LoF), and this time lost the hacking battle! An unusual stroke of luck for the Nomads. He lost a second wound to Jazz, going into NWI, and was Isolated by the Puppetmaster.
Round 2
So beginning my Turn 2, I knew my opponent would begin his in Loss of Lieutenant. He was also very noticeably running out of models. I was able to sweep up both Dr Worm and the Daturazi for good with my Intruder, then send the Gecko forward on the right, into his table half to get an angle on Bit and kill her as well. This left me in a commanding position – my opponent had only the Isolated Anathematic and one Imetron left, so couldn’t possibly hold more than one quadrant, while I held two, including one in his table half, that he simply couldn’t move to take from me. Discussing it openly with my opponent, we agreed it would be counterproductive for me to actually try and kill the Anathematic in my Turn 2 – it would put him into Retreat and end the game at the end of Round 2, while if I kept it alive I could score points in Round 3 as well. Accordingly, I moved my Uberfallkommando up into a threatening position by speculatively tossing Eclipse smoke, and passed the turn.
My opponent activated his Anathematic with his one usable Order, suffered some sort of ARO from my hackers (I can’t remember, if I was smart I declared Spotlight) and a shot from my Intruder, and obliterated the Uberfallkommando with plasma fire. The important part was that he survived and entered my table half, controlling a quadrant. This is a quirk of the current scoring for Quadrant Control – while I did score the maximum 3OP for the Round, my opponent scored 1OP as well, for controlling a quadrant in the enemy table half. A good illustration of why I prefer going second in this mission, if the game is at all close it is much easier for the second player to build up points.
Round 3
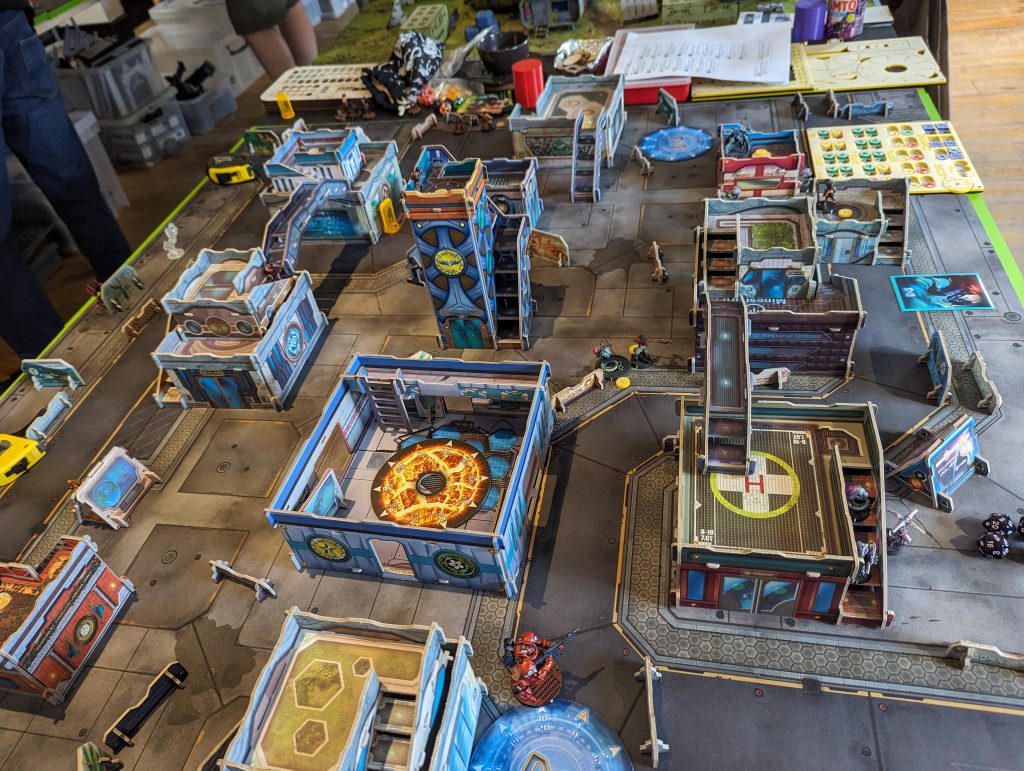
Fortunately for me, this game did not end up close. I tried to throw smoke with my Morlock’s Impetuous Order but he also died to a plasma ARO. So I engaged the wounded Anathematic without smoke using the Intruder, dropped it, and we called the game there. My opponent only had one Imetron left, so I could score the primary objective easily enough, and I was able to run my Puppetmaster up to score my Classified.
Summary
That meant the game ended 8-2 to me, with 274VP remaining to my opponent’s 6. The only OPs I had dropped were for only controlling equal quadrants, and none in the enemy table half, in Round 1. This was an unusual pasting and I put almost all the explanation for it onto my opponent’s self-admitted inexperience playing with and against guided missile lists. I didn’t even chuck any missiles in the game! But I think his fear that if he null-deployed, I would just shower him with pitchers and win that way, led him to put his AROs up far too aggressively. We talked it through extensively and he agreed the biggest problem was leaving the Overdron where it could not Guts Roll back into safety. Ultimately, 3 games in a day is a wipeout and we’ve all made these mistakes in the last round. I expect he will get me next time.
Conclusion
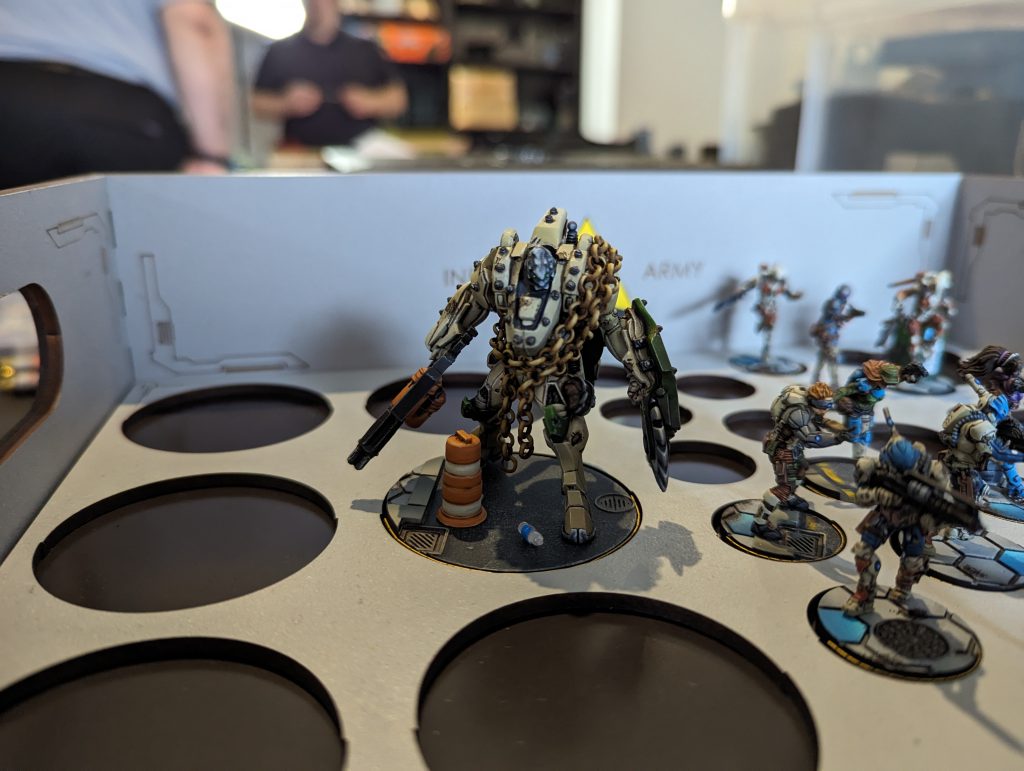
This was a small event (only 10 players) so in fact I was the only contestant to win 3 games, and walked away with the trophy. Fair play to Chris, I literally mean a trophy, it’s a light up LED sign proclaiming me the winner of Infinite Nerd 2. I shall plug it in to intimidate visitors when hosting games at my house. Maybe I should bring it along to club nights.
I was obviously quite lucky throughout – the dice worked when I needed them to and no bad results were game-losers. Most of all, my opponents all ended up giving me the first turn! In every game I was extremely aggressive and fought the whole game basically on the front foot. I am not reading too much into the results of a mere 3 games. But to me they were all reminders that if going second in a competitive game, you really need a plan. Some kind of ARO roadblocks, a combination of soft and hard defences, a reserve deployment model that can hamper what you expect your opponent’s 1-2 reserve drops to be …. it’s just so much more challenging to defend against an alpha strike than to put one together. My second list (IE not for Rescue) has a lot of the DNA of the meta Nomads build, and it’s certainly capable of alpha strikes. While quite strong defensively it needs some luck with the table and match-up to withstand certain kinds of alpha strike. Notably it does better against factions that are highly hackable, but don’t have apex hacking threats like the Asura or Anathematic themselves. I am definitely loving the Nomads again and will probably try them again at my next event.
The full tournament results can be seen here. Overall I had a great time and really hope these events continue, we need more Infinity in our neck of the woods. If anyone is visiting Shrewsbury, drop in to the Nerdy Coffee Co for a drink, they need your support!
Have any questions or feedback? Drop us a note in the comments below or email us at contact@goonhamer.com.


You must be logged in to post a comment.