
If you want to get 10% off and support Goonhammer, make your Conquest purchase by clicking here for US/Canada or here for EU/rest of world and enter code “goonhammer” at checkout.
Hello everyone, welcome to another event report for Conquest: Last Argument of Kings! I had the pleasure of attending the London Grand Tournament (LGT) earlier this month, the largest UK Conquest event and for many of us, the highlight of the gaming year. It was my first time at the LGT series and to say I was excited is understating it slightly.
The UK has a rapidly growing Conquest community and this event draws people in from all over the country. It’s a great chance to meet other players, find out about different play styles and metas and generally enjoy a weekend of some gaming.
Preparation
I played W’adrhŭn for the event, with the aim to include as many of the new awesome dinosaurs as I could reasonably fit (and paint) in a 2000 point list. With some practice games in the months building up, I decided on the below list:
I consciously chose a low activation list, wanting to take the advantage to Supremacy rolls as much as I could. Combined with the W’adrhŭn speed, I wanted to take the initiative with charges and damage whilst having big enough units that I wouldn’t be reduced below effective strength on the way in.
The Raptor Riders and Matriarch Queen (with Brood of Omgorah) are a very fast scoring unit that applies early pressure, and set up two tokens in Turn 2 to allow the Chosen of Conquest to chant in Turn 2 and move up 18” with the Scion. This early game pressure is followed up with the Tontor and big unit of Thunder Riders (with Flank thanks to the Thunder Chieftan) giving me my whole army almost guaranteed by Turn 3. From there it was a case of score high and hope to keep the early lead until the end of the game.
The downside of my cunning plan is that I had to paint up all the Thunder Riders, Chosen and the Tontor in just two weeks before the event. Several late nights in the week building up and I was battle ready for the event.
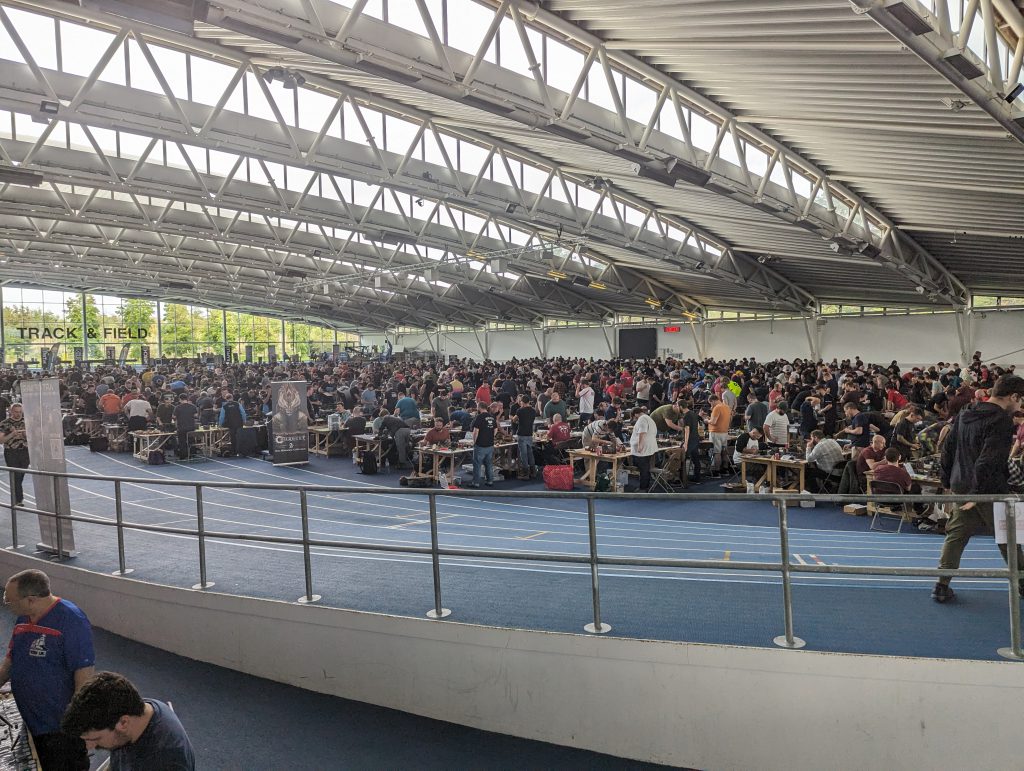
Arrival and Event
The LGT is held in a massive sports hall, and whilst a pain to get to by public transport had great access driving, a good variety of food stands and decent space across the venue. Given the hundreds of people in there on a warm Autumn day, temperatures were moderate and it never felt claustrophic. I’ve been to plenty of events in my Warmachine days, and I have to say this was one of the better venues I’ve been to.
The tournament itself was ran by Giannis, the events manager of Para Bellum itself, and supported by Stavros, the company Creative Director. It’s fantastic that the lead figures take the time to fly out to these events, both for them to speak with the community and to listen to their thoughts and insights.
Its worth noting that the September balance patch had been released two weeks prior, and whilst we used the most up to date Scenario Pack the event was ran using pre-update faction rulesets. It’s a bit rubbish to practice all year for a major event and then find your list is significantly different less than two weeks before the event itself. You can find our thoughts on the changes here.
Round 1 – Vs Old Dominion on Maelstorm
== (Warlord) Xhiliarch [195]: Calamitas, Blade of the Caelesor, Gladiator, Combat 1, Combat 2, Combat 3
* Varangian Guard (5) [350]: Standard Bearer, Princeps
* Praetorian Guard (5) [285]: Standard Bearer, Profane Reliquary
== Archimandrite [195]: Consecrated Mitre, Devoted to Hazlia, Arcane 1, Arcane 2, Arcane 3
* Bone Golems (3) [210]:
* Kheres (3) [160]:
* Legionnaires (3) [120]:
== Hierodeacon [145]: Eleutherea, Giver of Mercy, Arcane 1, Arcane 2, Arcane 3
* Buccephaloi (3) [220]:
* Legionnaires (3) [120]:
My first game was with Ben from Southampton running Old Dominion. There’s a few Old Dominion players in my local meta so I’m reasonably comfortable with what they can do. His list featured the staples of a combat Xiliarch with big blocks of Praetorians and Varangian Guard to maximise the Supremacy turn with the Buccepheloi and Bone Golems for some late game hitting power.
Maelstorm is unusual in that you can score the zones on Turn 1 rather than Turn 2, which I achieved using two March action and the Fluid Formation reform to get my Raptor Queen into the zone on Turn 1. Combined with the Chosen moving up 18” on the right zone, by the end of Turn 2 I was already 5 points ahead before the lines were close to engaging. Alex Marched and Charged the Praetorians with Xiliarch down the middle to retake the centre objective zone with the Varangians on the right opposite the Chosen with some Legionnaires. On the left, more Legionnaires squared off with the Blooded for the right zone.
Praetorian Guard are one of the harder units in the game to shift, at Defence 4 (Shield and Bastion) with 5 Wounds each and the immunity to Resolve damage that makes Old Dominion so durable. Unfortunately though, the latest W’adrhŭn releases of Thunder Riders and the Tontor both have Linebreaker and plenty of Cleave, so my counter charges with both swept through the Praetorians swiftly. A failed charge of the Varangians through the Legionnaires on the right broke both units unfortunately, letting me move the Chosen to the front of the right zone and secure it indefinitely.
Despite reinforcements from the Buccepheloi and Bone Golems, the Thunder Riders and Tontor were too much and punched through them too leaving the Varangians and Kheres as the last units for the Old Dominon. To their credit, they finished off the Chosen and Tontor before the Thunder Riders got to them and finished them off, ending the game in a W’adrhŭn Victory.
W’adrhŭn can be a challenge for Old Dominon to deal with, especially if they take and secure the tempo of the game in the start. If the Varangians had made their charge the right flank would have folded faster for me, but I’d secured a significant scenario lead by this point anyway. On to Round 2!
Round 2 – Vs W’adrhŭn on Head to Head
== Predator [105]: Animalistic Focus, Marksmanship
- Hunting Pack (3) [125]:
- Slingers (3) [175]: Flint Knapper
== Matriarch Queen [100]:
- Apex Predator (1) [190]:
- Warbred (5) [340]:
- Apex Predator (1) [190]:
- Braves (5) [215]: Standard Bearer, Champion
== (Warlord) Chieftain [100]: Violence of Action
- Veterans (3) [220]: Standard Bearer, Champion
A last minute drop had left us a player down, so Giannis had stepped in with a borrowed W’adrhŭn army from another player to even things out, and would be my opponent this round! By Giannis’ own admission, he doesn’t spend much time playing (which given that this is his day job I can understand him wanting a break from it!) and his list is what I could remember from memory, being mostly spares I think it might have been under points or with more artefacts I couldn’t remember. This was his first time using W’adrhŭn so we knew this would be a fun game of pushing dinosaurs across the board and seeing what happened.
Head to head is an interesting scenario which really rewards collapsing one flank. I pushed up aggressively on the right with my Raptors and Chosen to secure the central zone for some early points. Giannis’s slingers did some outstanding work killing two Raptors whilst preparing his giant Warbred unit to barrel down at my own zone. I responded by running my Raptors away to heal for a few turns and reinforcing the centre with my Tontor.
His Veterans fought with my Chosen but were outmatched and defeated, whilst his first Apex rushed down to the fleeing Raptors and charged them, but were unable to wipe them out before being taken out the next round by the Raptors chanting War to get through the Defence. His Warbred demolished the Blooded, losing two of their own due to Lethal Demise and Burnout, but were promptly wiped out by the Thunder Riders in return. Seeing the way the game was going, we resolved the fights between the remaining Apex and surviving Raptors (the Raptors won again!) before talking the rest of the game out so we could record points, for another win for my W’adrhŭn.
Giannis is a ball of energy and absolutely the kind of person to be spearheading events for Para Bellum. Despite the game turning against him he was enthusiastic and enjoying every moment of giant dinosaurs stomping across the table at eachother. An enjoyable game and left me fresh and relaxed into the final Round of the day.
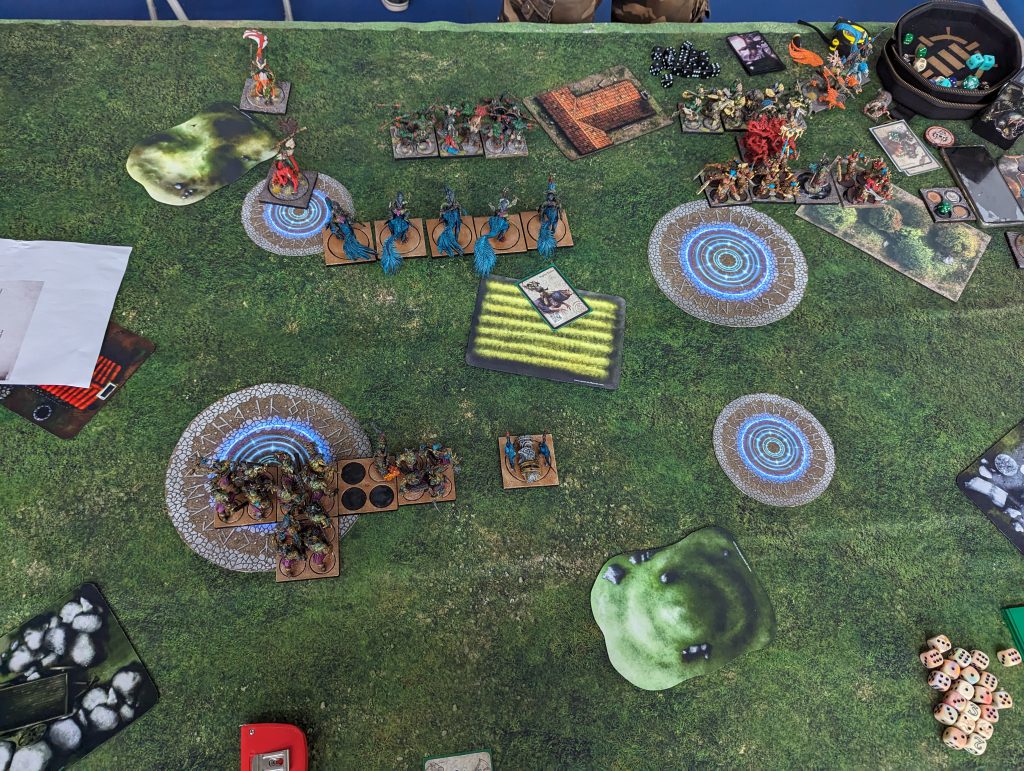
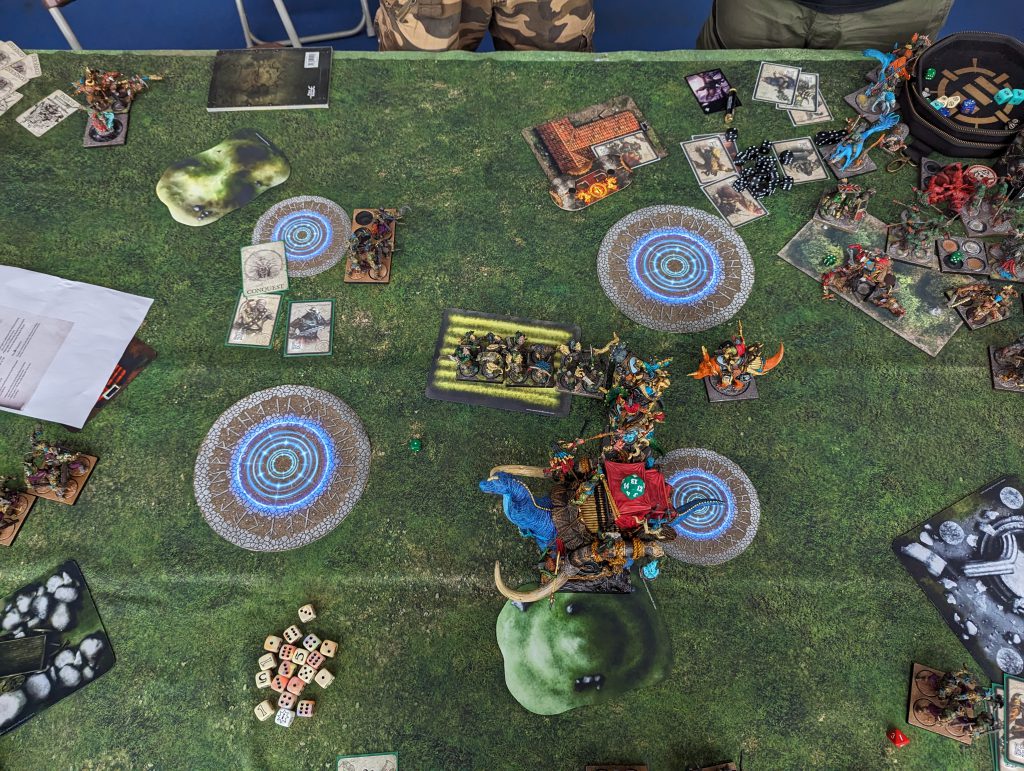
Round 3 – Vs Old Dominion on Grind Them Down
== Xhiliarch [145]: Semion of the Legion, Aventine Armor, Regalia 1
- Varangian Guard (4) [265]: Standard Bearer
- Praetorian Guard (5) [285]: Standard Bearer, Profane Reliquary
== Hierodeacon [95]: Arcane 1
- Karyatids (4) [265]:
- Legionnaires (3) [120]:
== (Warlord) Archimandrite [160]: Unholy Sacrament, Devoted to Hazlia, Arcane 1
- Kheres (5) [260]:
- Praetorian Guard (5) [285]: Standard Bearer, Profane Reliquary
- Legionnaires (3) [120]:
I drew Old Dominion again in Round 3 against Alex, representing from the Newcastle player group. Alex had a stunningly painted army and rightfully won 1st place for the painting awards against stiff competition. His list was very magic heavy, taking the Archimandrite as Warlord for the extra spellcasting backed up with two blocks of Praetorian Guard, the mandatory Varangian Guard, a big block of 5 Kheres and some Karyatids for some ranged presence.
Grind Them Down is a weird scenario. Aside from the normal zone scoring, you have to declare a zone that you have no friendly units in each turn, and gain extra points for seizing it. Its most efficient to alternate seizing your two nearest small zones and take the central one too, but its not easy to manage. Definitely worth a practice or two before you go to an event with it being used.
I took an early lead using the Raptors to score centrally and the Chosen on the left side, facing down the Archimandrite and block of Kheres. I’ve been stung by not dealing with Kheres early in the past and determined to not let this happen again, we spent several turns shuffling around and playing for position. In fact, we did this across the whole board! The Tontor came in on the right opposite the Legionnaires and Varangians, and the Thunder Riders moved centrally behind the Raptors who faced both blocks of Praetorians. I’d taken an early scenario lead, but only slightly as we were both scoring our own small zones consistently.
Our first clash didn’t happen until Round 5 when the Chosen surged forward into the Kheres to start chewing through them. My Blooded followed up to secure my zone in the interim. Meanwhile The Praetorians with Xiliarch charged into the Raptors to secure the middle zone, and my poor positioning of the Thunder Riders meant I couldn’t counter charge through my unit as planned, losing me some of the early tempo I had. I decided to sacrifice my Tontor to tie up the right flank, killing the Legionnaires but being taken down by the Varangians shortly after.
The Chosen and Blooded collapsed the left flank comfortably, leaving the central block as the decider. In a moment of accidental genius, with just the Queen and a Raptor left, I challenged the Xiliarch to a duel (normally a terrible idea as they are often combat monsters!). Sure enough the Queen was slain horribly by the Xiliarch in single combat, but my “Queen’s Gambit” paid off by clearing her out of the way of my Thunder Riders, letting them charge and roll the unit with mass Linebreaker and Cleave attacks. At this point I had safely secured the central and side zones whilst still having my fully powered Thunder Riders in play against just the Varangians and Karyatids, so the final turns were just sweeping up scenario points, leading to a win for W’adrhŭn.

This was a very cagey game for the first half, both of us trying to set up the aggressive strikes that we wanted. In the end I collapsed my flank quicker than he could mine, and with the Queen sacrifice paying off to reclaim the middle zone I had enough of a scenario and attrition lead to pull out the win. XXX is a great player and a great sportsman, and this game was a perfect example of how Conquest isn’t just about the best stat blocks and attacks. Careful positioning, laying formations and no small amount of luck are more important than picking the best units for your list.
This put me 3-0 at the end of day 1, and with just 3 of us undefeated I had a shot at making the finals much more than I had hoped! I returned home to relax and get ready for the last two games.
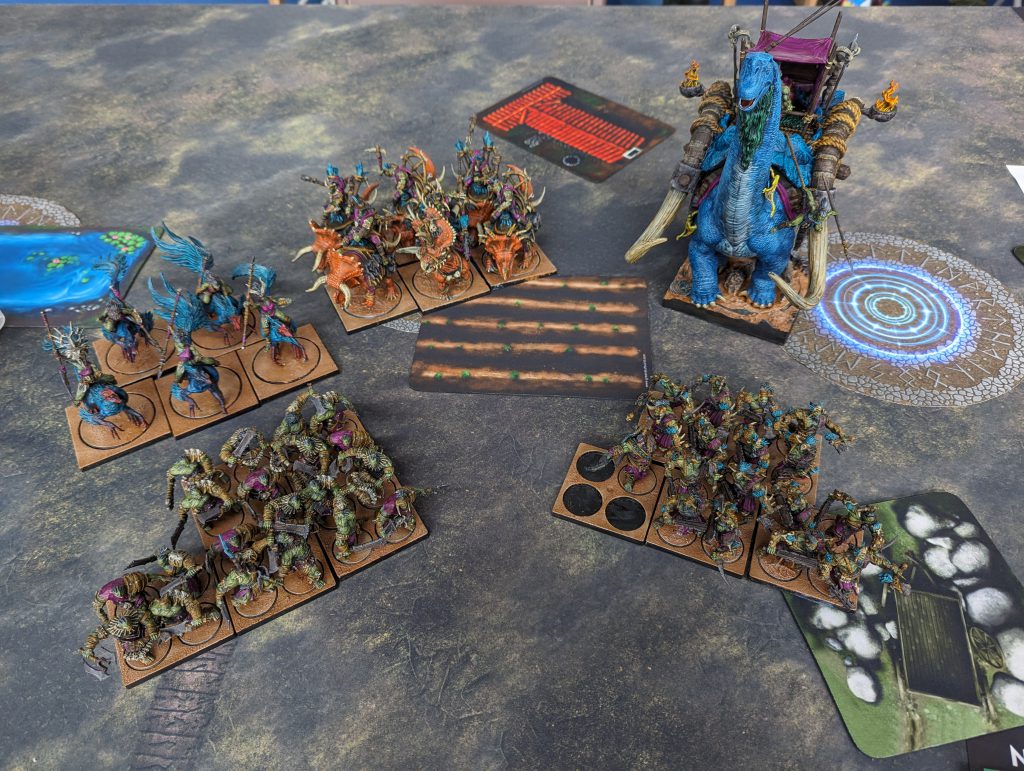
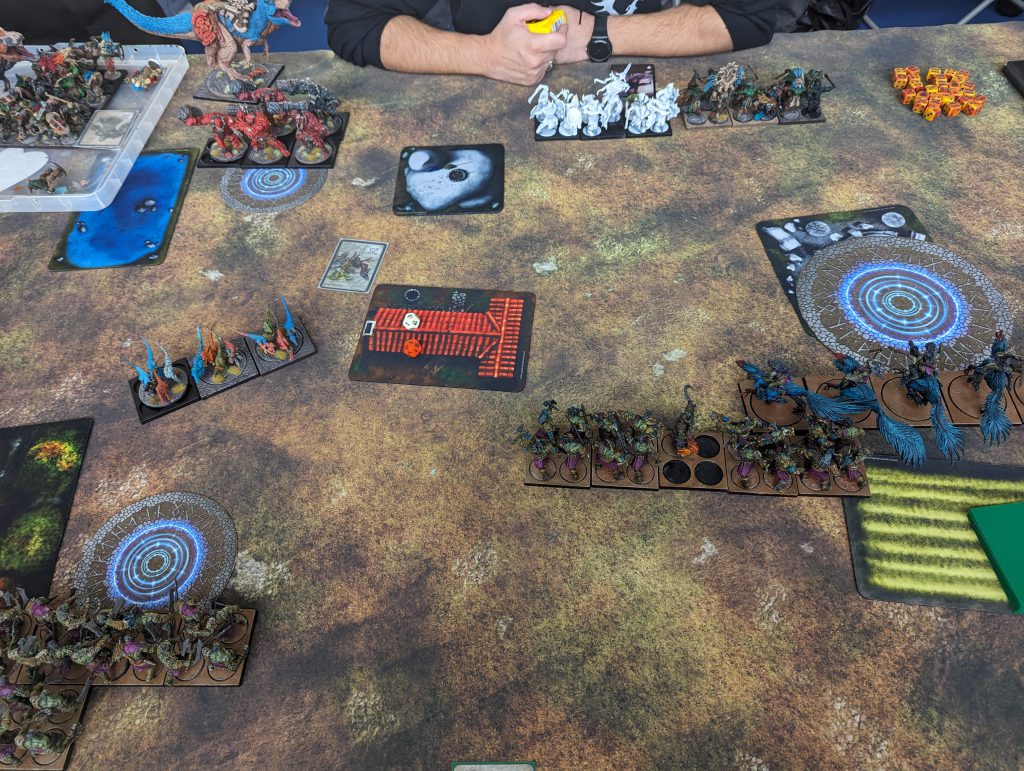
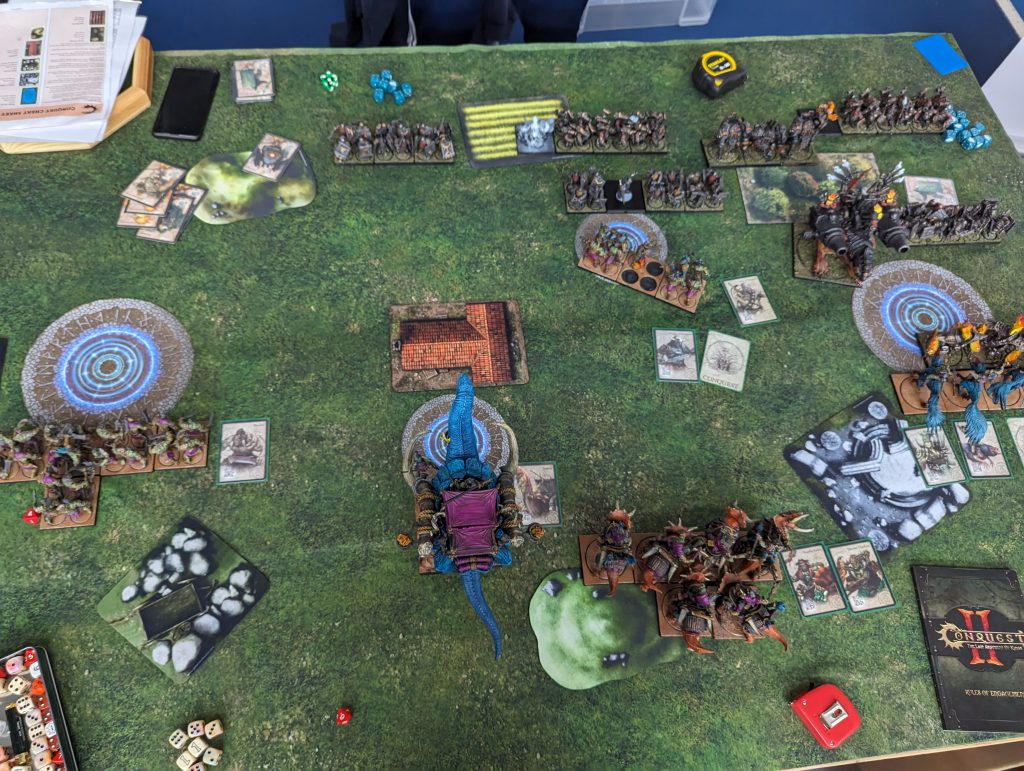
Round 4 – vs W’adrhŭn on Forlorn Hope
== (Warlord) Chieftain [135]: Death, Mantle of the Devoted, Violence of Action, Tontorr Rider
* Braves (3) [115]:
* Tontorr (1) [310]:
* Blooded (3) [160]: Aberration
* Thunder Riders (3) [250]:
== Matriarch Queen [175]: Death, Brood of Omgorah, Touched by the Goddess, Long Lineage
* Raptor Riders (4) [270]: Huntress
* Hunters (3) [170]: Tracker
== Scion of Conquest [105]: War, Sacred Censer
* Chosen of Conquest (4) [310]:
I drew the pair down for Round 4 into the W’adrhŭn player James, both of us having brought very similar lists. James is probably the best W’adrhŭn player in the country and had won the LGT last year, so this was going to be a tough game. Our lists were very similar, both bringing the exact same Queen + Raptors and Scion + Chosen packages along. He’d gone for a Chieftan with Mantle of the Devoted on his Tontor against my basic version, but his Thunder Riders were a minimum unit of 3 compared to my deathstar. Two glass cannons fighting means this is going to be bloody…
The first turn was almost like playing into a mirror, both our Raptors coming on first turn and positioning to go after the objectives. James’ Hunters allowed him to hit the necessary three wounds in Turn 2 and clear the objective whilst I decided to push my Raptors past the objective to threaten him from advancing too aggressively. We hit a rules query on whether Chosen of Conquest need to mix different tokens when arriving onto the board for chanting, which was so complex that Giannis got us in touch with the PB Rules Writer on the phone to clarify! In the end it was determined yes, which was a relief for me or it would have significantly impacted my previous games.
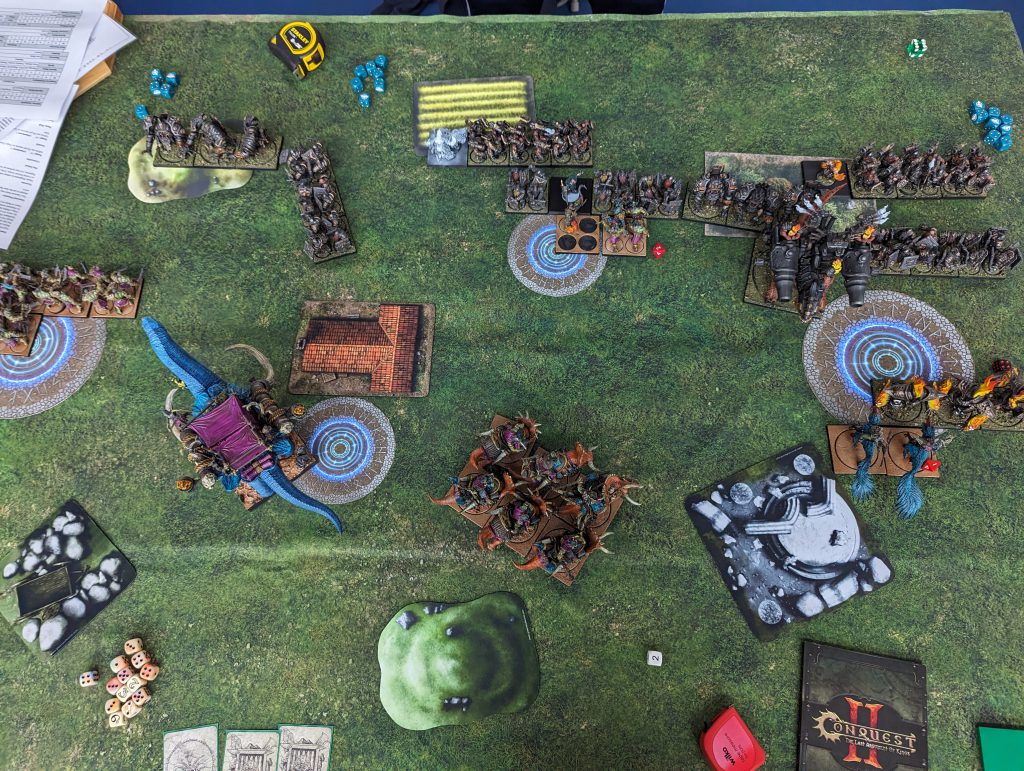
I won the following turn and my Raptors charged into his, wiping them out in a single Clash. Our Chosen units rushed each other’s opposite zones whilst our Tontors both deployed onto the right side. I set up my Thunder Riders to clear my Objective and keep the slight scenario lead, whilst out Blooded both reinforced the right flanks too. Some key Supremacy rolls later and my Tontor got the charge into his Chosen killing most of them, but his Tontor and Chosen together took down mine comfortably. He won Supremacy the following Round, letting his Tontor crash into the flank of my Thunder Riders before they could get their War chant up and finish his Chosen, killing 5 of the 6 of them. Having lost both my strongest units and only taken his Raptors in return, I switched into damage mitigation to try and hold onto the scenario lead I had. Pinning his Tontor with the Blooded and sending the Raptors in to finish off the Chosen were my best options, hoping to hold him up long enough.
The Tontor finished off the Blooded with ease, but we hit the Round time at the end of Turn 7 before the Tontor could finish off my Chosen too, which if wiped out would have left me without any units whilst James could have overtaken my scenario lead. All in all the score was a win for my W’adrhŭn!
This game turned on two key coin flip moments, both my Raptors getting into his Raptors and him getting into my Thunder Riders before I could activate them. If either of those had played different it would have been a very different game. I really struggled to contain his Tontor which more or less wiped out my entire army single handedly. James is an excellent player and I learnt a lot playing him, but there wasn’t much time to reflect on before going onto the finals.
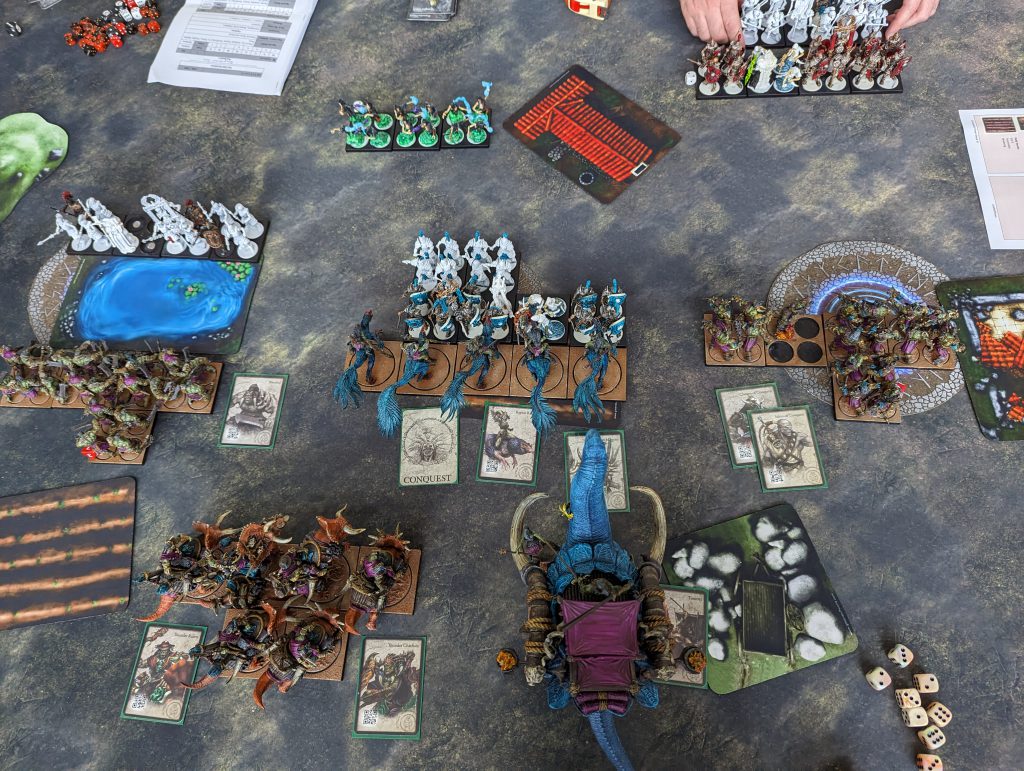
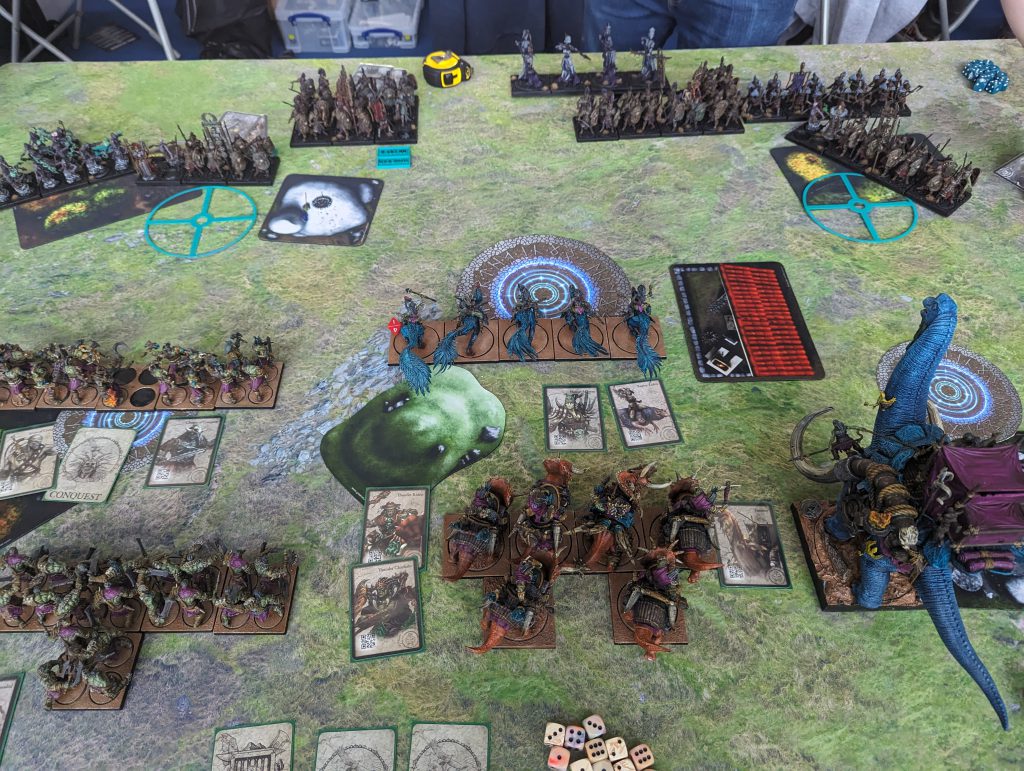
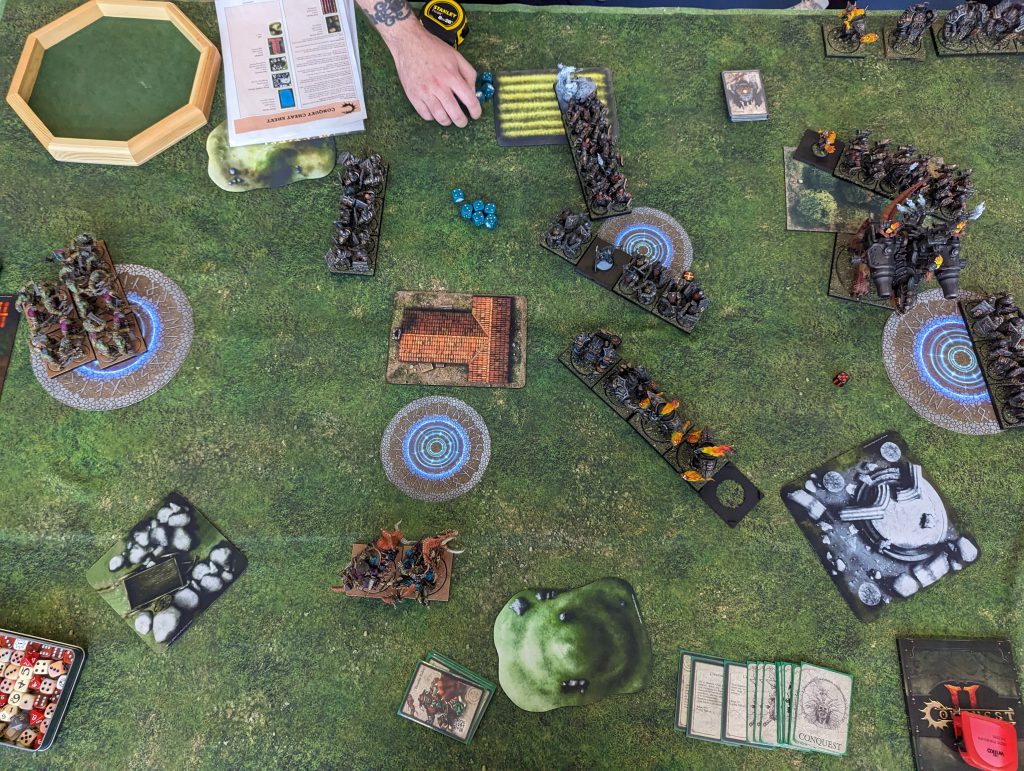
Round 5 – Vs Dweghom on Melee
== (Warlord) Tempered Sorcerer [200]: Cthonic Flame, Fire School, Focused, Arcane 1, Arcane 2, Arcane 3
* Fireforged (3) [180]:
* Hold Warriors (3) [130]:
* Inferno Automata (3) [180]:
== Tempered Sorcerer [155]: Memory of Breath, Fire School, Arcane 1, Arcane 2, Arcane 3
* Fireforged (3) [180]:
* Hellbringer Drake (1) [180]:
== Tempered Steelshaper [110]: Lava Shots, Arcane 1
* Hold Ballistae (3) [140]:
* Hold Warriors (3) [130]:
* Steelforged (3) [210]:
* Steelforged (3) [210]:
Time for the finals, against Daryl playing his Dweghom. A clubmate of Alexfrom Round 3, Daryl is a very experienced player with a terrifying Dweghom list. We’d actually been expecting to play eachother in Round 4, and neither of us hid that we had spent a lot of the Saturday night planning how we would play eachother!
Its worth reminding now that this event used pre-balance patch Army Rules still, meaning both Steelforged units were Defence 5, the Inferno Automota were one Move and Clash higher. Additionally the Tempered Sorcerers had old Flame Wall (2 hits per success plus one for each file) and the Focused Mastery (reroll 2 failed spell dice every spell, not every activation). Not game breaking differences, but if you play this same list now it’s a little less durable in places and not quite as offensively powerful through spells.
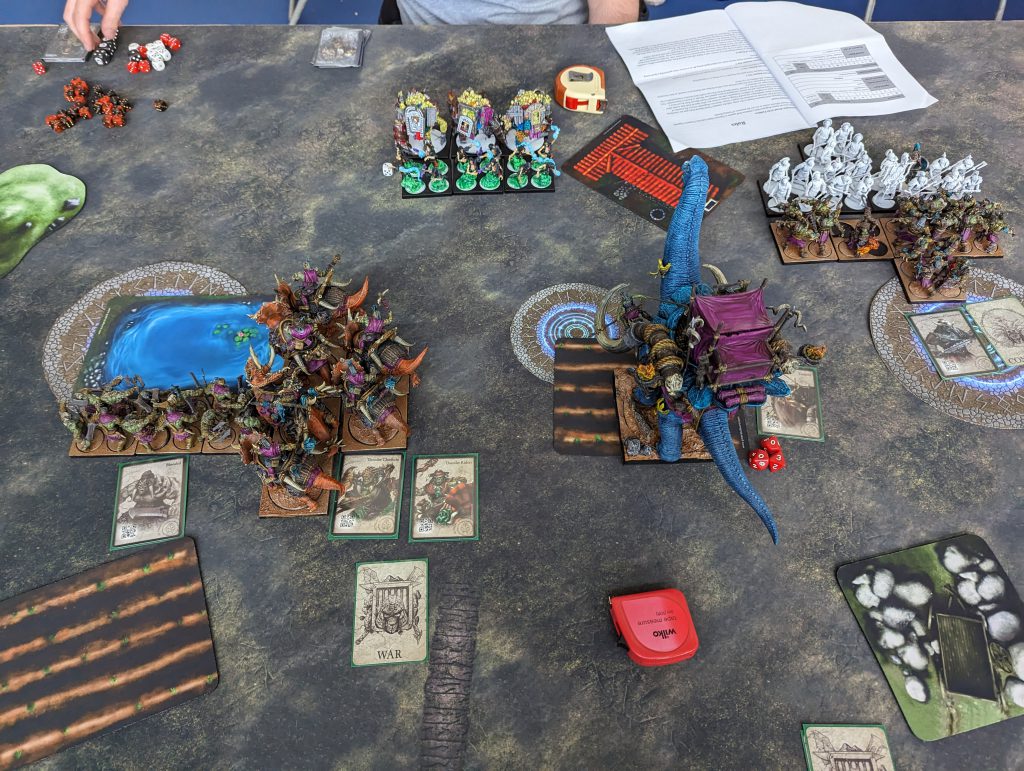
I pushed Raptors hard up the right flank facing off against the Inferno Automata and Helldrake whilst my Chosen took the central left zone, roughly facing off against the Steelshaper and Ballistae in his zone. I felt I would be throwing my Raptors away by engaging the Inferno Automata so I positioned to contest the right zone instead to slow down their collapse of the flank. Seeing he only had two stands in his own 6” zone, I triple Marched the Chosen to get three stands in and steal the zone, aiming to put a big scenario lead up by Turn 3 that he couldn’t get back on. I had forgotten he could cast with his Sorcerer on arrival, who even with interference killed exactly enough Chosen to bring me down to 2 stands and losing the Zone. With my Tontor marching in to score my 6” zone and the Blooded rushing the left Zone too, the score was at a healthy 21-10 by end of Round 3.
Turn 4 is where things start to go a little sideways. I charge the Chosen into the Ballistae, electing not to Clash as the current position means that his Sorcerer can’t draw line of sight and blast more spells into them. Daryl however activated his second Sorcerer instead, giving time for him to work through his Command Stack and move the accompanying Fireforged laterally opening up the line of sight to finish the Chosen by the end of the Round. The Raptors were brutalised by the Infernos, and even with the Matriarch healing they were whittled down and ultimately finished off the following turn doing no meaningful damage, crushing my right flank entirely.
There was no way I was going to be able to win the long game, so I switched plans to try and hold the two left zones as long as possible and keep scoring the 7 points a turn to maintain my lead. I sent my Tontor left to intercept the Steelforged, eventually grinding through them but ultimately being shot down by the Sorcerer and Fireforged once they’d dealt with the Chosen. Instead of charging my Thunder Riders in, I backed them to score and protect my middle left zone, hoping that they would hold the line long enough to let me keep my lead. But after a few rounds of Hellbringer Drake Shooting, debuffs from the Steelshaper and charges from the Steelforged and Inferno Automata they went down too. At the end of Turn 7 I had just my Blooded left, but the Regiments destroyed and consistent scoring had let Dweghom catch up. We tallied up the points remaining concluding a decisive Dweghom Victory.
This was a great game, even though it may have looked one sided by the end. I had a huge scenario lead by Round 4 and his units were very boxed in. There was a real time question of whether he could kill me fast enough to get into my Thunder Riders and finish me off, which he managed to do but honestly not by much. Looking back I should have held the Chosen back a turn and positioned better, but even then if I’d scored his zone rather than contested it would have helped keep my lead for longer.
There’s a real question here about small elite armies vs MSU too. I was often getting to go first due to having less activations, but the MSU list can stall out my turns until I’m committed and then respond once I have no more moves left. There’s advantages to both and I think its not certain which method is overall better.
Post-nerf, I think this is a much closer game possibly even favouring the W’adrhŭn depending what changes the Dweghom make. I absolutely cannot fault Daryl though for winning a very challenging matchup by calmly grinding and taking back the game despite my huge early lead. He earnt the win and was a pleasure to play against, exactly the opponent you would want to face in the final of a major event.
Conclusion
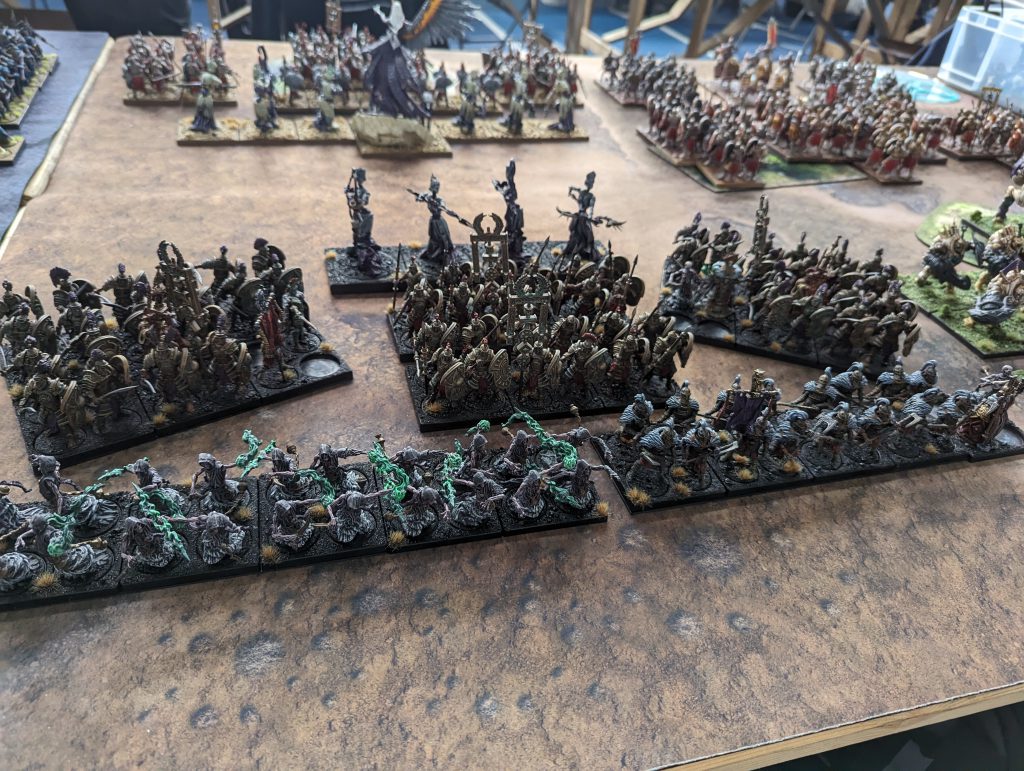
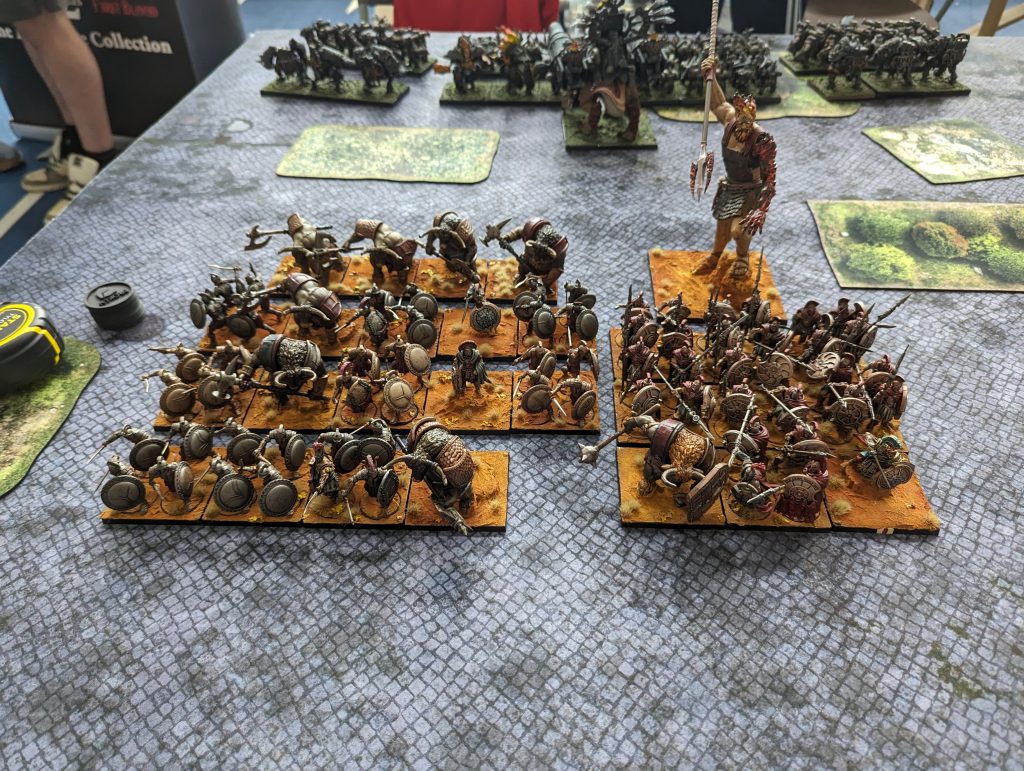
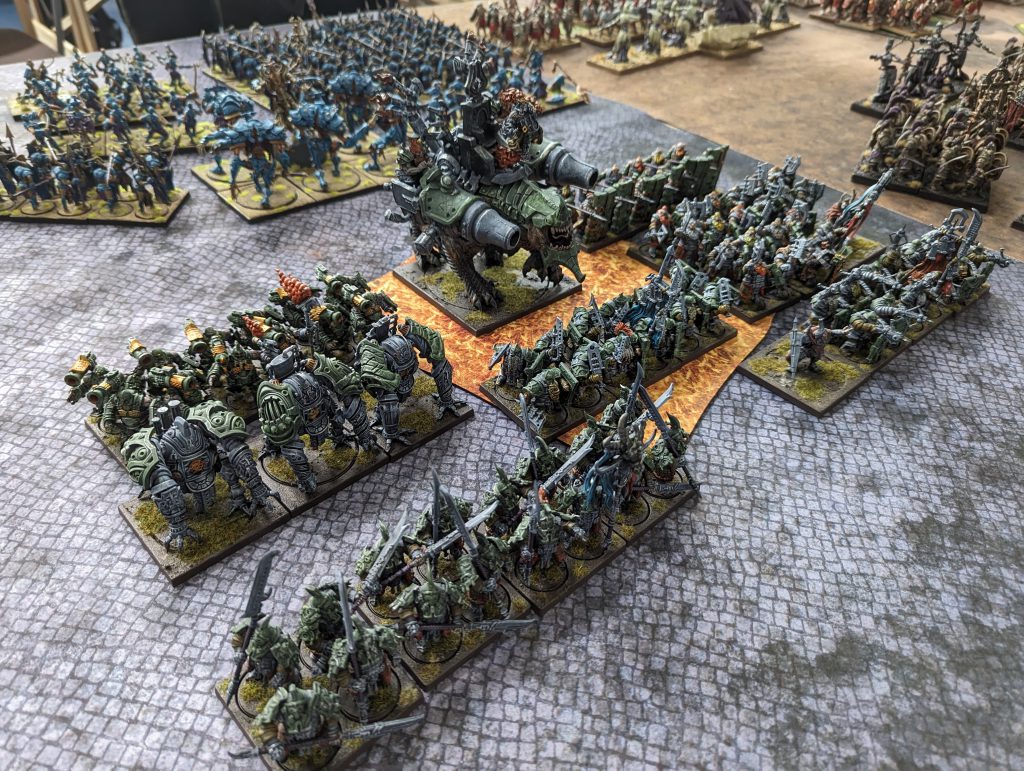
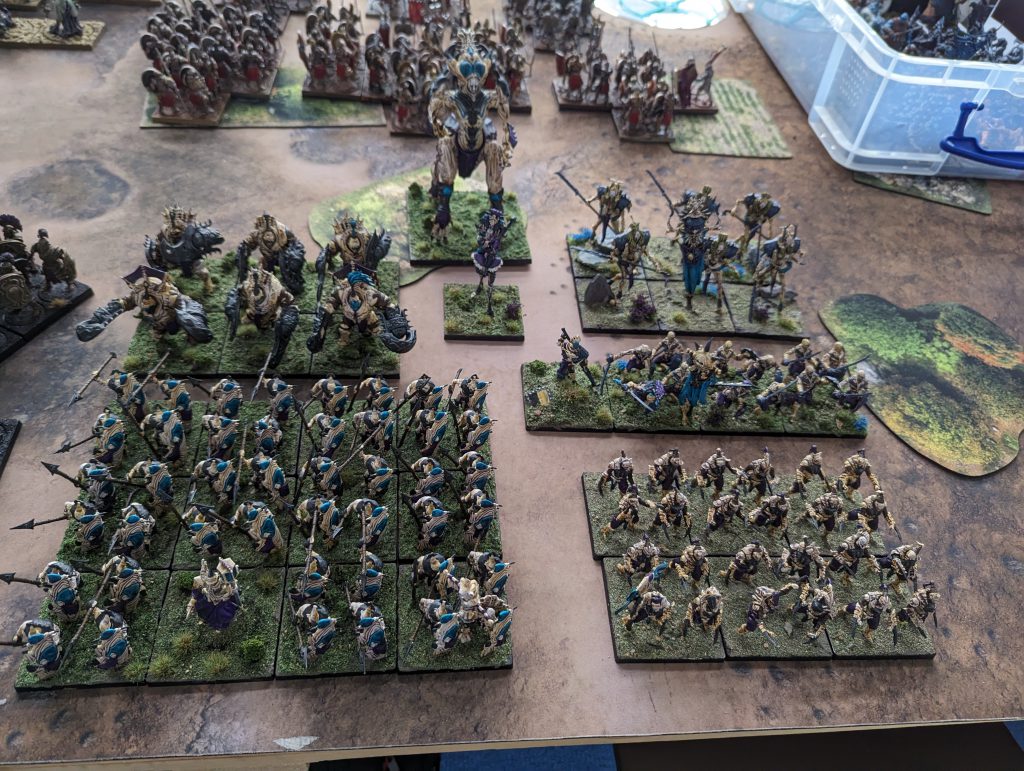
Overall I couldn’t be happier with my experience at the LGT. The atmosphere was great, the event ran smoothly and this was my first chance to really meet Conquest players from across the country. I’d managed to go fully painted, a rarity for me I have to say, and I hit my personal goal of winning more games than losing. Several of my games were very close and could have swung either way too, which always makes for an exciting aspect of this hobby. Here are some of the armies displayed, but this photo does not do it justice at all.
![]()
![]()
Importantly for me, I felt that I learnt a lot in my games and that I could have made better decisions at several points. Player agency is really important in any wargame; nobody likes to have a game where one player doesn’t even have a tactical fighting chance even in a less favoured matchup. Its something I really have come to appreciate about Conquest as a game system, where you can become a better player by taking time to learn and practice.
4-1 is an achievement I’m definitely proud of, but I would be lying if I pretended I don’t want to go for gold next year… until next time!
General Cross
Have any questions or feedback? Drop us a note in the comments below or email us at contact@goonhammer.com.

You must be logged in to post a comment.