
In this new min-series, Mike details his journey towards building a gaming board for Carnevale, sharing his thoughts and experiences with both the kits and techniques for getting the most out of them.
When I volunteered to create a miniature Venice, I hadn’t given a huge amount of thought to how I’d actually approach The Venetian Quarter, beyond “God damn wouldn’t it be cool to have a proper board with resin canals.” There were a couple of approaches I considered upon giving it more thought:
- I could pour each canal individually, using moulds designed to allow a modular set up with the streets. This, I imagined, would end up being pretty complicated but would allow for some neat water effects at the base of the streets.
- Another approach could involve a fixed layout, but this would mean at least finishing all the streets before actually starting the build and I was feeling impatient.
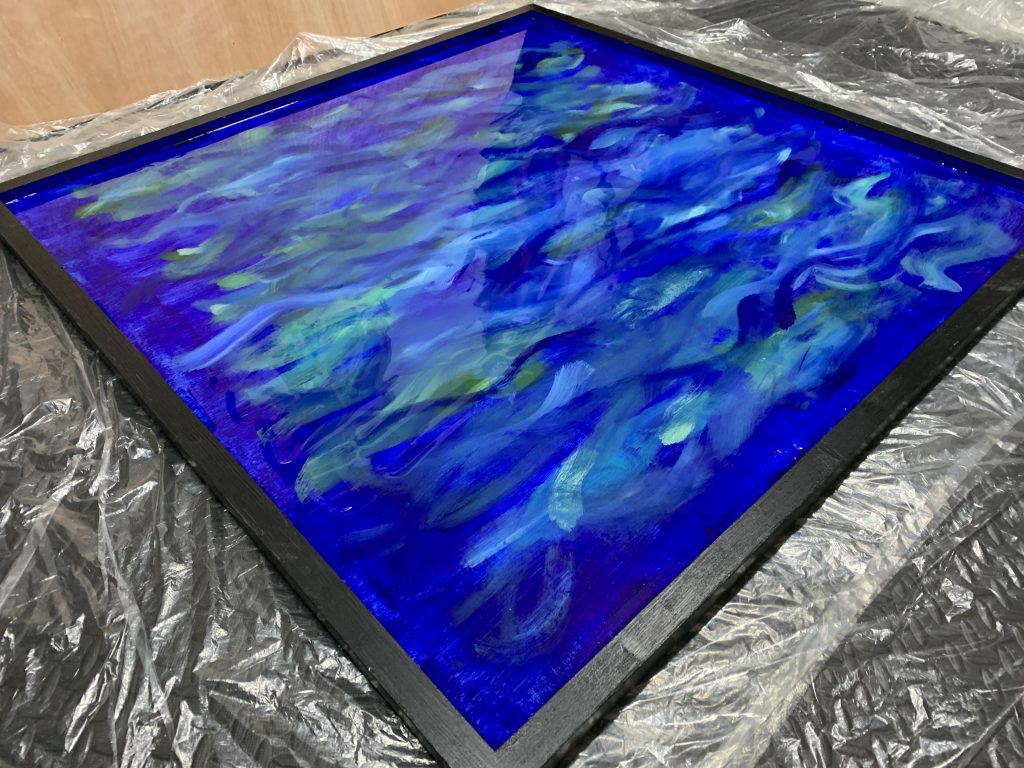
So I settled on pouring a single slab over a pre-painted base. While this approach wouldn’t look the coolest it would give me the largest amount of versatility for my investment.
With the initial style of board chosen I started doing a bit of research and asking around. Thankfully we have a number of hugely helpful and patient Patreons, and I spent a great deal of time chatting with Wowshawk and Drake Andrews about how I should approach the pour.
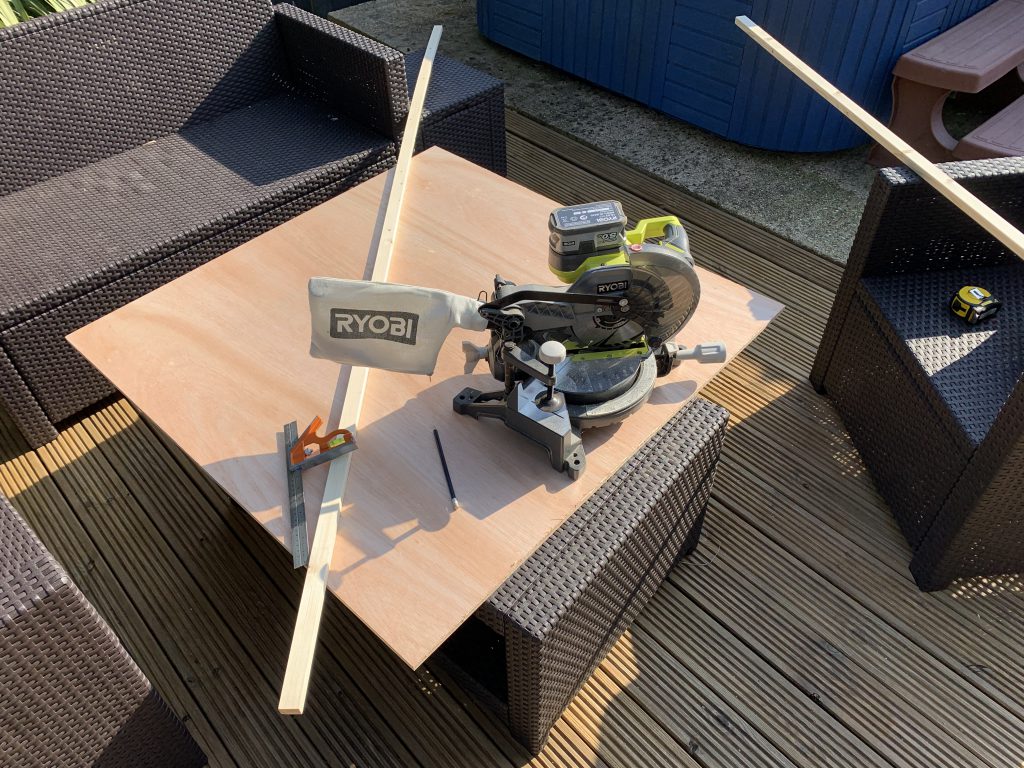
Something to note before you start: Be very sure of the size of board you want – resin pours are pretty permanent. I settled on 1m by 1m, not really thinking too hard about the implications for game boards that are mostly in Imperial units. In retrospect I should’ve opted for either 3′ by 3′ or 4′ by 4′. With space being a consideration, and if I was doing all this again, I’d go with a 3′ by 3′ board. The minimum thickness you want for your baseboard is 12mm, either MDF or plywood – any less and you’ll risk sagging or warping once the resin is on. While the pour was only going to be a couple of milimetres thick, I wanted to add a decent border to the piece, opting for 18mm by 28mm planed square edged whitewood.
With all of the raw materials together, I went ahead and assembled my frame, making the most of the good weather while I had it. The last time I’d done any real woodworking was secondary school, so I’d be continuing this project as I began and mostly winging it. In a rare moment of foresight, the plywood was cut to size by a professional with the right tools, and I remembered to add the 56mm to each measurement to account for my border.
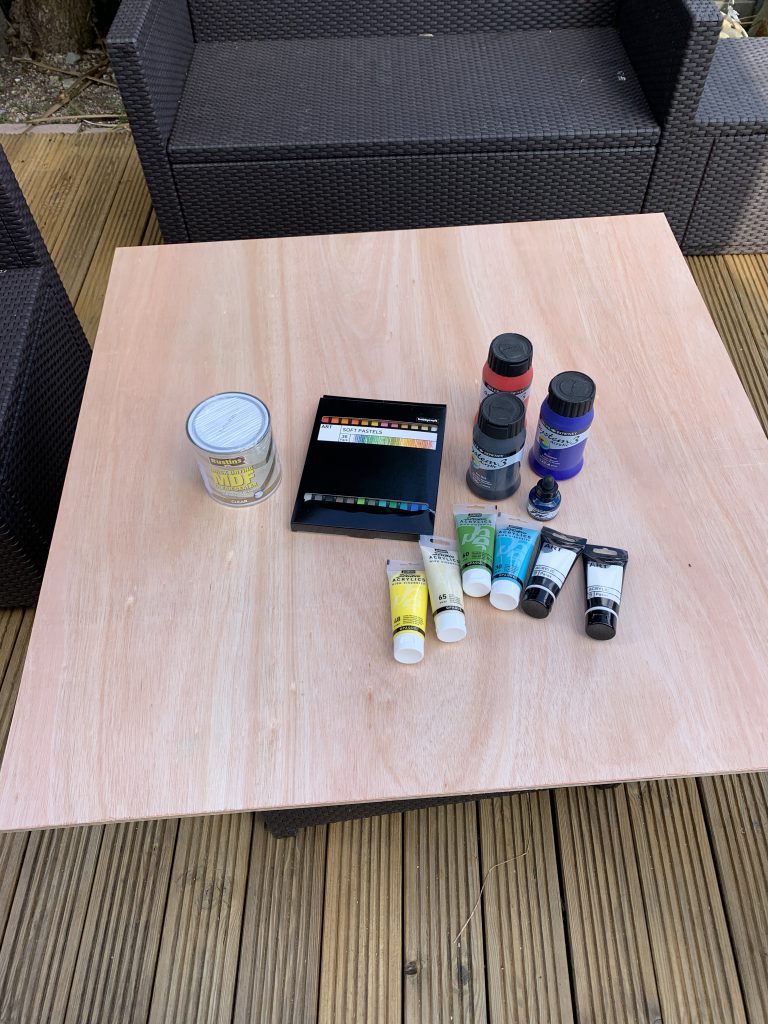
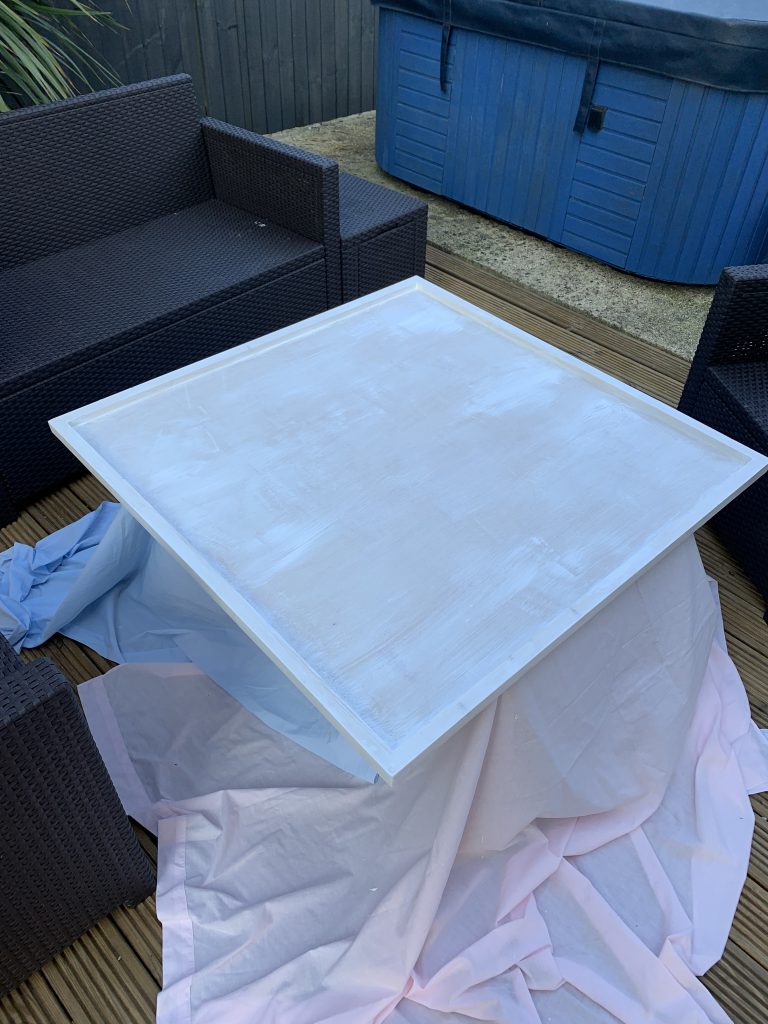
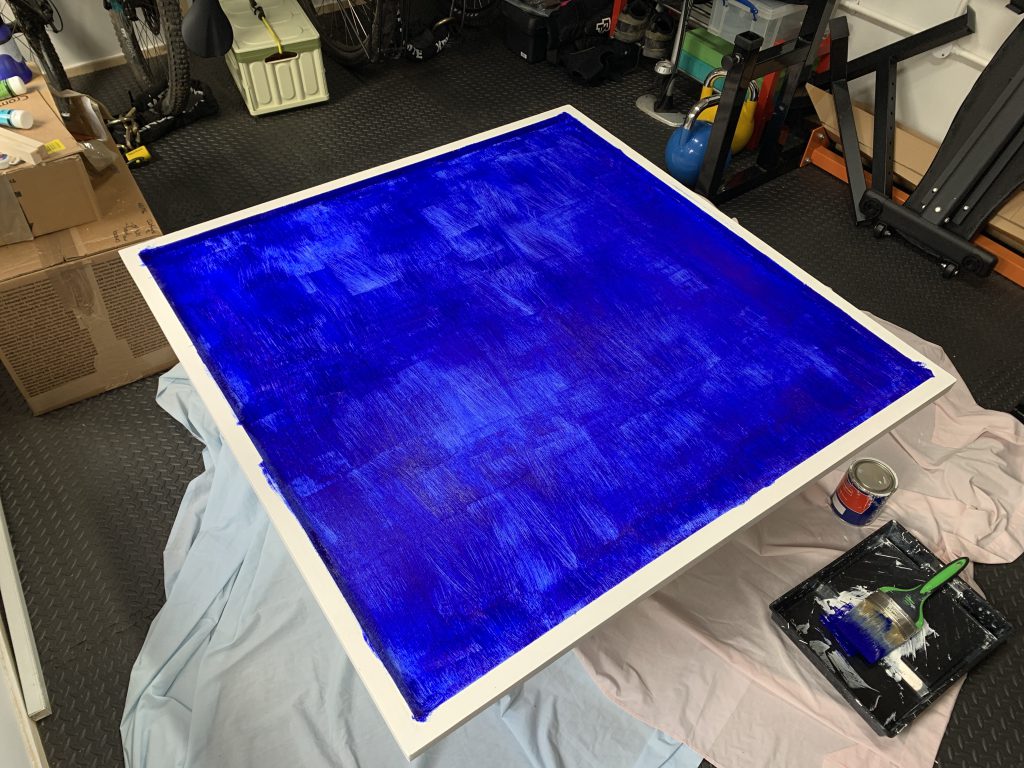
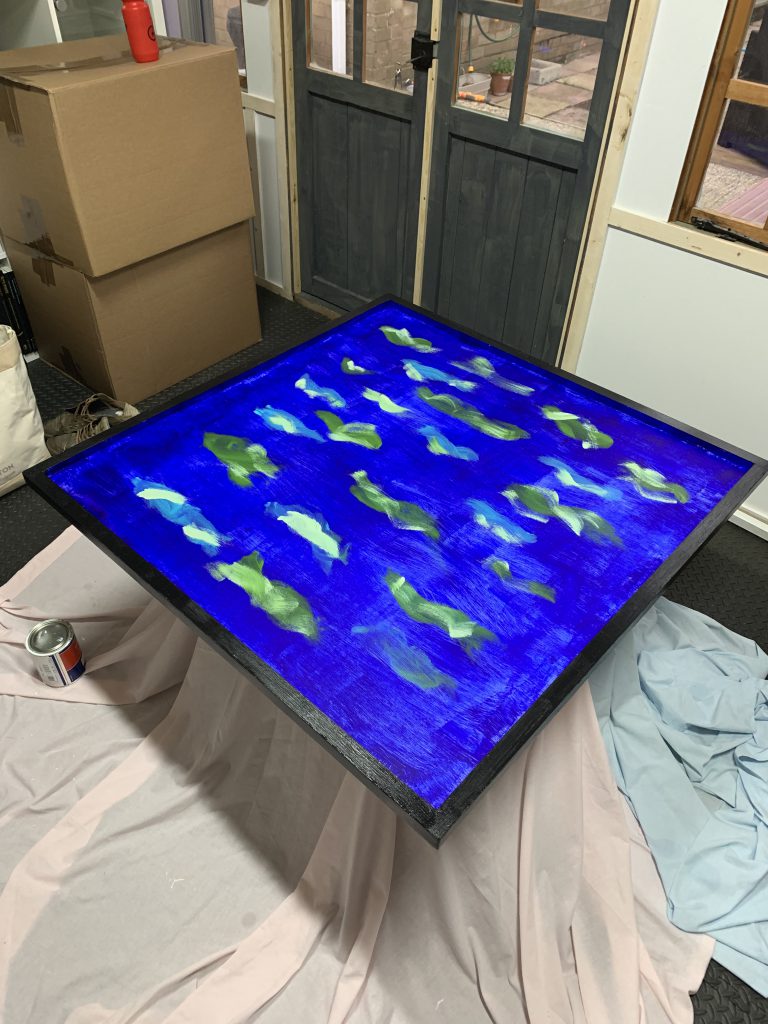
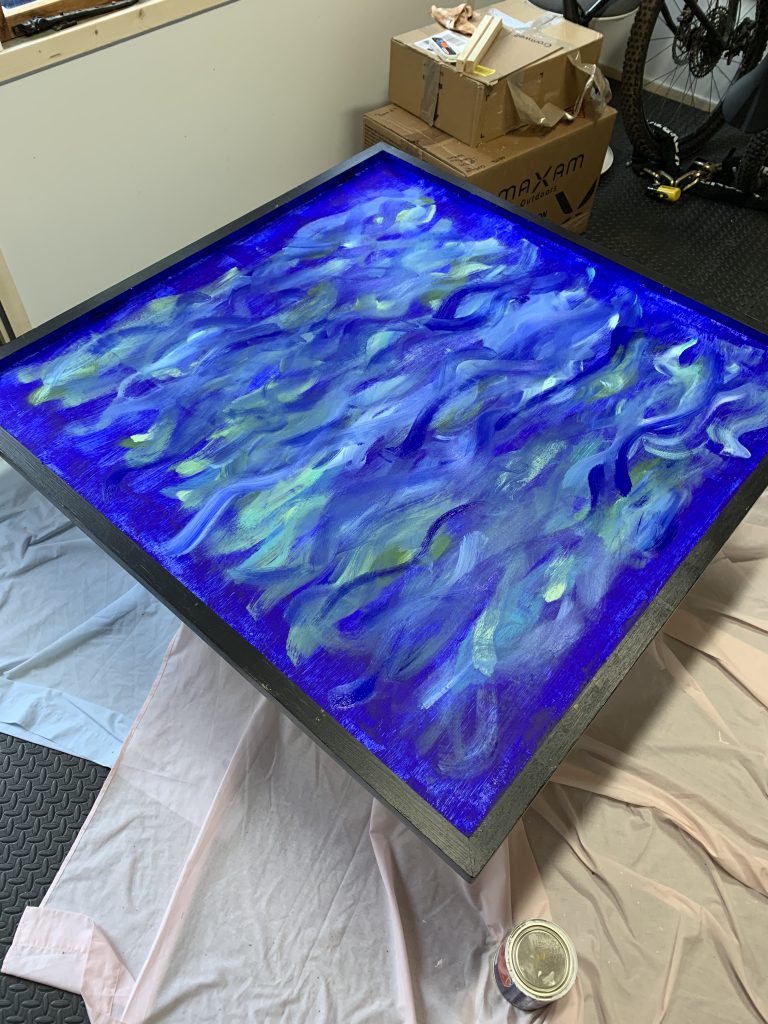
Much like painting a model, the frame would need priming too and once I had a couple of coats of wood primer down I set to work with various blues and greens to create a watery backdrop for the resin. With the backdrop painted I did the border in black, keeping it all relatively the neutral and framing the whole piece.
I’m lucky enough to have a reasonable amount of space in my hobby room, preparing for the pour I took Wowshawks advice and put down a couple of cheap plastic sheets just in case my DIY wasn’t up to scratch and I got any leaks. With a roll of duct tape and a litre of resin with a disposable mixing bowl at my side I was ready.
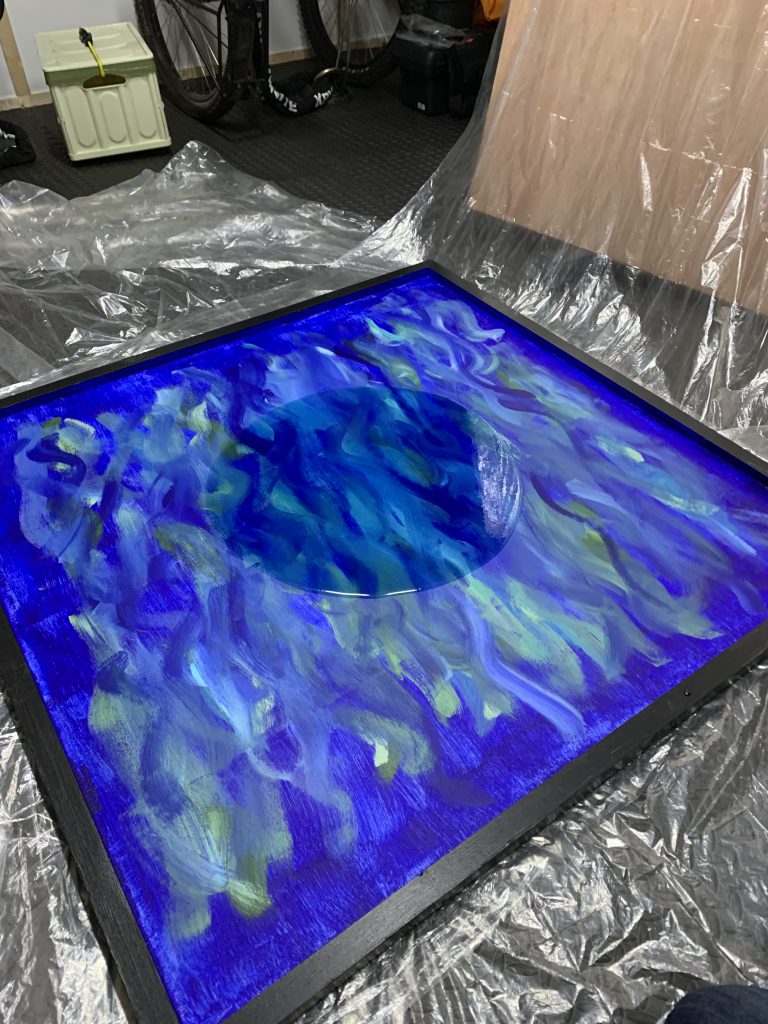
Shit. Remember I said I was winging it? Well at this point that was becoming an issue! I hadn’t checked to see what sort of coverage I could expect from a single litre of resin and the answer now staring me in the face was “not enough”. Thankfully Discord came to the rescue once again and I was talked through levelling it out as best I could, and I bought another litre of resin. If you do hit a situation like this, try gently tipping the board to spread the resin around as best as possible.
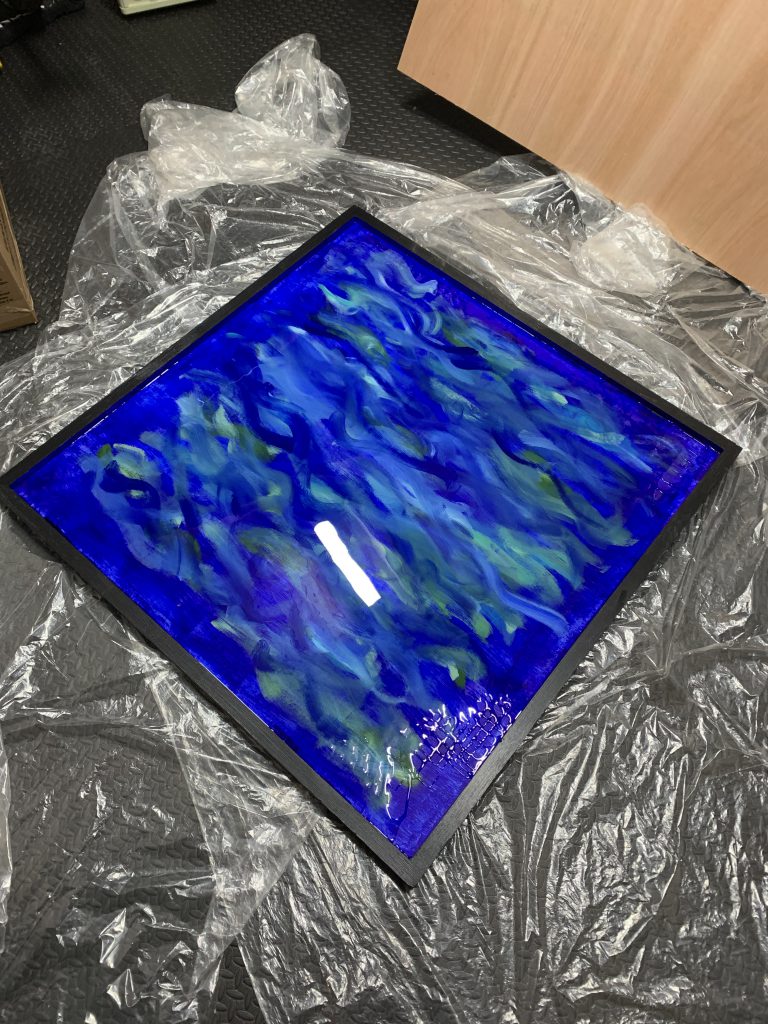
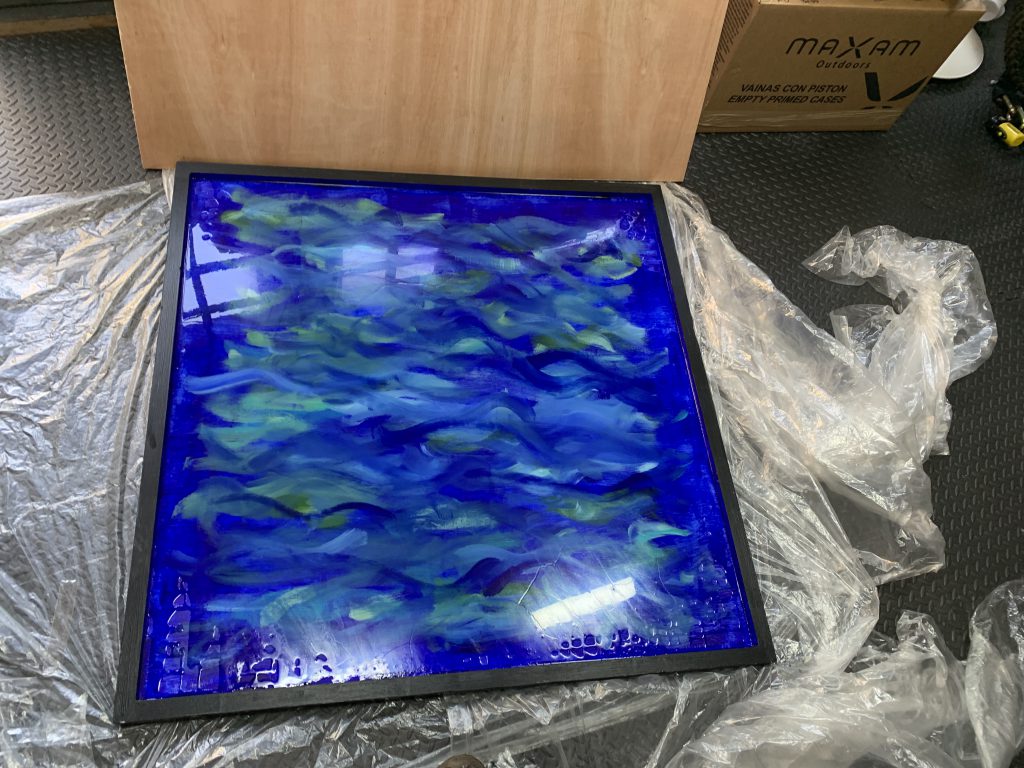
For the second pour, I gave up using the tiny mixer and tilting to level it and just used my gloved hand to push the resin level. This is not particularly smart or clean but it is fast! I was still left with a couple of spots I’d eventually need to fill to get the board perfect but at this point all the major gaps had been covered and there was no exposed paint.
Next Time: Building on the Water
This board was an absolute journey and one hell of a way to start dipping my toe in to scratch building terrain. From now on I’ll definitely be taking notes and doing a little more planning ahead, but I’m sure that won’t stop me from adding another act to the comedy of errors. In the meantime, if you have any questions or feedback, drop us a note in the comments below or email us at contact@goonhammer.com.

You must be logged in to post a comment.