In our How to Paint Everything series we look at how to paint well, everything, with different methods, approaches, and painters. In this article we’re looking at how to paint General Grievous, from Star Wars: Shatterpoint. This model was provided by Atomic Mass Games.
Welcome back to our continuing coverage of Star Wars: Shatterpoint, developed by Atomic Mass Games. In this HTPE, I’ll give my overall impressions of the box and walk you through how I approached painting General Grievous.
Overall impressions
The models in this box continue trends in Shatterpoint sculpts, both good and bad. First, the good. The models range from ok to great in the looks department, and have nice sharp detail, especially Grievous. Like many Atomic Mass Games models in both their game ranges, I find they look even better in person. Grievous certainly fits that mold. He’s obviously the centerpiece model of the box, and the sculpt lives up to that. The lunging, leering pose he has while perched on the statue wielding four lightsabers really fits his image as a creepy, intimidating villain. Grievous was fun to paint, but if you don’t have a painting handle, get one that can hold him! There’s lots of areas at odd angles you’ll have to paint. My old man wrists really appreciated having the painting handle to make this less painful, literally.
Kraken is…fine but less interesting as we’ve already seen a similar model in the core set. Like Kalani, Kraken has some options for different arms. But Kalani’s holomap arm and the ‘arm behind his back’ option are more distinctive and interesting than Kraken’s options. As far as painting, nothing remarkable to say here.
The B2 droids are exactly as expected. They’re big, lumbering, gun platforms on legs. There’s less to be done here in terms of interesting sculpts, and AMG correctly didn’t try to do anything too crazy here. There’s not much of great interest in terms of painting, but these are a good chance to try adding some visual interest by exploring more interesting color choices, or with things like weathering.
The bad trend we see continued is the surprising difficulty in assembling most of these models. Grievous and to a lesser degree, Kraken, were annoying to get to stand per the assembly instructions. (The chonky B2 droids with their more static poses and much larger leg-to-hip joins didn’t have this problem.) We saw this with previous droid models in the core set- the B1 Droids and Kalani. The models’ legs are meant to be assembled with a very specific angle and connection, but the soft plastic (especially with plastic glue) and often shallow connections make it more difficult to line up the legs in the very specific way you’re intended to. It can take a lot of experimentation with and falling of models to get them standing acceptably. I recommend building bottom up, in fact- do the legs and torso early, and get them glued to the base before building the rest. AMG is surely aware of all this, so here’s hoping droid models further down the development road will improve on this.
Prepping the model
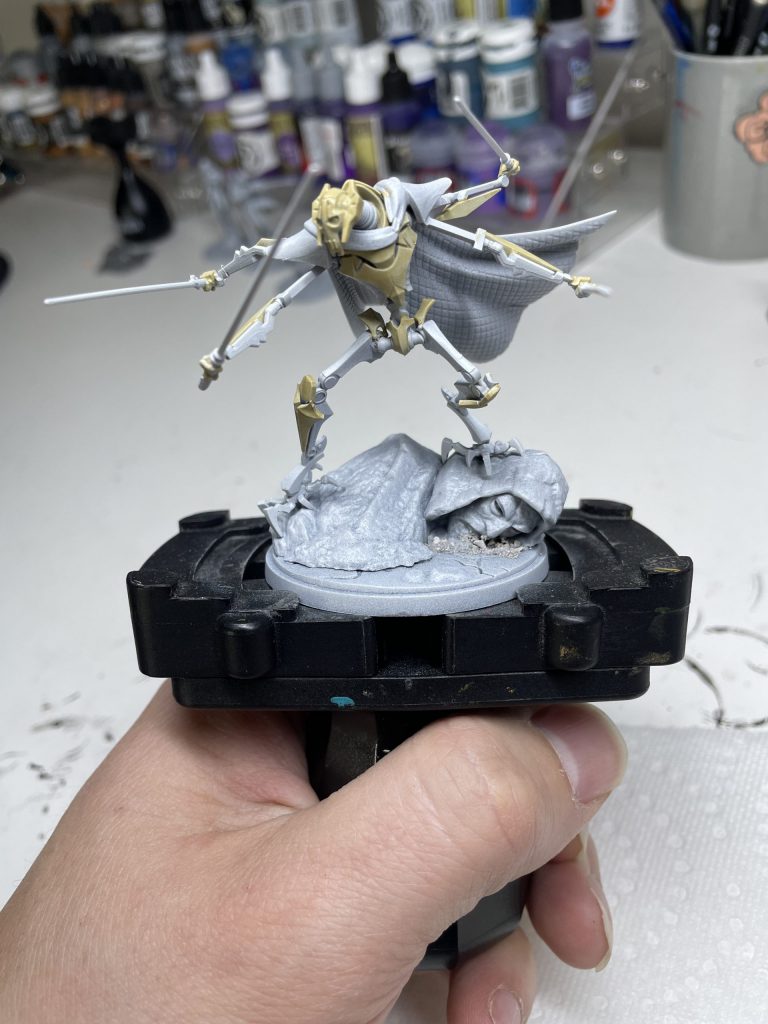
My first step on almost any model I paint is to prime it with white spray primer. (For those in the U.S., I recommend Duplicolor Sandable Primer in Flat White.) Grievous was no exception. I especially wanted that bright base for the khaki/whitish armor panels in particular. Speaking of which, my first step was to apply a coat of paint to those armor panels, to block out what was armor paneling and what was his skeletal undercarriage. Here I used GW Morghast Bone. Otherwise, I wanted to use an inside-out approach, starting with the interior parts of the model such as the skeletal substructure, before moving to the cape and finally armor plating.
Metallic ‘undercarriage’
After blocking out the armor, I switched gears and moved to basecoating all of the metallic undercarriage. I typically don’t put down a black or other dark color before metallics anymore, despite the white primer. Here I did however, because I wanted the metal parts to look darker than my usual metallic silver style. Over the black base I used my standard Scale Color Black Metal. (I’m a big fan of Scale Color’s metallics in general.) After that, I applied a wash of GW Nuln Oil. I did a heavier wash than normal to really darken that metal down. The next picture shows what it looked like after the was dried:
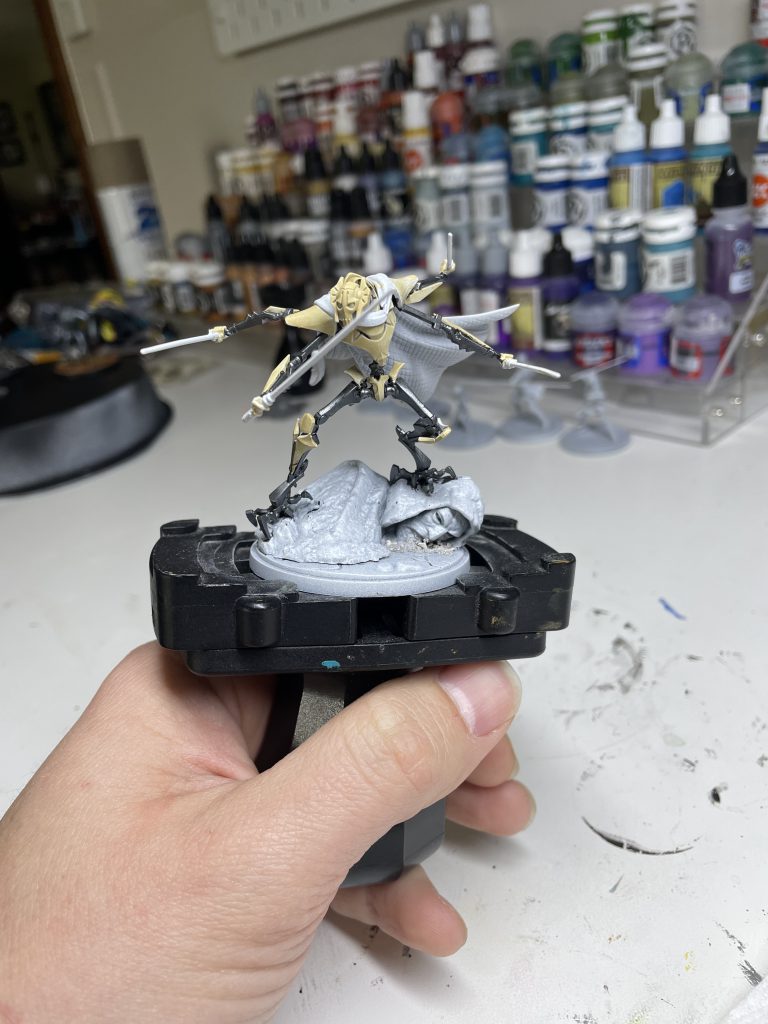
I did some edge highlights on the metal with Scale Color Heavy Metal, and moved on to his cloak.
Painting the cloak
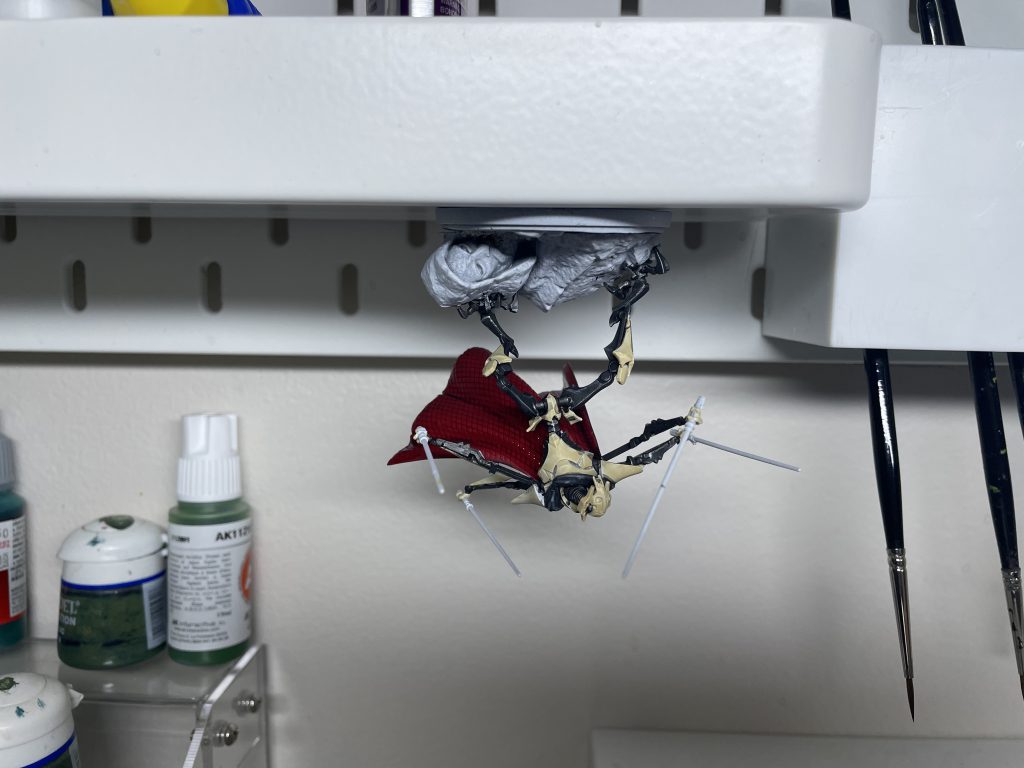
I started the interior of the cloak with 2-3 thin coats of GW Mephiston Red, followed by a wash of Carroburg Crimson. The wash wasn’t settling where I wanted it to though, down in the folds of the cloak. So I took advantage of my magnetized bases to get the wash to go where I wanted:
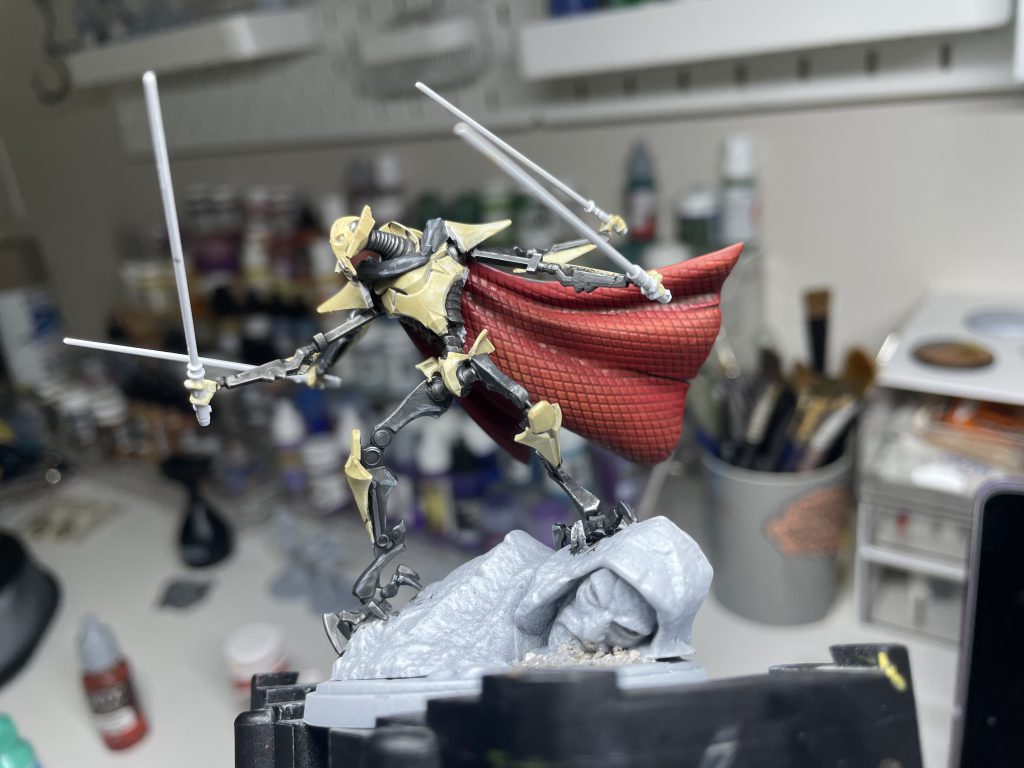
When the wash dried, I highlighted the interior cloak with a combination of drybrushing and a few edge highlights. I started with a drybrush of Mephiston Red again, the mixed in more and more orange (P3 Khador Red Highlight in this case) and drybrushed successively smaller raised areas of the cloak. I did a few edge highlights with a brush, but the drybrushing did most of the work here. Here’s a closeup of the result:
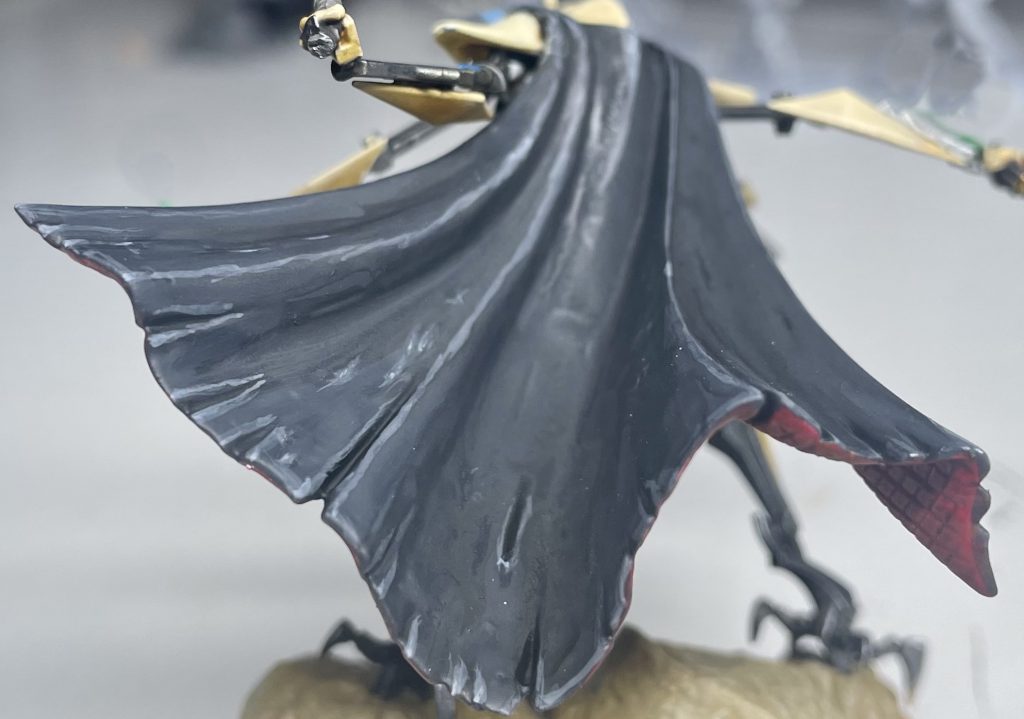
The cloak exterior is a sort of weathered, ratty black, so I wanted to emphasize that in the paint as best I could. I based the cloak with VMC Black Grey plus a bit of Huge Miniatures Pale Rose (about a 4:1 ratio), just to warm it up a bit. The whole cloak got washed with Nuln Oil. When that dried, I started doing brush highlights by mixing in more Pale Rose, then as they got higher and smaller, I started mixing in VMC Offwhite. Here’s the end result:
Armor plating
Once these major areas were done, I moved back to the armor plating. After another coat or two of the Morghast Bone, I gave the armor a wash of GW Seraphim Sepia. I should have used a lighter touch with this, as the wash pushed things more yellow than I intended:
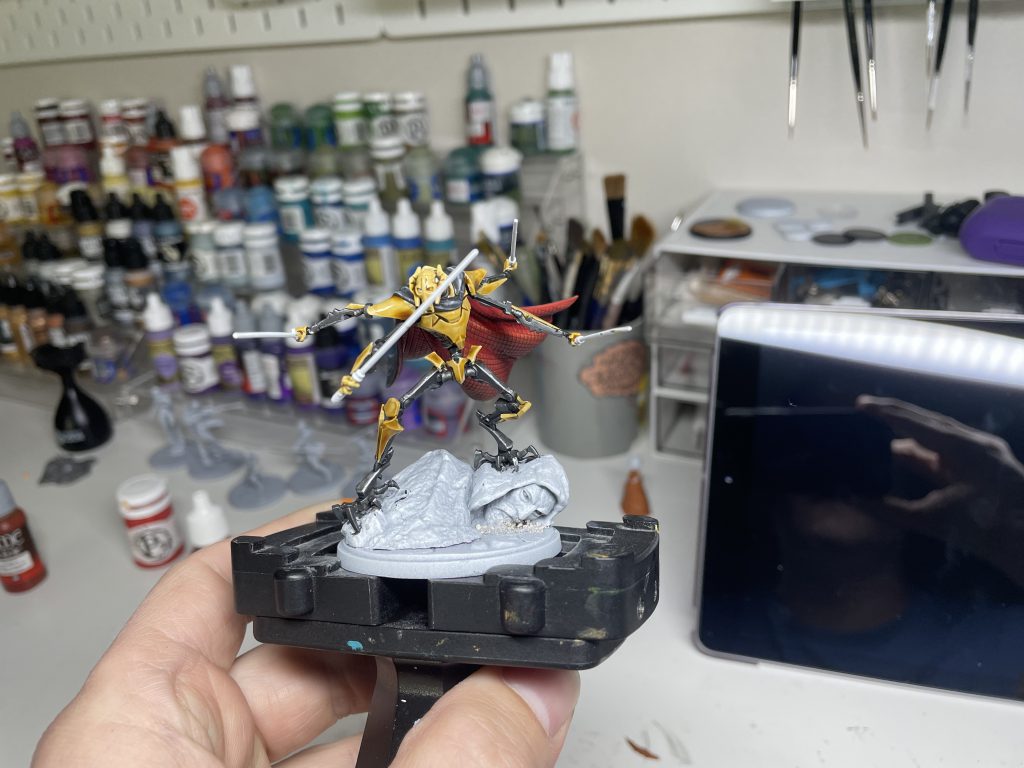
That meant I had to do more covering up of the wash than expected. But mini painting is 90% about fixing your mistakes, right? I started layering back up with Morghast Bone. As I moved to raised areas that would get more light hitting them, I started mixing in GW Ushabti Bone. I did some edge highlights here and there with straight Ushabti Bone as well. After that, it was details, blacklining, and basing left.
Details
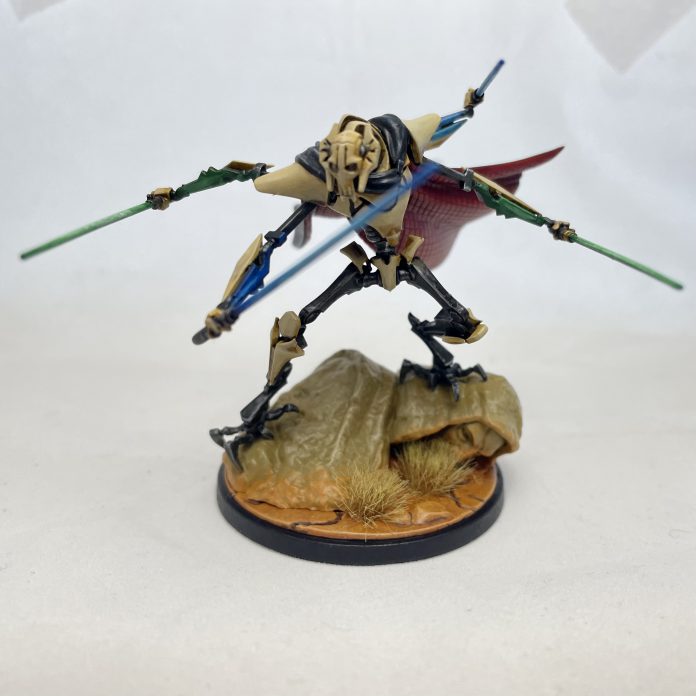
The lightsabers were base coated with a thin layer of GW Dawnstone followed by a wash of Nuln Oil. I hit a few of the greebly bits on the lightsabers with some other colors, mostly a dot of red or bit of gold, just to differentiate them a bit and add a little character visually. The blades were based with either P3 Cygnar Blue Highlight or GW Warpstone Glow. I then layered up, adding more and more P3 Menoth White Highlight to the original shade to get a glow effect. A blue or green wash was applied right at the base of the blade as well.
I added some basic OSL effects to a few spots on Grievous as well. First, I drybrushed an area where I felt light from the saber would hit. I started with a darker color than the original basecoat. So, for the blue this was P3 Cygnar Blue Base. I’m missing a note for the green here, but it was likely P3 Iosan Green. Ultimately the point here is to represent light hitting a farther away surface that is then less bright, so just find a slightly darker shade if you use this method. Then I drybrushed a smaller area within that with the original base shade. Last I did a line highlight of the base shade mixed with P3 Menoth White Highlight. (You can use any good off white for this, but this one has been my go to for years.) You can see the results of these in the final pictures below. I did initially try to do some OSL on his left shoulder, but it just wasn’t working for me for some reason. I covered that back up and stuck to doing OSL on his arms. Is the lighting I ended up with realistic? No, but just doing those arms was a lot less frustrating for me, and especially at tabletop height it looks effective enough.
After blacklining various spots on the model, and painting the eyes, it was time to base.
Basing
I used my standard desert/alien soil scheme here, but first I had to take care of the statue. I wanted a light colored, sandstone sort of look for the statue rather than a gray stone. Looking back, I think a gold or bronze statue could look nice here as well, especially with some tarnish and weathering. But for mine, I basecoated it with GW Tallarn Sand. I then mixed in a little P3 Menoth White Base and ultimately Menoth White Highlight as I drybrushed more and more lightly and with more focus on raised areas.
From there, I painted the soil with GW Skrag Brown, followed by successive lighter drybrushes of GW Deathclaw Brown, GW Tau Light Ochre, and P3 Menoth White Base. Be sloppy with this step by the way- getting some paint on the statue helps tie it in more to the base. Crevices and cracks got lined with P3 Battlefield Brown. I glued down a few Army Painter grass tufts, painted the base rim black (It’s either black or Goblin Green. These are the only acceptable base rim colors. Don’t @ me.), and that was that!
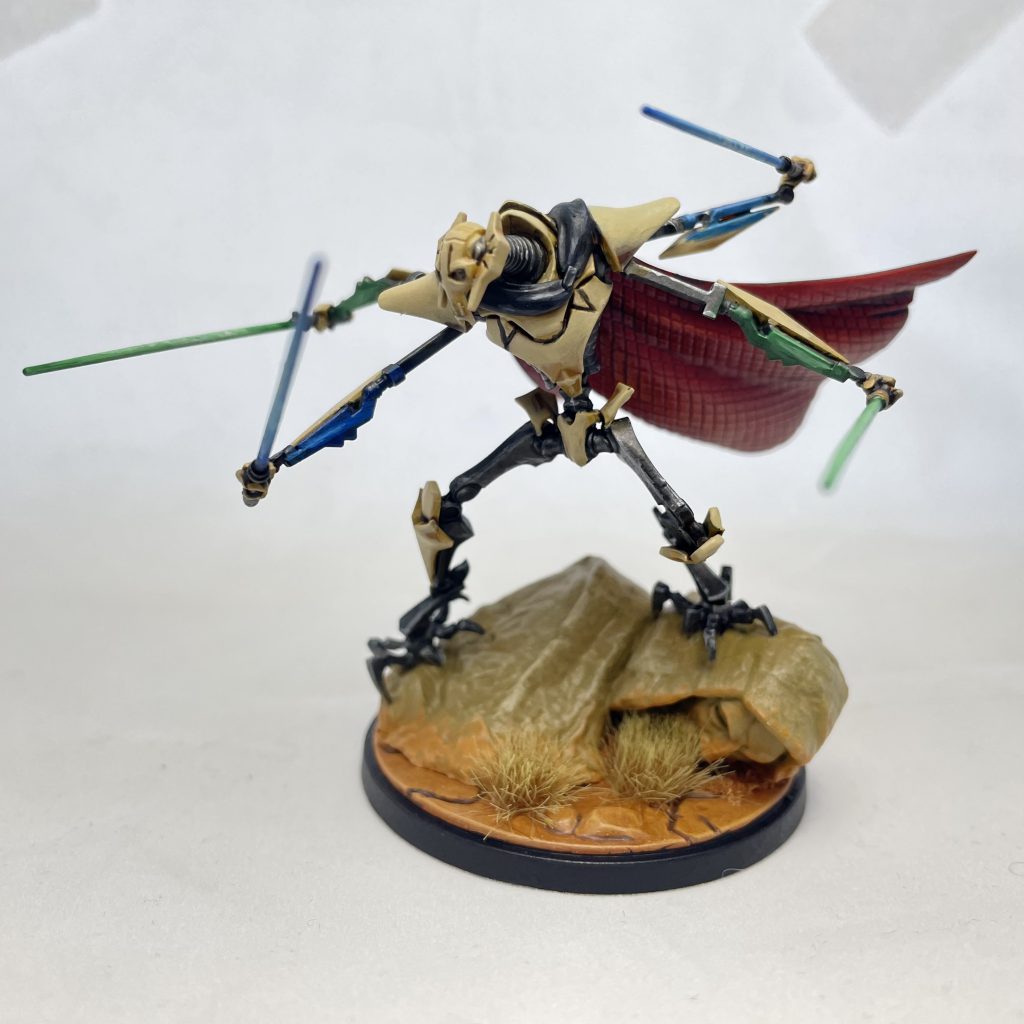
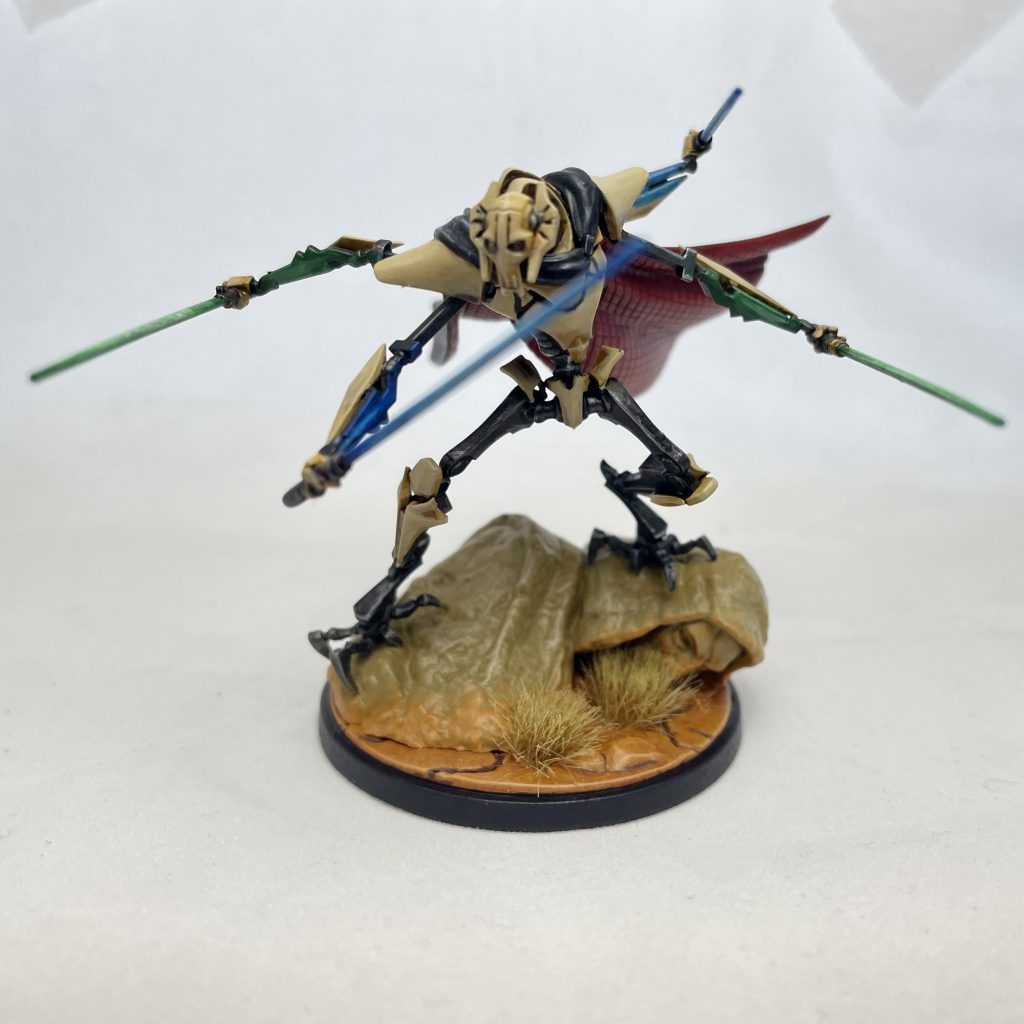
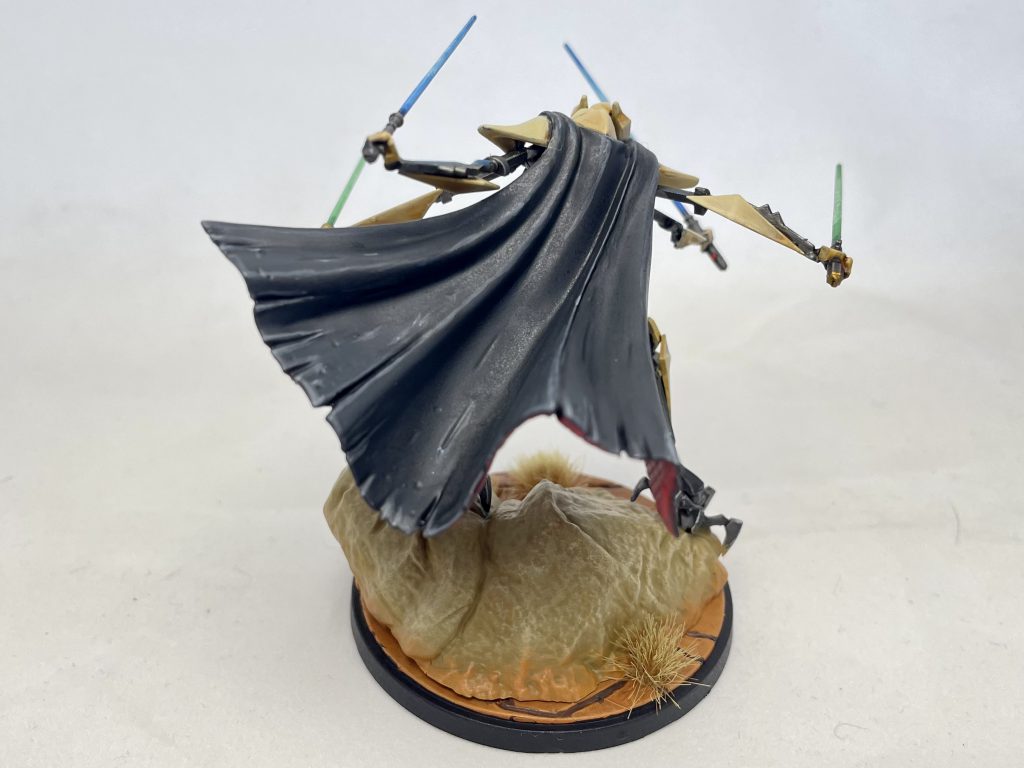
I painted this model start to finish in a few sessions spread out across a single day. For me, that’s ludicrous speed painting and a testament to how enjoyable a process it was. I’m looking forward to running Grievous and a swarm of droids on the battlefield very soon. Thanks for reading!


You must be logged in to post a comment.