This article is part of a larger series on how to paint the Thousand Sons. To return to the parent article, click this link.
The Thousand Sons are one of the more complicated and difficult armies to paint in Warhammer 40,000, with lots of gold trim and intricate details that can make them daunting for new players to take on. However there are some easy tricks you can take on when painting them to make the process less daunting. In this article we’ll look at one such set of tricks and show an easy method for painting the faction.
When it comes to painting the Thousand Sons there are two schools of thought: In one, you base the model gold and paint the armor panels, and in the other you paint the armor first and then paint the trim. There are advantages to both – when you base the model gold you can save a lot of time and make it way easier to paint the model as a whole, and get some great edge highlights on your trim, at the cost of having better/easier gradients on the armor.
This is the Games Workshop method, as showcased in Duncan’s video on painting Thousand Sons.
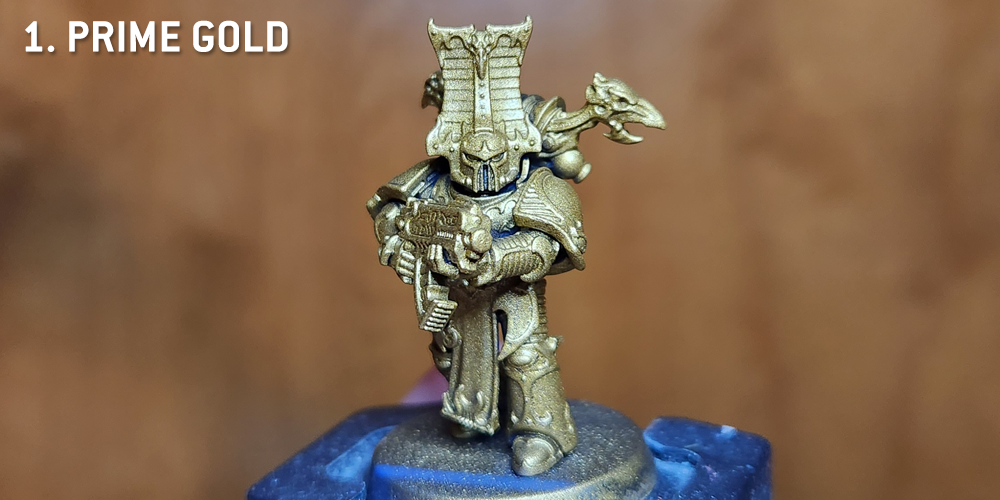
Step 1: Prime the Model Gold
Don’t overthink it. I’ve primed the model with GW’s Retributor Armour spray here, then gone back and cleaned up some spots I missed with the pot version.
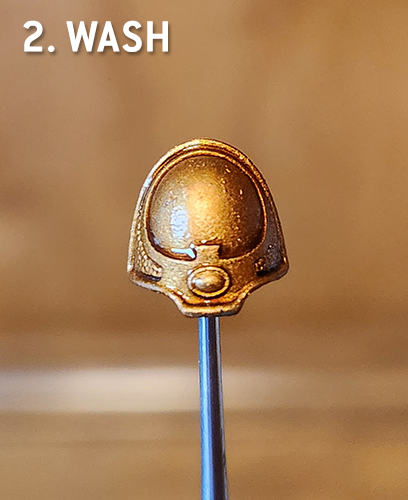
Step 2: Wash the Model
We want to hit the recesses on the gold and give it a more burnished look, so we wash the entire model. The GW method for this uses Reikland Fleshshade, but if you want something colder and darker, you can do Agrax Earthshade instead.
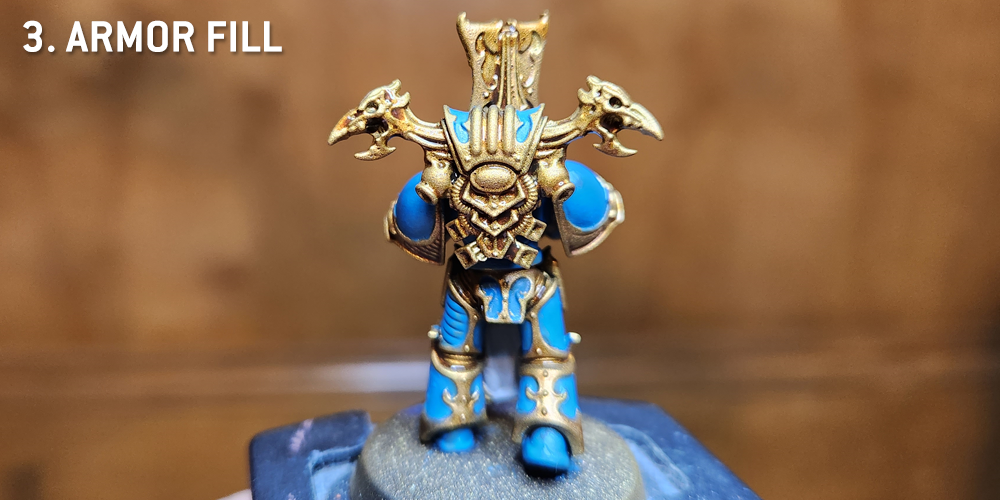
Step 3: Paint the Armor Panels
Now it’s time to do our first pass at painting the armor. I’m using Thousand Sons Blue here, and painting close to the trim, though you don’t have to get right up on it. Eagle-eyed readers will notice I messed up a spot on the butt. If you make some mistakes here, just go back and touch them up with gold before the next step. You don’t have to paint all the way to the edges here. I
This is also the step where I painted the tabard, dropping a coat of Celestra Grey.
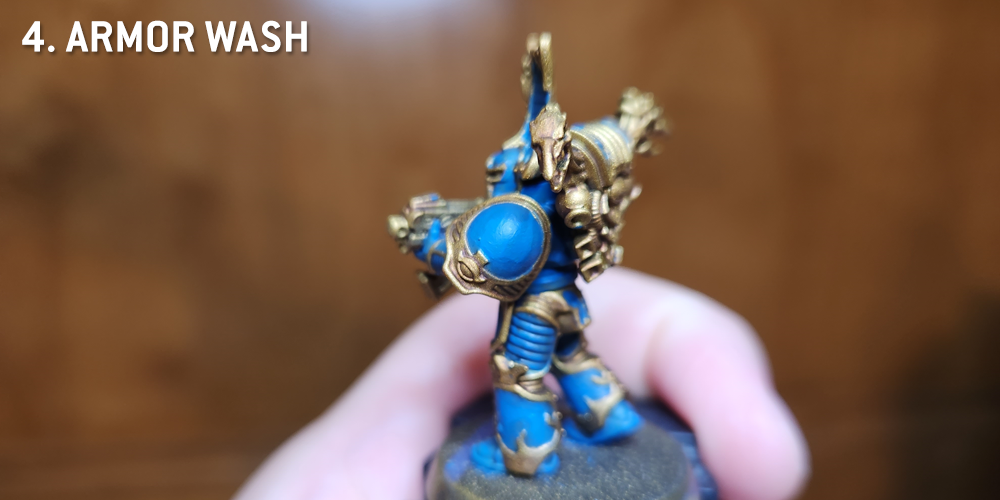
Step 4: Wash the Armor
Now it’s time to wash the armor. For this I used Nuln Oil. The goal here is to create deep, dark lines between the armor panels and the gold trim, so we want to avoid hitting the trim if we can, but we can darken the armor however. You can do this on the tabard as well.
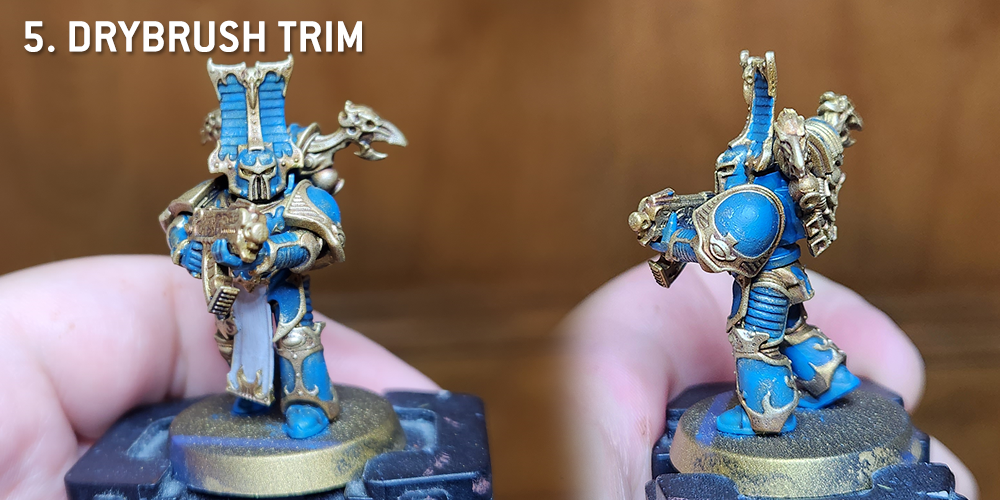
Step 5: Drybrush the Trim
Now it’s time to drybrush the trim. Using a small drybrush – I use the Artis Opus series D small brush for this – drybrush the edges of the trim with a lighter gold. The GW method for this uses Sigmarite, but I didn’t have that so I used Liberator Gold, which is basically the same color, only wetter. You can hit the armor panels in this step as we’re going to repaint them later, but you want to be careful to avoid getting paint in the recesses we just darkened.
When you’re done you’ll have some great edge highlights on your trim, so as we move on to the next steps we’ll want to be sure to avoid messing those up.
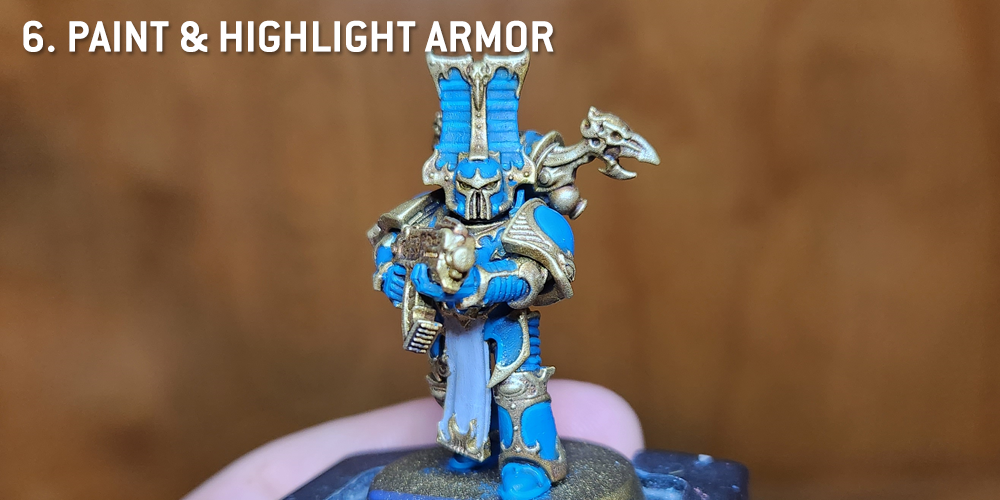
Step 6: Paint and Highlight the Armor
After the trim is done we can return to the armor. This is just Thousand Sons Blue, covering those parts of the panels we hit with Nuln Oil and our gold drybrush. Once we’re done laying down a new basecoat, we’ll highlight that with Ahriman Blue. You want to use this to hit the raised edges of the blue parts, and if you’re feeling adventurous, you can do thin lines against the edges of the panels to help it stand out from the trim. Remember when you do the stripes you don’t need to highlight all of them – this is the step when you’ll figure out which stripes are blue and which are yellow.
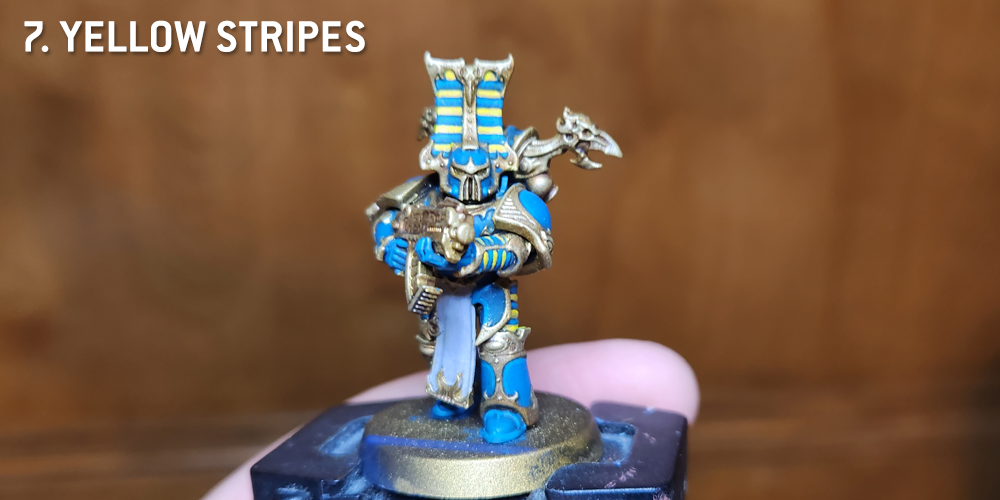
Step 7: Yellow Stripes
It’s time for the stripes. This is a two-step process. Step one is painting the stripes with Averland Sunset. Step 2 is edge-highlighting those stripes with Flash Gitz Yellow. For the really narrow stripes, such as the ones on the vambraces, I don’t edge highlight so much as I just paint the bulk of the stripe with the brighter color and leave averland showing around the edges/closer to the trim.
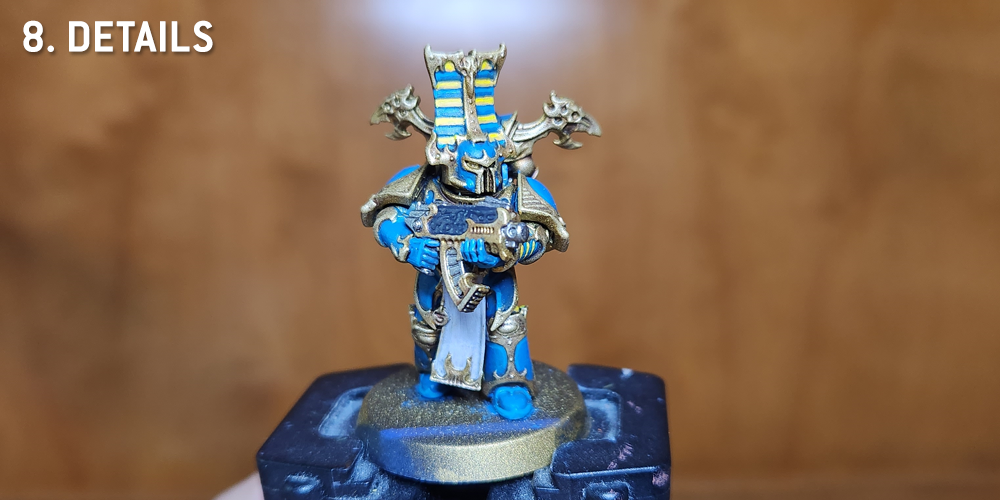
Step 8: Details
Now it’s time to start hitting some of the details. Here’s where I’ll paint the metal parts of the model, such as the bolter casing and barrel, the piping on the chest and backpack, and the exposed parts on the back of the knee. To do this I use Leadbelcher, then I wash the area with Nuln Oil and highlight with Leadbelcher and Runefang Steel.
This is also when I’ll paint the tabard. I’ll highlight it with Grey Seer and then use mixes of that and White Scar to highlight it up to white.
Step 9: Finishing Touches
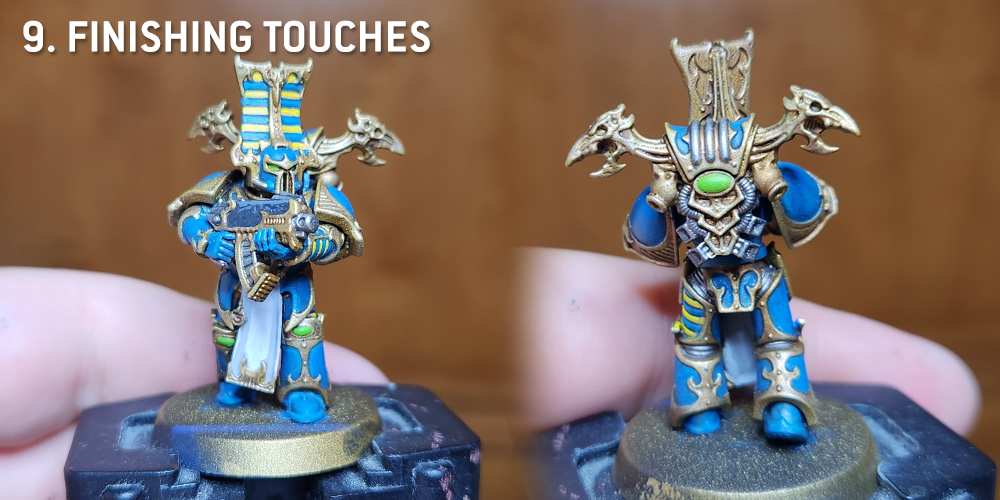
Now it’s time for the finishing touches. The eyes are painted with Moot Green, and that’s what I used for the gems as well, though the fast GW method is to paint those first with a bright silver like Runefang Steel and then coat them with something like Warpstone Glow or another contrast paint to do quick shimmery surfaces. You can also use a mroe traditional gemstone method here. I highlighted the moot green gems with a 50/50 mix of Moot Green and Dorn Yellow.
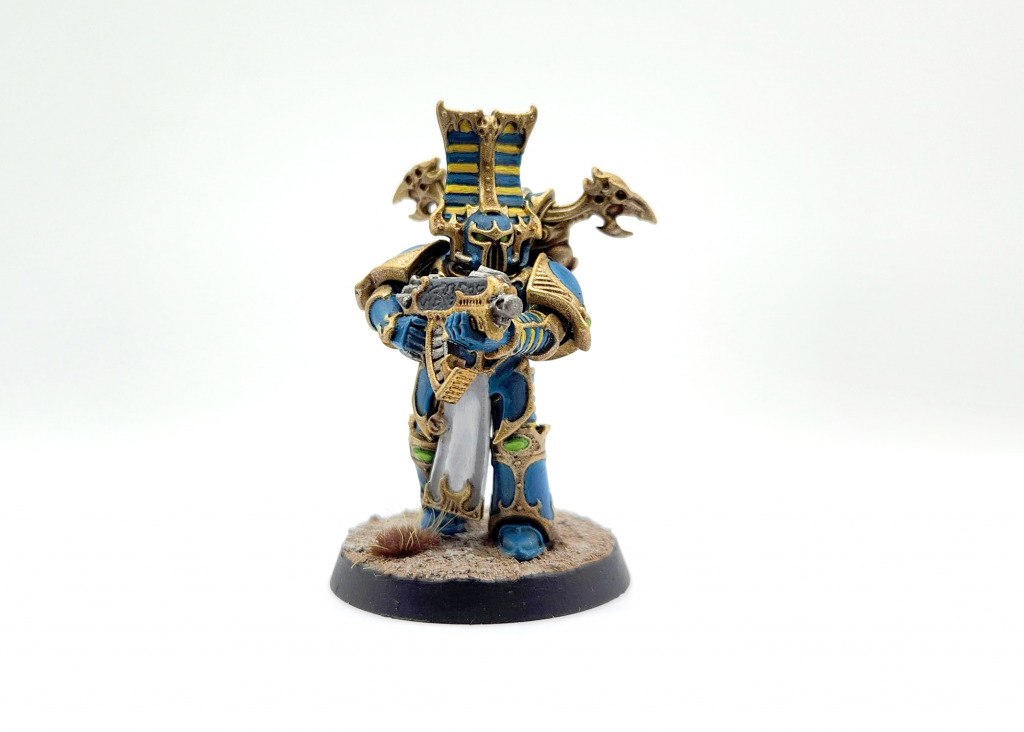
After that I hit the base with some Agrellan Badland following the easy desert bases recipe laid out in the How to Paint Everything: Thousand Sons main article.
This article is part of a larger series on how to paint the Thousand Sons. To return to the parent article, click this link.

