This article is part of a larger series on how to paint the Thousand Sons. To return to the parent article, click this link.
The Thousand Sons are one of the more complicated and difficult armies to paint in Warhammer 40,000, with lots of gold trim and intricate details that can make them daunting for new players to take on. The upside is that it doesn’t take a lot to make them look great and they offer a lot of really great opportunities for things like OSL, freehand, and cloth that can make them a very eye-catching army on the table.
When it comes to painting the Thousand Sons there are two schools of thought: In one, you base the model gold and paint the armor panels, and in the other you paint the armor first and then paint the trim. There are advantages to both, but I prefer to do gradients on my armor paneling that makes it very difficult to do the trim first without painting over it. So I just base my models black and start from there.
This scheme is also a bit darker blue than the official GW scheme, as I’ve based it more on the classic 2nd edition Thousand Sons ‘Eavy Metal paint scheme, which used a much darker, deeper blue than the more teal/aqua scheme the faction currently uses. As such I’ll be doing more custom color here.
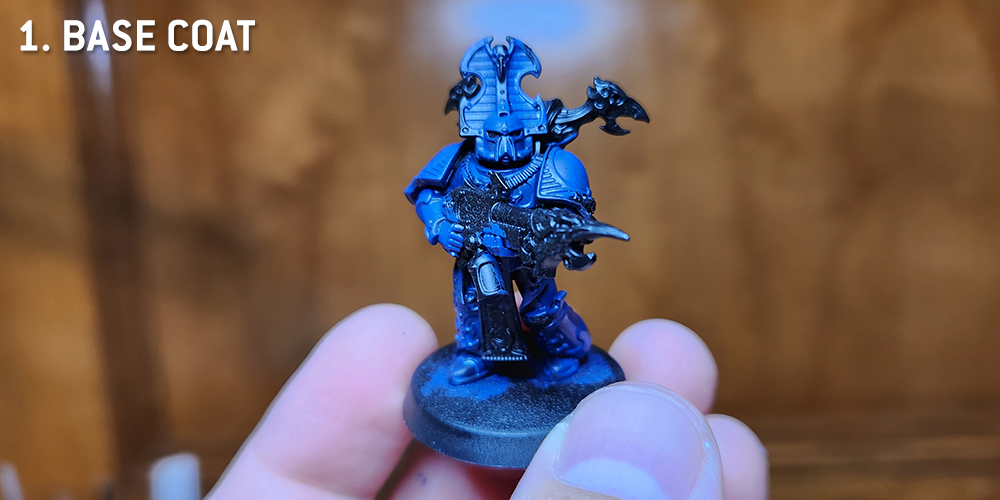
Step 1: Basecoat
I prime my Thousand Sons black, then I basecoat the armor with a coat of GW’s Kantor Blue.
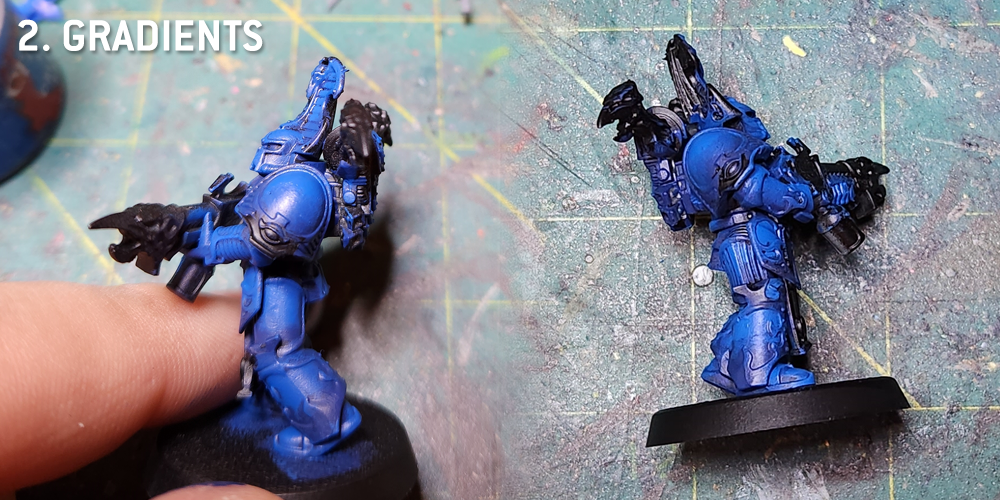
Step 2: Armor Gradients
Now it’s time to apply the gradients. This is done by mixing Kantor blue with Caledor Sky in several steps, and doing a kind of “wet drybrush” on the model in several passes with a brush. Usually I do 3-4 steps here, mixing 3:1 Kantor:Caledor, then 2:1, then 1:1, 1:2, and 1:3. When I’m done I’ll hit the top areas with pure Caledor Sky and use Drakenhof Nightshade around the lower parts of the armor to create that dark line separating the armor and the trim. It’s a hard effect to photograph, but I think the above photo shows off the final effect when I’m done. I do this everywhere there’s blue, though note that it’s meant to be top-to-bottom, so parts with Kantor will be lower on the model and not necessarily just toward the trim.
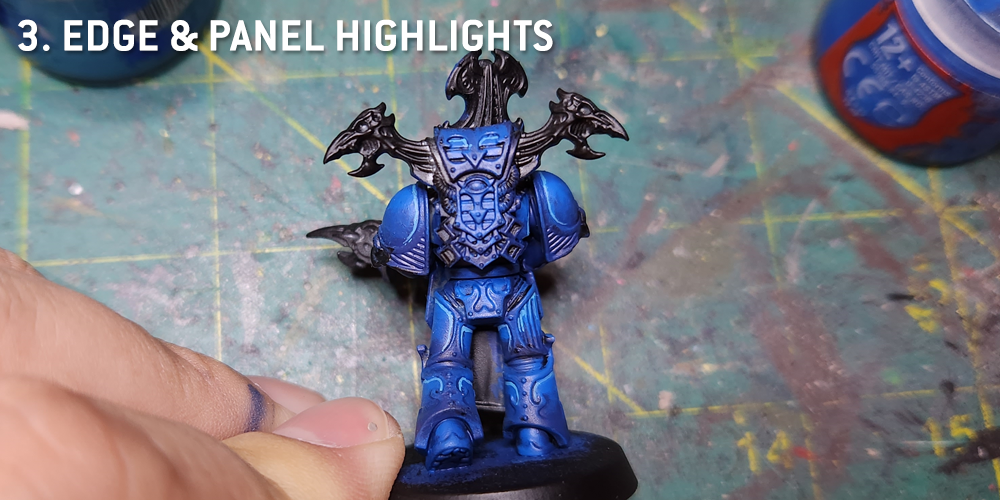
Step 3: Edge and Panel Highlights
This is the part that really makes the armor pop. I do a thin line of Lothern Blue around the edges of the armor panels, tracing the lines made by the trim. I try to leave a thin line of darker armor between the panel highlight and the trim itself. I’ll come back and correct this gap line with Kantor or Drakenhof later if I need to. I also edge highlight points on the armor here, and edge highlight the stripes on the striped parts of the armor – you don’t have to highlight all of them, just the stripes you want to keep blue. The rest we’ll highlight yellow.
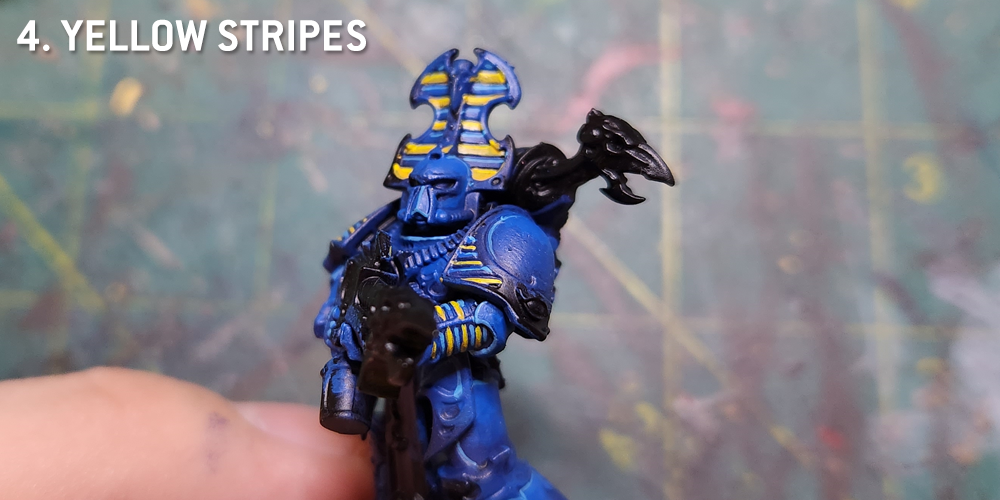
Step 4: Yellow Stripes
Speaking of which it’s time to paint the stripes. This is the same as the GW method – I paint the stripes with Averland Sunset, then I edge highlight those stripes with Flash Gitz Yellow.
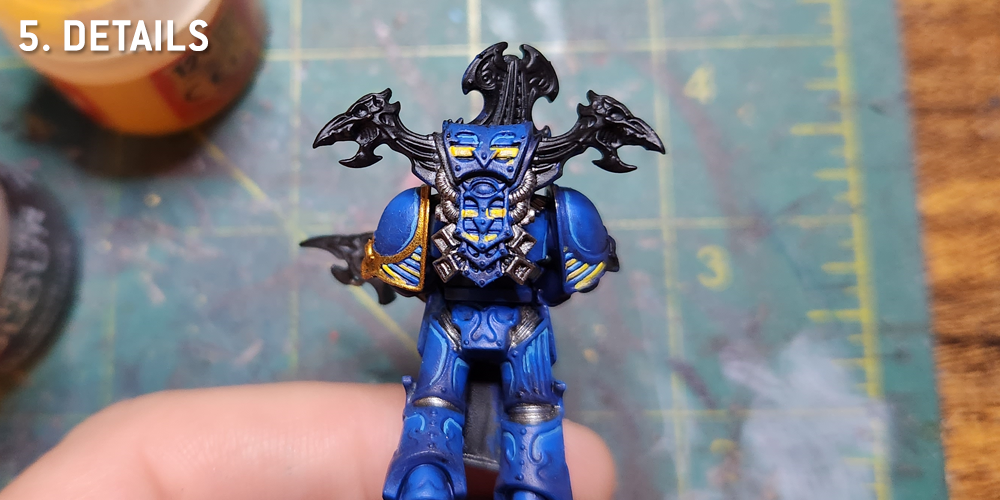
Step 5: Details
Before we start painting the trim we want to finish painting all the areas that the trim will surround – the tabard, the gun, and the exposed metal cabling on the model. The cabling I paint with Leadbelcher, then wash with Nuln Oil. The parts of the gun casing which aren’t trim I tend to paint red, so they’re painted with Mephiston Red and washed with Carroburg Crimson. Meanwhile the tabard I paint with Celestra Grey then highlight up to white using Grey Seer and Reaper Pure White.
If I have any bone parts – like the skull on the helmet here – I’ll paint that with Rakarth Flesh. I’ll wash it later when I wash the trim.
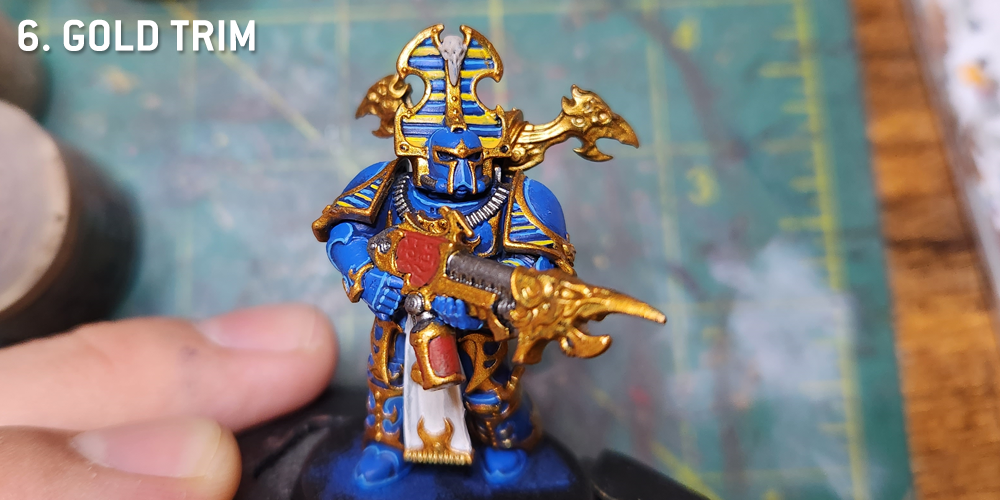
Step 6: The Gold Trim
Now for the part that sucks: Painting the gold trim. We’ve had a lot of freedom up to this point, but now it’s time to be careful. I’ll usually hit the big areas first, like the head on the warpflamer or the gold parts of the backpack, then come in and spend more time on the finely detailed areas, taking care not to go over when I’m doing thin lines next to the armor paneling. If I do, I usually cover it back up with Kantor and then Lothern if I had a panel highlight there – the panel highlights are a pain but they help in this regard, making it so I don’t have to match a gradient if I only go over a little bit.
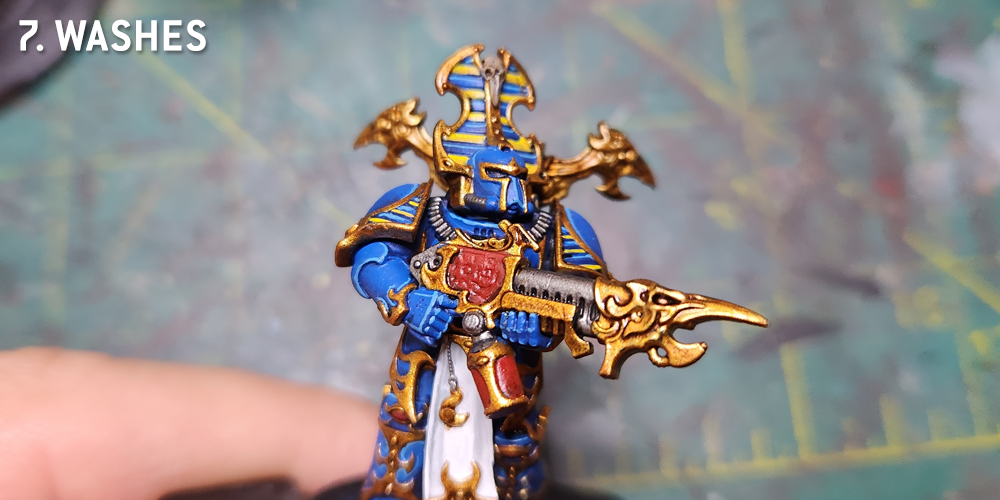
Step 7: Wash the Trim
Now we’re going to wash the trim. I use Agrax Earthshade for this part, which gives the trim a darker, burnished, more worn-out look. It’ll also contrast better with my model. Be careful not to hit the armor panels in this step, or your tabard. I’ll wash the bone parts here as well.
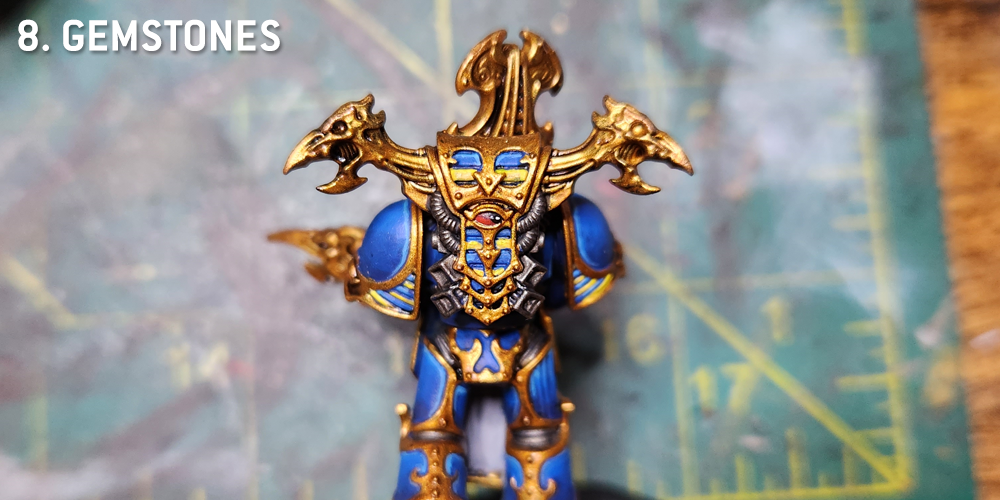
Step 8: Gemstones
This is when I pick out the gemstones, using the standard procedure laid out in our guide to how to paint Gemstones, Lenses, and vials. These gemstones are typically red on my Thousand Sons, which I like as a spot color.
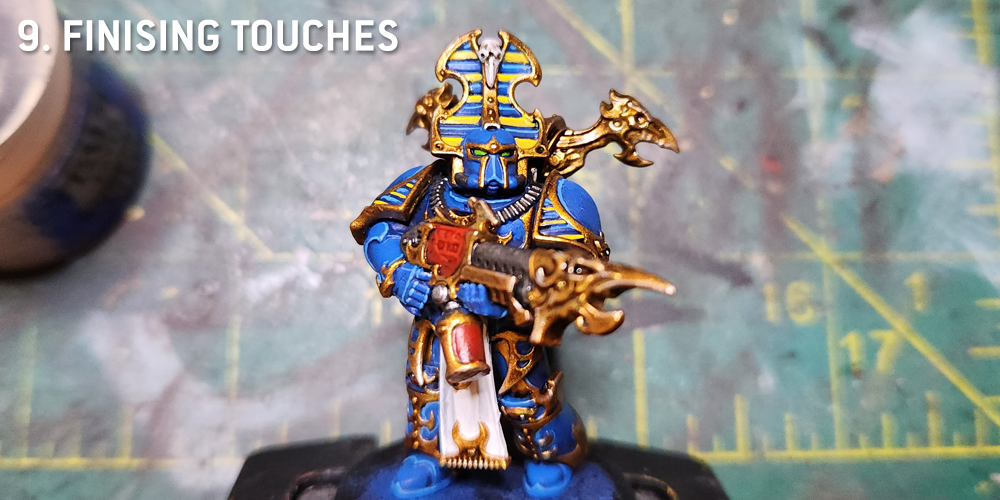
Step 9: Finishing Touches
Now it’s time for the finishing touches. The eyes are painted with Moot Green, while the red parts of the gun are highlighted with Evil Sunz Scarlet. I’ll go back in this step and highlight parts that need it, hitting the skull with Rakarth Flesh and Reaper Polished Bone, while the gold trim I’ll highlight with Liberator gold and Runefang Steel on the raised edges.
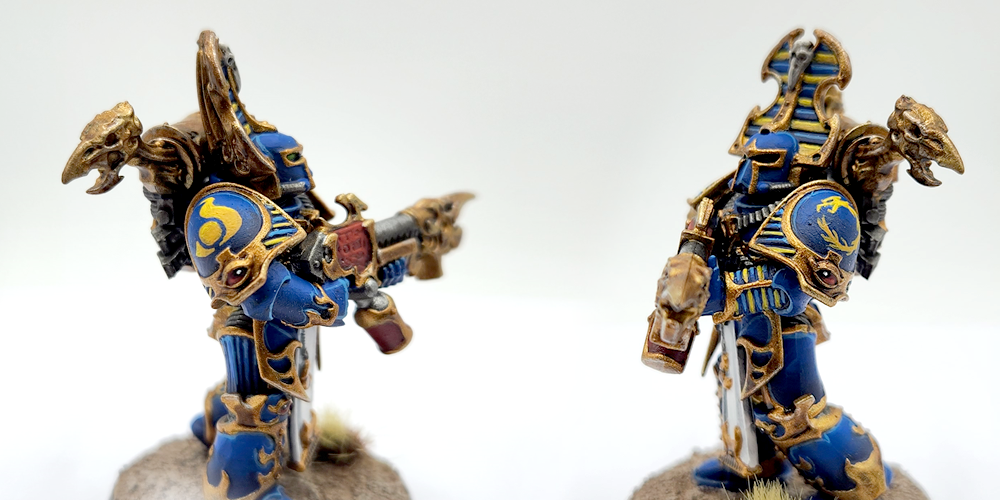
There are a few extra steps you can take from this point to further improve the model – I’ve started adding corner highlights to my Thousand Sons minis, adding dots of Reaper Ghost White to spots on the armor with corners, adding a second layer of highlights to my Lothern blue panel lines. I also paint on the shoulder icons at this point, as I do not like to use transfers. These are done with Averland Sunset and highlighted with Flash Gitz Yellow.
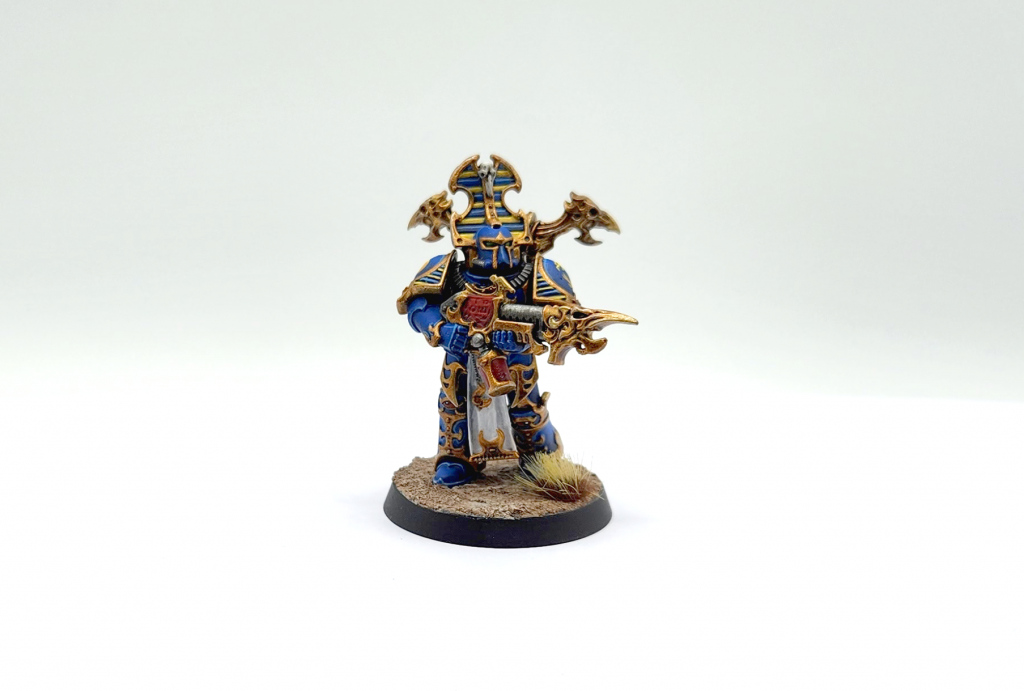
After that I hit the base with some Agrellan Badland following the easy desert bases recipe laid out in the How to Paint Everything: Thousand Sons main article.
This article is part of a larger series on how to paint the Thousand Sons. To return to the parent article, click this link.

