
Welcome back, Dear Reader, to my ongoing log of personal, hobby, and competitive progress for Warhammer 40,000. Last time around I talked about playing some Crusade games and I did a single practice game against T’s Adepta Sororitas. This time I’ll talk about the practice games I played for the Oxford GT and some of the additional prep I did for the event.
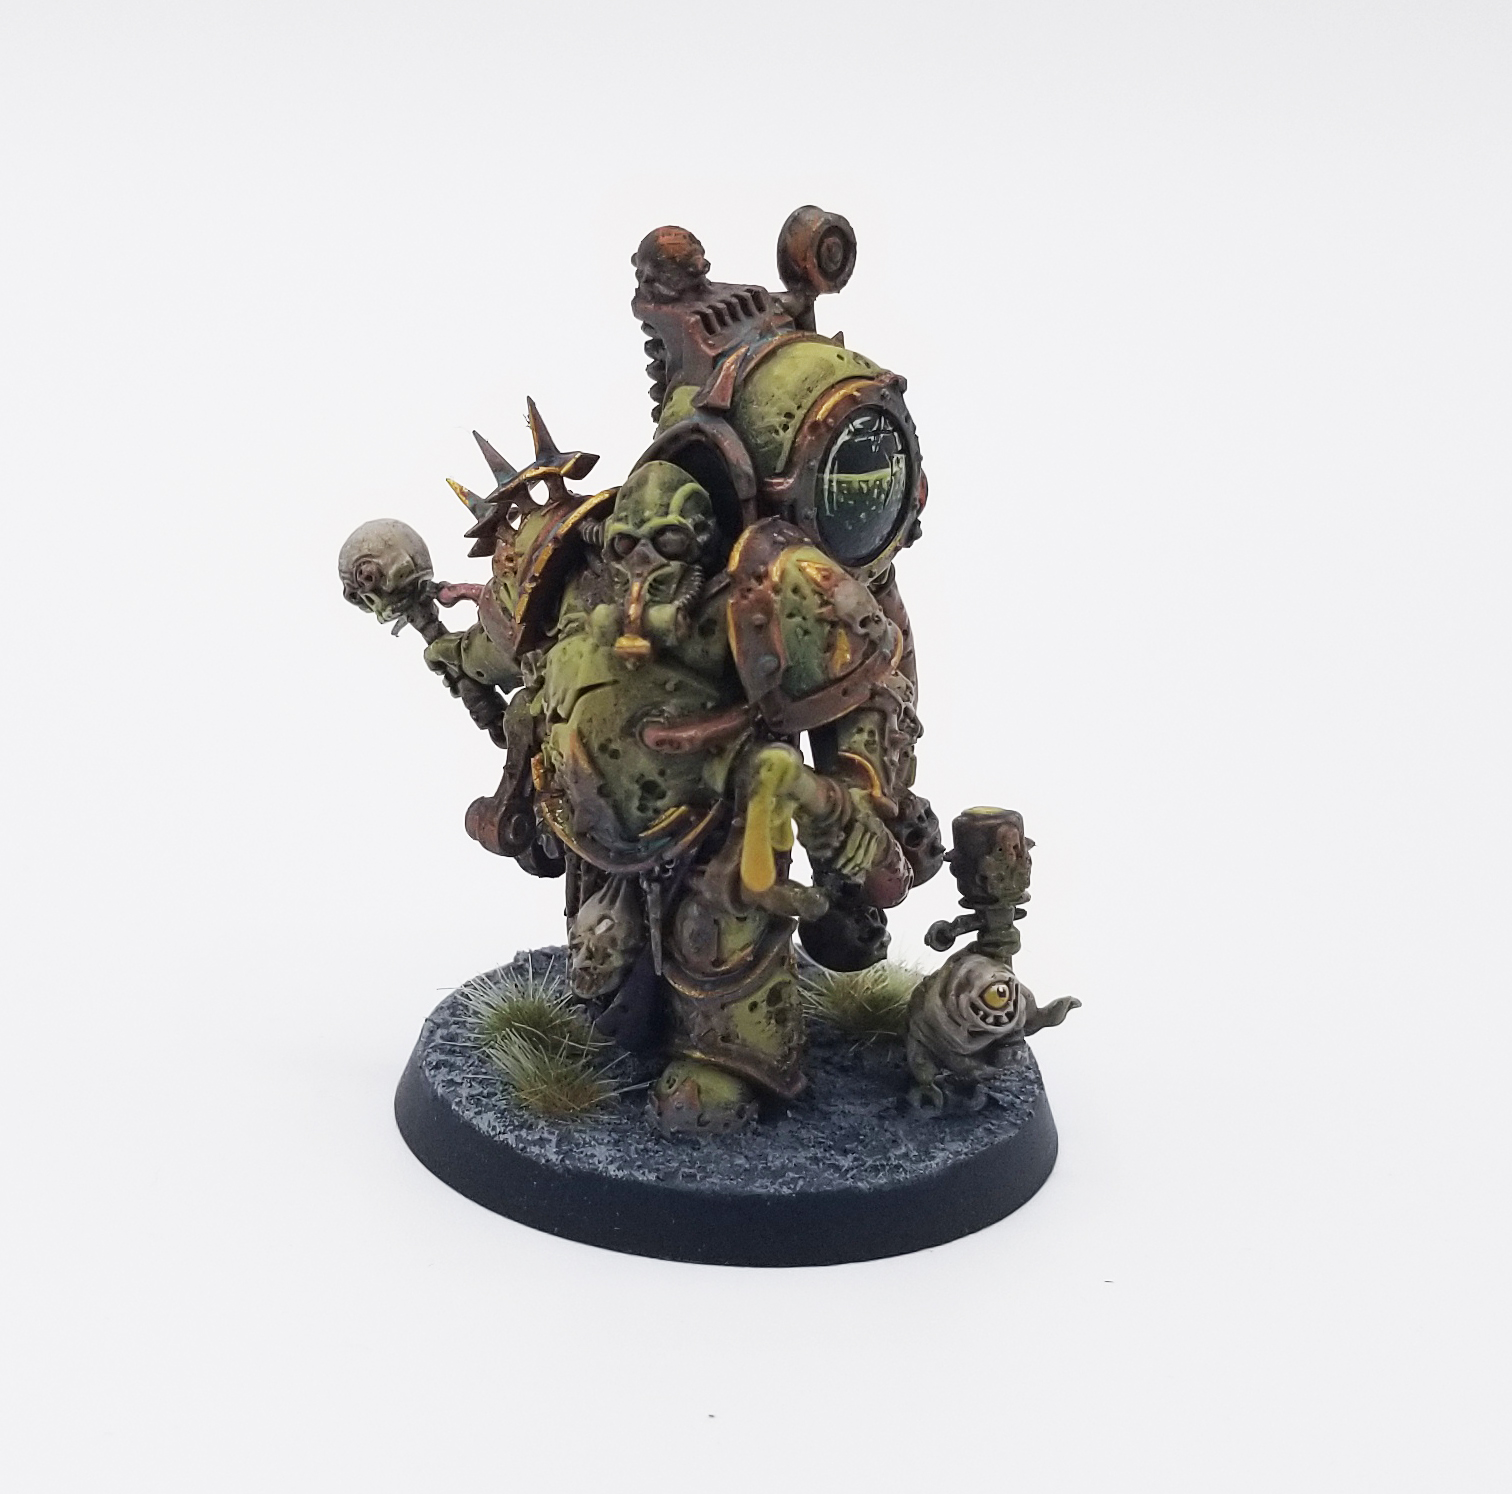
I’ve been heavily leaning toward Death Guard for this event, and that’s what I played in my practice games; I’ve pretty much settled on the final list, though I had some final tweaks I wanted to test out. Specifically, I was on the fence for whether I wanted a Biologus Putrifier or a second Foul Blightspawn in my list to pair with the second unit of Plague Marines. Let’s run through the pros and cons of each:
The Case for the Foul Blightspawn
- Gives me a second unit with Fights First, making the army hard to assault
- Gives me a second unit with very good overwatch, again making the army hard to assault
- Allows me to double up on Blightspawns, and having two identical units means I don’t have to think about which unit is which as much
- He’s got a pretty solid gun on him, good for taking out bigger targets, esp in concert with Mortarion ignoring damage modifiers

The Case for the Biologus Putrifier
- I’ve already got one painted, whereas I’d need to paint a second Blightspawn
- Can only Overwatch once per turn, even if I take two Blightspawns
- Free grenade
- Combos much better with the Tallyman, making a unit LETHAL HITS on 5+ and giving them +1 to hit much better, plus it gives me more a reason to take meltaguns and it’s better for melee attacks
Ultimately I’ll end up going with the Putrifier – I like his synergy with the Tallyman more – but it’ll be a decision I come to after two more key practice games. Let’s dive into those.
Game 1: vs. KC’s Blood Angels

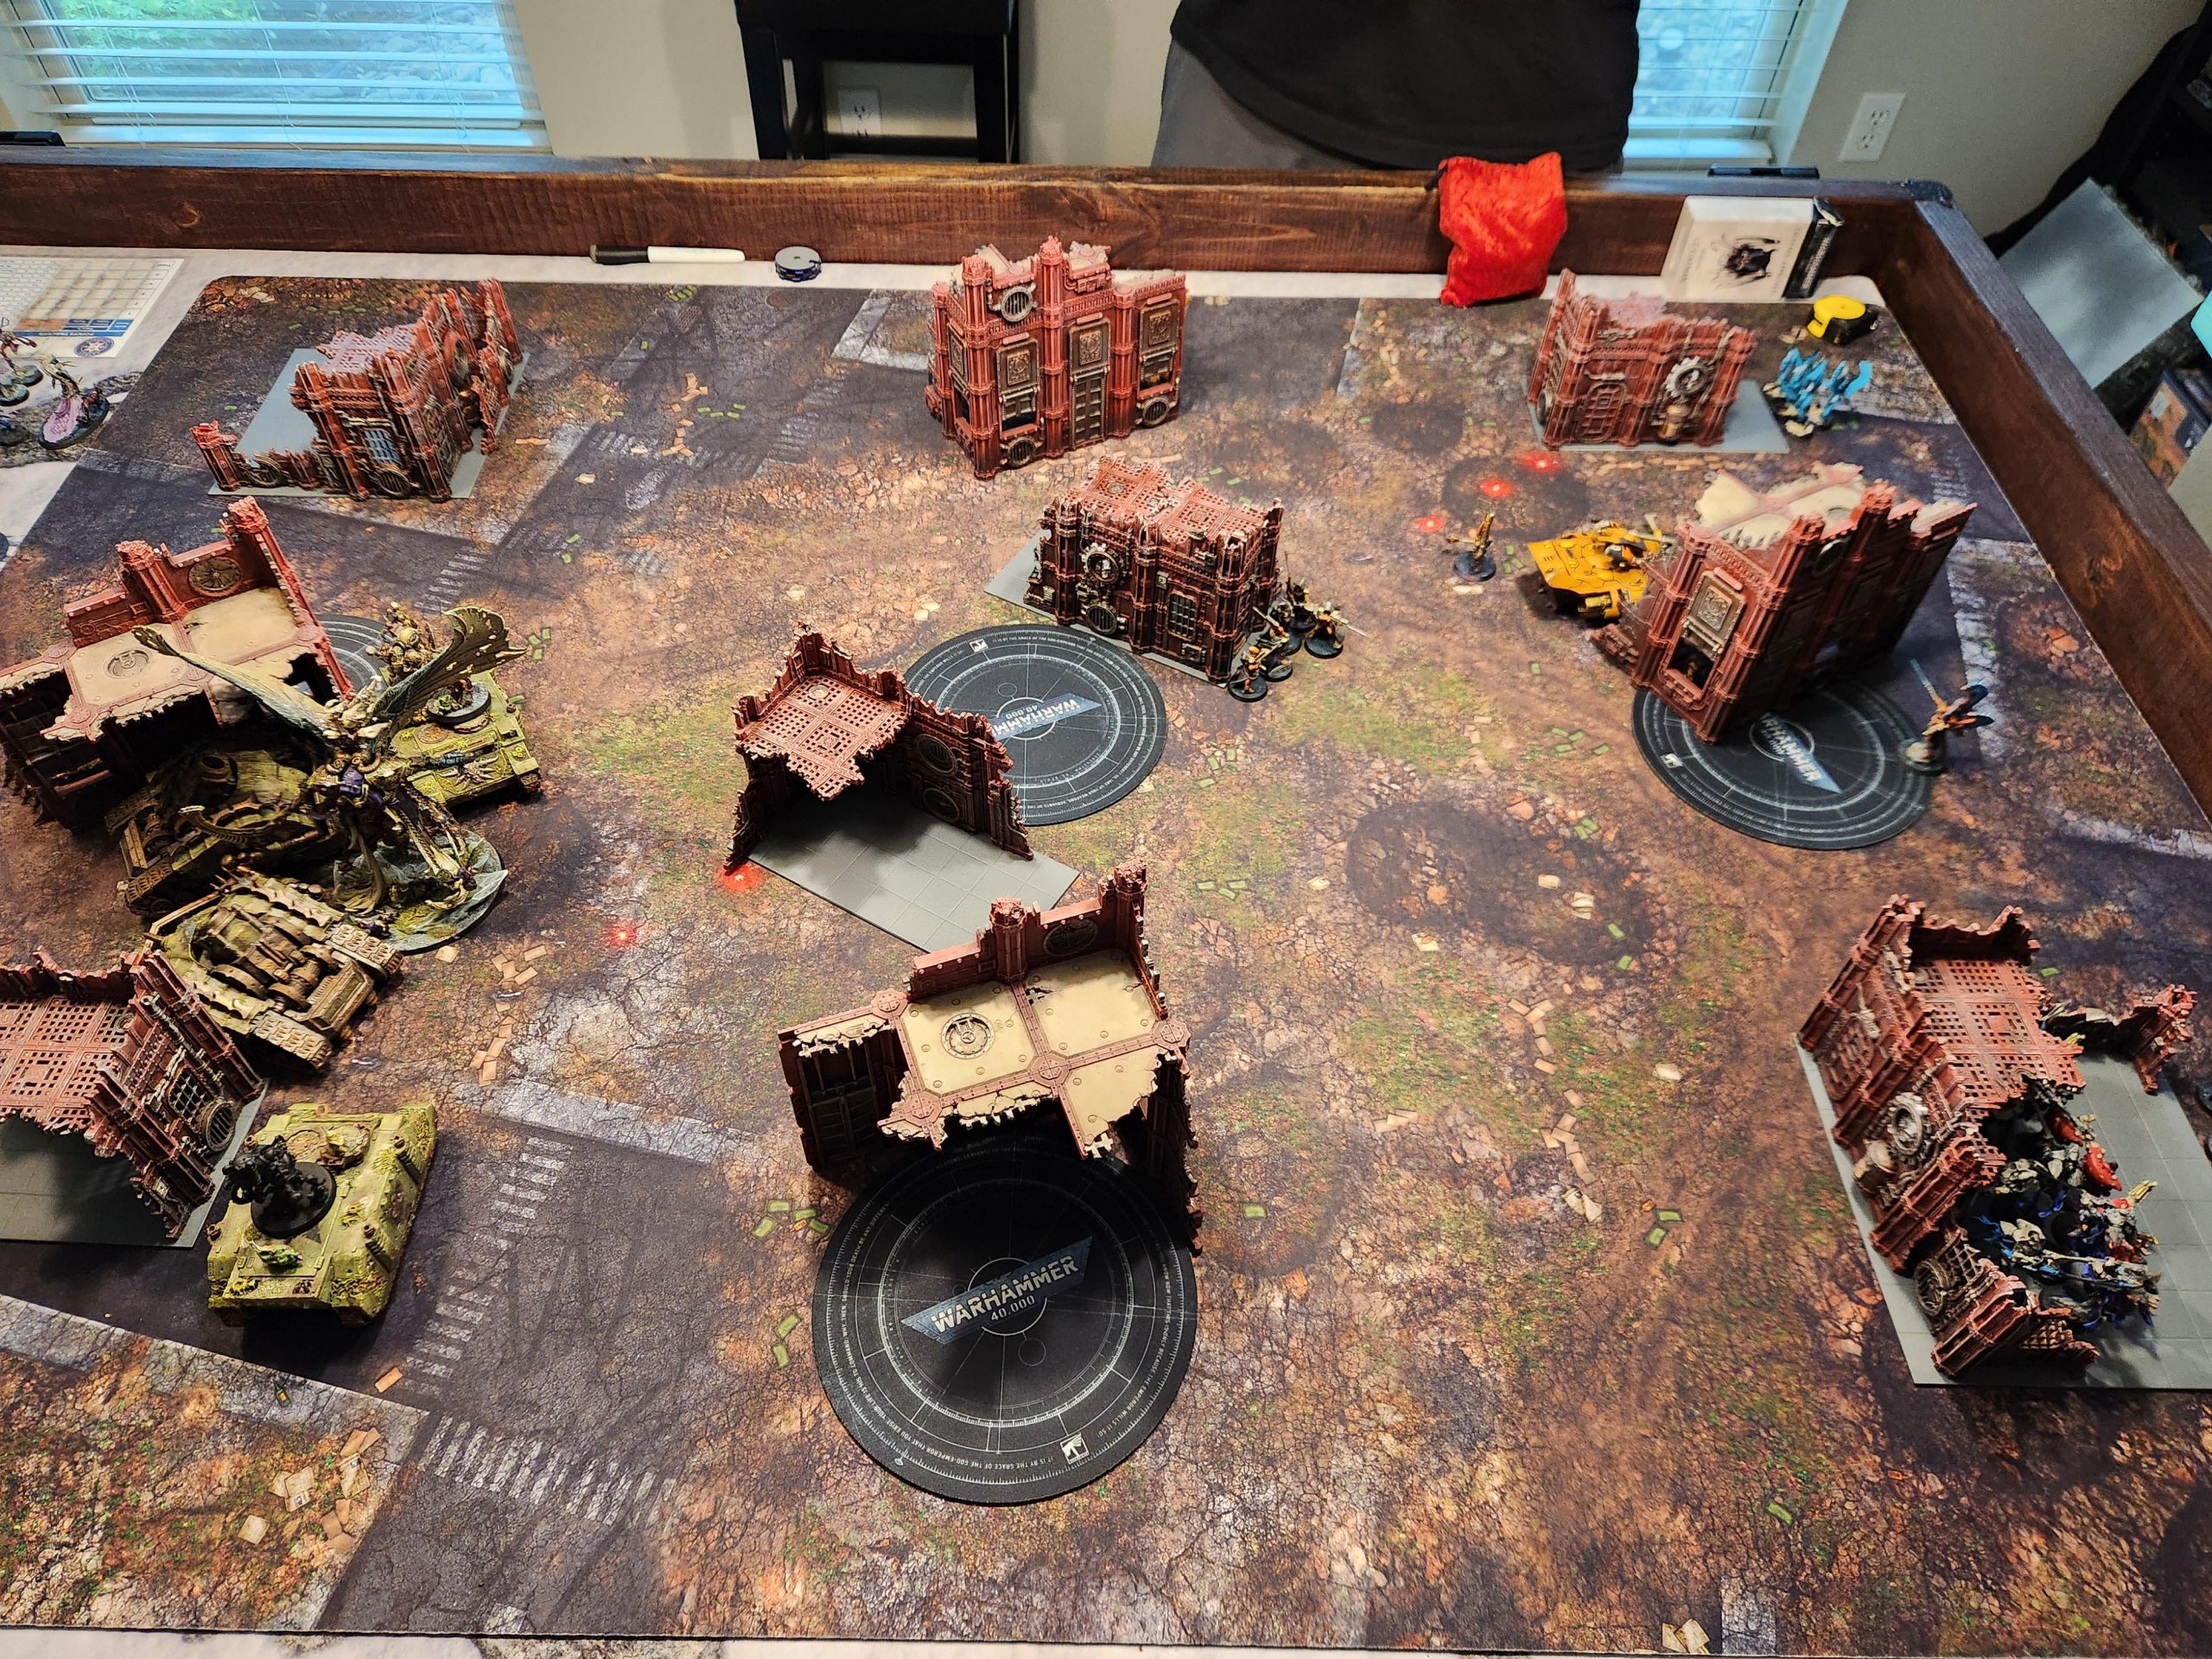
All of these games are based on Mission 1 of the UKTC pack, running Priority Targets, Hammer and Anvil, and Chilling Rain. The terrain here is pretty open, and strongly benefits shooting armies, which gives me a big advantage over KC’s Blood Angels. KC’s running a list that’s heavy on Death Company, with a Land Raider Redeemer full of guys, two Baal Predators, the Sanguinor, and some Jump Packs. KC and I are both on Tactical.
I’m Going First.
That’s great for me, as it lets me move up and get into position to punish KC attempting to move to the middle of the table. The way Priority Targets works I really just need to hold one objective outside of my DZ and then plan on controlling board at the end of the game. I chose to play conservatively turn 1, pushing up but sitting back from the bulk of KC’s forces. I kill his Infiltrators because I need to do that, but don’t manage to put much damage on his tanks, which sit out of range.
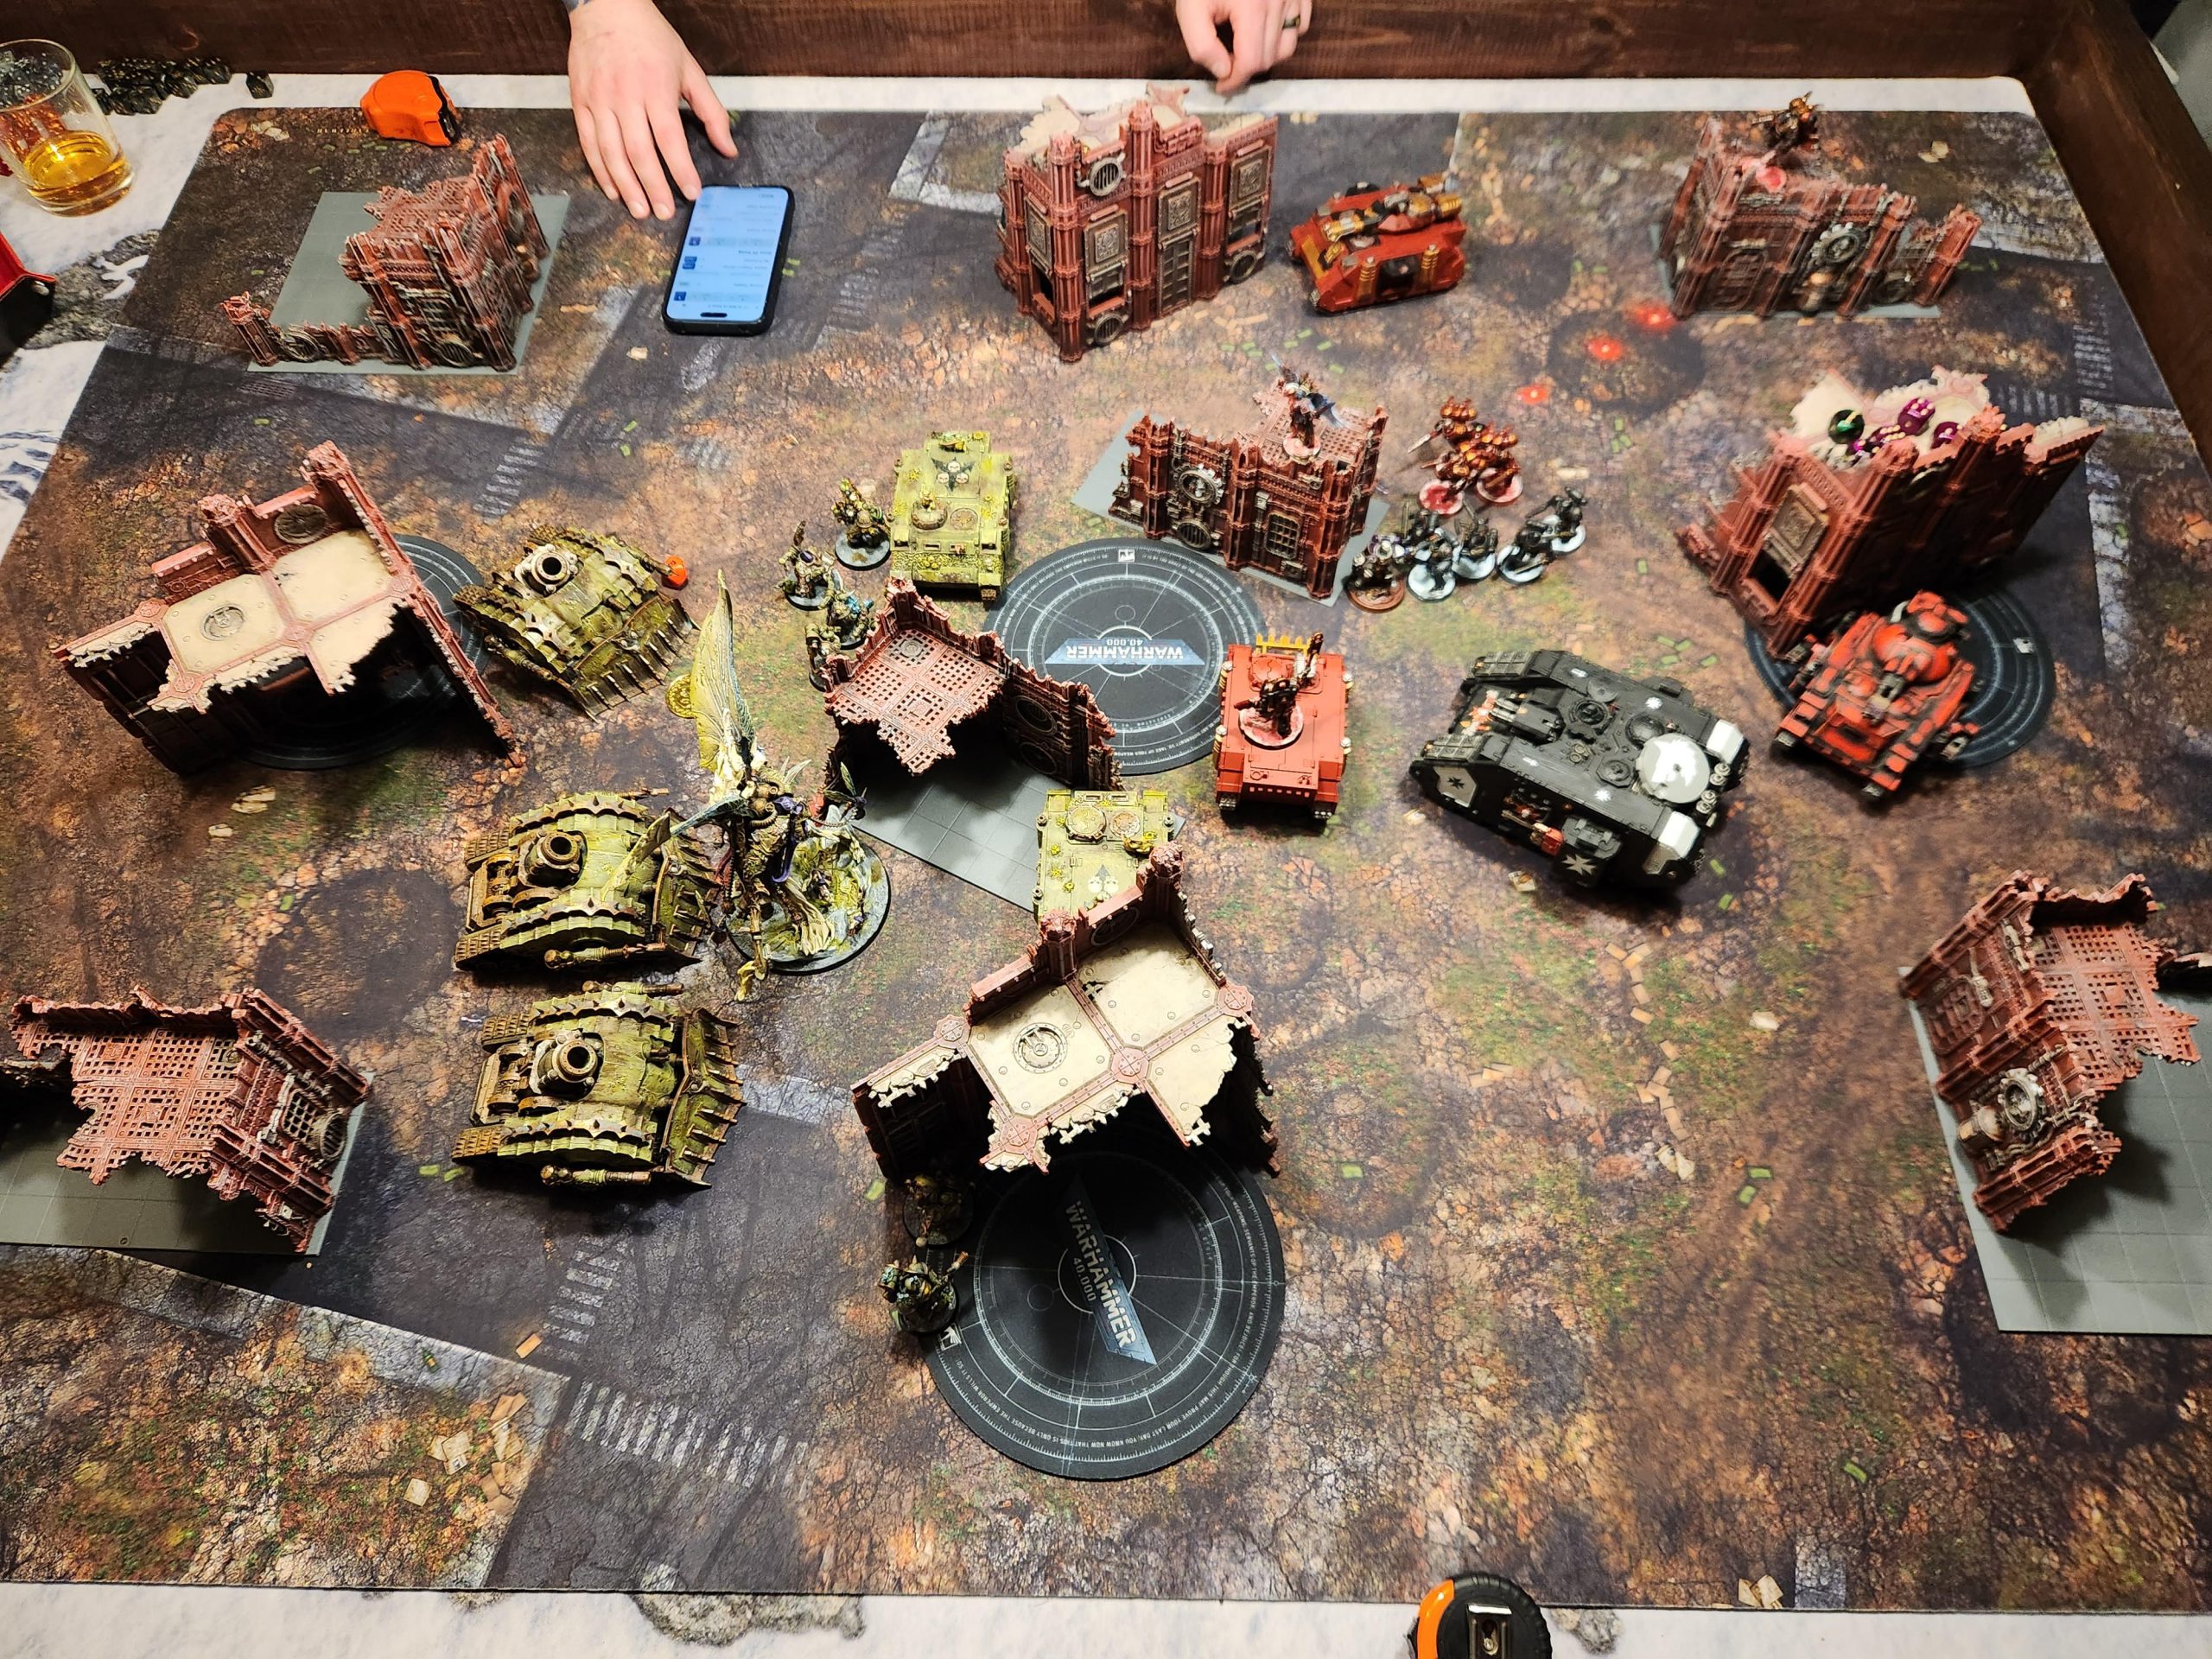
I take some lumps in the return fire – losing a big chunk of my Plague Marines – but it’s not enough to put me in a hole. On my turn the return fire hits; I drop in both units of Deathshroud and use them and the tanks to take out the Redeemer and Rhino and wipe out everything inside – something Mortarion helps with on the backend.
By this point I’ve still got some challenges – KC drops on my backfield objective and kills my PBC there to clear me off it – but I’m ahead on primary and secondary, and KC’s had shit luck with secondaries. I end up more or less tabling him by round 4.
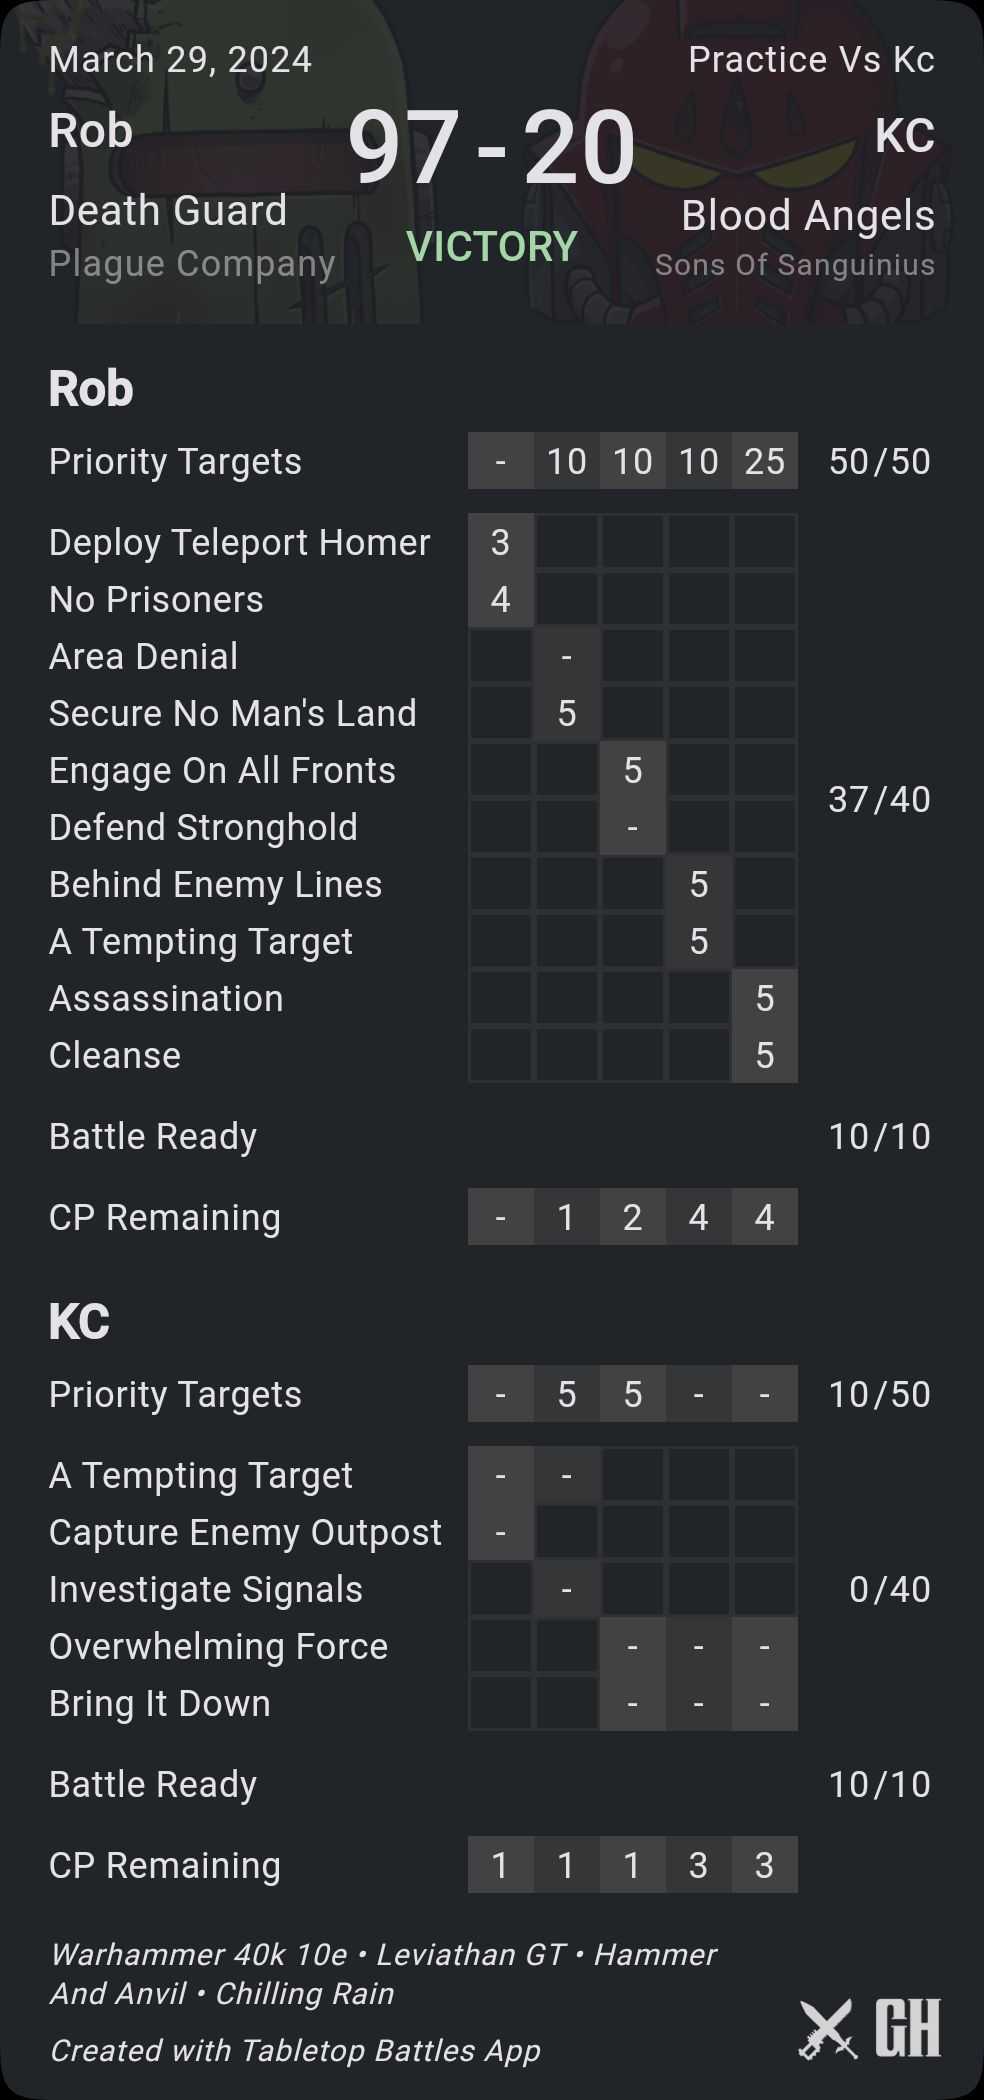
Result: 97-20, Win
Lessons Learned
- This is some really open terrain, and that’s a mixed bag for me – it’s great for getting open lines of sight with my mortars, but not so great when you consider all of my other guns top out at 24″ range. It’s brutal for KC on this mission, though – he howls a bit about how I ambushed him with bad terrain. He’s not wrong, ha ha.
- Here I wished I’d had the second unit of fights first/good overwatch to deal with KC, but it went well enough that I’m not sure I’d need it if I had to play this again.
- The Sanguinor is a nasty threat, but he doesn’t actually do a Heroic Intervention when he drops down – it just looks very similar. So he doesn’t get his charge bonuses. That’s a big deal for his damage output.
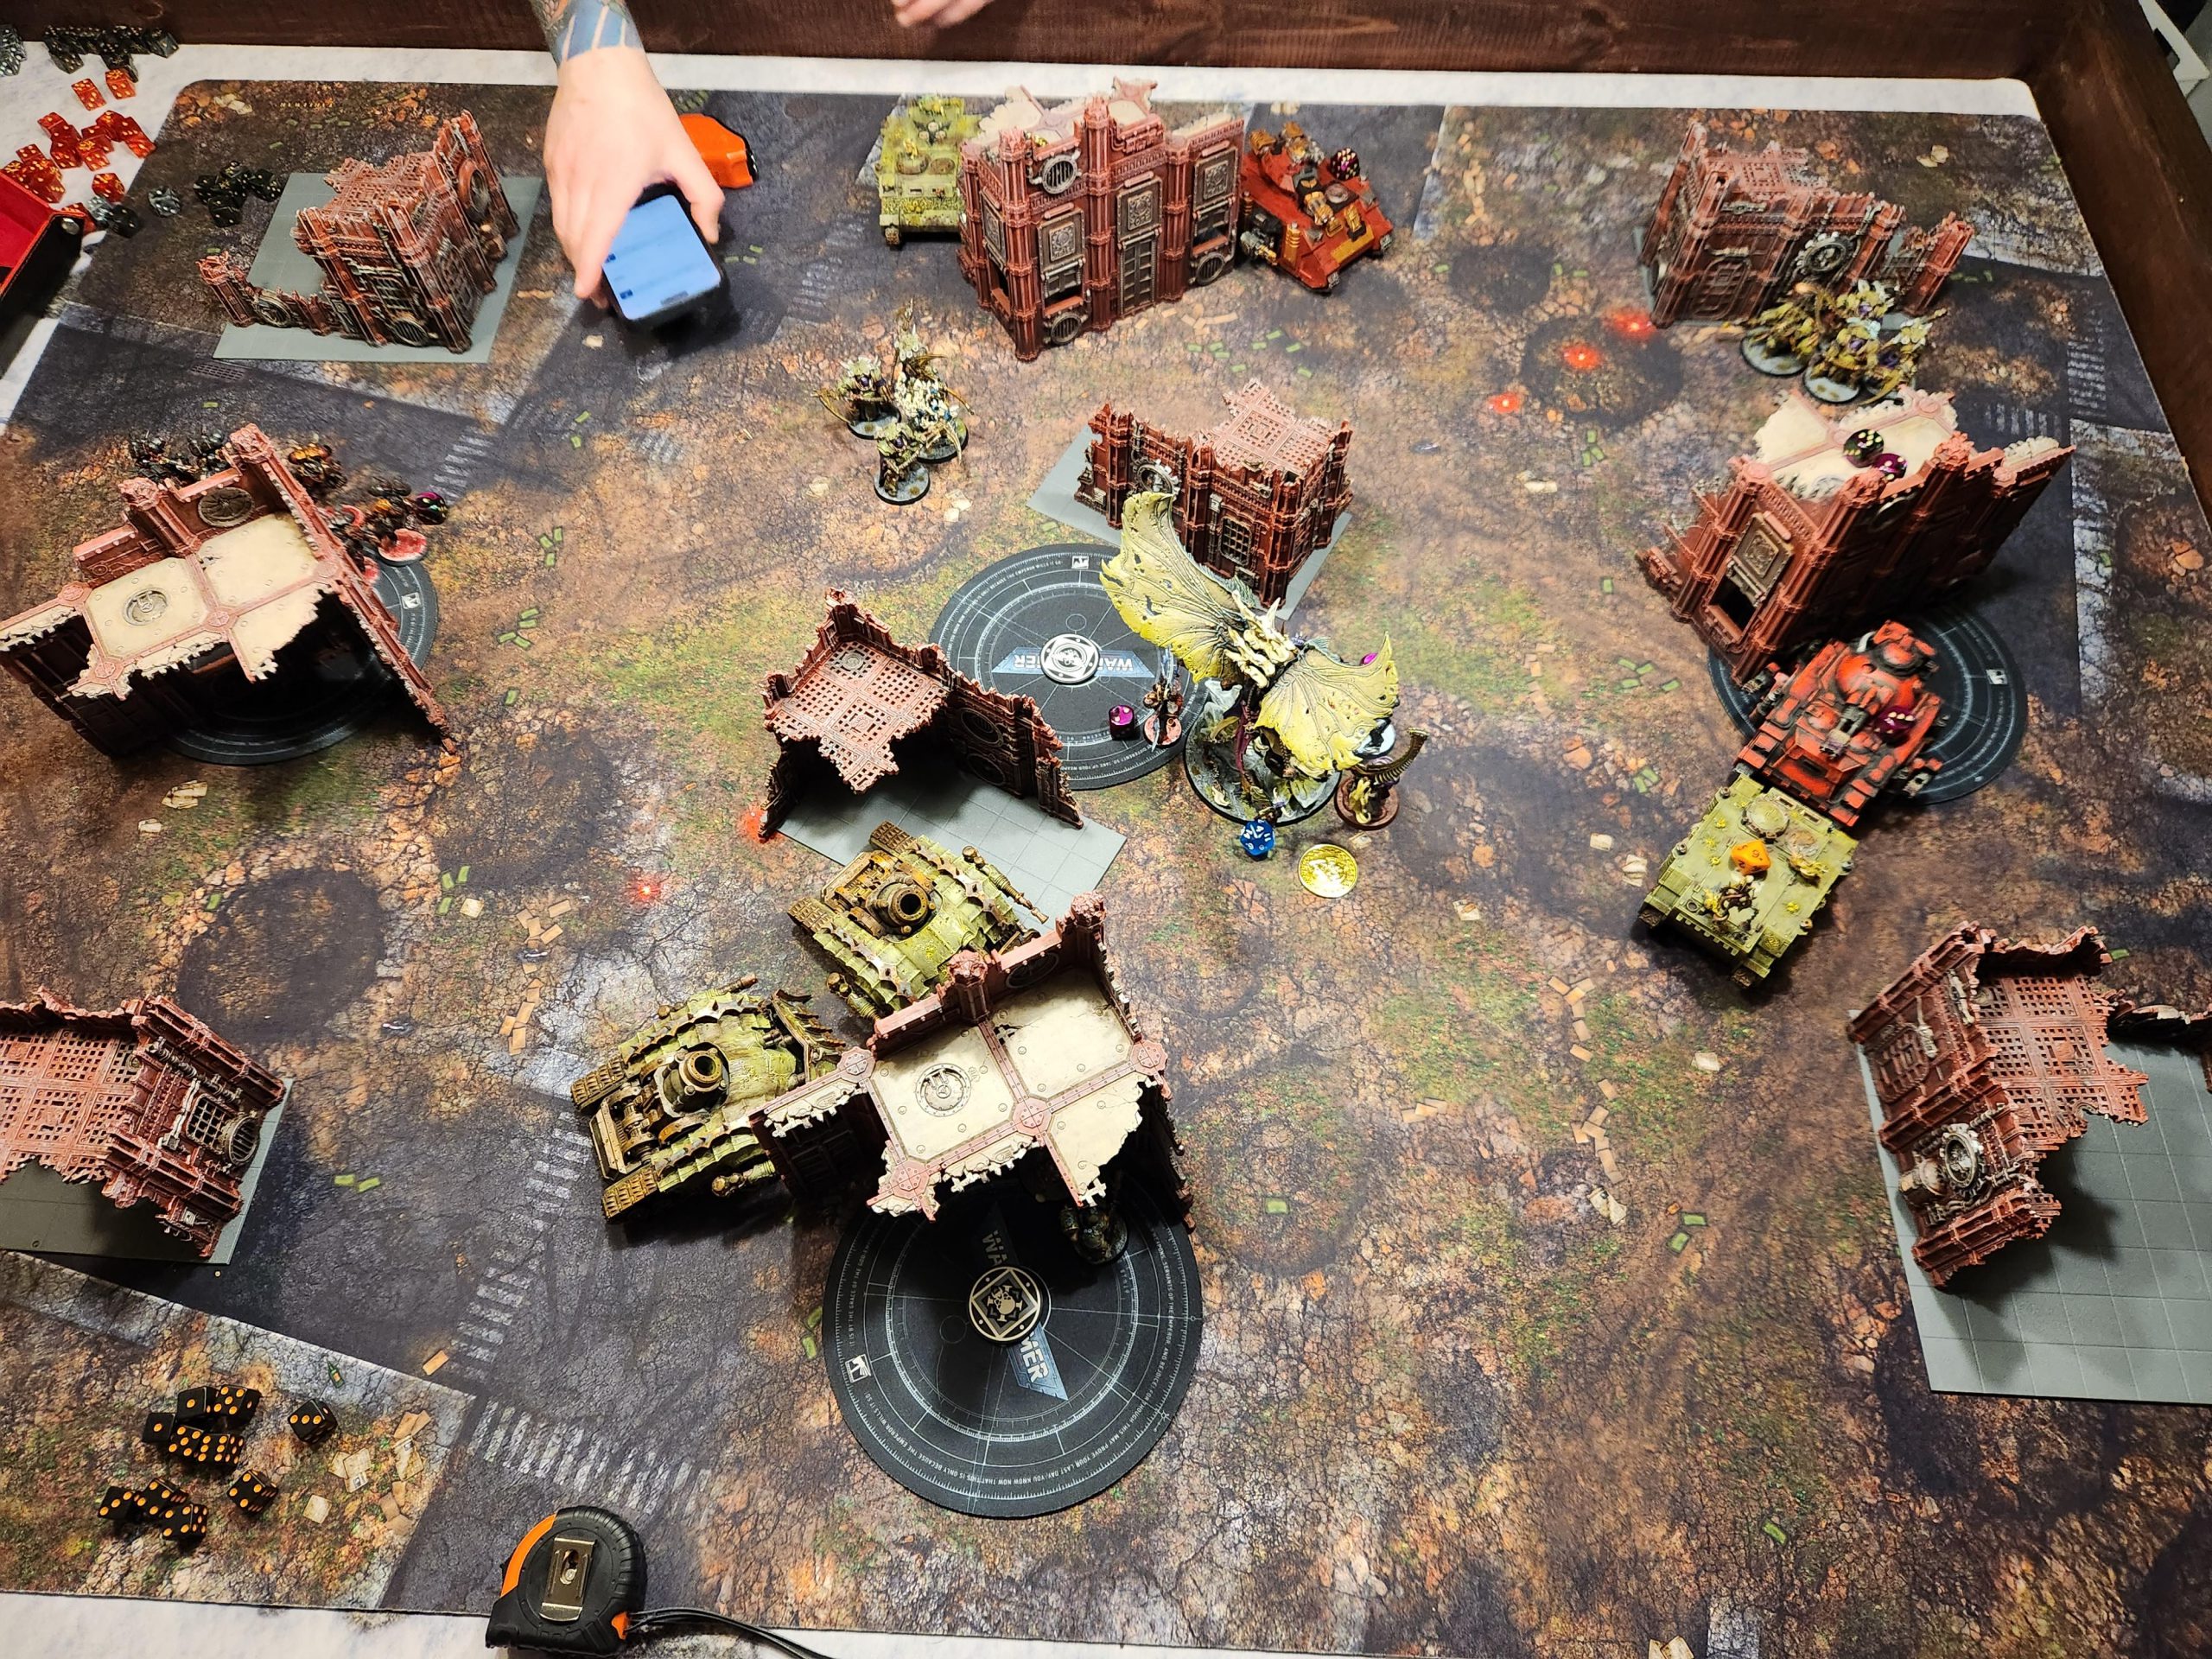
Game 2: vs. Erik’s Aeldari
Same mission, but this time I’m up against my old sparring partner, Erik. He’s running VSL’s Aeldari list from a recent event win and it’s a real bastard. The list is built to run off Fixed secondary objectives, divebombing my deployment zone over and over to score Behind Enemy Lines and Deploy Teleport Homers.
I think this is a much easier game if I go first, so this time I purposely have Erik take the first turn. I go with -1 WS/BS on this mission, and that was a mistake.
I’m Going Second.
That’s not a great place to be in, as Erik has more than enough movement to get a unit of Warp Spiders into my DZ turn 1 and drop homers. Erik isn’t running Nightspinners but he is running Dark Reapers, so I put both units of Nurglings in deep strike. This is a mistake, and we’ll revisit that later in the article. The big problem I have to deal with here are the Dark Reapers and on turn 1 they’re able to get a direct line on one of my PBCs and kill it. That’s a bad start for me.

I play this one a bit too aggressively. I’m worried about things I shouldn’t be, and not thinking about ranges; Erik’s Eldar can easily outrange me with most units. I pull my Rhinos to mid-table and get out my Plaguemarines, and that’s a mistake – I should have held them – and use my PBCs to go after the Warp Spiders in my Deployment zone. I’d love to kill the Dark Reapers instead, but stopping scoring comes first.

On Erik’s second turn the Swooping Hawks come in, dropping another homer and scoring two units’ worth of BEL. Erik spends most of the game ignoring Mortarion, though that works out OK for me as he’s able to cause some problems. The biggest issue here is that I don’t have the means to keep my DZ empty once the Reapers clear out the PBCs, and Nurglings don’t live long enough to keep multiple units of Dark Reapers busy – it’s too easy for Erik to move them and screen with Phantasm.
It’s a losing effort – I’ve made too many mistakes – but Erik also dices me pretty hard, with some units that just roll insane saves to stick around at 1 wound remaining. Fuegan does this shit twice to keep me off primary, and that turns a game that’s still pretty close by the end into one where I can’t make up the difference. That said, it was too much relying on luck in a mission where Erik put up 40 on Secondary.
Result: 78-90, Loss
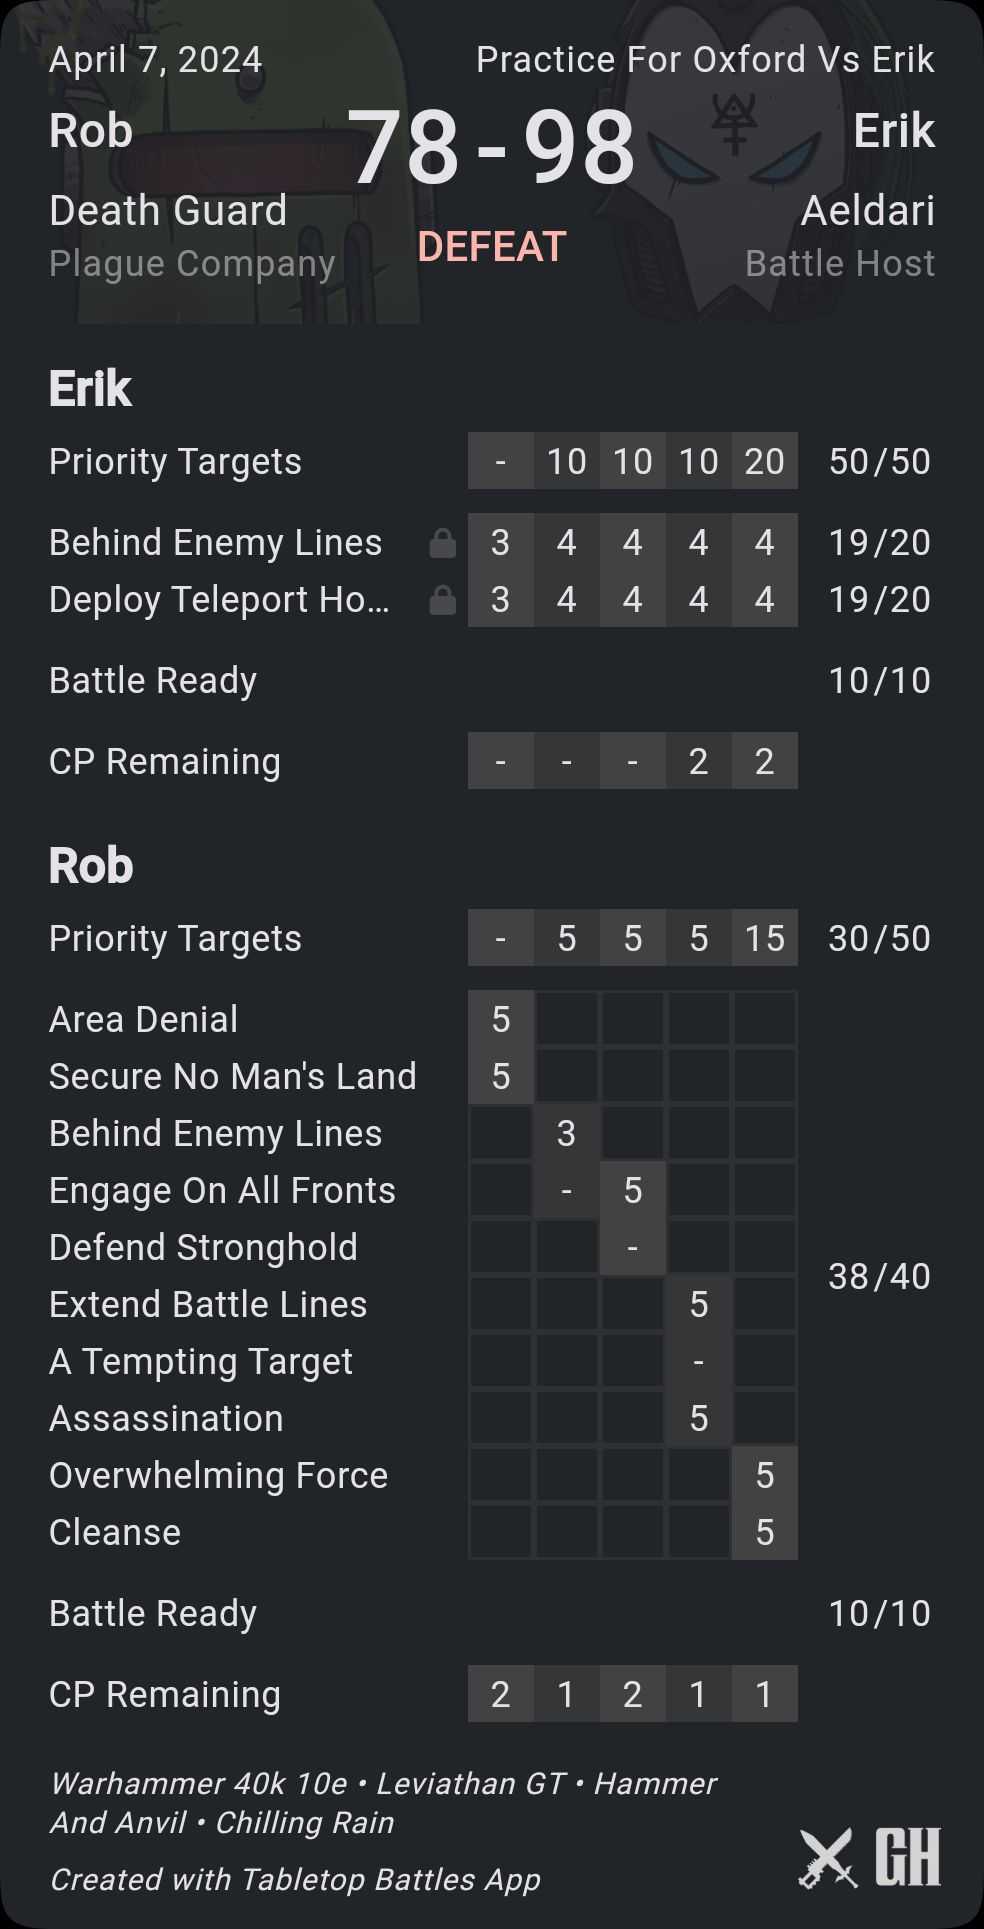
Lessons Learned
- I should have put the Nurglings in my deployment zone from the first round, using them to screen out deployment on one side of the table. This would have kept Erik out of my DZ turn 1 – and off homers/BEL – while also forcing him to make a decision between shooting my PBCs with his dark reapers or using their indirect fire to shoot my Nurglings – which would likely take 2+ units to destroy. If the Nurglings live, I can use them to create bigger screen bubbles on the deployment zone.
- Generally speaking, I should have spent more effort stopping Erik’s scoring and holding units back – getting up the table wasn’t nearly that big a deal here, and I could have just focused on a single objective out of my deployment zone.
- Working around phantasm and fire and fade is really tough, and it’s worth just assuming most things that don’t want to fight will vanish. That said, it’s also worth making sure you’re forcing the opponent to spend CP to make it happen.
- I tested the second Blightspawn in this game but it also didn’t make much of a difference. On the other hand, a free grenade would have been much more helpful vs. Fuegan, so I’m going to go back to the Putrifier.
That second game was frustrating, but a good learning experience. It was still potentially winnable late, and I have a good idea of how I’d play against that list again.
Hobby and Dadhammer
That just leaves some hobby work to do. I’m not painting the second Blightspawn, but I do need one more Plague Sprayer for my Plague Marines, so I need to get him painted up. I’ve also got two more Assualt Intercessors for my son Bryce, so we pack up the rest of his squad and head over to the local Kingwood Warhammer to do some more painting.
The reason to do this is because it gives us a very specific environment to paint in – Bryce will paint at home, but only if there isn’t a single TV on in the house. So the Warhammer store gives us a great environment to do that in. It takes some prodding, but Bryce manages to get through all four of his remaining Assault Intercessors that day, giving him his first completed unit.
Max – the Kingwood Warhammer store operator and all-around great guy – also pitches in, helping Bryce build his first character: A Terminator Captain converted using some extra parts. Bryce helps pick and clip the bits, and Max helps assemble them.
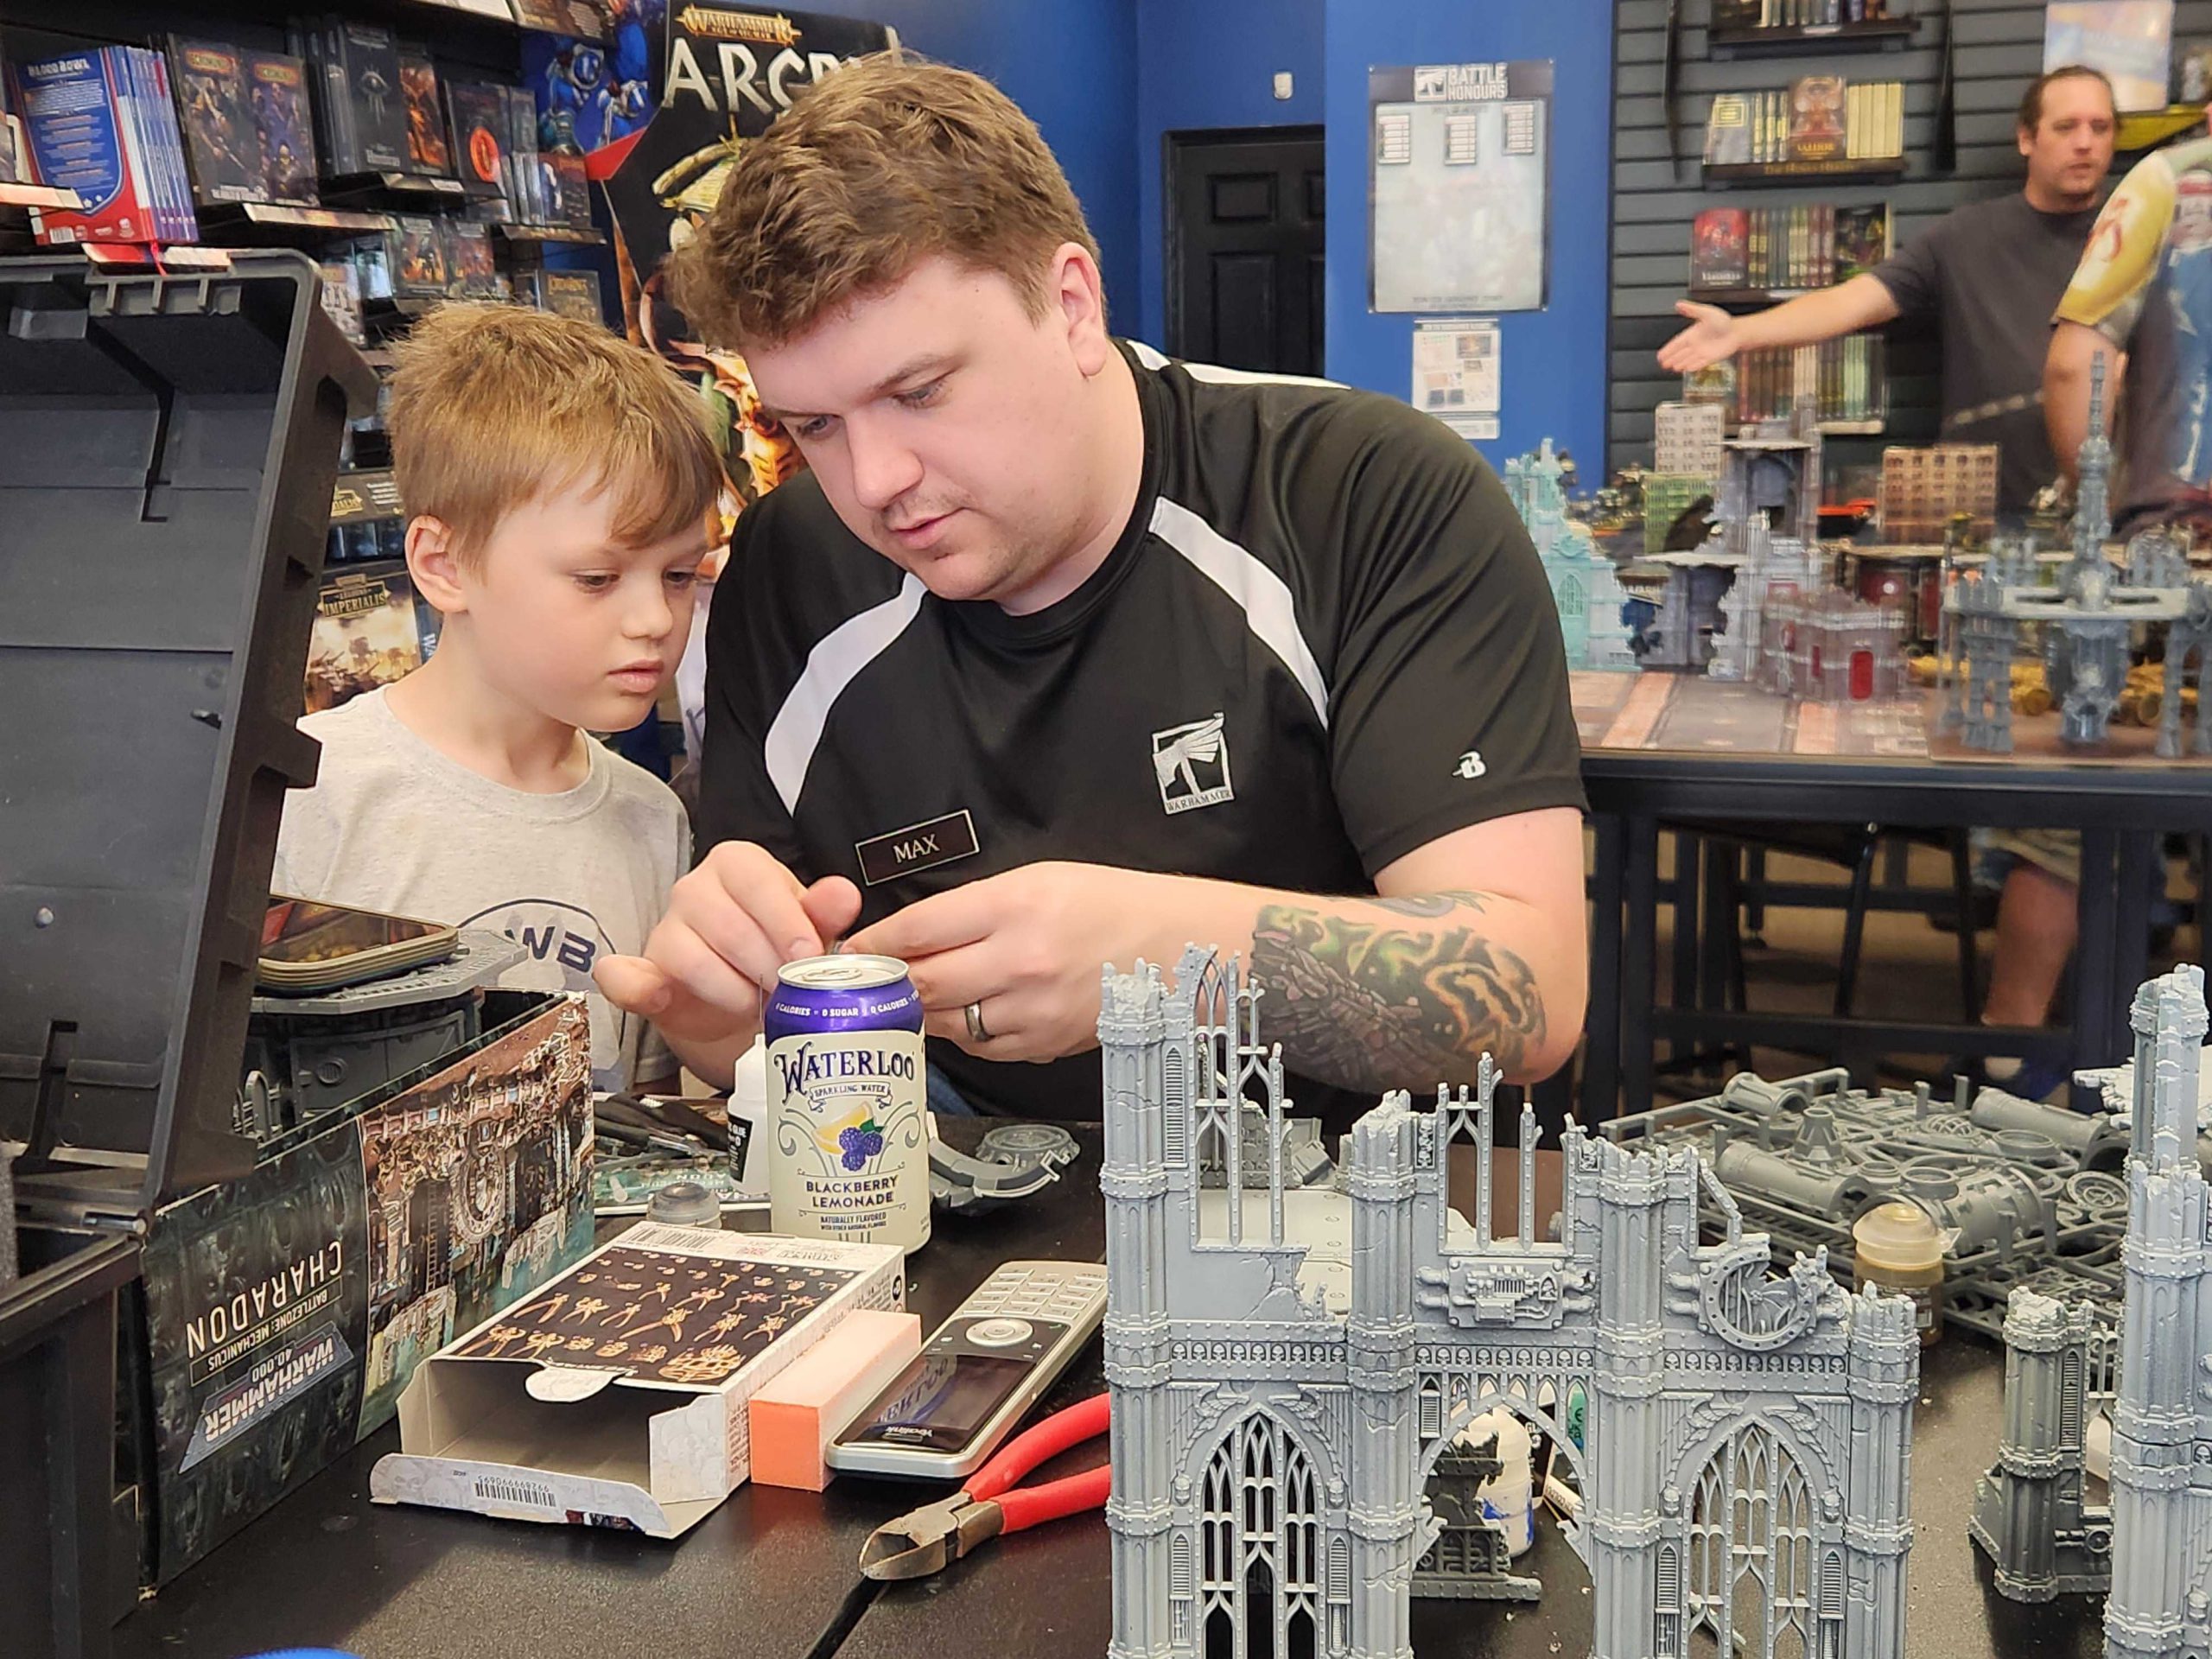
They’ll end up making a little base of bodies for Bryce’s terminator captain to stand on, and add some skulls on top. Bryce is eager to paint the guy immediately, but we have to wait for the glue to dry and it’s been a few hours so we head home. Once the glue dries I prime the captain with Retributor Armour and bryce begs me to let him paint him. I finally relent, and to my pleasant surprise, Bryce has gotten pretty good at using paint stands and painting without making a mess. He washes and drybrushes his captain, paints the robe, and adds some blood effects. It’s all looking pretty good until he sneaks off without telling me and adds a bunch more paint to the model. He’s made some interesting choices painting the guy, I’ll say that.
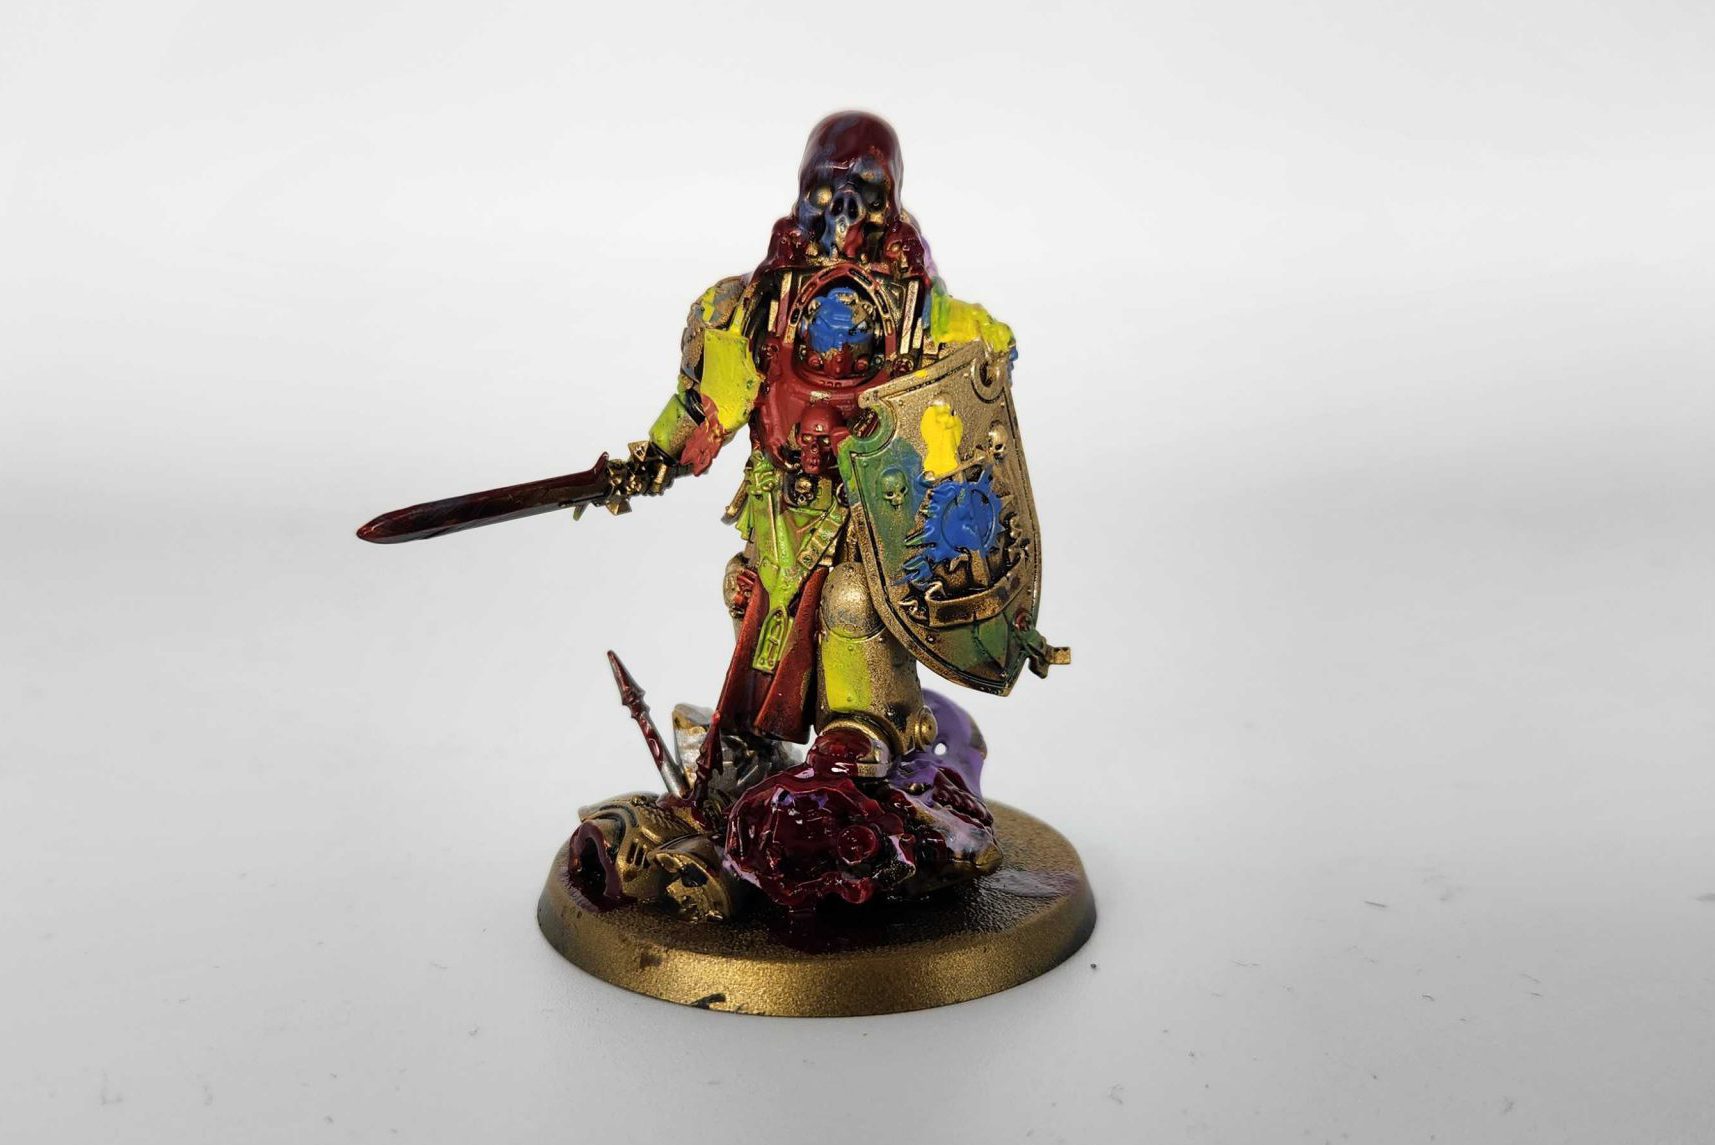
What matters is that, at the moment, he’s happy with the model. We’ll come back to him later, I’m sure.
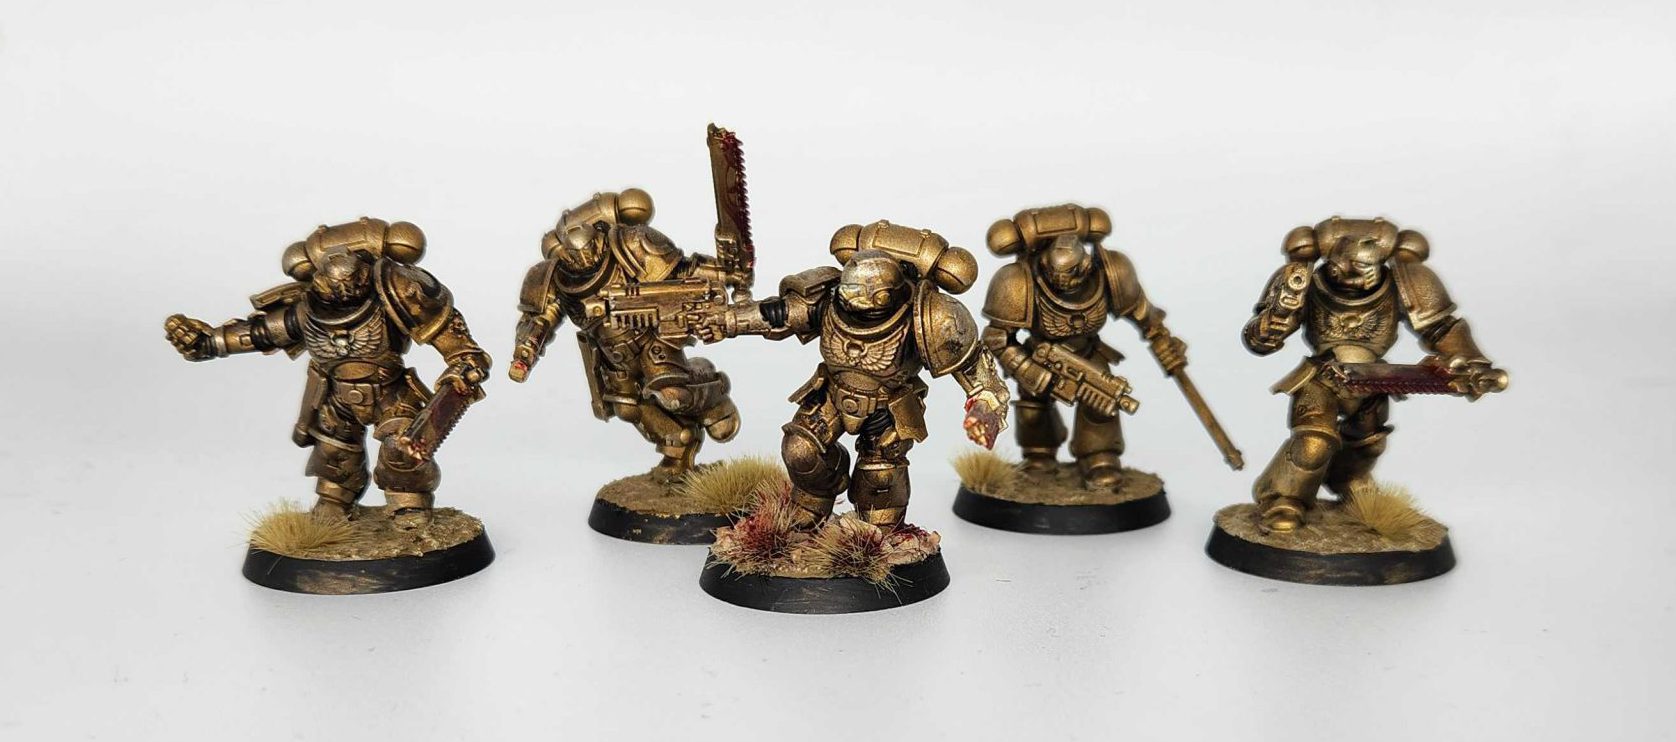
In the meantime, I get my last Plague Marine painted. He’s a rush job, but I’ll put the final details on him after I get back from Oxford. He’s good enough for now, and that’s what matters.

Next Time: The Oxford GT
Well, that wraps up this week’s article. Join me next Thursday when I’ll talk about the Oxford GT, and the Thursday after that, when I’ll cover some of the other Crusade games I played this past weekend. I don’t have stellar hopes for the Oxford GT – It’s a tough meta and I’m playing a mediocre army – but I’m hopeful I can finish at least 4-2. 5-1 would be a real treat, but would probably require losing in rounds 1 or 2. Either way, there will be a ton to write about.
See you next week.
Have any questions or feedback? Drop us a note in the comments below or email us at contact@goonhammer.com.

You must be logged in to post a comment.