I’m sure you’ve all done it. Picked up a cardboard tube, or a pole, or a broom, checked nobody was looking, then swung it about, made “Vwoom” noises and pretended it was a lightsaber. Well, I’m here to make your Lightsaber dreams one step closer to reality. But only on the tabletop. And without the actual cutting bit.
Now you’re all nicely confused, I’ll start properly. This is a tutorial for fitting lights into a Star Wars mini, and giving it a light up lightsaber. I’ll go into other applications at the start.
Stuff You’ll Need

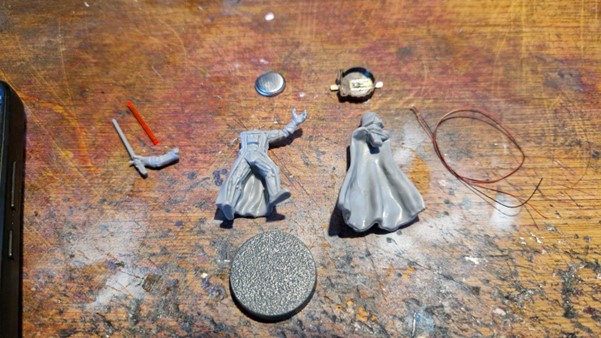
- A Mini (obviously)
- A CR1220 battery and battery holder
- An Pre-Soldered 0402 LED of an appropriate colour
- (If you don’t have a solder reflow oven at home you will go insane trying to do this yourself)
- A piece of 0.8mm (1/32”) clear acrylic rod in an appropriate colour
Tools

- A Soldering Iron and Solder
- A very sharp knife
- A small hand drill with sharp bits
- Plastic and super glues (not pictured)
Now, I understand that while you might have some of this stuff just knocking about, you probably won’t have most. Fortunately, everything on this list can easily be purchased online from Amazon for the electrical components, or a good model railway shop if you have one local to you.
One thing I would highly recommend is investing in some Silicon Carbide drill bits for your hand drill. They are super sharp and will make short work of most models. The downside is that they are also super brittle, and it is extremely easy to snap the bit off inside a model, necessitating either drilling it through and pulling out the piece, or cutting it open to remove it. If that sounds like a bad time to you just get some standard steel bits. I have a fancy cordless soldering iron because I do a lot of this kind of thing and I like my toys, this is 1,000% not needed at all.
Tutorial
Right. First things first, cut off that lightsaber blade.

That was easy, wasn’t it. Feels good doesn’t it? Kind of naughty? Hold onto that, things are about to get wild.
Now, the key to doing this is remembering that you can only drill straight lines. You cannot drill around a corner. So what I like to do is examine the model and draw a series of imaginary lines from the base to where I want the light to be. Here’s a visualisation:

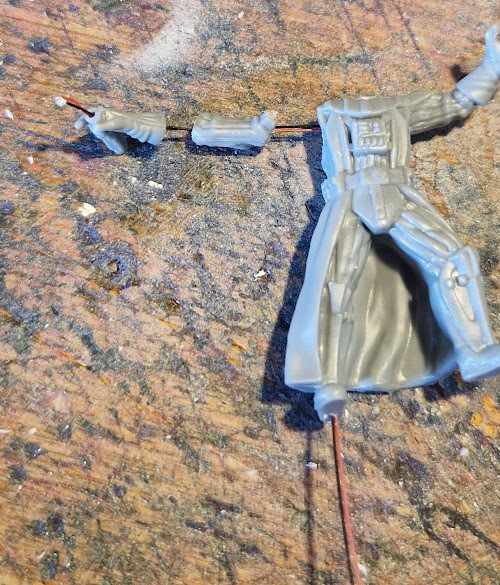
Now, Vader is quite easy as a starting point because we can draw a straight line from his right foot right up into the chest cavity. His arm, however, presents a little more of a problem. We can easily drill the wire channel into the lightsaber hilt, and also from his shoulder, but the section between his wrist and elbow is inaccessible. So it’s time to put him under the knife.

What I’ve done here is found a point where his arm could be bisected at the elbow, with the cut line being mostly obscured. In this case it’s the base of his glove, sometimes it’ll be a crease or a seam in the model. The idea is, that you’re taking advantage of the model itself to hide where you’ve had to perform surgery.
Now, as you can see from the above picture, I’ve managed to thread the LED wires through the channels in his arm, through a hole drilled through the shoulder joint into his chest, then down and out of the leg. Next up comes finding somewhere to hide your power source.
Now, as we’re just using 1 LED, it’s okay to just use a 3v battery without a resistor in the circuit. Technically as it’s a red LED it runs at 2.4-2.6 v so it should have a resistor, but for our purposes it’s close enough. No, it won’t overheat and burst into flames, no it’s not going to make the LED pop like a pinata. It does slightly reduce the lifespan of the LED, but it’s still in the tens of thousands of hours.
Note that I said “as we only have one colour”. If you’re planning on doing fancier models with multiple lights, it does start to become a consideration. The easiest way to visualise it is with your standard ROYGBIV colour spectrum. As you move from red towards blue and purple, you require more power to generate those wavelengths. With LEDs it’s not much, a red LED draws about 2.4v, a blue about 3.0v. But, as electricity is intrinsically lazy, it makes a difference.
Put those two lights in the same circuit, and only your red ones will light, as they’re drawing less power. Pop a resistor of the right amount on it though, and everything will pop into life. Like I say, for these applications it’s not really needed, but if it makes you feel better, pop a resistor in there, check all your voltages, wear a condom, whatever makes you feel safe and secure.
Anyway, now back to the model. At this point, I like to do a quick check to make sure the light still actually works, as I’ve glued a model together only to find it then won’t turn on one too many times. If you’re happy with that, pull the wire through until the LED is right in the tip of the lightsaber hilt, and glue that sucker together.
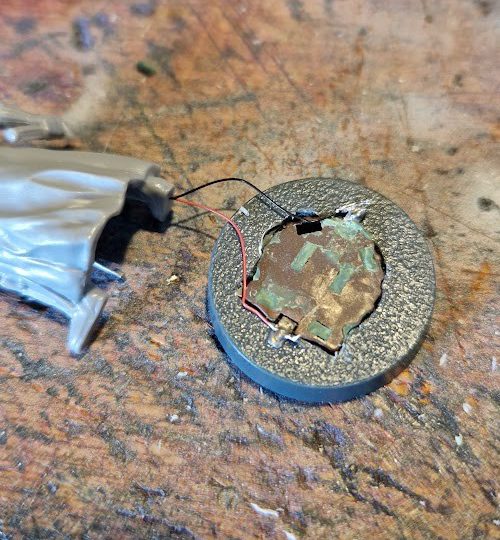
Now, using a Dremel, or large drill, ort a knife and some care, cut a hole in your base for the battery holder to sit in.

I’ll be honest, I hate this step. I always get the size a little wrong and end up having to green stuff around it to fill the gap. One other solution I have used in the past is 3D printed rings to bump up the height of the base just a little, so the wires can just be fed through a small hole and the holder hot glued to the inside of the base.
At this point, solder your wires onto the battery holder (including your resistor if you’re using one) and make sure you get them the right way around! LEDs only work one way, so if your wires are on the wrong terminals nothing will happen. Now take your acrylic rod, cut a length you deem to be appropriate and glue it into place as a blade. Personally, I like to sandpaper it a little to scuff up the surface, just because it makes it scatter the light a little better, but that’s entirely down to personal preference.

And there you go. One light up Star Wars miniature lightsaber. Really, the key things are to have a plan as to where the wire will be routed, and where you need to dissect the model to achieve that. I will admit, this is a fairly brief tutorial, so if you have any questions or things you’d like clarified, feel free to drop them in the comments. I would suggest asking me over on Instagram (@fullymoddedlighting).
Lett me know in the comments if you’d like to see another tutorial for, I dunno, 40K plasma weapons and power weapons? That’s a bit more involved, and requires casting replacement bits, so isn’t just “Do what I told you before, but with a Marine”.


You must be logged in to post a comment.