In our Fabricator General series, we talk about hobbying techniques and tricks, and ways to build, model, shape, and fix everything, with an eye toward information for both beginners and veterans. In today’s special feature, Mike “Pvt_Snafu” Bettle-Shaffer, Chris “head58” Tatro, and Kevin Genson talk about owning a 3D printer and what you should know before buying one.
Should You Buy a 3D Printer?
A friend (or was it Oscar Wilde?) once gave me a piece of advice, and it’s “that the only thing better than owning a 3D printer is having a friend who owns one”, if they’re willing to carry that printer to your house then even better. 3D printers are a hobby unto themselves and while they can provide cost savings and a whole new realm of possibility in the long run, the short term set up is very time-consuming (but rewarding). There’s also a lot of technical expertise and education that will go into getting the most out of your 3D printer so be warned: It’s not a light investment, neither from a money nor time standpoint.
I’ve personally found it to be a rewarding addition to my hobby time and owning one has meant that I’ve been able to support friends and my local gaming club with cheap terrain that still looks the part.
Plastic noodles or lasers and goop?
The two most common types of printer you’ll typically see spoken about online – and the two we’re covering today are FDM (Fused Deposition Modelling) and SLA (Stereolithography). Up until now FDM printers have been much more common and still dominate the hobby scene. With typical print resolutions of around 0.12mm they’re decent for printing terrain and lower-detail miniatures. If you’re using them for 28mm miniature printing expect results similar to Reaper Bones. The 3D printing DM has some great guides and review, plus results of the Ender 3, which I’ll be talking about later.
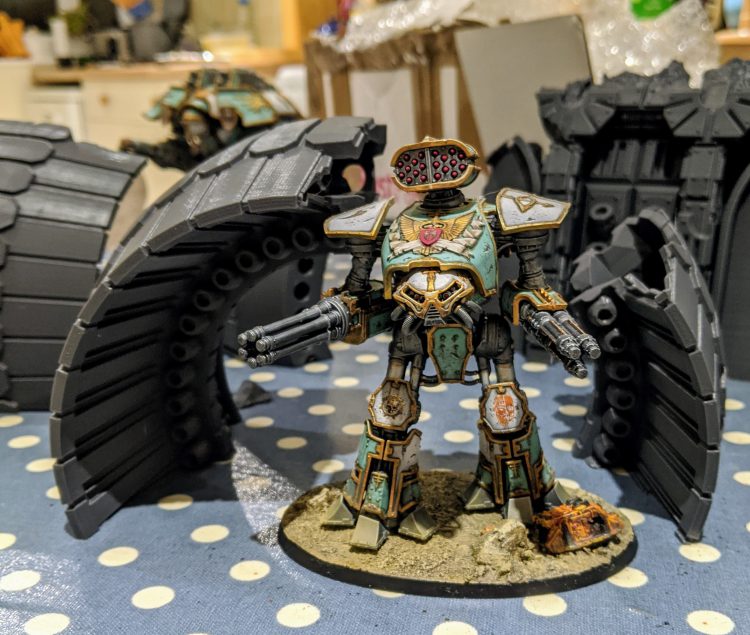
There’s a number of SLA printers available at a more affordable cost now and the resolution these are capable of printing at means that printing pieces for conversions has become feasible. Layer lines are near invisible and very little finishing is typically required after the post processing steps.
FDM – Which printer should you buy?
This comes down to budget, though I personally wouldn’t recommend going any cheaper than an Ender 3. For the price point it has a good range of features, a huge community supporting it and a whole host of upgrades once you’re a little further in to the hobby. The Ender 3 is definitely a tinkerer’s printer though, so if you’re the sort of person who doesn’t like building and fiddling with gadgets this might not be the best printer for you. While shopping around you may also come across the Ender 3X and Pro, but from what I’ve seen of reviews and the price points, the regular Ender 3 still has them beat.
At the more expensive end of the market, there’s the Prusa i3 MK3. With the high price tag comes a much more stream-lined printing experience, better build quality and some would say a better out of the box finish on prints.
If you’re picking up an Ender 3 it’s worth considering some of the many upgrades available to you. The first one I’d recommend is a Raspberry Pi 3b. This will allow you to run an Octoprint server. With Octoprint running and connected to your Ender you gain access to a number of new features, including thermal runaway protection and the ability to load models from printing remotely. Both of these make it much easier to run the printer unattended. I won’t go into the various other Octoprint plugins and upgrades available now, as I think just those two make it worthwhile.
Up next is the glass bed. I wouldn’t call this one vital but it makes printing with PLA a little bit easier and gives a lovely finish on the bottom of the print. You might need to use different surface preparations or show some caution when printing with other materials on glass but since I’ve switched my bed adhesion has been good and prints are very easy to remove once the bed is cool.
I prefer buying PLA from one of the larger manufacturers. It costs a little bit more but the customer service you get, including print troubleshooting is worth while for that little bit extra. You can get good quality PLA for around £20/$25 including shipping.
Getting started with an Ender 3
So you’ve decided to go ahead and buy an Ender 3. Good choice, it’s going to arrive looking like a giant Mechano set and you’re going to need to learn a little bit about Linux if you’ve also decided to pick up a Raspberry Pi. There are many people, who are much smarter than me, that have written guides on getting set up so this is going to be more of a reference section for you, but at least you don’t have to go and find it all yourself!
I’m going to assume that you’ve gone ahead and bought the following:
- Ender 3
- Raspberry Pi 3b
- Glass bed
- PLA
Ender 3 assembly guide from 3D Printed Tabletop
Octopi download and setup guide from OctoPrint.org
There’s a couple of options on how you can fit your glass bed. Using the clips to secure it means you lose a little bit of your print area but the bed is easy to remove. One alternative is double sided thermal tape. This makes the glass bed harder to remove but ensures a good thermal profile across the glass bed.
Common Ender 3 upgrades from Teaching Tech
Important safety note: some printers, especially the Ender 3, come delivered with operating software that does not have Thermal Runaway Protection enabled. You know that part of the printer that heats up to 200+ Celcius? Imagine if the thermostat on your printer got buggy and kept thinking it wasn’t up to full temperature yet, so it just kept increasing the heat. Yeah, that would be bad. Thermal Runaway Protection keeps that from happening. While this is probably very unlikely I sleep better at night knowing I’ve upgraded my firmware to a version that has this safety measure. You can find out details about how to upgrade the firmware here. If you’re not comfortable with updating the firmware just yet, Octoprint also offers Thermal Runaway Protection. Octoprint obviously isn’t a substitute for having it at the firmware level but it certainly helps. I also bought a small smoke detector and mounted it right above my printer because I love my family, but you do you.
The assembly guide linked earlier has some advice on how to get your bed trammed (not levelled, trammed, they’re apparently different). I’ve found that once you’ve used the paper method you’ll want to confirm the tramming using something like this print. While your printer is laying down the calibration squares, keep an eye on it. You’re looking for nice, smooth and slightly squished together lines for your first layer.
Praise the Omnissiah – my printer is setup!
Now what? One of the things I did before buying my printer, was to create some collections over at Thingiverse. It’s a fantastic resource for free 3D models and the quality of many of them is very high. Searching for “sci-fi terrain” and “fantasy terrain” is enough to fill weeks of print time. If you’re looking for larger ranges, with a more consistent visual style then there’s a number of places you can buy the stls you need for a great price.
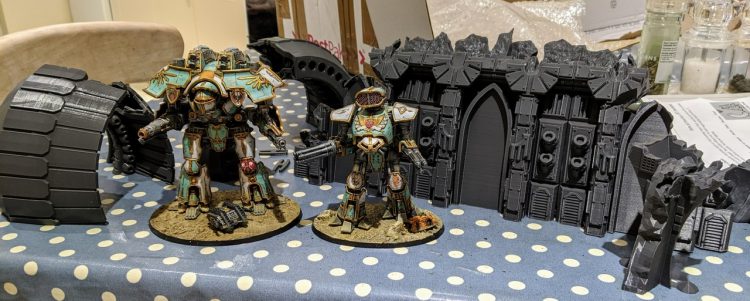
Once you have your stl files you need to convert them to something your printer can read. A slicer program like Cura 4 will let you tweak settings like print quality, speed, and sturdiness and then save the stls as “gcode” files. Read the documentation for your slicer software and get to know what all these things mean, and read online guides to find suggestions for good settings. You can get away with fairly rough print quality (0.2mm layer height) is good for terrain and objects without a lot of fine detail. But even with “fairly rough” quality be prepared for prints to take several hours to complete. These aren’t Star Trek replicators (yet).
FDM Recap: What should I buy if I want to print terrain and stuff?
In order of importance:
- An Ender 3
- PLA
- A Raspberry Pi 3b with power supply and SD card
- Glass bed.
- A glue stick or hairspray for keeping your print bed sticky, so your prints adhere better (you may find that you can get by without this on a glass bed, it’s worth experimenting)
- Automotive Fillable Primer and sandpaper – this slightly thicker primer will fill in some of the small gaps and smooth out the layer lines on your prints. You can then sand it down with increasingly fine grit sandpaper until it is baby smooth. Look for more on finishing your prints in a future Narrative Forge article.
SLA Printers
In contrast to a FDM printer, the SLA printers selectively cure sections of resin as the part is slowly removed from a vat. The consumer grade ones use a LCD projection screen to “mask” complete sections at once, which means entire layers are built simultaneously. Unlike FDM printers, where build time is a function of volume, projection SLA print times are entirely a function of build height. The most common printer is the Anycubic Photon, the latest model (the “S”) is available for $400. SLA printers are able to produce a level of detail and smoothness that rivals production wargaming model quality. The majority of products from companies like Shapeways are manufactured on resin printers. Another unit that has recently gained a lot of attention is the Epax X1, which costs about the same as the Photon. The high end printers are Formlabs, which cost several thousand dollars and use a laser instead of a LCD screen.
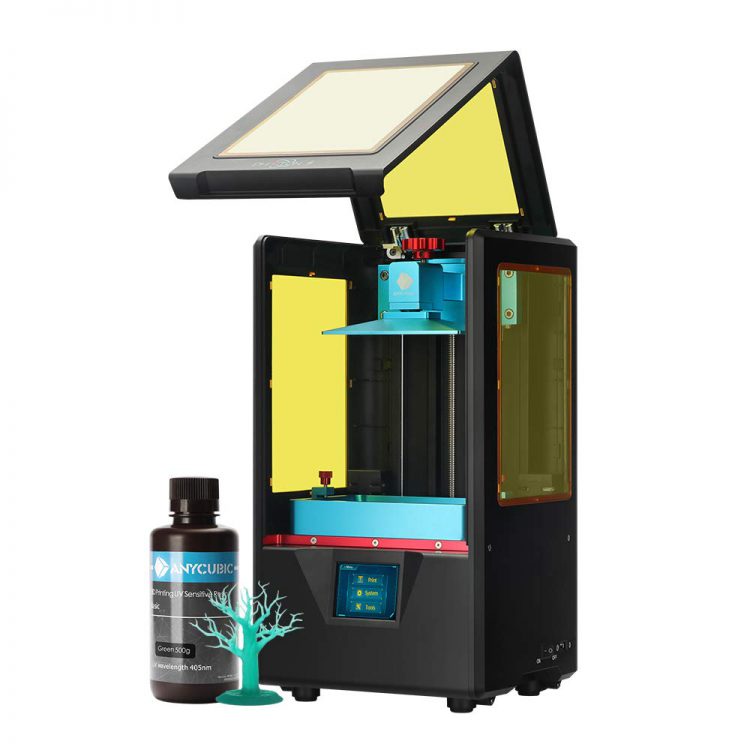
Resin printing is NOT the same as FDM printing. It requires the use of unpleasant-smelling chemicals that need a secondary cure, and while the results are fantastic they can also be very messy. Look up resin printing on YouTube to get a sense of what’s required. You need to be careful when handling the parts and the resin, and printing a resin part takes a different mindset than a FDM part. It’s not particularly difficult, but resin printing has been compared to more of a science project than a turn-key solution. If you’re not interested in dealing with the learning curve and the mess you might want to look elsewhere.
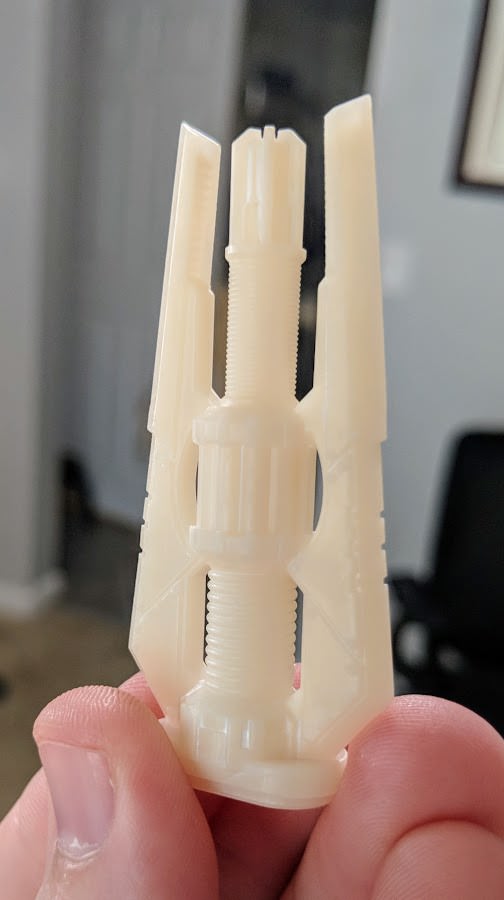
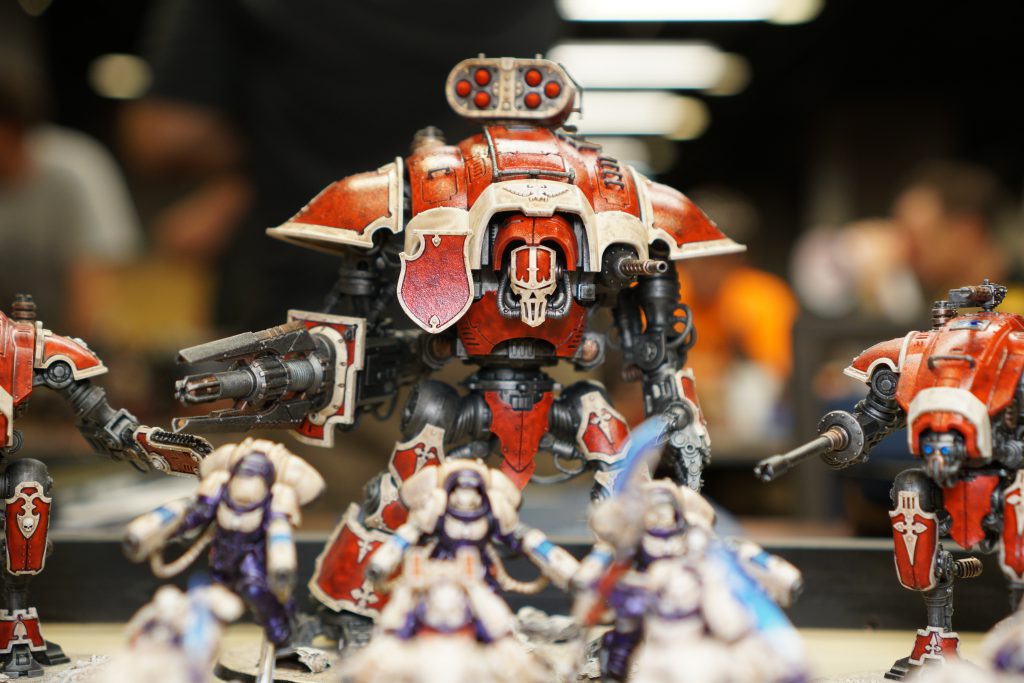
Above is an example of the kind of quality you can get from a 3D printed part using SLA. When the 8th edition Codex:Imperial Knights first came out I wanted to build a then-new Knight Preceptor, but GW wouldn’t release the model until after NOVA 2018. Rather than wait, I took advantage of some CAD software I was familiar with and put together my own las-impulsor. After three iterations I was able to successfully make the part, and with a bit of sanding and priming the end result turned out great.
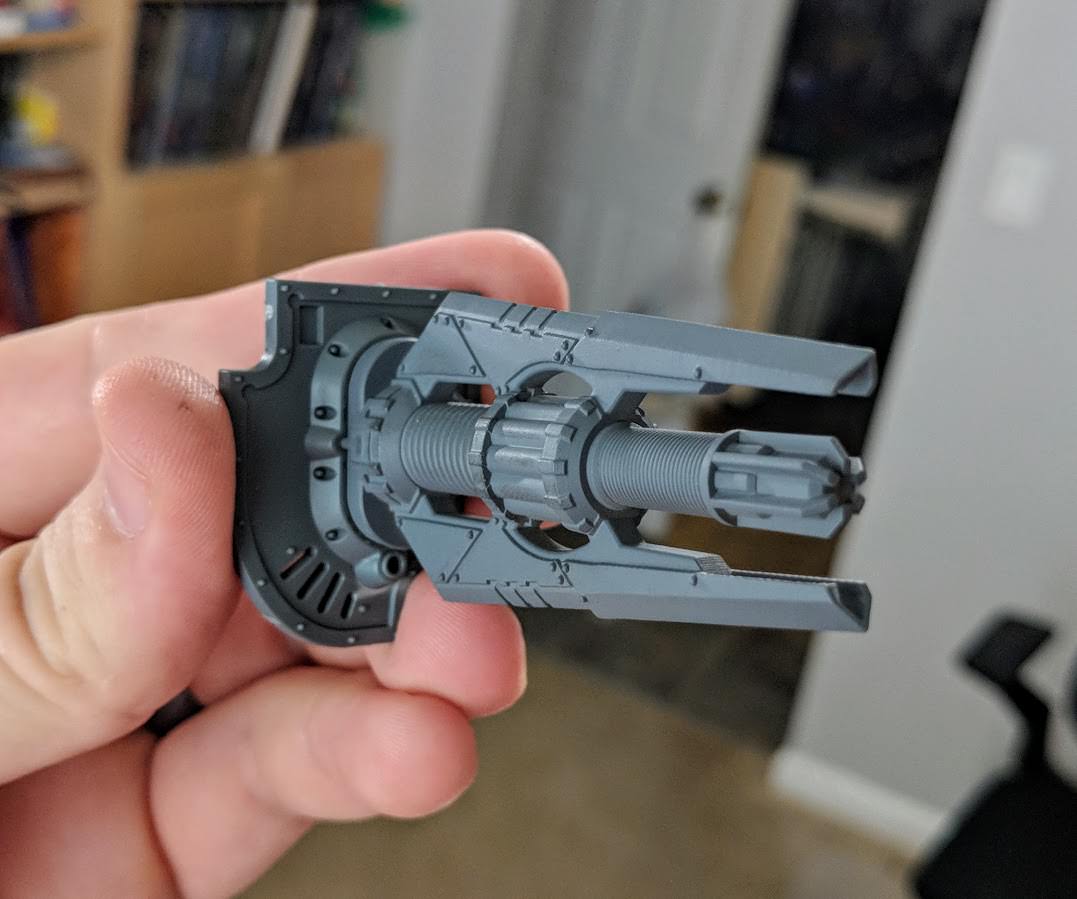
Those “rivets” on the size are roughly half a millimeter in diameter, and you can barely tell the difference between the printed gun and the injection molded base behind it. I was able to print this part after less than a week of working with the Photon. My biggest challenges were balancing details and the limitations of the printer, dialing in the settings to ensure a quality build, and tweaking the geometry so that it looked right.
The Equipment
In addition to the printer and resin, you’ll need the following to make a resin part:
- A place to operate the printer that has plenty of ventilation and is room temperature, as the resin can smell very bad and flows poorly in cold temperatures.
- Disposable gloves, as the resin can be extremely messy. I prefer nitrile.
- Paper towels or blue shop towels for cleaning up messes and the vat.
- Isopropyl Alcohol (ideally 95% or better) for cleaning off parts and the printer, available at most drug stores.
- Paper funnels with filters for transferring resin.
- Plastic scraper to remove failed parts stuck to the bottom of the printer.
- Metal scraper to remove completed parts from the printer base plate.
- Jars or containers for washing the parts.
- Safety glasses to protect your eyesight when trimming parts and working with resin.
- A UV light source (the sun also works) to fully cure the part.
- High grit sandpaper for smoothing out layers and imperfections.
The Process
This is the process used for fabricating a part using something like the Photon:
- Starting with the part file (typically in STL), the fabricator uses a program to orient, support, and slice the part. Chitubox is commonly recommended. Part orientation and slicing is where the vast majority of success or failure will occur.
- The fabricator loads the resin into the machine along with the part file.
- The part is printed, hopefully successfully.
- The fabricator removes the part from the build plate using a scraper.
- The part is washed in isopropyl alcohol to clean off any uncured resin.
- The part is cured using either a UV lamp or left out in the sun.
- Any excess support structures or build lines are removed via cutting, scraping, and sanding
Useful Resources
- The Anycubic Photon Facebook Group is extremely helpful for Photon users and resin printers in general.
- There is also a Facebook group for Chitubox users.
- Wargaming3D put out an exhaustive guide for getting started with resin printers that is great for getting more information.
- This is an amazing Photon Resin Setting Spreadsheet that’s a fantastic resource for good resins and decent settings.
This Is Only The Beginning
We’ve barely scratched the surface here, but this should help point you in the right direction toward the difficult but fun and rewarding hobby of 3D printing. There’s a ton more to learn and look into here, and if you’ve got a knack for 3D modelling, the sky is the limit in terms of what you can accomplish here. As always, if you have any questions, comments, or feedback, drop us a note in the comments below, or email us at contact@goonhammer.com.


You must be logged in to post a comment.