
Goonhammer Patron Liz “Morkai” Weir attended the GHO UK in March as her first Tenth Edition tournament. Today, she’s put together a tournament report about how her games went, and what she learnt from the experience ahead of her next big event.
If this sounds like it’s your idea of fun, tickets for our next event on 7th-8th September are available here. Same great venue, same great terrain from our partners at Bandua Wargames!
This is a trip report from playing 40k at the first UK Goonhammer Open of 2024. For me, this was a return to competitive play – I first dipped my toe into the scene with Ninth Edition back in 2022, having returned to the game after something like a decade out of the hobby. I was tempted back in by friend and fellow Goonhammer patron Beornwulf’s account of their first tournament, and (since neither part of being a Son of Russ appealed the way it did when I was last playing) I borrowed some of Beornwulf’s Aeldari to try out the new rules, and six months of Crusade games and furious painting later I was going 1-5 at the first GHO of 2022 with an army of my own.
I was mostly playing more casually in 2023 and hadn’t got my models on the table much since the release of Tenth Edition, but the Goonhammer Open gave me something to aim for. I had a couple of games with a fully operational Wraithguard blob against Beornwulf’s nascent Dreadnought list before the last balance patch, and followed up with a post-dataslate game against Gerebell, whose acquaintance I made during last year’s Vadinax campaign. The latter convinced me that I needed to up my Fate Dice infrastructure a little, so I cut down on the Wraithguard to fit in a Farseer and Guardians; and then two weeks before the event, the post-game discussion I had with Gerebell about the value Death Jesters and Striking Scorpions would add over the Troupe and Troupe Master I was running collided with a Competitive Innovations article showcasing a Warlock Skyrunner doing the job my bike Farseer was doing, I realised the points worked out perfectly, and suddenly I had painting deadlines.
Two weeks turned out to be long enough to paint five Aspect Warriors and a character, so I ended up with this:
![]()
Army List - Click to Expand Aeldari – Battle Host: A Seer did it and ran away Assassination: 7 characters +1 respawn Avatar of Khaine [335pts]: The Wailing Doom Fuegan [115pts]: Searsong, The Fire Axe + Character + Autarch Wayleaper [115pts]: Dragon Fusion Gun, Howling Banshee Mask, Star Glaive, Warlord Death Jester [105pts]: Jester’s Blade, Shrieker Cannon, **Fate’s Messenger** Farseer [80pts]: Eldritch Storm, Shuriken Pistol, Witchblade Spiritseer [65pts]: Shuriken Pistol, Witch Staff Warlock Skyrunner [70pts]: Destructor, Shuriken Pistol, , Twin Shuriken Catapult, Witchblade, **The Weeping Stones** + Battleline + Guardian Defenders [110pts]
. 10x Guardian Defender: 10x Close Combat Weapon, 10x Shuriken Catapult + Infantry + Fire Dragons [85pts]
. 4x Fire Dragon: 4x Close combat weapon, 4x Dragon Fusion Gun Striking Scorpions [75pts]
. 4x Striking Scorpion: 4x Scorpion chainsword, 4x Shuriken pistol Swooping Hawks [75pts]
. 4x Swooping Hawk: 4x Close combat weapon, 4x Lasblaster Wraithguard [190pts]
. 5x Wraithguard: 5x Wraithcannon + Mounted + Shroud Runners [80pts]
. 3x Shroud Runner: 3x Close Combat Weapon, 3x Ranger long rifle, 3x Scatter Laser, 3x Shuriken Pistol Windriders [160pts]
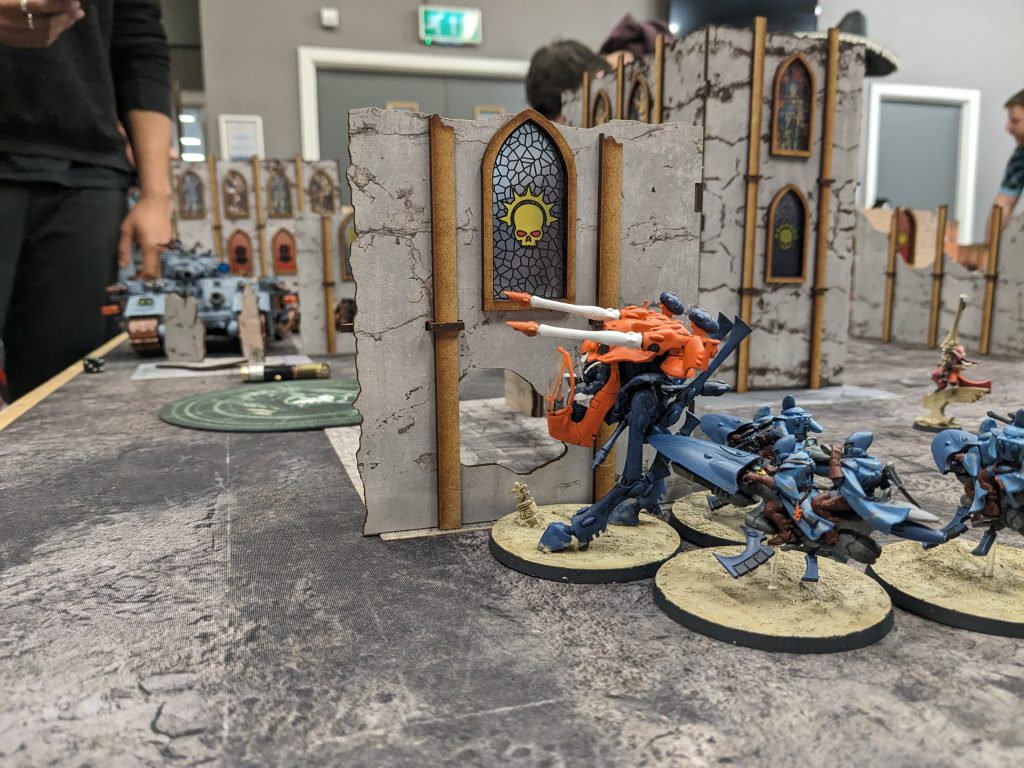
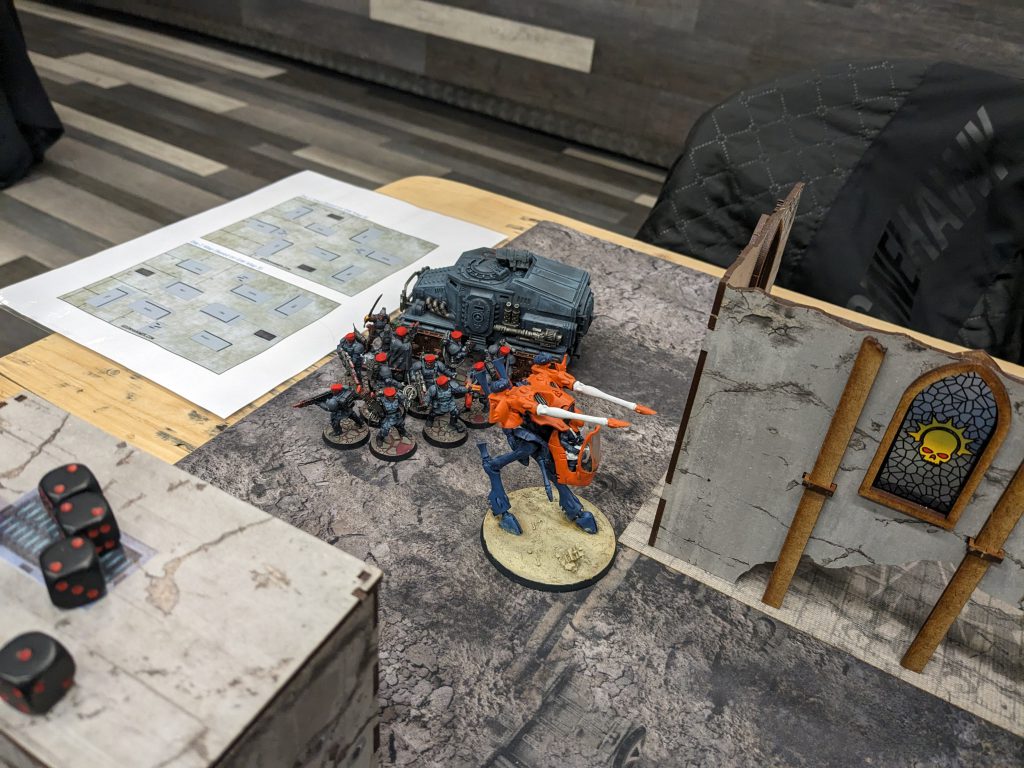
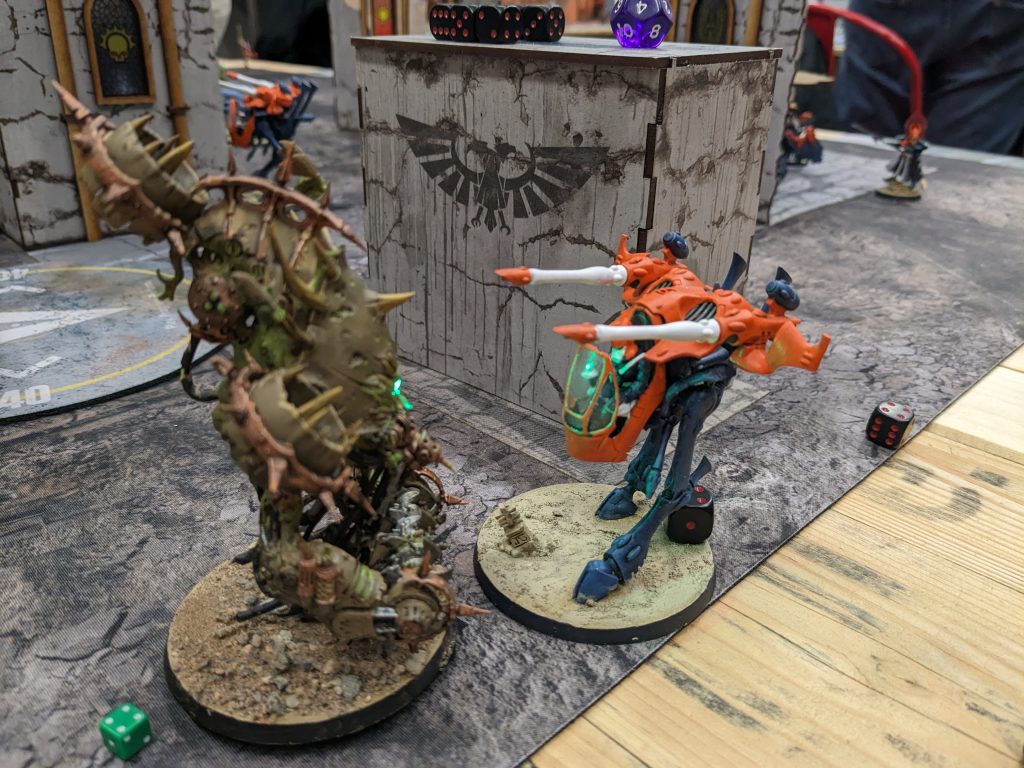
. 6x Windrider with Shuriken Cannon: 6x Close Combat Weapon, 6x Shuriken Cannon + Vehicle + War Walker [110pts]: 2x Bright Lance, War Walker feet War Walker [110pts]: 2x Bright Lance, War Walker feet + Dedicated Transport + Wave Serpent [120pts]: Shuriken Cannon, Twin Bright Lance, Wraithbone Hull ++ Total: [2,000pts] ++ The overall plan is pretty conventional elf stuff – the Avatar and the Wraithguard can brawl in the middle of the board enough for me to pivot around, with the Wave Serpent dropping the Wraithguard off to mitigate their slow movement. For the tournament itself, Fuegan hung out in the transport with the Wraiths, with the Fire Dragons running around solo; I’d attached him to the unit in my practice games, but the hit bonus didn’t feel like it was adding as much as the flexibility would, especially when I needed space in the transport for the Wraithguard. I usually just deployed on the board – my Swooping Hawks don’t need to start in reserve to do deep strike shenanigans, and the various 14” fly moves in the army are much harder to screen out than a reserve drop, but mostly I just didn’t have the game-sense honed to sniff out the times I’d want to reserve anything. With that I was ready! I’d been chewing on expectations before the event; after a 1-5 at my first Goonhammer Open and a 3-2 in my second Ninth Edition tournament, I was confident I had a 3-3 in me – but after over a year out of the tournament scene and with only a handful of games this edition, I wasn’t sure it’d be this weekend. I was hopeful I’d pick up at least one game (I’d put the other five down to being very rusty), and happy that a 2-4 would be respectable. With those goals in mind, I packed my army and set off. For me, the event started on Friday with a lift to the site with Wings and a relaxing evening of light manual labour helping to set up the boards, and – since I happened to be around a lot of people with a lot more experience in Tenth than me, including a few who know their way around a space elf – I managed to pick up a few tips. Probably the biggest was the suggestion from Wings to look at Deploy Teleport Homers as a first pick of Secondary, particularly with the option to drop Swooping Hawks in the backfield on later turns and start racking up those four-point bonuses. I put that into play immediately with Take and Hold – Chilling Rain – Search and Destroy Army List - Click to Expand WHOS A GOOD BOY, YOU ARE (1985 points) Chaos Knights CHARACTERS War Dog Stalker (175 points) BATTLELINE War Dog Brigand (170 points) War Dog Brigand (170 points) War Dog Brigand (170 points) War Dog Brigand (170 points) War Dog Brigand (170 points) War Dog Brigand (170 points) War Dog Huntsman (150 points) War Dog Karnivore (140 points) War Dog Karnivore (140 points) War Dog Karnivore (140 points) War Dog Karnivore (140 points) ALLIED UNITS Nurglings (40 points) Nurglings (40 points) Right back in it for the first round! I’d played a few games against Chaos Knights in Ninth, but hadn’t run into them this edition. Mostly that left me with a lot of respect for the mess a chaincannon can make of a unit of Aspect Warriors or Windriders if it gets a clear shot. Across the board, Jed’s army caught my eye with a series of conversions, adding a bit of variety to what could have been half a dozen identical War Dogs; the lashing spines of some of the melee models (Maulerfiend tendrils, as far as I could tell!) were the most obvious, but far from the only bit of customisation going on. The mission, thankfully, was a straightforward one to ease me back in – a simple “just hold some objectives” Primary on a deployment map that gave me enough space to work. Bring It Down was obviously a good pick to pair with Homers, so I was happy going Fixed here, and Jed picked Engage On All Fronts and Assassination. I was pretty happy with that; it’s definitely possible to score a big Assassinate against my list, especially with the Avatar and Spiritseer brawling in the midboard, but many of my other characters are a little harder to catch. While I don’t love the idea of War Dogs all up in my face, pushing them into my deployment zone for Engage likely means giving me good angles on them to pick them up without exposing my units for retaliation, whereas the two-point second prize for scoring units in three quarters is low enough that I wouldn’t mind giving it up for the whole game. I deployed fairly cagey, with my Striking Scorpions infiltrating up ready to push for the right-hand objective and all my scout units poised to find firing lines or dive back into cover. There was a traffic jam behind the ruins on my side where I hadn’t entirely thought through how I was fitting in the Wave Serpent, Windriders and Avatar, while on Jed’s side a few War Dogs were on the line ready to apply pressure, with Nurglings infiltrated and ready to Engage on the left flank. The other Nurglings lurked in the Warp, likely looking to drop in my deployment zone, along with a War Dog in reserve. I wasn’t too concerned about the Engage potential, or the chance to get a War Dog somewhere unpleasant – the Guardians and Autarch give me enough backfield goons to screen, even if the Hawks head out to do things early in the game, and Eldar mobility covers the rest. Winning the first turn was worth a lot here. I’d have been happy enough hiding in my ruins and letting him move out, but this let me commit my Wraithguard and Wave Serpent to the centre objective and put some damage into the Dogs before they got into position. I only secured one kill, but I didn’t feel too exposed, and I had a presence on a few objectives. War Dogs moving out on the right flank and midboard kept me to 5 on the Primary for turn two, but the Fate-fueled survival of a deceptively tough War Walker meant I was still online with a lot of anti-tank firepower, and over the course of round two I picked up another five Dogs (including the Death Jester scoring a natural 6 on top of the Fate’s Messenger one for a 4-wound hit on a Dog on the right flank – already making that painting time worth it!), which left Jed without much to work with. I dropped Homers this turn – I didn’t have space to drop in the backfield and I wanted everything committed to damage in the midboard – but that barely mattered; while Jed had enough left for a 10-point Primary score on turn three, I cleaned up from there, with the Hawks jumping into his deployment zone to hit the four-point Homers from turn three onward for a final score of 85-35. The Ritual – Chilling Rain – Hammer and Anvil Army List - Click to Expand ++ Army Roster (Xenos – T’au Empire) [2,000pts] ++ + Configuration + Battle Size: 2. Strike Force (2000 Point limit) Detachment: Kauyon + Epic Hero + Commander Shadowsun [100pts]: Warlord Darkstrider [60pts]
Longstrike [140pts]: Railgun, 2x Seeker missile + Character + Commander in Crisis Battlesuit [80pts]: Cyclic ion blaster, 3x Cyclic ion blaster, 2x Shield Drone + Battleline + Breacher Team [90pts]
. Breacher Fire Warrior Shas’ui Breacher Team [90pts]
. Breacher Fire Warrior Shas’ui Breacher Team [90pts]
. Breacher Fire Warrior Shas’ui + Infantry + Pathfinder Team [90pts]
. Gun Drone Pathfinder Team [90pts]
. Gun Drone + Vehicle + Ghostkeel Battlesuit [160pts]: Battlesuit support system, Cyclic ion raker, Twin fusion blaster Ghostkeel Battlesuit [160pts]: Battlesuit support system, Cyclic ion raker, Twin fusion blaster Hammerhead Gunship [130pts]: Railgun, 2x Seeker missile Riptide Battlesuit [165pts]: Ion accelerator, Twin smart missile system Riptide Battlesuit [165pts]: Ion accelerator, Twin smart missile system Riptide Battlesuit [165pts]: Ion accelerator, Twin smart missile system + Dedicated Transport + Devilfish [75pts]: 2x Seeker missile Devilfish [75pts]: 2x Seeker missile Devilfish [75pts]: 2x Seeker missile ++ Total: [2,000pts] ++ Hey, I recognise that name. I was about as prepared as I could be for this match – my practice game against Gerebell, one of the students in Kyle’s Puretide Program, was on this exact mission and map. That gave me a head start on finding strategy, as I went in with a good idea of what I’d be able to achieve with Cleanse and careful placement of objectives. That said, I don’t think this one’s easy for me – I’m usually happier with a broader battleline that gives me more room to take advantage of my mobility, so short-edge deployment is out of my comfort zone even before I start thinking about the fact that I know Kyle’s a frequent flier on the top tables. No point letting that spook me, though; I put that out of my mind and got down to the game. I took Bring It Down and Cleanse against Kyle’s Assassination and Cleanse. Kyle’s army (a striking dark red scheme with some gorgeous bases) staged into assorted ruins, while I set up ready to make some objectives and roll out. I made one of my classic blunders with my Wave Serpent this game – I didn’t want to traffic-jam myself like game one so I dropped it in the middle of the board, but I hadn’t really thought about where the contents would go if it blew up. Which it did. Rapidly. Those are T’au on the other side of the table. That gave Kyle space to put some hurt on my Wraithguard before they could do anything – I definitely forgot their ability to shoot back until my turn, but even if I had remembered it he’d done enough damage to them with Riptides and Ghostkeels shooting from outside their range that they were whittled down to the point of not doing much before they got a chance. I rolled out from there, but Kyle runs a tight ship and I gave him more than a few mistakes to take advantage of. The most technically impressive was definitely his Breachers completely no-selling my Avatar’s attempts to get into his backfield with a move-block, but for me the crown for the most memorable goes to my Death Jester backflipping onto the midboard objective to threaten some scoring, at which point those same Breachers declared overwatch and the clown hit the ground dead as a doornail. Some time later I realised I’d made a very similar, “It’s only overwatch, how bad can it be?” blunder in that practice game. One day I’ll learn. I put up a decent effort, but was unable to push out into Kyle’s defences to get more than two objectives on Primary. Failing to secure more than a couple of vehicle kills, and bleeding characters (particularly with that bit of Death Jester slapstick), I was firmly outplayed to a very instructive 71-95 finish. We had time for a chat after the game, and Kyle gave me a few pointers I’m going to be keeping in mind in future, and in some cases did at the event; after some notable missteps leaving my Avatar out of range of the Farseer’s abilities, making sure to mark the ranges to give a visual reference did me a lot of good! I had a great time in this matchup and I’d be delighted to run into Kyle again at another event; but with a loss on the books and my brain gently expiring from a very intense game trying right up to the wire to squeeze out a few more points, I headed on to the 1-1 bracket and my next opponent. Priority Targets – Chilling Rain – Crucible of Battle Army List - Click to Expand 03) Classico Revised (2000 Points) Astra Militarum CHARACTERS Lord Solar Leontus (125 Points) Platoon Command Squad (60 Points) Tank Commander (205 Points) Tank Commander (205 Points) Ursula Creed (55 Points) BATTLELINE Infantry Squad (60 Points) OTHER DATASHEETS Basilisk (135 Points) Basilisk (135 Points) Bullgryn Squad (80 Points) Bullgryn Squad (80 Points) Bullgryn Squad (80 Points) Kasrkin (100 Points) Kasrkin (100 Points) Kasrkin (100 Points) Manticore (180 Points) Manticore (180 Points) Scout Sentinels (60 Points) Scout Sentinels (60 Points) Hey, I also recognise that name. I’ll be honest – this one’s getting a much less detailed writeup than the rest of the games. I was exhausted after game two, with half an hour to find the table and reset myself, which is perhaps not the ideal state to be in when trying to make something out of a game with a world-class player piloting a list that hard-counters mine. Nassim picked Homers and Assassination, which wasn’t a surprise – I’d brewed the list up on the understanding that with a couple of Lone Operatives and the Farseer hiding in the backfield, it’d be reasonably tricky to pick up 20 on that objective despite the abundance of characters, but the artillery car park laughs at such petty machinations as, “hiding in a ruin on the other side of the board.” I looked at Nassim’s list and swung the other way – while in theory it gave up a lot of Bring It Down, in practice I’d need to get deep to threaten the artillery, and I wasn’t confident I’d manage that. I’m pretty comfortable playing Tactical and I was far too tired to think through any other options, so I went with that. Things started very much how they’d go on, with the unceremonious death of my Wave Serpent and Wraithguard to a cleanly choreographed barrage. I did… something with the forces that remained to me – trying to chew through Bullgryns was involved, and the Avatar headed out to try to make something happen – but I failed a player-level battle-shock test somewhere during Nassim’s second shooting phase and relaxed into the exhibition of my army being systematically dismantled (via Nassim helpfully letting me know Fuegan had a Feel No Pain I’d totally forgotten). I’d love to have stayed engaged a bit longer, as playing to my outs in a losing battle is something I often enjoy, but that’d take a little more event stamina than I have. As it was, I had a good time on my way to a crushingly unambiguous 36-98 loss. I do have a few ideas of where to start playing this matchup, mostly from chatting to Wings on the way home – this was a game where giving Strategic Reserves a bit more consideration to start pulling firing lines with my Windriders would be very worthwhile, and if ever there’s a matchup for me to say “well, if he goes first I probably die to an artillery barrage, so I’m deploying on the line and letting Morai-Heg take the wheel” it’s this one. Armed with these deep strategic insights, if I run into Nassim on a similar list in future, I’m optimistic that the heady heights of losing, like, 45-90 may be within reach. But that’s getting ahead of myself – well before any such ideas crossed my mind, I spend the second half of round three’s time slot chilling and playing board games with some of the Goonhammer crew (mostly not the 40k players, but Corrode had a similarly, ah, prompt finish against Death Guard), before we went out for dinner. I was a little out of it after the one-two punch of those rounds, but I had enough left in the tank when Wings hit the pairings button to take an initial look at my next opponent’s list. Purge the Foe – Chilling Rain – Crucible of Battle Army List - Click to Expand 187th scout troop (1995 points) Astra Militarum CHARACTERS Cadian Castellan (45 points) Cadian Castellan (45 points) Lord Solar Leontus (125 points) Regimental Enginseer (45 points) BATTLELINE Death Korps of Krieg (65 points) Death Korps of Krieg (65 points) DEDICATED TRANSPORTS Taurox Prime (90 points) Taurox Prime (90 points) OTHER DATASHEETS Baneblade (480 points) Bullgryn Squad (80 points) Bullgryn Squad (80 points) Cyclops Demolition Vehicle (25 points) Leman Russ Demolisher (200 points) Medusa Carriage Battery (110 points) Medusa Carriage Battery (110 points) Scout Sentinels (60 points) Scout Sentinels (60 points) Tempestus Scions (110 points) Tempestus Scions (110 points) After my heartbeat had slowed down and I was ready to face the prospect of another Guard list, I took things in properly. This wasn’t going to be a rerun of the last game’s artillery drubbing – there were a couple of Medusa batteries, but not the same crushing weight of fire as Nassim hit me with. No, there’s only one thing I can call this: Chris was running a Baneblade list. Hell yeah. Chris picked Tactical, while I – with a little trepidation – picked Bring It Down along with Teleport Homers. I knew this was a bit of a gamble, as his list had exactly 20 points for the objective on the table, and I was already considering just avoiding the Baneblade. I deployed the bulk of my forces staged behind some ruins towards my long board edge, with just a few light elements – one of the War Walkers, the Shroud Runners and Death Jester – up north to threaten the objective on that side. Chris largely mirrored that, notably putting the Baneblade up in the ruin, with a Leman Russ and Sentinel in the middle and some infantry towards the southeast objective. Chris took the first turn, which was something of a blessing for me with the Primary rewarding whichever player scores more kills in the round- with mobility and firepower on my side, I’m generally pretty confident in planning around securing a few kills, especially against an opponent running multiple Sentinels and infantry squads. His turn one was cagey – I hadn’t exposed much to his firepower – and didn’t give me much to work with either, so I staged the Wraithguard in the Wave Serpent over to the southeast objective and sent my Avatar up ready to brawl in the midboard, with my Striking Scorpions running out into the open to score Deploy Teleport Homers. They got picked up, but then the Avatar of Khaine waded into the midboard brawl and gave a good accounting, while my Fire Dragon Exarch – lone survivor after an early Medusa barrage – followed the Scorpions to do some point-scoring duty. I pushed in towards Chris’s home objective from the southeast, but ended up on a fighting retreat to the northwest after a Taurox full of Scions rolled onto the board via Rapid Ingress and then screamed around the corner to unload on the objective in a sweet move that scored Behind Enemy Lines, blew up my War Walker and took firm control of the northwest objective. The Baneblade eventually came out to play and helped grind the Avatar down – slower than Chris would have liked! – as we kept trading off the centre objective, but with the second turn advantage (and a few breaks in my favour like that Fire Dragon being allowed to live because everything was pointing at the Avatar) I built up a solid Primary lead that Chris’s lead on Secondary couldn’t overcome, despite my dropping a few points on Homers and leaving five Bring It Down points on the board because I didn’t get round to finishing off the Baneblade. Without that second turn this would have been a lot tighter, and Bring It Down may well have proved to be a mistake in that case; as it was this scored me a 90-79 victory. Chris was a fantastic opponent, and I love what he’s done with the army – the grey fatigues tie the whole thing together, but carefully chosen spot colours like the officers’ green coats and the very striking red berets on his Scions give the different branches of the army some distinction and make it very easy to read on the tabletop. With my second win secured, cruising on target for the standard I was hoping to hit, I started getting ready for round 5. Scorched Earth – Chilling Rain – Dawn of War Army List - Click to Expand Blacktoof Boyz v2 (2000 Points) Orks CHARACTERS Big Mek in Mega Armour (85 Points) Boss Snikrot (85 Points) Mozrog Skragbad (195 Points) Nob on Smasha Squig (80 Points) Nob with Waaagh! Banner (70 Points) Warboss (80 Points) Weirdboy (55 Points) BATTLELINE Boyz (170 Points) Boyz (85 Points) DEDICATED TRANSPORTS Trukk (65 Points) Trukk (65 Points) OTHER DATASHEETS Battlewagon (160 Points) Gretchin (40 Points) Gretchin (40 Points) Kommandos (135 Points) Meganobz (150 Points) Squighog Boyz (250 Points) Squighog Boyz (125 Points) Stormboyz (65 Points) I knew I was in for a tough one here – pressure lists are something I often struggle with – but my generous helping of anti-tank firepower does match up nicely with the fairly mechanised list Martin brought, and the long-edge Dawn of War deployment gives me much more space to take advantage of my mobility than Hammer and Anvil would. I went with Assassination and Homers here, as I was fairly happy with the idea of Orks staying back to screen and there seemed to be enough characters who’d want to be running towards me that I’d have a good chance of picking up enough to be worth some points. Martin took Tactical objectives. I dropped the bulk of my forces safe behind the centre ruin, with my War Walkers to my left and the Hawks and Shroud Runners holding the right flank. Martin had the Battlewagon and a wall of squigflesh ready to take the centre, with Trukks on both flanks and the Weirdboy ready for secondary duty, hiding in the backfield. Martin took the first turn, which was OK with me – I wasn’t too keen to expose anything to get sight lines against his deployment, and there was no way he wasn’t going to expose something for me to work with. After scout moves and an extremely keepable Strands of Fate roll, we were ready to go. Snikrot and the Kommandos slunk out of the shadows to attempt a decapitation strike on my Autarch, who promptly Phantasmed back out of sight (after taking a bomb squig to the face!) to leave the orks with the consolation prize of a war walker, while everything else rolled up onto the objectives. My first turn went pretty well: The Autarch risked Kommando overwatch to pick up Snikrot with the help of my Windriders on the left flank, and in the centre I picked up the Battlewagon. That was the site of the first of a few major errors, though. I’d set myself up with some options for various units, and with the Battlewagon on 4 wounds, I tried to pop it with the Death Jester in the hopes of saving my War Walker’s bright lances for the Meganob-filled trukk on the left. That was a clear misplay; the trukk was a much lower priority target than the chance to have the DJ pick up some boyz or squigs, or maybe even snipe out the Waaagh! Banner Nob. I also sent the Swooping Hawks in to score Homers in the midboard – in hindsight there’s no reason to do that, the Shroud Runners are more disposable. Still, the latter probably wouldn’t matter – I missed the charge with my Striking Scorpions, but the Avatar of Khaine happily slammed into the mob of Boyz and I popped Epic Challenge, ready to pick out the two characters in there – a trick I’ve had in mind ever since my first round of 10e Avatar combat achieved a grand total of nothing once Wings’ Necron Warriors had time to reanimate. In my head, what happened next was the Avatar stabbed the Warboss through the neck and then got too busy striking a cool pose to kill anything else. That definitely sounds better than “I rolled an ungodly number of 1s, only put two successful wounds through out of six Strike attacks, and then one of them bounced off an invulnerable save,” anyway. That put me on the back foot as the green tide rolled forward. The Avatar fell in Martin’s turn, and my backfield was starting to feel very threatened as Mozrog and the Meganobz obliterated my remaining War Walker, but I still had some tools to work with – the Death Jester was still up and ready to pick off some Squighog Boyz and I had my Windriders, Autarch and Fire Dragons on the left flank. The Fire Dragons moved through the ruin to line up on Mozrog, and that was my second major error. Turns out T10 is a tough nut to crack for S9 fusion guns, and that 4+ Feel No Pain blunted the little that got through. I pivoted to picking on the Meganobz with the Windriders – significantly more likely to achieve something – but while I picked a few of them up, there were still a couple of meganobz left, along with the Big Mek. I also tried to get something done on the right flank, but Fuegan and the Shroud Runners didn’t quite get there. That pretty much did it – Martin rolled in to pick up what remained, and my turn three scored me one more hit of Assassinate when Fuegan repeated the big guy’s feat and picked off the Waaagh! Banner Nob with Epic Challenge. That left me with essentially nothing left, and we quickly ran through the rest of the scoring for a solid 30-94 defeat. I think this one was closer-fought than the scoreline suggests – that turn two, in particular, was a fulcrum where some better decisions on my part could have left me scattering across the board with just enough mobile elf bullshit to start stealing some points and picking Orks off as they chased me around, which is a plausible path to victory. As it was, I didn’t quite measure up to Martin’s extremely solid level of play, and the pressure list absolutely took over the game. Another quick finish gave some more time to talk, and to admire Martin’s army – here the thing that caught my eye was the mirroring of the spot-colour pink from the squigs to some of the details on boyz’ guns, making for another very consistent colour scheme. The 2-3 record was about where I’d been projecting as a solid result, but having scored that first win on day one I was hungry to equalise the record in game six. Vital Ground – Chilling Rain – Sweeping Engagement Army List - Click to Expand S scrub 7 Ft Typhus (1995 points) Death Guard CHARACTERS Biologus Putrifier (50 points) Biologus Putrifier (50 points) Foul Blightspawn (50 points) Foul Blightspawn (50 points) Lord of Contagion (80 points) Lord of Virulence (100 points) Typhus (80 points) BATTLELINE Plague Marines (180 points) Plague Marines (180 points) DEDICATED TRANSPORTS Death Guard Rhino (75 points) OTHER DATASHEETS Death Guard Cultists (50 points) Deathshroud Terminators (120 points) Deathshroud Terminators (120 points) Foetid Bloat-Drone (90 points) Plagueburst Crawler (180 points) Plagueburst Crawler (180 points) Poxwalkers (50 points) ALLIED UNITS Nurglings (40 points) Nurglings (40 points) Rotigus (230 points) I immediately recognised an army that had caught my eye earlier in the event; several of Jonno’s Death Guard have an extremely-convincing OSL effect achieved by literally just putting sickly green LEDs in them. Looking closer at the army I found the overall colour scheme worked to support that – he’s really committed to the “green, green and more green” Nurgle look, but the grimy green-brown of their armour is set off with a much brighter grey-green smoke on a few key models to add a hit of contrast and interest without seeming to betray the theme of Nurgle’s dull monotony. This was another Assassination/Homers against Tactical secondary match- Jonno’s list had eight characters who all looked like they wanted to come out and play, and this looked like the very easiest map to touch the enemy deployment zone on. My first few drops were the usual conservative staging into the midfield ruin, but as deployment developed a plan started to form. A lot of the Death Guard were committed to deep strike, with Typhus, both terminator units and Rotigus all held back – never an unwelcome thing to hear when I have my Eldar on the table. My Shroud Runners were starting towards the right-hand objective, ready to scout back towards the midboard if I wanted to refuse that flank, and Jonno sent Nurglings to screen their scout move back followed by both Plague Marine units lined up to grab that objective. I left my Death Jester on the right to dance around and shoot characters, but committed both War Walkers and the Striking Scorpions to clear off the more lightly-held left objective; I felt pretty good about my chances of taking down a Plagueburst Crawler, Bloat-Drone and some cultists with five chainsword goons and a significant portion of my generous anti-tank allowance. The dice smiled, I got the first turn, and we were off to the races. The Avatar rolled into the midboard to take a speed-boost off those nurglings, while my Shroud Runners scored Homers and the Wave Serpent dropped off the Wraithguard in range to pick up the Plagueburst Crawler. A battery of bright lances took out the Rhino, stranding the other Plague Marine unit on the right flank, and while not everyone covered themselves with glory – the Bloat-Drone survived on four wounds and, more embarrassingly, the Scorpions looked at their first successful charge into a unit they’re well-matched for and didn’t take out all ten Cultists – that left me in a good position. The Death Guard shot back and shambled forwards, but didn’t get much work done, and as of my second Assault phase I had the Avatar of Khaine on my enemy’s home objective putting the Wailing Doom through the other Plagueburst Crawler. I’d screened out basically the whole board, so the terminators all dropped in Jonno’s home ruin. They hid for a while under threat of Avatar overwatch, which gave me time to bring up the Wraithguard, and with the Plague Marines never making it far enough onto the board to do anything but finish off the Death Jester and Rotigus dropping into my right flank with an entire gunline of assorted elf pointed at him – plus some unfavourable Secondary draws for Jonno on turn three – I took a solid 95-37 win. Three wins, three losses – I hit the stretch goal! That was much more than expected for my first event back, particularly after matching into some very strong players on the way – with an even record and some obvious points I can look to improve on, particularly from the game against Martin and my old nemesis the Orks, I’m absolutely confident in crowning myself with the exalted title of ‘midtable scrub’ and might even be able to push a little higher if I work for it. Between tips from my opponents, my own analysis and the significant bonus of time to chew over things with Wings on the way back, I’m keen to see what I can improve – beyond tightening up some of my sequencing, better planning on the Farseer’s 12” buff range, and improving use of my Swooping Hawks (mostly by not wasting them early), all of which I was variously fucking up and trying to improve over the event, I’m also planning to give Strategic Reserves more of a look. (If nothing else that’ll ease off my deployment zone traffic jams!) With another very simple list tweak (saving 20 points by taking Wraithblades rather than Guard, and investing the savings to swap the Wave Serpent for a Falcon) I have a tank to paint – much like my first one back in 2022, this year’s Goonhammer Open has me excited to get stuck into the competitive scene, and with my next event booked already, it won’t be long before I can put things to the test. Thanks for the write-up Liz, and were glad you had a great time! Once again, if you at home would like to come to the next GHO UK on 7th-8th September, you can buy tickets here. If you have any questions or comments feel free to drop us a note in the Comments below or email us at contact@goonhammer.com. That’s also the best way to suggest topics for future articles. And if you want regular updates in your inbox, subscribe to our newsletter.
Bring It Down: 3pt x2, 2pt x2 = max 10pts
+ Epic Hero +
. Heavy Weapon Platform: Bright Lance
. Fire Dragon Exarch: Close combat weapon, Firepike
. Striking Scorpion Exarch: Biting blade
. Swooping Hawk Exarch: Aeldari Power Sword, Close combat weapon, Hawk’s TalonRound 1: Jed Hutchinson’s Chaos Knights
Matchup
Strike Force (2000 points)
Traitoris Lance
• Warlord
• 1x Daemonbreath spear
1x Havoc multi-launcher
1x Slaughterclaw
• Enhancement: Aura of Terror
* This Datasheet also has the Battleline keyword.
• 1x Armoured feet
1x Avenger chaincannon
1x Daemonbreath spear
1x Havoc multi-launcher
• 1x Armoured feet
1x Avenger chaincannon
1x Daemonbreath spear
1x Havoc multi-launcher
• 1x Armoured feet
1x Avenger chaincannon
1x Daemonbreath spear
1x Havoc multi-launcher
• 1x Armoured feet
1x Avenger chaincannon
1x Daemonbreath spear
1x Havoc multi-launcher
• 1x Armoured feet
1x Avenger chaincannon
1x Daemonbreath spear
1x Havoc multi-launcher
• 1x Armoured feet
1x Avenger chaincannon
1x Daemonbreath spear
1x Havoc multi-launcher
• 1x Daemonbreath meltagun
1x Daemonbreath spear
1x Reaper chaintalon
• 1x Havoc multi-launcher
1x Reaper chaintalon
1x Slaughterclaw
• 1x Havoc multi-launcher
1x Reaper chaintalon
1x Slaughterclaw
• 1x Havoc multi-launcher
1x Reaper chaintalon
1x Slaughterclaw
• 1x Havoc multi-launcher
1x Reaper chaintalon
1x Slaughterclaw
• 3x Nurgling Swarm
• 3x Diseased claws and teeth
• 3x Nurgling Swarm
• 3x Diseased claws and teethThe Game
Round 2: Kyle Grundy’s T’au
![]()
![]()
Matchup
. 2 Twin smart missile systems
. . Guardian Drone
. . Gun Drone
. 9x Breacher Fire Warriors: 9x Close combat weapon, 9x Pulse blaster, 9x Pulse pistol
. . Guardian Drone
. . Gun Drone
. 9x Breacher Fire Warriors: 9x Close combat weapon, 9x Pulse blaster, 9x Pulse pistol
. . Guardian Drone
. . Gun Drone
. 9x Breacher Fire Warriors: 9x Close combat weapon, 9x Pulse blaster, 9x Pulse pistol
. Pathfinder Shas’ui: Semi-automatic grenade launcher
. . Recon drone
. 3x Pathfinders w/ ion rifle: 3x Close combat weapon, 3x Ion rifle, 3x Pulse pistol
. 6x Pathfinders w/ pulse carbine: 6x Close combat weapon, 6x Pulse carbine, 6x Pulse pistol
. Shield Drone
. Pathfinder Shas’ui: Semi-automatic grenade launcher
. . Recon drone
. 3x Pathfinders w/ ion rifle: 3x Close combat weapon, 3x Ion rifle, 3x Pulse pistol
. 6x Pathfinders w/ pulse carbine: 6x Close combat weapon, 6x Pulse carbine, 6x Pulse pistol
. Shield Drone
. 2 Twin smart missile systems
. 2x Missile Drone: 2x Missile pod
. 2x Missile Drone: 2x Missile pod
. 2x Missile Drone: 2x Missile pod
. 2 Twin smart missile systems
. 2 Twin smart missile systems
. 2 Twin smart missile systemsThe Game
Round 3: Nassim Fouchane’s Astra Militarum
![]()
![]()
Matchup
Combined Regiment
Strike Force (2000 Points)
• Warlord
• 1x Conquest
1x Konstantin’s hooves
1x Sol’s Righteous Gaze
• 1x Platoon Commander
• 1x Close combat weapon
1x Plasma pistol
1x Power fist
• 4x Veteran Guardsman
• 4x Close combat weapon
1x Flamer
1x Heavy flamer
2x Lasgun
4x Laspistol
1x Master Vox
1x Regimental Standard
• 1x Armoured tracks
1x Demolisher battle cannon
1x Heavy stubber
1x Hunter-killer missile
1x Lascannon
2x Militarum plasma cannon
• 1x Armoured tracks
1x Demolisher battle cannon
1x Heavy stubber
1x Hunter-killer missile
1x Lascannon
2x Militarum plasma cannon
• 1x Duty and Vengeance
1x Power weapon
• 1x Sergeant
• 1x Plasma pistol
1x Power weapon
• 7x Guardsman
• 7x Close combat weapon
1x Flamer
6x Lasgun
1x Vox-caster
• 1x Heavy Weapons Team
• 1x Close combat weapon
1x Laspistol
1x Mortar
• 1x Armoured tracks
1x Earthshaker cannon
1x Heavy bolter
1x Hunter-killer missile
• 1x Armoured tracks
1x Earthshaker cannon
1x Heavy bolter
1x Hunter-killer missile
• 1x Bullgryn Bone ’ead
• 1x Brute Shield
1x Bullgryn maul
1x Close combat weapon
• 2x Bullgryn
• 2x Brute Shield
2x Bullgryn maul
2x Close combat weapon
• 1x Bullgryn Bone ’ead
• 1x Brute Shield
1x Bullgryn maul
1x Close combat weapon
• 2x Bullgryn
• 2x Brute Shield
2x Bullgryn maul
2x Close combat weapon
• 1x Bullgryn Bone ’ead
• 1x Brute Shield
1x Bullgryn maul
1x Close combat weapon
• 2x Bullgryn
• 2x Brute Shield
2x Bullgryn maul
2x Close combat weapon
• 1x Kasrkin Sergeant
• 1x Plasma pistol
1x Power weapon
• 9x Kasrkin
• 9x Close combat weapon
3x Hot-shot lasgun
1x Hot-shot laspistol
1x Hot-shot marksman rifle
1x Melta Mine
2x Meltagun
2x Plasma gun
1x Vox-caster
• 1x Kasrkin Sergeant
• 1x Plasma pistol
1x Power weapon
• 9x Kasrkin
• 9x Close combat weapon
3x Hot-shot lasgun
1x Hot-shot laspistol
1x Hot-shot marksman rifle
1x Melta Mine
2x Meltagun
2x Plasma gun
1x Vox-caster
• 1x Kasrkin Sergeant
• 1x Plasma pistol
1x Power weapon
• 9x Kasrkin
• 9x Close combat weapon
3x Hot-shot lasgun
1x Hot-shot laspistol
1x Hot-shot marksman rifle
1x Melta Mine
2x Meltagun
2x Plasma gun
1x Vox-caster
• 1x Armoured tracks
1x Heavy bolter
1x Hunter-killer missile
1x Storm eagle rockets
• 1x Armoured tracks
1x Heavy bolter
1x Hunter-killer missile
1x Storm eagle rockets
• 1x Close combat weapon
1x Heavy flamer
1x Hunter-killer missile
1x Sentinel chainsaw
• 1x Close combat weapon
1x Heavy flamer
1x Hunter-killer missile
1x Sentinel chainsawThe Game
Round 4: Chris Ward’s Astra Militarum
![]()
![]()
Matchup
Strike Force (2000 points)
Combined Regiment
• 1x Close combat weapon
1x Plasma pistol
1x Power weapon
• 1x Close combat weapon
1x Plasma pistol
1x Power weapon
• Warlord
• 1x Conquest
1x Konstantin’s hooves
1x Sol’s Righteous Gaze
• 1x Archeotech pistol
1x Enginseer axe
1x Servo-arm
• 1x Death Korps Watchmaster
• 1x Plasma pistol
1x Power weapon
• 9x Death Korps Trooper
• 9x Close combat weapon
1x Death Korps Medi-pack
1x Grenade launcher
6x Lasgun
1x Meltagun
1x Plasma gun
• 1x Death Korps Watchmaster
• 1x Plasma pistol
1x Power weapon
• 9x Death Korps Trooper
• 9x Close combat weapon
1x Death Korps Medi-pack
1x Grenade launcher
6x Lasgun
1x Meltagun
1x Plasma gun
• 1x Armoured tracks
1x Storm bolter
1x Taurox missile launcher
1x Twin Taurox hot-shot volley gun
• 1x Armoured tracks
1x Storm bolter
1x Taurox missile launcher
1x Twin Taurox hot-shot volley gun
• 1x Armoured tracks
1x Baneblade cannon
1x Co-axial autocannon
1x Demolisher cannon
1x Heavy stubber
2x Lascannon
2x Lascannon
1x Twin heavy bolter
2x Twin heavy bolter
2x Twin heavy flamer
• 1x Bullgryn Bone ’ead
• 1x Brute Shield
1x Bullgryn maul
1x Close combat weapon
• 2x Bullgryn
• 2x Brute Shield
2x Bullgryn maul
2x Close combat weapon
• 1x Bullgryn Bone ’ead
• 1x Brute Shield
1x Bullgryn maul
1x Close combat weapon
• 2x Bullgryn
• 2x Brute Shield
2x Bullgryn maul
2x Close combat weapon
• 1x Armoured tracks
1x Demolisher battle cannon
1x Heavy stubber
1x Hunter-killer missile
1x Lascannon
2x Multi-melta
• 1x Battery close combat weapons
1x Medusa siege cannon
• 1x Battery close combat weapons
1x Medusa siege cannon
• 1x Close combat weapon
1x Hunter-killer missile
1x Plasma cannon
1x Sentinel chainsaw
• 1x Close combat weapon
1x Hunter-killer missile
1x Plasma cannon
1x Sentinel chainsaw
• 1x Tempestor
• 1x Plasma pistol
1x Power weapon
• 9x Tempestus Scion
• 9x Close combat weapon
5x Hot-shot lasgun
2x Hot-shot volley gun
2x Plasma gun
• 1x Tempestor
• 1x Plasma pistol
1x Power weapon
• 9x Tempestus Scion
• 9x Close combat weapon
5x Hot-shot lasgun
2x Hot-shot volley gun
2x Plasma gunThe Game
Round 5: Martin Brown’s Orks
![]()
![]()
Matchup
Waaagh! Tribe
Strike Force (2000 Points)
• Warlord
• 1x Grot Oiler
1x Killsaw
1x Kustom Force Field
1x Power klaw
• 1x Mork’s Teeth
1x Slugga
• 1x Big Chompa’s jaws
1x Gutrippa
1x Thump gun
• 1x Big choppa
1x Slugga
1x Smasha squig jaws
• Enhancements: Headwoppa’s Killchoppa
• 1x Kustom shoota
1x Waaagh! banner
• 1x Kombi-weapon
1x Power klaw
1x Twin slugga
• Enhancements: Kunnin’ but Brutal
• 1x Weirdboy staff
1x ’Eadbanger
• 1x Boss Nob
• 1x Power klaw
1x Slugga
• 19x Boy
• 19x Choppa
19x Slugga
• 1x Boss Nob
• 1x Power klaw
1x Slugga
• 9x Boy
• 9x Choppa
9x Slugga
• 1x Big shoota
1x Spiked wheels
1x Wreckin’ ball
• 1x Big shoota
1x Spiked wheels
1x Wreckin’ ball
• 4x Big shoota
1x Deff rolla
1x Grabbin’ klaw
1x Lobba
1x Wreckin’ ball
1x Zzap gun
1x ’Ard Case
• 1x Runtherd
• 1x Grot-smacka
1x Slugga
• 10x Gretchin
• 10x Close combat weapon
10x Grot blasta
• 1x Runtherd
• 1x Grot-smacka
1x Slugga
• 10x Gretchin
• 10x Close combat weapon
10x Grot blasta
• 1x Bomb Squig
1x Distraction Grot
• 1x Boss Nob
• 1x Power klaw
1x Slugga
• 9x Kommando
• 1x Breacha ram
1x Burna
4x Choppa
2x Close combat weapon
1x Close combat weapon
1x Close combat weapon
1x Rokkit launcha
4x Slugga
2x Speshul Kommando shoota
• 5x Meganob
• 5x Kustom shoota
5x Power klaw
• 2x Bomb Squig
• 6x Squighog Boy
• 6x Saddlegit weapons
6x Squighog jaws and saddlegits
6x Stikka
• 1x Bomb Squig
• 3x Squighog Boy
• 3x Saddlegit weapons
3x Squighog jaws and saddlegits
3x Stikka
• 1x Boss Nob
• 1x Power klaw
1x Slugga
• 4x Stormboy
• 4x Choppa
4x SluggaThe Game
![]()
![]()

Round 6: Jonno Rowse’s Death Guard
![]()
![]()
Matchup
Strike Force (2000 points)
Plague Company
• 1x Hyper blight grenades
1x Injector pistol
1x Plague knives
• 1x Hyper blight grenades
1x Injector pistol
1x Plague knives
• 1x Close combat weapon
1x Plague sprayer
• 1x Close combat weapon
1x Plague sprayer
• 1x Plagueblade
• 1x Heavy plague fist
1x Twin plague spewer
• Enhancement: Living Plague
• Warlord
• 1x Master-crafted manreaper
• 1x Plague Champion
• 1x Bubotic weapons
1x Plasma gun
• 9x Plague Marine
• 1x Blight launcher
3x Bubotic weapons
1x Heavy plague weapon
1x Meltagun
1x Plague belcher
9x Plague knives
2x Plague spewer
• 1x Plague Champion
• 1x Bubotic weapons
1x Plasma gun
• 9x Plague Marine
• 1x Blight launcher
3x Bubotic weapons
1x Heavy plague weapon
1x Meltagun
1x Plague belcher
9x Plague knives
2x Plague spewer
• 1x Armoured tracks
1x Havoc launcher
1x Plague combi-bolter
1x Plague combi-bolter
• 1x Death Guard Cultist Champion
• 1x Brutal assault weapon
1x Cultist firearm
• 9x Death Guard Cultist
• 9x Brutal assault weapon
7x Cultist firearm
1x Grenade launcher
1x Heavy stubber
• 1x Deathshroud Champion
• 1x Manreaper
1x Plaguespurt gauntlet
• 2x Deathshroud Terminator
• 2x Manreaper
2x Plaguespurt gauntlet
• 1x Deathshroud Champion
• 1x Manreaper
1x Plaguespurt gauntlet
• 2x Deathshroud Terminator
• 2x Manreaper
2x Plaguespurt gauntlet
• 1x Fleshmower
1x Plague probe
• 1x Armoured tracks
1x Heavy slugger
1x Plagueburst mortar
2x Plaguespitter
• 1x Armoured tracks
1x Heavy slugger
1x Plagueburst mortar
2x Plaguespitter
• 10x Poxwalker
• 10x Improvised weapon
• 3x Nurgling Swarm
• 3x Diseased claws and teeth
• 3x Nurgling Swarm
• 3x Diseased claws and teeth
• 1x Gnarlrod
1x Streams of brackish filthThe Game
Taking Stock

You must be logged in to post a comment.