In this week’s guest Fabricator General article from our Historicals team, Lupe takes up through step by step in thatching buildings using toweling for an authentic medieval feel.
Thatched buildings have a very specific look and feel to them, and there are many different ways of approaching thatching your buildings once you’ve made them. Some of the most common are using teddy bear fur or various kinds of straw or grass, but in my experience these tend not to result in something that looks like traditional European thatching. The technique I settled upon, which I’ll take you through today, instead uses towelling and an awful lot of PVA to get the final result.
Materials
You’ll need:
- A building that needs thatching
- Some old towels, not too fluffy. You really want cheap ones and I picked up a bunch of hotel surplus for this specific purpose – cost me about £10 for more towels than I’ll ever use. As little stitching as possible is ideal, because you don’t want to be using those sections
- A sharp pair of scissors
- Lots and lots of PVA glue. No more than that. And a big old brush to slap it on with
- A good black sprayprimer or an airbrush you can run a black primer through
- Vallejo Grey Black, Citadel XV88, Citadel Karak Stone, Citadel Ushbati Bone (or equivalent colours from other brands)
Method
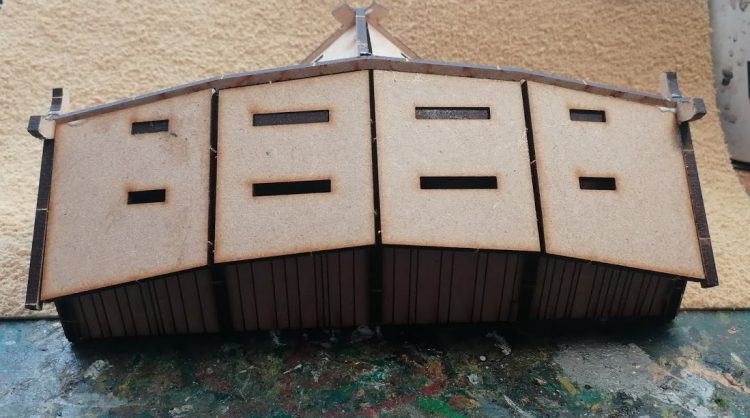
First, get your building ready for thatching. That means fully built but unprimed (unless you happen to want to waste primer doing bits of it twice).
Now get your towelling and work out the grain – brush it out until you work out which way the fibres lay most comfortably. This is absolutely essential – if you get the grain going the wrong way, you’ll end up with something that looks more like a hedgehog, or just a tangled mess. Once you’re sure of the grain cut about 1″ wide strips at 90 degrees to that grain, so the grain lies across the strip. These strips should be a little longer as the roof you’re thatching is wide. Make sure when you’re assembling your pile that you orient the strips so you know which direction the grain runs on them and they’re all the same way.
Cut your first strip down to fit the roof.
On a peaked roof you’ll start the edges and work up to the top, and cap the peak with a strip connecting both sides. So measure along the edge of one side of the roof for the first one, giving yourself about 1/2″ of overhang each side. More than that is absolutely fine, you’ll be tidying this up later but you need some overhang or it won’t sit right.
On a round roof the principle is the same but of course you will find that you need the strips to loop in on themselves. For this I recommend making them a little longer than necessary so they overlap a little, but making sure the overlap isn’t in the same place for each strip. This will help even out the look. The cap will instead of a strip be a little circle of towelling, but the principle is the same.
Water down the PVA a little to make it run smoother, then absolutely slather it on across about the bottom 3/4″ of the roof, nice and thick. Then take the strip you’ve cut to size and lay it on so it overhangs the roof in all directions. Make sure the grain runs down from the roof to the ground.
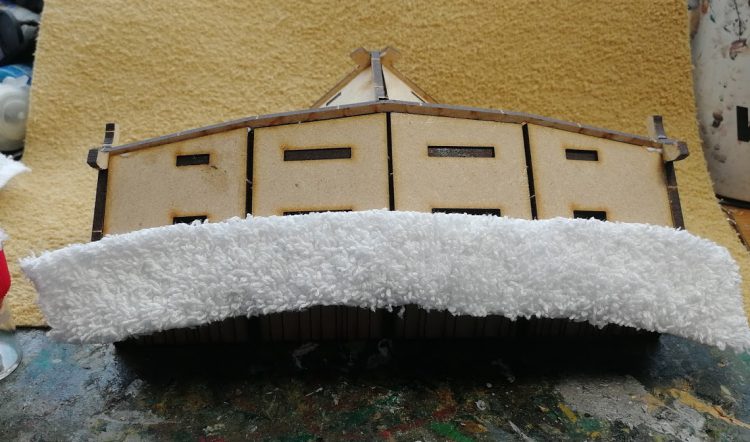
Now that that PVA and slap it on the upper half of that strip and over the next 1/2″ of the roof, and cut and place another strip form the pile overlapping.
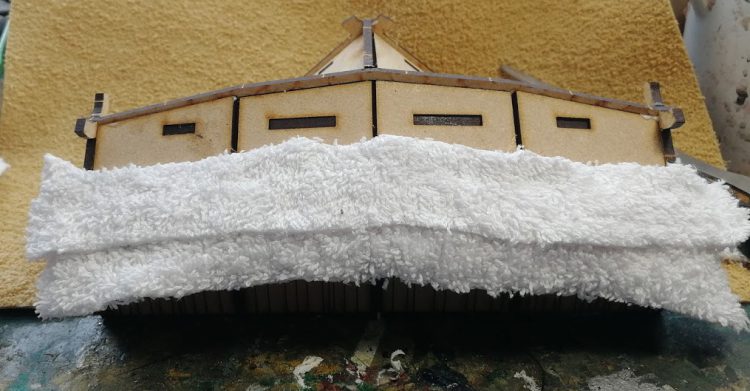
Smooth it down so it sticks nice and firm, and then repeat, until you your last strip lines up at the crest of the roof.
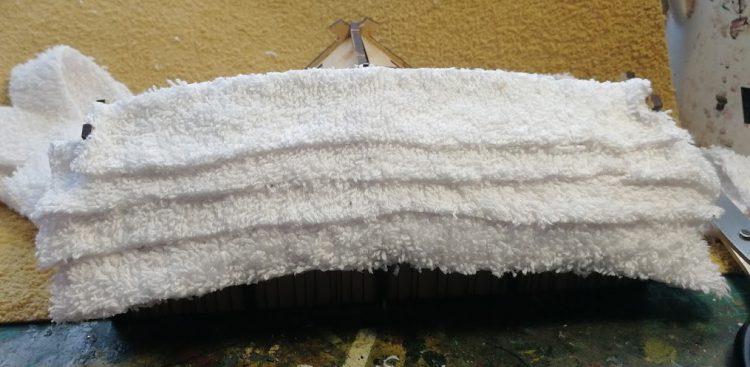
Do the other side of the roof (if there is one) then cap it off with a thinner (1/2″) strop over the top to connect the two sides. Leave it all to dry for at least half an hour so you don’t shift the strips in the next stage.
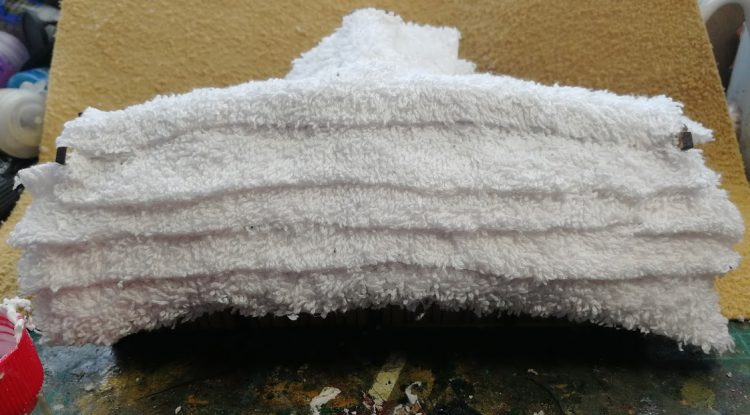
Now it’s time to neaten it all up – with a sharp pair of scissors trim the edges the neaten them. You’re not looking to get rid of all the overhang, just to make the strips all the same length of overhang and get it a little tighter to the roof.
That done it’s time for the fun bit. Water the PVA down a fair bit so it’s nice and runny, then absolutely slather it on across the roof, working your large brush downwards to smooth out the fibres and get it lying right. You want to make sure every part of it is covered in the PVA, and it soaks in as much as possible.
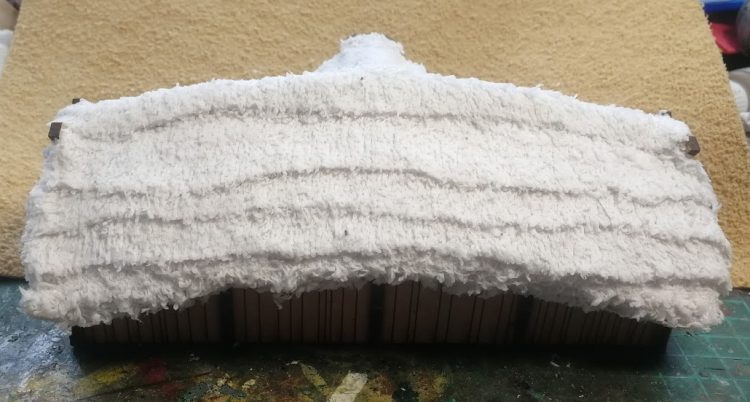
This done, leave it to dry for at least 24 hours. You may need to leave it for longer – when it’s done, the whole thing will be firm and hard, like a springy plastic.
When it’s fully dry, prime it black. Make sure you get right in and underneath, so absolutely no white shows from any angle.
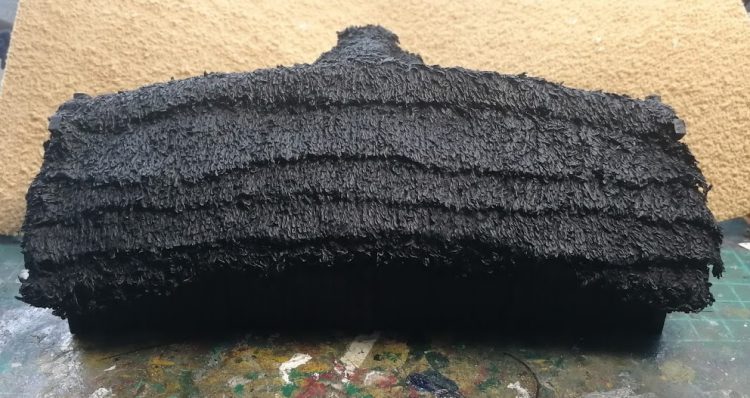
Now grab a large brush and start painting the thatch your Grey Black or equivalent. The goal here is to really paint the whole thing, but not to worry about working it into every single little nook and cranny – the reason we basecoated so thoroughly was to make sure the black underneath can act as shadows in those places.
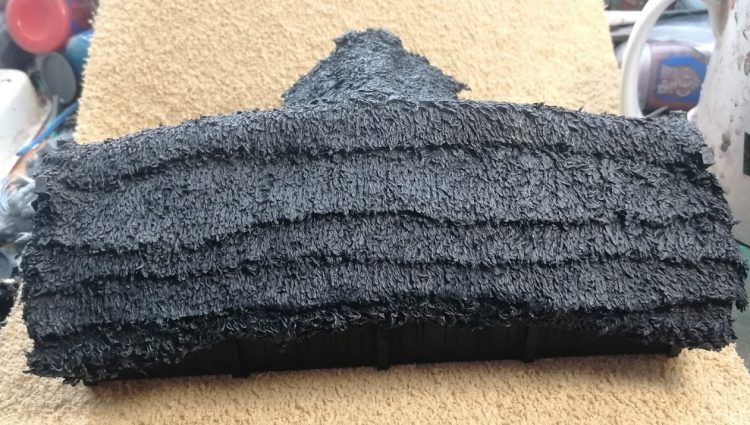
Now you make be thinking “Lupe that doesn’t look much different” and also “Lupe my God clean your desk” and to that I say this grey is an important part of building the colours as we add more tones and helps it look more natural and also no screw you I will never clean my desk.
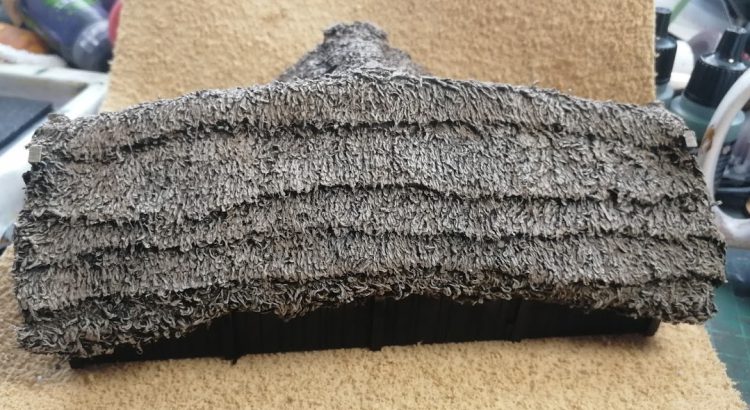
When that’s dry you can apply the XV88 using a large brush again but this time as more of an overbrush. Think of this as an absurdly heavy dry brush – dragging the paint downwards over the roof to create variation in tones.
Do the same but a little lighter with the Karnak, and then finally do a more traditional drybrush with the Ushbati. The final result should look a little like this:
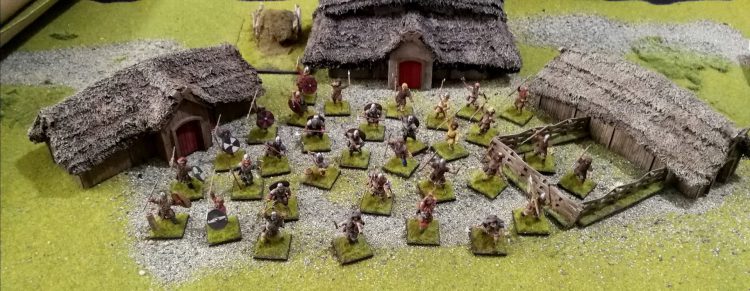
You can then finish painting the rest of the building and soon enough you’ll have your own tiny thatched village to play with.