Fast forward in time. Your mail gets delivered and your massive box of FutureProof Modular Terrain is sitting on your porch/doorstep/stoop. You dive into it and explore all the parts.
You read the instructions. Do you leave it as-is, keep it modular, and build it before each game? Do you glue together ruins with the parts in the kit? For most people, I think that’s a great option. Depending on your gaming space and storage situation, the components are great right out of the box. However, what if you think it needs a little something … more …

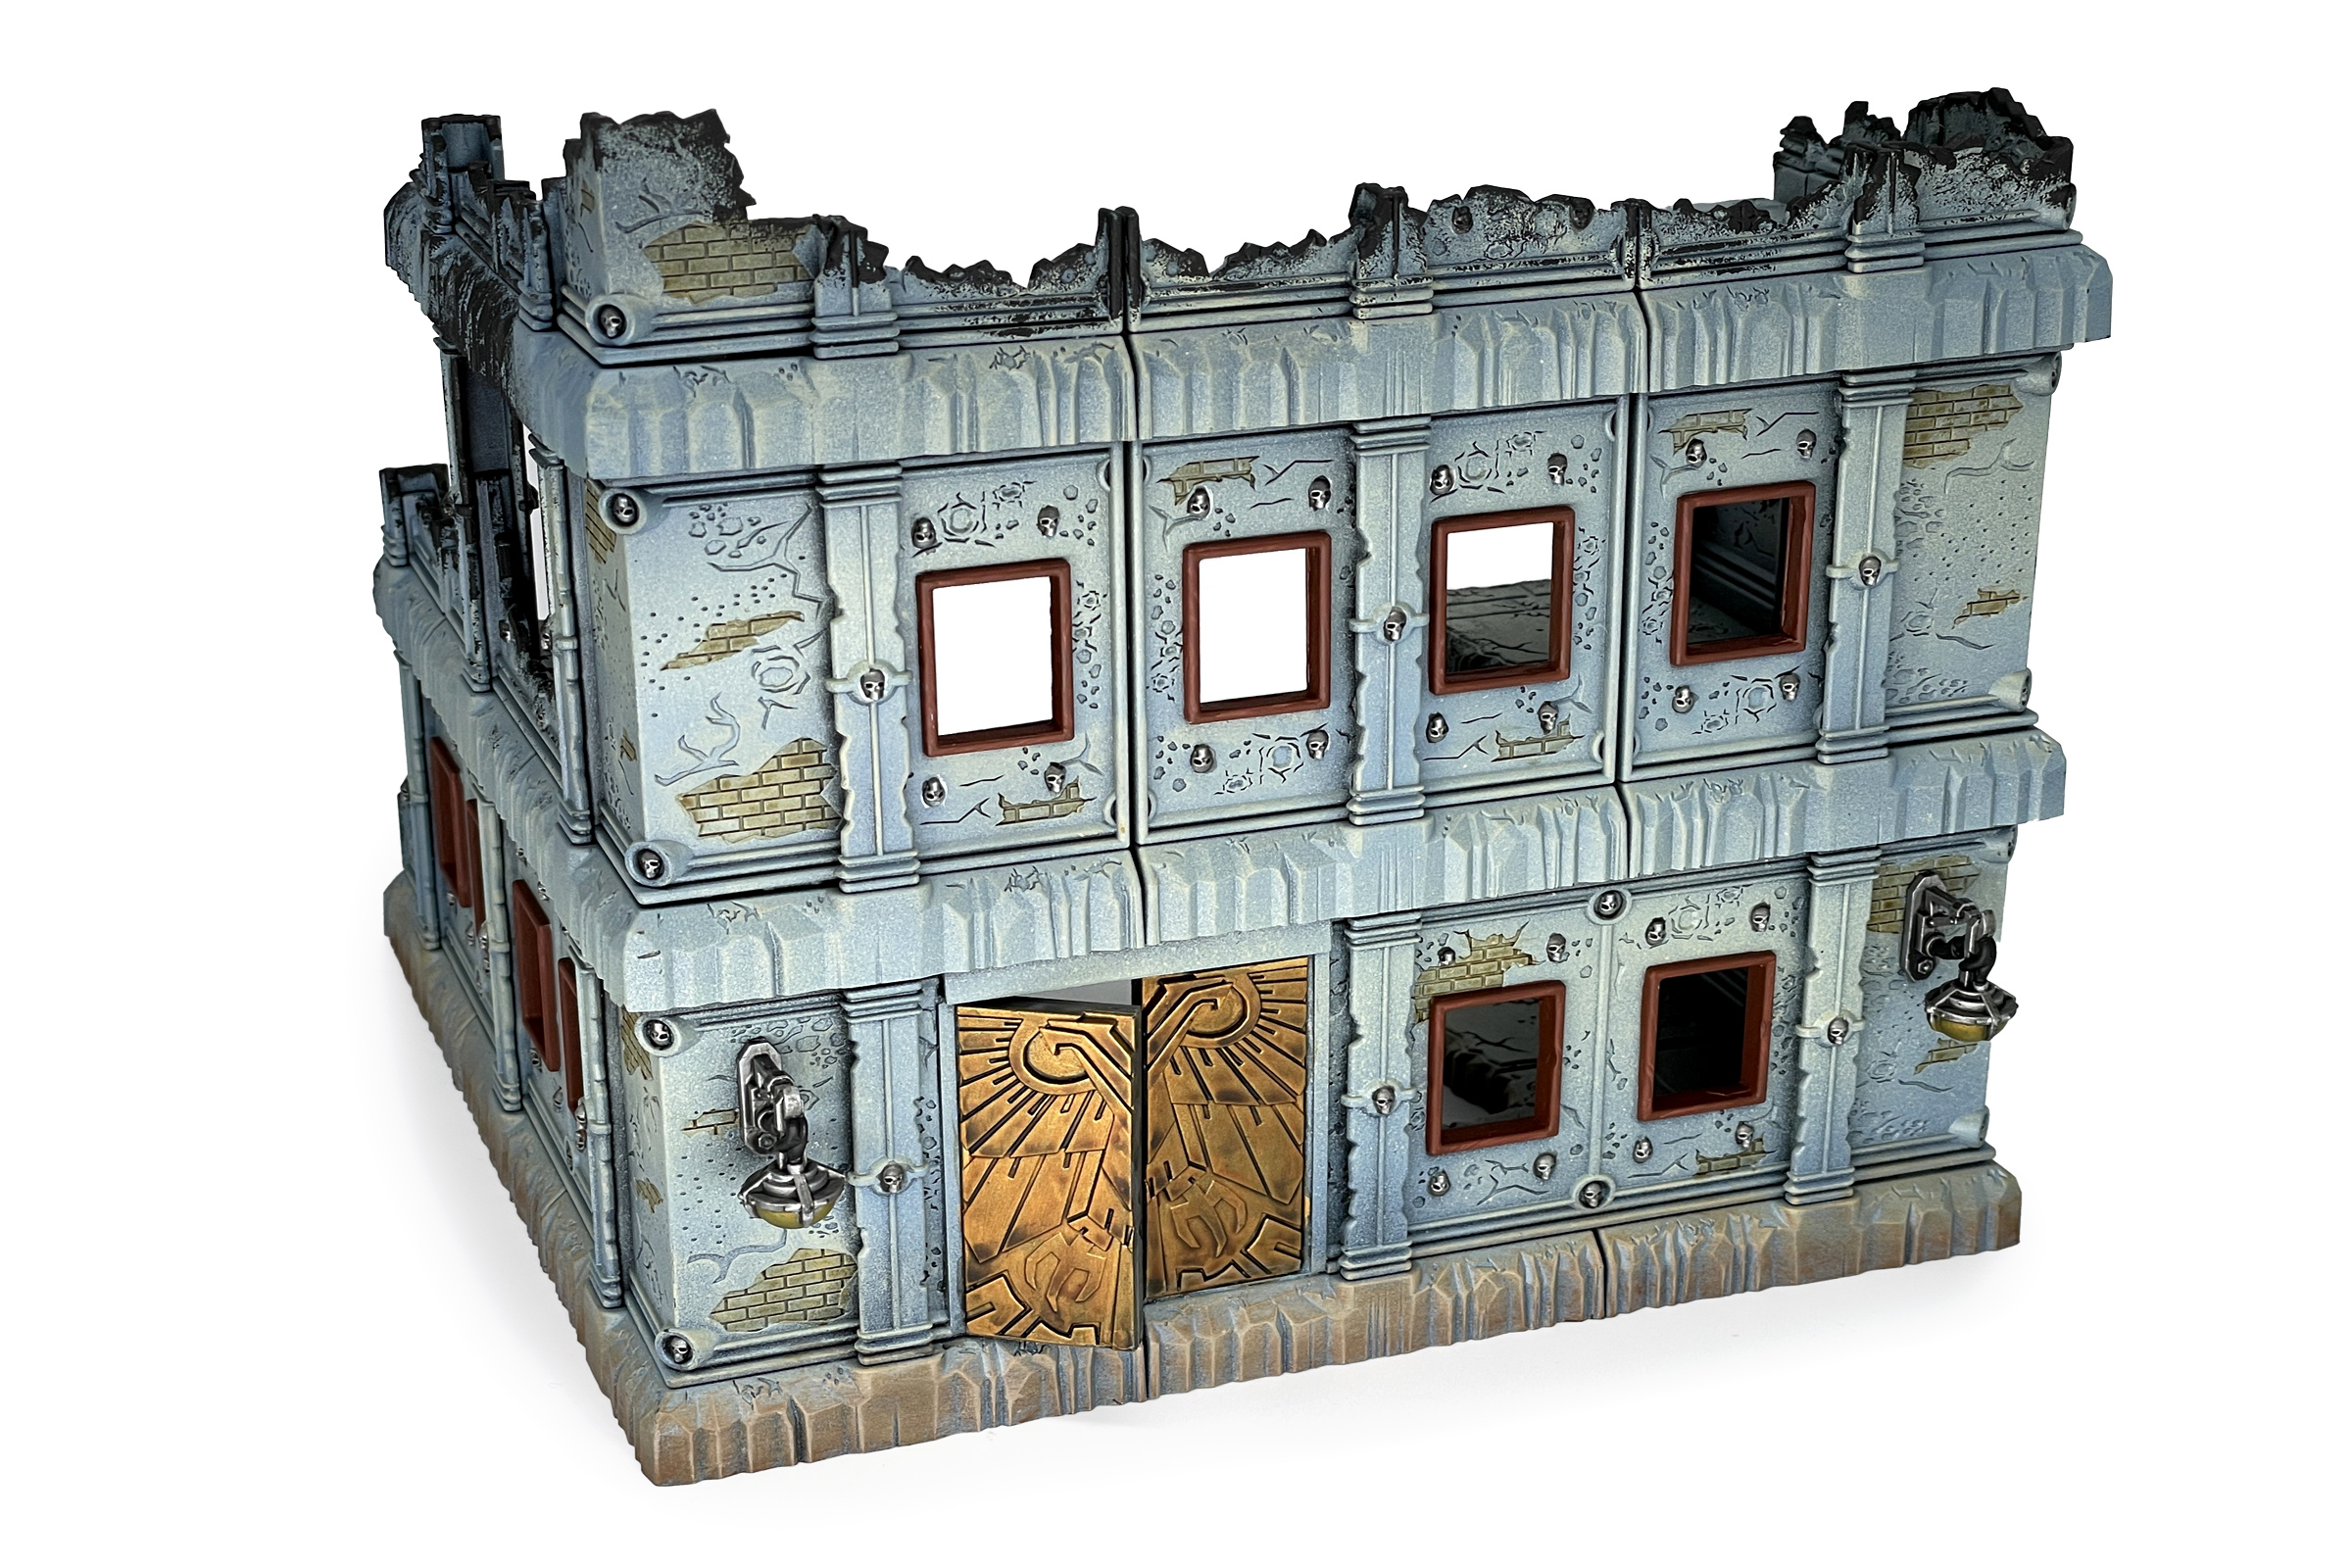
When I sat down with these parts I saw the opportunity of the included pieces. Chopping stuff up and kitbashing kits is a normal part of my build process, and I found that this would be no different. I took the components from three ruins, dumped them into one box, and started grabbing parts. Ruined building? Has to have broken walls on the ends. Kit doesn’t come with one? Chop a wall to make my own.
Let’s go over what I did to make the FutureProof Modular Terrain a little more mine.
Walls
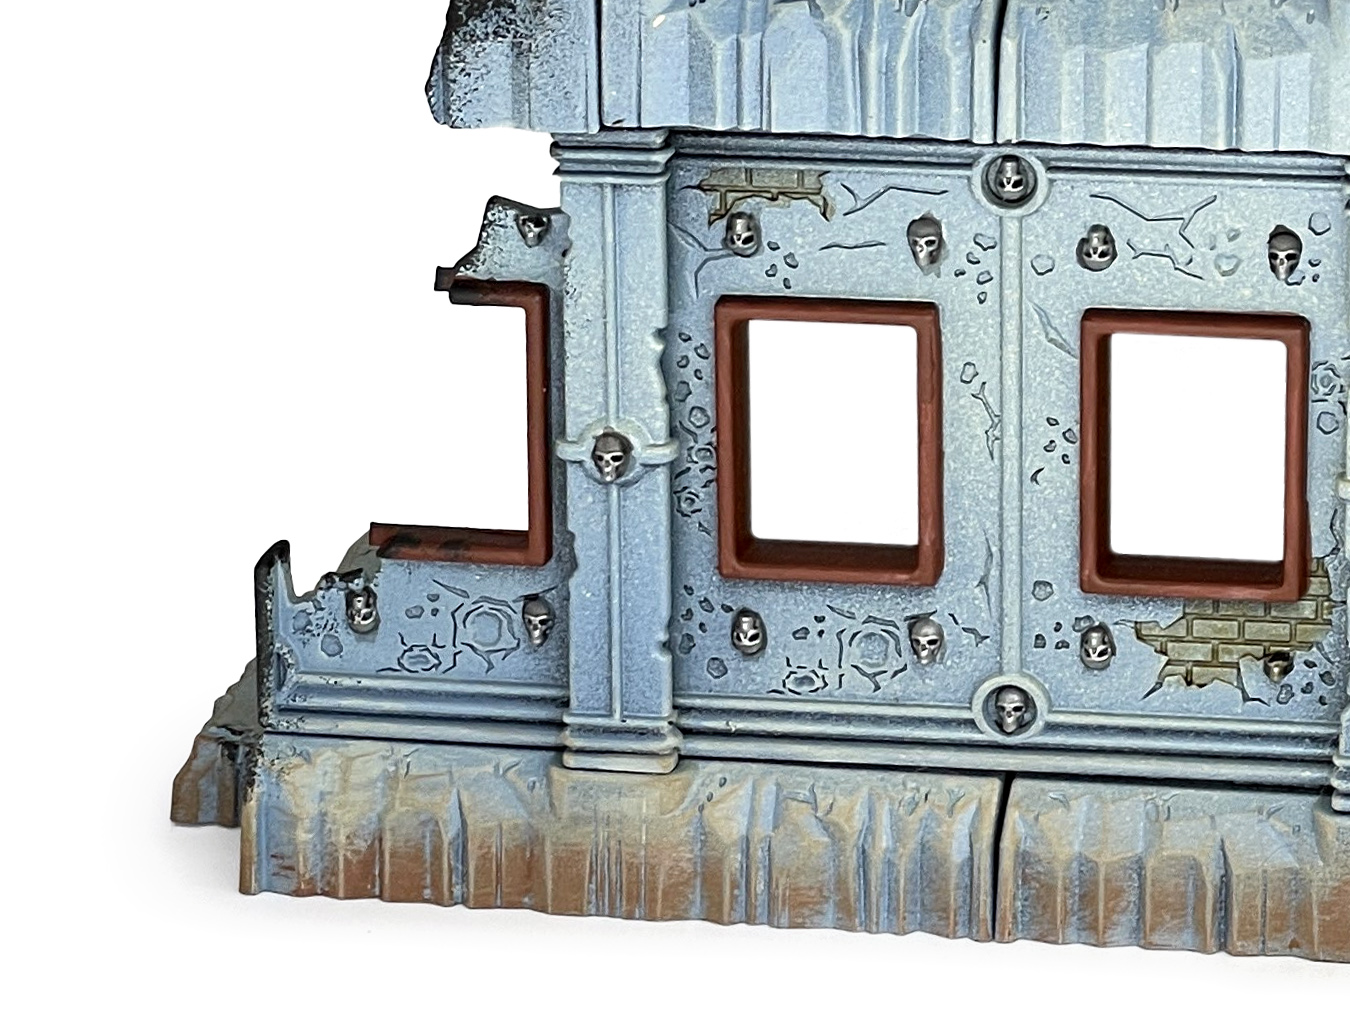
While you can flip and rotate these walls to mix up their appearance, I wanted to chop these walls in half to get an even larger variety of ruins. And it doubled the number of wall components I had to work with. That free ruin real estate!

I used an X-ACTO Knife to cut a jagged line across a full wall and repeatedly scribed over it to cut through the wall. Then a little clean up and I ended up with two new half-height walls.

I did the same thing to some of the corner pieces I used on top. I didn’t want the same design at both corners, so I took a full-height corner piece and used a razor saw to chop it in half. For me, I love variation so I will do anything to create it and avoid repetition.
Windows
The grim-darkness of the far future is gloomy enough, so I decided to let some light in and opened up the windows. I broke out a ¼” drill bit, drilled out every blocked window, and cleaned up the edges.

One thing to note, these full-width walls have window frames on one side, but not the other. I couldn’t have that, so I grabbed some .080” half-round styrene rod and sculpted window frames myself. If you’re wondering, the top is 19.5mm wide and the sides are 26.5mm tall. I cut them to length and then cut the corners at 45º angles.

And with that, I have even an even larger variety of walls for making some truly one-of-a-kind buildings.

Doors
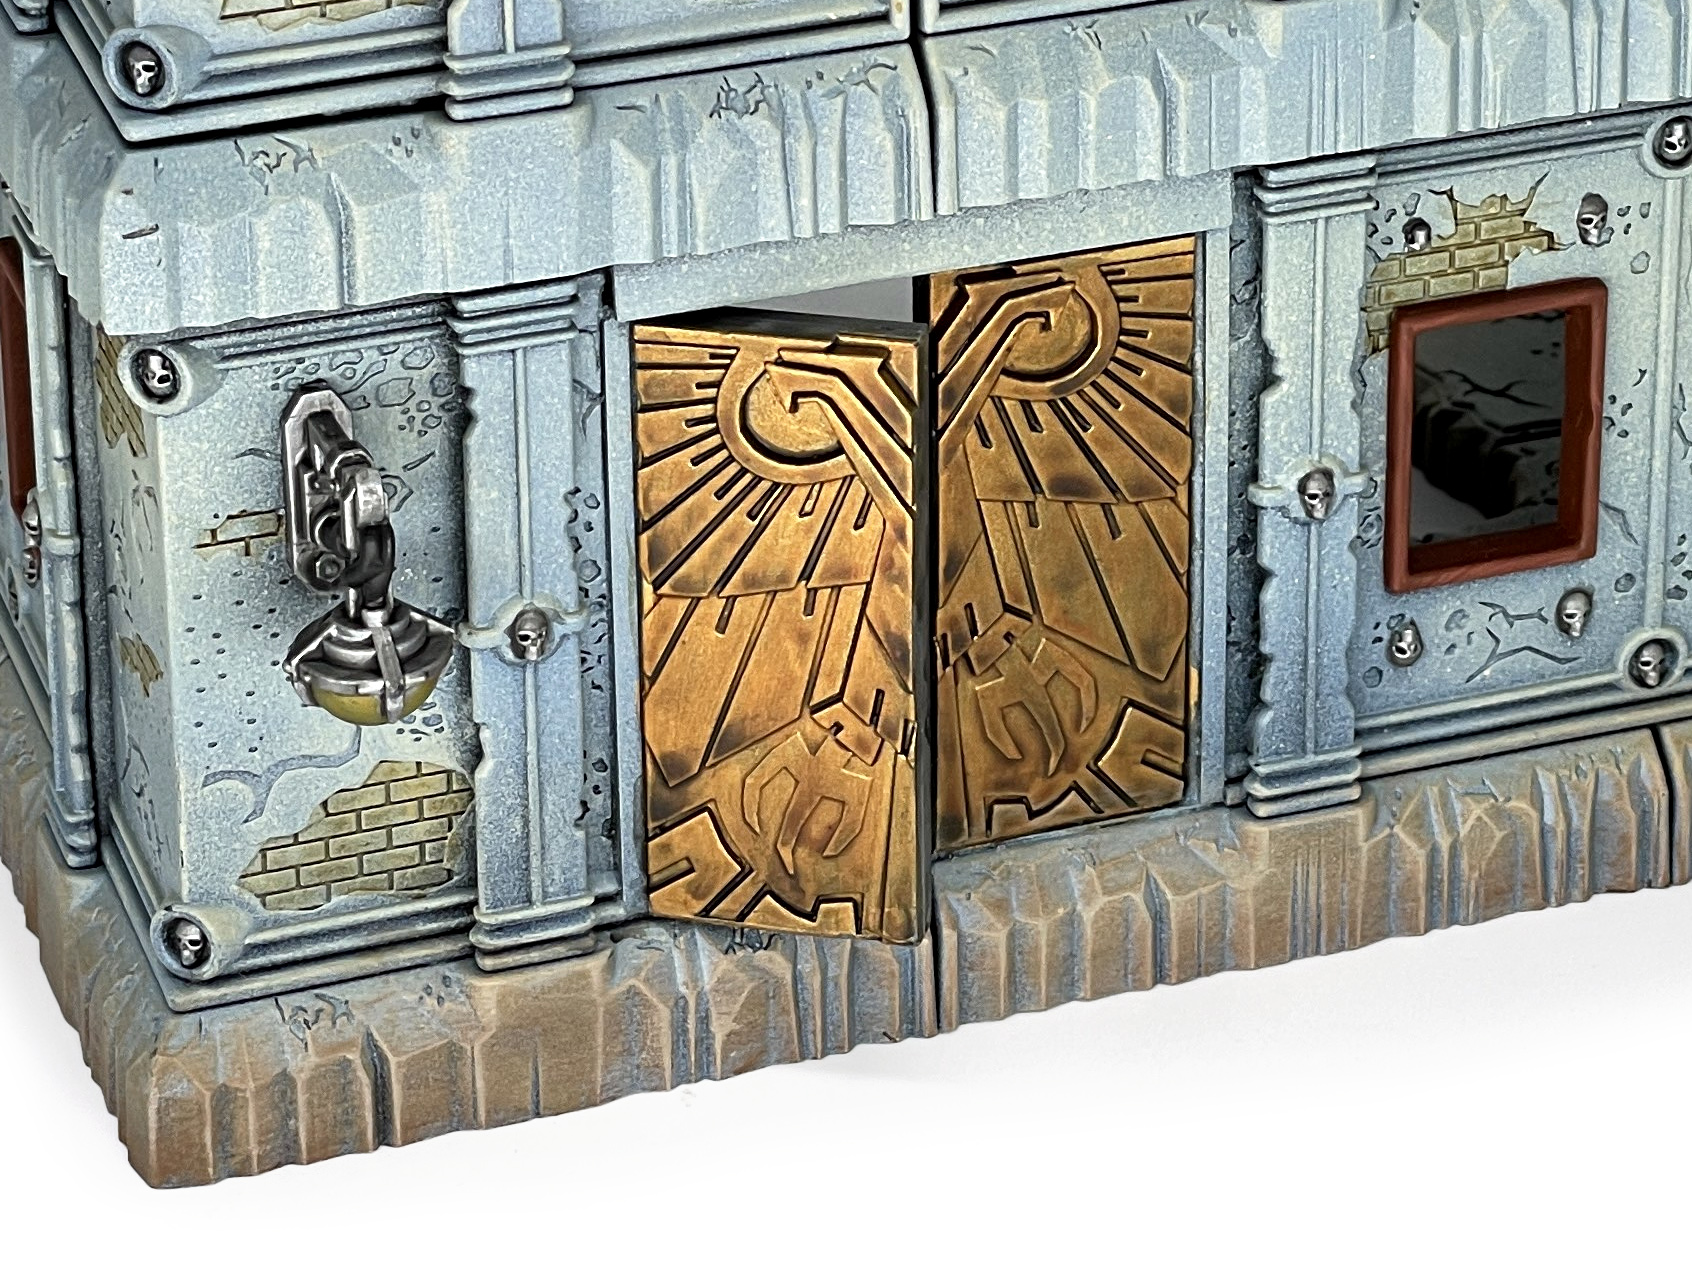
As I was assembling the first floor, I realized I wanted a door to break it up. Now, the kit doesn’t come with a door, so I went raiding my bitz boxes. I found the door from the old Cities of Death range and after a dry fit, found it to be just narrower than a full wall opening, but it was too tall. Chopping off the bottom section of the door meant it would be a perfect fit, with a section of .25” square tube to fill the gap.

I cut down a narrow wall section, using the window frame as a guide, to fill in the space in the wall dividers. The door jams are made with some .080” x .125” stock and strips of .080” half round. I used a strip of .020” styrene for the jam and after cutting the door in half, glued it in with one door slightly ajar.
This kicks so much ass. Like I’m not even joking, this rules. Time for superliminal advertising: buy this terrain, and build doors like this. Do it.
I dare you.
-Pendulin

FutureProof Terrain. Credit: Dylan
Floors
For the second ruin I made, I was running out of floor sections. I took a corner-floor piece and cut it up to turn it into a half-width floor. This left me with some missing edging, which I filled in with two pieces.

First, I carefully cut out a chunk of outer-corner floor edging. And to fill the rest, I used some pink insulation foam, which I carved to be a similar texture as the plastic. Before painting, I put on two coats of black acrylic paint to protect it from the sprays I was using to undercoat the whole piece.
Final Thoughts
Exactly how friendly is this stuff to convert? While none of what I did was difficult, I had to get creative due to the thickness of the walls. I first tried cutting the windows with a knife, but after I realized the effort wasn’t worth it, I switched to a drill. I used a razor saw as much as I could to cut up the walls and floors, which sped things up.
One benefit of the thickness of the walls is how durable it feels after conversion. It was more effort to work with, but the longevity of the final product is great. I fully support the design decision there.
That all said. I’m really happy with the conversion work I did to make my buildings mine. I didn’t have to stray too far from the included parts and at most it took a little creativity to maximize the kits.
Built straight out the box to the instructions and these things are great and will last years being used by anyone. If you have the terrain bug and take a little time, you can make something really special with these to make your buildings stand out even more.
Have fun out there and don’t be afraid to shop stuff up.
If you like what you see, get yourself a set of FutureProof Modular Terrain on Kickstarter. If you don’t like what you see, then go to the Kickstarter comment section and let Snot Goblin Gaming know! Everyone knows that comment sections are the pinnacle of discourse and, if you disagree, feel free to comment below!
Thanks for reading! If you have any questions or comments feel free to drop us a note in the Comments below or email us at contact@goonhammer.com. And if you want regular updates in your inbox, subscribe to our newsletter.


You must be logged in to post a comment.