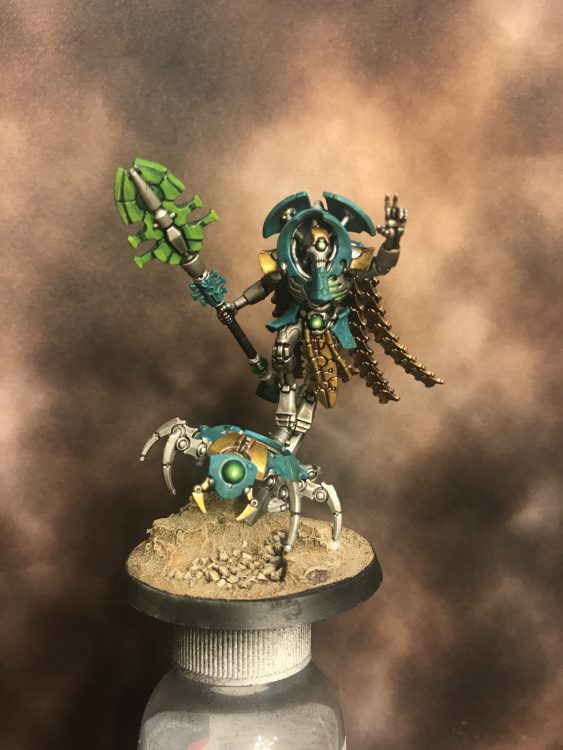
Basing is a critical part of the painting process. Armies on the battlefields of the 41st Millennium or the Mortal Realms will find themselves fighting across a wide variety of terrain, from lush jungles to barren rockscapes, industrial wastelands to agrarian fields. Your basing helps tell the story of your army – where are they fighting and why? In the spin-off How to Base Everything series, we look at different methods for basing your miniatures, so that you can locate them in time and space.

Deserts are a great setting for wargaming. The concept of the desert planet is a common trope in science fiction, whether it’s Tatooine in Star Wars or Arrakis in Dune. In the real world, a number of iconic battles (and, therefore, films based on those battles), have taken place in deserts – Lawrence of Arabia and the North African Front spring to mind.
True to this tradition, the worlds of Warhammer have featured deserts heavily. The famous Battle of Tallarn in the Horus Heresy takes place on the the eponymous planet, turned into an irradiated wasteland by the Iron Warriors. In the Old World, the lands of Araby and Khemri were based on North Africa and the Middle East, which have a large number of desert and semi-desert regions, and of course the Mortal Realms contain all kinds of locales – Aqshy, the Realm of Fire, is an obvious choice for a desert landscape, but any realm could feature them. Ghur is home to the Bone Desert for example.
In this article we’ll explore how to incorporate this biome into your basing, with different approaches and techniques for adding variety to what can otherwise just be sand.
Covered in this Article:
- How to create desert bases for your miniatures, with multiple approaches that cover different types of desert terrain.
- Reference material for painting deserts, showcasing the different types of desert terrain you can paint.
- Tips and tricks for working with GW texture paint.
Reference Material
Making great bases is a lot like building a small diorama, and great dioramas start with reference materials. When you’re sitting down to do a desert base theme for your army the first thing to do is to get an idea of what kind of desert you’re looking at. The word “desert” probably conjures to mind something like the cartoon below:
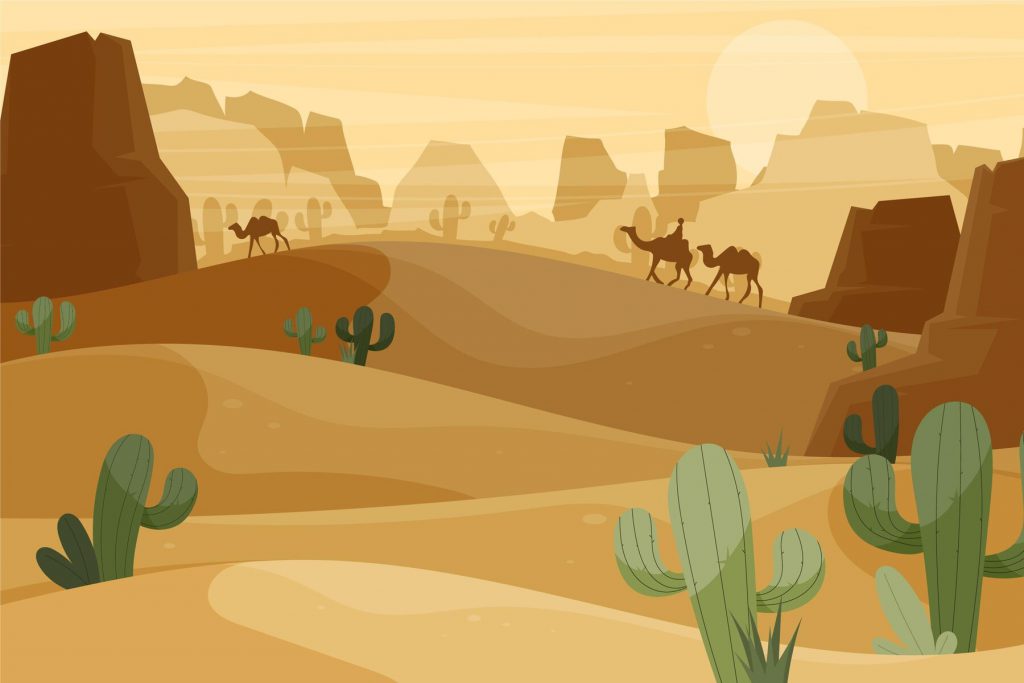
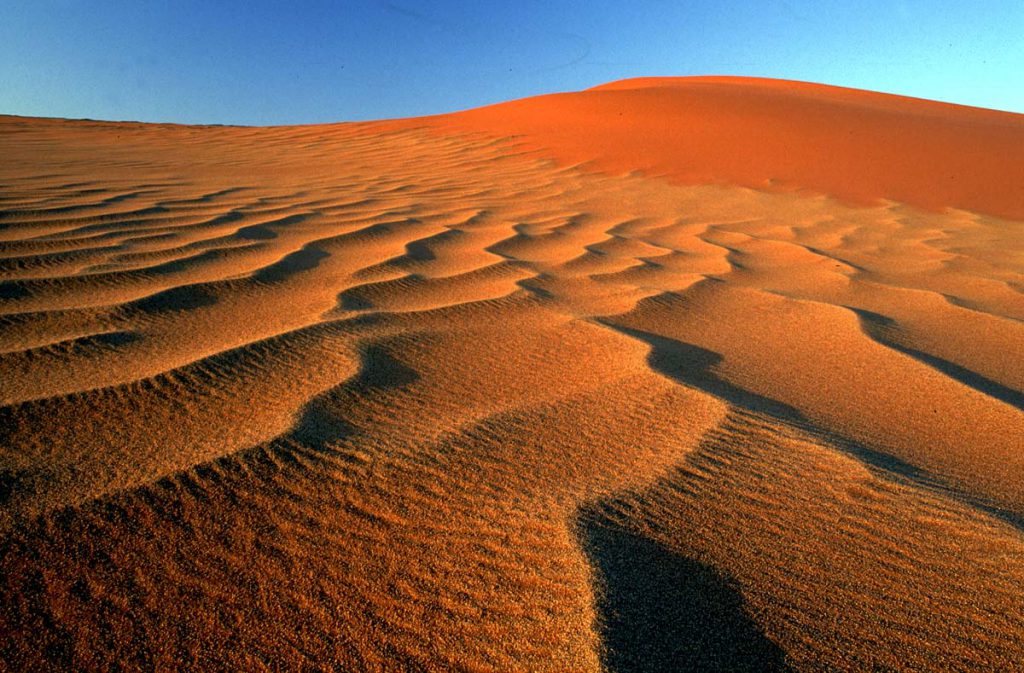
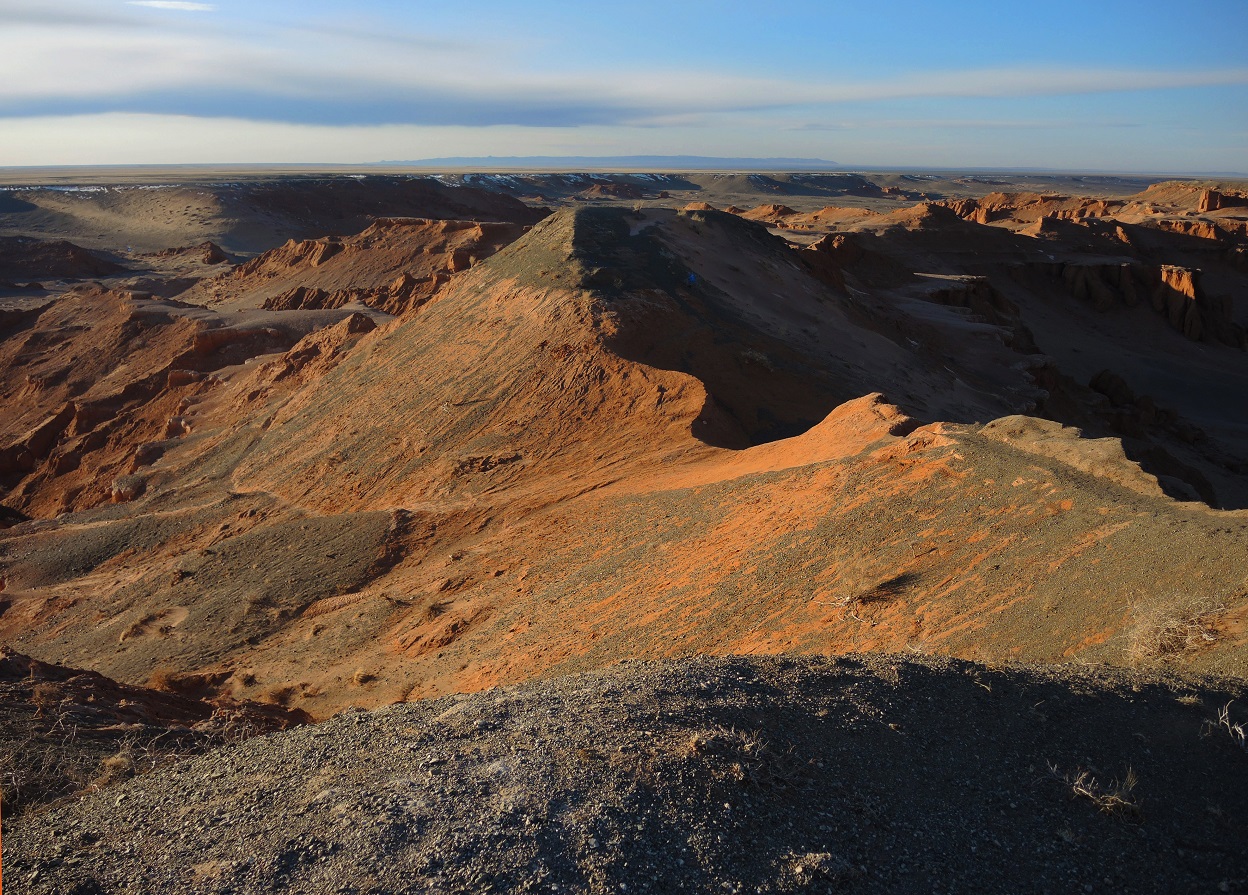
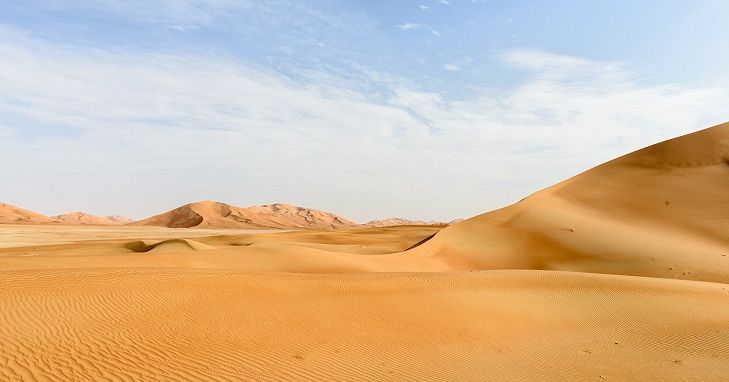
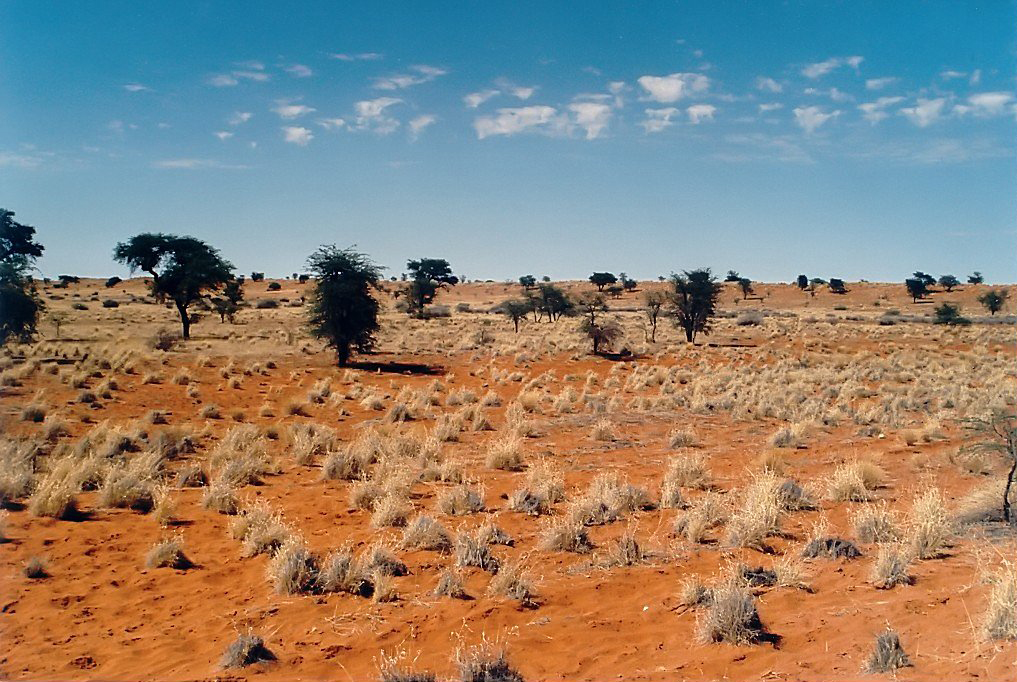
Yellow sand, cactus, camels, some rocks. This is certainly a desert but it’s not the only kind. Here’s a few images of other deserts, which all look quite different (and I will point out at this juncture that yes I’m aware that Antarctica is also a desert and that not all deserts are hot, this is an article about basing not a geography lesson, just roll with it):
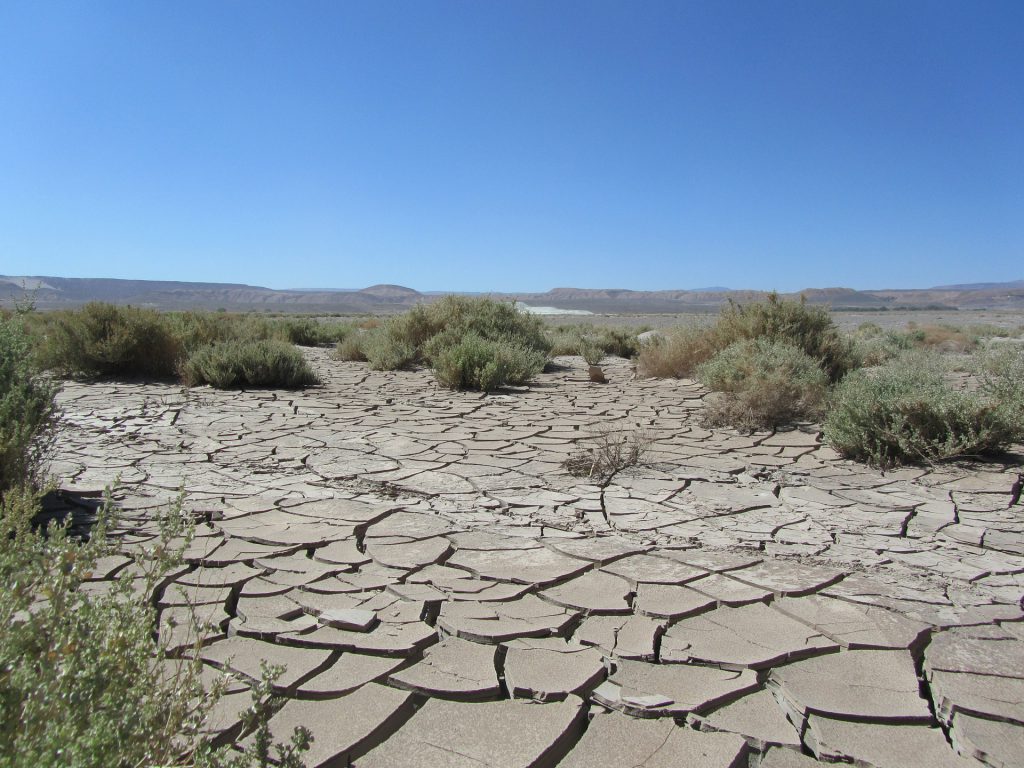
As you can see, these are all very different looking. The Namib and the Rub’ al Khali are the most similar, but feature strikingly different colours – the Namib is much redder whereas the Rub’ al Khali is the “classic” yellow. The Gobi is a much more diverse landscape, with lots of reds, browns, and blacks, while the Kalahari features similar red soil to the Namib but has a lot more plant life. The sand in the Atacama, meanwhile, appears bleached and bone dry with lots of cracked earth.
This gives you a lot of freedom to experiment! You can go for the plain, empty wasteland style, or use scrub bushes and trees, and a wide range of colours. Below are a number of techniques our authors use to create their own desert bases – you can try using them, or take them as inspiration for your own.

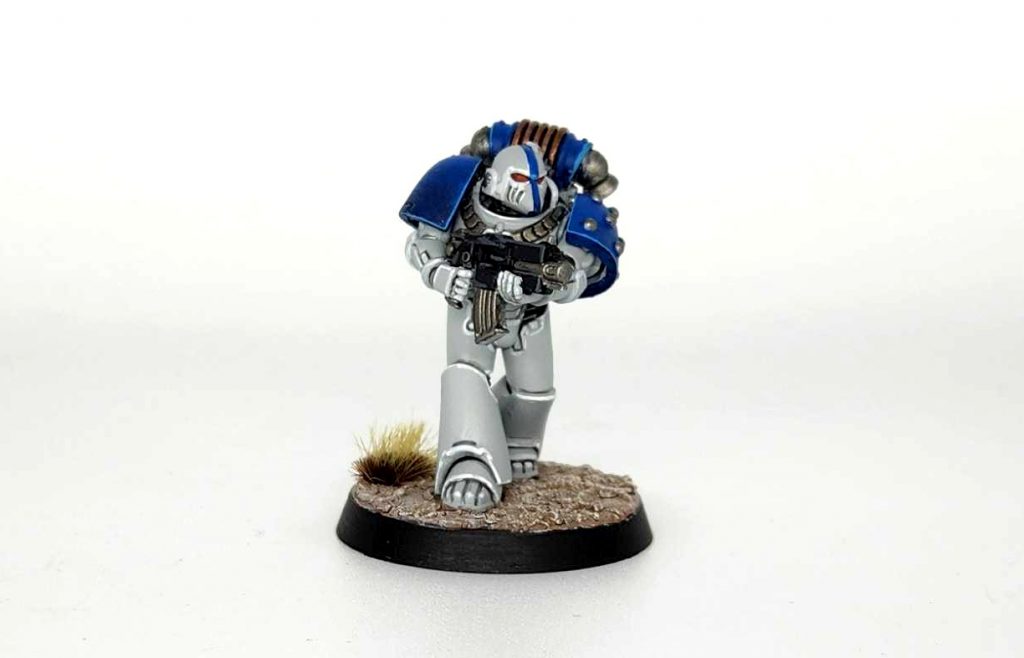
TheChirurgeon's Method - Click to Expand We’ll kick this article off with a very basic approach, working with Games Workshop’s technical paints to create quick and easy desert bases. When you’re working with crackle paint, it’s important to remember that the primary function of crackle paint is to break apart as it cures and leave cracks beneath. That means whatever is under the paint is liable to show. So working with crackle paint like Agrellan Earth means starting with a basecoat. I like to use Rhinox Hide for this, though any dark brown will do. Now we’re adding the texture paint. I primarily use Agrellan Earth for this, though whereas I used to use that solo now i do a mix of that and Agrellan Badlands. This lets me get a mix of cracked earth and sandy texture and also helps prevent flaking later – the biggest problem you’re going to have with the crackle paint is that it loves to flake off your base in transit, and that means touch-up work later. You can prevent some of it with additional washes and varnish, but you can’t stop it completely. As you paint, note that the thicker you goop on the crackle paint, the bigger the cracks and chunks it’s going to form. You have to wait for your paint to dry. Not much else to this step, but I wanted to show the difference between the two states so you can see what changes. You can also see where the Agrellan Badland puts in work on the lower left side of the base, offering an alternative texture. You can wash before this part with Agrax Earthshade if you like but at this point I typically just jump in and start drybrushing. I use Reaper Polished Bone for this, but if you’re a Citadel-only person, Wraithbone is pretty close in tone. Time for the final details. I’ll clean up and fix any problem areas, including spots where the texture paint may have flaked off, then it’s time to add a tuft or rock or something. For tufts I use Army Painter Wasteland Tufts from their basing kit, scattered in various places in order to give the whole thing a little more life. The results are quick and easy and look more than good enough to say “hey someone put some work into this.”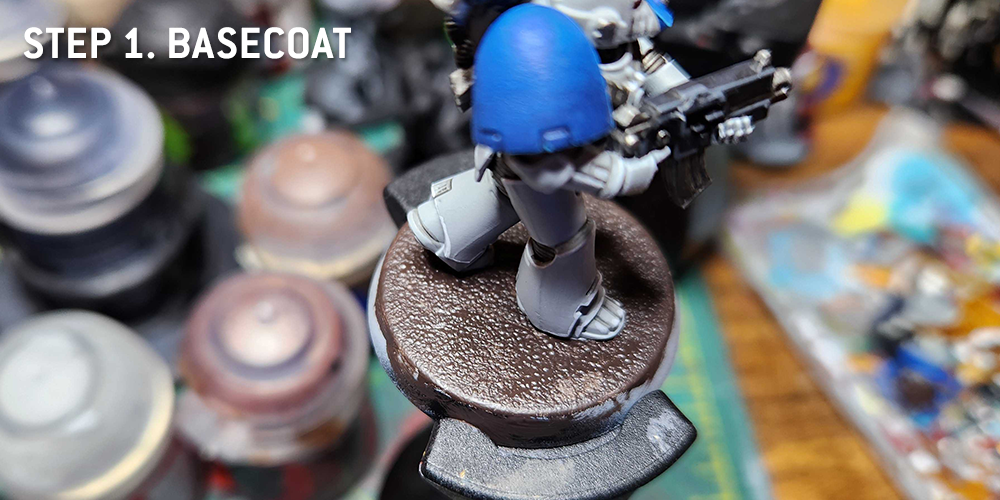
Step 1. Basecoat
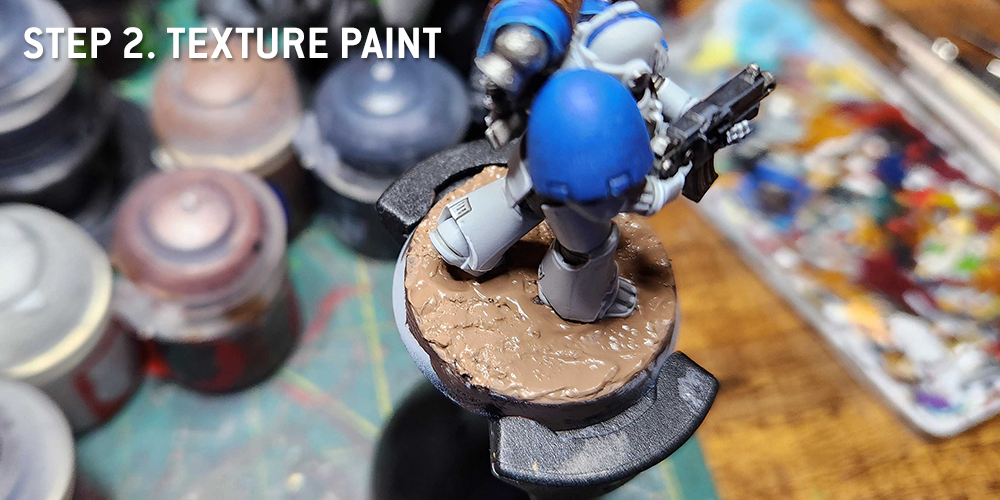
Step 2. Texture Paint
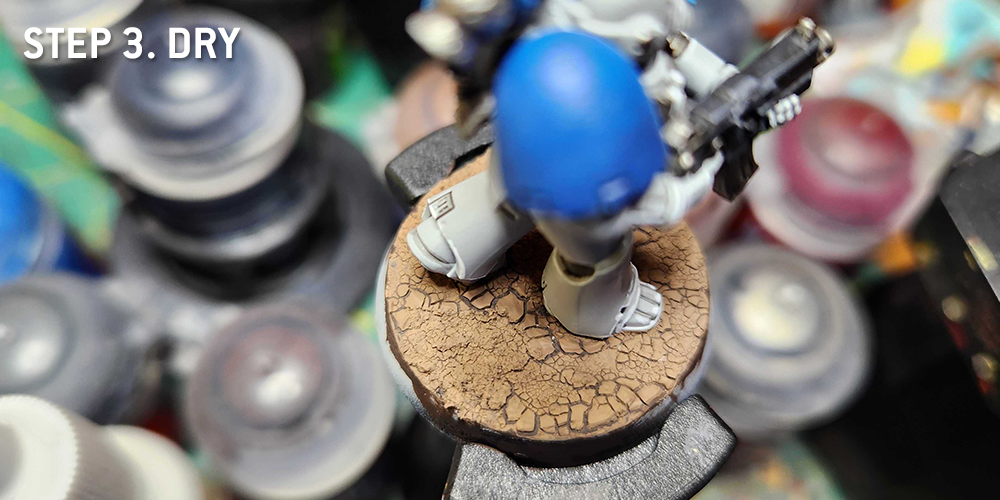
Step 3. Dry
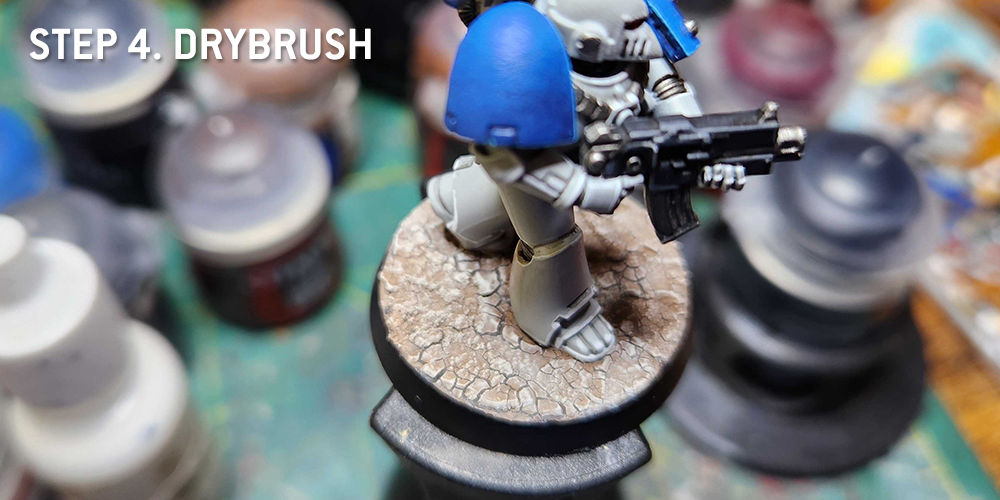
Step 4. Drybrush
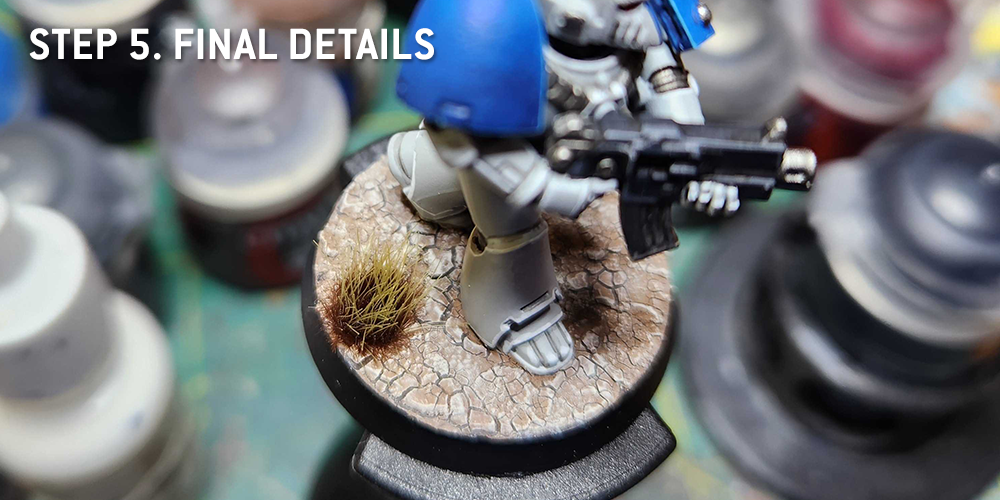
Step 5. Final Details
Zuul the Cat's Method - Click to Expand To me, Necrons are only as good as the ground they’re standing on and I really wanted my ground to stand out. I landed on a desert world, very much in the theme of the old Tomb King range from WHFB. Starting the bases is simple. Lay down some cork torn into various shapes and adhere to the bases with super glue. Then, use some Vallejo Ground Texture Acrylic base (I used Grey Sand, but any gritty texture will work.) While the paste is still wet, I sprinkled some crushed walnut shells into the lower recesses on the bases, pressing them into the paste a bit to make sure they stick. I then primed all the bases with a zenithal highlight. To paint them, I picked the following three colors: Vallejo Tan Earth, Vallejo Iraqi Sand and Screaming Skull. Start by covering the whole base with a fairly thinned down Tan Earth, then Iraqi Sand then Screaming Skull, focusing the brighter colors on the raised or exposed areas. Once that is dry, drybrush the entire thing with Iraqi Sand followed by a second, targeted drybrush of Screaming Skulls across the rocks & highest points.

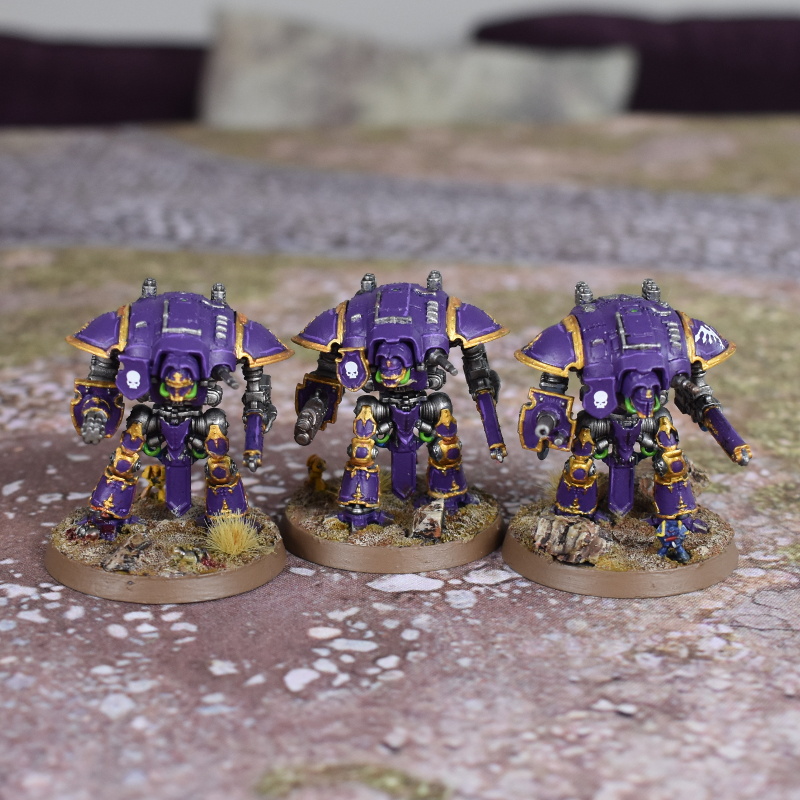
Corrode's Method - Click to Expand I use desert basing on my Adeptus Titanicus army, which is the Legio Astorum. They fought at the Battle of Tallarn (hence the little Ultramarines, Imperial Fists, and Iron Warriors who also feature) which was virus bombed by the Iron Warriors during the Horus Heresy, turning it into a desert world. I should state right up front here that I didn’t develop this technique myself – SA goon General Olloth taught me it and I have copied it shamelessly for your consumption. The cork rocks get glued on in the building stage, and then once the model is primed I start off with the simplest of all basing techniques – slapping down a layer of Armaggedon Dunes. This creates an easy base layer of broken up earth with the appropriate colour. Once that’s dry, I throw down a bunch of washes on it – a mix of Casandora Yellow, Fuegan Orange, Agrax Earthshade, and Seraphim Sepia. What you need to do here is basically blob these on in pools, mixing each colour at the edges so that you get a variety of different shades. This will give you a multi-tonal layer which looks quite mad. After that, a little drybrushing is in order – personally I drybrush Zandri Dust, and then Screaming Skull over the top. This restores some of the yellow and evens out the colouration. Finally I give it all a thinned-down wash of Agrax Earthshade, and glue on some Gamer’s Grass dry tufts. The other bits and pieces are about storytelling – this is Tallarn, hence the Marines, who are set up in little dioramas so you can imagine them fighting battles around the titans’ feet (or, in the case of one unlucky Iron Warrior, under them). That sounds like a bunch of steps, but really it’s very easy or a hobby idiot like me couldn’t do it.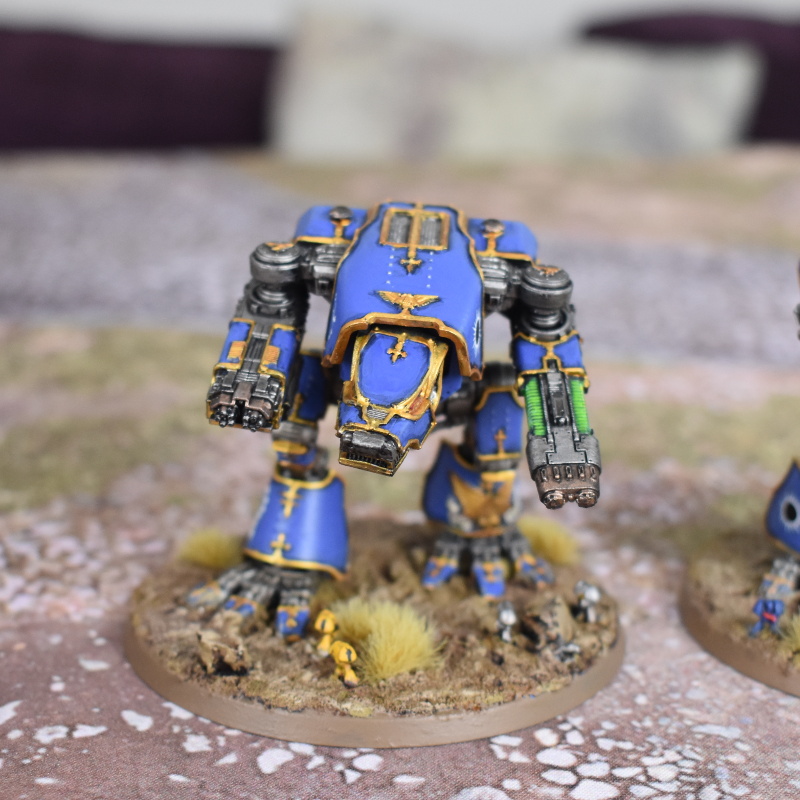

Kevin's Method - Click to Expand For my bases I wanted a dry, parched, bleached look that complemented the bone on my Regal Skulls. The effect is extremely easy to do and I think it looks great. To start I take the base and superglue on pieces of oyster shell. Oyster shell is a fantastic material because it has a ton of texture, scales well to 40K models, and is cheap. Once the shells are on the base is painted with a textured crackle paint like Games Workshop’s Agrellan Earth before the model is primed in gray. My preference is to airbrush with Badger Stynylrez in gray, which is far easier to use than it is to spell. I then airbrush Vallejo Game Air Bonewhite and then apply a wash of Army Painter Strong Tone. Any brown will work but I prefer the Army Painter series of washes. I then drybrush with VGA Bonewhite (yes, the pre-thinned airbrush paint) which provides a very interest effect where the material is both tinted and the edges are raised up. I then finish up by drybrushing in white, either user the an airbrush paint for a bit of tinting or regular paint to bring out the edges. The rim is done in a 50/50 mix of Vallejo Black and Liquitex Ink! Carbon Black; the combination provides an extremely smooth coverage. Incidentally that recipe is nearly identical for how I do the bone; the only difference is that I use Army Painter Soft Tone for the wash. You can easily expand this technique and make it your own by adding additional flora such as grass clumps, or perhaps some alien plants in a very vivid color.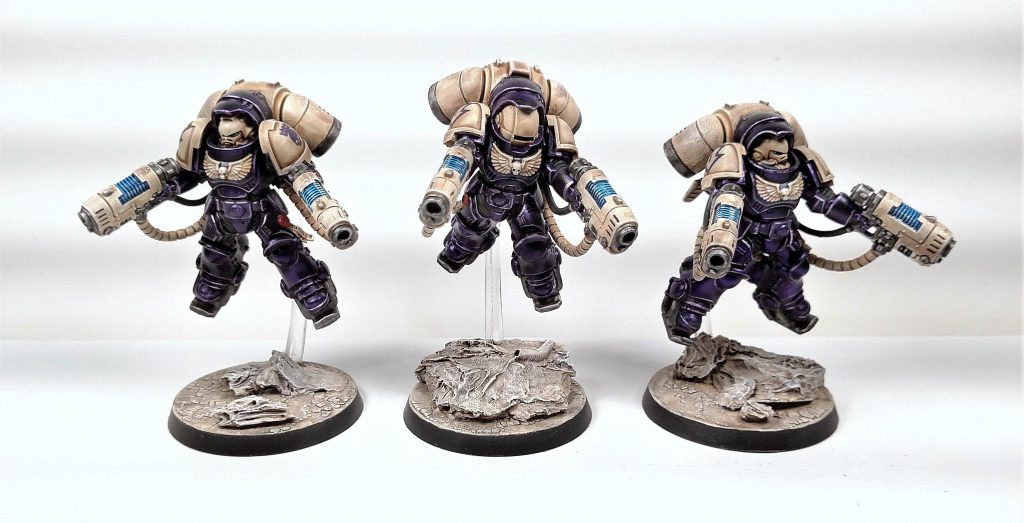

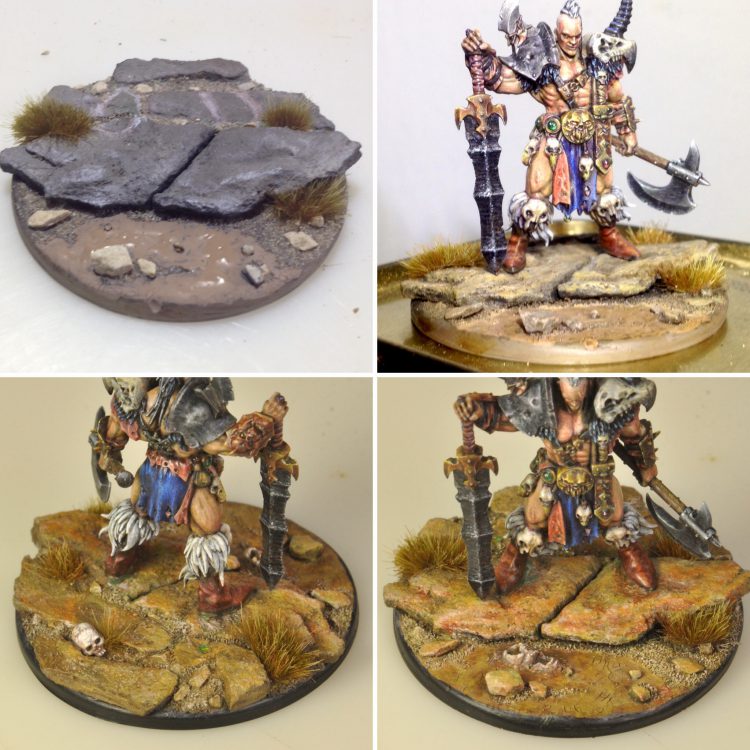
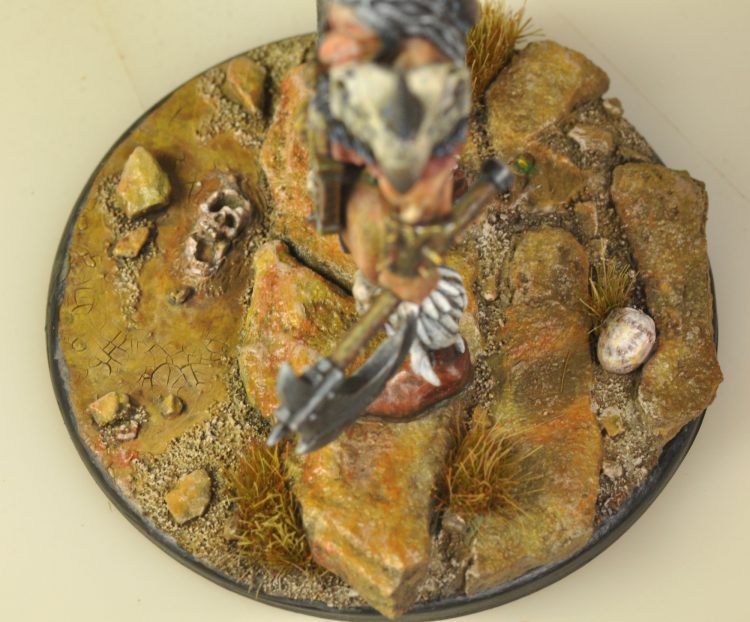
Skails' Method - Click to Expand I’m doing what I think of as hybrid basing, combining old style sand and rock basing with newer technical paints. My basing toolkit includes fine sand, coarse sand, sifted fine gravel, and pieces of sandstone. The sandstone is from fairly common landscaping material (at least in the United States). I happened to have some in my yard (and a 6 year old who enjoyed smashing it to bits) but I have seen similar material weathering the same way around homes and businesses. Weathering causes thin layers of various thickness to separate from larger pieces. It can be easily snapped by hand and metal tools can quickly wear down the edges for shaping. I used this technique to base my Darkoath Chieftan. My idea was to have him standing on a rocky ledge next to a dry creek bed. The base size here is 50mm. To begin I roughly laid out sandstone pieces and snapped a long down the middle for a nice crack, then ground down the edges with pliers to simulate erosion. The stone was glued down with superglue and the gaps between stones were filled with greenstuff. Then laid out where I wanted sand and tufts before glueing them down. These tufts are Army Painter highland tufts. Small bits of gravel were added in front bottom area and on the greenstuff with superglue. Sand was put down with PVA glue over the green stuff and also under the ledge and around the bits of gravel. Then agrellan earth was spread across the front area that was still bare base.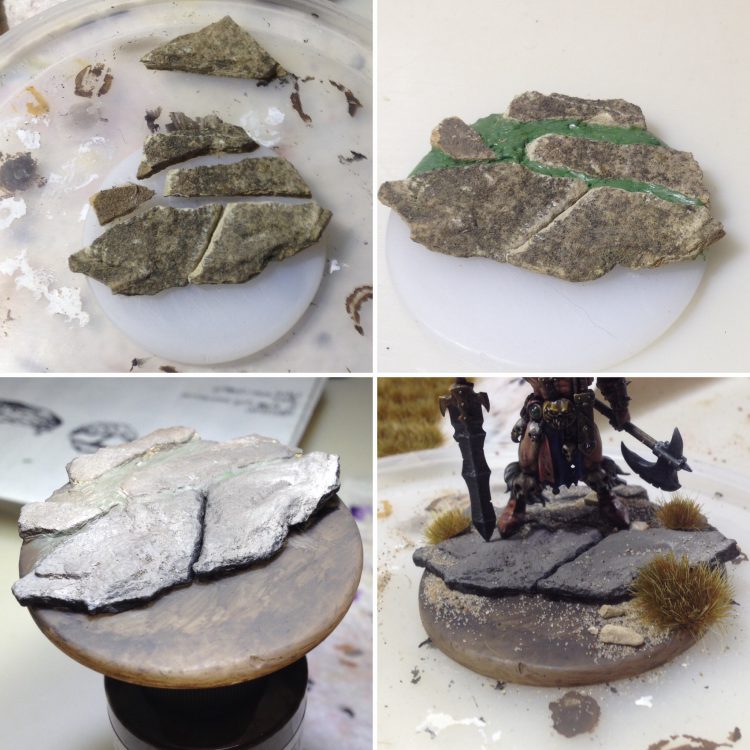

Pendulin's Method - Click to Expand For my desert-themed Skaven, I needed a quick and simple base that I could produce en masse. Something easy to create in giant batches, while still looking good individually and cohesive when viewed at a distance. After quite a bit of experimentation, I found my recipe of choice. As I mentioned, this is a fantastic horde base. It doesn’t require any real crafting or planning, and can easily be done in batches. If you don’t like how one particular base turned out, don’t throw it away. Go ahead and use it, and try different paint/wash/drybrush ratios on the next base. Once they are sitting next to 50+ other models with similar bases, they all blend together and any imperfections are entirely lost. There are also tons of ways of spicing up this style of base. Tiny grass tufts, skulls, or spare weapons scattered about will all make these bases stand out even more. Maybe add tiny ponds, swamps, or putrid green bile-pools. The sky’s the limit! Well, the desert is, but still.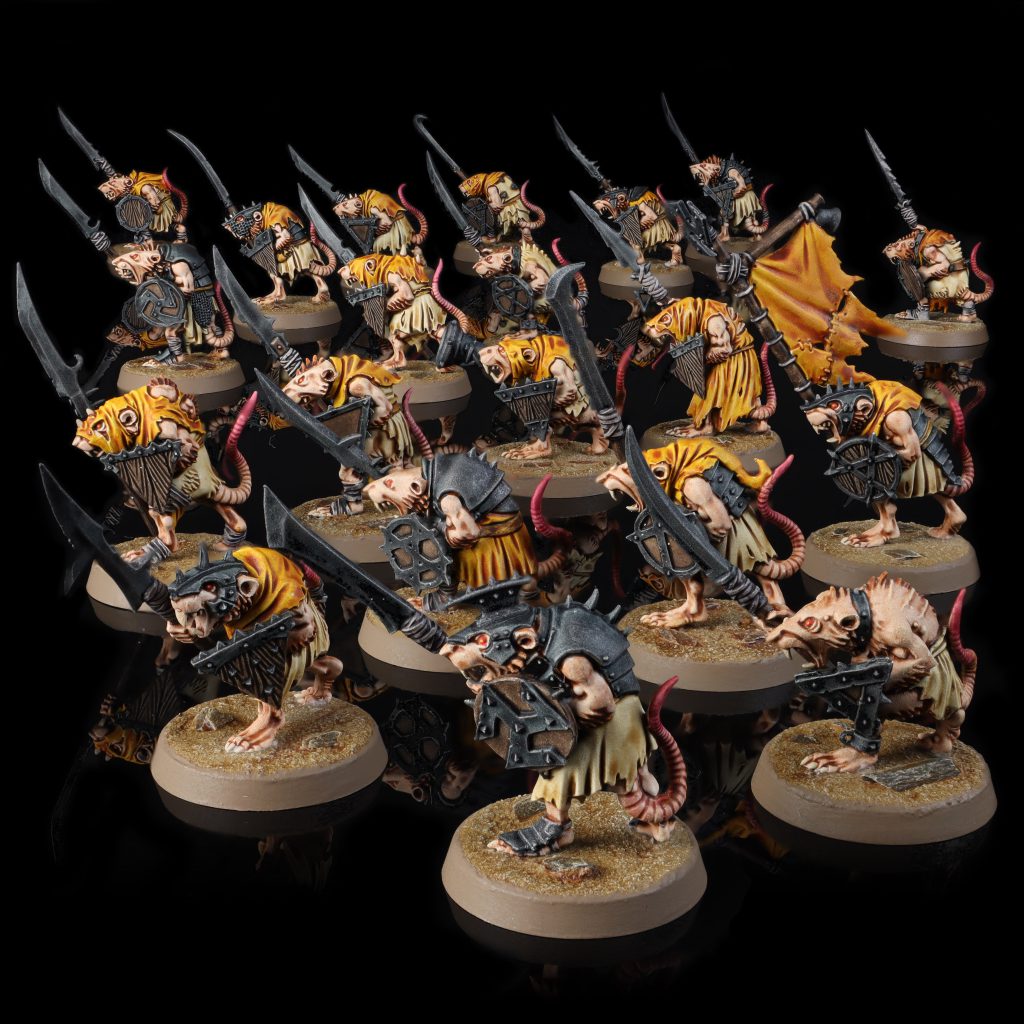
Credit: Pendulin
Let the texture paint dry overnight.
You want this brown paint to be thin enough that slapping a layer down causes pooling in the crevices and covers maybe 30-40% of the rock. Don’t worry if you uses too much or too little though. Trust me, it’ll look fine, and you can always experiment with more or less on your next base.
Let this also dry before continuing.
You’ll want extremely thin, yet even coverage of Tyrant Skull across the entire base, as that’s what gives it that “pop” at a distance.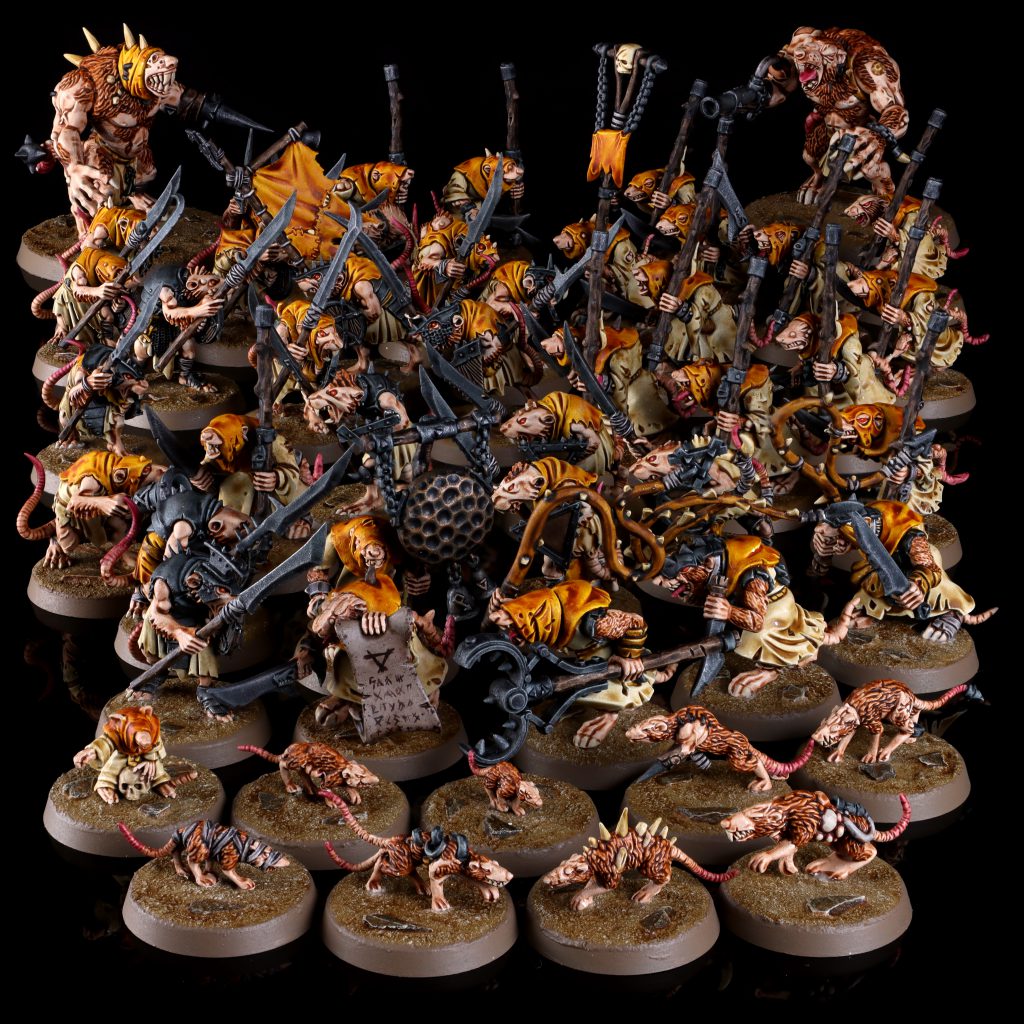
Credit: Pendulin
Wasteland-Style Goodbyes
That wraps up our tutorial on desert bases but as always, if you have any tips or tricks of your own, questions, or comments, feel free to drop us a note in the Comments section below. Or you can shoot us an email at contact@goonhammer.com if you want to reach us directly or have a request for a future article. We’d love to hear from you!
