
Custodes are a fantastic faction to paint. Big, cool models with tons of details. Here I’ll go over my steps for painting Allarus Custodians in their Shadowkeeper color scheme. Because I subassemble my models, the majority of this will mostly be focused on the body of the model, but I’ll also cover painting the weapon and the head.
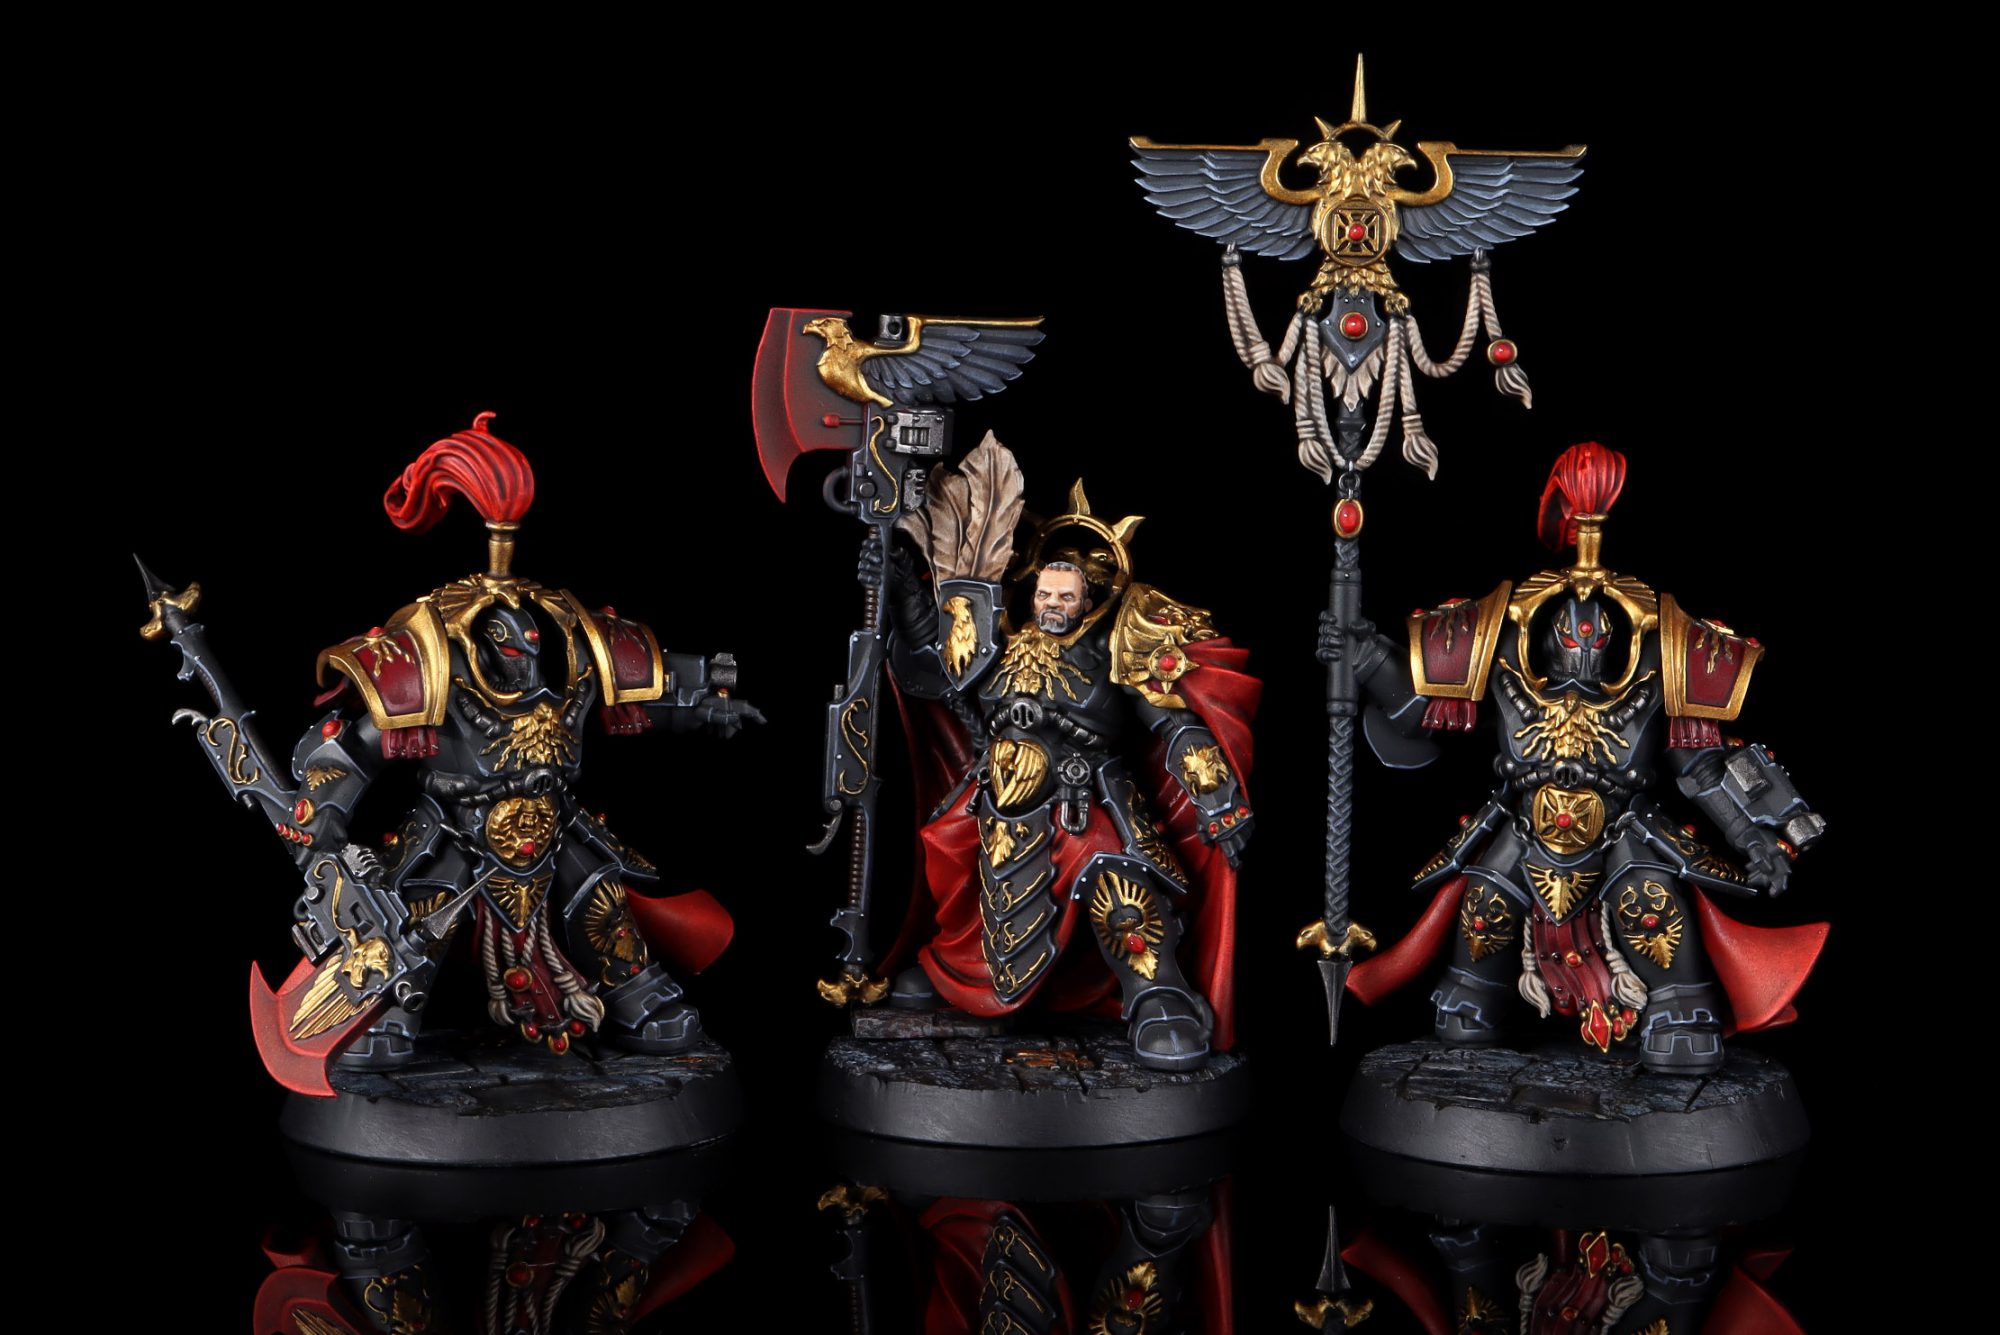
Table of Contents
Paints
These are the paints I used when painting this Allarus Custodian, roughly in the order in which they are first used.
- Vallejo: Black Primer
- Vallejo Model Air: Panzer Dark Grey
- Citadel: Mephiston Red
- Citadel: Nuln Oil
- Citadel: Evil Sunz Scarlet
- Citadel: Wild Rider Red
- Vallejo Game Color: Charred Brown
- Scale75: Dwarven Gold
- Citadel: Khorne Red
- Vallejo Metal Color: Steel
- Citadel: Wraithbone
- Citadel: Agrax Earthshade
- Citadel: White Scar
- Vallejo Game Color: Sombre Grey
- Vallejo Game Color: Wolf Grey
- Citadel: Contrast Blood Angels Red
Prime: Black
Prime the Allarus black. I happened to use Vallejo: Black Primer through my airbrush, but use your favorite. Citadel Chaos Black rattle can spray, Badger Stynylrez, Rustolerum Black Primer (not the Paint+Primer), it’s all good.


Base: Panzer Dark Grey
I used Vallejo Model Air: Panzer Dark Grey, which is fantastic and prethinned for both airbrushing and traditional painting. Because this is the final layer of paint for about half the model, you want as smooth a coat of this as possible. The easiest way of getting a smooth base coast is with an airbrush. If you don’t have access to one, just be extremely careful with properly thinned layers
Vallejo helpfully lists their RAL color number for their paints, and VMA Panzer Dark Grey is RAL7021. Any other paint with that number will (at least theoretically) be the exact same color. Vallejo sells both a non-prethined paint, as well as a primer for this exact color, so you might be able to save a step and just prime your models right off the bat with this. I can’t speak from experience though, as I’ve never used their 7021 primer.


Cloth: Base with Mephiston Red
Now we’re getting to some color with Citadel: Mephiston Red. Carefully thin and base the cloth with this. I usually have to do three to four layers for it to cover well without leaving streaks.
And now’s a good time to bring up that I unintentionally oversaturated these photos. The red in this is more vibrant than in real life, but stick with it. We’ll get there.


Cloth: Wash with Nuln Oil
Create some shadows in the cloth with a good ol’ wash of liquid talent: Citadel: Nuln Oil. Apply enough to get a good amount of coverage and a little bit of pooling in the deepest recesses. And don’t worry too much about a little bit of coffee staining, as we’re not yet done with the cloth.


Cloth: Drybrush Mephiston Red
Going back to Citadel: Mephiston Red, but this time with a drybrush. The purpose of this is twofold: first is to beat back some of those shadows, and second is to create a scuffed ‘n scratched texture to the cloak. If you’re not a fan of this texture, you could easily swap drybrushing for wetblending, stippling, traditional layering, or any other technique you prefer.
When choosing how much of this to apply, basically keep going as you break apart any big coffee-stained areas of Nuln. Once all the shadows are broken up and the whole area looks kind of scratchy, you’re probably good to move on to the next step.


Cloth: Drybrush Evil Sunz Scarlet and Wild Rider Red
Giving a little bit more highlight to the cloak, follow up with a drybrush of Citadel: Evil Sunz Scarlet. This is meant to let the brights pop a bit more, and stand out from the Mephison Red layer. Focus this drybrushing on edges, corners, and large flat surfaces, but don’t worry too much about being too precise. Basically try avoiding the shadows, but don’t fret. However, don’t go too heavy on this as we’re wanting this to be a highlight on top of the Mephiston Red, and not for this to become the primary color of the cloak.
Once that’s done we finish the cloak with just a little bit of drybrush using Citadel: Wild Rider Red on the tips, corners, and where lot of light would naturally fall. Be careful with this color as it will quickly oversaturate the cloak, so use only the faintest amount of it.


Armor: Cleanup
Drybrushing tends to get bits of paint flecked all over your model, so now is a good time to clean things up. Go back to Vallejo Model Air: Panzer Dark Grey and clean up any areas that have red specks on them.


Gold: Base with Charred Brown
It’s kind of tricky to paint gold over black. You tend to be able to see through the gold to the underlying base paint. To avoid that, give a quick base coat to all areas you plan on painting gold with Vallejo Game Color: Charred Brown. This step isn’t strictly necessary (especially if you get your hands on some Scale75 paints for the next step), but it’s not a lot of work and can save you some hassle later.


Gold and Details
This might look like a “draw the rest of the owl” picture, but trust me it’s not really that much. Let’s break down the steps:
- Gold – Scale75: Dwarven Gold
In the long, long ago when painting Custodes I used Citadel’s Retributor Armor. However, when using that paint for this Allarus Custodian I again had the same problems as I had previously. Retributor Armor doesn’t quite cover as well as it should, and it sort of tears as you apply it. Because of this, I switched over to Scale75’s Dwarven Gold. If you have access to this paint, it’s fantastic. It goes on smooth and coats like a dream. It’s good enough that you might even be able to skip the previous Charred Brown step. - Pauldrons, Ribbons, Gems – Citadel: Khorne Red
Use about two thin layers of Khorne Red on the armor and ribbons hanging from the shoulders or armor plates, and be sure to cover the spherical part of the gems with a smooth layer. - Barrel, Pipes, Rivets- Vallejo Metal Color: Steel
This is a fantastic color that I can’t recommend highly enough. How much you paint Steel compared to how much you leave Black Grey is up to you, but I find this steel color a fantastic way to brake up the monotone of the armor. Be sure to paint the little rivets on the ribbons hanging from the shoulders and armor plates. - Braided Cloth – Citadel: Wraithbone
For the braided cloth on the front and the back, we’re going for a dirty white cloth look, and that starts with a layer or two of Wraithbone.


Gold and Details: Nuln Oil, Agrax
Time to crack open some more liquid talent, and apply Citadel: Nuln Oil. You don’t want a lot of it, but you do want light, even coverage. Cover basically everything you painted in the last step: all the gold, the pauldrons, ribbons, gems, steel, and braided cloth. Afterwards, apply a wash of Citadel: Agrax Earthshade to the braided white cloth on the front and back.


Gems
After applying the Nuln Oil, paint a swoop of Citadel: Khorne Red on the gems, focusing on the bottom half and right half. Try to avoid the very edge of the gem though, cause you want that to be sunken into shadows from the Nuln Oil. Afterward, paint a smaller swoop of Citadel: Mephiston Red in that same area, trying to give it an effect of reflected light. Then finish it off with a tiny dot of white in the top left corner for glare. Any white paint will work, and I happened to use Citadel: White Scar.


Edge: Sombre Grey, Wolf Grey
The final step is where the paint scheme comes to life. It’s also, in my opinion, the most relaxing step. Just edge highlighting, lots and lots of edge highlighting.
Start off by hitting every hard edge with Vallejo Game Color: Sombre Grey. Rather than tracing the edge of the model with your brush, try holding your brush at a 45 degree angle to the edge on the model and run the side of the brush across it. Grazing the model with the side of the brush this way will give you much more consistent lines.
Follow that up with a second edge highlight of Vallejo Game Color: Wolf Grey, but this time only apply it on corners, edges, and really sharp points.
If you look closely, you’ll also notice that I painted the chain-links attached to the front armor plate in this picture. I wasn’t being clever by waiting until now, I simply forgot to paint them earlier.


Weapon
For the most part, painting the Allarus Custodian’s weapon is the exact same as painting the rest of the model. The one difference is creating that red/black weapon effect, and that’s pretty easy to do.
After basing with Panzer Dark Grey, simply drybrush with Citadel: Mephison Red, then Citadel: Evil Sunz Scarlet, and finish with just a touch of Citadel: Wild Rider Red. Drybrush from the edge of the blade inward on both sides, and reduce how much paint you use after each stage. It might sound tricky but trust me it take only a minute or two to create this effect.
After drybrushing, you still want to see a lot of the underlying black paint, so don’t go too heavy on the reds. It’s trivially easy to add more red later, but extremely difficult to add more black grey without starting over..


Head
Similar to the weapon, painting the head involves all the same steps as the body with only one exception. That exception being the glow around the eyes. Paint the entire eye with Citadel: Khorne Red, and then thin that down to create a glaze. Apply that glaze to the area surrounding the eye for an Object Source Lighting effect. Next paint the front half of the eye with Citadel: Mephiston Red, and finish it off with a little bit of Citadel: Evil Sunz Scarlet where you would imagine the eyes to be focusing.
You’ll notice that I only have two pictures of the head. While I did take a bunch of in-progress shots between these two, I initially painted the nosepiece gold. This created a Squidward look which, while hilarious, didn’t do the model justice and I replaced it with black grey. So all that’s left is the first image and the finished product. Use your imagination for the in-progress pictures!


Final Touches
The final touch is the Custodian’s hair. For that, base it with Citadel: Wraithbone, and then follow that up with Citadel: Contrast Blood Angels Red. Once that’s dry, give it a wash with Citadel: Agrax Earthshade. Easy, peasy.
The armor plate above the Custodian’s head is solid gold. For that, follow the exact same steps as the rest of the body.
After everything is painted, take a moment to make sure you didn’t miss anything. Once you are satisfied with the model, put everything together.


Wrap-up
That wraps things up in just 16ish simple steps. And because models look more dramatic with a black background, here are some fancy pictures of the final product.


Though this article covered painting an Allarus Custodians, you can easily follow the same steps for any other Custodes model. Here are other examples of Shadowkeepers I’ve painted in this scheme.


If you want to read some more off-the-cuff talk about Custodes, check out Fireside with Pendulin: Adeptus Custodes article which focuses more on Kill Team and what initially drew me in to the Custodes faction.
And as always, we hope this How To Paint Everything helps you create your best army. If you have any question or comments, then drop us a line at contact@goonhammer.com, Facebook, Twitter, or in the comments below.
