In our How to Paint Everything series we look at how to paint, well, everything, with a look at different approaches and techniques. In this article we’re looking at horn and antlers.
Horns and antlers are both types of cranial appendages made of bone. In general antlers are grown and shed every year, while horns are permanent with a bony core that attaches to the skull.
Horns
Horns come in all sorts of styles in the Games Workshop range of models. Some are your basic smooth cow horns, others are heavily textured like goat or sheep horns. I’ve put together some methods to approach these different styles.
Contrast Methods
Smooth Horns
Primed white.
Citadel Contrast Skeleton Horde applied over all surfaces, any pooling pulled to bottom of horn with brush.
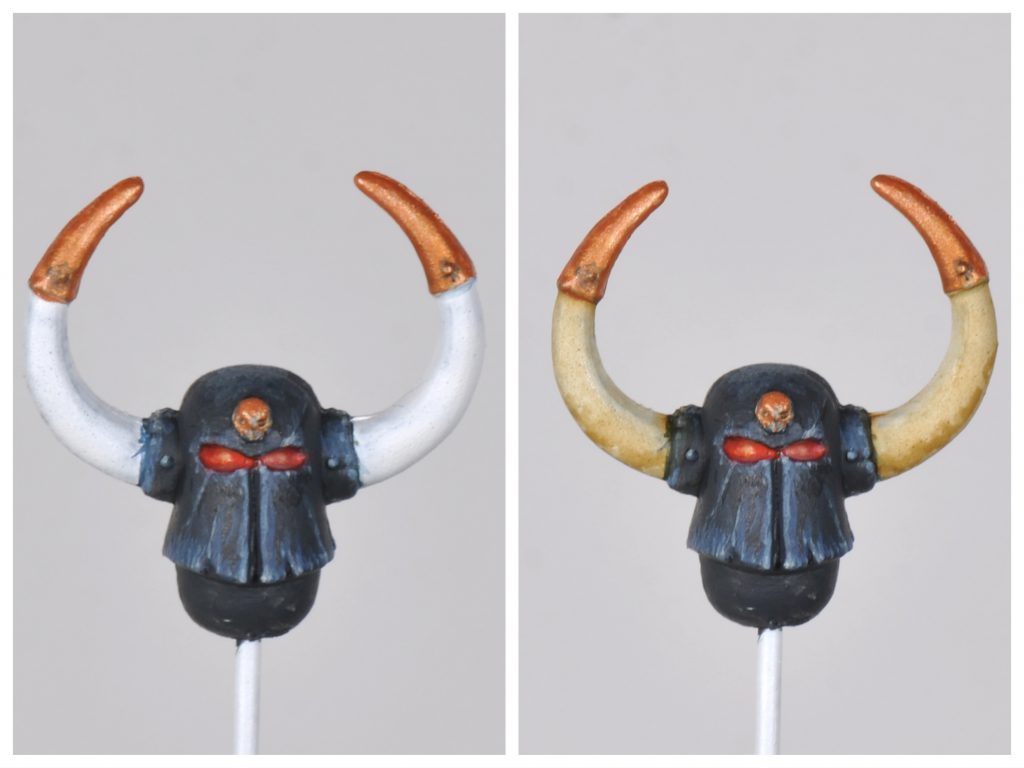
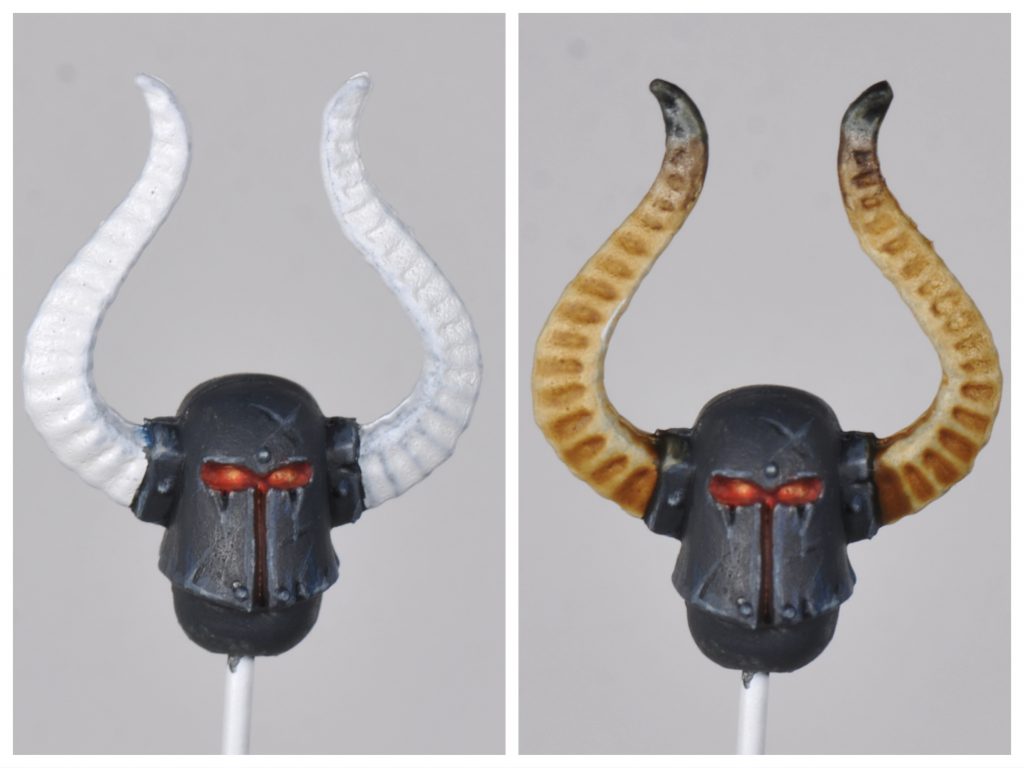
Textured Horns
White prime.
Citadel Contrast Skeleton Horde over all surfaces, any pooling wicked off (absorbed by a slightly dried brush, I usually dab the brush on a paper towel to pull off excess paint) or pulled into recesses. Citadel Contrast Black Templar applied to ends of horns while Skeleton Horde still wet. Citadel Contrast Wildwood applied over transition from Skeleton Horde to Black Templar while both previous paints are still wet.
Layering Methods
These are more traditional Games Workshop style approaches: a solid smooth base coat with a wash and/or layering progressively lighter colors.
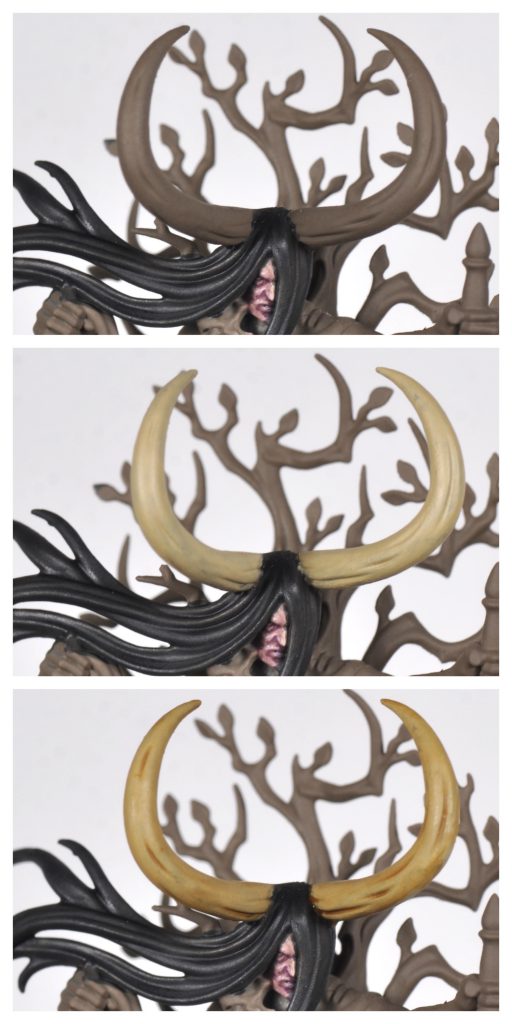
Lightly Textured Horns
I have started here with a brown primer (top image). Next is a solid base coat of Citadel Zandri Dust (middle image). Then a wash of Citadel Seraphim Sepia all over, any pooling wicked off or pulled into recesses (bottom image).
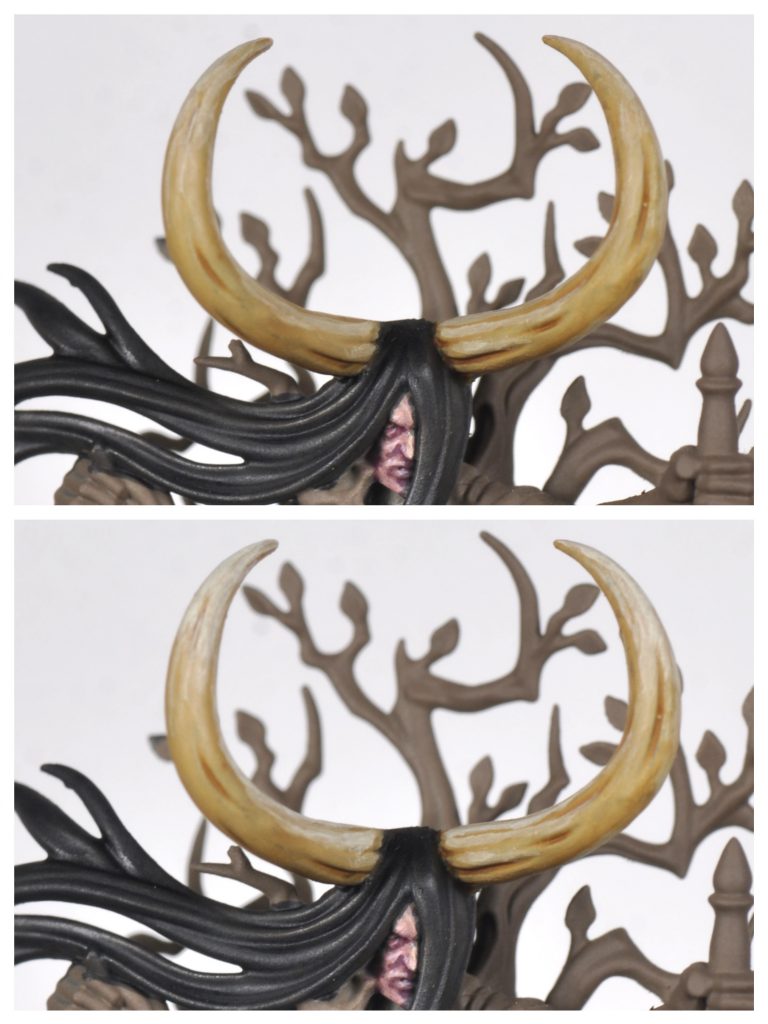
Citadel Ushabti Bone is used as a highlight layer, broadly over the surface area facing upwards (top image). Finally Citadel Screaming Skull is applied on ends of horns facing upwards and on the top facing horizontal surface towards the base of horns (bottom image).
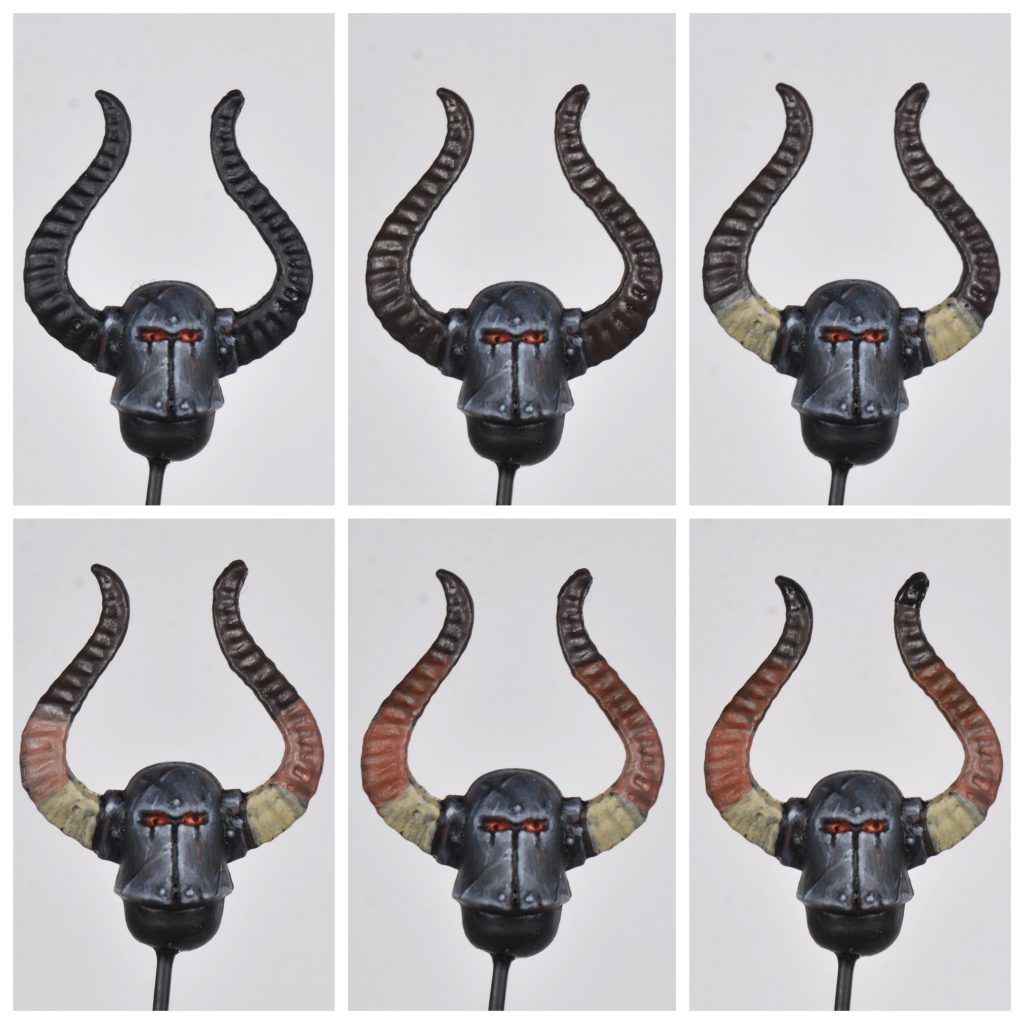
Heavily Textured Horns
Top left image: Black Primer
Top middle image: Citadel Rhinox Hide base coat.
Top right image: Citadel Zandri Dust at base of horns.
Bottom left image: Zandri Dust and Citadel Doombull Brown mix (about 1:1 ratio) further out on horns than Zandri Dust layer.
Bottom middle image: Doombull Brown layer further out on horns.
Bottom right image: Doombull Brown and Rhinox Hide mix (about 1:1 ratio) towards ends of horns.
Left image: Citadel Seraphim Sepia wash all over.
Middle image: Citadel Ushabti Bone highlight along top edges of horn and ends.
Right image: Citadel Screaming Skull highlight on smaller portion of edges hit by Ushabti Bone.
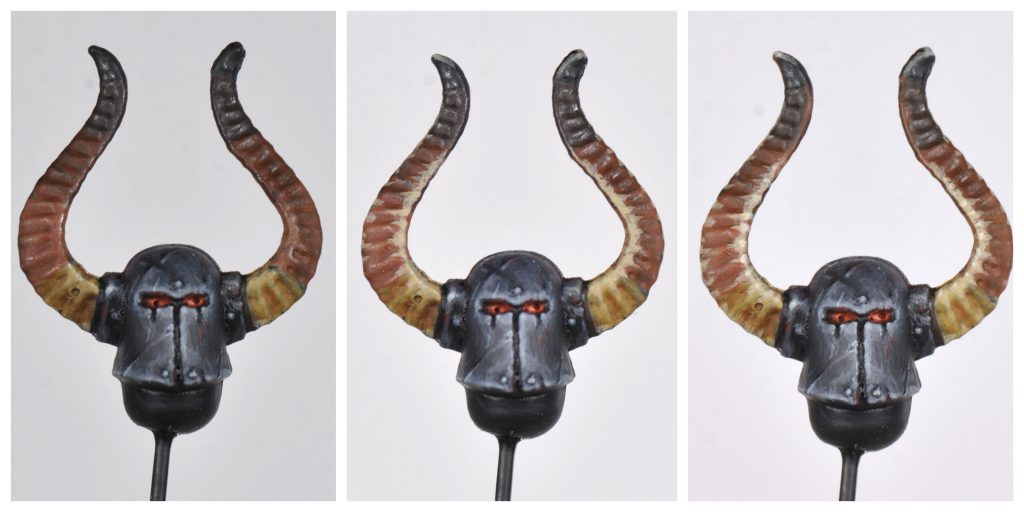
I went for fairly even proportions with each color on this one, but each color segment can be adjusted to taste for lighter or darker colored horns e.g., the Zandri Dust layer could cover three quarters of the horn and the other steps could be compressed to fit.
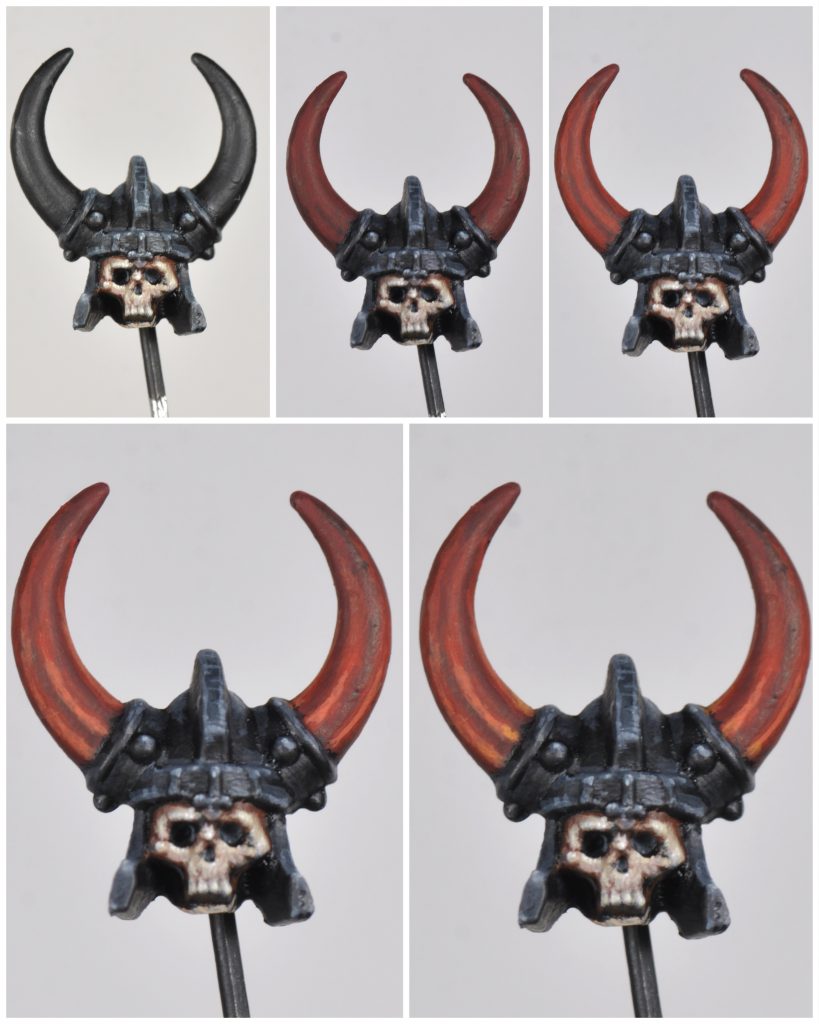
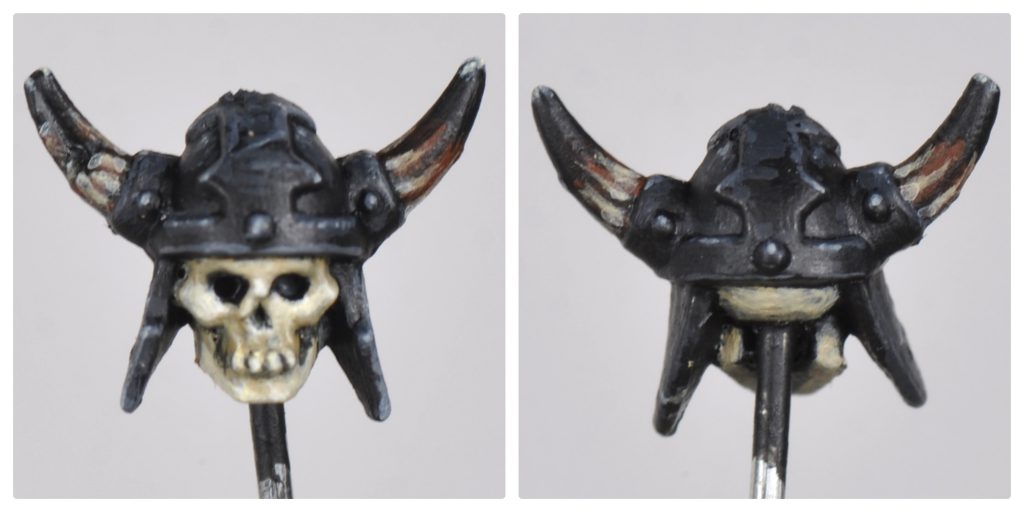
Smooth Red Horns
Top left: Black Primer
Top middle: Citadel Khorne Red base coat
Top right: Citadel Mephiston Red layer in thick stripes going from base to ends of horns.
Bottom left: Citadel Wild Rider Red layer over previous layer, in thinner stripes, going from base to partly up horns.
Bottom right: Vallejo Game Color Fire Orange over previous layer, mostly just at base of horns.
Smooth Dark Horns
For lighter colored horns you could use this same process, just take the lighter stripes all the way to the ends of the horns.
Top left: Black primer
Top middle: Citadel Rhinox Hide layer from base to about 3/4 of the way toward ends.
Top right: Citadel Doombull Brown in stripes towards ends, not going further than previous layer.
Bottom left: Citadel Zandri Dust layered over bottom half of Doombull layer.
Bottom middle: Citadel Ushabti Bone over about half of Zandri Dust layer.
Bottom right: Citadel Screaming Skull over the Ushabti Bone, right at the base of horns.
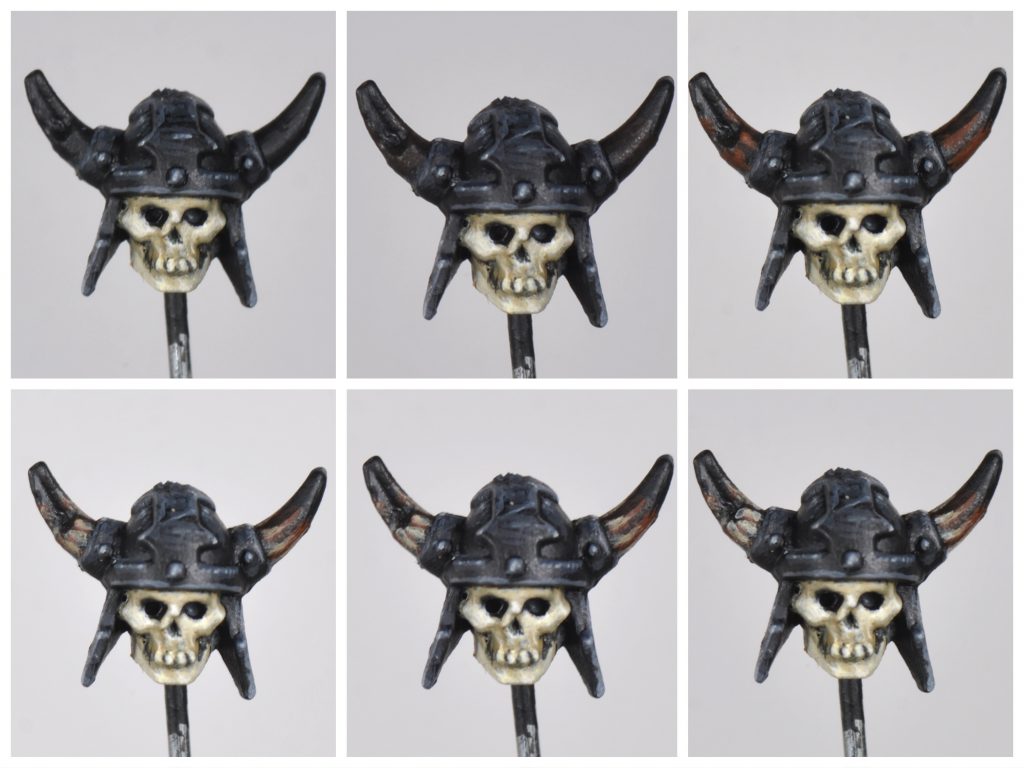 For the finishing touch I put a bit of Vallejo Model Color Ice Yellow on the tips of the horns.
Antlers
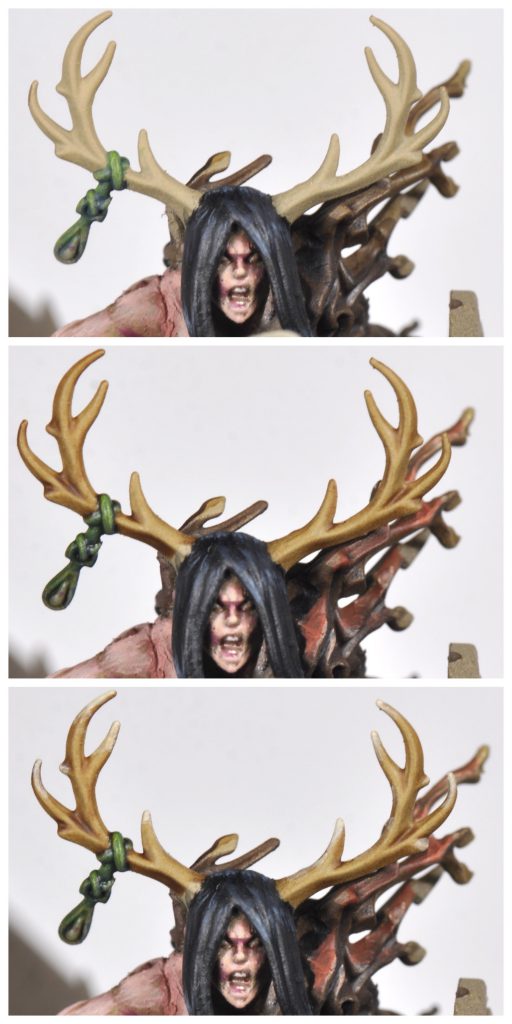
Contrast Method
For these antler I started with an airbrushed layer of Citadel Zandri Dust (Zandri Dust primer would work too, or really any light colored primer). Then Citadel Contrast Skeleton Horde all over, making sure it doesn’t pool on the top sides of antlers. For an extra step I added a bit Citadel Ushabti Bone to the antler points.
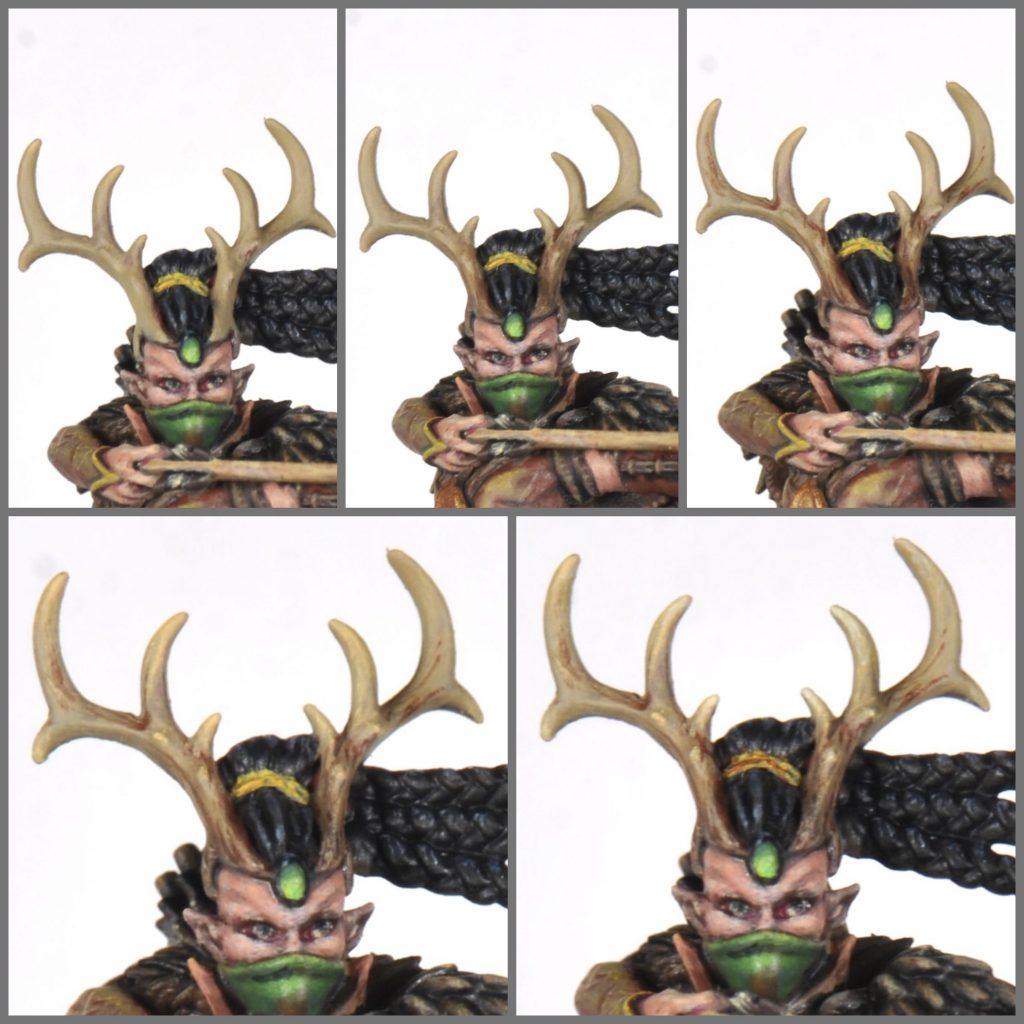
Layering Method
Top left: Citadel Zandri Dust base coat.
Top middle: Vallejo Model Color Burnt Umber in rough lines going halfway up antler.
Top right: Pro Acryl Mahogany in thin lines along shaft of antlers.
Bottom left: Pro Acryl Light Golden Brown on all the points and bumps.
Bottom right: Vallejo Model Color Ice Yellow at the tips of antler points and bumps.
Have any questions or feedback? Drop us a note in the comments below or email us at contact@goonhammer.com.


You must be logged in to post a comment.