
Thanks to a generous review copy from Atomic Mass Games, I’m following up on my recent work on the Battle for the Throne box. All of the techniques used here can be applied to that box. Or, they can be used for any situation where you want rich, warm terrain with high contrast elements to break things up visually.
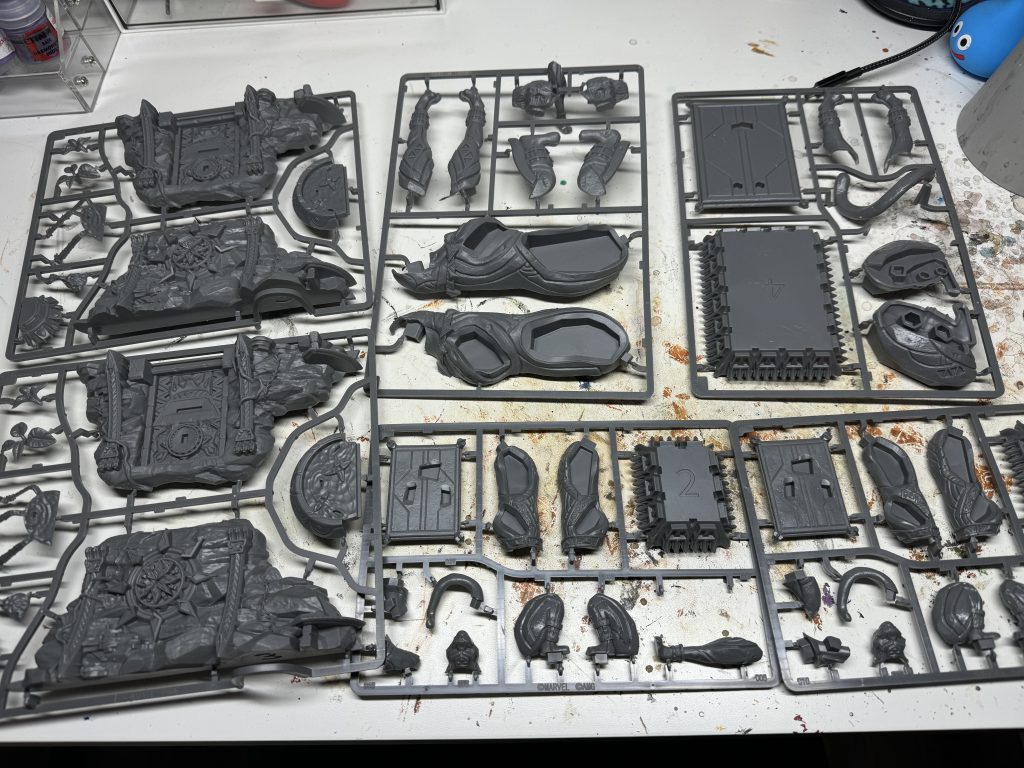
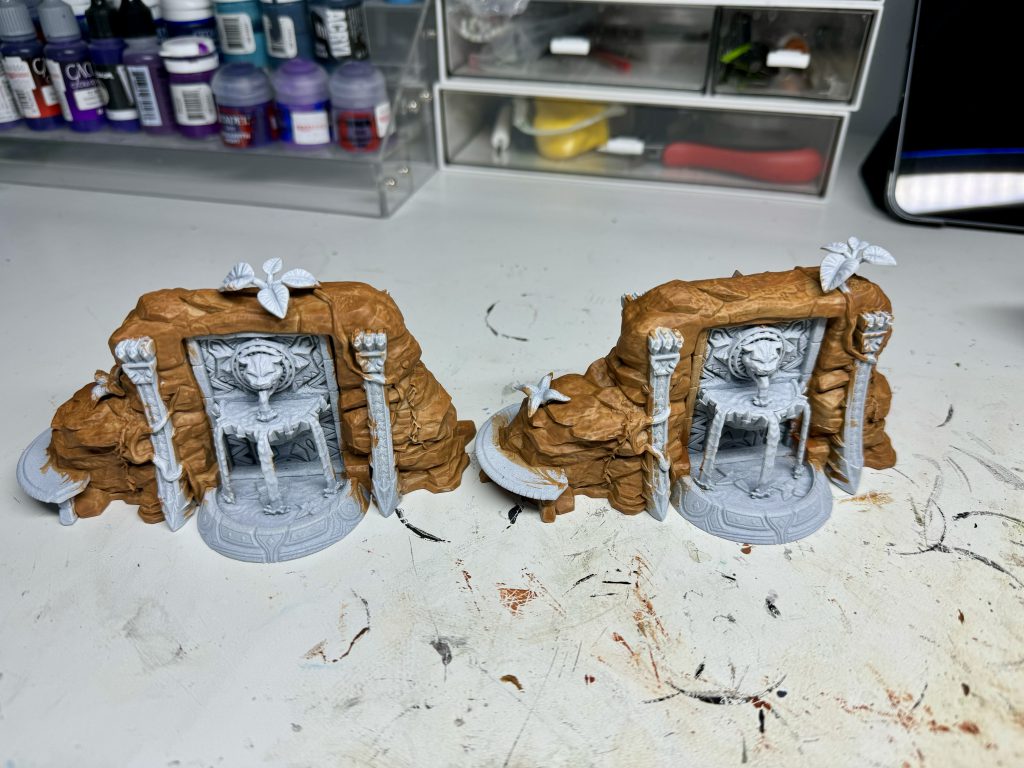
The terrain assembled very easily. But due to how they assembled, all of them had a seam running through the middle. I did a quick and dirty seam fill with generous amounts of plastic glue during assembly followed by wiping away the excess. This reduced how noticeable the seams were but didn’t eliminate them altogether. I’m less bothered by these in terrain vs. models, so I didn’t do any additional work there.
For all this terrain I relied on my old standbys of white primer (the one true primer color) and heavy use of washes to provide shading. I do often use black primer for terrain as it helps models pop more on the table, and the instant shading black primer can provide is useful for large pieces. But here, like with the waterfall piece, I really wanted bright, punchy colors especially for the water. I used almost exclusively drybrushing for quick and easy highlighting.
Here is where I take a little detour to remind readers to take notes while painting! I’ve gotten better about this but am far from perfect about it. That really came back and bit me here. I wanted this terrain to match the waterfall piece. But I managed to not take a single note while painting it. My memory is terrible but I was able to piece together colors that were close enough to the waterfall piece. I’m not mad at the end result at least.
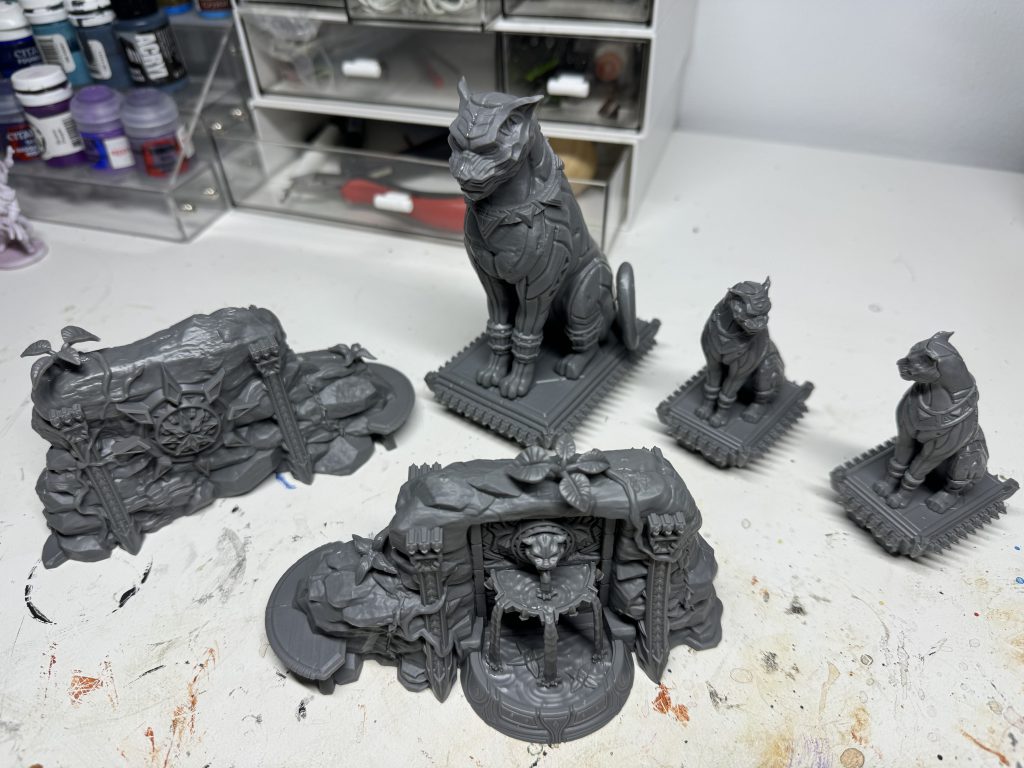
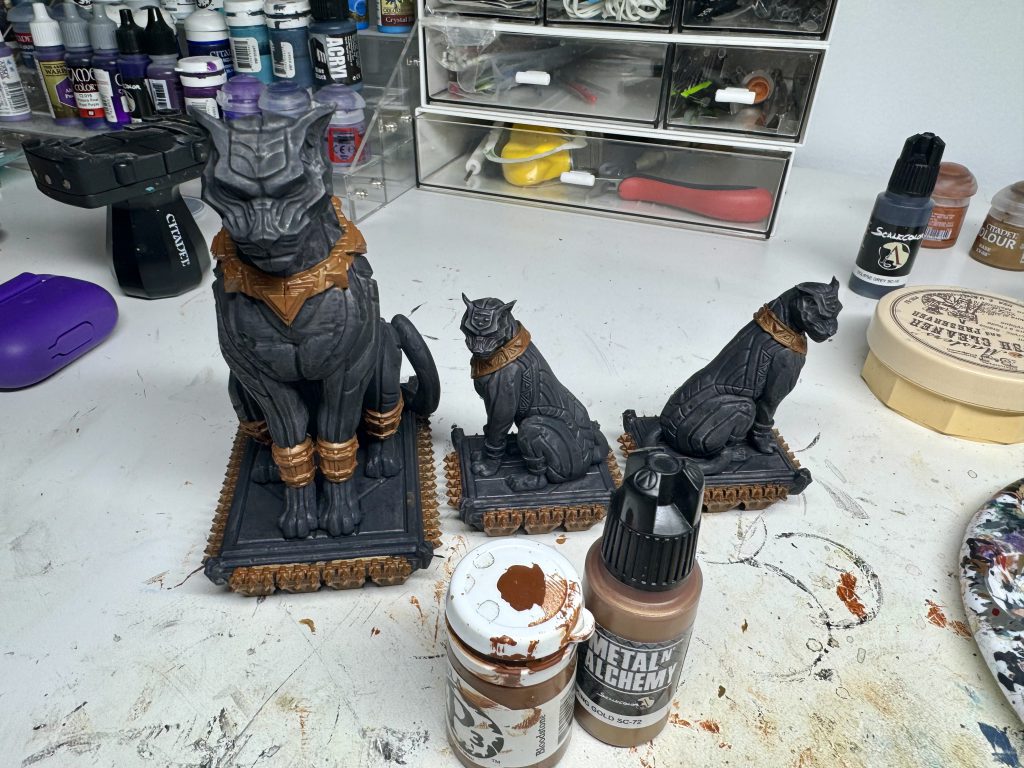
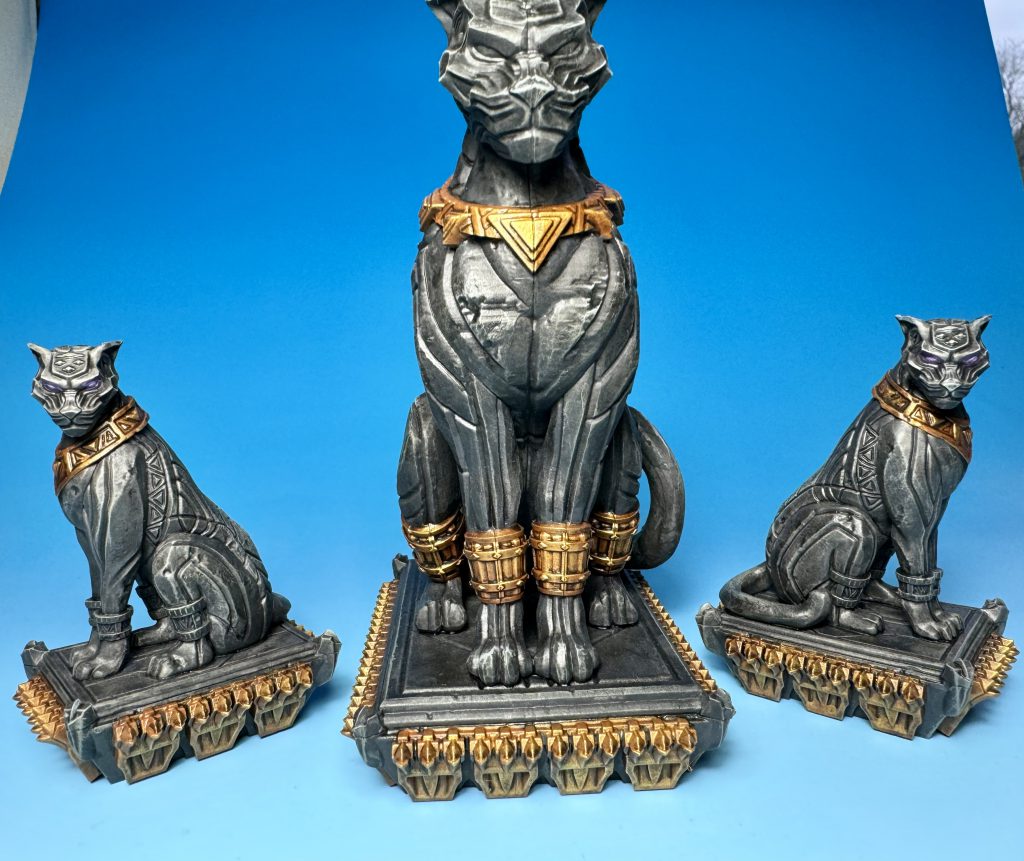
Anyway. I started with the three panther statues by doing a relatively thin application of Scale75 Eclipse Grey with my biggest brush. Play with the amount of thinning here to your liking. I wanted it just thin enough that raised surfaces would come out noticeably lighter than the rest.
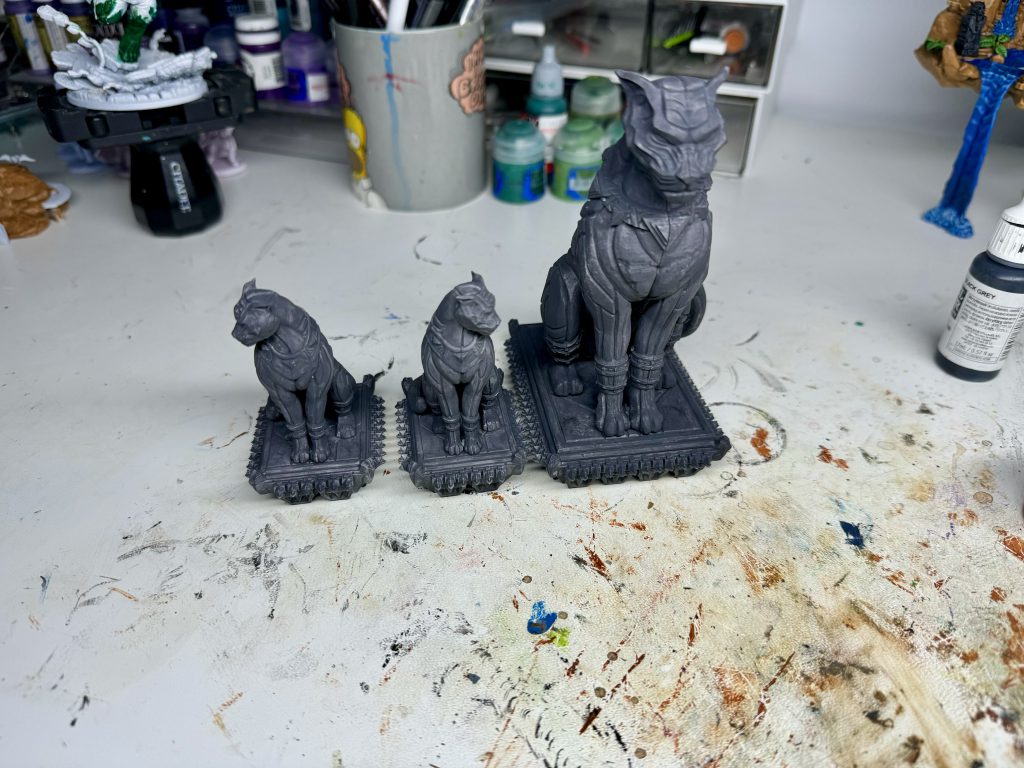
Following the basecoat, I washed the entire model with GW Nuln Oil. You can be a little sloppy here, but you don’t want too much wash pooling in recesses. If so, you might find it dries and leaves behind patches of dusty white areas that will need to be touched up.
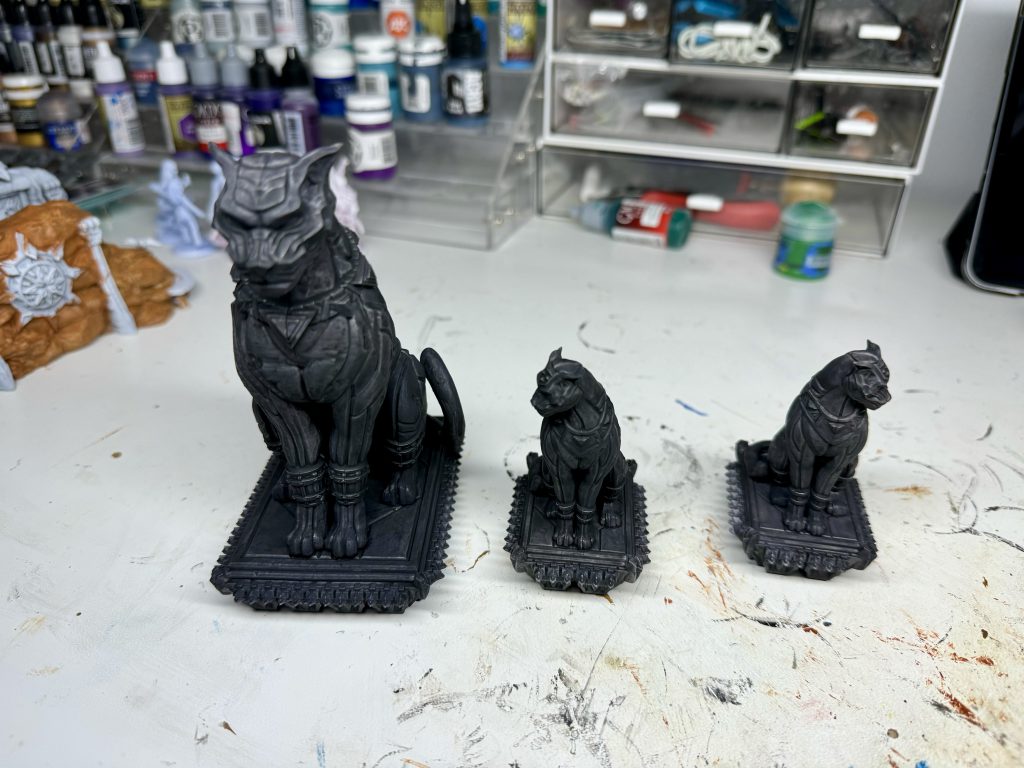
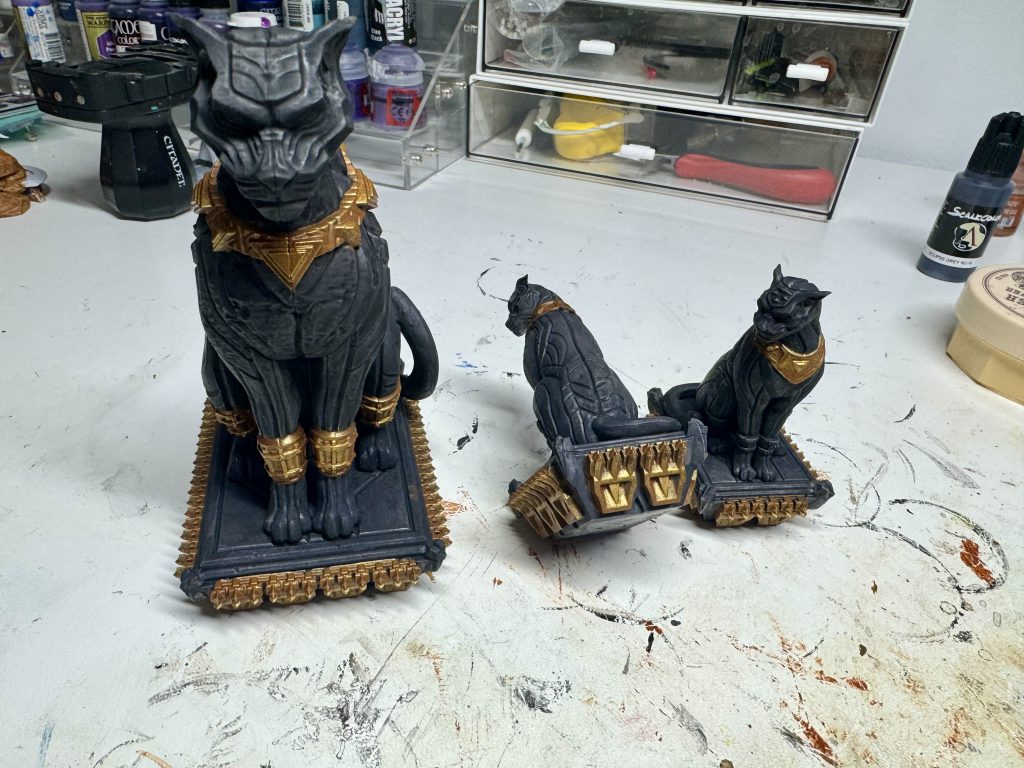
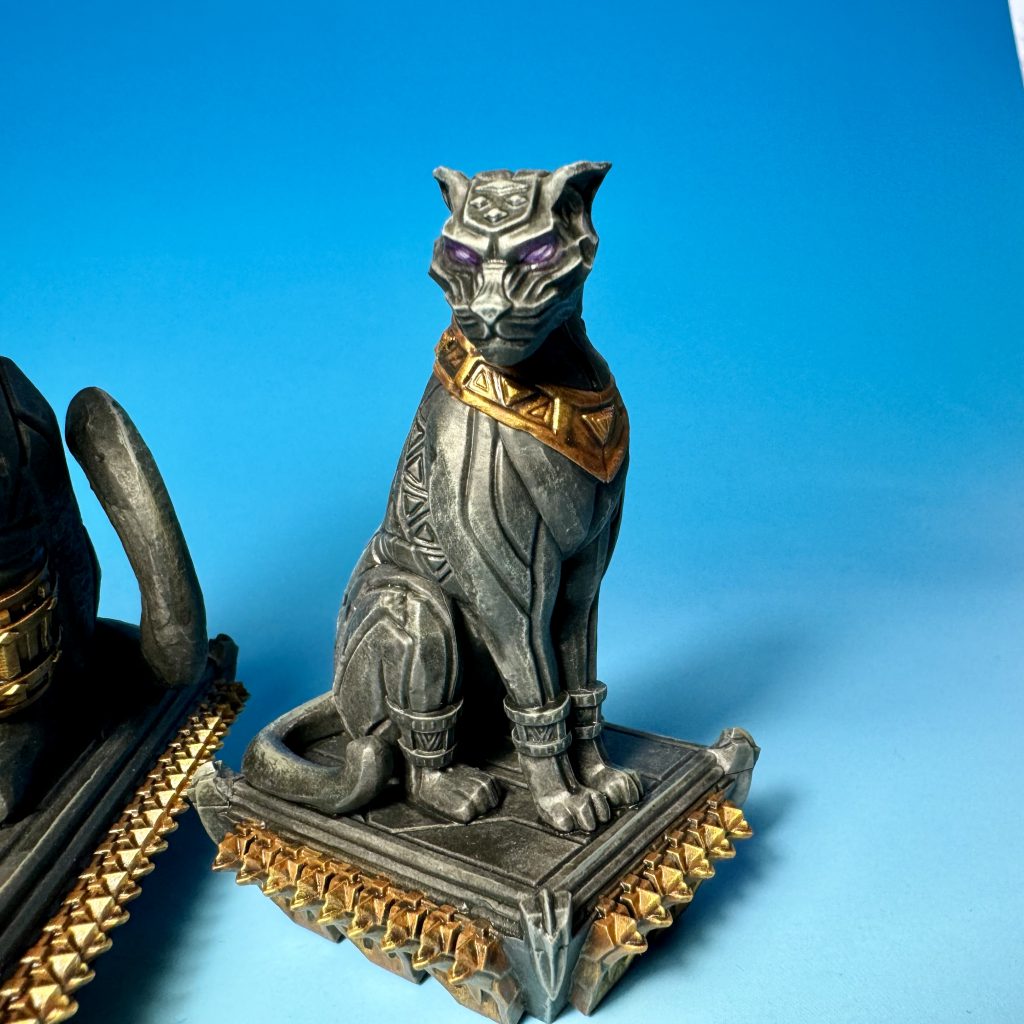
After the wash dried, I did a series of lighter layers of drybrushing. By lighter, I mean removing more of the paint from the brush before starting, and also applying a lighter touch. Some tutorials suggest you start highlighting after a wash by drybrushing or layering again with your base color. I’ve definitely done that in the past. But I find you lose some effect of the wash and less contrast in the end. So skip that in my opinion. For the statues I started by drybrushing the whole model with P3 Bastion Grey. I then focused on areas that would be more exposed to light with a drybrush of GW Dawnstone. You can see what this looks like below, where I’ve started basecoating the gold bits. Later while working on the fountain pieces I went back with another very light drybrush of VGC Stonewall Grey just to give a little more highlight and contrast. You can see this final result at the end of this tutorial.
After finishing the stone, I moved to the gold details. I normally do metallic bits as early as possible in the process since my metallic method is somewhat messy. But the gold areas were proportionally pretty small compared to the stone. Also I knew it would be easy to clean up any splatter of gold on the much darker stone.
To begin the gold, I applied a basecoat of 1:1 P3 Bloodstone and Scale75 Viking Gold. You could get away with skipping this step and basing directly with a metallic. But I argue that you get (in this case) a much richer and warmer gold in the end by mixing in that nice warm brown. That’s my go-to for painting gold, but definitely experiment with other non-metallic colors mixed into a metallic basecoat. You can definitely get some cool effects!
Following this basecoat I did a heavy drybrush of a lighter gold, specifically Scale 75 Dwarven Gold. I’ve sometimes seen this this heavy drybrushing referred to as ‘overbrushing’. In my mind it’s a midway point between standard painting and drybrushing.
I then washed all the gold with GW Agrax Earthshade. This is a little different for me as lately I’ve been a fan of using GW Reikland Fleshshade for this step. I really like the warmth and ruddiness that wash applies to gold. But here I thought this gold should look older and weathered, so Agrax worked better for my purposes.

After the wash dried, I drybrushed Scale 75 Dwarven Gold followed by P3 Solid Gold. (Yes this contradicts my previous admonishment to not repeat the basecoat color after I wish. Embrace chaos)
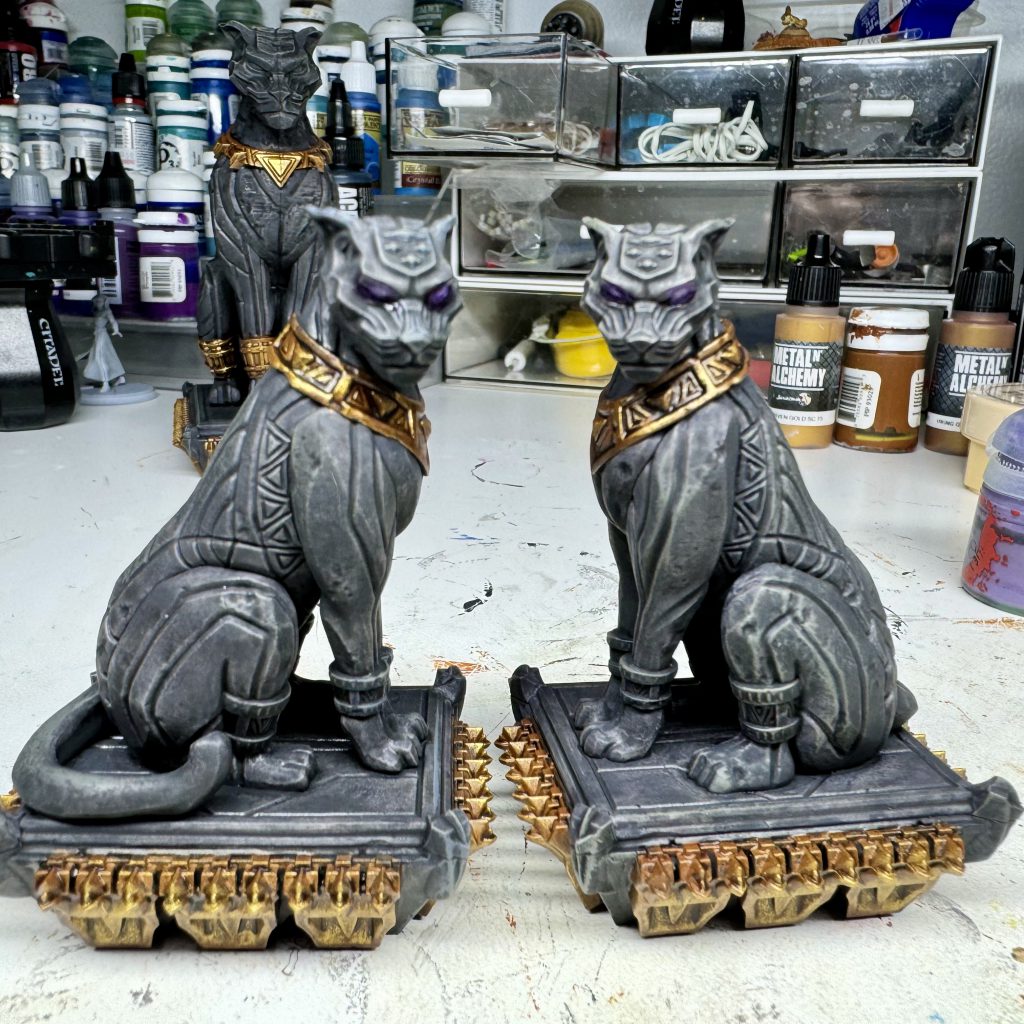
Once the metallic areas were done, it was just some cleaning up to do here and there and the statues were done. I did go back a day or two later and add a quick glow effect to the eyes of the smaller statue. I used some purples which looking back at my notes…I did not write down. My best guess is a base of Army Painter Alien Purple, including drybrushing that shade wherever I wanted the glow to hit. Then a smaller layer of some GW Genestealer Purple on the eyes, followed by a dot in the center of Genestealer mixed with an off-white such as P3 Menoth White Highlight. (MWH is the GOAT of off-white paints and my favorite mix-in for making lighter shades.) This was all a little nod to the optional special rules that came with this terrain. (I will probably never use said rules but painting them in regardless of that fact is extremely on brand for me.)
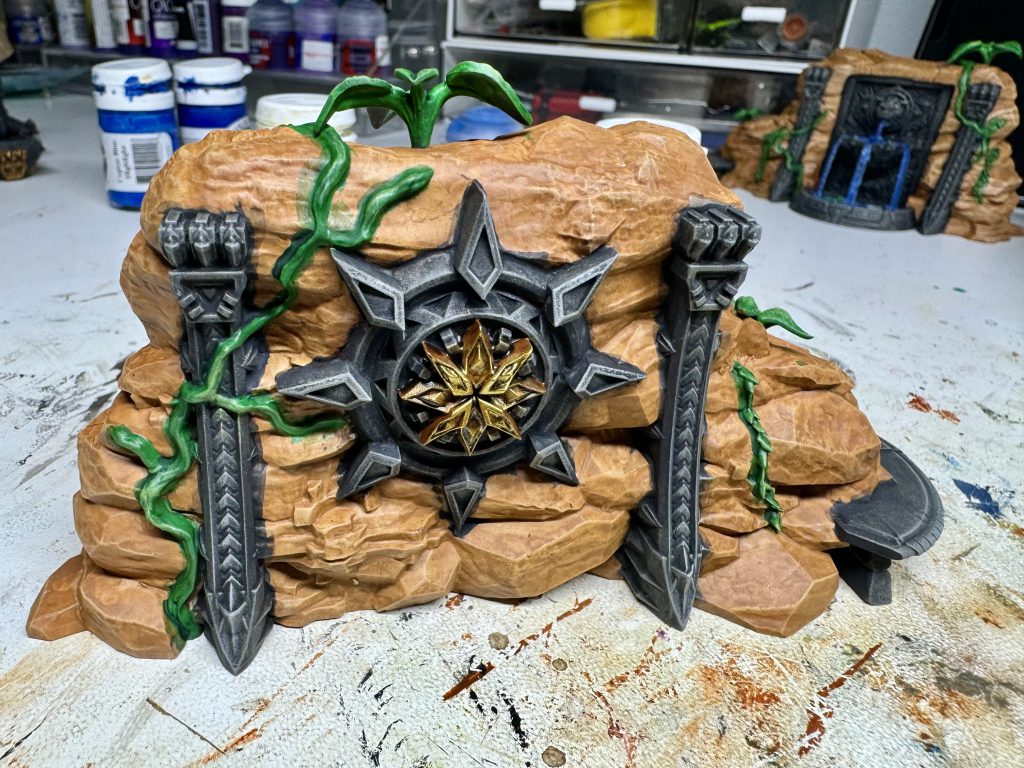
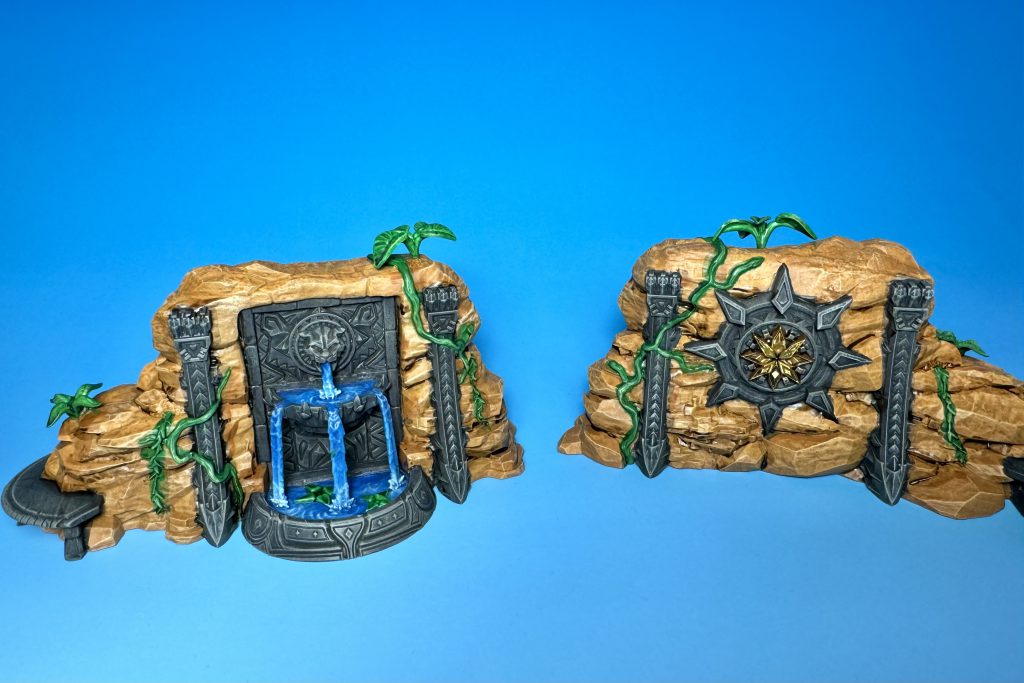
After completing the statues it was time to tackle the fountain pieces. These weren’t necessarily difficult. But I knew all the vines and plants would be tedious, and worried that the fountains would be a pain. Turns out, they weren’t as bad as I expected. To start, I basecoated all the rock with a 1:1 mix of GW Skrag Brown and and GW XV-88 to give a nice warm base. As with the dark stone steps above I tried to keep this coat somewhat thin to let the white primer do its thing and provide some instant highlighting. Again a little patchiness here and there is fine. That will give a more natural stone look by the time you’re done. After this I drybrushed layers of warm lighter colors: GW Deathclaw Brown, GW Tau Light Ochre, and P3 Menoth White base.
After that, I did the dark stone and gold star using the same methods detailed above. I basecoated all the plants with GW Warpstone Glow. I washed them with Biel-Tan Green and followed that with a drybrush of GW Warboss Green then a light drybrush of P3 Sulfuric Yellow.
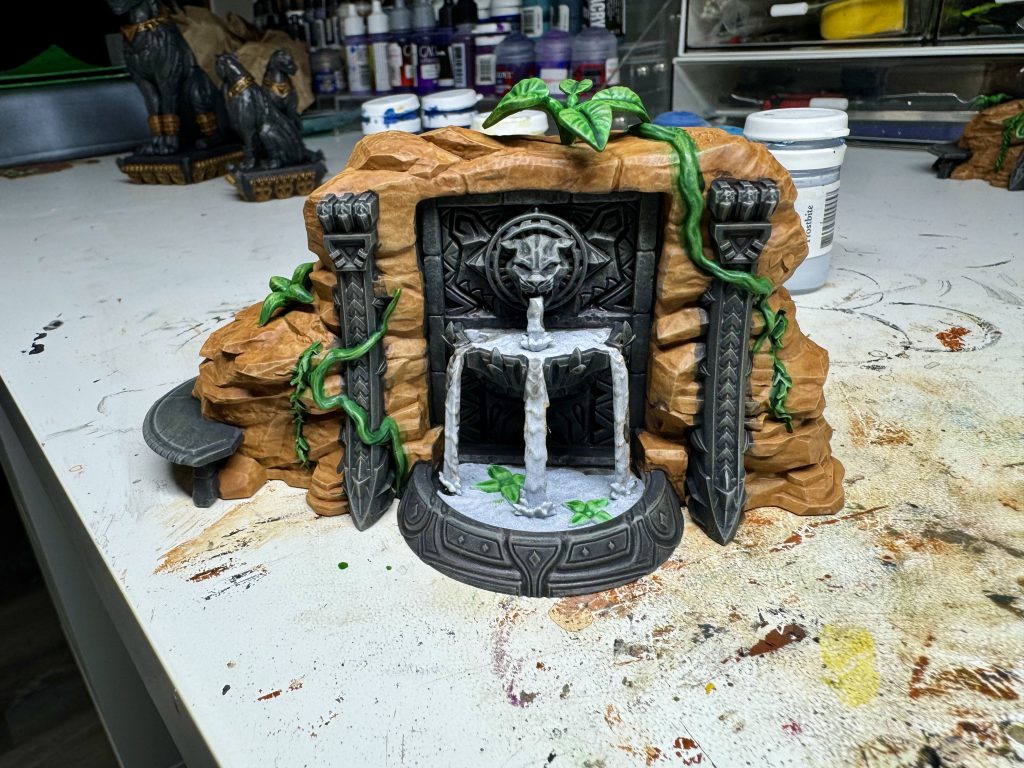
For the water, I again tried to rely on my memory of painting the waterfall piece. Here is where I struggled the most as I don’t think I quite captured the same look. It may also be because these water features are much smaller and harder to blend and layer up. I’m not mad at the end result. But it was another good reminder for me to take notes every time. (It also meant I was distracted trying to recreate that scheme, and didn’t take many pictures during the process of painting the water. Also very on brand.)
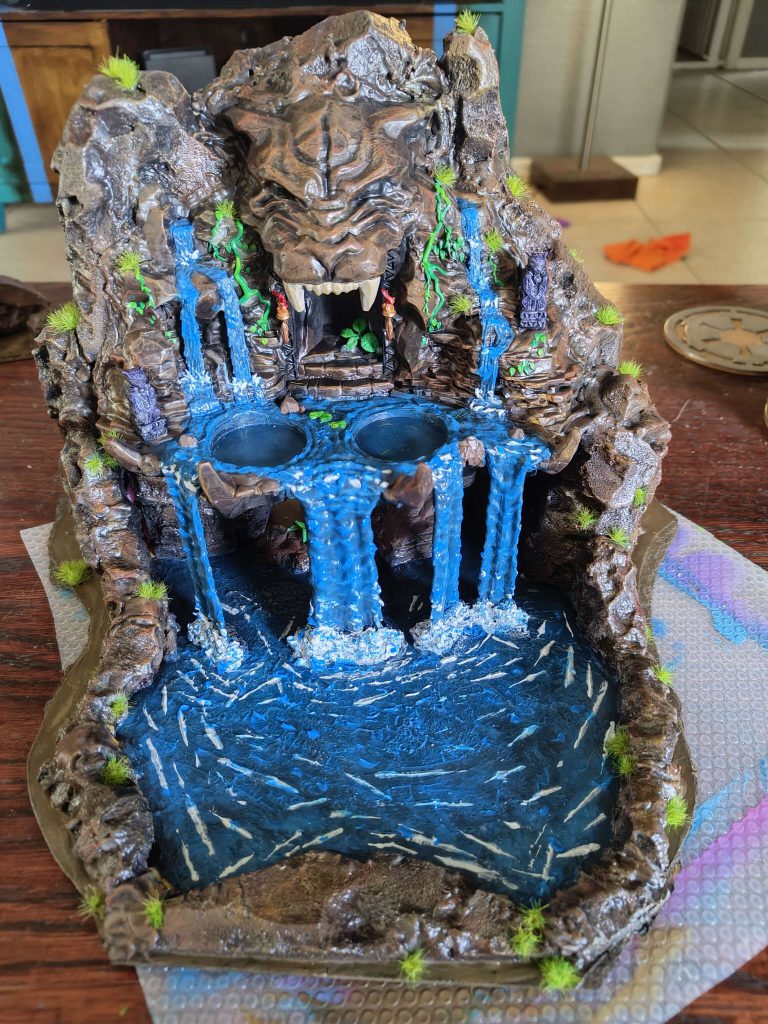
I started by basing all the water with P3 Exile Blue. I then mixed that with P3 Cygnar Base and painted most of the water leaving that darker color in the recesses. From there it was that same process: smaller layer of straight P3 Cygnar Base, then mixing that with P3 Cygnar Highlight, then a final much smaller layer of straight P3 Cygnar Highlight. Essentially you’re just moving through lighter and lighter shades, with a transition mix of each shade in between. Below is a pic taken before I started the drybrushed highlights:
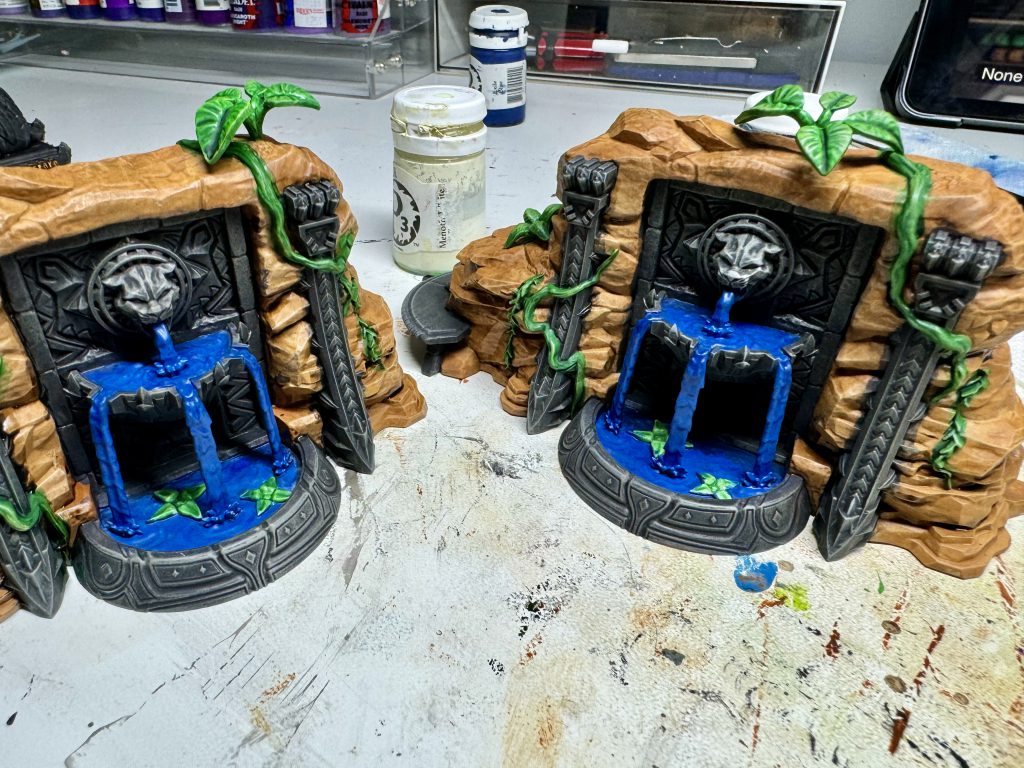
Said drybrushing consisted of GW Lothern Blue, P3 Frostbite, and P3 Menoth White highlight. I focused these on ripples and areas where there would be more turbulence, such as where the water stream hits the lower pool. After that it was some bits of cleanup and that was that!
Overall, this was a pretty simple set of terrain to assemble and paint. If you want to create a full Wakanda-themed board these pieces will look great. However, you’re definitely going to want to purchase the other Wakanda terrain box to fill out your table. As mentioned in my review of the throne box, the waterfall is going to be tougher to integrate as a usable and good-looking piece. But you couldn’t go wrong with something like this to bring that piece onto your table:
The Discord thread linked there includes WIP pics if you want more information. I definitely recommend checking it out. And that’s it for me this time. Hope you found this helpful and thank you as always for reading!
Have any questions or feedback? Drop us a note in the comments below or email us at contact@goonhammer.com.

You must be logged in to post a comment.