In our How to Paint Everything series, we take a look at different armies of the Warhammer universe, examine their history and heraldry, and look at several different methods for painting them. With the recent release of the Dominion boxed set, we’re looking at the two factions involved and how to approach painting them.
The Dominion box is packed full of miniatures, with massive model counts on both sides. It comes with nearly a full army of Stormcast plus a ton of the new Kruleboyz for Orruk players. While we’ve covered Stormcast Eternals before in a previous HTPE article (and we’ll be updating it soon), it’s worth looking at the models in the new box and adding more schemes to the mix. In this article we’re looking at the new Stormcast models; in a second article we’ll be looking at the Orruk Kruleboyz.
Painting the Stormcast Eternals
The Dominion box comes packed with more than 1,300 points of Stormcast, including new units and characters with some fantastic models. While the default scheme for Stormcast involves a base coat/primer spray of Retributor Armour Gold, we’ve tried to explore some more varied schemes with our boxes.
Colin’s Stormcast Eternals
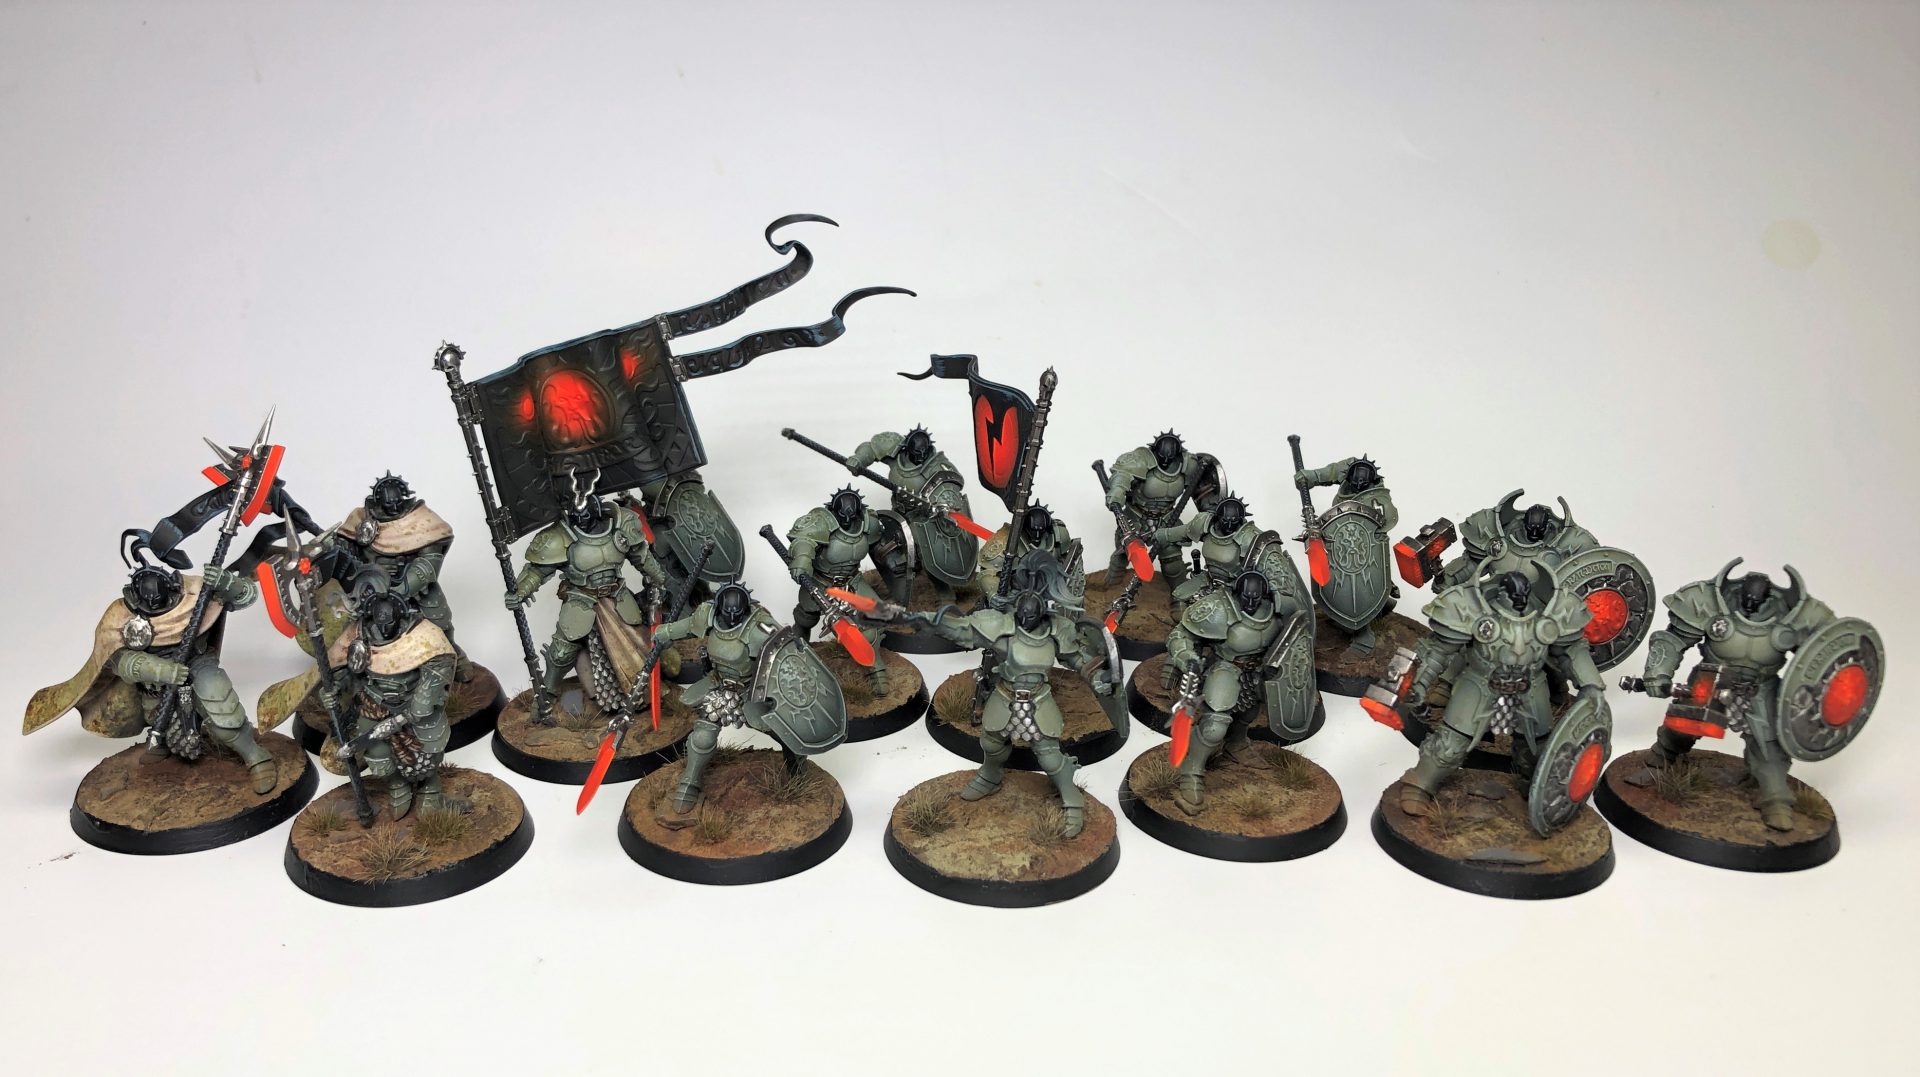
I knew I wanted to paint the Stormcast Eternals in a more natural tone, to compliment the Kruleboyz in the other half of the box. I really like this green grey that I typically use for stone, so I decided to try it out on the Stormcasts’ armor. To give them a mystical/magical element I opted for a very strong Orange glow for their weapons and banners. The black helmets help to anchor the scheme, and also speak to their lack of humanity after countless reforgings. Overall I really enjoyed painting these and am looking forward to finishing off the rest of the characters!
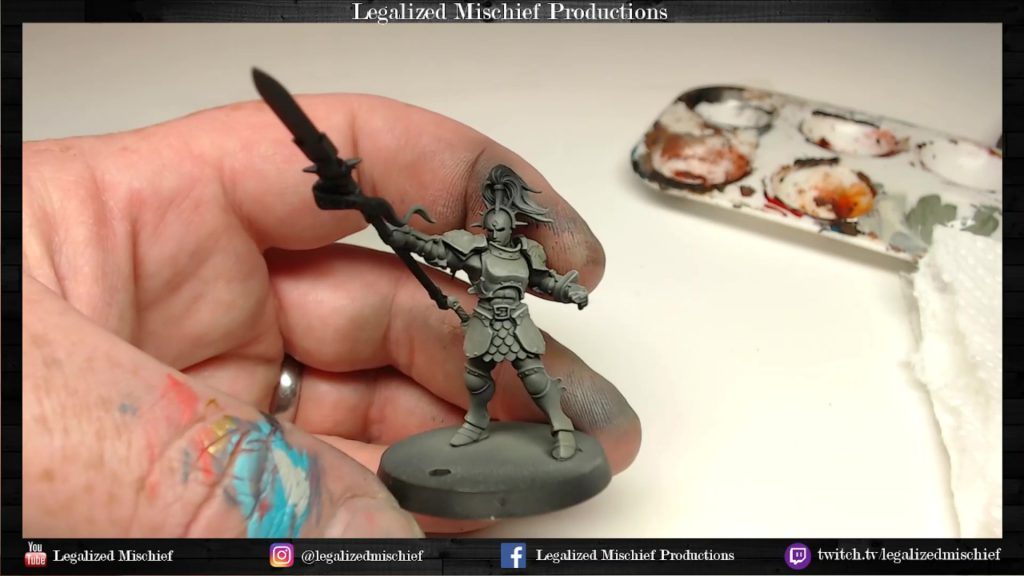
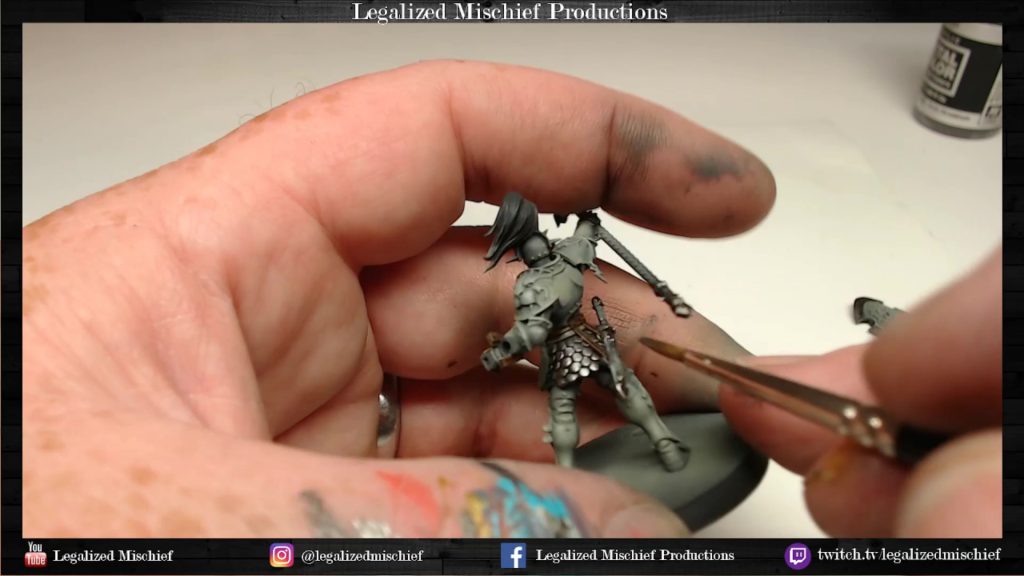
I neglected to take step-by-step photos while painting, so here are the recipes and a couple of screenshots! I use mostly non-GW paints, but the exact paints are less important than the colors and the techniques.
Armor:
- Prime Black
- Basecoat Vallejo Model Air Panzer Dark Grey
- Highlight Vallejo Model Air German Grey
- Highlight Vallejo Model Air Grey RLM02
- Drybrush a 2:1 mix of Vallejo Model Color Ivory and German Grey, focusing on the chest, shoulders, arms, and knees
- Drybrush again (if necessary), adding a little more Ivory into the previous mix
Ropes/Leather:
- Basecoat Vallejo Model Color Dark Rust
- Wash Vallejo Sepia Ink
- Highlight 2:1 mix of Dark Rust + Vallejo Model Color Ivory
Steel Metallics:
- Basecoat Vallejo Metal Color Burnt Iron
- Wash GW Nuln Oil
- Highlight Vallejo Metal Color Dark Aluminium
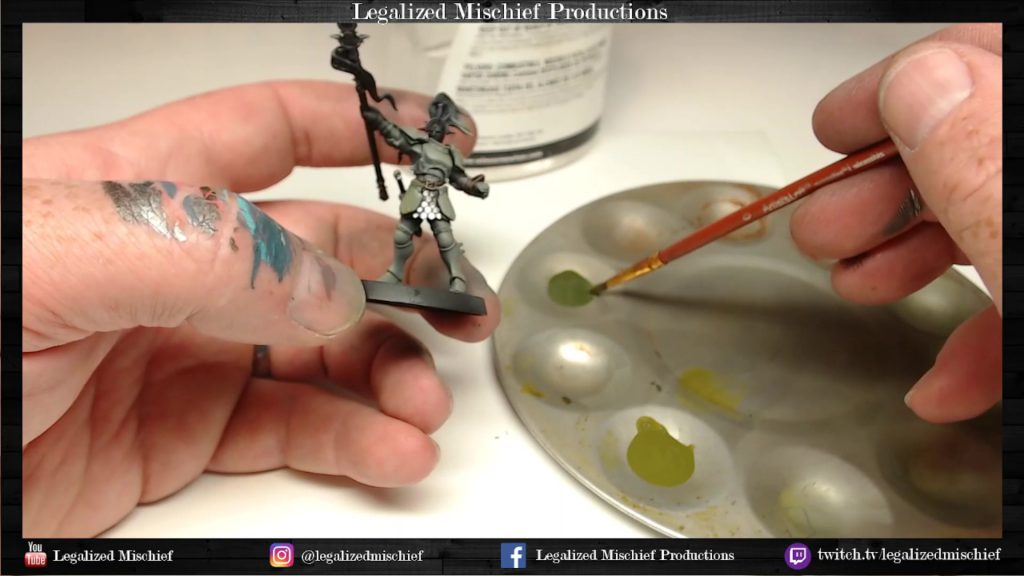
Black Helmet & Weapon Haft:
- Basecoat Vallejo Model Color Black
- Edge Highlight Vallejo Model Color Intermediate Blue
Black Banner:
- Basecoat Vallejo Model Color Black
- Highlight Vallejo Model Color Dark Sea Blue
- Highlight w/ 3:1 mix Dark Sea Blue + Vallejo Model Color Ivory
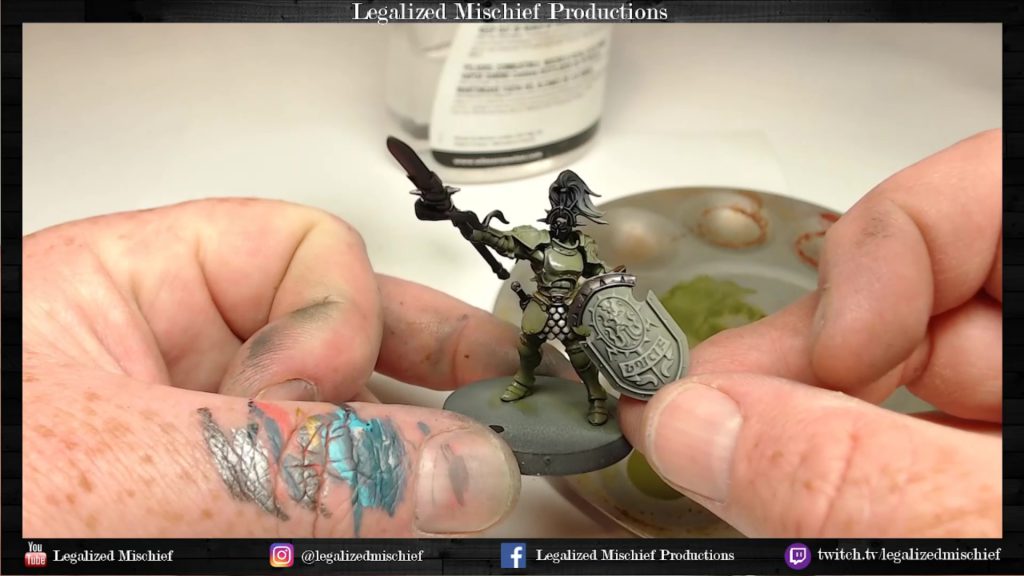
After those steps are done, it’s time to use some enamels to add a little more color saturation into the armor and give it a more organic look. Enamels are great because they’re heavily saturated, but also easily thinned. They can also be manipulated after they’re applied, unlike acrylic washes. To wash the armor, I used Slimy Grime Light and Slimy Grime Dark, both from MIG AMMO. These were thinned with Windsor & Newton Artists’ White Spirits. After application, a q-tip is dipped in the White Spirits and the enamels are gently wiped off the higher surfaces of the armor.
Getting ready to apply the enamels:
In this picture, the armor has been painted with the enamel washes but the shield has not. You can see how much more green the armor is and how much more of a vibrant and natural tone the enamels brought to the scheme. It’s a great tool to have in the tool box.
HAWT Orange Glow:
Disclaimer: An airbrush does make this a lot easier
- Basecoat GW Evil Sunz Scarlett
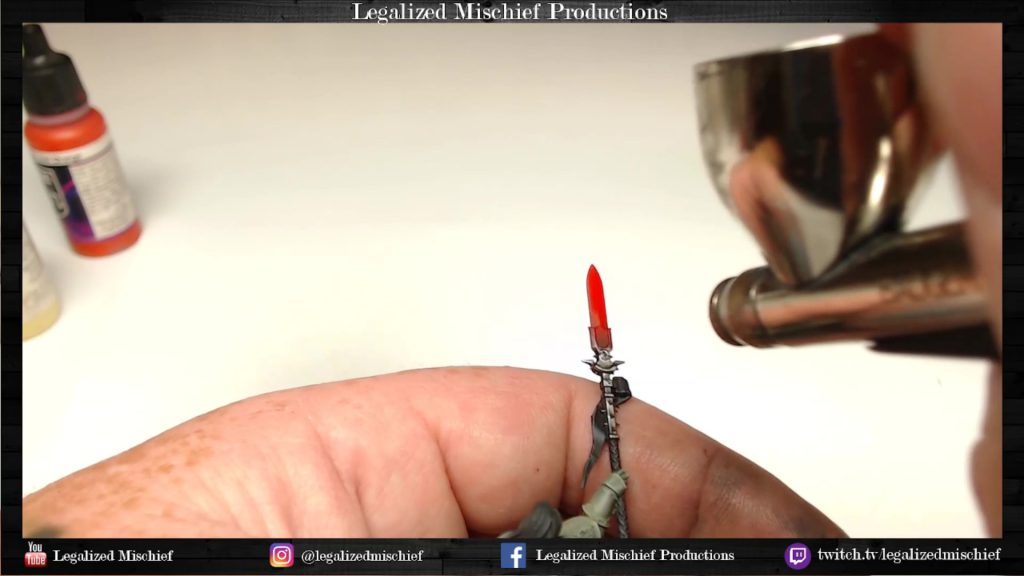
- Fade opposite sides of the blade with Vallejo Model Color Ice Yellow. This can be done with tape, or you can carefully spray from the side of the blade to get a fade without tape (this will take some practice). In the screenshot below, one half of the blade has been highlighted. The opposite side of the blade will have the yellow towards the base of the blade and the tip will remain red. I use Ice Yellow to do this because the orange airbrush paint is very, very thin. if I didn’t do a very light pre-shade, the orange wouldn’t register on top of the red.
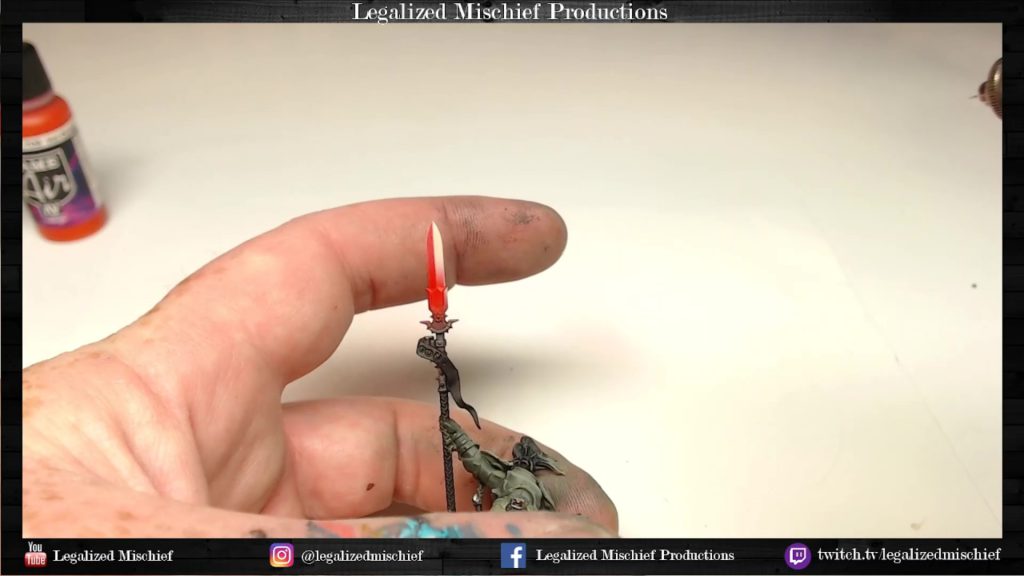
- Overall Glaze on the blade of Vallejo Game Air Hot Orange
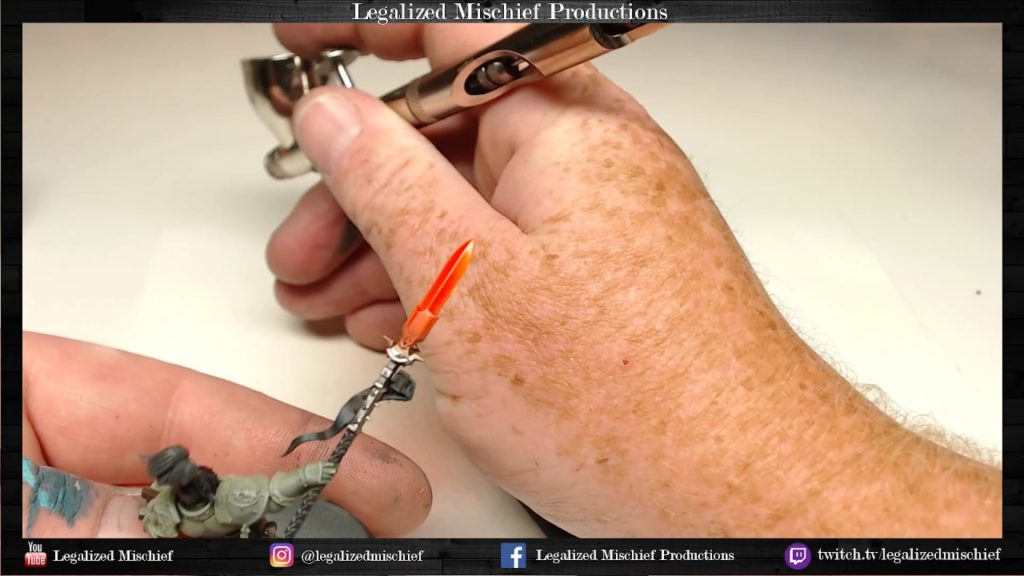
Finished Stormcast Eternals Vindictors:
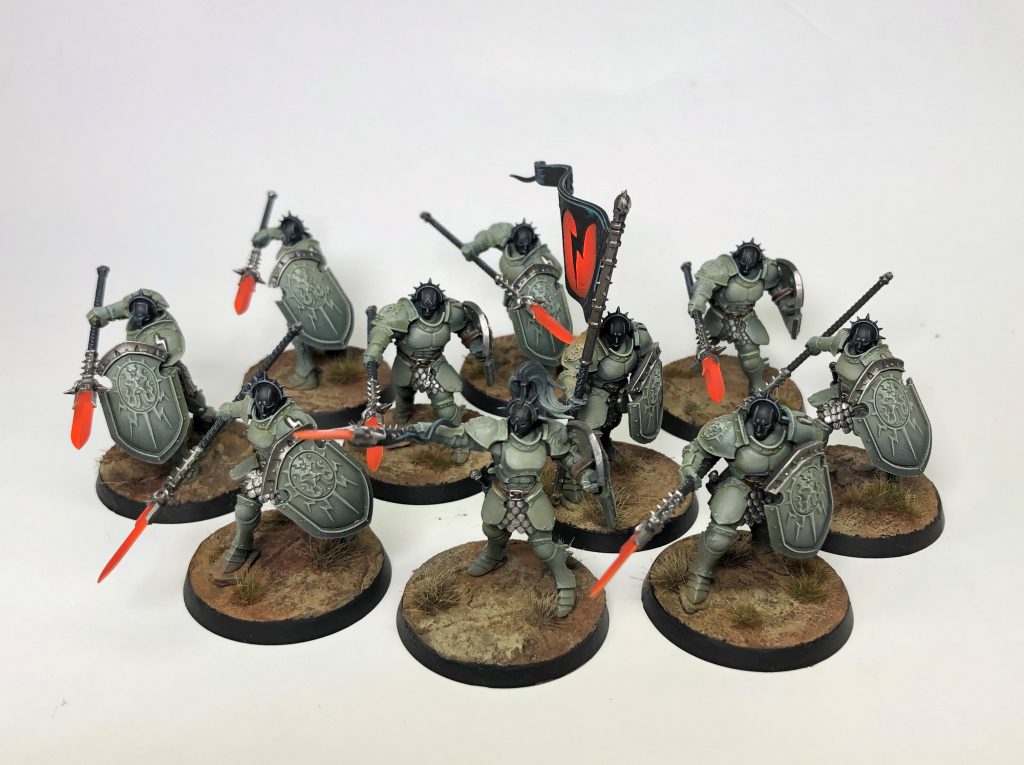
This scheme is very efficient, and has a very distinct look. I really like how much the orange stands out against the natural tones on the rest of the models and their bases. The bases are very straightforward, essentially some texture paste, a basecoat, and pigments. If you’d like to see full video step by step tutorials on these Stormcast Eternals, the Kruleboyz, and many other topics, you can check out my Patreon page!
Robert “TheChirurgeon” Jones’ Method
I was looking to do something a bit different from the standard gold method when painting my Stormcast Eternals, figuring that someone else would take on that challenge. So I went with the blue-and-white of the Celestial Vindicators for my Stormcast, which is a cool scheme that lets me use the paints I’ve already got sitting around for my Alpha Legion dudes.
1. I usually prime black but in this case it didn’t make a ton of sense given I’d need to do white shoulder pads so instead I went with a primer coat of Grey Seer.
2. Next up I did a basecoat of Ultramarines Blue Contrast Paint to lay down the base color. Swiftblade recommended I use Macragge Blue but I didn’t have any of that sitting around and this is basically the same shade.
3. Next come highlights of Sotek Green. That’s the primary color I’m going with here but I need to blend it a bit. I start by basically coloring in the areas that are gonna be Sotek.
4. Blending time! I mix Sotek with Ultramarines Blue Contrast in different proportions and paint that over the intermediate areas to get some smoother blends from blue to turquoise. You can see this most prominently on the greaves. I also use it for some shading.
5. Next up come highlights. I mix Sotek Green and Reaper Ghost White to get a lighter blue and use that for edge highlights on the turquoise. I also block in the leather parts here using Snakebite Leather Contrast.
6. More details. I hit the boots with Dryad Bark and the leather in between armor plates with Mournfang Brown. Those’ll get washed with Agrax Earthshade later on. I also paint the scale mail and spear tip with Leadbelcher.
7. Time to add the gold bits. This is just Retributor Armour.
8. And now it’s time for washes! I wash the gold bits with Agrax Earthshade and the silver bits with Nuln Oil.
9. Finishing touches. I highlight the scale mail with Ironbreaker and use it to do the rivets on the armor plates and some edge highlighting on the gold bits. I also clean up the shoulder pads a bit, edge highlighting them with Reaper Pure White and doing a bit of a gradient highlight on them from Pure White to Grey Seer to make the white not so obvious. After this it’s Astrogranite for the base drybrushed with Celestra Grey.
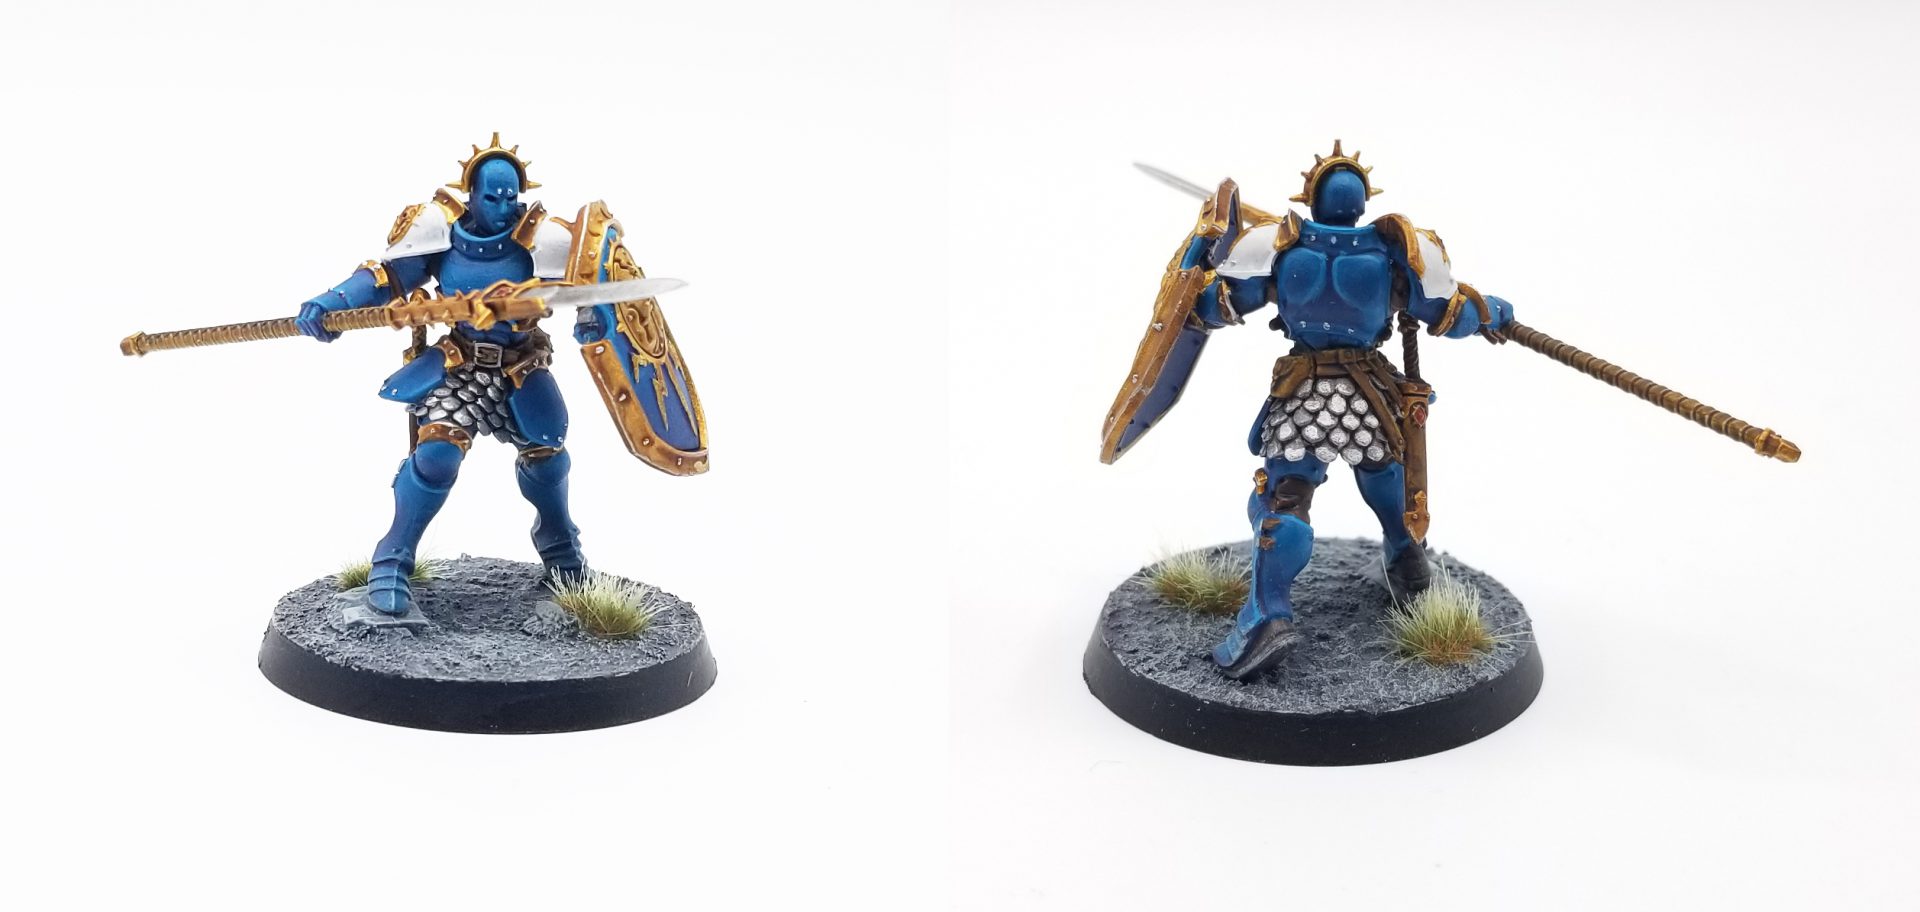
Overall I’m very happy with the final result. The blue looks good and I think it stands out from the regular full gold armor crew you normally see. Sure it’s a bit tougher but painting this wasn’t too bad – maybe a couple of hours at most – and it looks pretty solid.
James “One_Wing” Grover
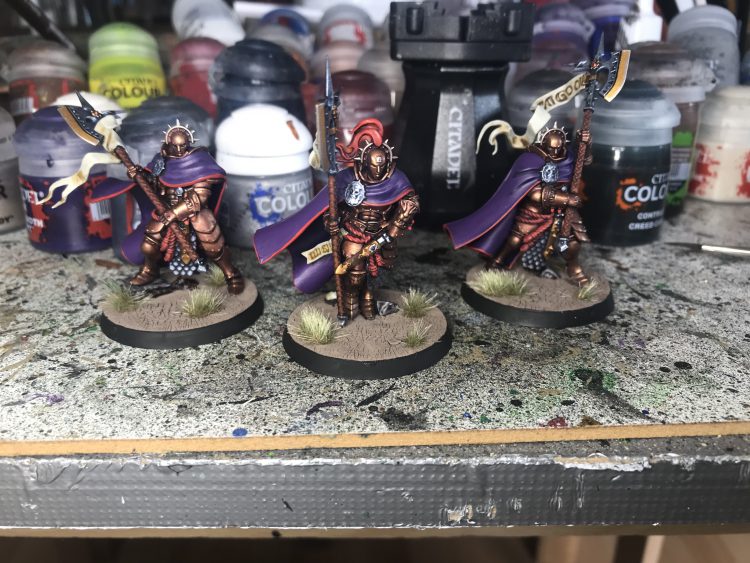
I also wanted to go off-piste from the box scheme, but also wanted to stick to primarily using metalics, because if I’m honest part of the attraction of Stormcast for me is that they can be relatively quick to paint. I picked the Praetors to work on, as I’m a sucker for both cloaks and halberds.
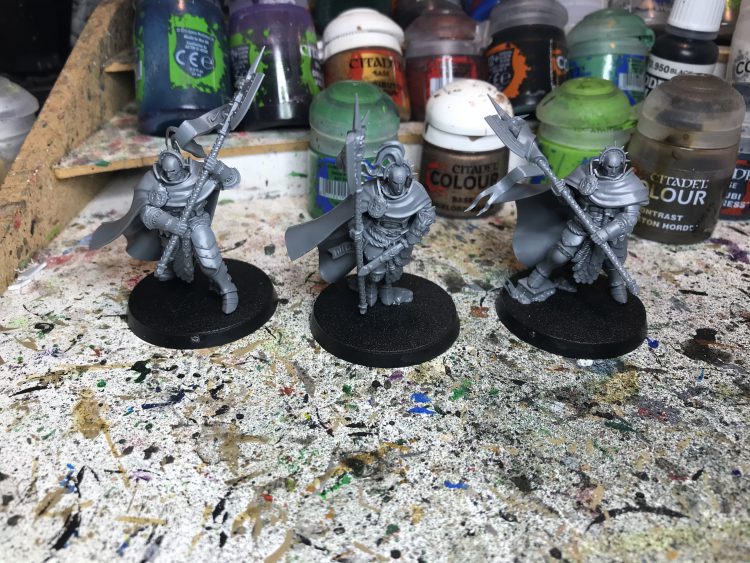
In terms of building the models, things were pretty easy going, but there are a couple of takeaways I’d want to use if I was doing them again:
- The joins between the sections of the cloak are the hardest to line up, and I’d want to pre-prepare them with a thin line of plastic glue.
- I glued these into their base, and that later made getting a brush to the inside of the cloak a pain. Even if you’re planning to glue them down, I’d push-fit till the cloaks are done.
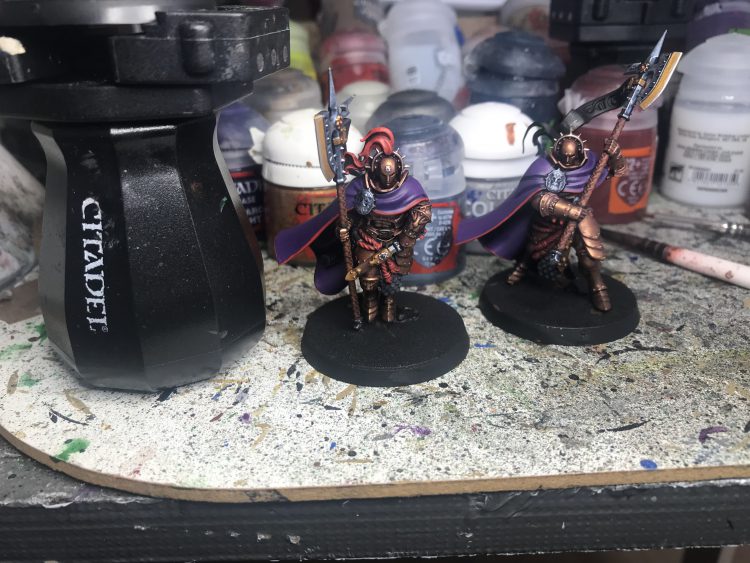
I wanted a colour scheme that captured the regal majesty of the Stormcast, but didn’t particularly fancy trying to get a good blue down, so ended up choosing a different shade of gold as my primary colour, and then using purple and red as accents. The recipe was as follows:
1. Spray Chaos Black.
2. Block in Balthazar Gold on all of the armour (two coats).
3. Grey Knight Steel on the lapel broches, scale, and main body of the halberd head.
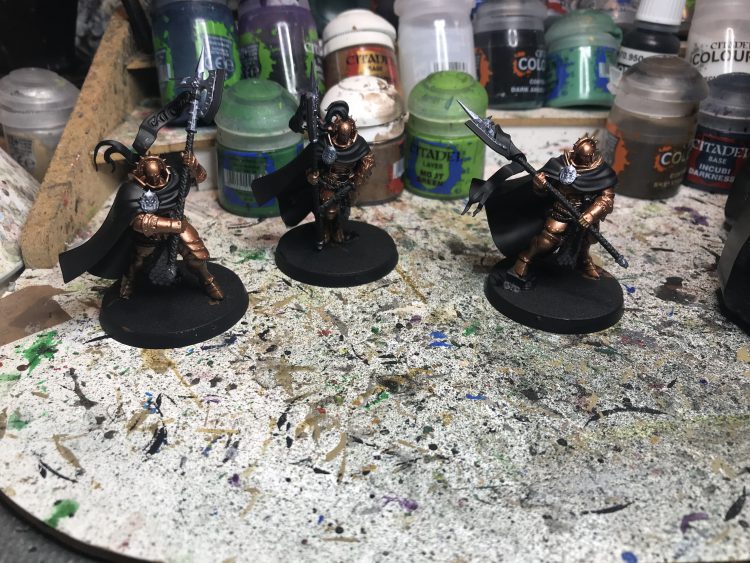
4. Wash the Balthazar Gold with Druchii Violet and the Grey Knight Steel with Drakenhoff Nightshade.
5. Drybrush the gold with Gehenna Gold and the silver with Stormhost Silver.
6. Paint the cloaks with two coats of Naggaroth Night and then wash with Druchii Violet.
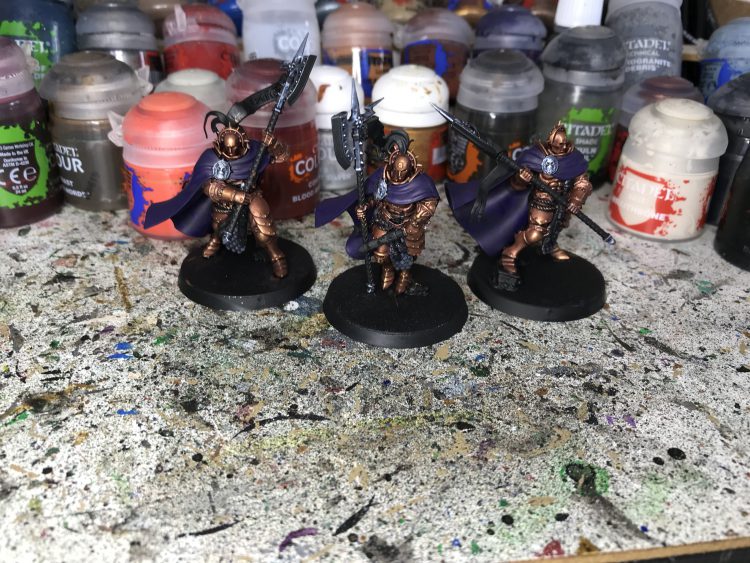
7. Bring up the cloaks with coats of Xereus Purple, re-darkening some of the recesses on the front of the shoulders with Naggaroth.
8. Add various bits of detailing (see below).
9. Line the edges of the cloaks with two coats of Evil Sunz Scarlet.
10. Paint the blade edges with two coats of Retributor Armour.
11. Edge the blades and paint the halos with Canoptek Alloy.
12. Paint the banners with two coats of Grey Seer.
13. Wash them with heavily thinned Skeleton Horde.
14. Mix some of what was left of the Skeleton Horde pool with some Deepkin Flesh and use that to highlight the banners.
For the detailing:
- The ropes/plume were Mephiston Red, followed by Wild Rider red and a wash of Carroburg Crimson then a light bit of drybrushing to bring them up.
- The halberd hafts were Mournfang Brown > Cygor Brown, followed by a wash of Carroburg > Agrax.
- Some Retributor Armour and Mournfang Brown, both washed with Agrax, was used to detail the scabbards and a few other things.
The basing is extremely simple, just Agrellan Earth, dried in the sun for an hour or so, then some Middenland Tufts applied.
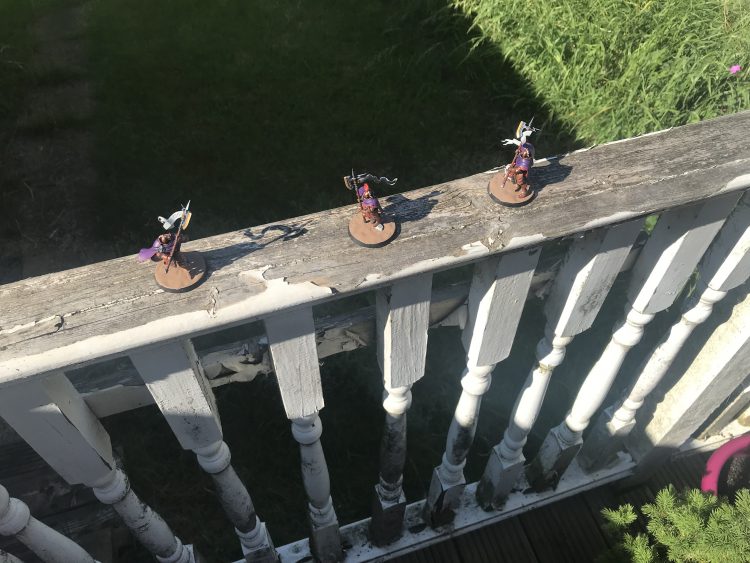
That brought the paint job to completion, and I’m thrilled with how the finished product turned out.
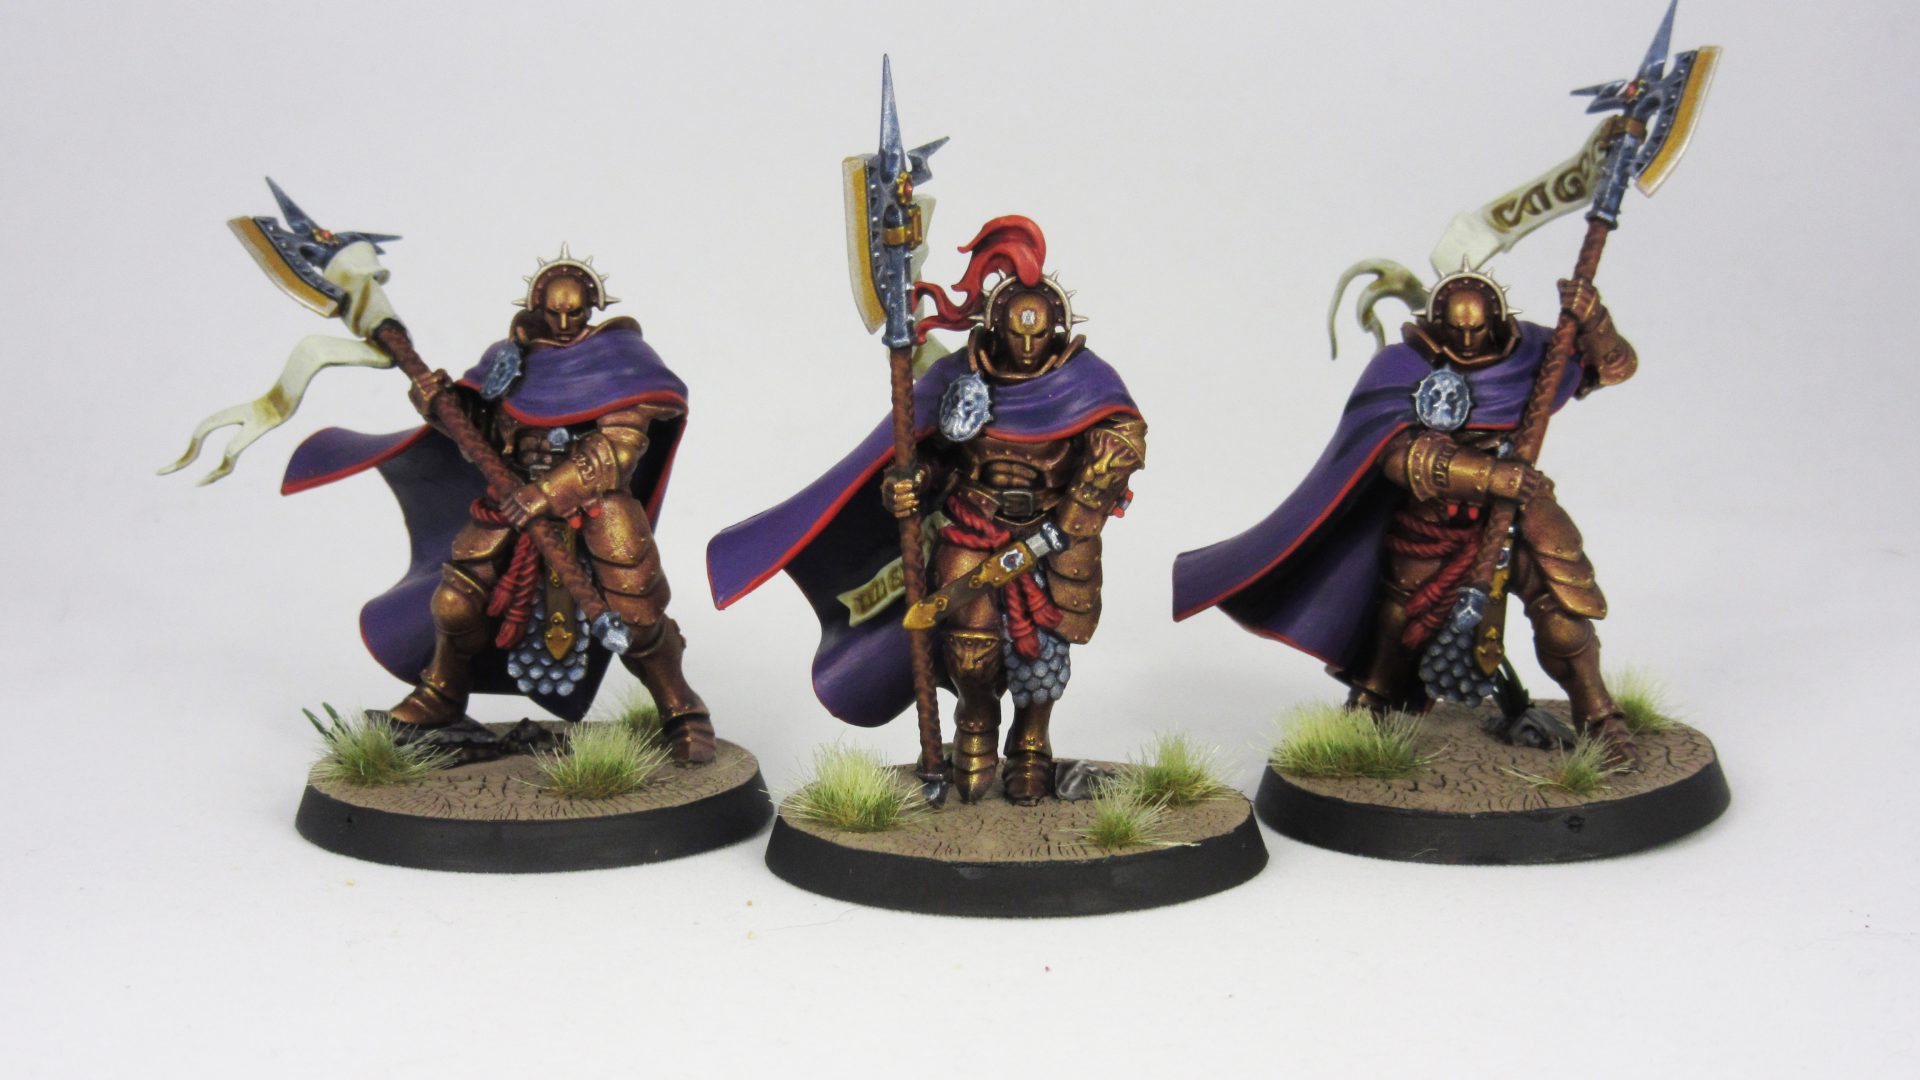
I’m planning to hit the rest of the Stormcast half of the box in much the same scheme, so stay tuned.
Have any questions or feedback? Drop us a note in the comments below or email us at contact@goonhammer.com.




You must be logged in to post a comment.