This article is part of a larger series on how to paint Necrons. To return to that series, click here.

When I was setting out to paint Necrons for the How to Paint Everything update, I knew I wanted to do a faction with blue energy/blades, and I wanted to do warriors with more of a ceramic look to show off an alternative to the “silver tide” we normally see for Necrons. This aren’t quite Thokt, but they’re pretty close, and this is how I’d paint them.
I started by priming this Necron Warrior with Leadbelcher. You could do another color, but I like having the metal underparts covered from the jump.
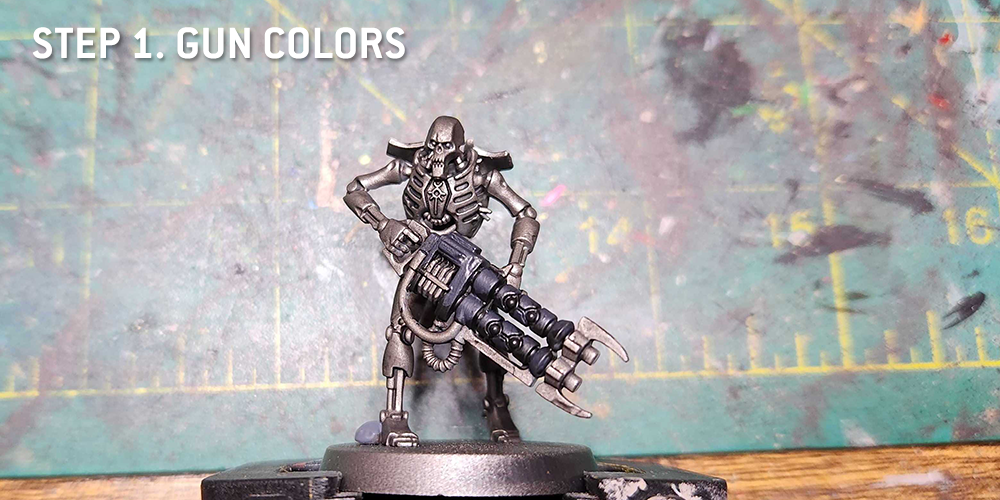
Step 1. The Gun
I started by painting the gun. This was a basecoat of Black Legion Contrast paint, though Abaddon Black would also work. Then I hit it with a highlight layer of Corvus Black on top of that.
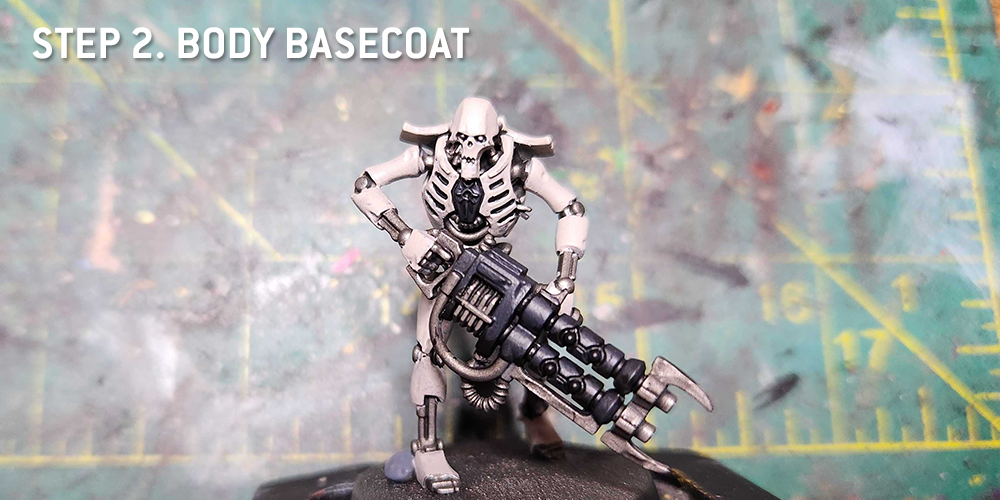
Step 2. Body Basecoat
Next up is the body. I hit the raised sections with Rakarth Flesh, which is kind of a dark bone/pale flesh color. It’s also got more of a yellowish tint to it, which will work well with the blue color I’m using later. I also hit the chest emblem with Corvus Black at this point.
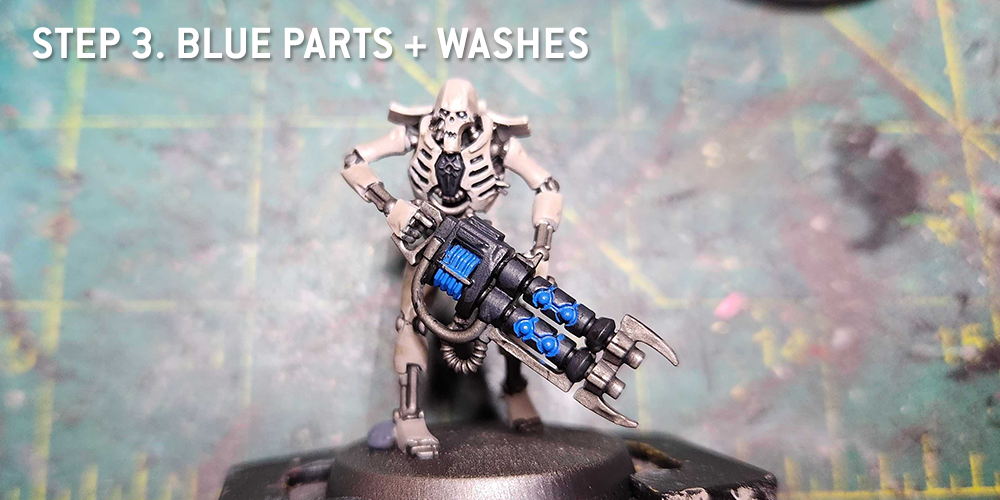
Step 3. Blue Parts and Washes
Next up it’s time to wash this bad boy. I wash the metal parts with Nuln Oil and wash the Rakarth parts with a mix of Rakarth Flesh and Agrax Earthshade. Agrax alone is a bit too extreme here, so I’m working in layers and mixing it with Rakarth to get a more gradual gradient.
This is also where I hit the orbs, rods, cables, and coils on the model. I did a base layer of Caledor Sky. It’s a bright blue and I’m going to work that up later.
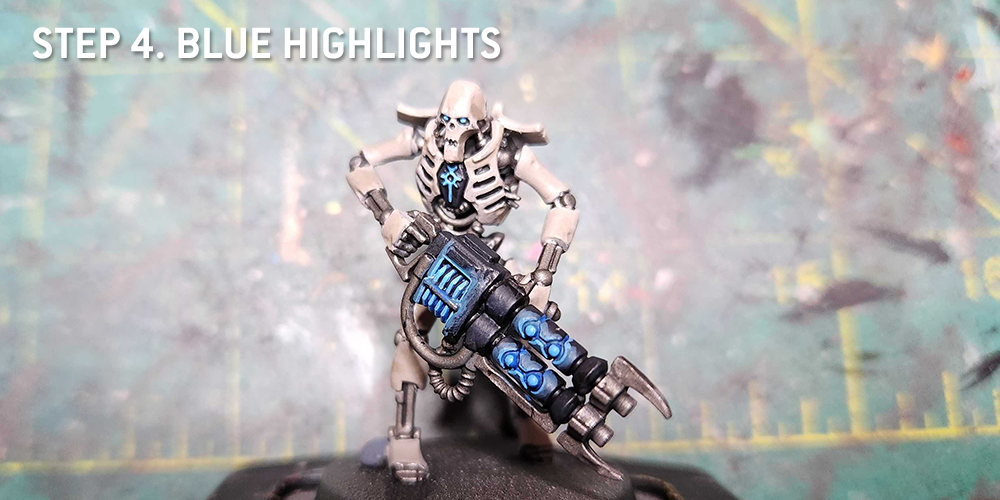
Step 4. Blue Highlights
Time to highlight the blue parts. I hit those parts with Lothern Blue, though you could also use Baharroth Blue here as well if you wanted a lighter/greener shade. I also do a bit of OSL work here, mixing the Lothern Blue with Corvus Black and doing a couple layers near the glowing parts of the gun. I follow that up with some edge highlights of pure Lothern. I also hit the eyes with Lothern Blue.
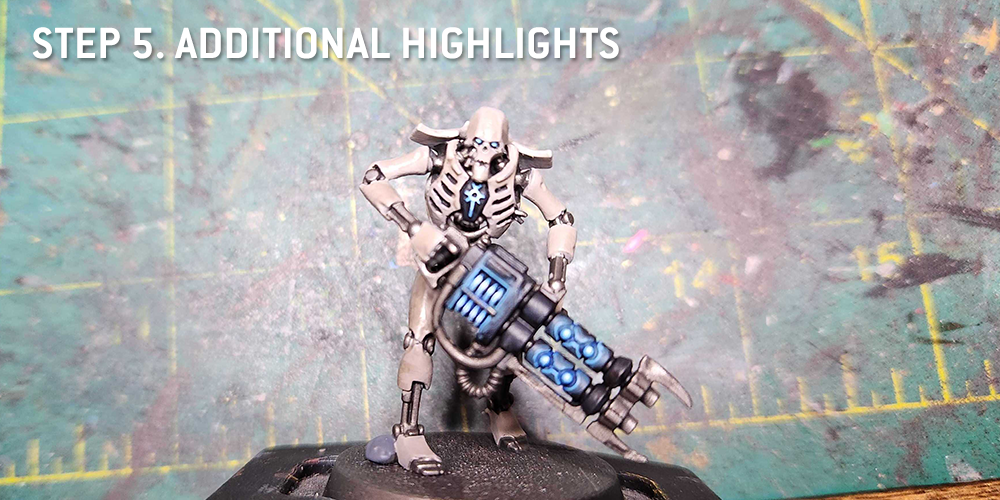
Step 5. Second layer of highlights
Time for a second layer of highlights on the blue to really make those spots pop. For this I use Reaper Ghost white, potentially mixed with a tiny dot of Lothern blue to add a bit more bluish hue to it. This goes on the eyes, chest symbol, coils, and the center of the orbs.
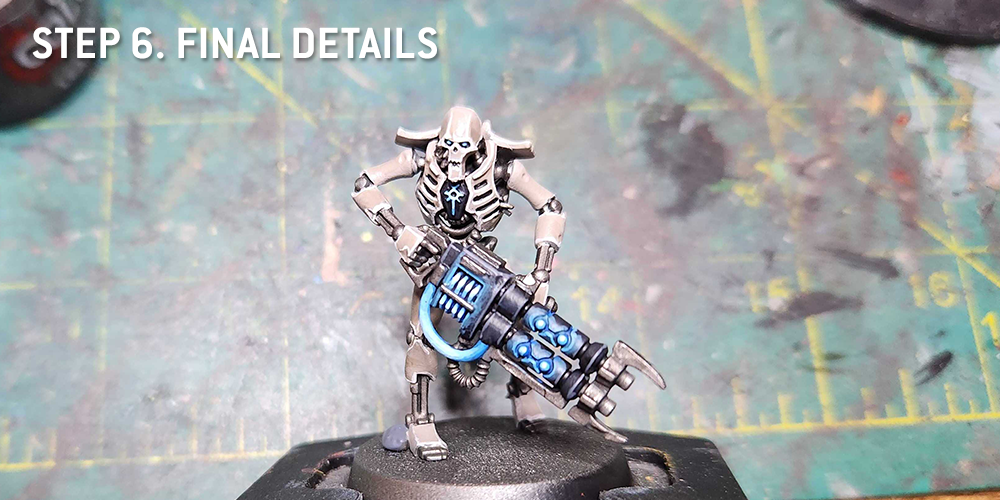
Step 6. Final Details
Time for the final details. This is mostly edge highlighting the ceramic parts of the model, where I’m using Reaper Polished Bone (Citadel Wraithbone also works), and doing some highlights with a mix of polished bone and rakarth Flesh. I come back and do the tubing on the gun, starting with Caledor Sky and working up to Reaper Ghost White. And I do some additional edge highlighting, using Mechanicus Standard Grey on the black parts of the gun and Runefang Steel on the metal parts.
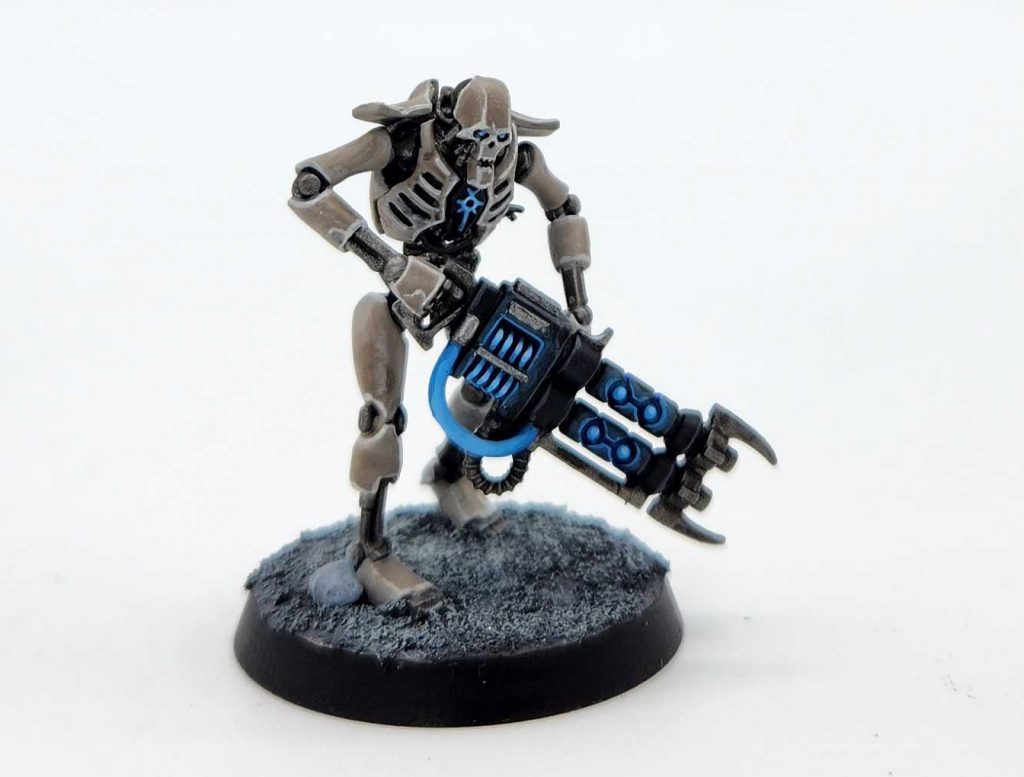
And that’s it. This guy was my favorite to paint of the Necrons I painted for this project, and if I had to do it again, I’d probably go with this scheme over the red-and-bone Novokh scheme I painted, as I just think it looks super slick.
This article is part of a larger series on how to paint Necrons. To return to that series, click here.
