
G’day Goonhammer readers! Coming up in July is the biggest Kings of War tournament in our area, ConVic 2023! A two-day, six game event, it’s the Australian equivalent of an American grand tournament (we never call them that for whatever reason). It’s a big deal, with interstate travelers, loads of prize support and a slick Player Pack. Last year we performed well enough, with Urr winning a respectable four games and Cytoplasm two. Both of us want to do better, and so we chronicle here our plans and preparations for ConVic 2023.
The Contenders
Urr’s Revitalised Varangur
My List
3 x Night Raider Regiments - All Bows
2 x Fallen Hordes - Blessing of the Gods, Brew of Strength
2 x Snow Fox Regiments
1 x Cavern Dweller
1 x Magus - Lightning Bolt, Bane Chant, Crown of the Wizard King
1 x Magnilde
1 x Kruufnir
1 x Lord on Chimera - Pipes of Terror
This will be a pretty familiar list to those who read our CanCon articles, and really any battle report I’ve written in the last year or so. I keep the same core of the Fallen Hordes, Snow Foxes and Unique Heroes, but there’s been a few changes as point levels are different, and my Night Raider models have arrived. The Night Raiders replace the old Magus Conclaves, and while they are more expensive, they shoot, score, and fight reasonably well, so they have a lot more flexibility, though they lack the piercing.
I threw in the Lord on Chimera as a replacement for the Lord on Frostfang. With the slightly higher points limit, there’s a bit more room to add a more expensive single model. I’m not convinced it’s the way to go, but it’s worth a try out. This goes for the Cavern Dweller too. It is quite a block of nerve to chew through, especially with Lifeleech 3, and can put out a bit of pain itself.
For preparation for a tournament, it is worth rereading your army list/rules every once in a while to see what you might have missed. I had missed the Magus’s reroll rules. I knew it was good for Lightning Bolt, but never really thought of the application for Bane Chant, and it does make the Conjurer’s Staff less necessary, so it was time to try the Crown of the Wizard King to help get Bane Chant a bit further away. While the probability of Bane Chant going off is lower, being able to get it to the Fallen at a greater distance would be valuable.
Cytoplasm’s Exhumed Undead
Sometime last year I came into possession of a large amount of Kings of War models. Amidst the ruin that was this pile of someone’s long neglected miniatures was a decent Mantic Undead army. Over the last six months I have been gradually restoring it all, unit by unit. Repainting, and then multibasing to add that final touch (and also convenience!).
3 x Zombies Regiments
1 x Skeleton Spearmen Regiment
1 x Wraiths Troop
1 x Wights Horde
2 x Revenant Cavalry Troops
1 x Soul Reaver Cavalry Regiment - Sir Jesse’s Boots of Striding
1 x Revenant King - Surge (5), Undead Horse
1 x Necromancer - Heal (3), Bane Chant (2), Inspiring Talisman
1 x Lykanis - Trickster’s Wand
1 x Vampire on Undead Dragon - Lightning Bolt (4), Staying Stone
The regiments of Zombies are the most perfect of unlocking units; cheap and fearless they can chaff up the enemy, or be left on an objective. They either stick around, or they’re dead (for reals). Very simple but very satisfying.
The Skeleton Spearmen regiment was included not just because I ran out of Mantic Zombies (because I did), but also because a fearless, Defense 4+, Phalanx unit is surprisingly useful. They’ll hold up the enemy for a turn longer than Zombies, and they are 3 Unit Strength.
The true chaff of the Undead are the Revenant Cavalry and the Wraiths. Both are relatively cheap, fast and fearless (which are very important for chaff), and both are resilient enough that shooting them off isn’t easy. A disproportionate amount of resources are always required to remove them, and taking advantage of this are the hammer units of the army.
The hammers of the Undead are some of the nastiest in Pannithor. They are, in order of outright lethality, Wights, Soul Reaver Cavalry and Werewolves. Obviously Wights are considered the best, but variety is the spice of life. Werewolves are definitely the weakest of the hammers, but their flexibility should hopefully come in handy. Either way, point these at the enemy, Bane Chant them if needed, and watch the opponent’s army crumble.
Keeping this whole army together are key support units. Revenant Kings act as a source of Inspiring and Surge (5). Lykanis with Hex (2) from the Trickster’s Wand is just for fun, the scowling of an Empire of Dust player brings me joy. The Necromancer is the final source of Inspiring, but went for Heal (3) to keep units going, and Bane Chant (2), because there’s always a combat you need to ensure goes well.
Originally I wanted Soul Reaver Infantry in this list, but unfortunately their shipping from the UK was not as speedy as I had hoped. Instead a Vampire on Undead Dragon makes an appearance! One of the better dragons among all the armies, Lifeleech (2) is quite invaluable.
Tested in Battle
Practice games are all well and good, but true list testing requires the pressure only a tournament can provide. Three games in a single day against competitive lists is the best barometer before heading into a full two-day grand tournament. Lucky for us, just such an event was on in May, and we got to test our early army builds.
Varangian Raids
Game 1 – Mitch’s Empire of Dust – Invade
2 x Skeleton Spearmen Regiment
1 x Revenant Horde - Brew of Strength
2 x Enslaved Guardians Horde - Jesse’s Boots of Striding
1 x Enslaved Guardians Archer Horde
2 x Revenant Cavalry Troop
1 x Ahmunite Pharaoh - Wings of Honeymaze
1 x Idol of Shobik
1 x Soul Snare
1x Monolith
So this is a pretty standard Empire of Dust list. It’s got all the good stuff you usually see. It’s mostly Defense 5+, but there are a few good targets for the Night Raider’ shooting, mainly that Revenant Horde. The Soul Snare is always a pain, as is the Idol of Shobik. Magnilde can handle the Snare, and I’m just going to try to avoid Shobik until I can kill everything around it and get some form of combo or flank/rear charge, with the Lord on Chimera being ideal for that.
I deploy the slower part of the army centrally, while I go for a fast right flank, consisting of both the Fallen and the Chimera. Mitch goes completely on my left, with just some Skeletons to slow me down more centrally.
The plan is to use my speed and crush that right flank then push in behind and take out those expensive units. This is mostly what happened.
Mitch slowly advances each turn while I zoom up with my good stuff, holding little back. By turn three the game is a bloody mess. I’ve broken through the right flank, having killed the Skeletons, the Guardian Archers, and the Pharaoh only survives thanks to a double one.
On my left however, it is the opposite. Mitch manages 8/8 rolls of 4+ from his surge from the Monolith onto the Revenants catapulting them forward!
I spent quite a while trying to decide what to do with that. I can get Snow Foxes, Kruufnir and two Night Raiders regiments into that unit. It needs to be a lucky roll to get them, but I decided to go for it. I do not get them. This lets the Revenants, Shobik and some Guardians push up into combat and cross the invade line, with the Soul Snare and Monolith behind. While some bad rolls from Mitch keep that flank alive for a turn, that’s all they last. But it is enough.
While Mitch has a lot more unit strength over the line, I’m in a very threatening position behind him. Mitch does his best with reforms, but there’s a Chimera facing down his lines, and he can’t save everyone. The Chimera gets a flank into the last unit of Guardians, and takes them out. It then gets killed by the Revenant Horde and Shobik. The (injured) Revenants get taken out by Magnilde and a Fallen unit, while the Cavern Dweller takes the flank into Shobik, and rolls hot, popping him in a go!
Mitch has timed out at this point, and I am very low on the clock myself. Thinking that the game is over, I get ready to start scoring, when Mitch reminds me that it was only turn 5. I’ve got about two mins to try to cement the win. The Cavern Dweller runs back across the line, as does one unit of Fallen. The second Fallen goes into the Monolith, and gets him too! Magnilde (I call her Maggies) goes into the Soul Snare, but I run out of time, so that combat remains unresolved.
This ends up being a solid win to me. Not by as much as one might expect. While most of my expensive units lived, I don’t actually have that much Unit Strength left. There were a few mistakes that stand out, with the big one being the Quad Charge. I shouldn’t have taken the quad charge, just blocked with the Foxes and shot the Rev Infantry for at least one more turn. Shobik getting popped in a turn was also something that seems unlikely, but it was nice, I don’t think you can count on a Cavern Dweller doing that every game! All-in-all, a good, fun game that was close until the end.
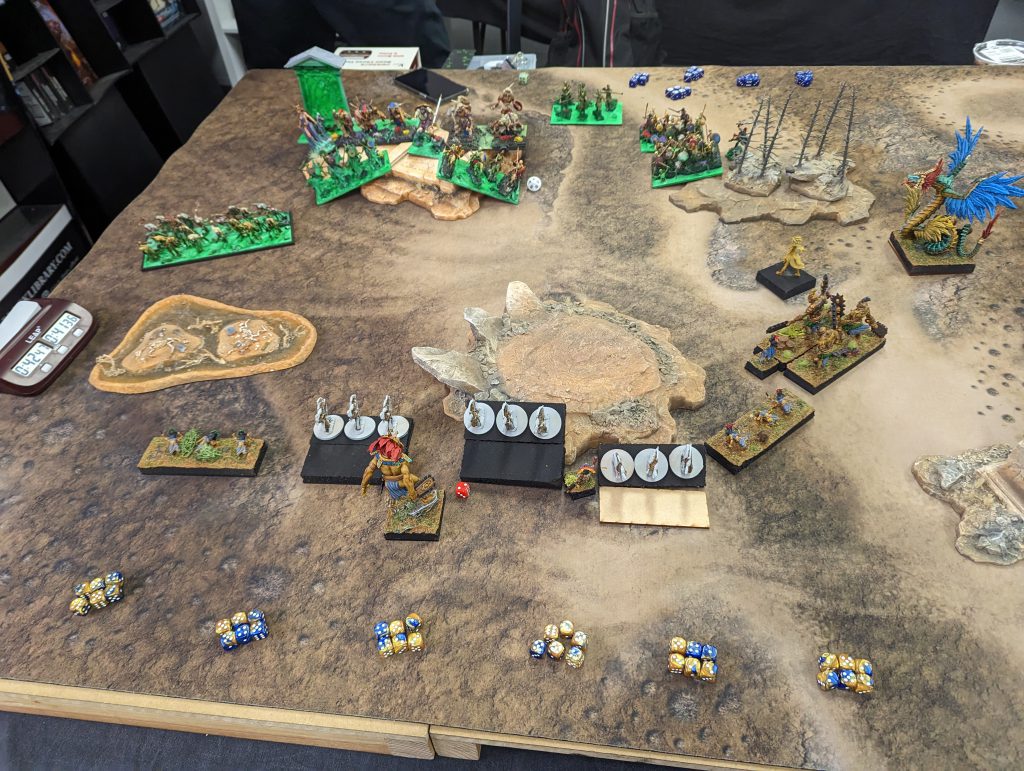
Game 2 – Rex’s Salamanders – Plunder
1 x Ancients Regiment
2 x Salamander Ceremonial Guard Horde
2 x Scorchwing Regiments
1 x Rhinosaur Cavalry Horde
1 x Ember Sprites Regiment
1 x Lekelidon
2 x Phoenix
1 x Herald - Lute of Insatiable Darkness
1 x Ghekkotah Skylord on Scorchwing - Trickster’s Wand
1 x Rakawas, The Pale Rider
This is a tough list. It’s got big blocks of high defense infantry backed up by a lot of heal. A bit of shooting to keep you honest, a hefty bit of punch and it’s fast too. Annoyingly, it’s faster than me, and while the Scorchwing Regiments will struggle to kill most of my units in one go, they will hold them up long enough for the other unit to get into a flank, or to get the Rhinosaur Cavalry or Rakawas in charge range.
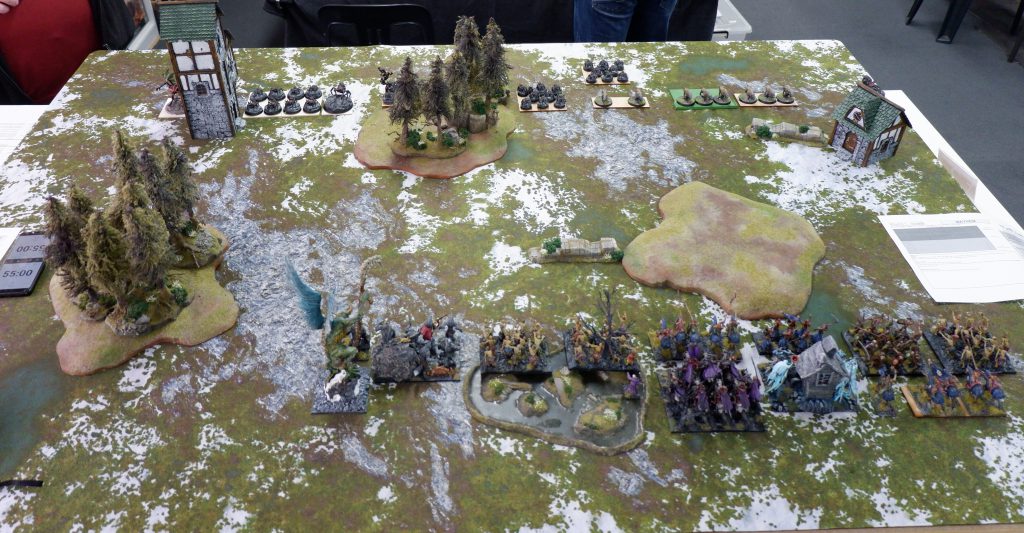
I don’t have a great plan here, except grab the two point token on my left and run away with it, then try to fight in the middle. This is also mostly what happens. On the left it’s a standoff for most of the game. I’m not trying to fight the Ceremonial Guard in a forest, and I just want to let my Snow Foxes run off with the token. Unfortunately, they get shot off by the Skylord, somewhere around turn three. After some jigging around with the Chimera and Night Raiders, I get it back on the Dragon close to the end of the game.
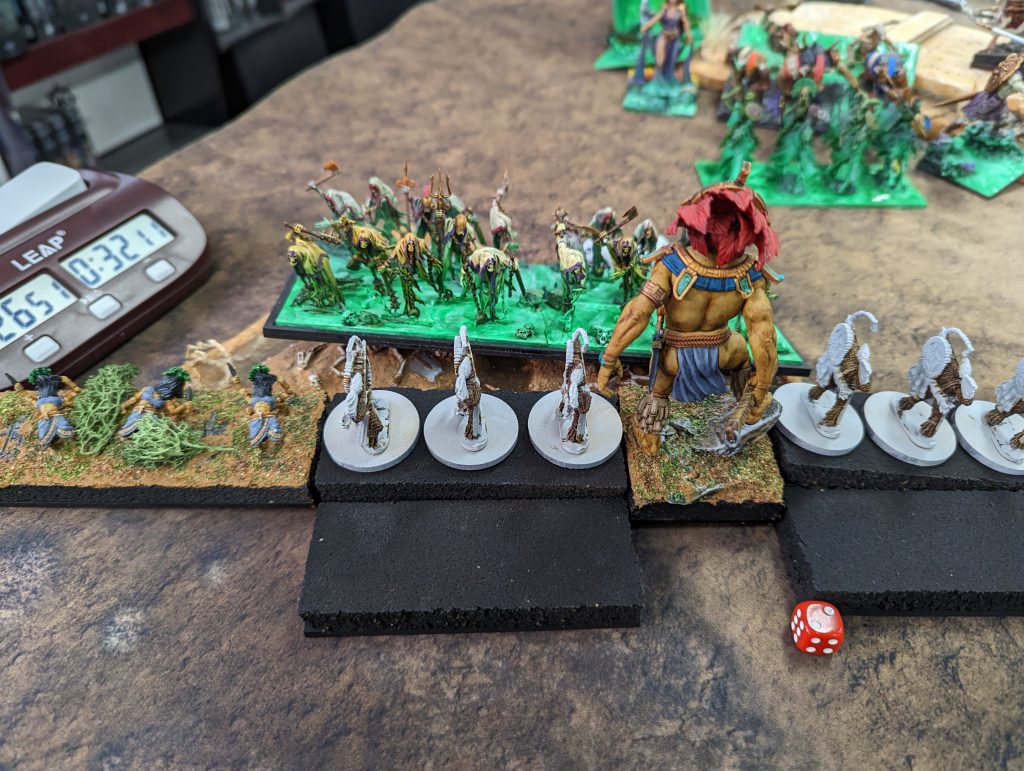
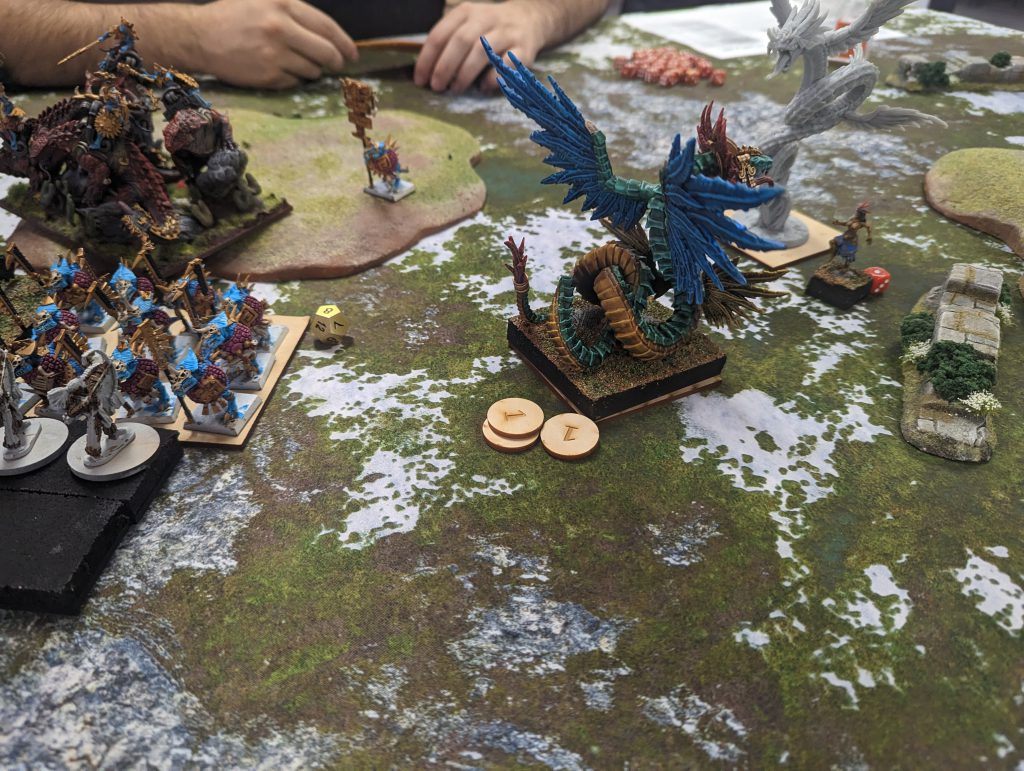
On my right, Rex’s Salamanders zoom up, threatening my flanks from turn two on. I did a bit of bad deployment there, so I can’t really counter. I end up just throwing away things to try to get some value. I put Magnilde, Fallen and Cavern Dweller into the Ceremonial Guard on that flank. Bane Chant does fail me here, and I don’t kill the Horde. In return I lose the Fallen, but it will take that right flank a while to get into the middle now, buying me some time.
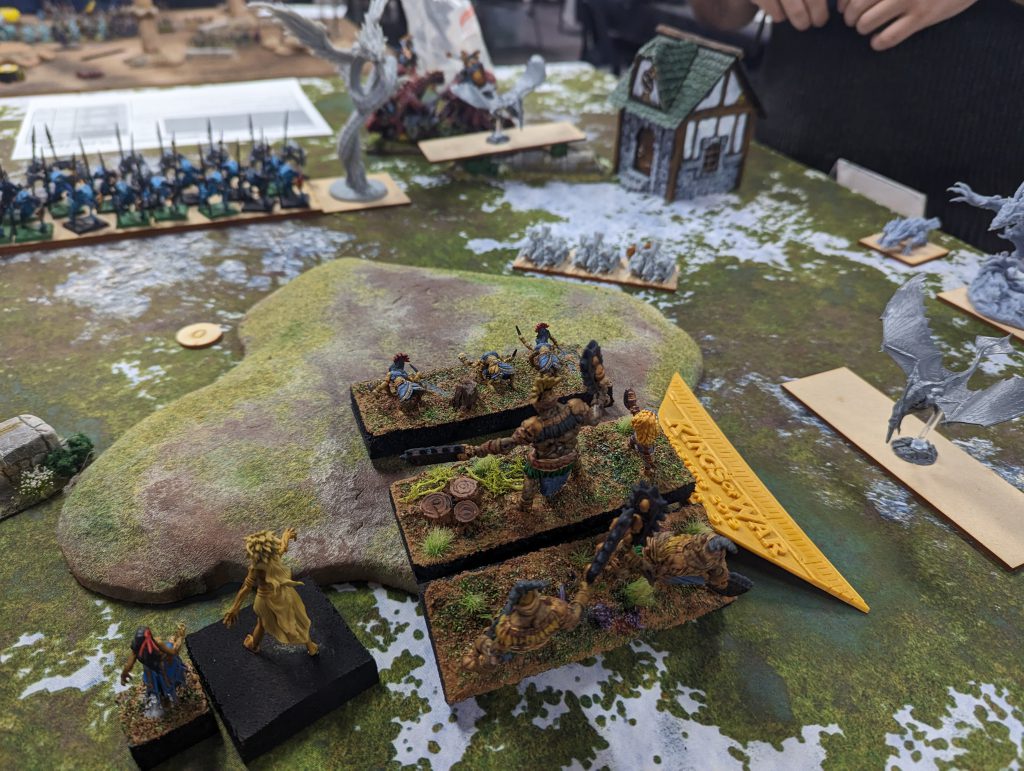
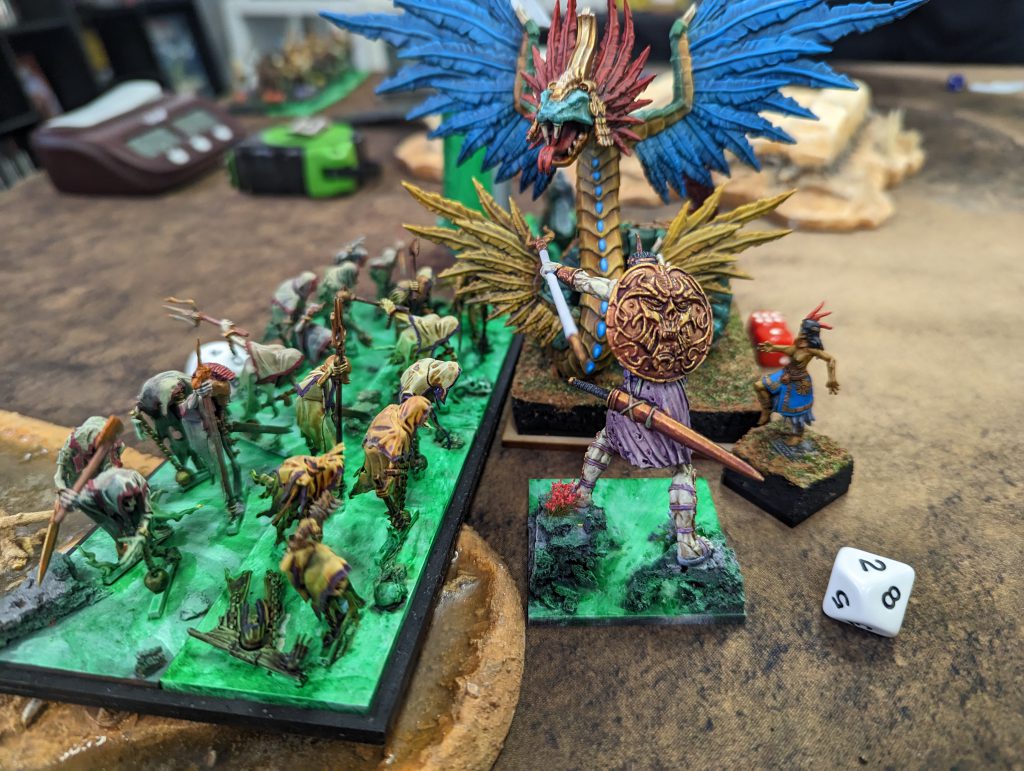
Magnilde and the Night Raiders are taking out the Scorchwings, and the Cavern Dweller gets a Phoenix. But the Cavern Dweller is killed in return, again holding up the Ceremonial Guard and Rhinosaur Cavalry.
Eventually, I get the remaining Fallen and Kruufnir into the left Guard Horde, do a bunch of damage but double one’s it. Fortunately, I don’t suffer much for it, with the Fallen surviving and Kruufnir just wavered. It is removed next turn. Magnilde has kept chipping wounds on the other Ceremonial Guard Horde, and the remaining Phoenix has been a poor healer.
![]()
![]()
By the end of Rex’s 6, I’m holding one two point token and one one pointer, while Rex has 4 points worth, with 3 on the remaining, heavily damaged Ceremonial Guard. I get to put the Chimera and Magnilde in, and, for the game, I get the kill.
Another great game, coming down to the last combat. A win here was not something I expected going in, and definitely thought was out of reach after just two turns. I definitely made some mistakes, like committing on the right so early. I realise as I am writing this, that the Chimera couldn’t have flown over the Ancients while holding a token. Luckily, this doesn’t change the outcome of the game. The token could have been dropped and picked up by the Fallen, with no issue. Magnilde continues to do the work, and Crown of the Wizard King has been proving itself to me. This time it let me get the Bane Chant off despite being Hexed. I liked the Chimera too, I just wish Icy Breath was a 12” rather than 10.
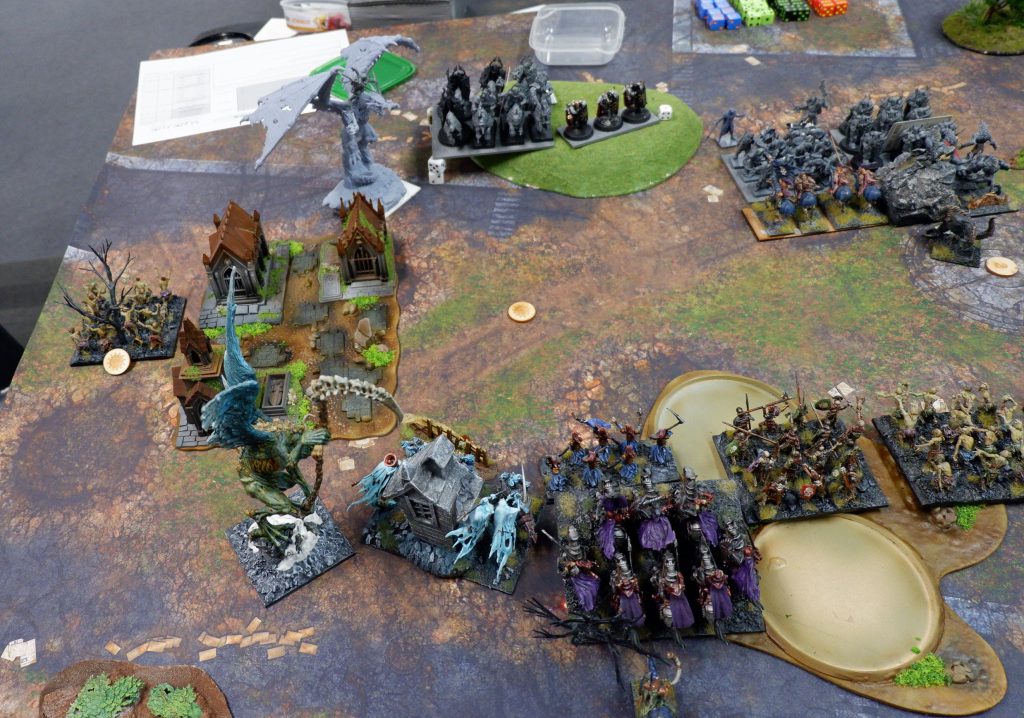
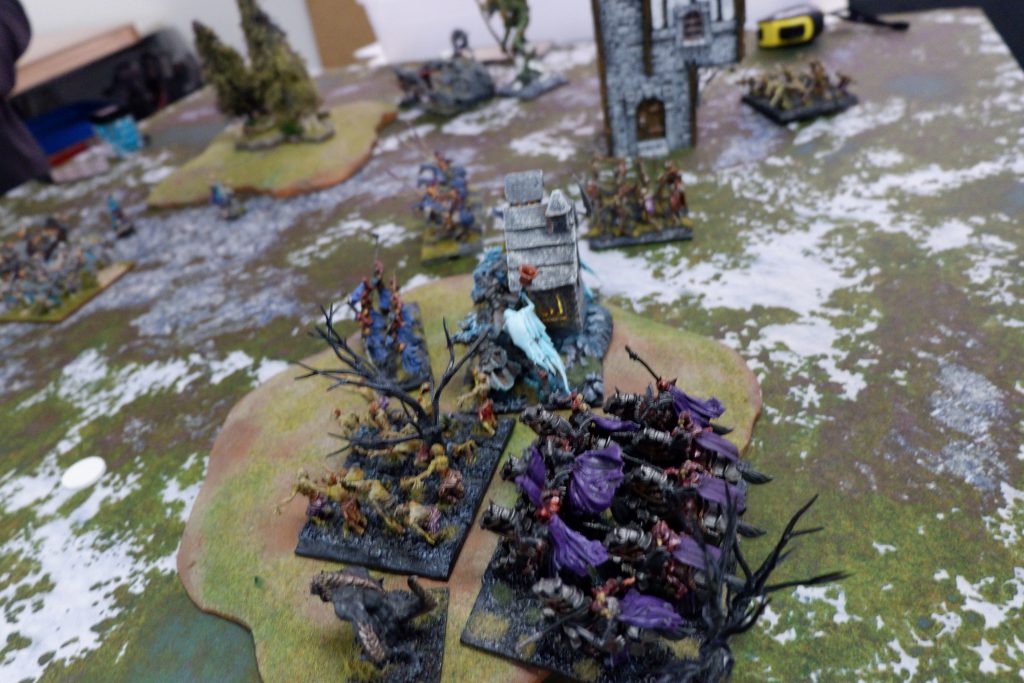
Game 3 – Andrew’s Undead
1 x Skeleton Warriors Horde
2 x Wraith Troops
1 x Soul Reaver Infantry Regiment - Healing Brew
2 x Zombie Troll Hordes
2 x Wights Horde
2 x Revenant Cavalry Troop
1 x Necromancer - Surge, Bane Chant, Inspiring Talisman
1 x Cursed Pharaoh - Wings of Honeymaze
1 x Zuinok Iceblood
Ok, third and final game, and we’re playing on the top table. Can I pull out a win? I’ve never beaten Andrew and I’ve also never beaten Undead. Unfortunately, this is not the day to change that, though it is a close one.
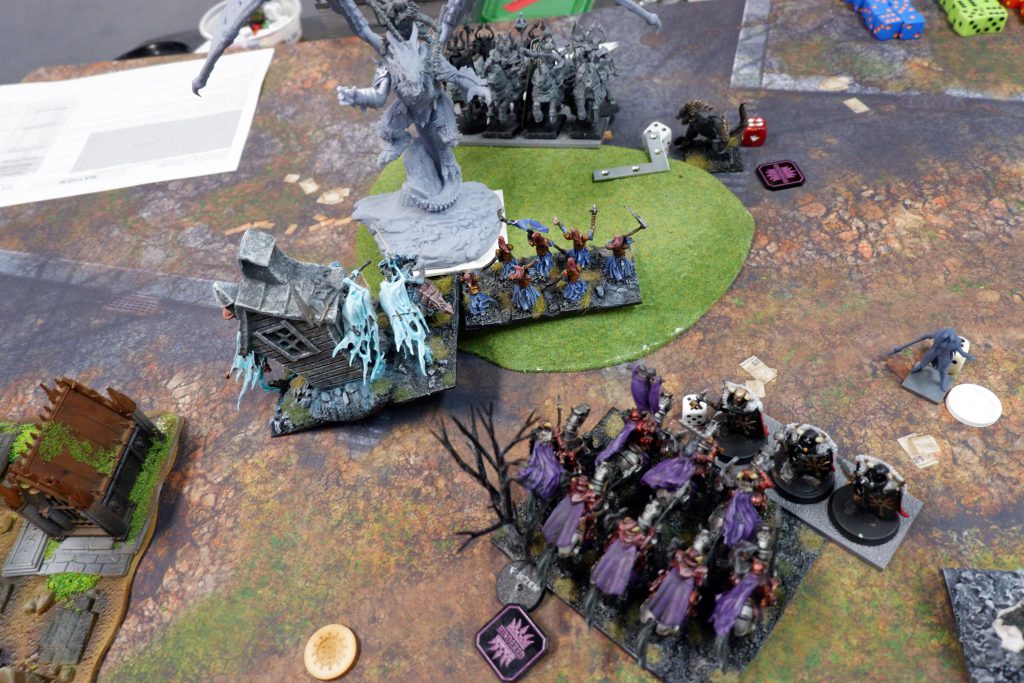
After we each spend the first turns moving up, I spot a juicy charge into one unit of Wights with the Lord on Chimera and Fallen, and the Wights go down. But that’s about the only bit of luck for most of the game. The reform lets the other Wights into the flank of the Chimera for a waver, while the Fallen get taken off by Zombie trolls in one.
The other Fallen try to stop the next Wights, but can’t manage it, and are also taken off. On the other side of the board, the shooting from the Night Raiders is doing nothing, and the Cavern Dweller can’t roll enough attacks to kill the Wraiths. We do do some damage, killing the Soul Reavers after a lucky waver, and Chimera bounces around taking out some Revenant Cavalry before running off to claim an objective for me. In the end, it is one to three, to Andrew.
We talked about it afterwards, but I really have to think about where I should put tokens before I start just putting them anywhere. Though we don’t know which side we start on in this scenario, backlining as many of the objectives as I could would make Andrew have to leave his melee units at the back of the table, while the Night Raiders are perfectly happy to do that. Also, if I had just burnt all the tokens I could, when I could, it could have been a draw, but I didn’t think my Fallen flank would collapse that quickly, but dice happen sometimes.
So overall, I end up third, which I’m still pretty happy about. The list performed well. I like the Crown of the Wizard King change, and the Night Raiders proved very useful. Also, I’m deep into painting them, so they’ll be coming regardless. The Cavern Dweller, not so much. While killing the Idol of Shobik was excellent, it was very lucky. The struggle to kill Wraiths is probably more in line with what would actually happen, so I think there will be some playing around to find a replacement. The Lord on Chimera, is also still a toss up. It performed well across the weekend, but it is a lot of points and not much unit strength, and my list is very elite already, so some more practice is needed.
All-in-all, a great day with some cracker games.
Undead Incursions
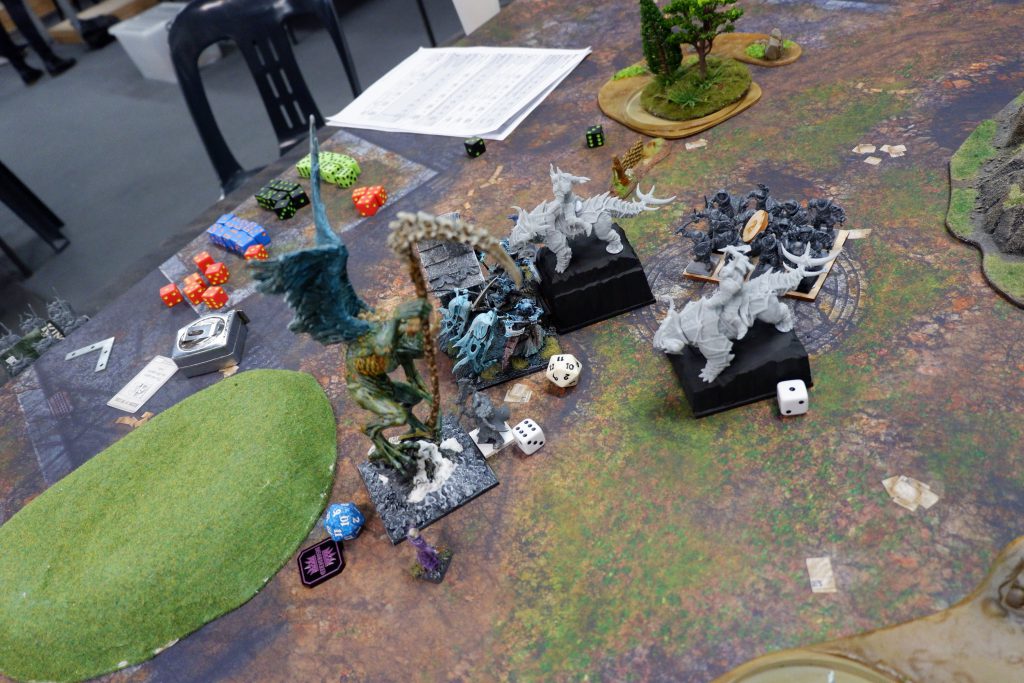
Round 1 – Adam’s Nightstalkers
My Undead first faced an army of Nightstalkers that was ultra-elite.
1 x Reapers Regiment - Screamshard, Brew of Sharpness
1 x Reapers Regiment - Screamshard, Brew of Strength
1 x Reapers Regiment - Screamshard, Sir Jesse’s Boots of Striding
1 x Fiends Horde - Blessing of the Gods
2 x Terrors
1 x Void Lurker - Diadem of Dragonkind

–Formation “Beaststalker Doomhounds”--
1 x Shadowhounds Troop - The Scrying Gem
1 x Shadowhounds Troop - Blood of the Old King
1 x Shadowhounds Troop - Pipes of Terror
The scenario was Invade, perhaps the simplest of all scenarios. I had the advantage by having much more unit strength across my army, so I just needed to move my army across and I’ll win. That and not lose too many units along the way.
I deployed the bulk of my army on the right half of the battlefield. Wraiths and Revenant Cavalry in front of my more precious units. I wasn’t particularly intimidated by the Shadowhounds, but didn’t want to let them get a charge off on whatever they wanted. Towards the left I put my Werewolves, Lykanis and Vampire on Dragon; this was for threat projection across the whole battlefield, but really it’s always my mistake (more on that later).
My opponent put down all three troops of Shadowhounds and two regiments of Reapers opposite my main force, spreading out the remaining Reapers, Fiends and Void Lurker towards the left. One Terror was on his right-most flank, looking to sneak down the edge and cause some anxiety. The other Terror was right in the middle.
Over the first two turns I pushed up to the center line. My Werewolves and Lykanis couldn’t help themselves and charged some Reapers (I really couldn’t stop myself), and they bounced, doing a very paltry eight damage. Unsurprisingly the Werewolves perished soon after.
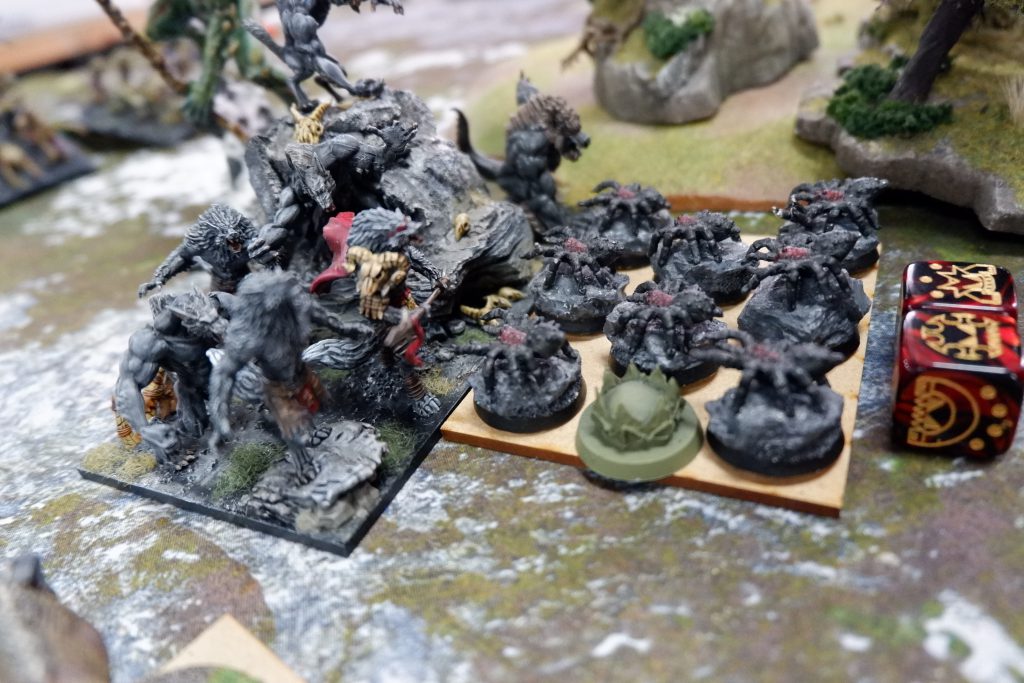
The Shadowhounds went into my lines, taking out some chaff, but getting destroyed themselves by my Wights and Soul Reaver Cavalry. By the time the Fiends and Void Lurker arrived, I was ready. They had been delayed by all the Zombies in the way, Zombies that managed to overwhelm a regiment of Reapers! The last of the Reaper regiments died to a multicharge from my Vampire of Dragon and Lykanis.
In the end I won. The Fiends were on my side of the battlefield, but my Wights, Skeleton Spearmen, Vampire on Undead Dragon and Lykanis were on his.
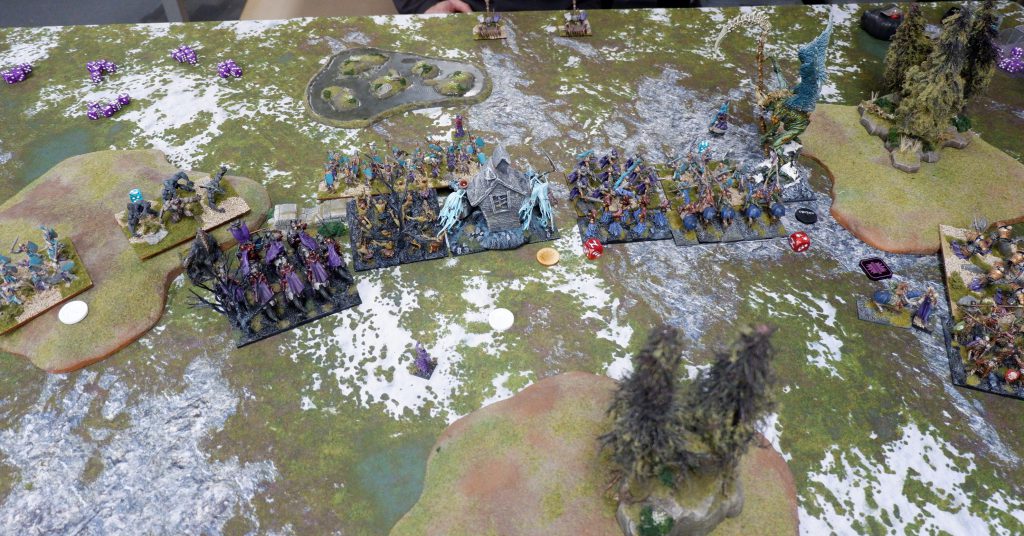
Round 2 – Scott’s Undead
When the Undead rise in rankings, they inevitably find more Undead. In this case, I was faced with a mighty army of Soul Reavers and Revenant Kings.
2 x Ghouls Regiment
1 x Soul Reavers Troop
1 x Soul Reavers Regiment - Staying Stone
1 x Soul Reavers Regiment - Chalice of Wrath
1 x Soul Reaver Cavalry - Blessing of the Gods
1 x Vampire Lord - Blood Rage, Blade of Slashing
1 x Necromancer - Boots of Levitation, Knowledgeable, Heal (3), Veil of Shadows (3), Scorched Earth (3)
1 x Revenant on Undead Great Burrowing Wyrm - Inspiring Talisman
1 x Revenant on Undead Great Burrowing Wyrm
1 x Revenant King on Undead Great Flying Wyrm - Brew of Sharpness
This army list is like a one-two punch, but with five extra punches.
Plunder was the scenario this time around; five loot tokens along the centerline, with two worth two victory points rather than one. I picked the very middle, and my opponent the far right. This was my first mistake. It was a mistake because I then deployed in the middle, with my Wights and Soul Reaver Cavalry towards the left, keeping a massive piece of blocking terrain on my left flank. This meant I was already quite far away from that crucial middle two-point token, and completely out of reach of the far right token. Not smart.
My opponent deployed nearly everything opposite my own forces, but stretched out much further. Two Revenant Kings on Wyrms were towards the right flank, and one regiment each of Soul Reavers and Ghouls on the far right flank.
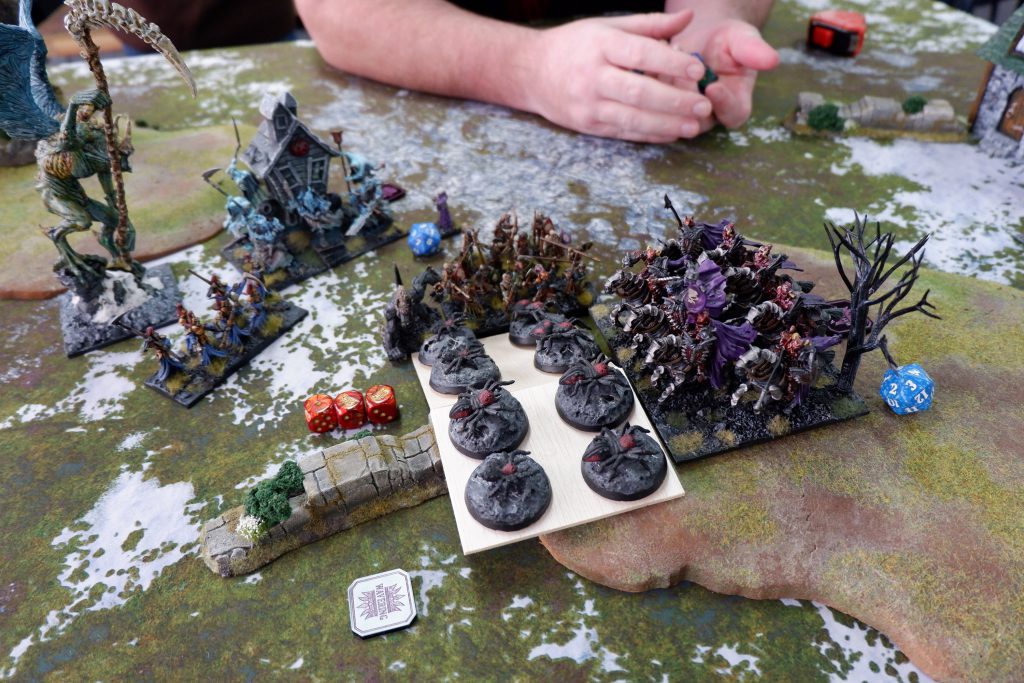
For the first three turns we shuffled around charge ranges, testing but not charging. My Zombies managed to grab a token on the far left completely unchallenged, hidden by the terrain. My Werewolves again charged into something, this time Soul Reavers. Despite having Bane Chant and being un-hindered they still failed to rout the vampires, and promptly died in the countercharge. Why do I do this to myself??
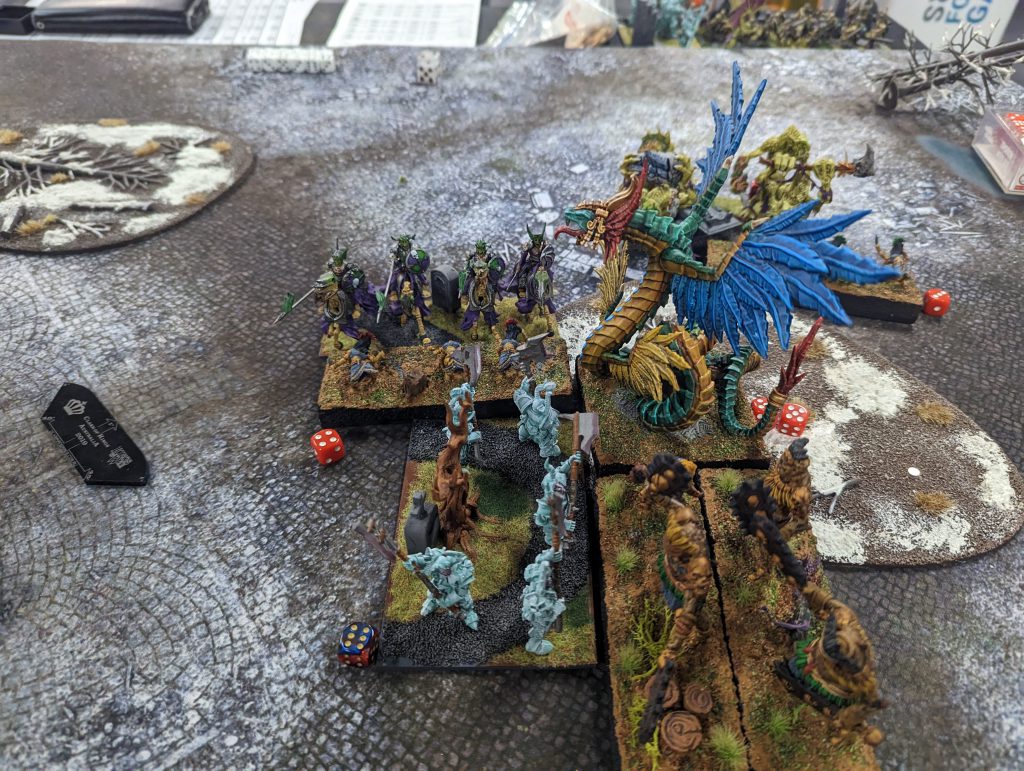
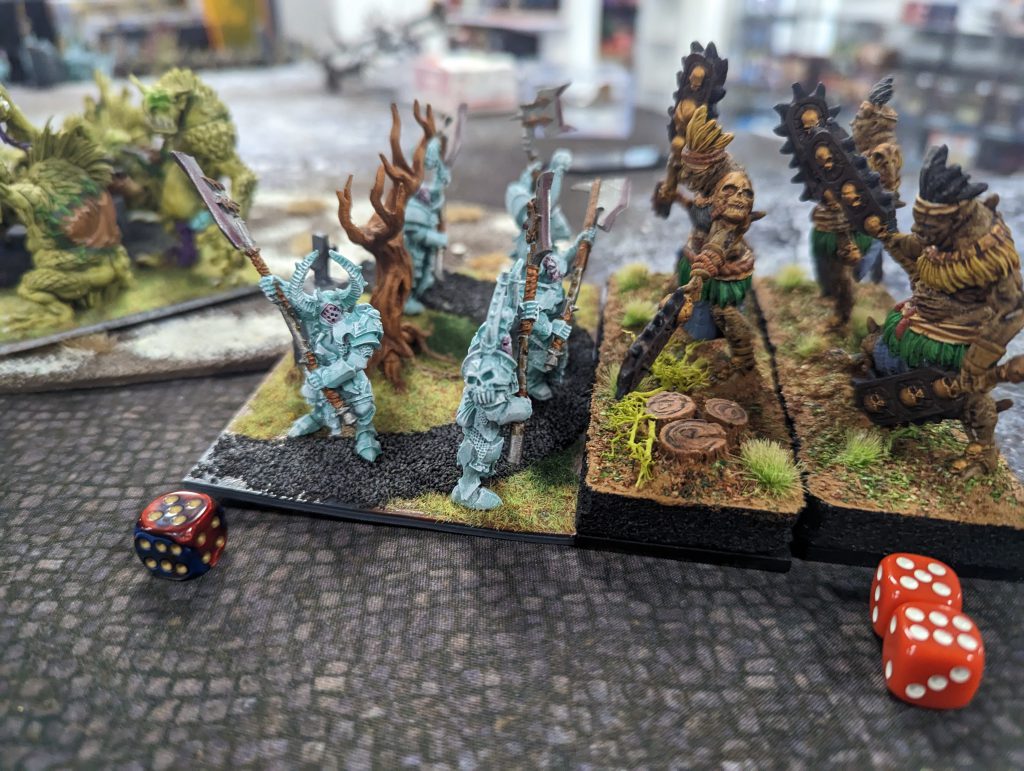
In Turn Four was when all hell broke loose. My opponent had just killed some Zombies with his Soul Reavers, leaving them in the middle of the battlefield. He missed the view my Undead Dragon had of the flank of these Soul Reavers, and so in that turn my Undead Dragon flank charged a regiment of Soul Reavers, my Wights and Wraiths charged his Flying Wyrm and my Soul Reaver Cavalry charged his troop of Soul Reaver infantry (it’s all getting quite confusing).
By the end of Turn Five half his army was dead (properly this time), but the Burrowing Wyrms and last regiment of Soul Reavers were closing in. All the while, the regiment of Ghouls on the far right were collecting tokens, a two point and a one point. I had managed to get two one point tokens, and it was only then that I realized that even though I was slaying vampires, the scenario was getting away from me.
The killing continued right until the end, but I could not get that middle two point token to secure the win. I should have put that two point token elsewhere, alas I left it out of easy reach. Lesson learned.
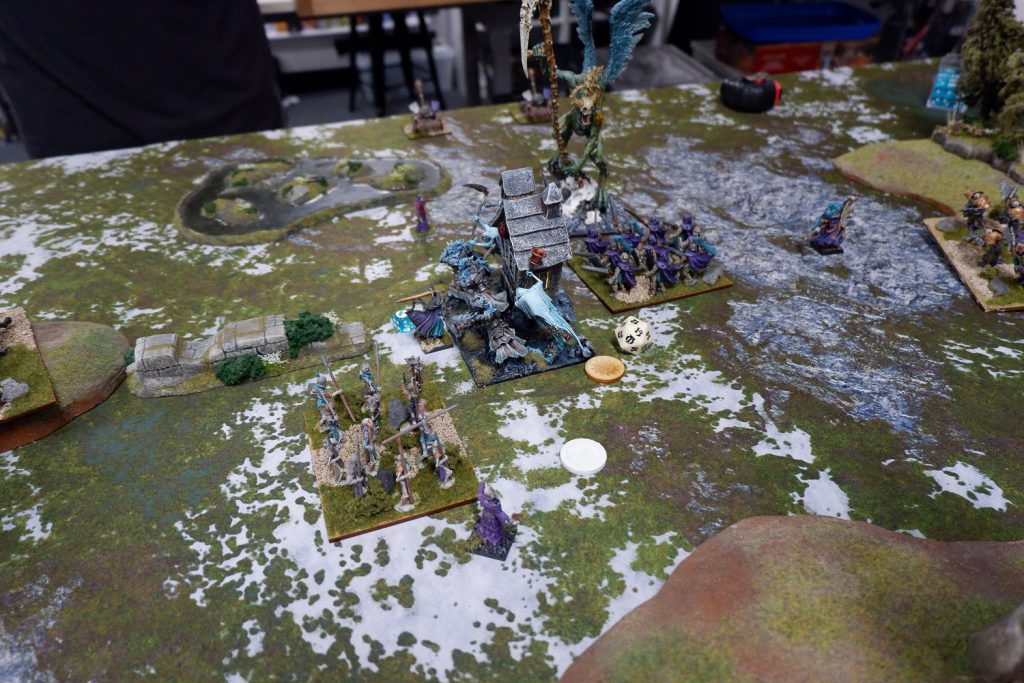
Round 3 – Dave’s Undead
With a win and a loss, I was hoping to have a nice peaceful game to round out the event, so I matched another Undead player with another variant of army (seriously, Undead have so many builds!).
2 x Revenant Regiments
1 x Revenant Horde - Hammer of Measured Force
1 x Soul Reaver Infantry Regiment
1 x Werewolves Horde - Helm of the Drunken Ram
1 x Wights Horde - Brew of Sharpness
1 x Revenant Cavalry Troop
2 x Balefire Catapults
1 x Vampire Lord - Blood Rage, Gnome-Glass Shield
1 x Revenant King - Lute of Insatiable Darkness
1 x Necromancer - Surge (6), Weakness (2), Inspiring Talisman
1 x Cursed Pharaoh - Wings of Honeymaze
The list is somewhat similar to my own, but taking everything a bit more elite where I took something cheap. I took Zombies, Dave took Revenants. I have a Vampire on Dragon, he has Sharpness Wights. I considered myself intimidated.
The scenario was Salt the Earth, lots of objectives (7), and they can be burned by the controlling player at the end of their turn. We took turns placing 3 objectives each. My very cunning plan is to place each objective at a distant corner of the battlefield, behind terrain if possible. It’s cunning because I then leave Zombies there all game to score them, but really it’s completely obvious. Thankfully my opponent was in no mood to go after them.
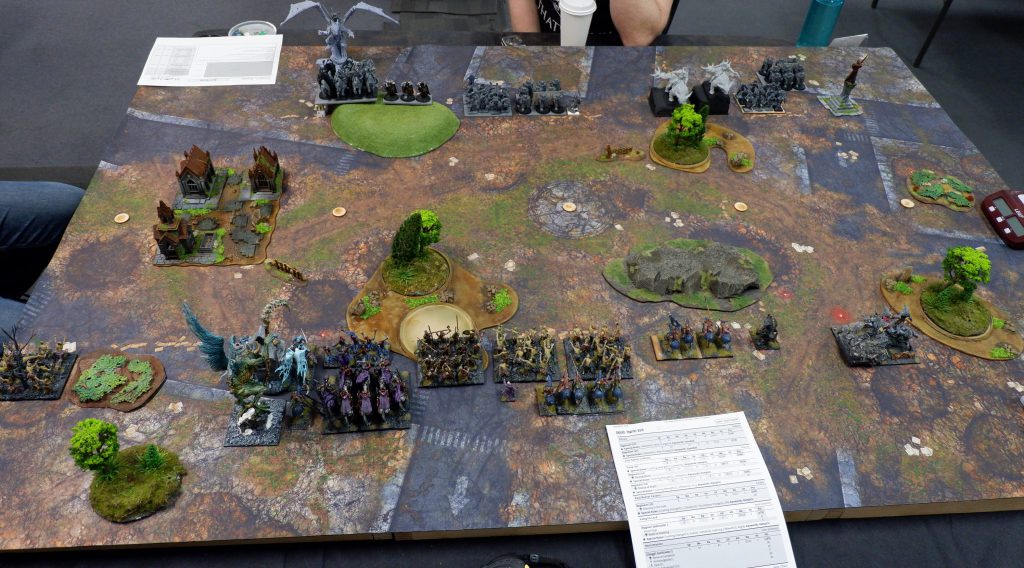
After deploying my obvious Zombies, the rest of the army straddled the right side of the battlefield. Chaff at the front (Zombies, Revenant Cavalry and Wraiths), hitters at the back (Soul Reaver Cavalry and Wights). This time I decided to be sneaky with the Dragon and Werewolves, and went for the far right flank, taking advantage of the massive forest and blocking terrain to shield them from the Balefire Catapults.
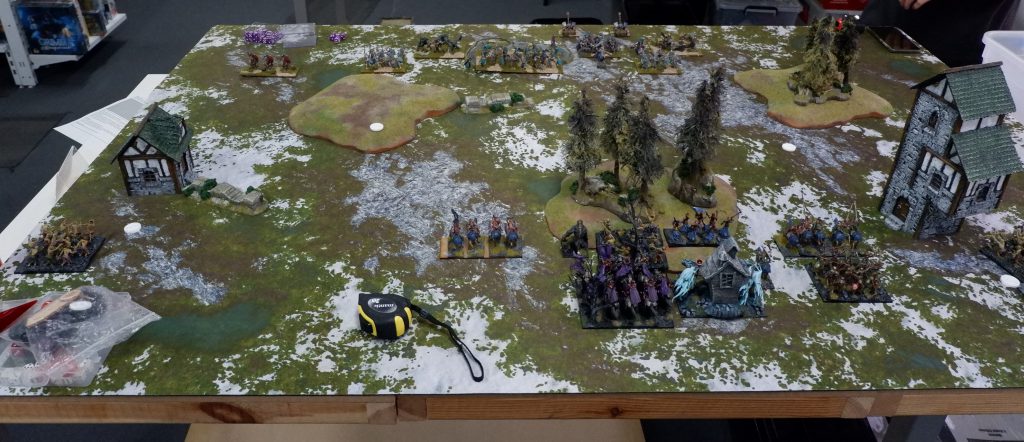
In contrast, my opponent spread his army across the middle, between the aforementioned massive forest and the distant blocking terrain on the left. The horde of Revenants right in the middle, with the regiments of Revenants spread out on both sides. Between these, but somewhat behind, were the Werewolves, Soul Reaver Infantry and Wights. Behind that, the dreaded Catapults.
The first turn we moved closer to each other, Balefire Catapults doing a bit of damage to my Revenant Cavalry. Not wanting to lose my chaff to shooting, I charged off the Revenant Cavalry and the Wraiths in Turn Two. One cavalry troop into Dave’s Werewolves, the others into the Revenants along with the Wraiths. The Werewolves and Dragon were coming around the side, but it was tricky to get line of sight through the forest without inviting Dave’s Sharpness Wights in for a charge.
This is exactly what happened.
Sharpness Wights got into the Werewolves, who died a terrible death. I then charge everything in response, sending the Soul Reaver Cavalry and Wights in to help out my chaff. My dragon in the flank of Revenants helps make short work of them. Unfortunately, the Soul Reaver Cavalry somehow bounced off the Vampire Lord, and were promptly flanked to oblivion. The Wights on the other hand ground the horde of Revenants to dust and managed to stay alive the entire game.
My saving grace was that I had burnt a token in Turn 2. So by this point there were only two tokens Dave was controlling, and no means to reach any more. I myself had the trusty Zombies on my own two tokens.
At this point my brain was struggling, a new army at a tournament was draining. My Dragon still lived, and I saw a path to reach the nearest, yet distant token. What I somehow managed to completely avoid seeing was that Dave’s Soul Reaver Infantry were clearly in range to charge, and he did so. Sorry Dragon.
Still, it was a draw. I just gave Dave a few more kill points than I should!
ConVic 2023
For those in Australia, we cannot speak highly enough of the ConVic event. Held in Springvale, Melbourne there’s no problem parking, with food and drinks at the event and nearby. It looks like there will be 30 attendees, with the number expected to climb in the last few weeks. It’s held on the 15th and 16th of July, so come along and be sure to say hi to us (the chumps in the Goonhammer shirts).
Have any questions or feedback? Drop us a note in the comments below or email us at contact@goonhammer.com.
