Ya gotta spend money to make money, Scummers! Previously, we talked about creating a gang designed to evolve with a campaign. If you’re able to get some games in these days, you may be sitting on a pile of Credits just beggin’ to be spent. This week is all about growth, and how to best prioritize your spending to turn your rookie gang into a crew of shrewd killers!
Campaigns in Necromunda, be they Dominion, Law & Misrule or Uprising, all add an additional ‘campaign layer’ to your strategy. Fighting to gain control of Territories and Rackets, and picking lucrative Scenarios that you can possibly win will hopefully ensure a steady flow of Credits to your gang.
Credit income is the engine that grows your Gang Rating and is the absolute priority of all your strategic choices in Necromunda. Get rich, or die trying!
Table of Contents
Have a Plan!
Some players may choose to take life as it comes, and decide on upgrades as they play and earn credits, while others prefer to plan in advance with an idea of what they’d like their gang to grow into over the course of the campaign. If you fall into the latter category (and if you’re reading this, chances are you do), it’s advisable to have some idea of what you’ll need, a sort of shopping list for the future.
Once you’ve created your gang, it is important to decide what types of additional fighters (and how many) should be eventually added to the Gang Roster, who’ll need an upgraded weapon, what other sorts of other equipment and Hangers-On are key. Building yourself a progression blueprint allows you to choose how to spend your credits instantly after a battle, which can be invaluable on days when you’re able to play multiple games in a single session.
It also enables you to get a head start on modelling and painting, since you can’t exactly decide to add three fighters and a Brute to your gang following a lucrative Ghast Harvest scenario if you don’t have any models available! Many players find this approach easier, as we are naturally focused on the next step and always looking to increase our Gang Rating.
Everyone we’ve ever played Necromunda with enjoys the feeling of buffing up their gang and spending credits!
Expanding Your Roster
Once you have enough, make sure they’re tough!
Last week we discussed the importance of starting out with as many fighters as possible at Gang Creation, and the same reasoning applies to campaign development. If you took fewer than ten fighters at founding or had fighters injured during games, you’ll need to keep the numbers up to be able to field full crews.
Ideally, you want enough fighters to fill the max crew size in a Scenario, even if you have a few fighters in Recovery. In our experience, the magic number tends to be around twelve fighters before diminishing returns kicks in.
Yes, if you have a bad game and get, say, six fighters in Recovery, you would still not have enough to play a Scenario with a Crew size of ten, not with any realistic hope of success. In these situations, the hope is for a Scenario with a smaller Crew size, where your gang would not be at a disadvantage.
You want to bring a full size Crew – being outnumbered is a big tactical disadvantage due to the alternating activation system in Necromunda. Every fighter past your first ten is essentially a reserve choice, rather than a starting player!
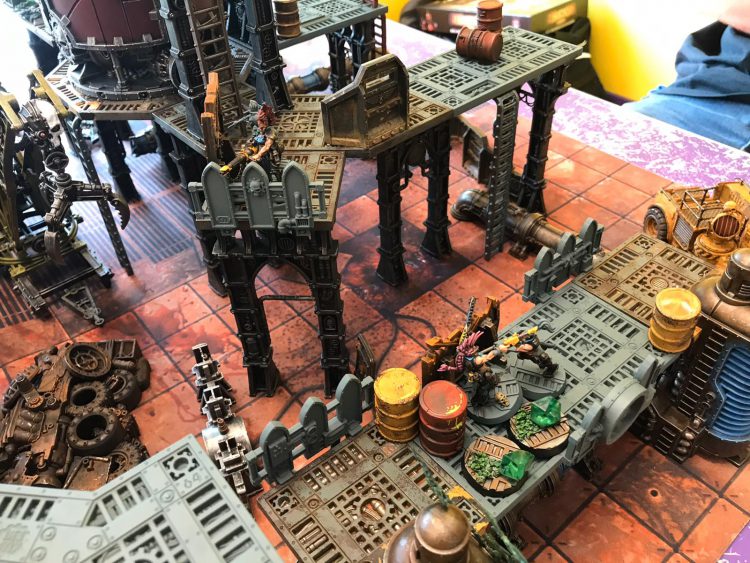
The statline of most Houses’ Champions makes them a great value, and the fighters best able to make use of powerful weapons. Recruiting additional Champions is nearly always a top use of credits. Different Campaign types (and groups) impose different restrictions on how many Champions you can recruit, but you always want the maximum number allowable.
For an early power boost, gangs can also consider taking a Brute (if you don’t fancy your House specific option, Ambots are also extremely good). Most of these choices can skew games against opponents in the early-Campaign stages, who may not have weaponry suited to taking your Brute out.
Be aware that against new players, it could spoil their enjoyment of the games, as they are not prepared (either in their Gang’s abilities or their understanding of the rules) to face a heavyweight model. Assuming that balance isn’t an issue for your group, Brutes are often worth it in our opinion. If you are lucky enough to get one in a small-numbers randomly selected Crew, it is often a decisive advantage.
As always, for anything dealing with credits in Necromunda, there is opportunity cost – you could get a very well kitted-out Champion for the cost of a Brute, with more customizable options. Brutes are not invulnerable and only stay good value if you keep them away from Meltaguns and similar high Damage weapons!
Tools of the Trade
Weapon Stats
Having a decent weapon is the most important aspect of all equipment in Necromunda. The one thing you need your fighters to do is damage their enemies, and their primary weapon is the mechanism by which they do this. There is little point in a fighter with top skills, heavy armor, and special wargear if he can’t put opposing models Out of Action. Alongside maintaining your Gang’s numbers, arming each of your fighters with at least one seriously punchy weapon is the absolute priority for spending credits in Necromunda Campaigns.
What should you look for in a weapon? Accuracy Bonuses (usually at short range) are always nice, but you can live without them on a Fighter with sufficient Weapon or Ballistic Skill, and improve them using weapon attachments.
Strength is important and can become vital as gangs move through the campaign since Toughness is a popular choice for fighters’ Advances. A Strength 4 weapon is an important upgrade over one that’s Strength 3, as it improves your to-wound roll against almost all fighters.
Facing Toughness 5 fighters can be uncommon early on (maybe think about the effect if you expect to play much against Goliaths gene-forged to Toughness 5, or Slave Ogryns). Strength 5 and 6 become more relevant and useful against Goliaths and against higher level gangs where many fighters may have advanced into Toughness 4 and higher across the board.
- A Note from Dan: I almost always take Toughness as my first upgrade on champions and leaders. Toughness is the key stat in Necromunda for preventing damage. In early campaigns, there will be a ton of Strength 3 shots flying around as people tend to stick to Lasguns and Autoguns for gangers. A Toughness 4 leader or champ can easily tank Strength 3 shooting, especially if they have a pinning-mitigation skill like Nerves of Steel or Spring Up. Strength 5, therefore, is an important inflection point for weapons. Champs and leaders should be gunning for Strength 5 early and often!
Armor Piercing begins a campaign as a luxury and turns into a necessity, as your opponents start stacking armor and other protective gear on their models with their own credits. This is an effective strategy, and is something you absolutely need to be prepared for as the campaign progresses!
Damage is perhaps the most important weapon stat. It allows you to roll multiple Injury dice, which vastly increases your chance to Seriously Injure enemies or take them OoA. For ranged weapons, high Damage is sometimes the only realistic chance to put enemies OoA; in melee, it reduces the awful possibility of Flesh Wounding your opponent and having to suffer Reaction Attacks.
Since leaders, champions and other models with two or more Wounds are so key to gangs, you’ll need to be packing a multi-Damage weapon to take them out in one shot. If my 2 Wound fighter is confronted by an enemy with a single Damage shooting weapon, I feel confident and in control of the situation, for that Round at least – I know my fighter can’t immediately go down or out. For melee weapons, this drawback can be minimized if they are in the hands of a fighter with multiple Attacks. Even then, I heavily prefer weapons with Damage 2 (or higher).
- If your group allows fighters to discard and swap weapons freely, there is a sort of hand-me-down system available to gangs. A champion might start the campaign with a Boltgun, and after a few games upgrade to a Heavy Bolter, passing the Boltgun on to a ganger. Planning ahead for this sort of thing can be helpful – Necromunda does not allow selling items back to the Trading Post for full value, so it’s more efficient to make use of hand-me-downs, or weapons you have replaced can be kept as back-up weapons.
If your group doesn’t allow weapon swapping, you will find yourself with a lot of back-up weapons on fighters and will ultimately be restricted in how many changes and upgrades you can make. If your group is a stickler for the Rules as Written, it is a system that absolutely requires planning ahead.
Special Ammo and Upgrades
One interesting tool players have at their disposal is special ammunition. Special ammo can turn a humble Autogun or Lasgun into a force to be reckoned with – a far cry from where they started! There is no real specific advice we can give on special ammo. Some of it is extremely good, and some of it is mostly useless. What we can do is take a look at weapons and give our thoughts on what are good upgrades for each.
Before we begin, sometimes it’s just a better idea to get a newer and better weapon. Think about what your fighter is meant to be doing and judge if a flat upgrade might be the best thing for them.
Stub Guns
The humble Stub Gun can get quite a big step up with the use of Dum-Dum Bullets. Dum Dums upgrade a Stub Gun to Strength 4 at the cost of a little bit of range. In most cases, this is absolutely worth it. Stub Guns can also get Warp Rounds, and if you’re an Outlaw, absolutely, 100% target these things for purchase. Just about everything can get Warp Rounds, and they’re worth it almost every time. The target must take an Insanity check on a hit. This is completely wild. If you are into illegal weapons, throw Warp Rounds on every Stub Gun you have, and watch your friends vanish into the immaterium.
Auto Weapons
Auto weapons are Autoguns and -Pistols. They’re known for relatively poor accuracy, middling reliability, and lots of potential hits. That being said, they’re one of the most customizable sets of weapons platforms in the game! As stated before, Warp Rounds are always a good choice, but they do lose the Rapid Fire trait. In most occurrences, that’s okay, as the Insanity condition is pretty much always worth it. Phosphor Rounds are excellent if your campaign meta skews heavily towards the Pitch Black tactics card or you know a guy with a Delaque gang. Static Rounds are rarely worth it, and the same goes for Rad Rounds. The Autopistol also gets access to Manstopper and Fragmentation Rounds. Frags are mostly useless, but the Manstopper Rounds are definitely worth it.
Bolt Weapons
Bolt weapons are already good. In most cases, they’re good enough that their regular firing mode doesn’t need any sort of upgrade. However, there are some really good upgrades available for bolt weapons! Gas Shells are interesting. If you’re dealing with a lot of multi-wound targets, it might be a good idea to bring a clip or two of Gas Shells to bypass their inbuilt protections. Shatter Shells are Frag Grenades shot out of a Bolter. They are extremely useful.
Finally, Gunk Bolts are hilarious. They are great if you end up playing a lot of melee gangs in your campaign, as they’ll slow their targets to a crawl, but where they really shine is when combined with Blaze. A gunked fighter catches on fire on a 2+ instead of a 4+, so if you’ve teched heavily into Flamers or Blunder-Poles, then Gunk Bolts are a no-brainer.
Las Weapons
There are two options for Las weapons. First, the Focusing Crystal will take a Las weapon from no AP to -2 AP, at the cost of becoming Unstable. In the late game, this may seem invaluable as armor proliferation runs wild. But it comes with a severe downside – Unstable is essentially a 1/12 chance of taking yourself OoA every time you fire, regardless of how tough or armored you are. Second, the Hotshot Pack, which is actually a weapon attachment because reasons. It increases the Lasgun’s strength to 4, which is really good, and also increases the gun’s AP to -1, which is also really good. Both upgrades reduce the gun’s ammo roll, but who cares?! Bobo’s Lasgun just got good, what does it matter if it runs out of ammo every now and again? Sheesh.
Shotguns
Shotguns have a ton of ammo types, and they’re almost all good. Instead of going through them one by one, just stay away from Plantbuster, Rad, and Phosphor Rounds. They all rock an awful 8” range and a functionally useless. Otherwise, you’re good! Go hog wild!
Combat Shotguns
Combat shotguns already rule. Hard. We’ve covered this. They really don’t need upgrades, but look at that! Firestorm Shells! Now your Combat Shotgun is a HEAVY FLAMER, except it’s not completely useless! Firestorm Shells are the number one reason to keep an eye out for special ammo at the Trading Post. Do not sleep on them.
Grenades
Be it from a launcher or thrown the old-fashioned way, just about every Grenade has its uses. Probably not Plantbusters, but everything else? Yes. Especially Smoke Grenades. We’ve covered Smokes before, but trust us when we say they’re worth it.

Weapon Attachments
Weapon attachments are a good way to increase your ranged fighters’ accuracy, as well as to allow a little bit of extra utility in situations. Once you’ve invested in a powerful gun, it’s worth doubling down on a fancy scope. We prioritize these after buying protective gear but before really considering back-up weapons or other wargear (except for Suspensors, which are an immediate purchase for any Unwieldy weapons).
The options in this category tend to come with restrictions: Infra Sights, the top-shelf scope, cannot be put on weapons with Rapid Fire, while Telescopic Sights, which work well enough for cheap if you have a good short-range to-hit bonus, can’t go on Heavy Weapons.
Scopes usually work by improving the Aim action, so they mostly reward your long-range shooters who are more likely to engage in multiple-Round exchanges of fire, and will more often be firing at enemies in cover. Fighters using ranged weapons at close quarters will be more likely to rely on flanking enemies and more often will need to Move instead of Aiming anyway.
For close-range shooters, the Las-Projector can increase short-range accuracy. All these weapon attachments are to some extent vanity items. We can’t say they are the best value unless they’re on the most powerful weapons, and even then it’s a lot of credits, perhaps for marginal gain. Certainly take your big guns and protective gear first, but they are fun!
- There are just several wargear items which are essentially weapon improvements. Master-Crafted Weapons are busted good (they may be changed to limit their benefit going forward, if House of Chains is any indication) and can be bought as an upgrade for existing weapons even if your group doesn’t allow weapon swapping. Certain other items, like Chem-Synths, are explicitly to improve Toxin weapons and can be considered to broadly fit in the same category as scopes – expensive, but very worth it if they help a fighter with their primary task.
The Back-Up Plan
A common question from new players is whether they should invest in secondary weapons, either in case of Ammo Roll failures or to add tactical flexibility. For weapons with difficult Ammo Rolls, it’s a reasonable investment!
Take a budget Basic Weapon to back up a Special or Heavy that may run dry, especially if the weapon is Scarce and can’t be reloaded in-game. Adding back-up weapons for flexibility is something we consider a low priority in our Gangs. We would consider it after you have given every single fighter their ‘final’ weapon, and after you have invested in protection and weapon attachments.
For us, flexibility comes from having different fighters in the gang who can cover different ranges and use different types of weapon. A close combat fighter is best off working towards close combat, and if he can’t charge in and fight immediately he’s better off repositioning for it rather than shooting some back-up weapon. Also, ammo checks are honestly pretty rare. Sure, they’ll jump up and bite you every now and then, but having the one good gun is more important than having a back-up stubbers.
Additionally, focusing your fighters on specific roles means you can concentrate their Advances on supporting their primary role. This is all personal preference and players should experiment to see what works best for them. I might consider back-up weapons on leaders and champions if they have suitable stats, and Grenades are always worth having as back-up weapons on a fighter who isn’t already toting a Template or Blast weapon.
Protection: Are You Carrying Any?
Old-school Necromunda was notably light on armor, only rarely appearing on most fighters, typically leaders, and was often expensive. In current Necromunda, most everyone gets something!
It will surprise a new player, but it is extremely cheap and easy to get a a fighter a 2+ save in Necromunda. Mesh Armor is 15 credits for a 5+ save (unless your Orlock and all your fighters have it for free), an Armored Undersuit is 25 credits for +1 save, and Ablative Overlay is 20 credits for a degrading +2 to save. That’s 45-60 credits for a fighter to pretty much ignore damage for the early rounds of the game. It’s so cheap and easy to get good saves, that you should prioritize armor for your champs and leaders immediately. Your heavy hitters can’t impact the battle if they’re already dead, so go ahead and get you some armor.
You can keep away from Carapace Armor or any of the other fancy armor. Ablative Overlays are so cheap that they kind of ruin the curve. A lot of Arbitrators, us included, feel that there must be something done to tone them down. Our recommendation is that they’re one-use only: they work for one game, and then they’re gone.
If that’s the case, then all the different armor sets start to look more attractive.

Other Equipment: Wargear
The great mass of Wargear aside from Grenades and protective gear is comparatively overpriced, I’m sorry to say. The cost of a powerful weapon or an armor upgrade just represents better value for credits than the more unusual wargear options. Much of the cool stuff is situational to the table/terrain (Drop Rigs) or to the weapon types your opponents use (Respirators and Web Solvent).
A lot of it you could buy and simply never use throughout a campaign. They simply cost too much compared to weapons and armor. I would treat most wargear (aside from direct upgrades to weapons or to protection) as vanity buys for after you’re 100% happy with your gang’s weaponry and personal protection. But as ever, there are exceptions.
Some equipment affects the campaign layer and those should be considered differently to kit which helps a single fighter. Uphive Raiments, which basically gives a leader or Champion the Fixer skill (D3x10 credits income per game) for 50 credits. Things like that are straight up investments – pay cash and get a chance to get more cash on the campaign layer later on.
Ammo Caches can help with your weapons running dry. While I’m not a big fan of them, it’s a potential way to mitigate the issue if it’s costing you games. Medicae Kits replicate a Savant skill which can seriously help Injured fighters recover in-game. Mobility items like Grapnel Launchers, while situational, can rescue a Hobbled fighter who’s been reduced to a 3” Movement stat and can be invaluable on the right table or Scenario.
Some pieces of equipment can introduce whole new mechanics to the game – Photo-goggles are the hard counter to Smoke Grenades; Falsehoods are terrifying and a bit more powerful than they need to be, falling into the Ablative Overlay trap of potentially becoming campaign-ruiners when doled out to fighters too liberally.
For Wargear as a whole; if it doesn’t hit the enemy, help you hit them or protect you from being hit, it’s a lower priority. A fighter with a 100-credits of weapon and armor will beat one with a similar value of other equipment. Buy these items if you have a particular situation in mind, after you’ve bought more universally useful stuff.
Putting It All Together
Genghis: Here’s the same Orlock gang we used as an example in the previous Gang Creation article. It’s the current state of the Gang Roster (Gang Rating 2620) just six or seven games into a Law & Misrule Campaign, before COVID cut us short.
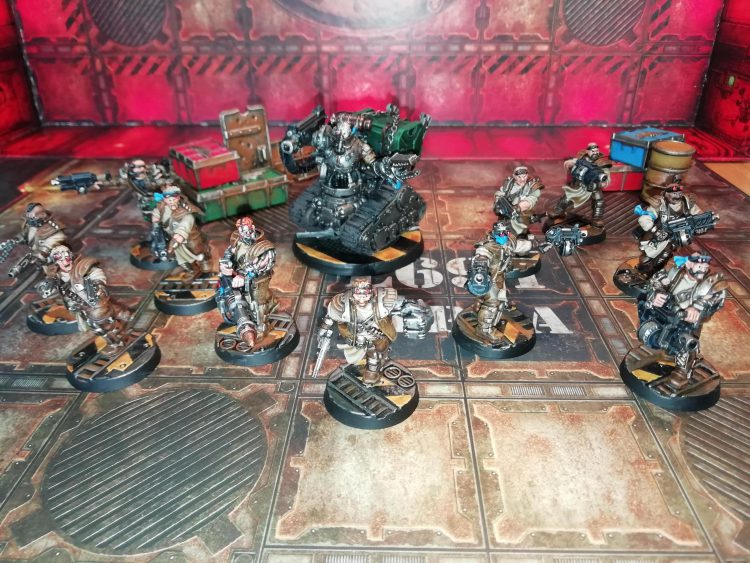
- Leader (Nerves of Steel, +1WS): Stub Gun, Master-Crafted Power Fist, Carapace Armor, Armored Undersuit [375]
- Champion (True Grit): Bolt Pistol (2x), Las cutter, Mesh Armor, Armored Undersuit [295]
- Champion (Munitioneer, +1BS): Autopistol, Heavy Bolter, Full Servo-Harness, Mesh Armor, Armored Undersuit [470]
- Champion (Fearsome): Mining Laser, Autogun, Mesh Armor, Armored Undersuit [260]
- Ganger: Grenade Launcher, Mesh Armor, Armored Undersuit [145]
- Ganger: Combat Shotgun, Firestorm Ammo, Mesh Armor, Armored Undersuit [165]
- Ganger (+1T): Shotgun, Executioner Rounds, Mesh Armor, Armored Undersuit [155]
- Ganger: Flail, Stub Gun, Mesh Armor, Armored Undersuit [105]
- Ganger: Boltgun, Autopistol, Mesh Armor, Armored Undersuit [145]
- Ganger: Autogun, Mesh Armor [70]
- Juve: Stub Gun (2x), Blasting Charges, Mesh Armor, Armored Undersuit [110]
- Ammo Lugger Brute: Heavy Bolter, Heavy Carapace Armor, Mono Sight [325]
From the starting roster of ten models, I first added the fully kitted out Brute, then upgraded my two champions’ and leader’s weapons. A couple gangers got upgraded ammunition, a couple received hand-me-down weapons or Blasting Charges. Then I bought everyone Armored Undersuits and the Leader some Carapace Armor, and recruited my third champion with a Mining Laser.
In the future, I’ll need to buy the new champion Suspensors for that Heavy Weapon – it was silly to get him without them, but I wanted to lock in the purchase. One ganger is left clutching an outdated Autogun, he’ll probably get a replacement, maybe a Long Rifle. The Flail/Stub Gun ganger is in line for a Hand Flamer and/or a Chainsword. Then it’s on to weapon attachments!
Every fighter is built with sensible equipment choices and a clear role, but everyone is unique and I’ve avoided using certain items as they’re just too good, or don’t fit the gang’s theme. Not every choice is made for pure efficiency – e.g. I have Bolt Pistols on a champ when Plasma Pistols are clearly superior. It’s up to every player what they want to take, with aesthetics and modelling/painting projects ideally playing a strong role.
Genghis: Now, let’s take the theoretical Van Saar starting roster from the previous article. Can we make them a bit more rounded? Without real games to dole out experience for advances, this gang was upgraded through a straight cash infusion of 750 Credits, to approximate a power level on par with the real-world Orlocks above.

- Leader (Trick Shot): Combi-Lasgun/Plasma Gun, Energy Shield, Mesh Armor, Armored Bodyglove [270]
- Champion (Gunslinger): Plasma Pistol (x2), Mesh Armor, Armored Bodyglove [225]
- Champion (Hip Shooting): Combi-Lasgun/Melta Gun, Mesh Armor, Armored Bodyglove [245]
- Ganger: Suppression Laser, Mesh Armor, Armored Bodyglove [120]
- Ganger: Lasgun, Hotshot Pack, Mesh Armor, Armored Bodyglove [110]
- Ganger: Lasgun, Hotshot Pack, Mesh Armor, Armored Bodyglove [110]
- Ganger: Lascarbine, Photon Flash Grenades, Mesh Armor, Armored Bodyglove [100]
- Ganger: Las Pistol, Las Sub-Carbine, Mesh Armor, Armored Bodyglove [100]
- Juve: Laspistol, Sword, Mesh Armor, Armored Bodyglove [75]
- Ganger: Long Las, Mesh Armor, Armored Bodyglove [100]
- Ambot Brute: Tunneling Claw, Grav Fist, Carapace Armour [285]
I took an Ambot, thinking it would cover Van Saar melee weaknesses a bit better than their House Brute (which would also be a strong choice). I added another ganger to take the total to eleven fighters, and gave him a Long Las just to add some additional ranged ability on bigger tables.
I bought everyone Mesh Armor (Van Saar’s starting armor rules make this a no-brainer) and added powerful weapons on the star players. I used hotshot upgrades and hand-me downs and cheap grenades to slightly upgrade the Gangers, but I feel they are well behind the Champs in offensive power. If this were a real campaign gang, I would be looking to bump them up to special weapons as well in due time. I might have spent less credits on them at this stage of the campaign in order to save up.
This Gang isn’t terrible, but my inexperience with Van Saar is showing. I’m not comfortable with any of the House’s close combat weaponry, so the Gang relies on the Ambot in that aspect and will seek to keep their opponent’s at arm’s length and do most of their work by shooting. In the long term:some shields, more armor, and power weapons will protect them from enemy combat threats and let them mix it up close if it comes down to it.
Powerful grenades could be distributed to gangers if I were playing on tight 2D ZM boards, while long-range champions with Heavy Weapons would be strong on larger 3D Sector Mechanicus boards.
Conclusion
Our recommended priorities for developing your gang through a campaign are, in order:
- Augment the Gang Roster to at least twelve fighters, with as many champions as your gang’s composition will allow.
- Have every fighter carry a powerful weapon loadout.
- Have each fighter as heavily armored and protected as possible.
- Take weapon attachments on high-value weapons until they can reliably hit on a 2+.
- Invest in alternative or back-up weapons, especially for fighters with Scarce weapons.
A late-Campaign gang should be stuffed full of champions to the maximum ratio allowed and every fighter in the gang should be packing major heat, with Grenades in their back pockets.
All the advice given above is to put your gang’s credit stream to use efficiently, and by following it any House should be able to hold their own. The Underhive is a dangerous place and success in a Campaign is also down to luck (yours and your opponents’) and choices on the campaign layer. With some poor Lasting Injury and income rolls, any gang can end up on the back foot.
Conversely, a single lucky game with certain Scenarios can rocket a gang far ahead of the opposition. Be disciplined in your credit spending if you’re fighting for survival or for a place in the pack.
…and if you follow these guidelines and your Gang Rating winds up doubling your opponents’, to the point that you’re thrashing your friends mercilessly every game? Maybe do the fun thing and waste some income on a bit of exotic wargear instead of hiring your umpteenth champion instead!
If you’ve got some solid tips for growing your gang that you think every player needs to hear, bend our ears over at necromunday@goonhammer.com, on Facebook, or in the comments below. Next week, the whole team puts their heads together in an attempt to discuss the million-credit Necromunda question: “How can all of us attract new players to this game?”
