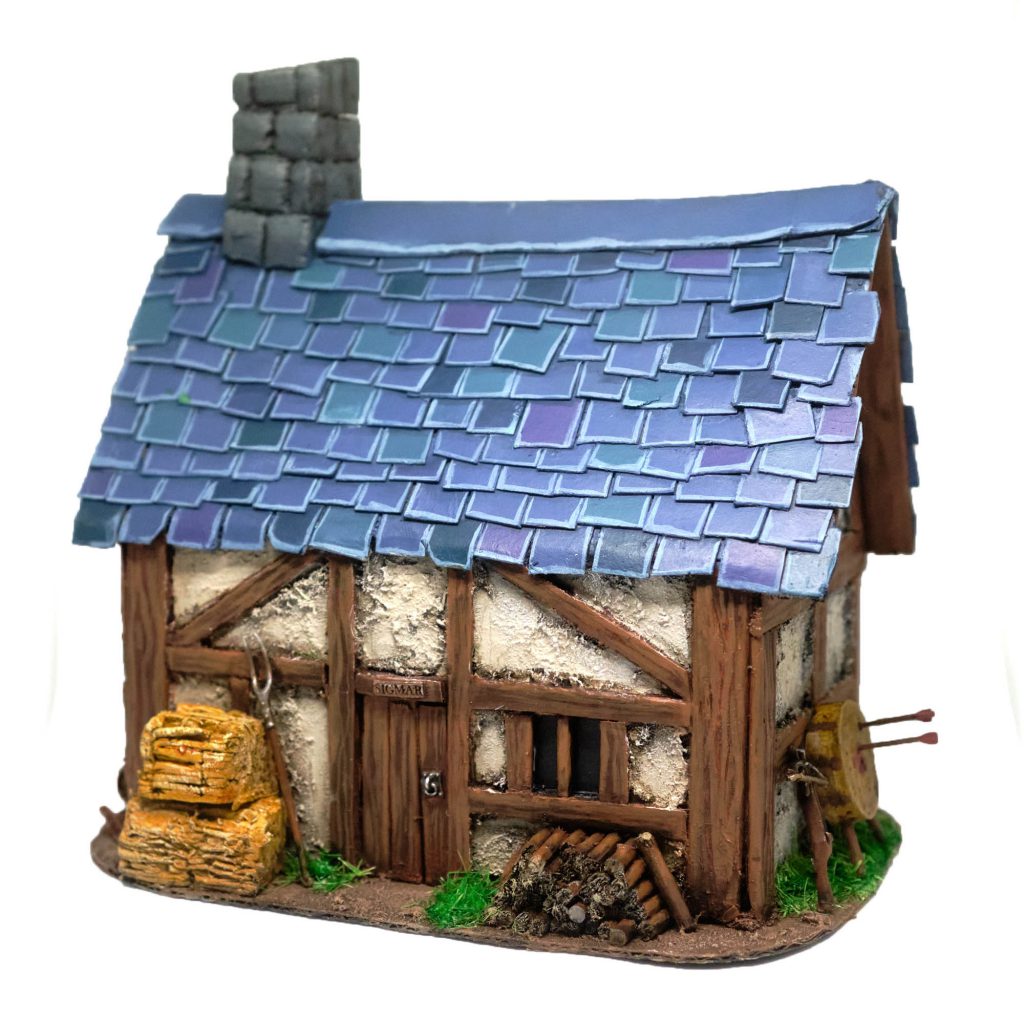
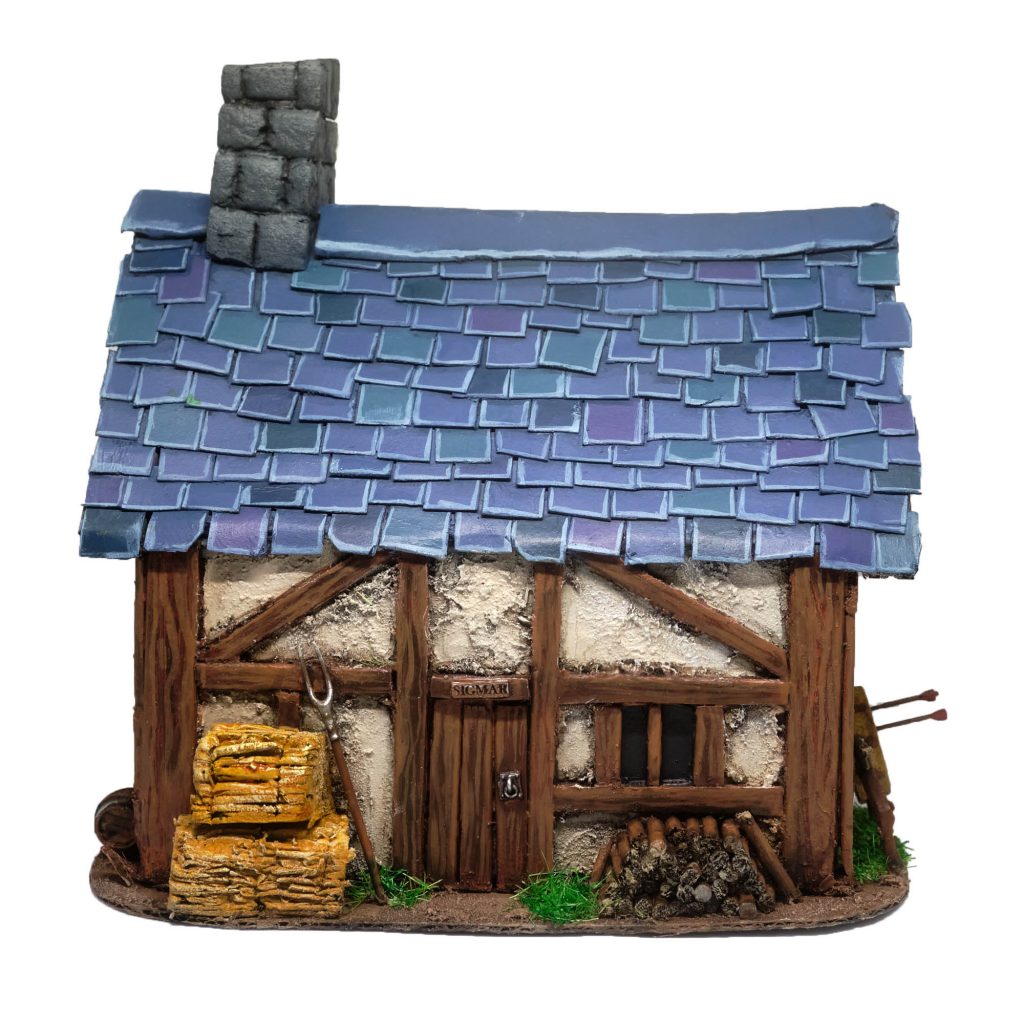
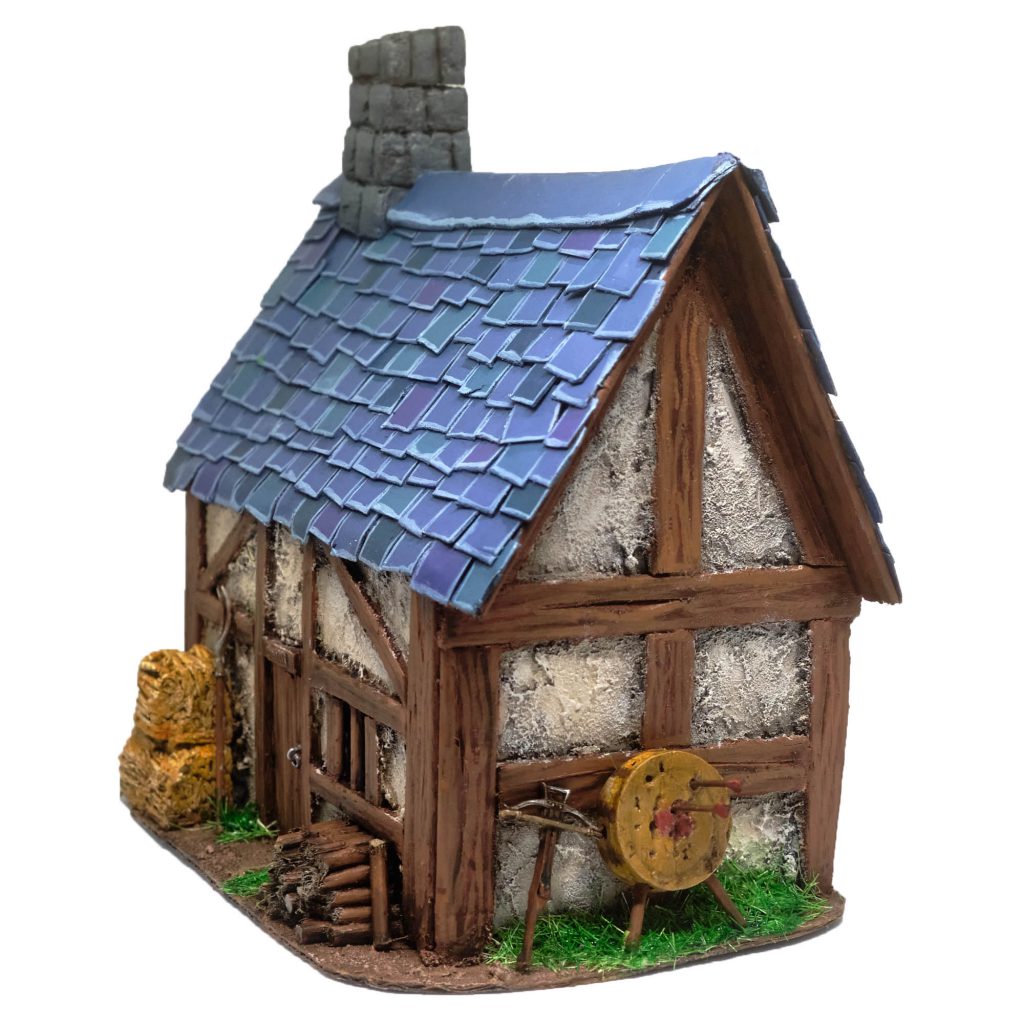
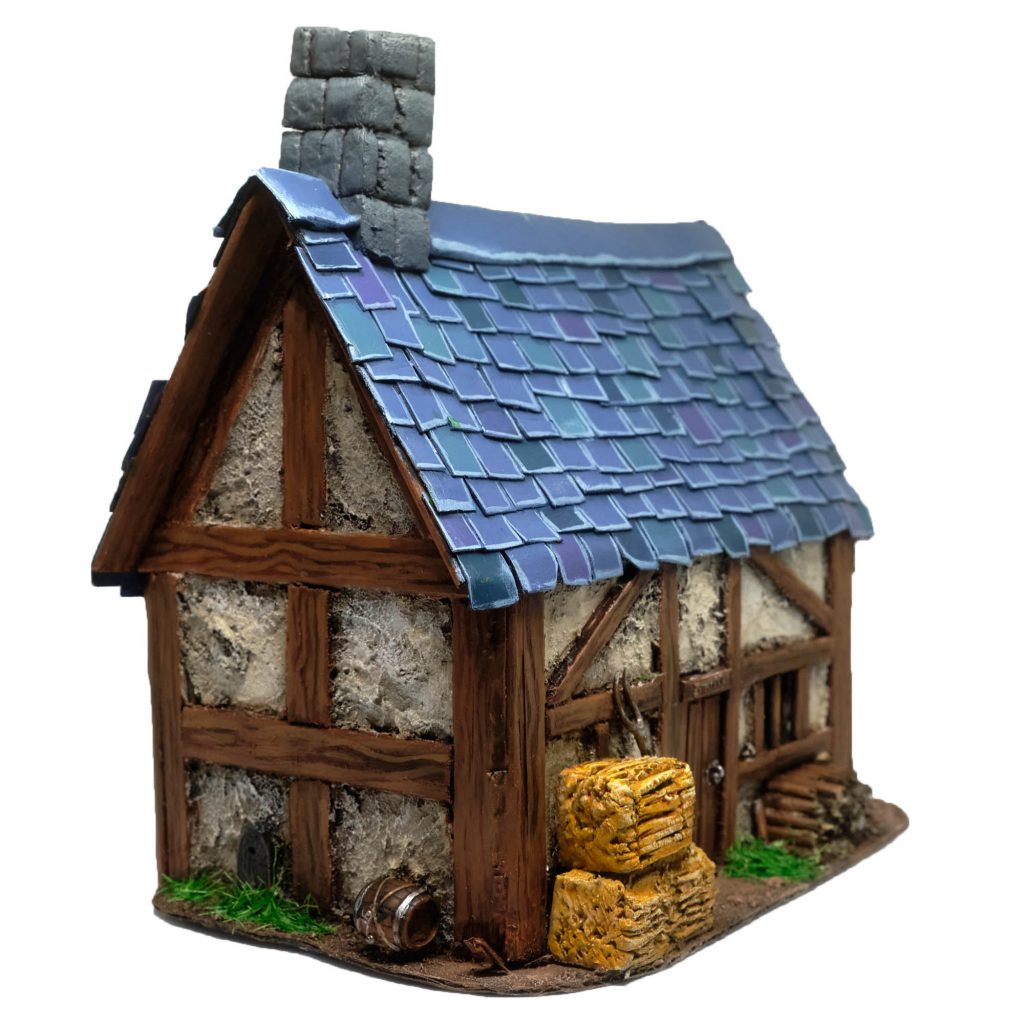
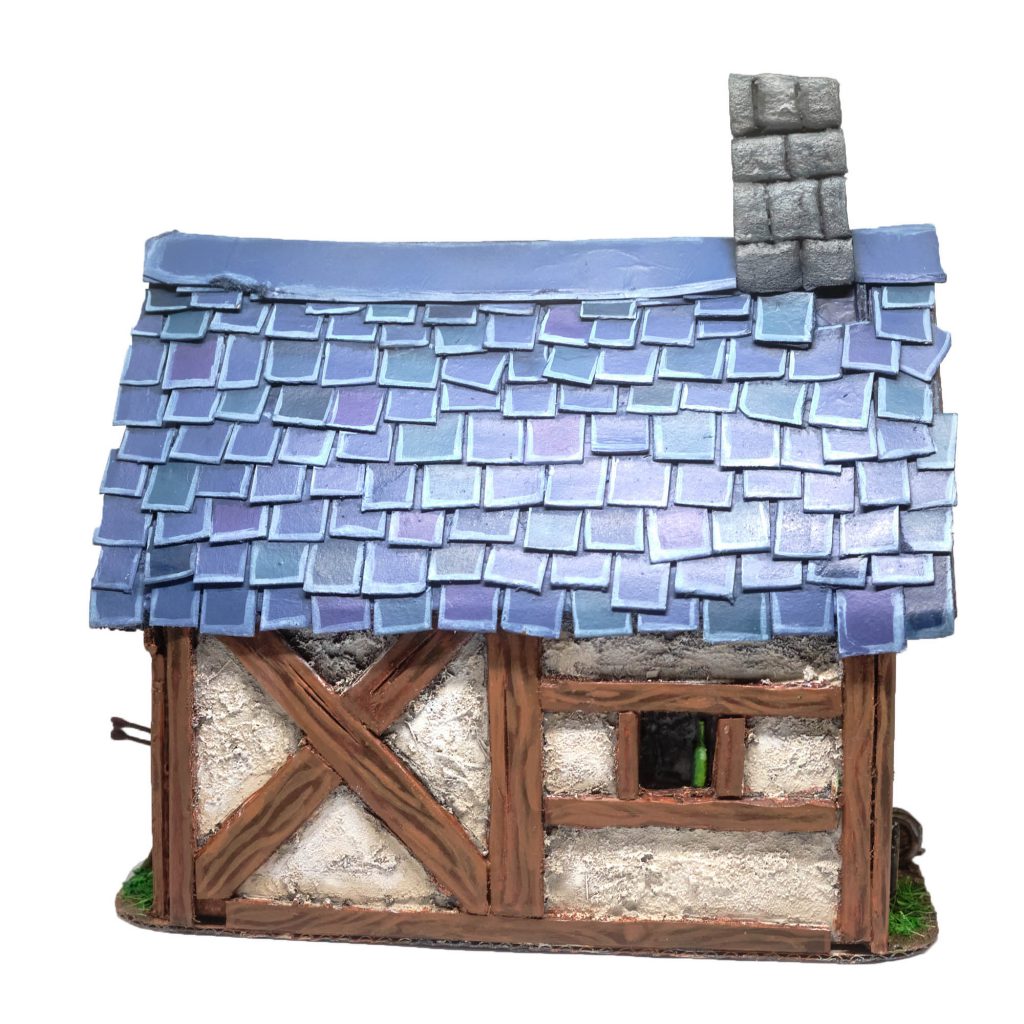
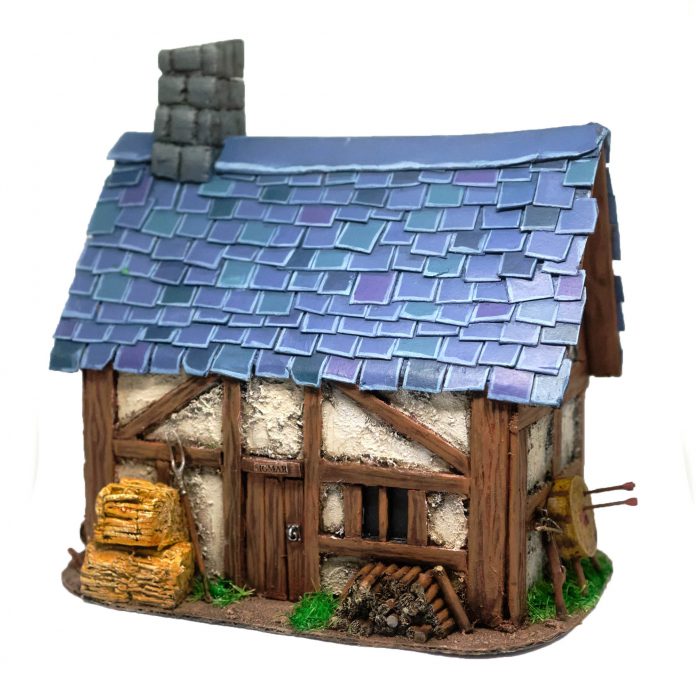
It’s perhaps the prototypical terrain piece for fantasy or historical wargaming, the humble house. The half-timbered style we’re going to be building today fits in perfectly in plenty of settings, but slots particularly well into a high-late medieval to early modern European time-frame (hello, Warhammer Fantasy Battle/Age of Sigmar!)
There are lots of ways to create a half-timbered house, but the method I’m going to employ is the wattle-and-daub in-fill style that’s both much easier to do and (I think) nicer looking than either brick or stone.
Materials
Here’s a list of the materials I used to build this particular piece:
- A Sturdy Cardboard Box – appropriate scale for a cottage, but if you wanted to, you could build a much grander house with a bigger box, this method scales pretty well!
- Craft Sticks – light wooden sticks not dissimilar from the kind of sticks you’d get in an ice lolly. I bought a bag of 500 of these beauties for about €4 a while ago, that particular bag will probably last me for the rest of my (hopefully long) life.
- Thin-ish cardboard, think cereal or pizza box.
- Textured paint – you can get this by the bucket from DIY stores, or you can just make your own by mixing paint, PVA glue, and baking powder.
- Some XPS foam – the pink stuff that builders use, I bought a big sheet a while ago and it’s lasted me a good long while.
- Barbeque Skewers
- Various bits from your Bits Box for flavour
- Paints
- PVA Glue
- Mod Podge
- Grass flocking
Structure
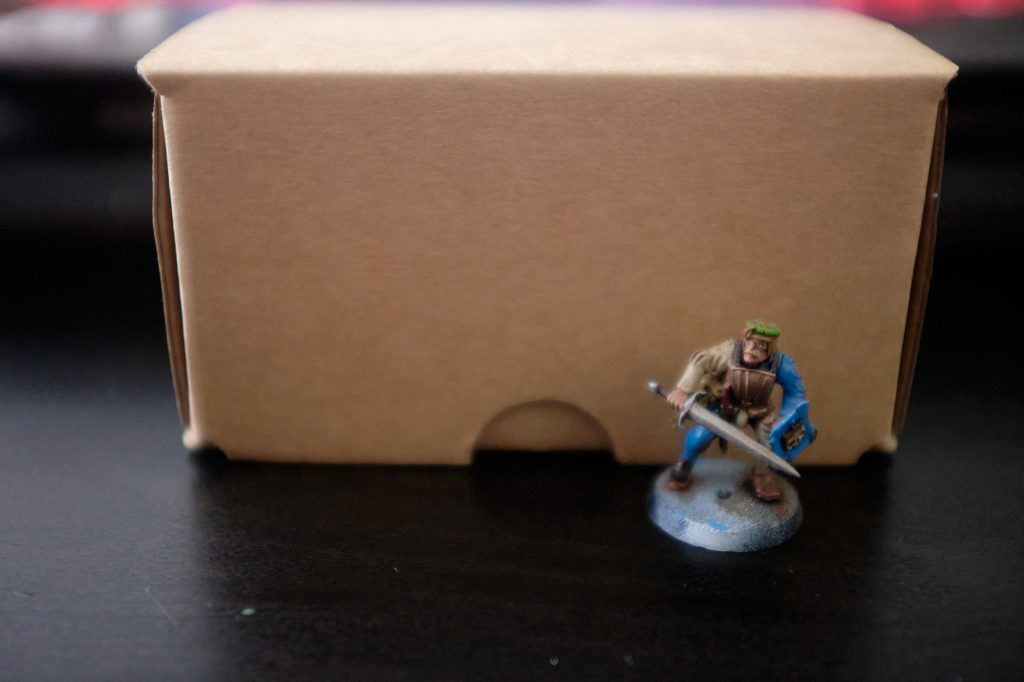
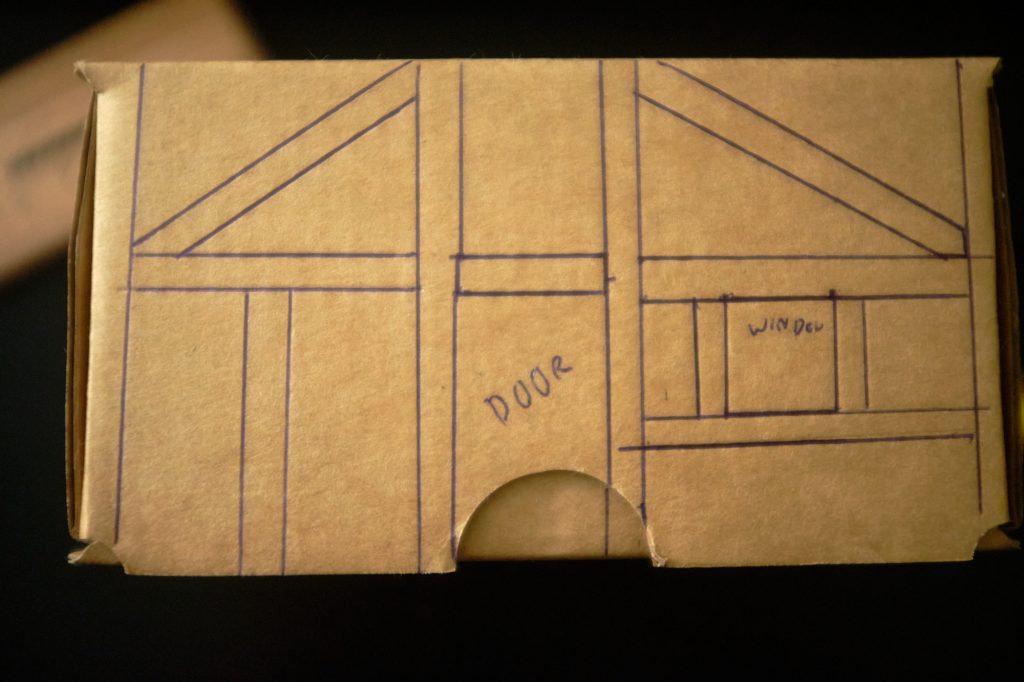
Having found a box that’s the right sort of scale, the first thing to do is grab a pen and ruler and start drawing where the beams are going to go. This step helps visualise exactly what the house is going to look like before I even put glue to cardboard; draw your inspiration from photos of existing houses and fantasy artwork.
With the general beam outline drawn in, I realise that I should probably have made the gables first, so let’s go through that quickly. The gables of a house are the triangular bits of wall that give the roof its shape.
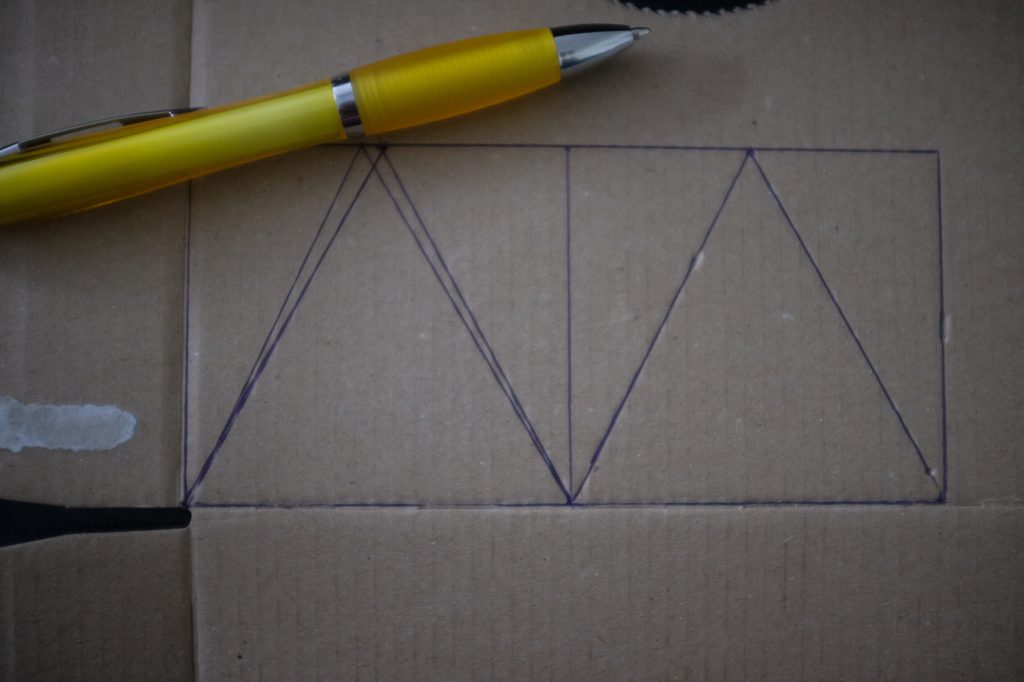
Houses of this period are typified by having really steep rooves to help rainwater sheet off, so we’re looking at some kind of equilateral triangle. To get the right proportions measure the depth of the box and draw a square to match, then mark a point halfway along the top side. Connect the corners of the square to this point, which will give a nice little equilateral triangle. Maths! Once these triangles are marked out, extend the bottom into a rectangle that covers an entire end-wall of the building. As you can see from the photo, I also cut out some trapezoid shapes from the same cardboard to provide an anchoring brace at the roof-end. This ultimately wasn’t necessary, but any structural stability is valuable here! PVA glue takes ages to dry properly, so I wrap the whole structure in elastic bands to keep a constant, even pressure while it sets.
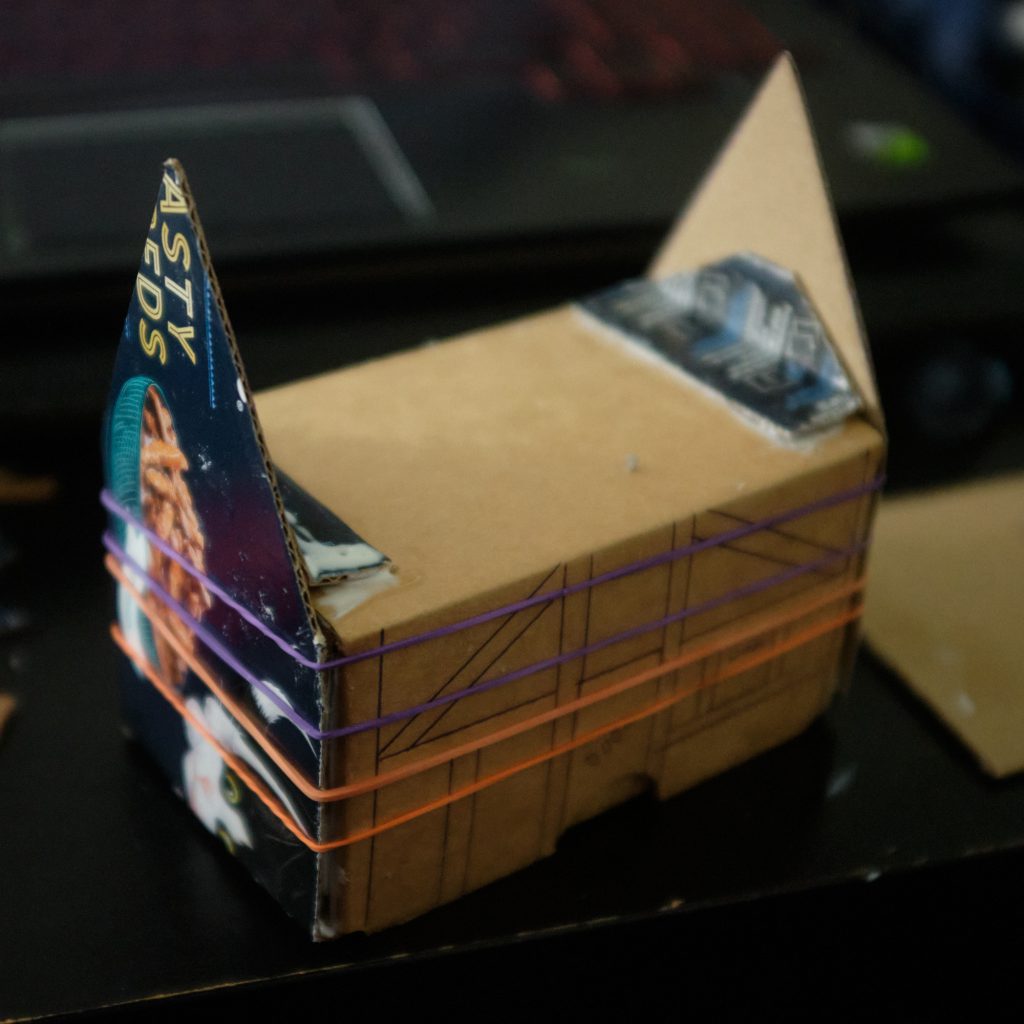
Once the glue is reasonably dry, I poke some wooden barbeque skewers through each of the gables and glue them in place. These provide some excellent rigidity and stop the gables from flopping about. We want people to be able to use this thing in their games, so it can’t be too fragile! Don’t worry too much about the skewers poking out, once the glue is dry we can easily trim them down with some clippers.
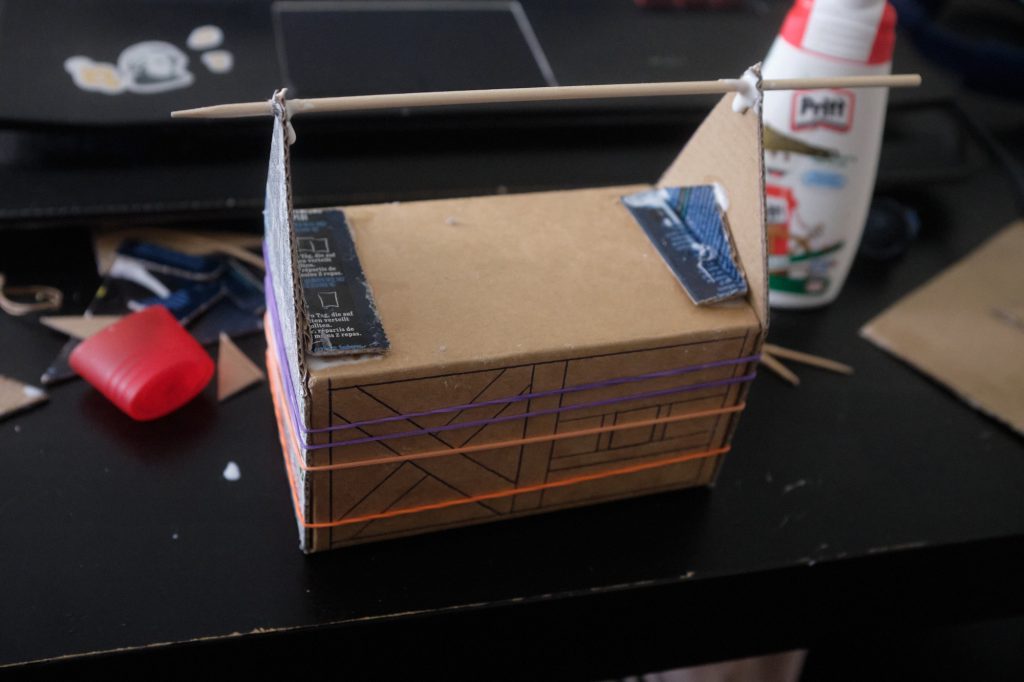
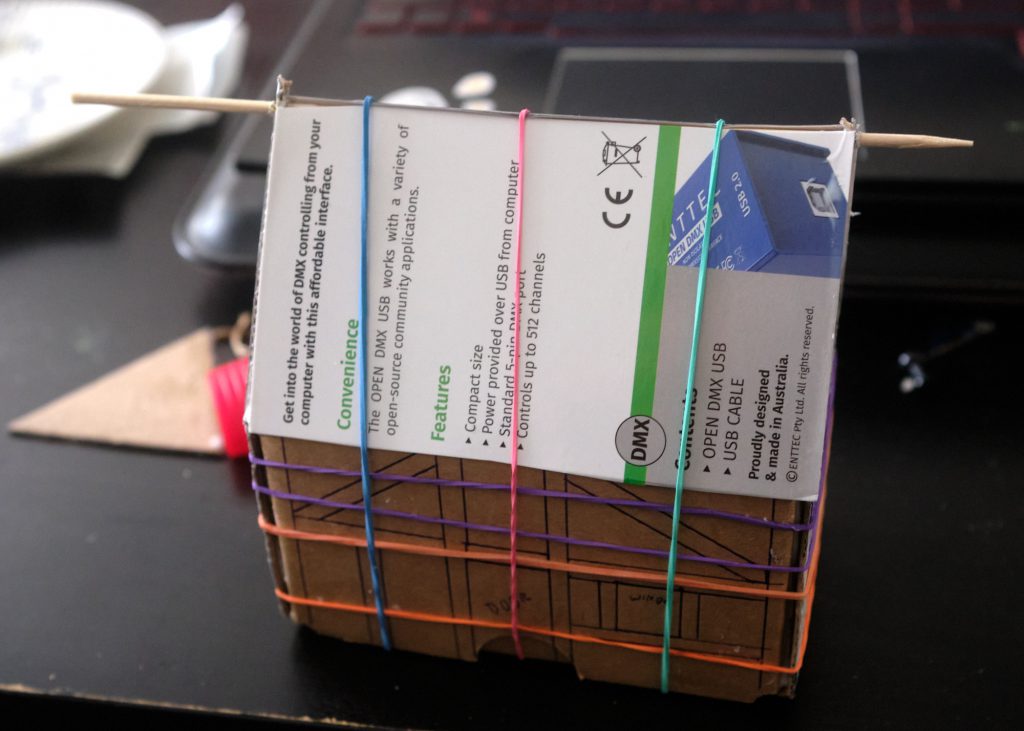
With a pair of well stuck and glued on gables, we can lay the general structure of the roof! To do this, draw two rectangles on a piece of card, with the long edge equal to the width of your structure, and the short to the length of a side of the gable triangle. With these two panels cut out, you can glue them down. Wrap them with elastic bands to stop the cardboard from warping. As the PVA glue will shrink while drying, if the cardboard isn’t sufficiently robust it will bend. If that happens, don’t worry, warped cardboard can be “reset” back to its original state by simply painting thinned PVA glue on the other side.
Walls
With the general structure finished, we can move onto the decoration! First stop: Beam town. Using the craft sticks, a sharp knife, and some clippers, cut the shapes of the beams. Be very careful when using a sharp blade to trim wood! If you’re merrily using a scalpel to whittle a beam into shape and you slip, you’re going to get blood all over your lovely terrain piece! Always cut away from yourself, and if you’re a youngster, ask your Mum/Dad/Uncle/Aunt/Neighbour/Teacher/Lollipop Lady/Member of Parliament to do this bit for you.
Since you drew your plan with pen in the first place, you should have a relatively easy time fitting the beams together. One of the nice parts when it comes to building fantasy/medieval buildings is that you don’t have to be super neat, there’s no commissar with a bolt pistol coming to check that your work is in line with Imperial Standards, you can be a bit loose and free with it. Leave gaps! Leave rough edges! Have beams that aren’t exactly the same width along the length!
While you’re at it, make a door by cutting one of the big sticks in half, then clipping it down to appropriate plank sizes. Stick three of them in the gap you left for your door. Add a handle. Done!
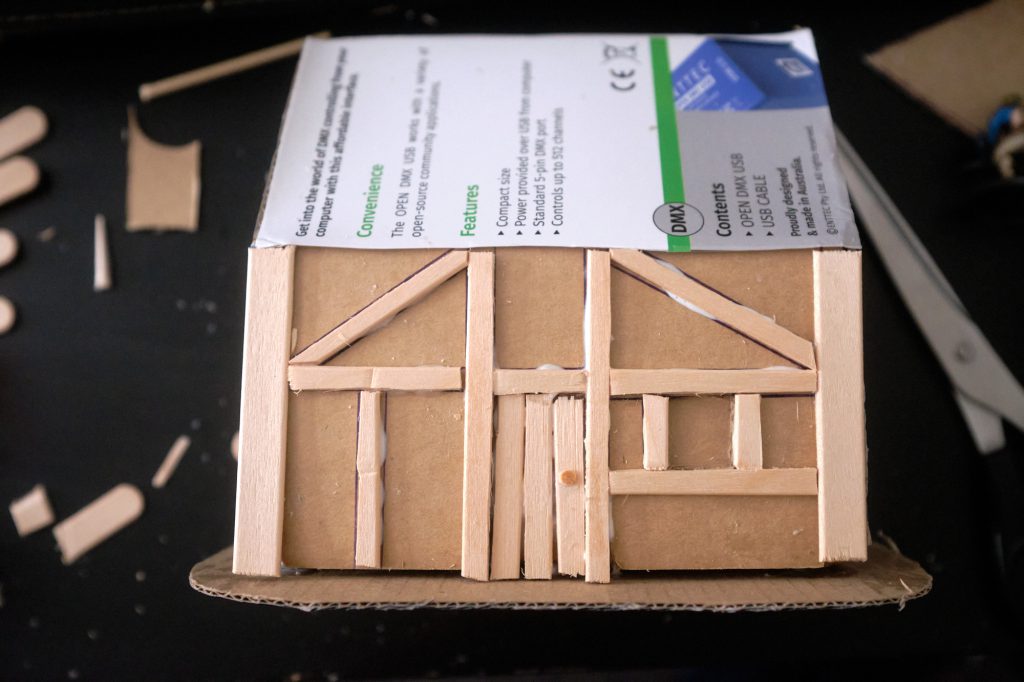
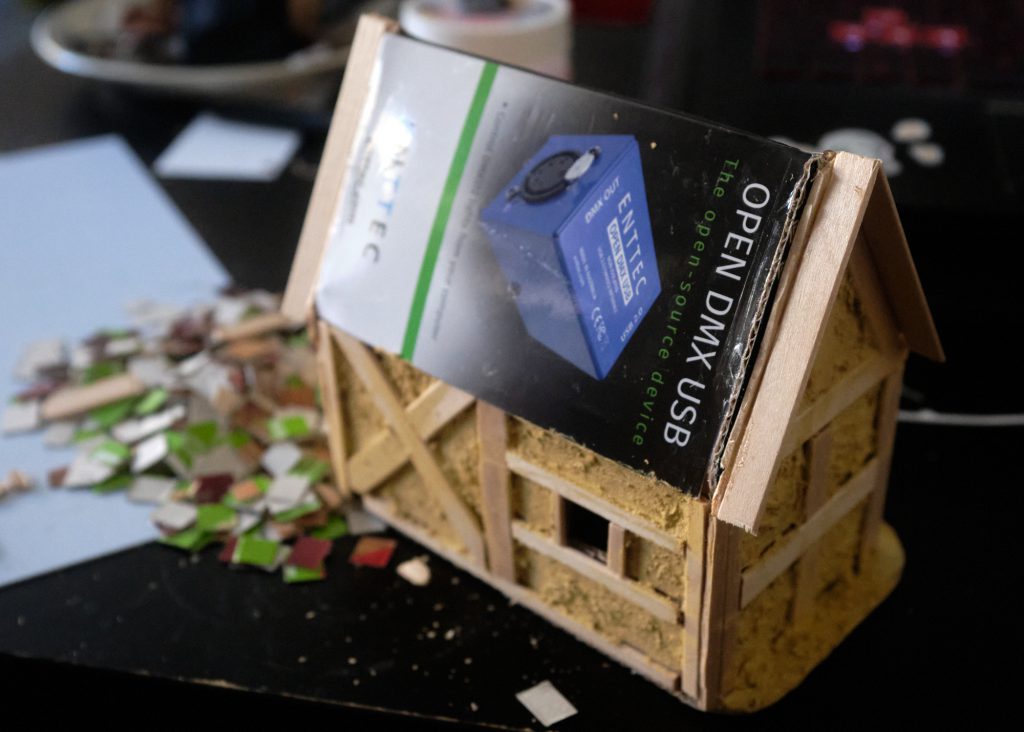
Next, texture the whole piece with lovely texture paste. I used the last dregs of my pot of Vallejo Desert Sand, but you can just use paint mixed with PVA glue and baking powder. Make sure to fill in all the panels between the beams, you don’t have to be super neat, but try and avoid getting any of the texture on the ‘face’ of the beams. If you spill a little then just mop it off with a piece of tissue, no worries there. This doesn’t have to be particularly smooth or neat. Of course, if you want it to be very neat and pristine, I would recommend using some kind of very fine-grained polyfilla and a pallet knife to get a lovely smooth in-fill on your panels, the choice is yours! While you’re at it, take some time to texture the base too.
Roof
After texturing I realised that the overhang on either gable end was non-existent; if you look at pictures of existing half-timbered houses, they have a bit that juts out from either end to direct rainwater away from the face of the building. No worries, we’ll just clip two of our sticks to the right length and attack them laterally to the gables with some superglue. Once the tiles go on, you’ll barely even notice the join!
Next, it’s time to make the tiles. Here’s how:
- Get your pizza/cereal box.
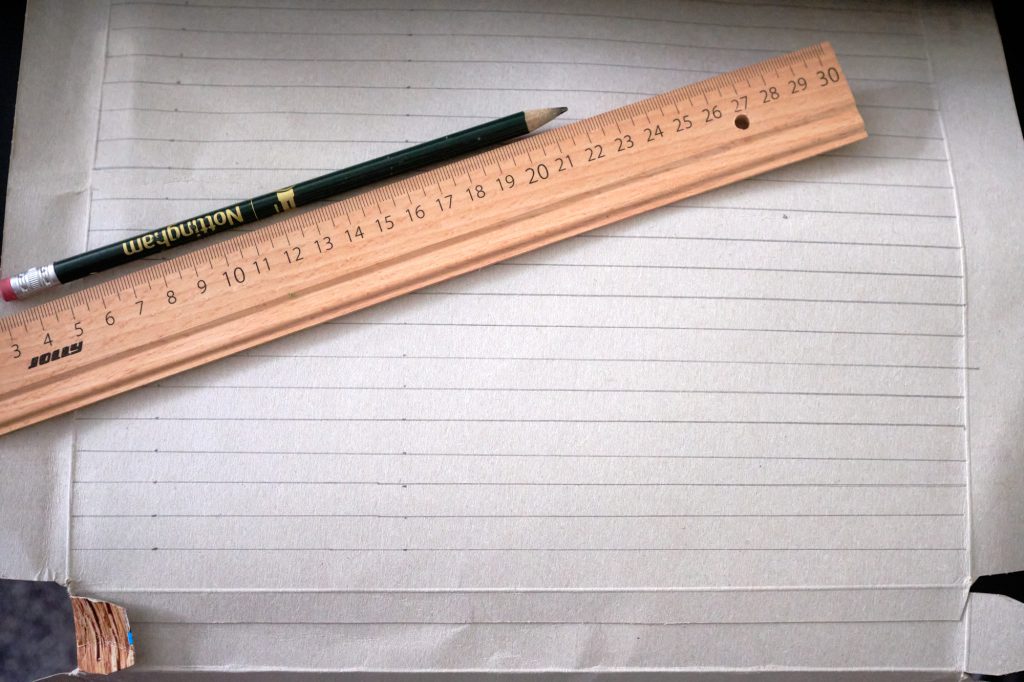
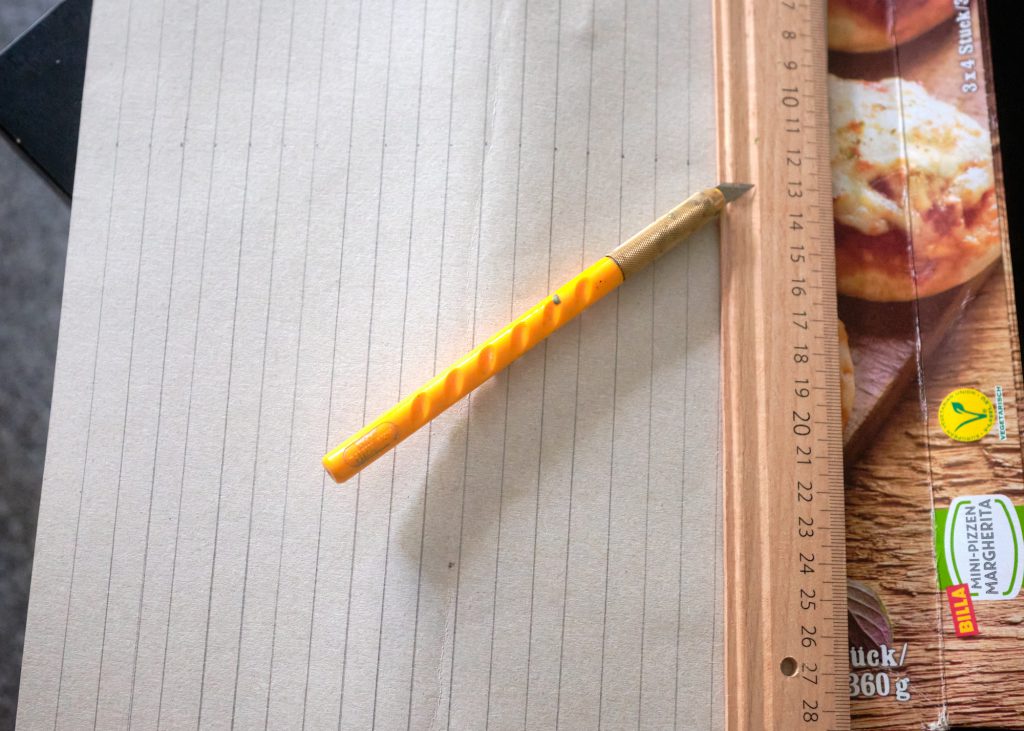
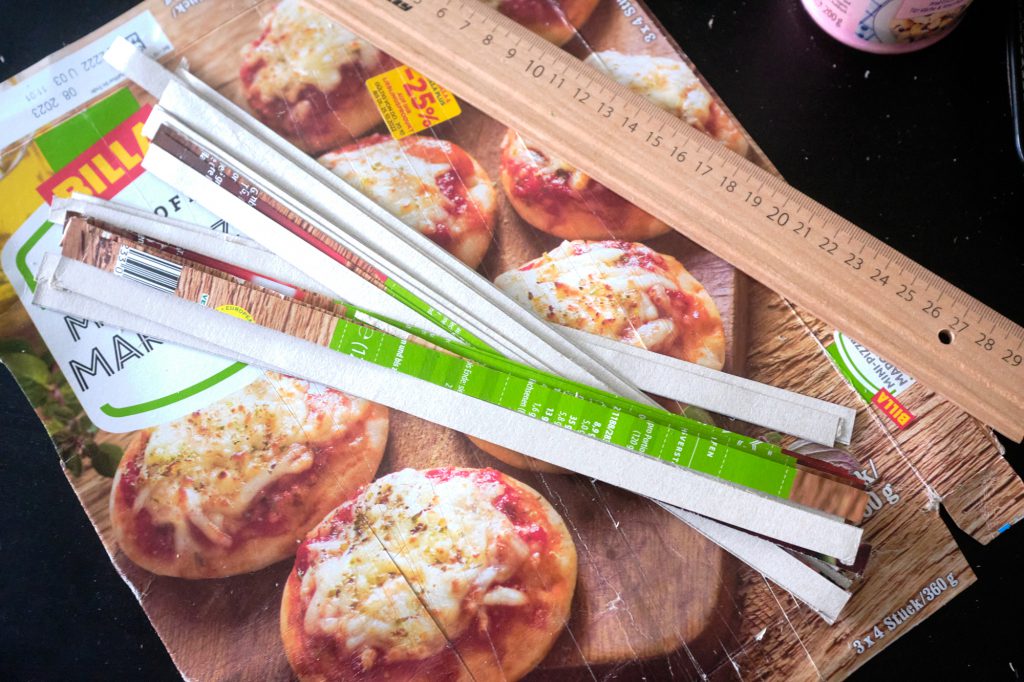
- Measure out 10mm wide strips, and cut them out with a sharp knife and ruler (and cutting mat!)
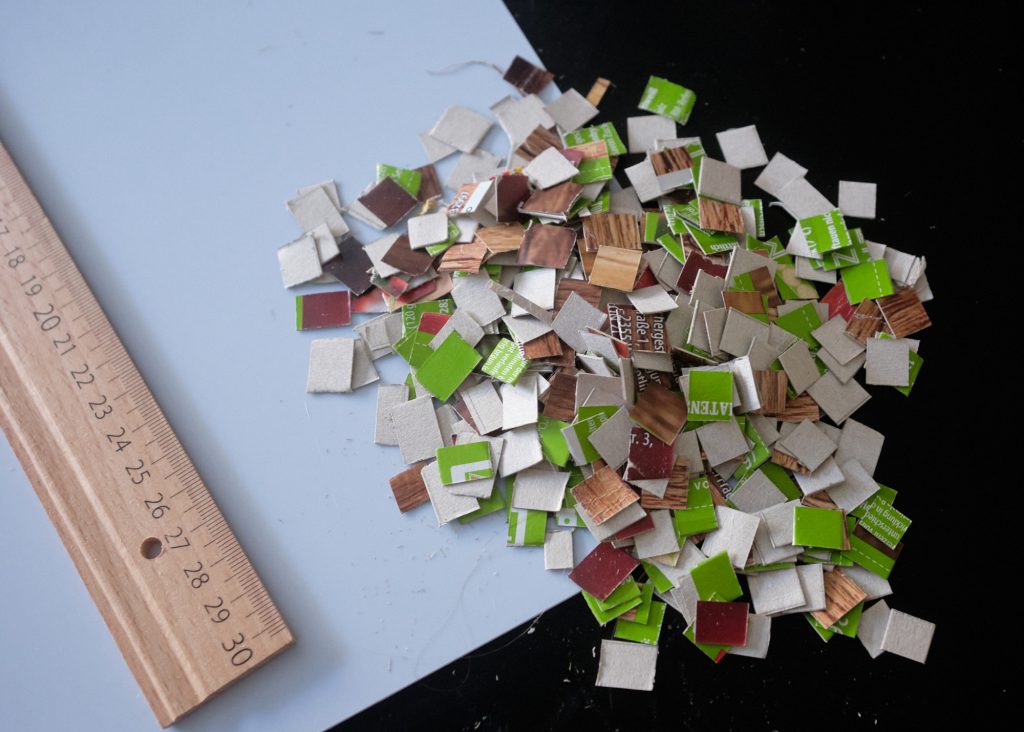
- When you’ve got a sufficiently large amount of strips, snip them down into tile shapes. You don’t need to be super neat here either, there’s no requirement for tiles to be perfectly square on all the edge.
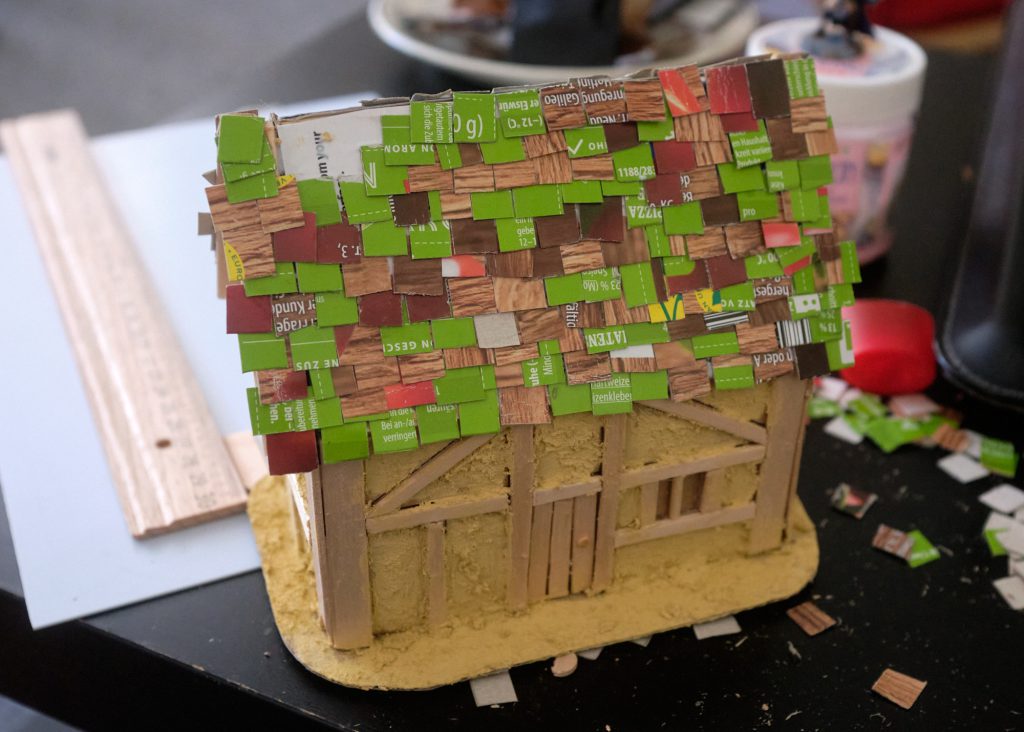
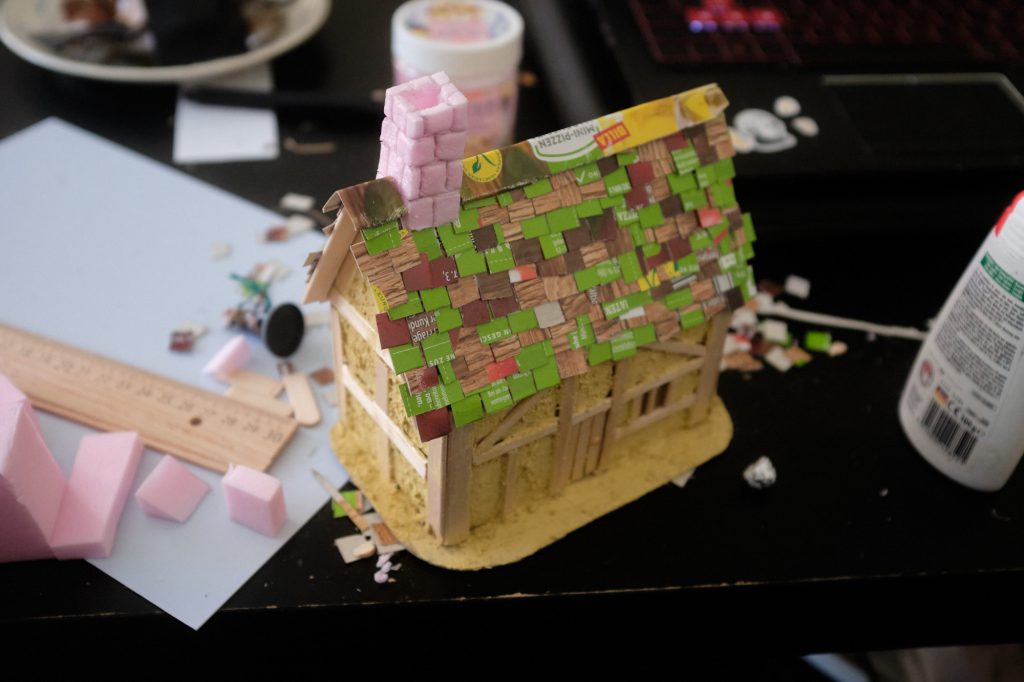
- Starting from the bottom, spread a quantity of PVA glue over the roof material and place tile after tile in rows along the width. For your second row, try and lay the tiles so that the gap between two tiles on the row beneath lines up with the middle of the tile above. Think of the sort of pattern you would make with bricks when building a wall and copy that. Don’t do this neatly, roofers in the present are bad enough, imagine how shoddy they would have been 650 years ago! Leave a gap at the top for the chimney. Speaking of the chimney –
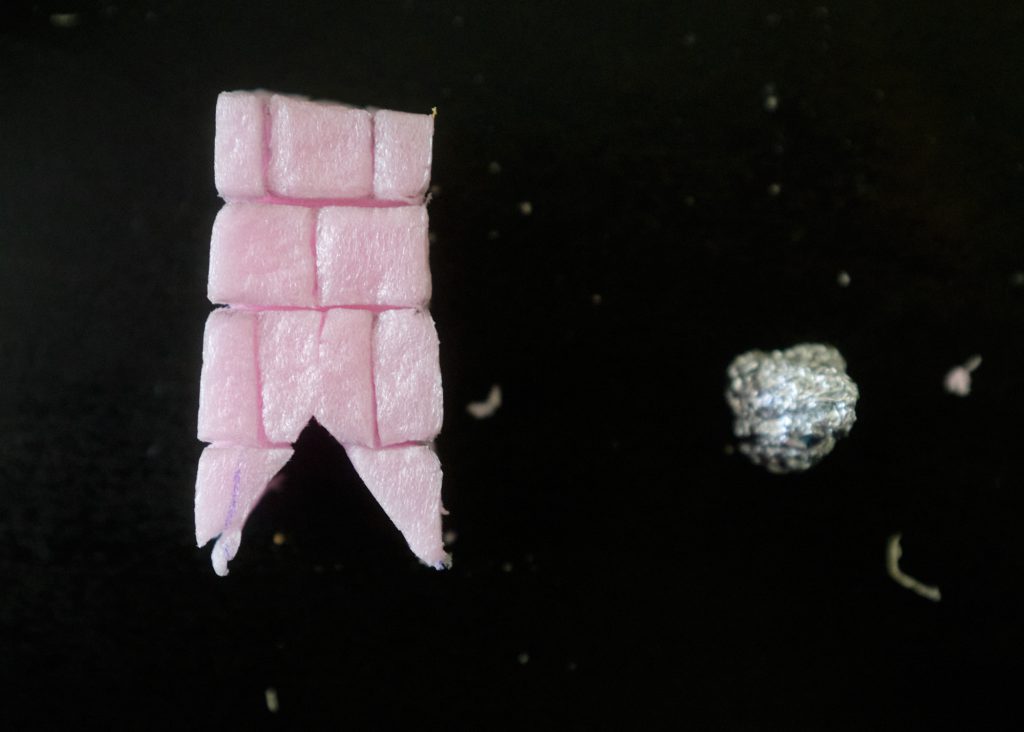
- Take a bit of XPS foam and chop it into the shape of a chimney. Once you’ve done that, slice a brick pattern into it using a sharp blade.
- Using a pencil, draw over the cuts you made, letting the pencil sink deep into the foam to create the gaps between stones.
- Get a piece of aluminium foil. Scrunch it up into a ball. Press this ball randomly on the foam you’ve made your chimney from. Voila! Stone!
- Slice a triangle into the bottom of your chimney at the same angle as the slant of your roof, and stick it on with a gob of PVA. Don’t use superglue with XPS foam, it will cause the foam to melt!
- Once you’ve spent a very very long time laying your tiles and creating your chimney, cut a length from your remaining pizza box approx 2cm wide and fold it in half. Lay this strip over the top of your tiled roof to create a cap. Remember to make another smaller piece for the bit that comes after the chimney!
and now, in pictures:
Extra details
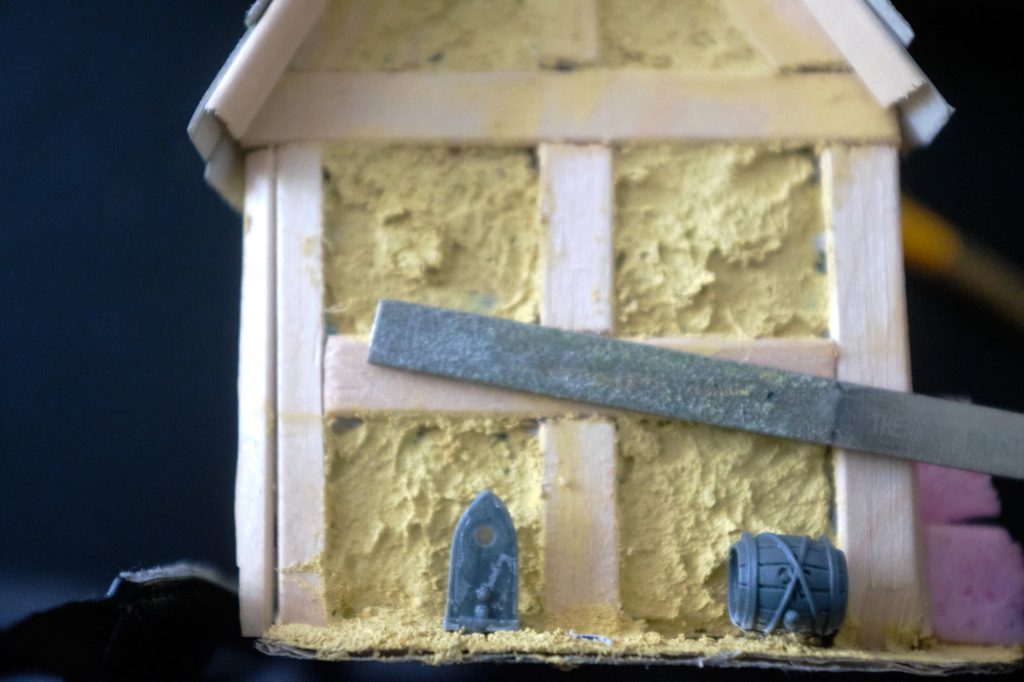
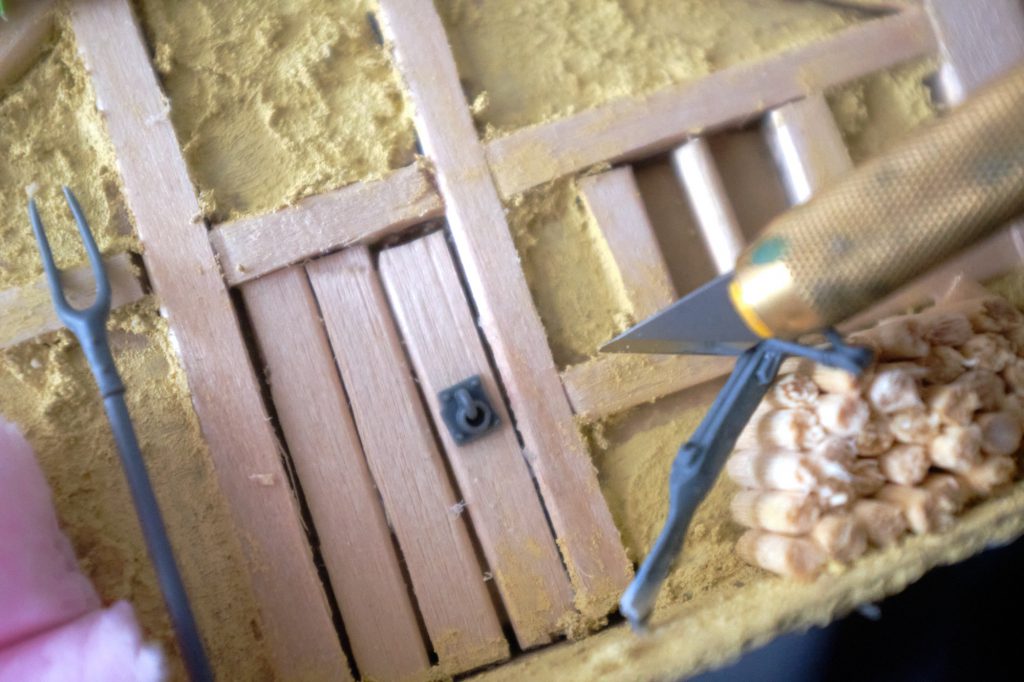
You don’t really have to do any of the next bits, but adding extra detail will help bring your little house to life and make it look more lived in. Raid your bits box for anything appropriate you think suits the setting. I managed to dig up a few bits from the Ogre Ironblaster (“Sigmar” cross-beam, milestone marker, barrel, door handle), Empire Freeguild Handgunners & State Troopers (crossbow and bottle), and Mancrusher Gargant (pitchfork + arrows) kits that work well here.
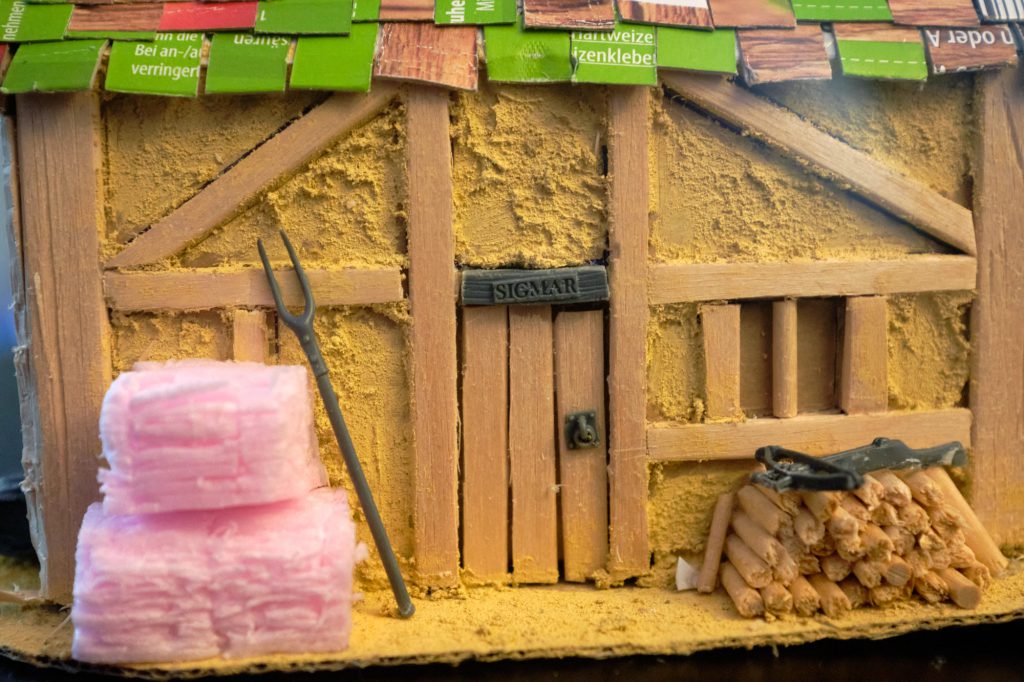
In addition to this stuff, make a woodpile by clipping barbeque skewers into logs and stacking them against the wall. Pretty straightforward. A tiny little axe from a toothpick stump and a little bit of plasticard for the blade completes the set, aww. Making hay-bales from XPS foam is pretty easy. Simply get 3 blocks and slash the shit out of them with a very sharp blade and poke them full of holes on each end. To simulate the bales being tied with some string, draw some lines perpendicular to the cuts you made, about 1mm in from each side.
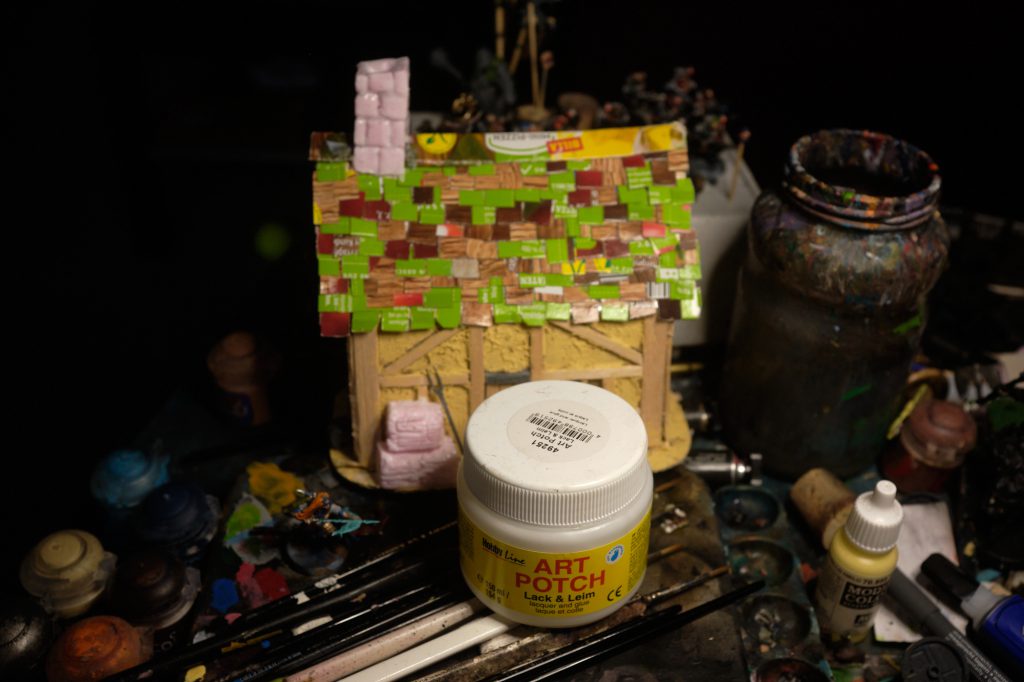
With all that done, use “Art Potch” aka Mod Podge to seal the XPS foam and make it a little more durable. This is basically thin PVA glue with a little varnish added to make it firm, but it works well to counteract the rather delicate nature of the foam.
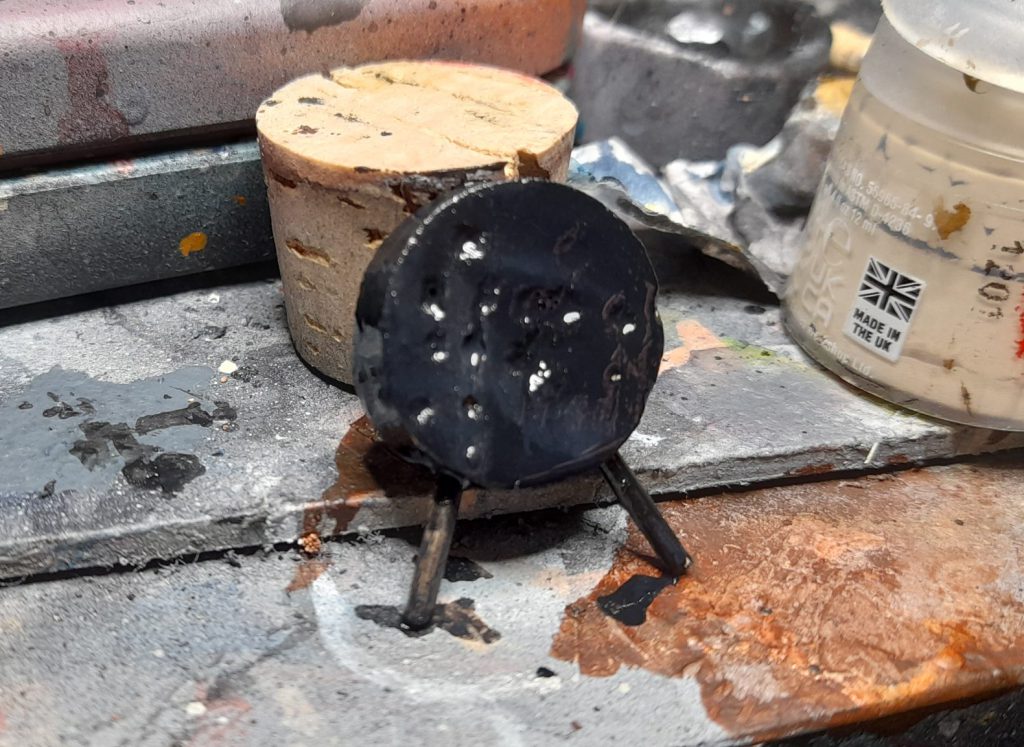
A final little detour before painting, make a practise archery target to lean up against the wall from a slice of cork and two pieces of toothpick. To complete the piece, take some of the arrows from the Mancrusher Gargant kit and stick them in the holes.
Painting
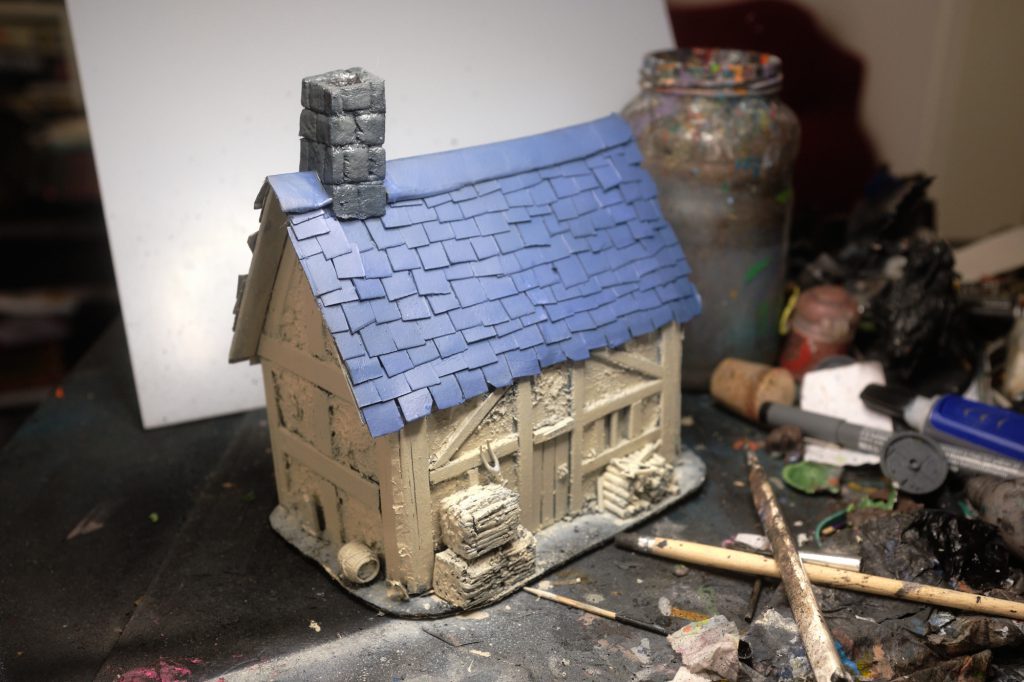
Prime the whole construction with Vallejo Black Surface Primer, and then go over all that with some Wraithbone through the airbrush. This takes absolutely forever, but I don’t have Wraithbone in a can, and the propellant from spray cans can melt the XPS foam we used for the chimney and haybales. After that, basecoat all of the tiles with The Fang, again through the airbrush. Finally, basecoat the chimney stack with Vallejo Air Dark Sea Grey.
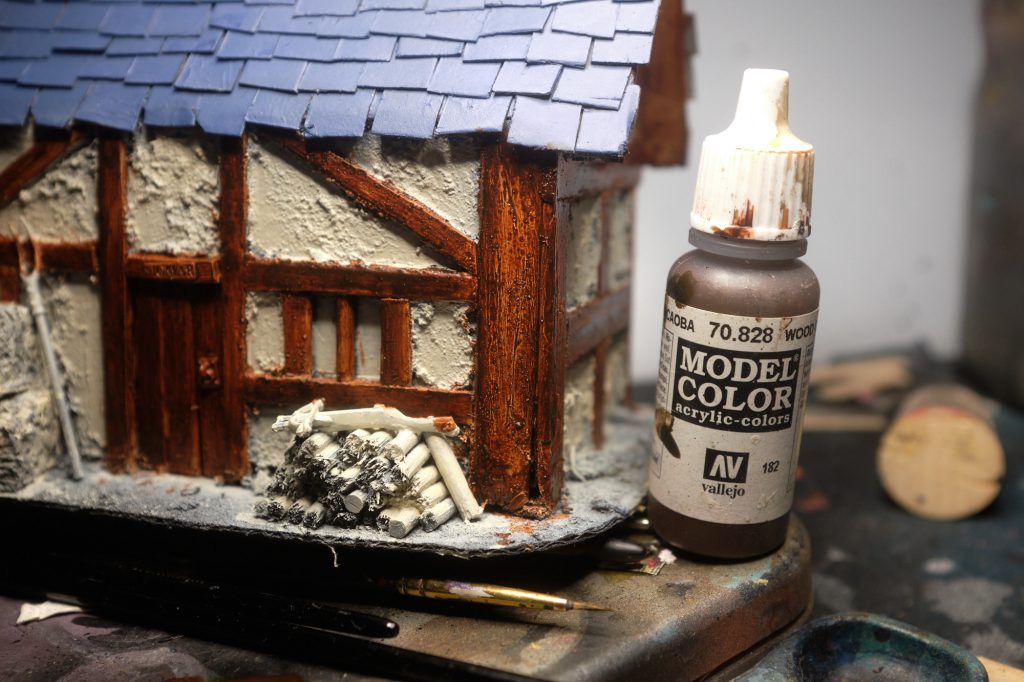
Next, go over all the wood with at least two coats of Vallejo Model Color Wood Grain. It’s a really nice pseudo-contrast paint that emphasises the grain of the wood a lot. If you chose to scratch the wood up with your blade earlier, this paint will make those marks stand out nicely. Just make sure that you use two coats, otherwise it can be a little blotchy.
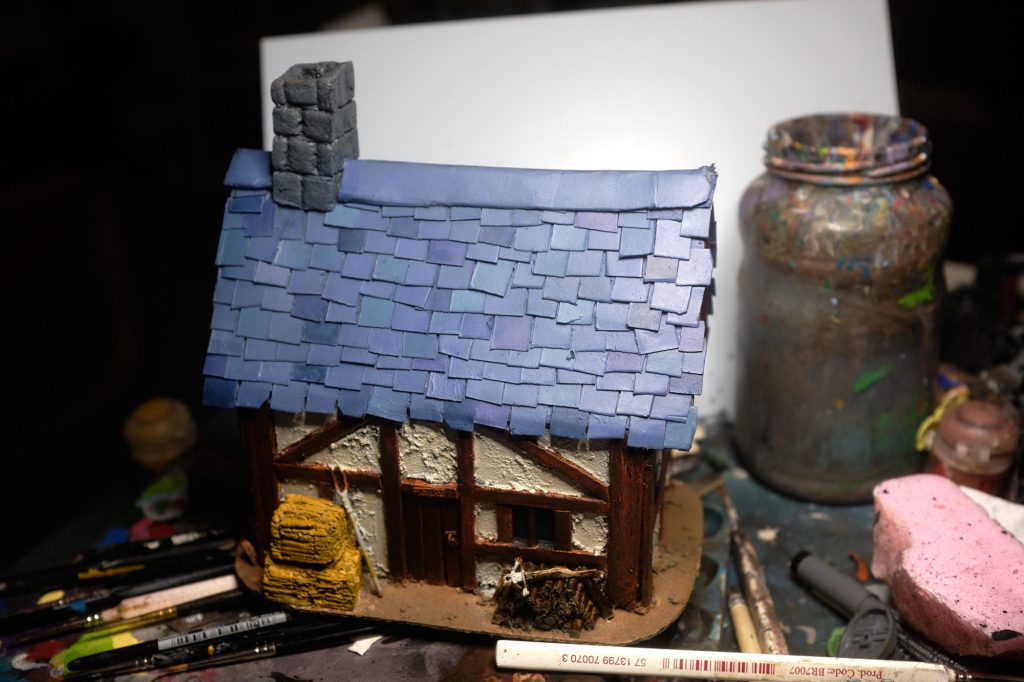
Next, basecoat the ground with Army Painter Leather Brown and the hay bales with Balor Brown. Paint the insides of the windows black.
To add some variation to the roof tiles, pick out tiles at random and paint them with various shades of blues and purples. I mixed a little Xereus Purple into The Fang to make a soft purple tint. Other tiles were basecoated with Stegadon Scale Green, Thunderhawk Blue, and Night Lords Blue. Keep it random, but try not to have two of the same colour next to each other (unless that colour is the base tone, in this case, The Fang.)
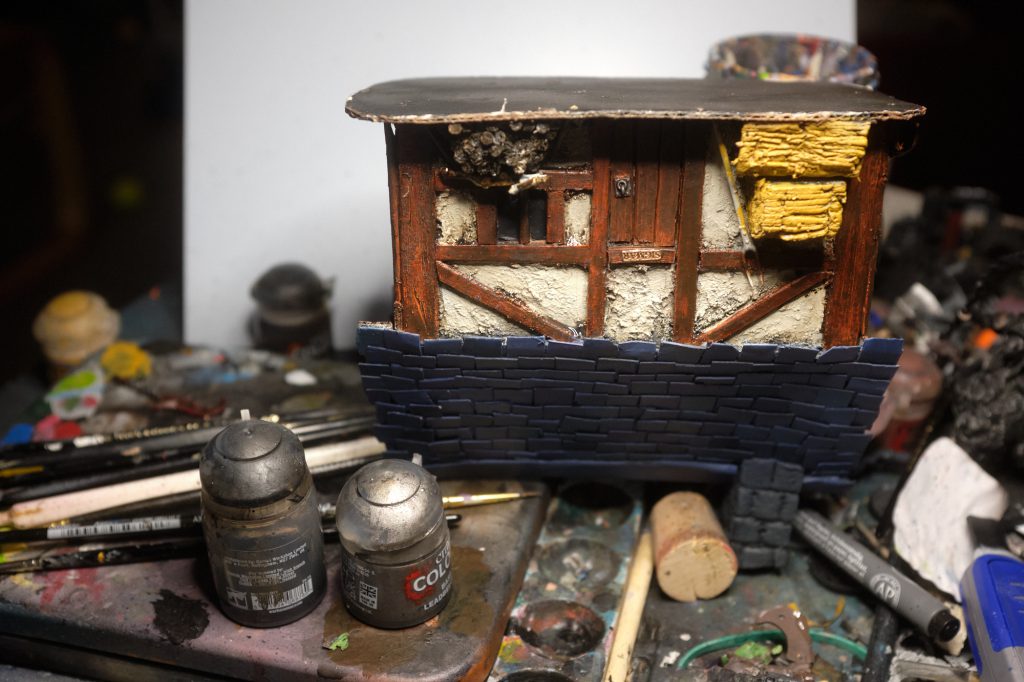
Shade time!
Wash the off-white panels between the wood using very thinned-down Nuln Oil. Try doing this with the house turned upside down so that it runs a bit and settles naturally against the underside of the various beams. Use this moment to basecoat the steel metallics with some Leadbelcher, and the brass of the Sigmar plaque with Runelord Brass.
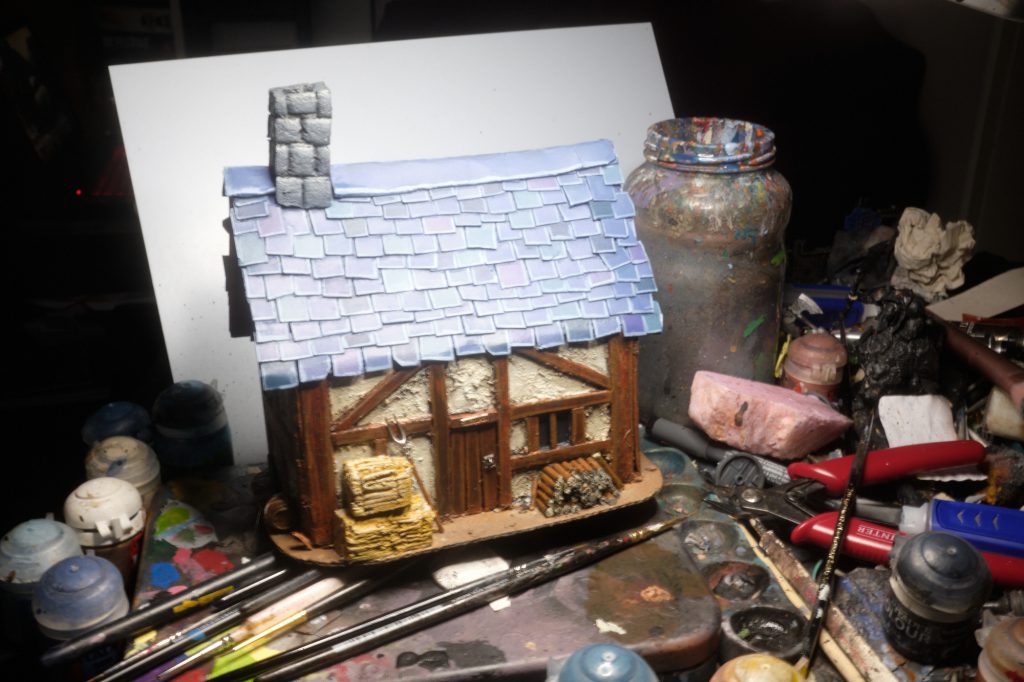
Shade the roof by running Drakenhof Nightshade where tiles overlap one another, in this case, along the top of each tile where it meets the others. Once this has dried, neaten up your tiles with their original colour. Now, if you’re a masochist (as apparently I am) you can spend three episodes of Criminal Minds edge highlighting each individual tile with Fenrisian Grey. The Goonhammer team mocked me for this needless effort by pointing out that, yes, you could also drybrush this in about two minutes.
Paint the top half of each stone in the chimney with Vallejo Dark Sea Grey mixed 3:1 with some White Scar. As you paint, feather this out with a wet brush at the bottom to get a nice gradiant between light and dark.
Shade the earth with Agrax Earthshade, you didn’t need me to tell you that.
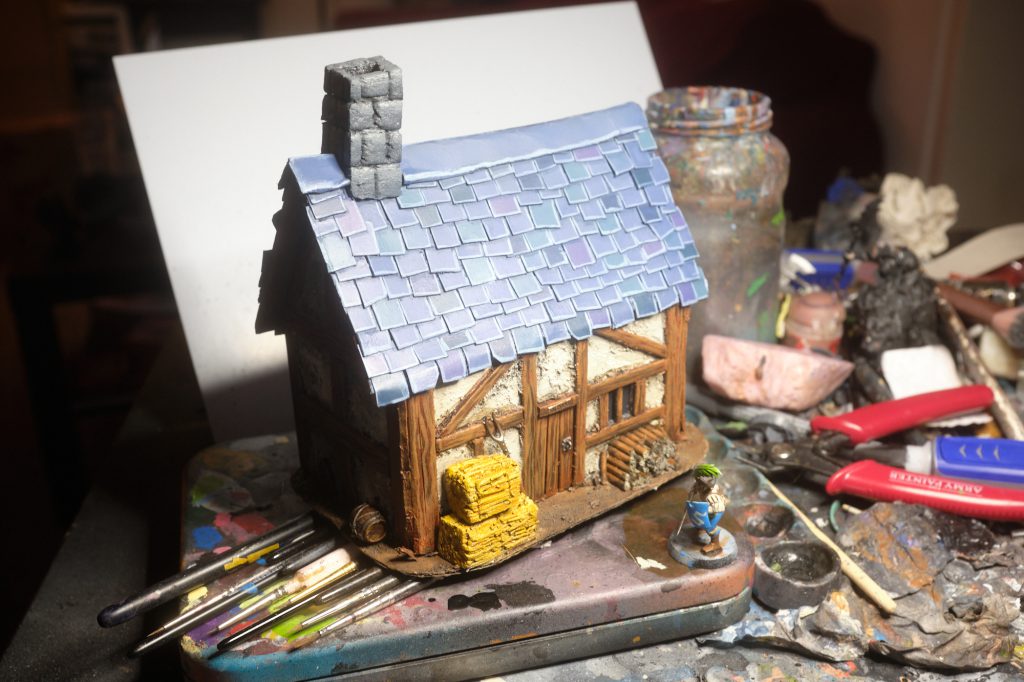
Ultimately I wasn’t happy with how dark the wood was. If you want to, you can mix Mournfang Brown with a little Fire Dragon Bright and paint grain patterns directly onto the wood. Look at references of real sawn and stained wood for this to help you understand the patterns of the grain and how they flow around and along the length of a plank. This way, I think the effect is much much stronger than the original.
Shade the hay bales with Casandora Yellow and then highlight the hay with Vallejo Model Colour Ice Yellow.
Drybrush the earth with Army Painter Leather Brown, and then give it a finer drybrush with Leather Brown mixed with a little Wraithbone (2:1)
Drybrush the off-white panels with some Screaming Skull. Be careful not to get this onto your lovely wood planking.
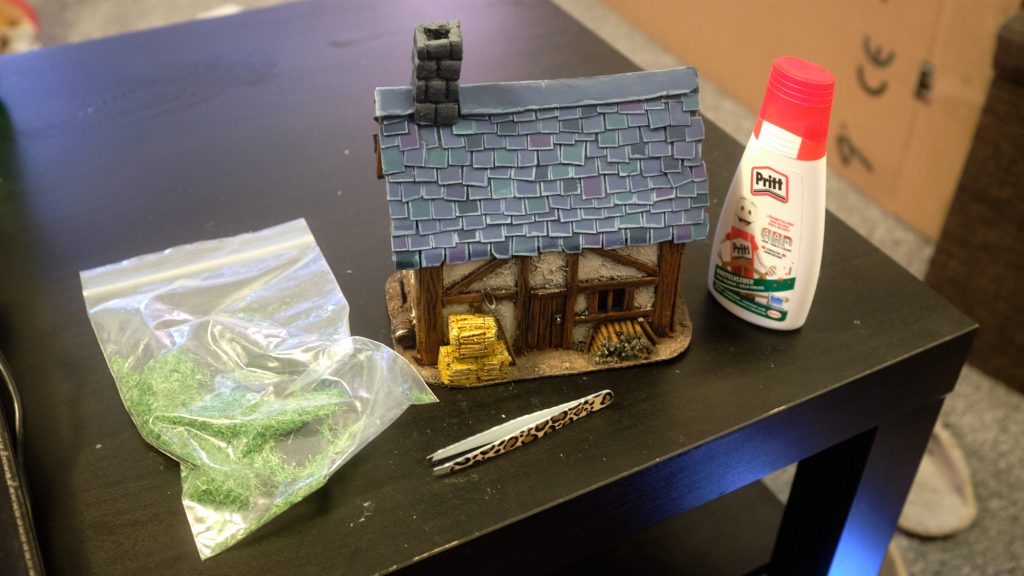
To finish, we’ll add a little grass. If you’re as stupid as I am, you can make your own grass flocking if you happen to have a piece of hemp rope knocking about. I wouldn’t recommend doing this, it’s both messy and time consuming, but if you insist…
- Take your hemp rope and a zip lock bag. Insert rope into bag.
- Using some relatively sturdy scissors, trim off tiny pieces (around 1mm) from the rope fibres.
- Do this for a very long time, or until your hand cramps up and you can’t trim anymore.
- Put some green paint (in this case, a mix of Citadel Moot Green and Elysian Green) into the bag and mix it well into the rope shavings, making sure to get a good even coverage all over everything. The paint will make the shavings clump together, but don’t worry, because, once it’s dry…
- Get a sieve and labouriously force the shavings through it. Imagine you’re using the world’s biggest tea strainer to prepare a cup for Satan himself. Push those fibres through that sieve and separate them!
Congratulations, Pilgrim, you will now have spent hours of effort to obtain grass flocking of a slightly lower quality than the tub of Army Painter grass you could have bought for €4 from your hobby shop. You idiot.
Blob PVA glue in places where you want some grass. Sprinkle said grass onto the PVA glue blobs. Once they’re dry, blow off the excess and you have some patches of grass in your yard! I wasn’t very happy with the colour of mine, it looked a bit dead, so I put a little Biel-Tan Green and ScaleColor Lime Green Ink onto it to give it a bit more pizzazz.
Your house in the country is ready! How bucolic!
