Welcome back to Goonhammer’s series for aspiring Titan Principes. We here at Goonhammer’s own Collegia Titanica know that Adeptus Titanicus can seem intimidating to players unfamiliar with its particular quirks, but this series aims to equip you with everything you’ll need to play out epic clashes on the battlefields of the far future with your very own Titan Battlegroup. In this series, we’ll be taking a more in-depth look at the various Legios of the Collegia Titanica – exploring their origins and how to use them on the tabletop, from maniple selection and their loadouts, through to how to command them on the field of battle to secure ultimate victory.
[Editors’ Note: This article was last updated on June 18, 2021, and includes updates through the Loyalist Legios book and the accompanying FAQ.]
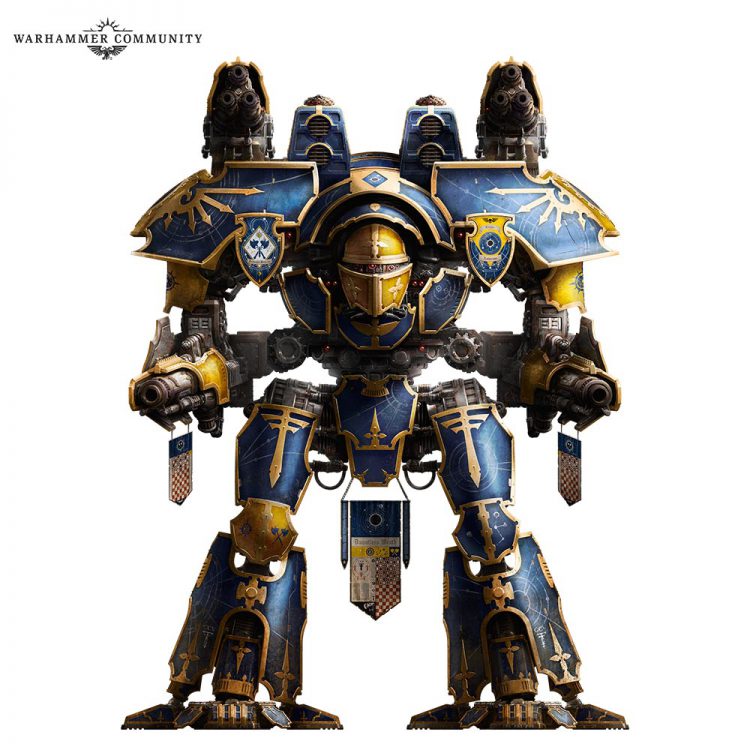
One of the most immediately recognisable Titan Legions, Astorum back up their striking color scheme with some of the best Loyalist traits out there, allowing them to move decisively to take control of the field, then hold onto it with a tenacity that other legions find tough to match.
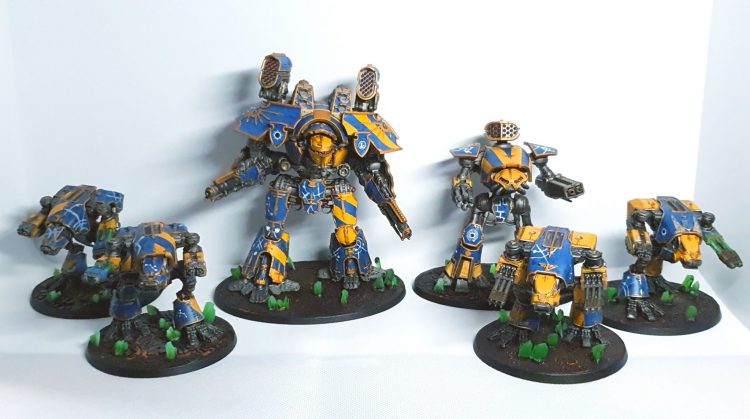
Who are Legio Astorum?
The Warp Runners come from Lucius; arguably the coolest Forge World in the Imperium, it’s a planet powered by an artificial sun where its core used to be and home to one of the largest Titan works outside of Mars.
In the background, Legio Astorum are unique in their ability to teleport their God-Engines into battle, giving them an incredible edge over others. Fortunately for their opponents this isn’t currently reflected by the rules.
Veterans of the Great Crusade, they fought in many campaigns bringing worlds into compliance and were honoured by their allies. One notable example of this is by the Thousand Sons who took the last Titan to fall on Kamenka Troika, the Warlord Canis Vertex, and mount it atop the Temple of the Pyrae Cult on Prospero. This Titan would walk again a century later via warp sorcery to nearly turn the tide of the Burning of Prospero.
During the Heresy, they faced Legio Krytos in the Battle of Tallarn and took part in the fateful Titandeath at Beta-Garmon.
Painting Legio Astorum
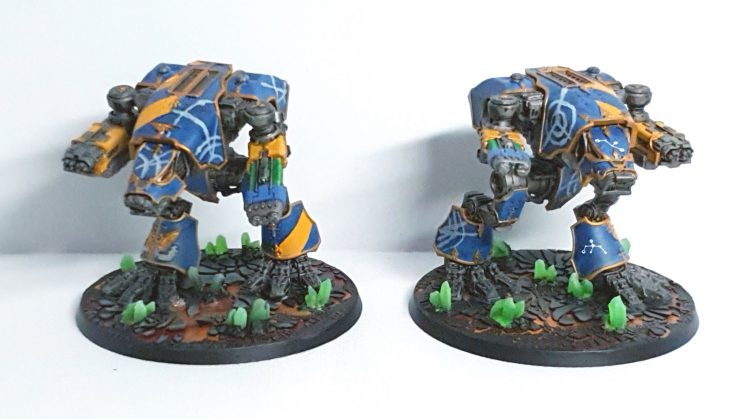
Our very own editor-in-chief Corrode has painted some Titans from the Legio Astorum, reportedly on the basis that the name “Warp Runners” is cool. Who can argue with decision making like that?
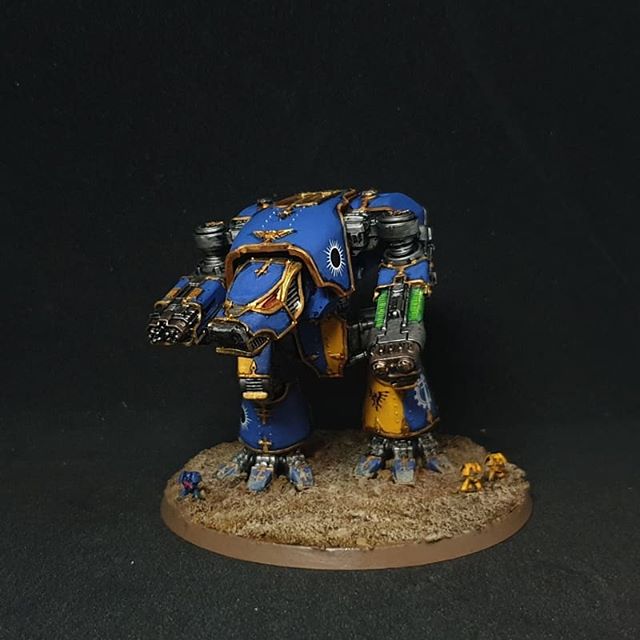
Corrode: You’re gonna have to bear with me here, because I am a very bad Titan Princeps and I painted my Warhounds about a year ago and then haven’t done any more. I have a Reaver next in my painting queue as I finally get back to the tiny god-engines,so writing this down is as helpful for me as it will hopefully be for some of you.
I picked Astorum partly for the cool nickname and partly because it was a scheme I thought I could easily execute. There’s also the key advantage that Astorum transfers are just in the box, and I don’t have to try and snap up Forge World sheets for the five minutes at a time that they’re in stock.
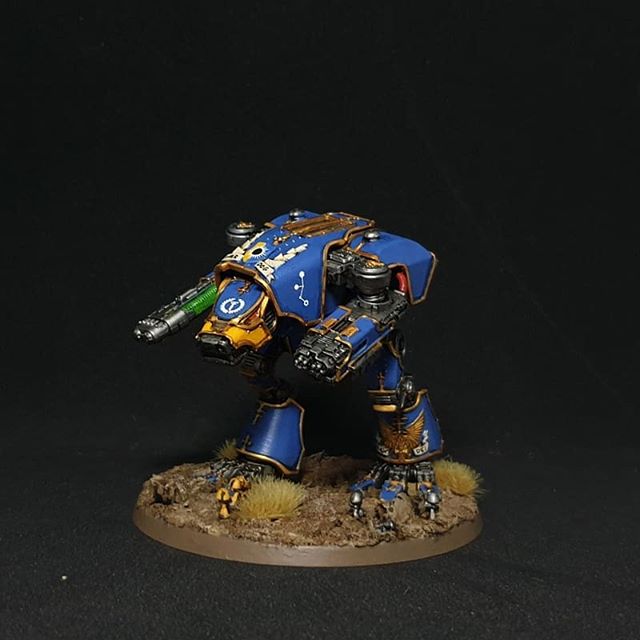
The three key colours are the blue, yellow, and gold. The blue is based with Macragge Blue and then layered Altdorf Guard Blue, with a wash of Drakenhof Nightshade lining the trim. The yellow is based in Averland Sunset and then layered a mix of 50:50 Averland Sunset and Flash Gitz Yellow to brighten it up. The trim is done in gold, a straightforward process of Retributor Armour base and then an Auric Armour Gold layer on top. I do everything brushing by hand, no airbrush or similar – the split panels are just done by careful brushing. I generally will paint the yellow in and then do the blue, since the blue will cover yellow more easily.
Basing-wise, I decided that I would theme my titans around the Battle for Tallarn. That means desert bases with minimal signs of life on them, and little Epic Space Marines battling beneath the titans’ feet. The Ultramarines and Imperial Fists both fought on Tallarn, and their colours neatly match the Warp Runners’ colours. Their traitor opposition were the Iron Warriors, and my bases are replete with Iron Warriors getting blasted apart or stepped on by Knights and Titans. A fitting end. I wish I had some Guard pieces to include the Tallarn Desert Raiders – I have a lot more titans to paint, so maybe I’ll go searching for them first. For the desert basing itself, the technique is featured in the How to Base Everything: Deserts article.
Warp Runners in Adeptus Titanicus
Brought back to the tabletop in the Titandeath supplement, the Warp Runners have have been in the setting since the first edition of Titanicus in 1989. Their traits are flexible and can work with most playstyles, although they do favor larger chassis and work best to enable aggressive early play.
Tactical Overview
War March lets your Titans move an extra 2” when they boost in the first two rounds of a game, but at a cost: any time a Titan who takes advantage of this rule rolls the Reactor die during the first two rounds, it instead rolls two and takes the “least favorable” roll. This effect gets better the larger the Titan you’re working with – 2” is proportionately more of a Warlord’s speed than a Warhound’s, and Titans with larger Reactor tracks can afford to risk the extra heat more than others.
Soggy: It’s comparable with Legio Mortis’ March of the Dead, both result in more early game movement with a slightly different cost. March of the Dead favors smaller chassis as it they get more from having a whole extra move with no reactor load. War March is the opposite, favouring slower larger chassis with more resilient plasma reactors and pairs well with Veteran Princeps below. I wouldn’t go out of the way and say one is better than the other as they align with different playstyles, but it is cool there is a similar but different theme for these opposing forces in the Titandeath supplement.
Veteran Princeps is simple, but powerful: it lets you re-roll a single Repair die, or two dice when rolling for Warlords and Warmasters (scale 10 or larger). In early rounds, this will help ensure you can vent the extra heat you’ll build up from War March, and will help you keep voids lit and critical damage to a minimum later in the game.
Bair: This is just so good. Take multiple Warlords, always, just do it.
Bounty of Mars lets you choose a damage location and add 1 to all repair dice you apply to that location. This could be used to bring that crucial weapon back online when you need it most, or to revive a Princeps who’s been injured or let you relight your voids despite the generator burning out. Keep in mind that it applies to all your Titans: while which location track takes hits is usually somewhat random, the Titans in the game right now are all much more likely to take those stray hits to the body than anywhere else. If your opponent has put critical damage into multiple Titans, this stratagem could let you bring multiple Titans back from the brink of death at the same time. Unfortunately, they can play around it by just focusing down a single target.
Condit: This is a cool ability when it lines up, but a bit overcosted when it doesn’t. It’s also got some light counter-synergy with the legion’s other traits – leaning into larger Titans means you have fewer Titans to benefit from this.
Astorum’s other stratagem, Machine Defiance, also increases your Titans’ resilience, but comes at it from a different direction. When a Titan’s voids collapse, you can roll dice equal to its servitor clades, and immediately increase its Void Shield level by 1 for each 5 or 6. Before you get too excited, this is explicitly not a Repair roll, so it won’t combo with Veteran Princeps or any other similar tricks you have up your sleeve. However, it has a solid chance of forcing your opponent to commit another attack to strip their target’s shields – Warhounds have about a 55% chance of getting at least one 5, while a Warlord will keep its shields up just over 80% of the time.
The Warp Runners’ Personal Traits aren’t really worth writing home about. The best of the bunch is Hero of the Crusade, but it’s not anything amazing – the bonus to command checks is nice, but it means you’ve got to make sure your Princeps is out ahead of the rest of its maniple, which can be a tough road to walk. Stick to the ones in the Core Rules.
Condit: On a somewhat positive note, Ancient MIU got a buff with the most recent FAQ that lets it ignore Shutdown orders if you roll them, so if you randomly generate your trait you no longer have a 1-in-3 chance of getting something completely pointless.
Maniple Choice
Astorum’s traits favor larger, heavier Titans. You’ll get the most out of Warlords, with Warbringers being a close second – the extra re-roll on the Warlord’s repair roll will come in handy in the clutch, which can make all the difference. Warhounds and Reavers both get at least some mileage out of Veteran Princeps, while Reavers see slightly more impact relative to their base stats than Warhounds.
The Myrmidon is an interesting choice, as a cleverly-deployed pair of Warlords can make use of the maniple’s consistent ability to issue Split Fire orders to pile as much firepower on one target as possible without losing the carapace weapons’ shots if your intended target manages to outmaneuver you. Its maniple trait is still underwhelming, but you could certainly make it work.
Instead, we recommend looking at Fortis or Regia for the increased durability. An Astorum Fortis maniple can get a stranglehold on part of the table and create a fortress that’s tough to crack, and a Warp Runners Warlord can keep pace with an unboosted Warhound, making the assortment of Titans in a Regia a little less awkward.
The Ruptura is worth considering, as Reavers can make good use of War March to close the gap even before the Artillery Bastion trait. The trait will enable one of your Reavers to use boosted War March movement without rolling the reactor die as well as allow your Reavers to move again if one of your Warbringers scores a kill. Just keep in mind that, while the Warbringers have similar defensive stats to Warlords, they still only re-roll a single die each Repair roll.
If you don’t want to run a Warlord, the extra 2″ of movement will help the Reavers in a Ferrox close to take advantage of their maniple trait as quickly as possible. Similarly, a Corsair’s Reavers will get plenty of benefit out of the extra speed to get up close where their ability to move unpredictably and sidestep firing arcs can be best brought to bear.
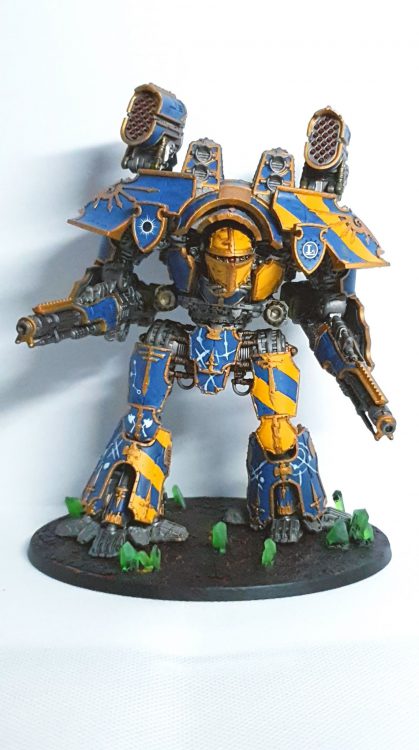
Here’s a sample 1500-point list that brings a pair of Warlords to take maximum advantage of your legion traits:
Legio Astorum Battlegroup – 1,750 points
Regia Battleline Maniple
Warlord Titan – 525 points
- Personal Trait – Iron-clad Tyrant
- Macro-Gatling Blaster
- Sunfury Plasma Annihilator
- Paired Gatling Blasters
- Tracking Gyroscopes
- Bastion Shielding
Warlord Titan – 545 points
- Macro-Gatling Blaster
- Sunfury Plasma Annihilator
- Paired Laser Blasters
- Tracking Gyroscopes
- Bastion Shielding
Warhound Titan – 230 points
- Plasma Blastgun
- Vulcan Megabolter
- Bastion Shielding
Warhound Titan – 230 points
- Plasma Blastgun
- Vulcan Megabolter
- Bastion Shielding
Warhound Titan – 220 points
- Turbo Laser Destructor
- Vulcan Megabolter
- Bastion Shielding
Astorum gets the most out of Warlords, so we’ve brought two! If they take the extra 2” in the first round, they move 8” per boosted move, letting them keep pace with the un-boosted Warhounds and allowing them to make it across the board and into range that much faster. Get them into position while merging with the Warhounds on enemy activations where you won’t collapse both Titans’ shields at once. Keep your 3+ save going that much longer with Bastion Shielding on every Titan, allowing a free push for re-rolls on 1’s once per Titan that’s shareable with your maniple trait. Even with penalty from your legion trait when taking the extra movement in the first two turns, pushing for Voids to Full can make sense – just don’t do it if you can’t afford to take at least one more heat. Make use of Veteran Princeps to keep your heat as low as possible to open up room to push for Voids to Full in a pinch.
Soggy: Regia Maniples can take a few plays for new players to really click, this is mostly due to the fact that playing with two Warlords can be unforgiving – your activations become incredibly important as any manoeuvering missteps will cost you a lot of firepower. In experienced hands a Regia is tough to break down and will most likely wear its opponents down first.
Use the Split Fire order where you can on your Warlords early on. You’ll probably have some difficulty lining up both carapace weapons on the same target, and the ability to target more than one enemy will let you bring all your arm weapons to bear on the same target. Your Warhounds don’t get much from orders round 1, and will likely want to take Emergency Repairs in round 2 to be sure they vent as much heat as possible.
Avoid pushing for speed with the Warhounds. In addition to making them so fast they’ll leave your Warlords in the dust, they’ve got a 25% chance of orange-lining and about a 30% chance of risking an awakened machine spirit every time you push, making the boost a bit risky for their shorter reactor track. Instead, let them march up the board with the Warlords, adding a few ablative shield points into critical void save rolls or distracting your opponent from the Warlords that form the core of your army and will do most of the heavy lifting.
Putting Tracking Gyroscopes on both Warlords means they can get to the mid-field, stay there, and put the punishment on anything, so long as anything smaller stays more than 10″ away. Consider the stratagem The Long Retreat so that they can back up at full speed to keep those carapace weapons firing, and use your Warhounds to block movement lanes and cut off flanking routes so you can get the most mileage out of the Warlords.
Once you’re in place, vent that heat and start brawling. If any of the Warhounds survive to round 3, consider breaking formation and going for a kill on a vulnerable opponent with the plasma blastguns and/or aimed shots with the lasers – now that you’re no longer running hot, you can devote more of your re-rolls to fishing for extra void shields, letting you play the Warhounds more aggressively and hunt for shots into vulnerable flank or rear arcs, or just start setting up the next target for your Warlords to tear into. We wouldn’t suggest squadroning all the Warhounds as you’re already short on activations with the investment into the Warlords, and the plasma/bolter loadout is relatively self-sufficient. The Warhound with the turbo laser can hang back outside a squadron and use its longer ranged weapon to put a few more dice on your target while sharing shields with whichever Warlord is still alive.
Machine Defiance is worth considering here – between the Warlords’ natural durability and the added boost from the Warhounds’ shields, your opponent is already going to have some serious difficulty taking down a Warlord without committing everything they’ve got, and having an 80% chance to force them to take at least one more attack to expose your armor means they’ll have to be sure to have a spare weapon to shoot with before they can get a shot at your armor.
You could change up the list by swapping the plasma/bolter loadout for twin turbo-lasers if you want a little more firepower while advancing up the table and more reliable ability to finish off targets at the expense of their ability to set up targets for your Warlords once they’re in position. If you’re confident in your positioning, swapping out Ironclad Tyrant for Dominant Strategist can let set up to destroy your opponent, then steal the Opus and strike first with one of your powerful mid-ranged Warlords when they least expect it.
Condit: You could also look at swapping out one of the arms on a Warlord for a power claw. Don’t count on it as an offensive threat, though – War March is good, but it doesn’t apply after round 2, and the extra 4″ isn’t going to be enough to track down an opponent who wants to avoid close engagements. If you do this, play the Clawlord aggressively to threaten a counter-charge and discourage your opponent from getting in close to your maniple. If you find yourself getting swarmed and overwhelmed, bringing a power claw is an excellent way to add some more risk to that for your opponent. Just don’t bring more than one – you’re going to need the firepower and you don’t have the tools necessary to convert them from a counter-charge weapon into a legitimate offensive threat.
Playing against Warp Runners
Be careful with your measurements in early turns. Brawler Warlords and fist Reavers will pick up an extra 4” in the first two rounds, which could make the difference if you’re not careful. Make sure you don’t overextend and leave yourself vulnerable, and if they overreach, punish them.
Warhounds that take the boost are likely to either orange-line immediately or risk awakening their machine spirits and getting a sub-optimal activation. Plan accordingly and take targets of opportunity when you get them: the added heat makes pushing for Voids to Full significantly riskier.
Machine Defiance can cost you an attack, so you’ll need to plan your turns with some redundancy when attacking key targets. Expect this to show up the moment you collapse voids on their centrepiece Warlord.
March for War
The Warp Runners have a great toolbox of traits at your disposal to secure the field quickly and hold it. Dislodging an Astorum Warlord is no mean feat, so take advantage of this. Strike decisively in the opening turns and your opponent won’t know what hit them.


You must be logged in to post a comment.