In true “every mini is a Necromunda mini” spirit, I sat down with a pile of FutureProof Modular Terrain and got to work. For me, Necromunda is all steel, rust, and grime. The underhive is no place for brickwork and rough stone floors. But outside the underhive, there’s always the Ash Wastes. Could someone have built long-ruined structures with ash bricks? Maybe an ancient Imperial building, forgotten from time and lost among the ash.
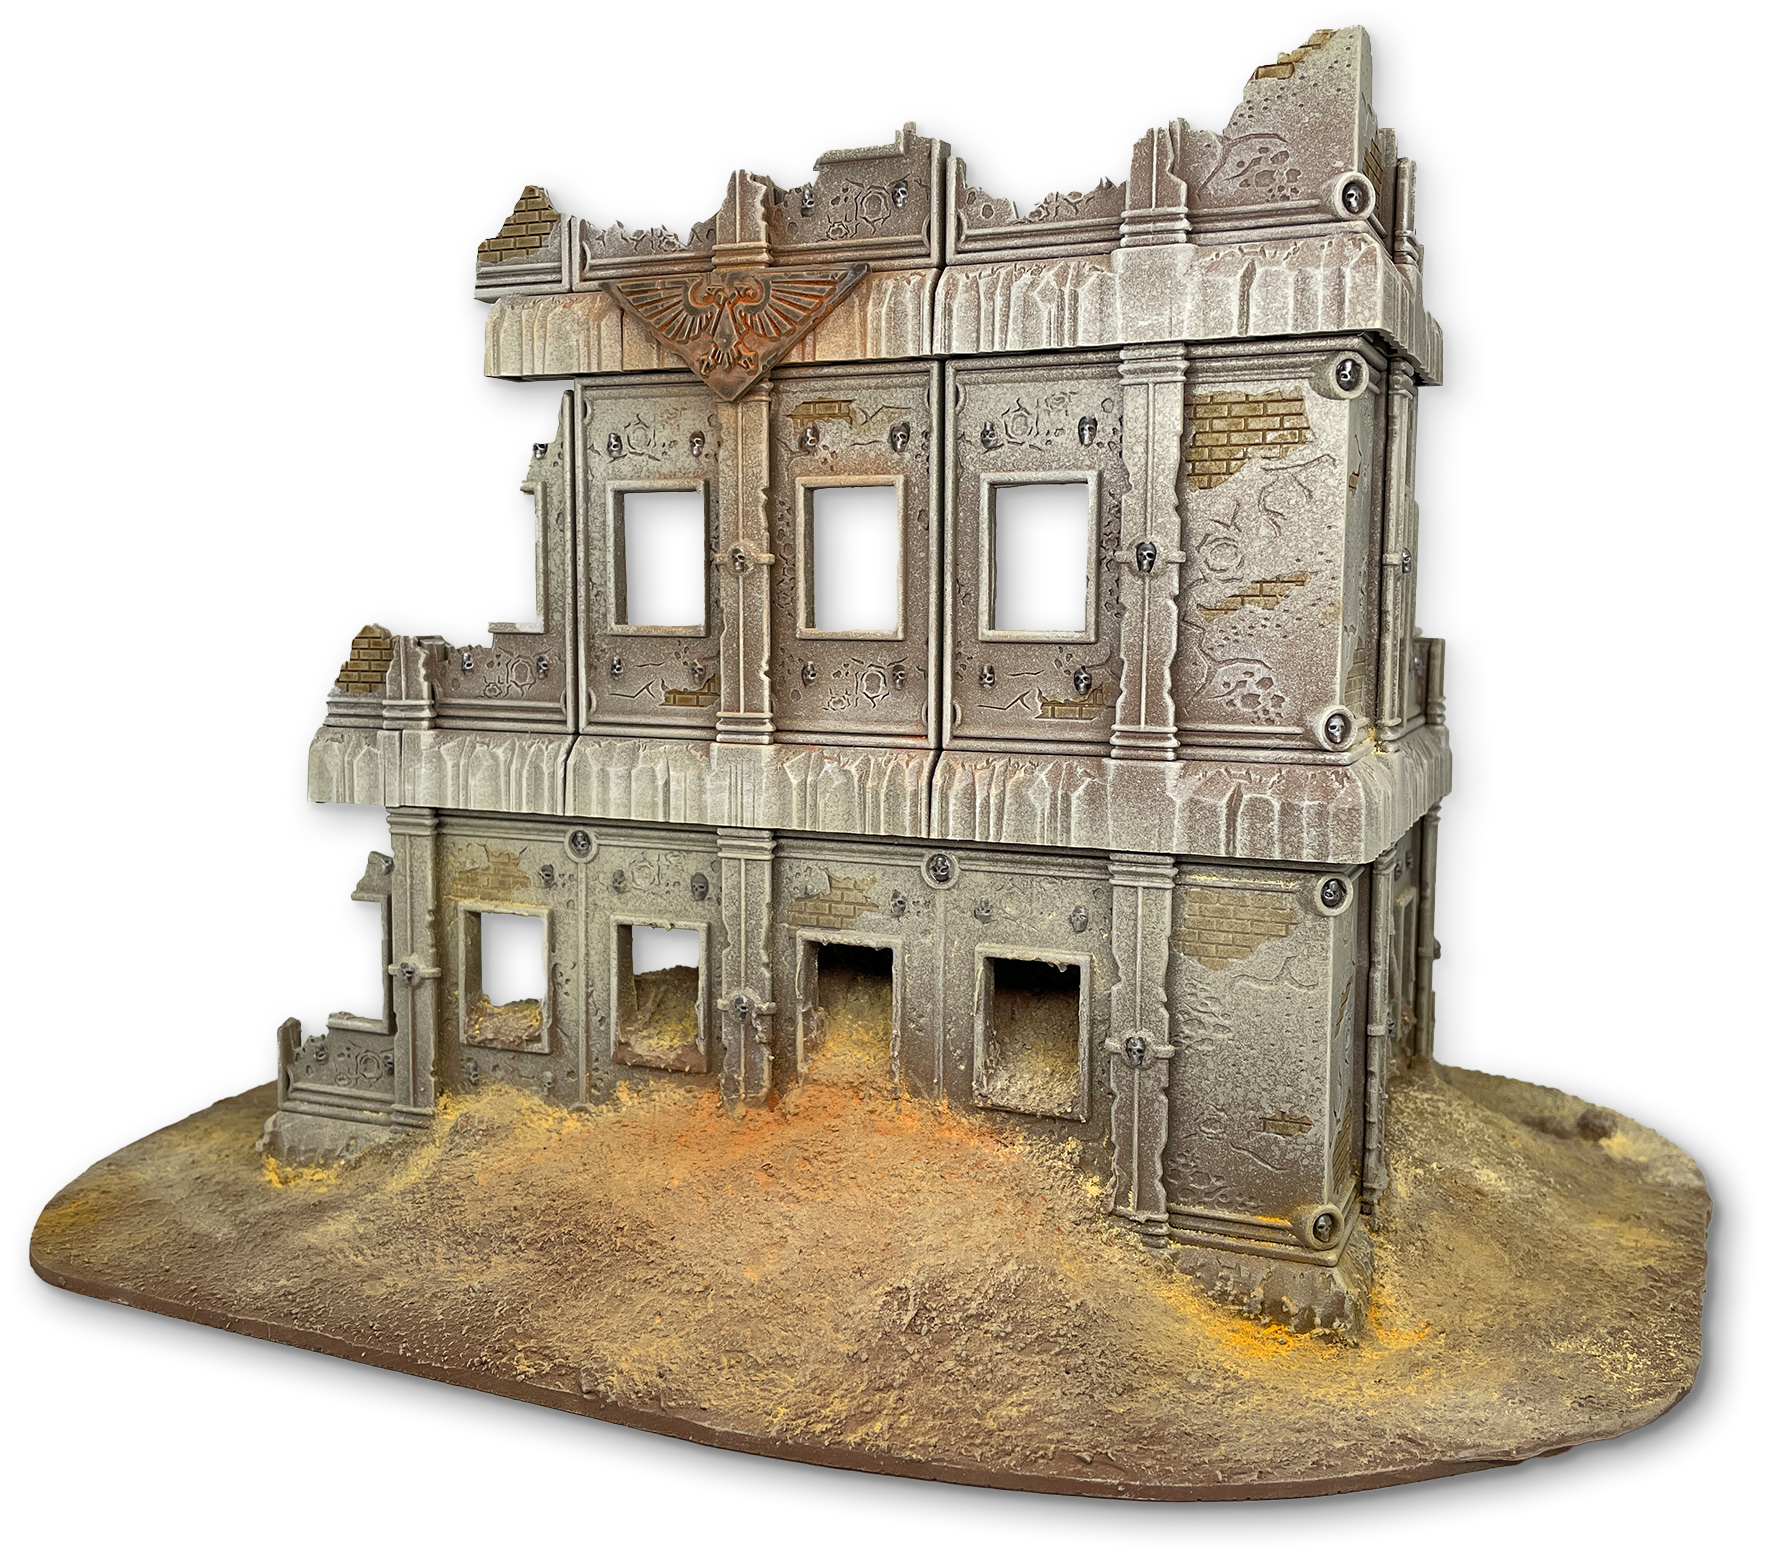
Needless to say, that’s where we went for this. I immediately thought of having a shell of a building being enveloped and overtaken by an ash dune.
Taking what I learned from our Kitbash, Conversions, and You article, I dove into laying it out. I cut out windows and made wall panels to fit. In true Necromunda fashion, I scavenged some flooring components, chopped them up, and used the parts to stretch the floors out a bit.

Once that was all set and glued together I grabbed some two-inch insulation board and cut it down to the rough size I needed with a box cutter. Insulation board is readily available from any home improvement store or, if that’s not convenient, you can easily order small sheets of it online. It’s a versatile hobby supply that, the more you work with terrain, the more you appreciate.

The sand dune would naturally form a peak inside the building, where it’s slightly protected from the elements. So the dune needs to ramp up from outside the building, and come to a peak in the corner.
To get this looking natural, the bottom of the foam needs to be cut out so that it fits over the ground-floor flooring.

Be sure to test that it fits before getting ahead of yourself. As you can see here, the foam fits well on the ruin, and lays flat. It doesn’t have to be a perfect fit, you don’t need to carve out the perfect negative of the plastic or anything. Not even close. It just has to be close enough that it feels roughly correct.

After that, time for more rough shaping. I continued carving it to to get it in the rough shape I wanted: invoking the drifting ash getting stopped by the building, filling it up, and then spilling out through the open windows.


With the foam looking good, it’s time to make it not look like foam any longer. I painted all the foam and base with a thick layer of artists black acrylic paint. After that, I used some texture paste I’ve had sitting around for a decade as a base layer and followed it up with a layer of drywall spackle.

After that was dry, I was left with a few cracks where I laid the spackle on thick, so I broke out the texture paste again and painted it all over and this time, added build up to the upper floors, so it would appear that ash had collected up there as well.

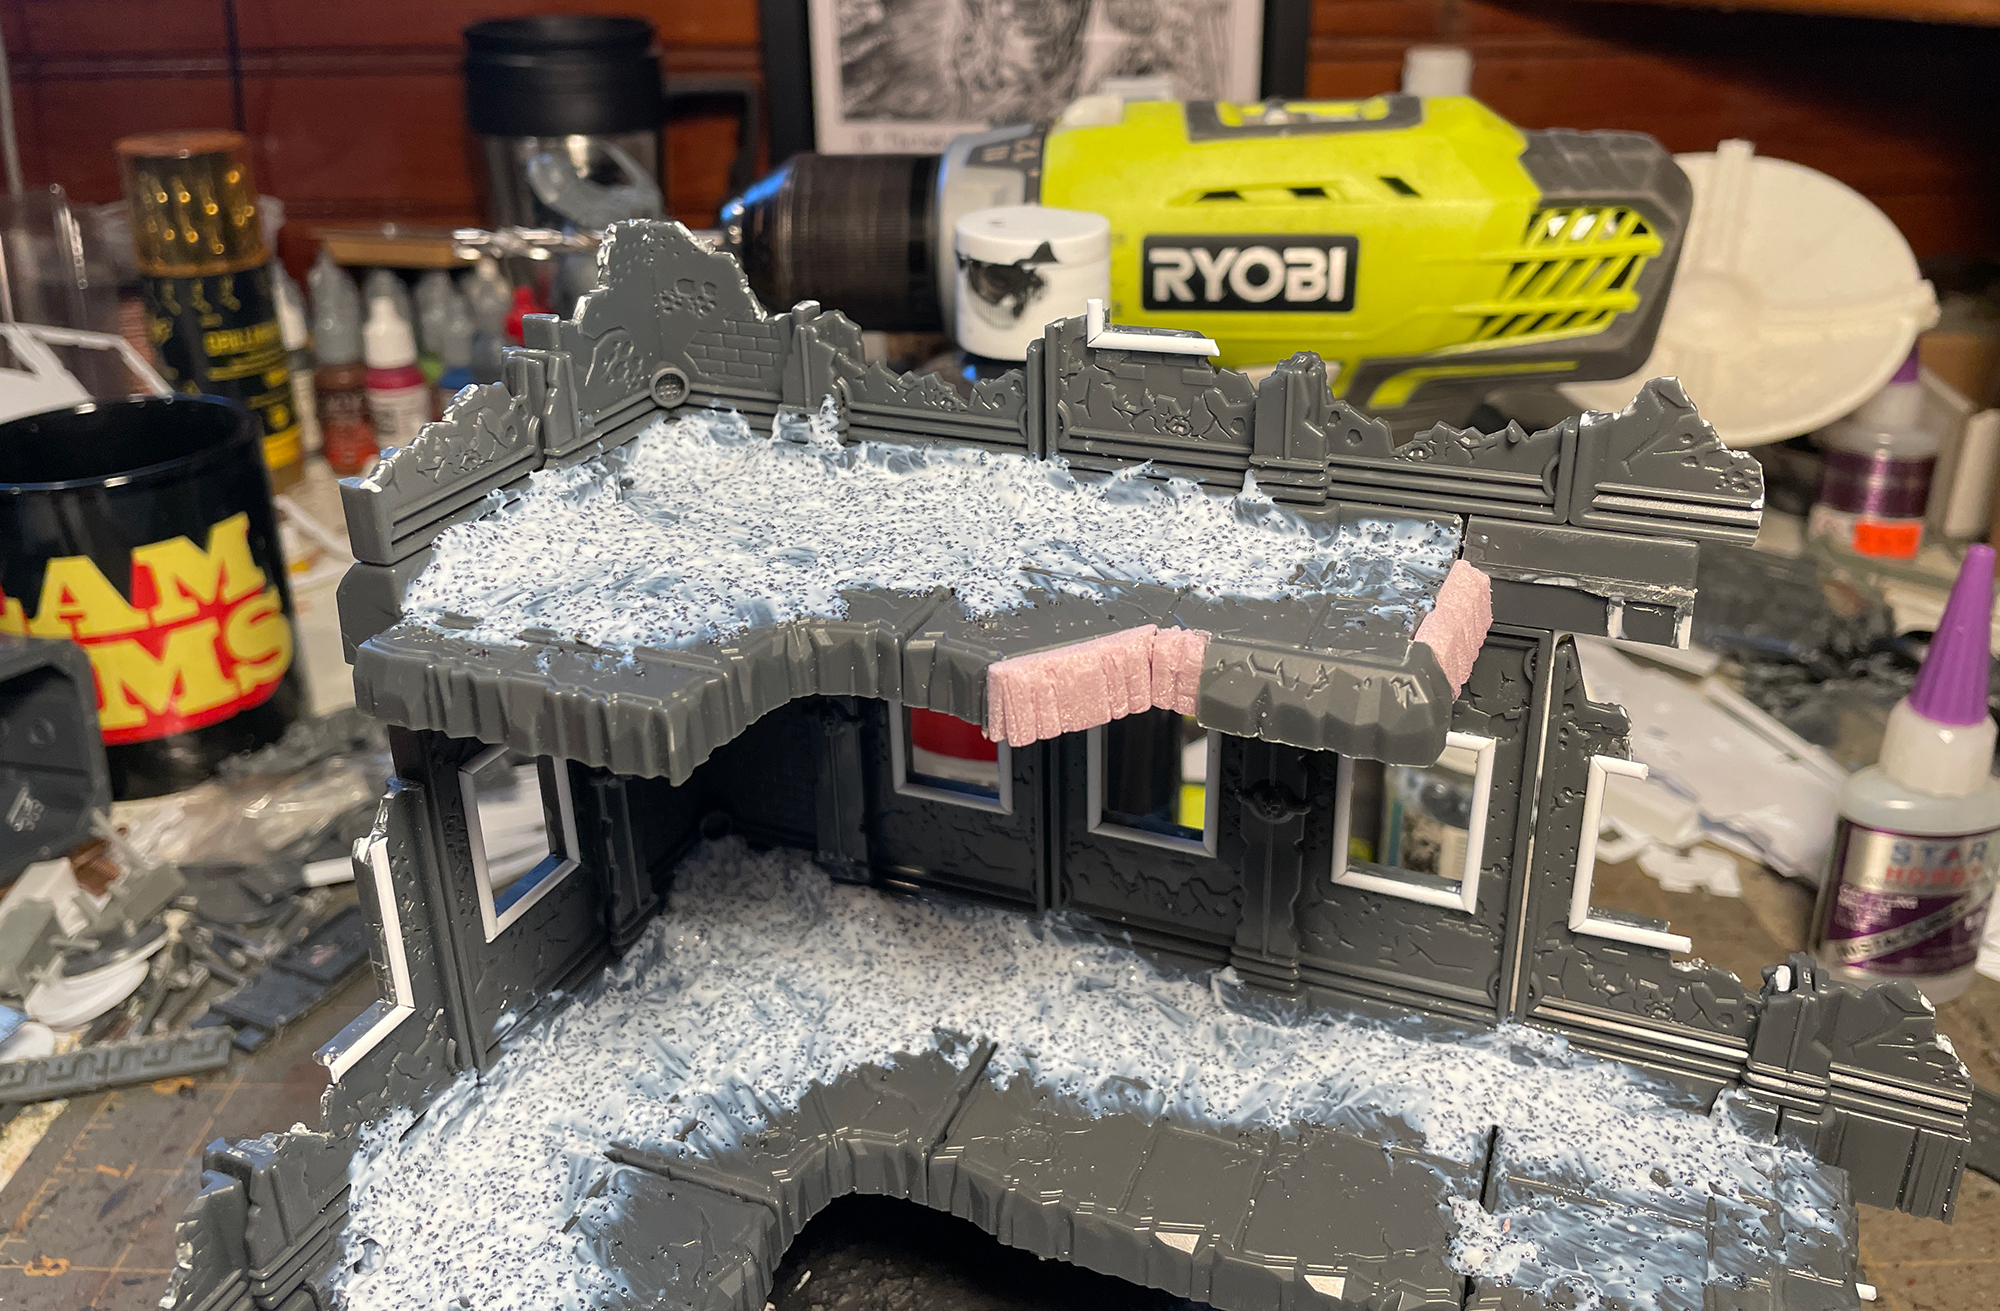
Once dry I painted the exposed foam floor extensions, added some putty on the cut wall joints, and got ready to spray it. I also added a large 3D printed aquila to the side to give this an ancient imperial ruin vibe.


With all that dry and the foam sealed, it was time to paint. There are lots of ways this can be done, and I’m going with an ashen bone look. If you want more inspiration, we have step-by-step guides on different ways this terrain can be painted in our guide, How To Paint Everything: FutureProof Modular Terrain.
I started by priming with Army Painter Leather Brown, and laid down a solid coat over everything. Pay close attention to priming the foam itself, as it can be a thirsty surface and soak up a lot of primer.
After that was dry, I sprayed, from a 45º angle above, Army Painted Skeleton Bone on the upper sections of each floor. Next was a drybrush of Ushabti Bone and white. I glazed the brickwork with Skeleton Horde Contrast. The Aquila and skulls were painted with Army Painter Plate Metal and washed with Basilicanum Grey Contrast.
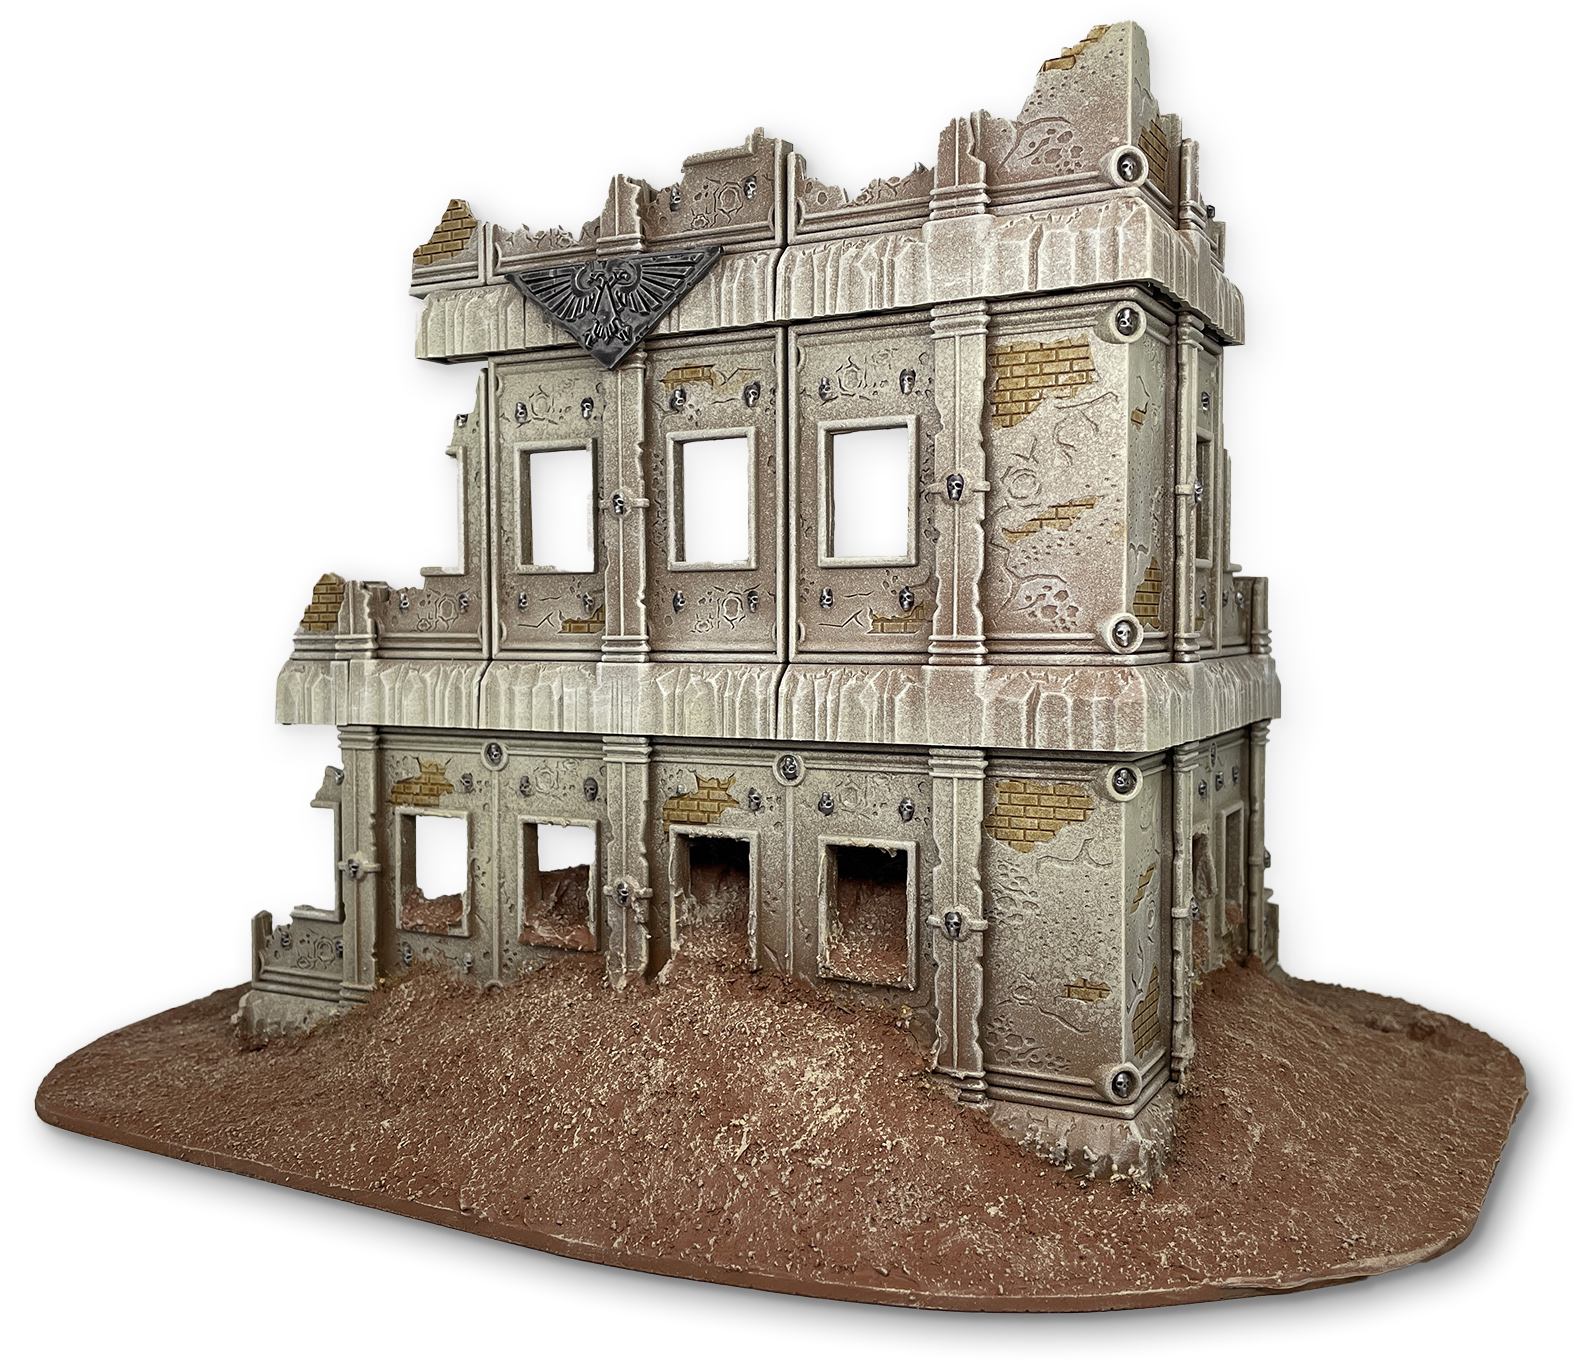
The sand dune was painted with mix of colors, made to match the old Citadel color Calthan Brown. If you don’t want to blend your own paints, that’s fine, just fine a nice earthy brown. I followed that up by drybrushing it with Ushabti Bone.
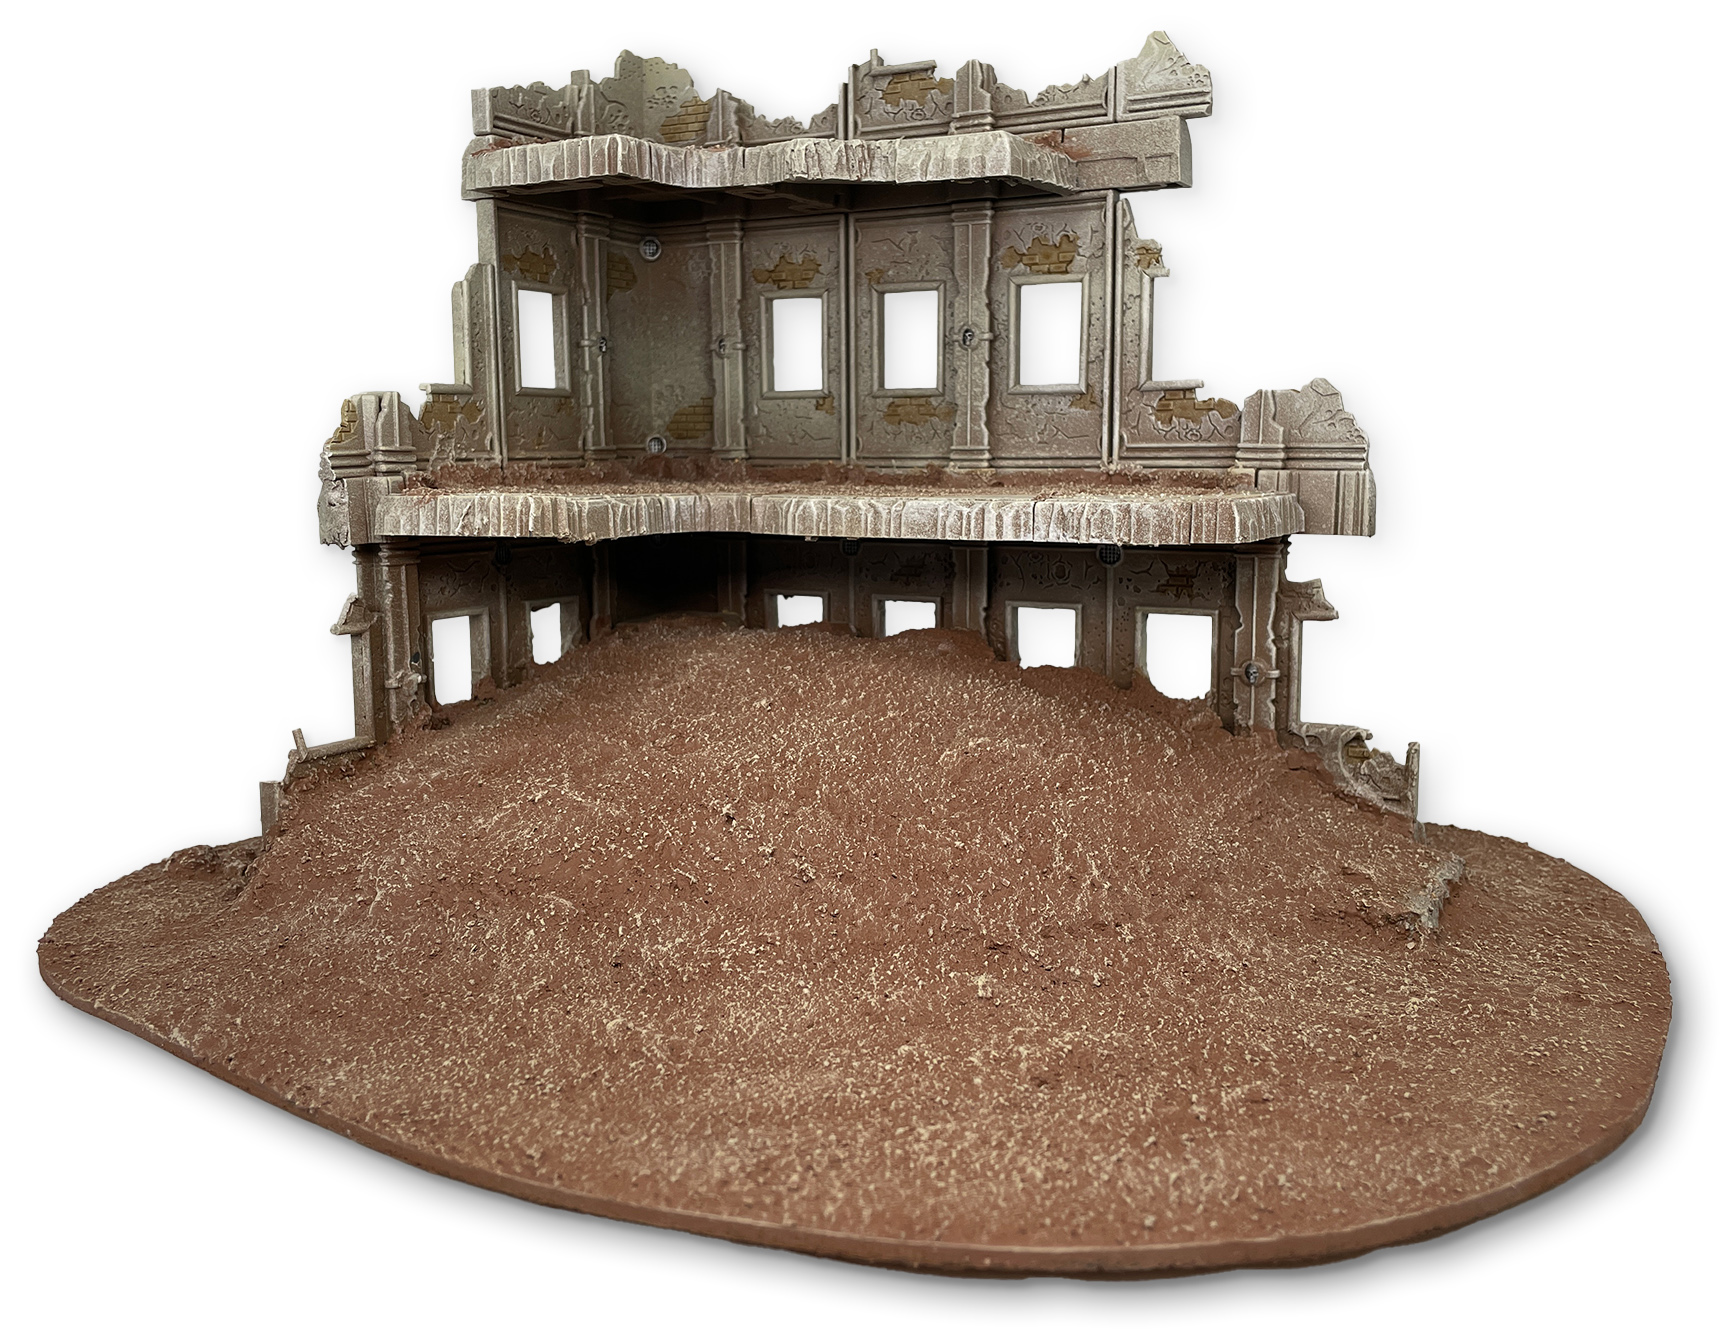
And then it was time for powders. I’ve been adding them to all my Ash Waste Vehicles and knew that I’d want to use them on the terrain as well, but this was the first real test of that. I’d say it was a success. I created my own powders for this. I bought a box of artist’s pastels and used an X-acto knife to scrape them down to powder (be sure to have proper ventilation and a respirator). I store the powder in small tubs, and then just paint them onto my minis with a cheap brush.

If you don’t want to go to this effort, lots of company sell pigment powders by the jar, and you only need a couple colors. But I recommend at least looking at sets of artist pigments. They’re significantly cheaper than you’d expect. You can get a full set for the cost of just 2 or 3 jars of pigment powders, and the full set will give you get a massive variety of colors to work with.
I used very dusty, ashy colors on the ground and floors and added some orangey rust powder to the Aquila. I never use a varnish or fixative over my powders, knowing that they will shift and change over time, but I love the truly dusty look that it gives. Just have to handle them carefully!

I’ve varnished powders before, so I can chime in with some advice. About 75% of the powder will “disappear” when you varnish it. It’ll get washed out and and lose that natural dusty look that you want to see when using powders. If you want to keep that dusty look, you’ll need to varnish it, then reapply powder, then varnish again, and repeat until you’re happy. It takes a long time, and even with that final layer of varnish down, you might still have some residual powder come loose over time.
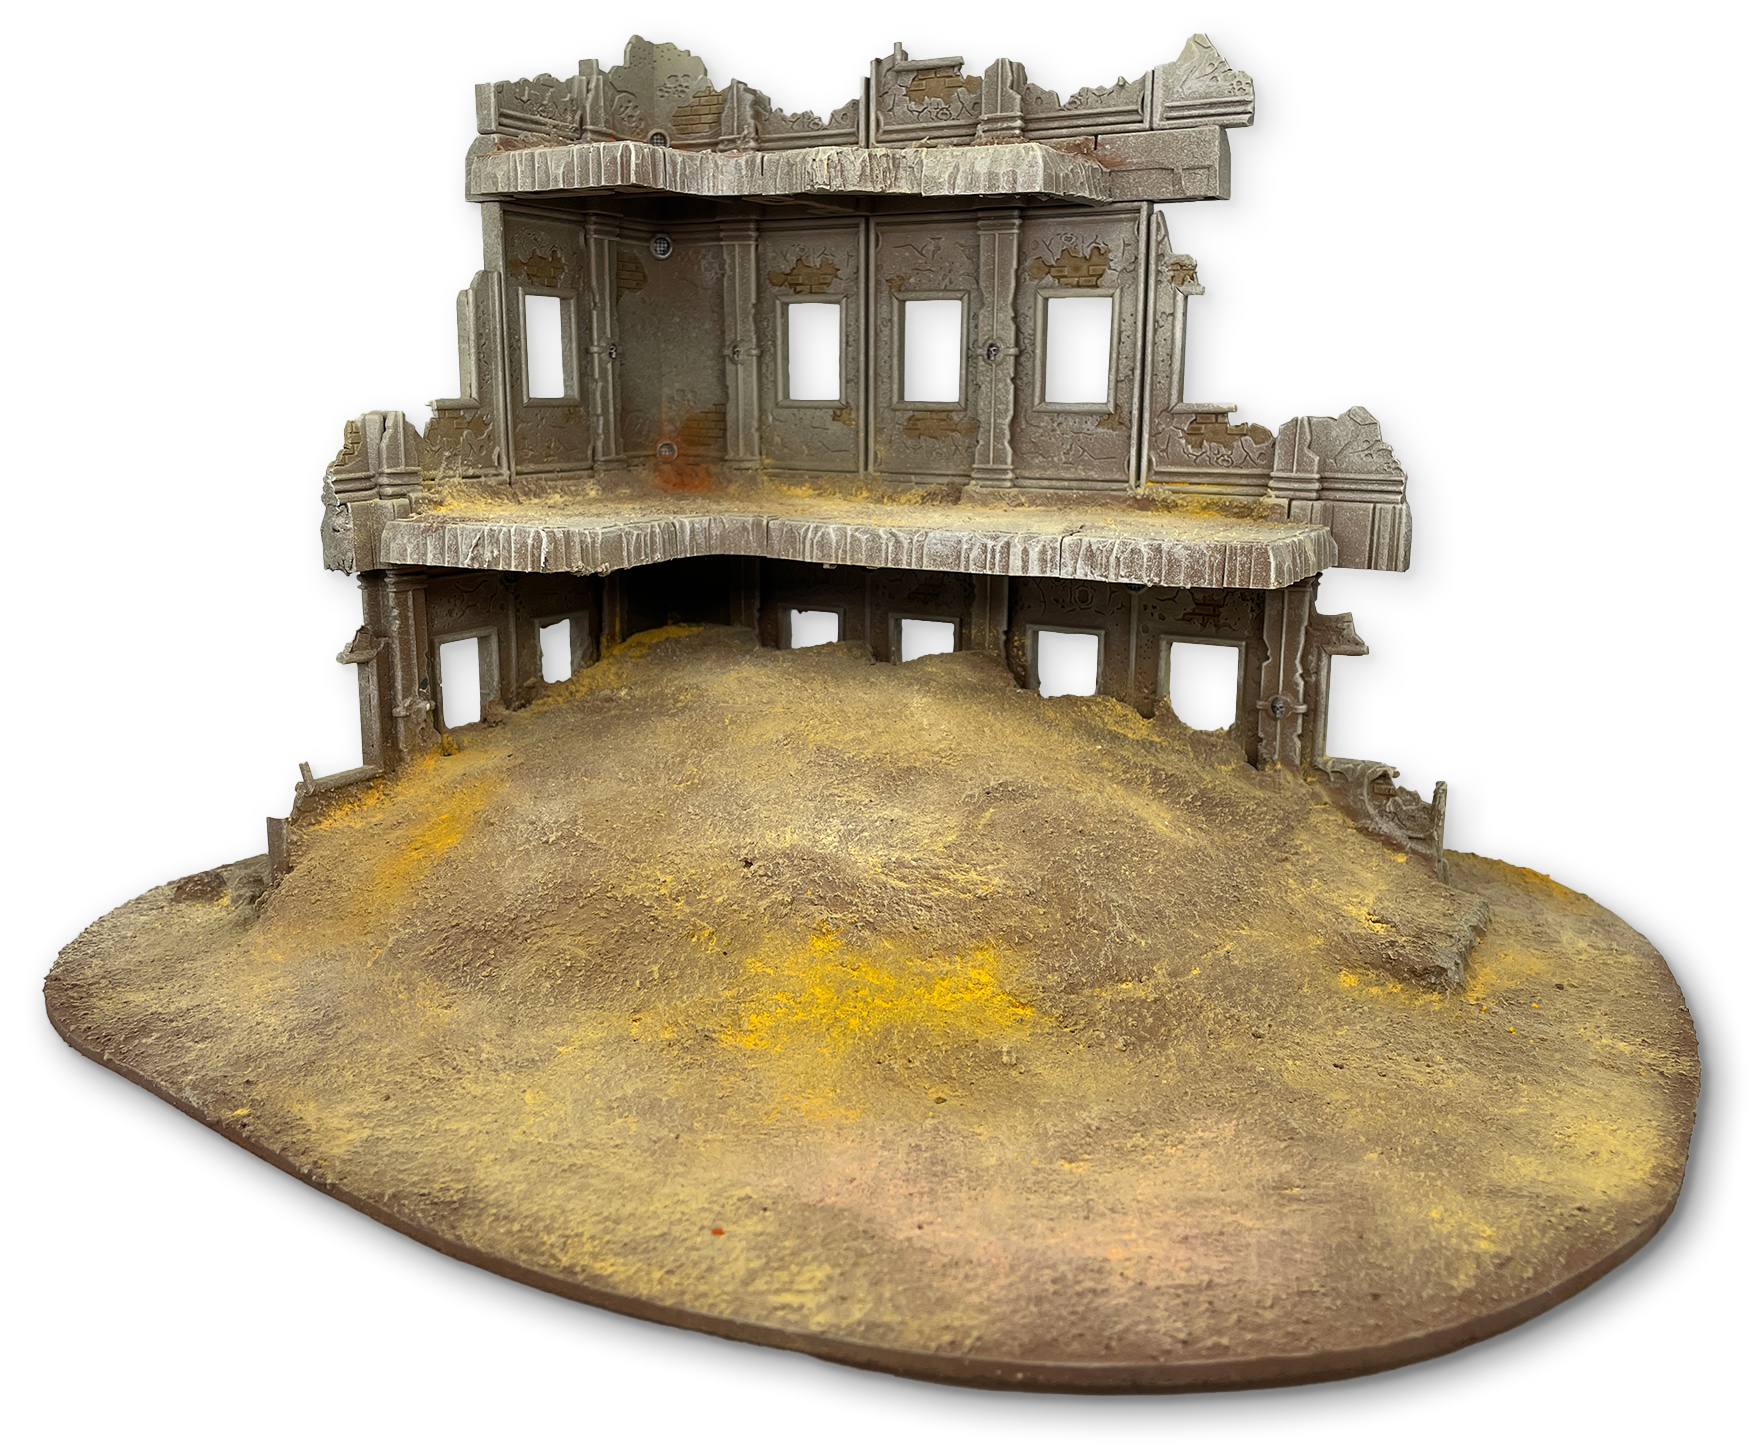
And that’s a wrap! A perfect ancient Imperial ruin, lost among the Ash Wastes, forgotten and broken. And by using similar sculpting techniques and colors on other terrain, this will be a perfect addition to the larger projects I have planned.
Final Thoughts
Though FutureProof Modular Terrain feels right at home in the Warhammer 40,000 universe, it’s always worth looking for ways to use it in other games. With little more than some simple conversions, sculpted foam, paint, and elbow grease; this ruin went from the grimdark battlefields of the distant future to one that’s right at home in the Ash Wastes of Necromunda. Just imagine what you could do with a little foam, spackle, and an afternoon. And if this guide sparked joy, check out FutureProof’s Kickstarter to get a set of your own terrain.
For myself, I ended up with a very cool, flavorful building in my Ash Wastes, ready for gangers clamber up and start blasting.
Thanks for reading! If you have any questions or comments feel free to drop us a note in the Comments below or email us at contact@goonhammer.com. And if you want regular updates in your inbox, subscribe to our newsletter.


You must be logged in to post a comment.