In this installment of our Hobby 101 series, we look at some simple techniques for adding environmental damage effects to your models to give them that proper “lived in” look!
We’ve all been there – you’ve just finished painting a model and are proud of your achievement, but then you go to put it on the table for your next game and it just looks too…clean! Something is missing, and that something is weathering.
“Weathering” is the process of adding visible damage (usually from environmental effects) to your model’s paintjob as a way to make it appear dirty, grimy, rusted, muddy, or otherwise altered such that it looks like it’s actually seen some hard use on the battlefield rather than coming straight off a showroom floor. (Do they have showrooms for Leman Russes and Basilisks?)
And because this is a Hobby 101 article, all of the techniques I will be discussing here can be easily accomplished with basic brushes and easily available materials. No airbrushing or fancy salt-crusting or chipping fluid here, though if you are interested in these techniques you can check out our How To Paint Everything: Weathering article. But here we’ll discuss just a few simple ideas that you can use to really crank up the realism of your models. So let’s dive in!
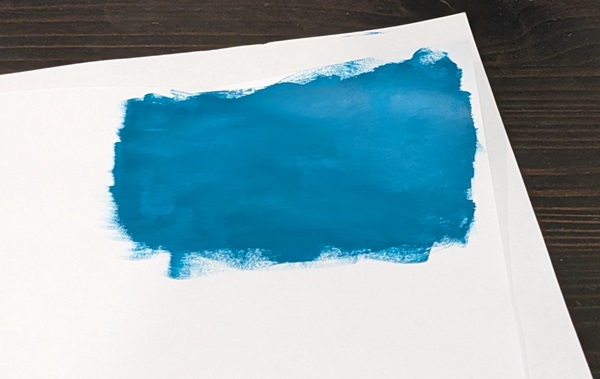
Aside: Before we start, I recognize that it can be a little daunting to attack what is essentially a finished, fully-painted model with the intent of making it look old and worn. Some of the techniques described here benefit from a little practice to get the right feel to achieve the desired look. A great way to practice is to make some swatches on plain paper using whatever your finished model’s base color is. That way you can practice and get a sense of how the finished product will look without worrying about “messing up” your miniature.
Dry Dust or Dirt
A very common effect of vehicles moving and soldiers marching is the creation of billowing clouds of dust. Given that dust is comprised of very fine, very dry particles of dirt, it hangs in the air, where it will settle onto horizontal surfaces and into nooks and crannies.
A great way to model dust is through the use of dry pigments. If you have never used them before, dry pigments are simply the ground up colored substance in regular paints, only without a medium binding them into a liquid form. You can get pigments in loads of different colors from a variety of different producers.
There are a couple of different ways to apply dry pigments, but the easiest is to use the same kind of brush you’d use for dry-brushing. Just dip it into the pot of pigments to get a little bit on the brush, then stipple it onto your model. You’ll quickly get a feel for how the pigment covers and how you can move it around with a dry paintbrush, and how your stippling motions can concentrate the powder into the crevices of your model’s details. There will always be excess pigment, so this part can get a little messy – I recommend doing this over a cloth or paper towel.
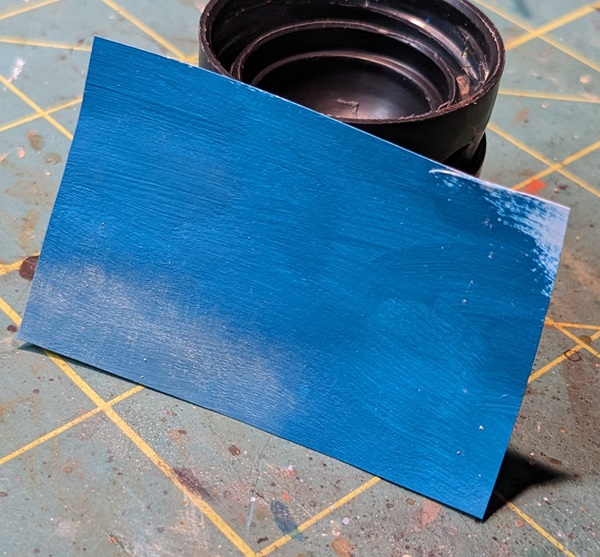
Once you have the pigment in place, you can vary how strong the effect is by using your drybrush (without pigment) to gently rub off any excess on the model in locations where you don’t want it. This is a great way to concentrate the dust effect in crevices, as a (relatively) stuff drybrush will pull most of the dust off the raised surfaces but leave it in the recesses.
It can take a little practice, but here’s one of the best bits about dry pigments – if you don’t like how it has turned out, you can simply wash it off with water!
Once you have the dust where you want it, the next step is to fix it in place. For this step, you can use odorless mineral spirits. Just take a regular paintbrush (I use an old Size 1) and dip it in the spirits. Then gently apply just the very tip of the brush to the dusty area. Capillary action will draw the mineral spirits into the dust, initially making it look almost like it disappears – fear not, once the mineral spirits dry the dust will be more visible again! This will help hold the small pigment particles in-place, although you should be aware that this isn’t as strong a hold as a spray varnish.
This brings me to a note on varnishing dust – depending on how you clear-coat your models, you run the very real risk of undoing your dust effects. I mostly varnish via rattle-can. Unfortunately, the pressure at which the varnish comes out of the rattle-can can actually blast away your dust, even after you’ve fixed it in place with mineral spirits. To combat this, hold your rattle-can farther away than you normally would to minimize this effect. Alternately, you can varnish your model first and then apply the dust effects. And if you happen to have an airbrush with an adjustable regulator, you can also spray on varnish using a very low-pressure setting, but that requires more specialized gear and is beyond the scope of this article. If all of that sounds dangerous, you can always use a brush-on sealer. A gentle application of Army Painter Warpaints Matte Varnish will do the trick.
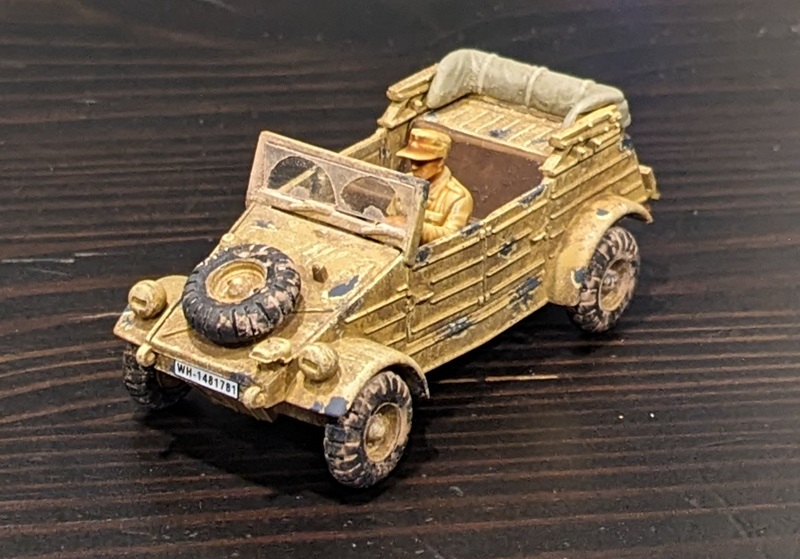
Special Effect: Dusty Windshields
You can apply dust effects with dry pigments to the windshields of vehicles and it looks great, but what makes it look even cooler is when you have windshield-wiper patterns in the dust!
This is an relatively easy effect to achieve, and just takes a little bit of masking tape and a sharp hobby knife. I use an X-Acto knife with a #11 blade (the really pointy one). Simply spread a piece of masking tape on your cutting surface and cut two concentric arcs. You’ll need to sort of eyeball how curved and how far apart they need to be based on your model’s wipers, but tape is cheap and at this stage you are just experimenting until you get something you’re happy with. Make two angled cuts to connect the arcs and voila, you have a mask for your dust! I like to leave a little extra on one side that I can fold over to make a little raised tab – this will make removing the mask from your model a little easier, but isn’t strictly necessary.
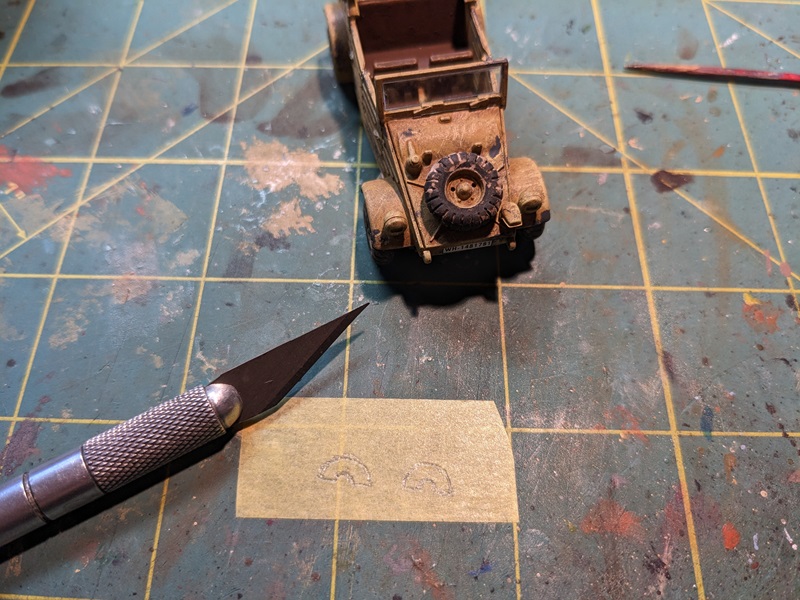
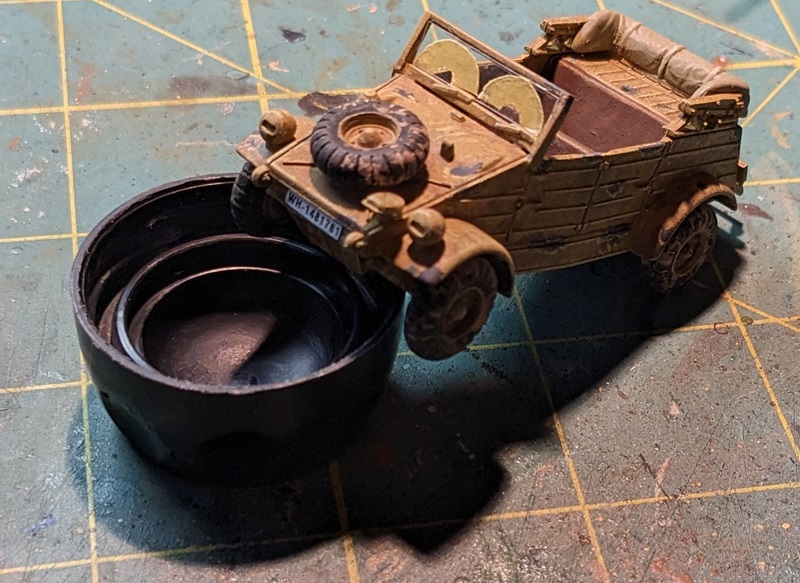
Once you have your mask cut out, carefully peel it up off your cutting surface with your hobby knife and gently stick it to your model’s windshield, ideally with one straight edge touching the wiper detail. Now apply and fix your dry dust effect as explained in the previous section. Once the mineral spirits have dried, carefully use your hobby knife to lift the mask off the vehicle. Voila, a dirty windshield!
Caked-On Dust or Dirt
Sometimes when dusty surfaces get wet (or when blowing dust encounters a wet surface), you get a sort of crusted-on dust effect. This is very easy to achieve by applying dry pigments with a damp brush.
For this process, just wet your brush slightly, then dip it into the dry pigment, getting a little on the end of the brush just like you would for applying it dry. At this point you can either apply it straight to the model itself, or “mix” it a little bit on your palette. This will produce a “paint” (of sorts) that you can then apply to the model using the same kind of stippling motion described above. This will look weird and a little gross, but don’t worry – once it dries it will look great!
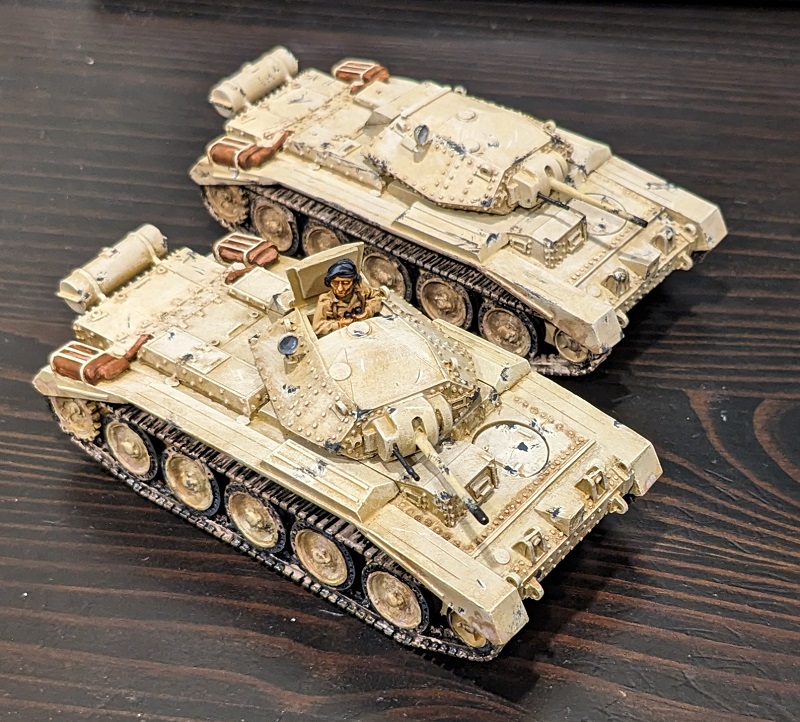
The thing that makes this trick work is the lack of a medium for the pigment. Once the water has evaporated, the remaining pigment has just a tiny bit of texture to it that gives it that very crusty appearance. I also find that this method results in more of the pigment remaining on the model even after a rattle-can varnish coat has been applied, and I use this method extensively for the tracks and road wheels of all of my tanks (using different colored pigments for different environments).
Chipped and Scratched Paint
Vehicles operating in harsh environments will see a lot of wear-and-tear, and the most obvious of these effects will often be chips and scratches in their paint. There are a couple of ways to get this look, but I think the easiest is stippling and underlining.
Aside: There is a school of thought that the best way to get this effect is by pre-painting the model rust colored, then applying chipping fluid, then painting your base color overtop, then using water to activate the chipping fluid with water. I personally find that to be too much work. Granted, the effect can be absolutely stunning in person, but whew is it a lot of effort. No, today we’re going to talk about a method that is much simpler.
Stippling is the practice of pushing your painting tool directly onto the model (as opposed to strokes like typical brush work). I say “painting tool” here because you can use a variety of different ways to apply the paint, with the most popular being chunks of sponge or old, ratty brushes.
Back when minis came in clamshell packaging or blisters, sponge foam material was ubiquitous, so it was a simple matter of just tearing off a rough chunk, dipping it in a little dab of paint, and gently applying it to your model. But if you don’t have any foam handy, you can do the same thing with a ragged brush. You know, those cheap craft brushes with curled tips and frayed ends? Turns out those are perfect for this.
One of the tricks to effective stippling is to make sure you are varying the amount of paint on the brush – more paint is going to yield a bigger, more solid chips, less paint is going to yield smaller, less regular chips. Next, vary the amount of pressure you’re using – more pressure is going to splay the foam or bristles out more and give you a bigger splotch, gentle dabs only leave a little paint. Finally, make sure that you’re rotating your sponge or brush a little bit so as to avoid having any kind of repeated pattern to your splotches. This can take a little bit of practice to get the hang of, but you can practice on a piece of paper beforehand to get a feel for it.
As for what color to use, you’ve got a couple of choices. Since more of the surfaces you’re going to apply this technique to represent things made of metal, you could certainly use a metallic paint. This is especially true for aircraft models, where the aluminum skin will show through – aluminum is very resistant to corrosion and will appear bright even after subjected to the elements for long periods of time. But for things made of steel, it doesn’t take long before that steel gets a dull finish or even starts to rust. As such, I like using a dark gray or a dark, reddish brown for this step. If you’re unsure, again it’s easy to experiment on a piece of paper and see what the overall effect will look like.
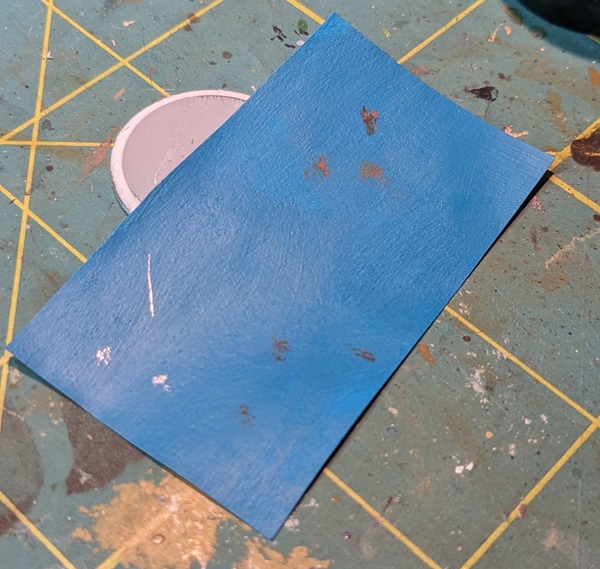
If you’re pressed for time, you could stop here and have a model that already will look great on the tabletop. But if you want to go the extra step, you could underline your chips to give them the impression of depth. This is a tromp l’oeil technique, where you are using color to fool the eye into perceiving texture where none actually exists.
To do this, simply take your highlight color (say, the color you did all of your model’s edge highlighting with – you did do edge highlighting, right?) and gently draw a very fine line along just the underside of the chip following that chip’s shape. You’ll want to think your paint to a fairly watery consistency and you’ll want to use a brush that holds a point well. This is a little bit of a delicate operation, so take your time and go slowly until you get a feel for it.
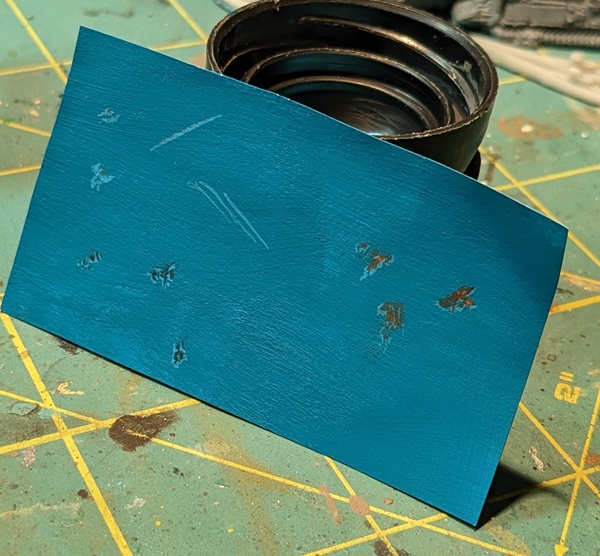
Note that in the above example the bright metallic chips don’t show up very well – that’s because the metallic paint is much more concentrated in how it reflects the light (it’s more “specular” reflection, to introduce a technical term). If you’re using a bright metal color for your chips, underlining them will help them to be more visible when viewed from all angles.
Scratches
If you want to add a little texture detail, you can use your highlight/underlining color even in areas without chips. This is a great way to make scratches that might dent or mar the surface but which don’t make it all the way through the paint to the metal beneath. The three little lines in the example above done this way, and are meant to evoke something like claw marks
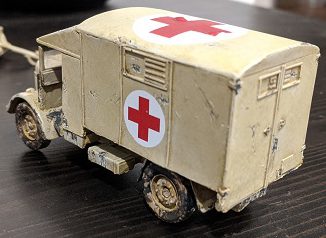
When you look at these effects very close-up (like in the swatch examples above), the effect can seem exaggerated and almost cartoonish. But at tabletop distances the effect is very convincing. And remember, less is more – it doesn’t take much to sell the impression.
Mud
Just like paint chipping, there are a couple of ways to do mud. For a more “caked on” effect, it’s hard to beat some of the “technical” paints from various manufacturers. These paints are designed to dry with an actual “chunky” effect, which gives true texture to the model. When applied well, these can look great!
One of the issues with technical paints, however, is that they do tend to work better at intermediate scales. If you are playing 40K or Bolt Action or something else that’s roughly 28mm scale, this is fine because the scale of the “chunks” is mostly going to match the scale of your model and will look very realistic. But if you’re working at a smaller scale – say 15mm or smaller – or if you’re going for a thinner, slimier-looking mud, the effects of the technical paints are going to look weird.
For these cases, I find that the easiest way to get mud effects is to take whatever brown or tan strikes your fancy and just stipple it onto your miniature. You use the same approach as described in the section on paint chipping above, but in general you’re using a bigger brush, more paint on the brush, more pressure when pushing the brush onto the model, or some combination of all three. Rather than just trying to get a few isolated spots here and there, you’re going for a thicker, more connected area that looks like, well, mud!
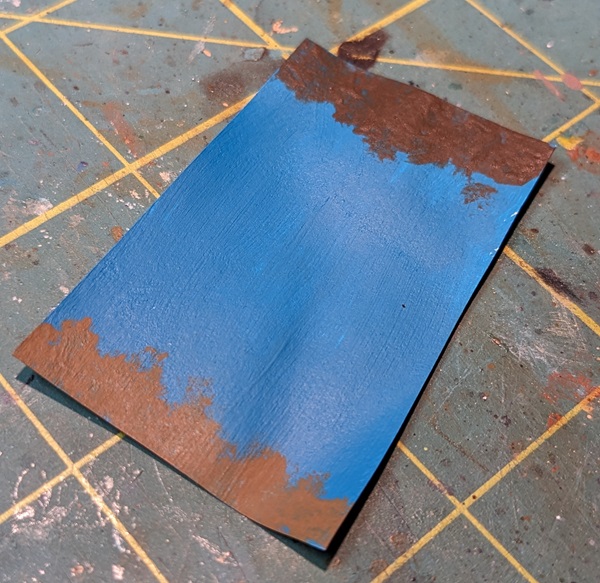
Of course there’s nothing stopping you from using other colors – who knows what color the mud on an alien planet might be? Red martian mud looks pretty cool on AdMech minis, for instance.
Whatever color you choose, the goal is to get an irregular effect, both along the edge of the area you’re covering as well as in how completely you cover that area. You want the mud to be thin enough that underlying color shows through in places, but thick enough that in others it is completely obscured. Like anything else, this takes a little practice.
Here too you can vary the consistency of your paint to get different effects. I added some Acrylic Matte Medium to the dark brown paint in the swatch pictured above, which made the paint a little gloopier. When stippled on, it gives just a little bit of texture. Normally you want to thin your paints such that it hides brush strokes, but for this kind of technique thicker is sometimes what you want. Don’t be afraid to dip straight out of the paint pot when you’re making mud!
Drying Mud
Generally speaking, wet mud tends to be darker than dry mud. Further, the longer mud stays stuck to an object, the more it will dry out. But this process isn’t instantaneous, so there will be some amount of time where both wet and dry mud are present on a surface.
How do we get this effect on a model? Turns out it’s as easy as applying one stippled coat of a lighter brown (representing the dried mud) followed by another stipple of a darker brown (representing the mud that is still wet). And of course there’s nothing stopping you from doing this with three or more layers, it just depends on how sharp you want your wet/dry transition to be.
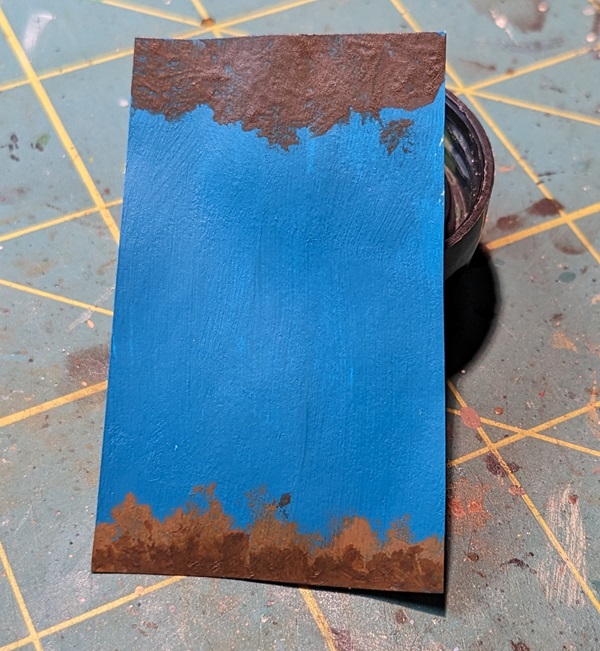
As with the paint chipping, up close this can look a little weird. But at tabletop distance, the effect looks very realistic, and really gives the impression that the model has encountered mud at some point in the recent past. This effect doesn’t need to be limited to vehicles either – it’s great on the legs of pack animals or on the greatcoats of infantrymen spending a lot of time in trenches.
Mud-Spatter
If you want something a little more nuanced than caked-on mud, you can also try mud spatter. This is the kind of thing you’d see when tiny droplets of mud (such as might be created by a fast-moving vehicle cruising through a puddle) spray and adhere to a surface.
To get a really nice spatter effect, here’s a great way to achieve it: taking a fairly large brush (I use crappy craft brushes for this), dip the brush into your paint, hold it about a half-inch away from your model, and give it a short sharp blow. The size and opacity of the droplets will depend on how thin your brown paint is. It can help to practice this a few times against your test swatch (or even just a regular old sheet of white paper) as this will help you calibrate how hard to blow, how close to hold the brush, and how thick or thin your paint should be to get the effect you want. And of course if you do have one you can use an airbrush to puff at your loaded brush – it might give you a little better directional control for your splatter, but honestly I find that just blowing on it is usually sufficient and saves me the hassle of cracking out my airbrush.
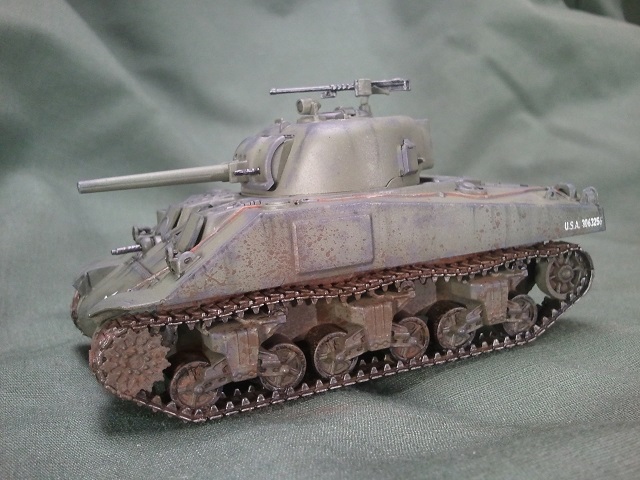
As a side note, I have tried the “flick” method (using a toothbrush or something with similarly stiff bristles), but I find the “puff” method to produce better-looking results with less mess.
Grime
When I say grime, what I’m really talking about are the streaks of filth you get when dirty surfaces are exposed to rain, which carries the dirt along in channels with the shedding water, depositing it in concentrated areas. This is a really cool effect and very easy to do with oil paints.
Don’t be scared; oils are actually really easy! And if you’ve already picked up a big tin of odorless mineral spirits to use as a fixative for your dry pigments, you’ve got what you need!
Almost any fairly thick oil-based paint will do, and you can use it more or less straight from the tube if you’re using artist’s oils. Just apply a tiny dot of the oil paint at the top of the region you want the grime streak to cover. Then, using a flat brush dampened with mineral spirits, gently swipe downwards. The spirits will thin the oil paint and draw it along the path of the brush. A couple of quick swipes and you’ll have gorgeous filth and oil stains. It really is just that easy. Using either a black or very dark brown paint is good for just general dirt or filth.
Heat Discoloration and Soot
OK, rant time: I have seen a lot of people but supreme amounts of effort into achieving this effect, fading their heat-discolored metallics all the way from silver through brassy to blue and purple. And I’ve got to say, I’m not a fan. It usually looks too…clean! Real heat discoloration is rarely that smoothly transitioned, and is usually accompanied by carbon build up (in the form of soot).
A much quicker, easier, and (in my opinion) more realistic way to achieve this effect is to paint your steely metallic color, then do two successive dry-brush layers; one of a brass color (Warpaints Tainted Gold is nice) and the other of a very dark gray or black. Make sure to concentrate your dry-brushing of each color on successively smaller areas to show the transition. This will give you a nice scorched look without needing to resort to any specialized inks or do any complicated blending. Simple, yet very effective on the tabletop.
Rust
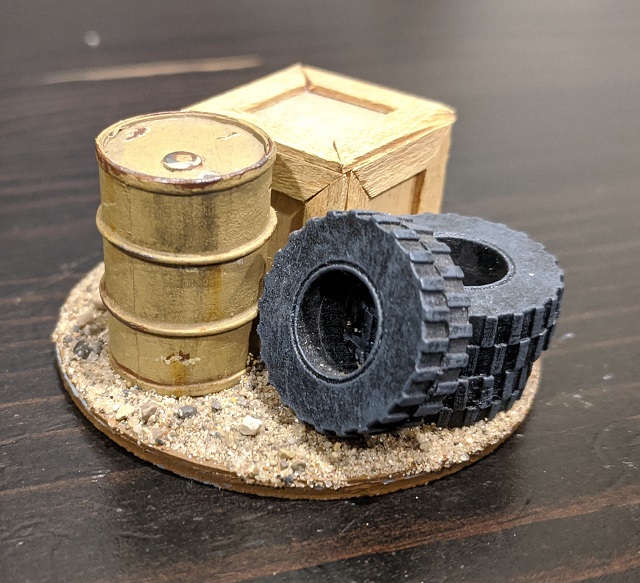
Anywhere there is iron or steel, rust is usually lurking not far away. Any moisture, even moisture in the air, is sufficient to start the oxidation process that causes rust. Furthermore, as an endothermic reaction, the formation of rust is accelerated by the presence of heat. That’s why the exhaust system is pretty much the first part of your car to show signs of corrosion, and why things rust exceedingly quickly in the jungle.
When creating rust effects, you have to consider whether you want to depict new rust or old rust. New rust is going to appear as a reddish tinge on an otherwise metallic surface. There are a couple of ways to do new rust, and one of the easiest is to simply use a product like The Army Painter’s “Dry Rust.” You can pretty much apply it as-is to anything you want to be rust-covered. And mixed with a little bit of The Army Painter’s Quickshade Wash Mixing Medium, it makes for a nice wash that will settle into crevices. This is great, as it will concentrate the rust in places that water would naturally pool or settle.
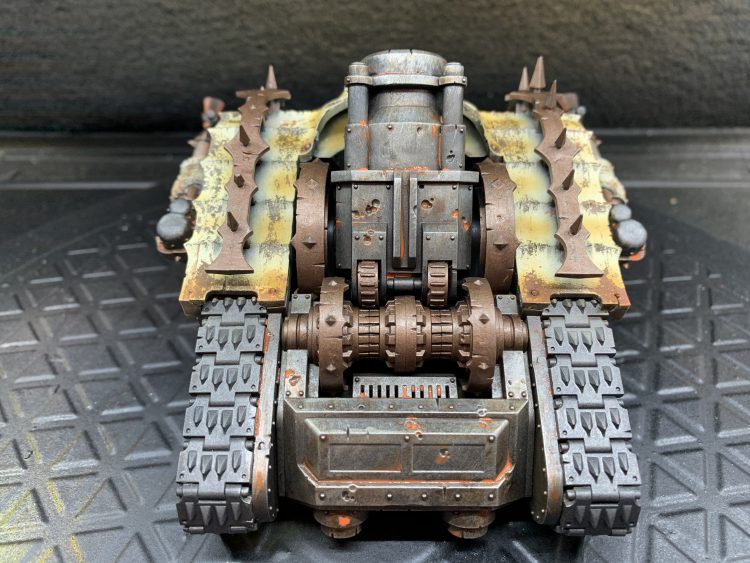
Old rust is the result of long exposure to moisture, as the corrosion starts to work its way into the entire surface of the metal object. My recipe for old rust is a simple two-step process, starting with painting the surface you want to be rusty with a nice medium reddish brown (like Warpaints Dryad Brown). Once the brown has dried, you can use the same wet application of dry pigments illustrated above in the section on Caked-On Dirt or Mud, just using an orange pigment instead of a dirt-colored one. Like the crusty dirt, once the water evaporates you are left with an irregular orange coat that his just the tiniest bit of texture to it, which is great for things like mufflers, vehicle suspension, or old wrecks that have been exposed to the elements for a long time.
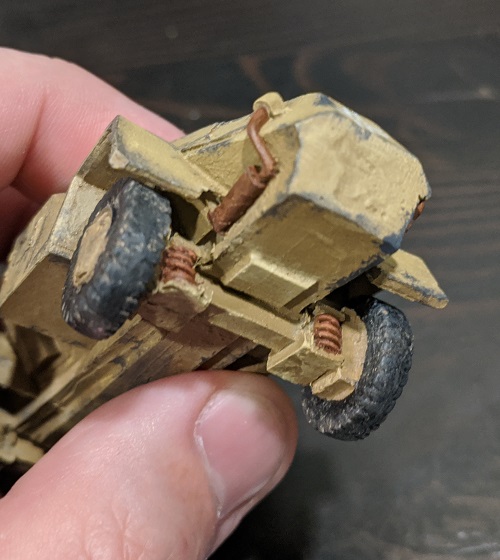
If that all sounds too complicated, the combination of a layer of Dark Rust with a little Light Rust (both from the Warpaints Fanatic Effects range) stippled over the top is a super easy way of getting a very similar effect.
Finally, much like grime, rust carried along with shedding water can cause staining and discoloration to a surface. You can use the same approach described in the section on Grime above, but using an umber or ochre paint instead. This can give you a really nice rust streaking effect and is very easy to do.
Verdigris
Verdigris is just a fancy word for the oxidation of copper/bronze/brass. It’s a really easy effect to get using something like thinned Army Painter Toxic Mist or Verdigris from the Warpaints range. Like rust, you’ll want to target it at recessed areas where water would collect, and also like rust unless you want something to look really old, less is more.
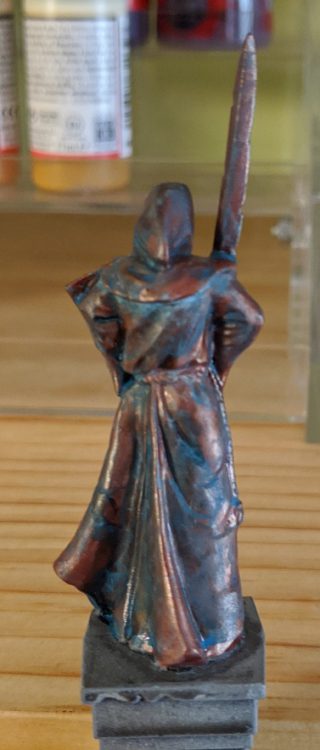
This miniature illustrates a great application of verdigris to show weathering on a bronze statue. Notice now the effect is concentrated in the recesses, giving a very natural and realistic look. Easy and super effective!
Mold and Algae
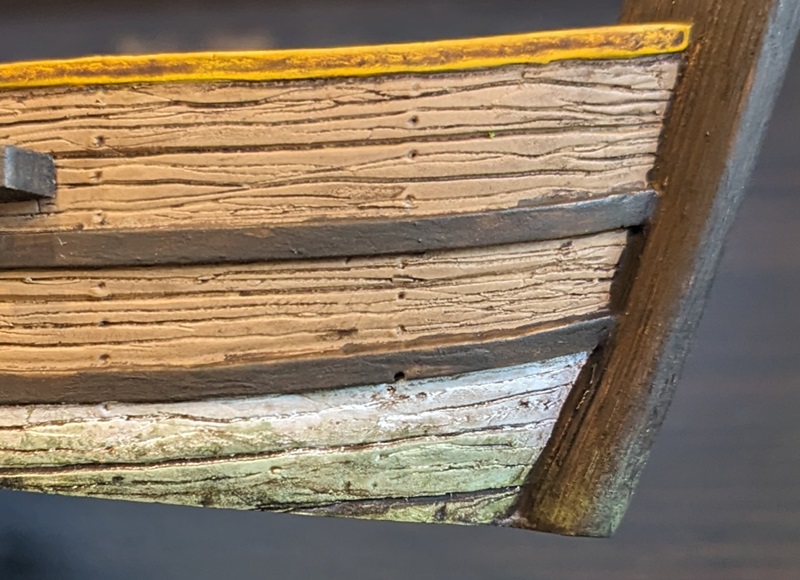
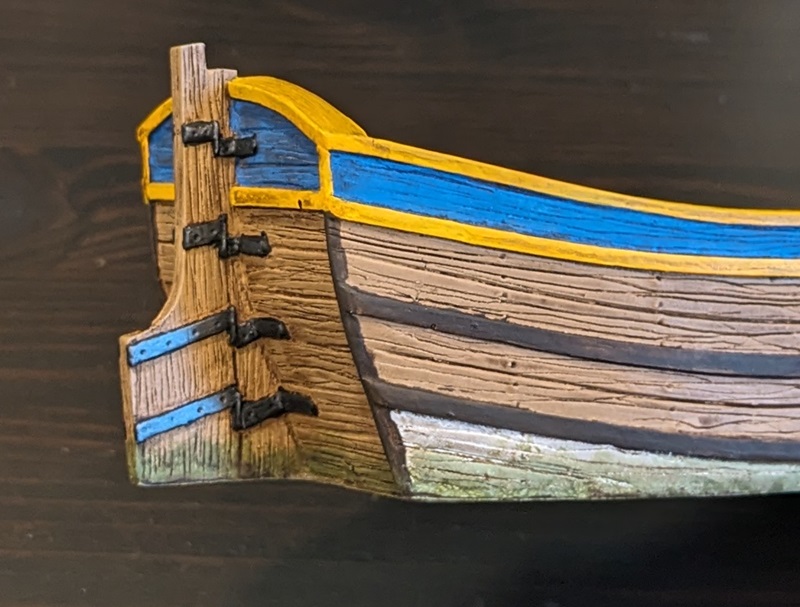
Anywhere there’s dampness, it won’t be too long until there’s mold, lichen, and/or algae. These are microorganisms that grow virtually anywhere but really go wild on organic surfaces, where they are essentially breaking down the material on a cellular level.
There are a couple of good ways to do mold. There are products designed to get mold effects in one go, but you can use paints to capture a similar effect. I like to use a pairing of Necrotic Flesh with a darker olive drab color, something like Army Green or Camouflage Green (all from the Warpaints line). Stipple on the lighter green first, then go back with the darker green stippled onto a smaller area, similar to how we did the dried mud effect above. This is especially effective for marine growth, the algae and seaweed that inevitably grows on anything that spends even a little bit of time in the ocean.
Bringing It All Together
When we’re talking about weathering, the whole is often more than the sum of it’s parts. By combining weathering effects, you can add a ton of character to your minis with surprisingly little effort. Though each individual technique is easy, to overall effect of multiple techniques together on the same model can give your model loads of character and really pump up the level of realism.
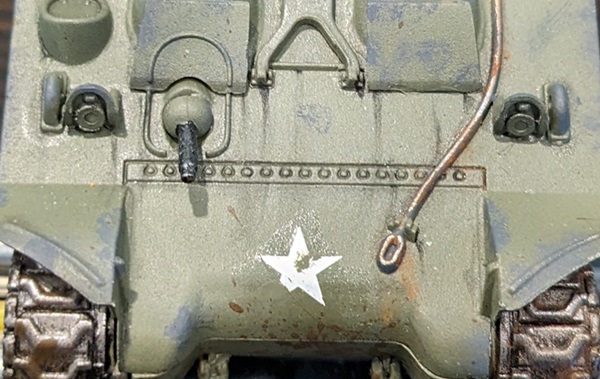
Let’s revisit a shot from earlier – this is the front of the hull of an American M4 Sherman tank. On this mini, we can see paint chipping (both the dark gray where the green base has chipped and green where the white star has chipped), rust on the tow cable, water-borne streaking of both grime and rust, and fine mud spatter. Taken collectively, this gives the impression that this tank has seen some shit. On the tabletop it looks very convincing and realistic.

Taken individually, these techniques are pretty easy. It might take a little practice to get just the right level of wear or grime, but take your time and you’ll see great results! Remember, less is more and you don’t want to go overboard, but even small additions can really make your models look fantastic on the tabletop!
Have a favorite technique or product that we haven’t mentioned here? Leave a comment and share your experience!
Have any questions or feedback? Drop us a note in the comments below or email us at contact@goonhammer.com.
