In our How to Paint Everything series, we take a look at how to paint different models, armies, and materials, and different approaches to painting them. In this article, several of our authors explore how to paint weather effects on various models and terrain.
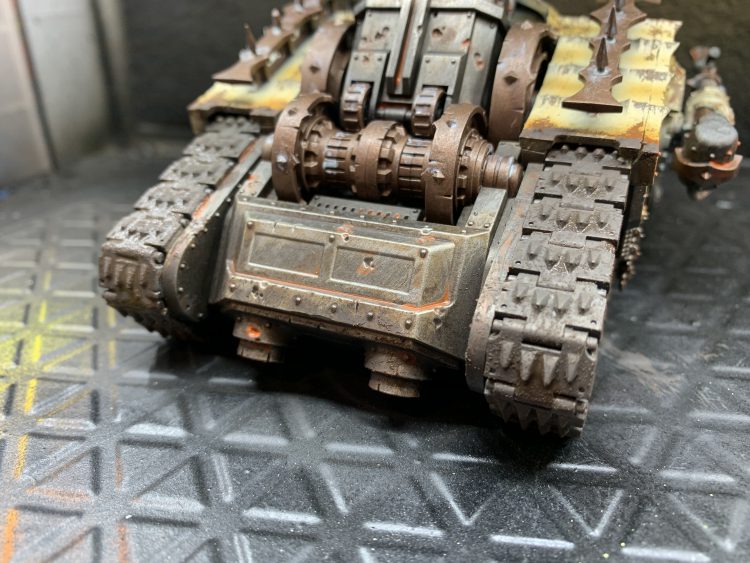
Charlie A’s Hairspray and Oil Wash Method (Plagueburst Crawler)
This is an amalgamation of weathering methods that I have found useful. These methods are meant to provide a relatively-realistic weathering effect quickly and with minimal effort. There’s no magic here. There’s little skill. It’s mainly technique and information applied in the right way. Anyone can do this, I am proof. I wanted to share the resources I picked up from various YouTube artists that helped me learn what I am sharing.
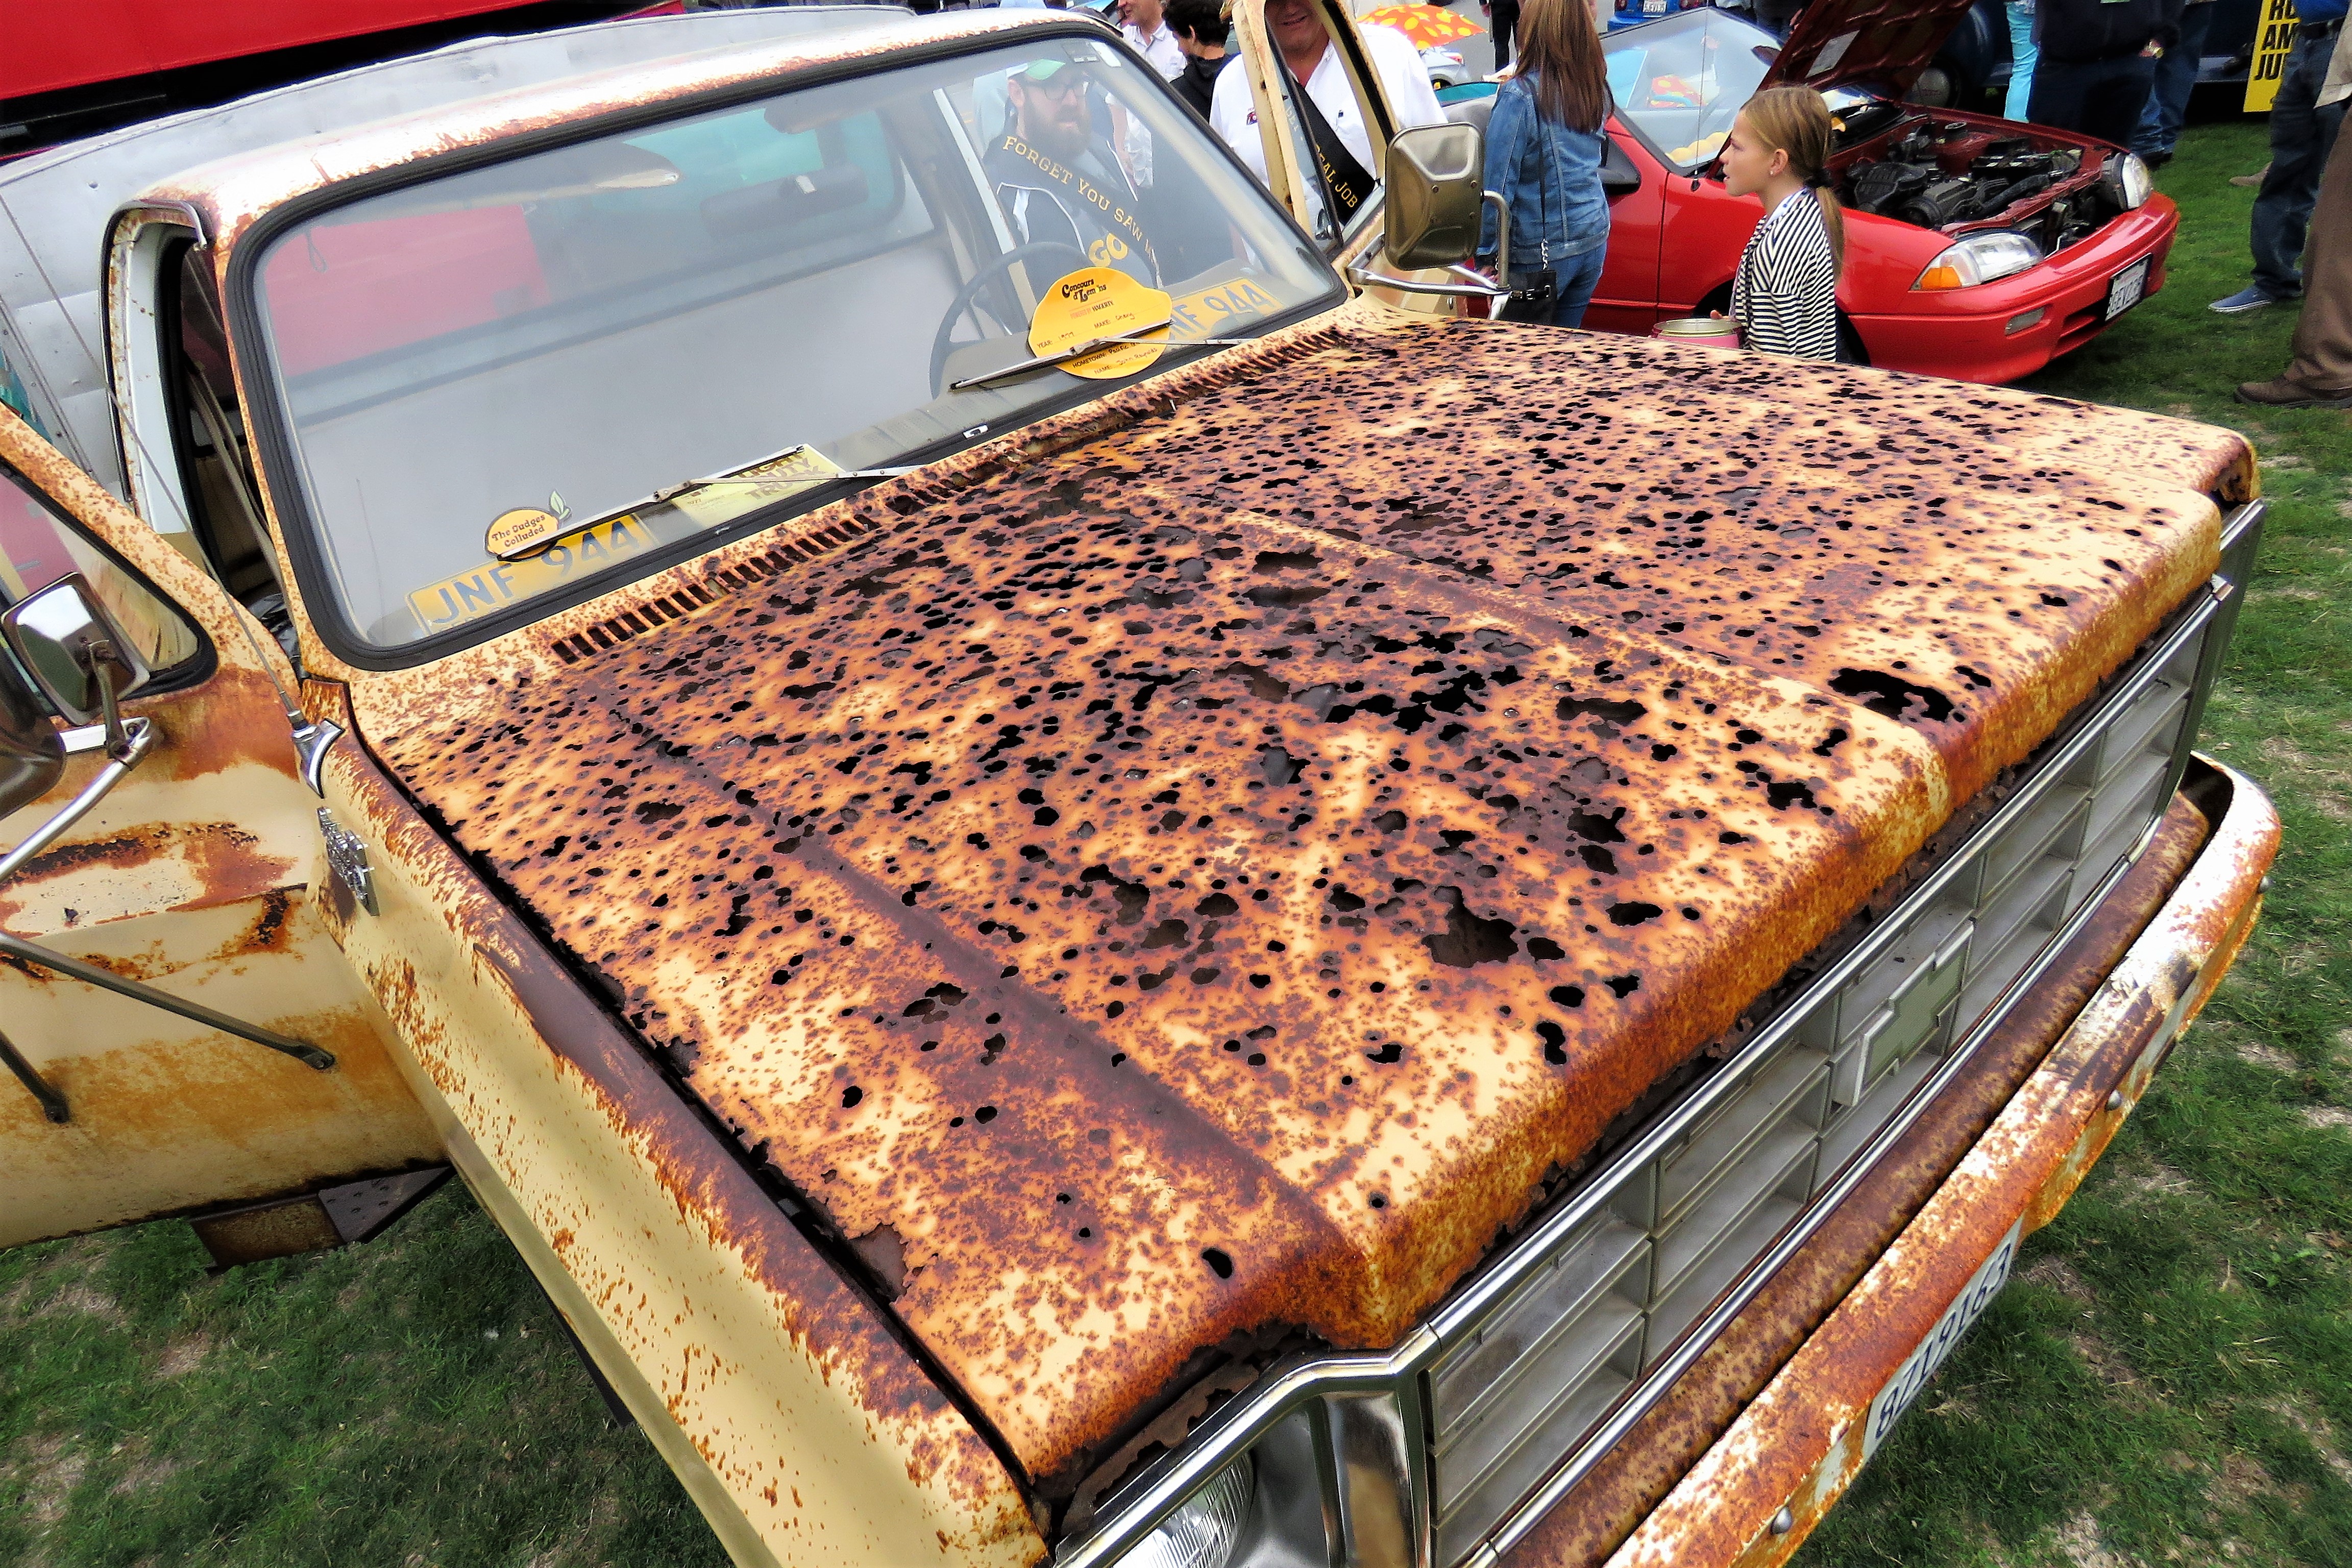
At its core, this method utilizes an airbrush and the water-solubility of a cheap hairspray to achieve the rust effect. We add to that layers of grime with an oil wash and some Citadel technical paint. Let’s start by understanding what we’re trying to achieve on the main panels of the tank: a realistic rust effect. It’s worth taking a look at some inspirational pictures to be reminded of what real rust looks like. For me, it’s a lot more orange than I would have guessed and we can see that it varies considerably in the darkest and lightest tones, so it’s beneficial to be reminded.
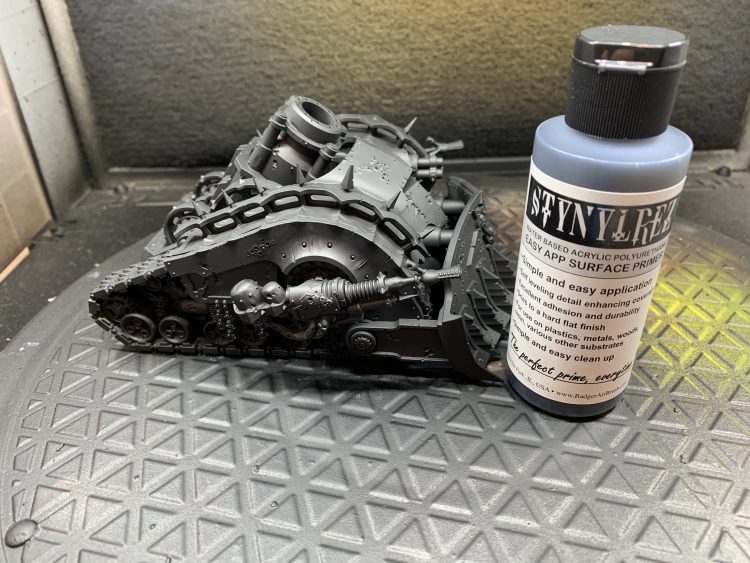
- PrimeWe start with a black prime. I used Stynelrez because it’s cold here and I don’t want to go outside in the cold. Any black primer will do.

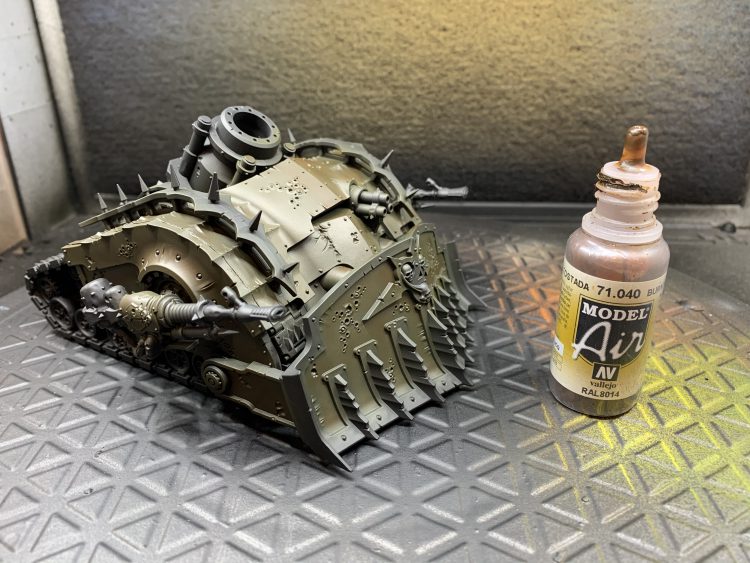
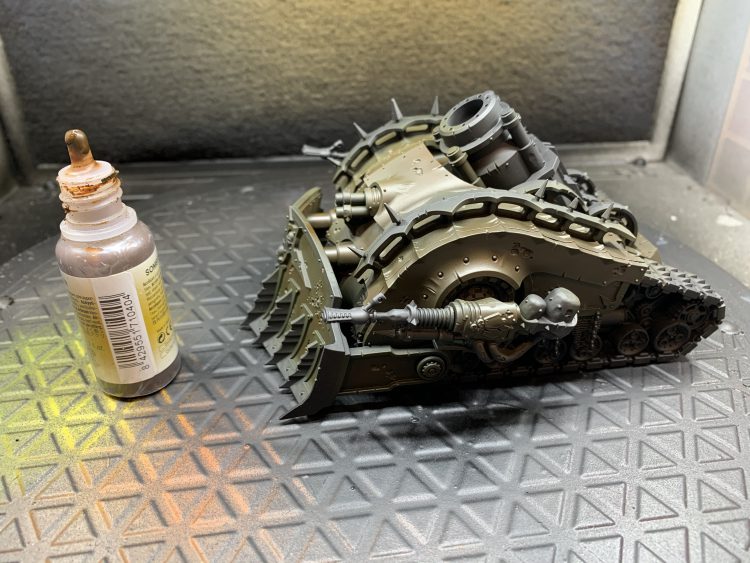
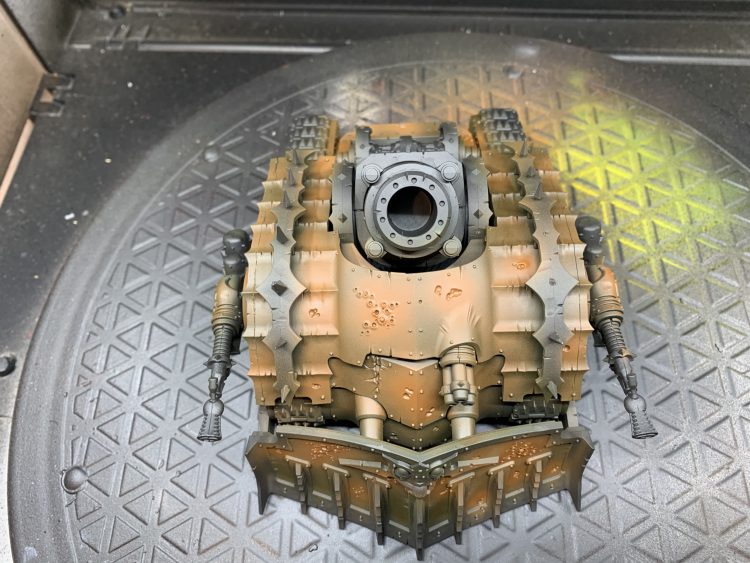
Plagueburst Crawler – credit Charlie A - Rust layersKeeping in mind the variations in tones we saw in our realistic rust example, I want to start with a dark Burnt Umber all over the model. This is a low-stress step and there’s no perfect way to do it. Basically, you’re trying to cover up most or all of the black so that when we scrape paint off in a later step, we don’t see black. The darkest we want to see is this dark brown.

Plagueburst Crawler – credit Charlie A 
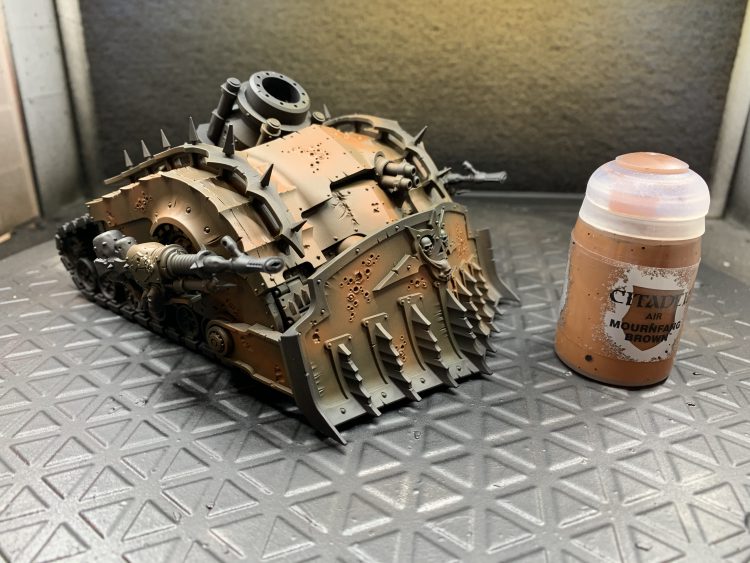
Plagueburst Crawler – credit Charlie A Mournfang Brown is a really solid rust tone and if you’re not using it for rust, you should give it a shot. You can see here that I’ve decided to build up some random areas with this color. I thought that rust might accumulate around the pox marks on the armor, as well as on the lower edges of panels where water might settle. As such, I started building up the paint in layers in these areas. Keep in mind that you’re going to be painting all over this in the future, so don’t stress about it too much.

Plagueburst Crawler – credit Charlie A 
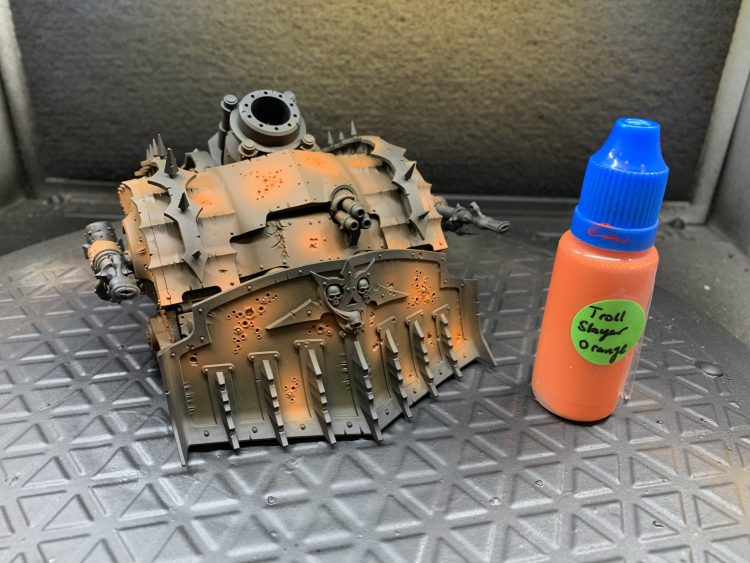
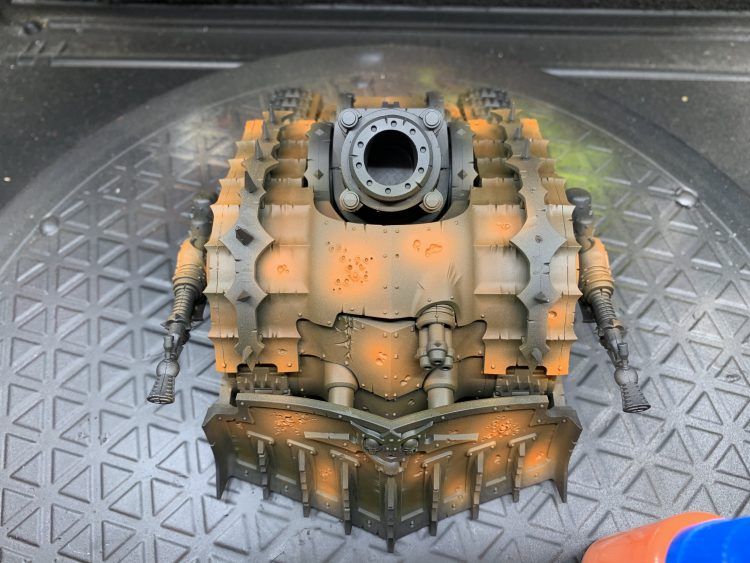
Plagueburst Crawler – credit Charlie A And now we come to our brightest rust tone. I used Trollslayer Orange. You can use any bright orange for this step, I had this color near at hand. Be mindful that multiple layers are required to build up a bright color, real rust can be quite bright, and that acrylic paint desaturates as it dries. That means that even if you think your first layer is bright enough, it will dry noticeably less-bright and will require several coats before it will actually dry that brightly.
Even though I had done this before, I thought this could be too orange while painting it. It wasn’t. Don’t be afraid of bright colors.

Plagueburst Crawler – credit Charlie A 
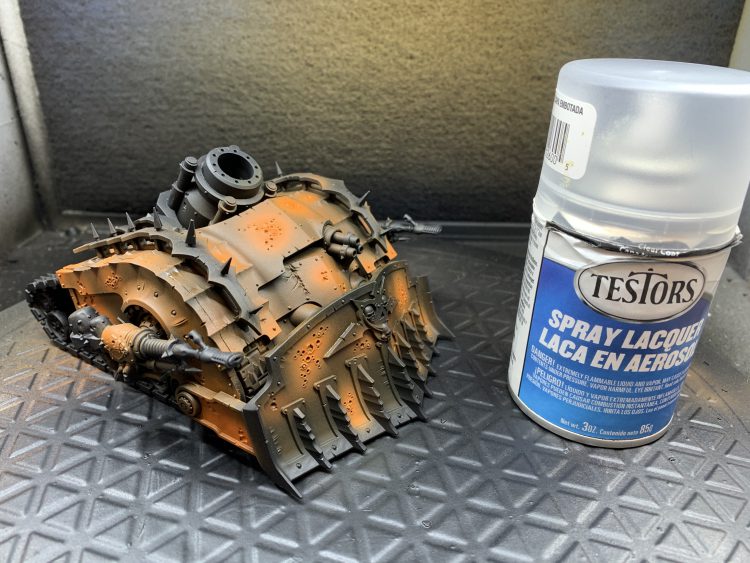
Plagueburst Crawler – credit Charlie A We have now built up the rust effects. This will serve as our undercoat for the model’s real color. Before we start base coating and highlighting the 30k Death Guard colors, we need to lock in the undercoat with a layer of varnish.
- SealIt’s hard to go wrong with a can of Testors in terms of quality and convenience.

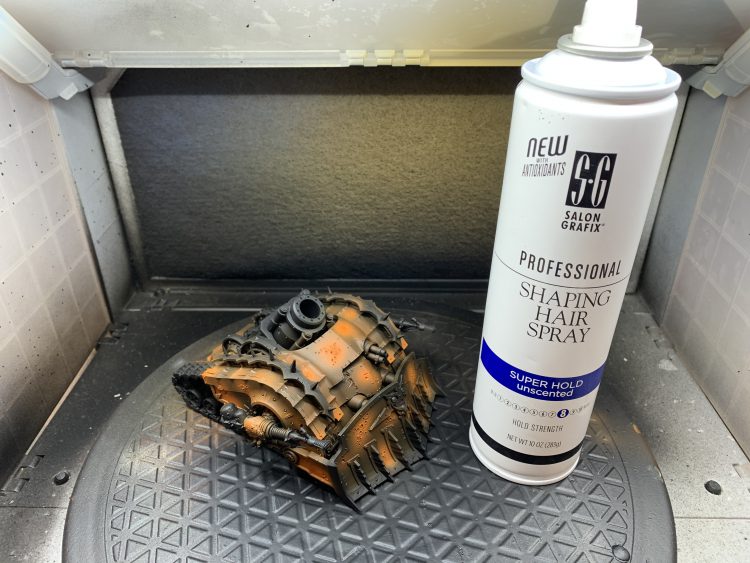
Plagueburst Crawler – credit Charlie A - HairsprayAs long as your varnish has dried (give it about 30 minutes at least), you’re safe to move on to applying a coat of hairspray. Ask your significant other for their cheapest can of hairspray (or go buy the cheapest one you can find), as the cheaper stuff is the most water-soluble. We will be taking advantage of that quality shortly.

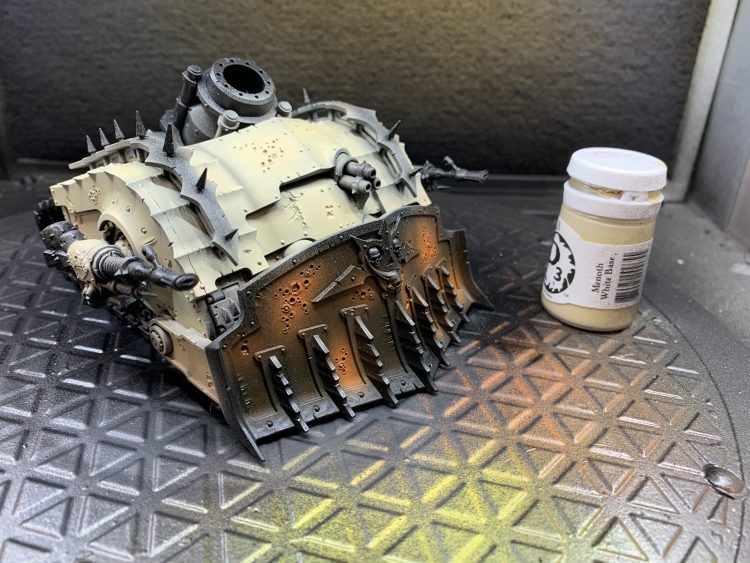
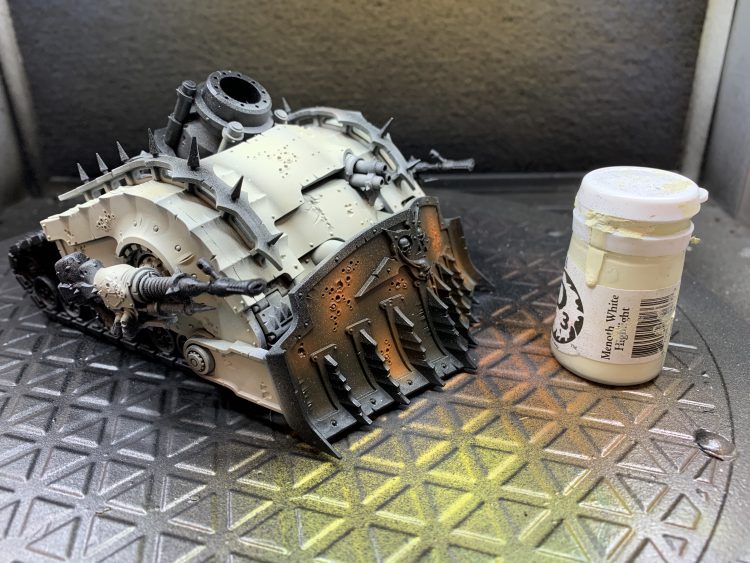
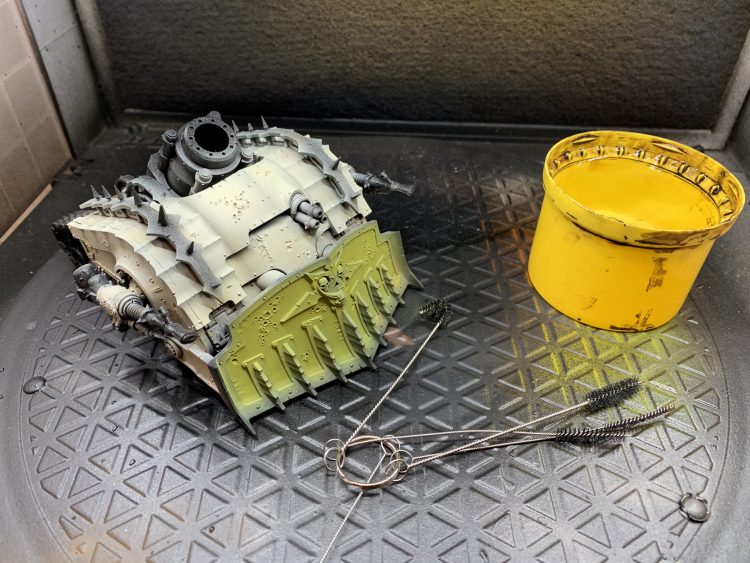
Plagueburst Crawler – credit Charlie A - Basecoat and highlightsOnce the hairspray is dry, you’re free to start applying your base coats and highlights. Since this is a 30k-scheme Death Guard Plagueburst Crawler, I’ll be using Menoth White and Menoth White Highlight, which are amazing go-to colors for any sort of cream, bone, or warm white in your life.

Plagueburst Crawler – credit Charlie A 
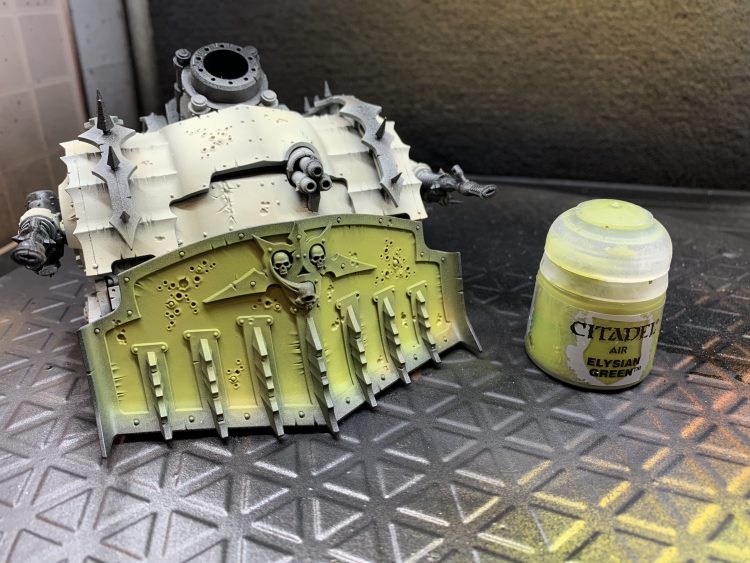
Plagueburst Crawler – credit Charlie A Elysian Green is a great color to start with for Death Guard. I’ve found it works well as the highlight color and can be shaded and tinted well with inks. There’s no highlight here, the whole dozer blade is just Elysian Green.

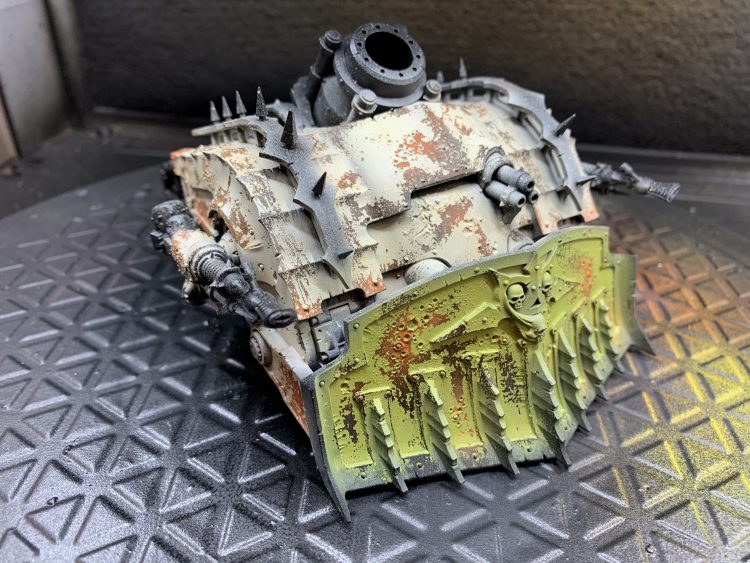
Plagueburst Crawler – credit Charlie A - Rub it offThis is the fun part and something I find incredibly relaxing. Go slow. You can always take more paint off. The thicker your paint layers, the more you’ll have to rub to get it off. I use an airbrush brush cleaning kit that I got for $1 at Harbor Freight. You could gently use a wire brush or pick or toothbrush if you wanted, too. Just get some water on the small area you want to work on and rub the paint off.

Plagueburst Crawler – credit Charlie A 
Plagueburst Crawler – credit Charlie A 
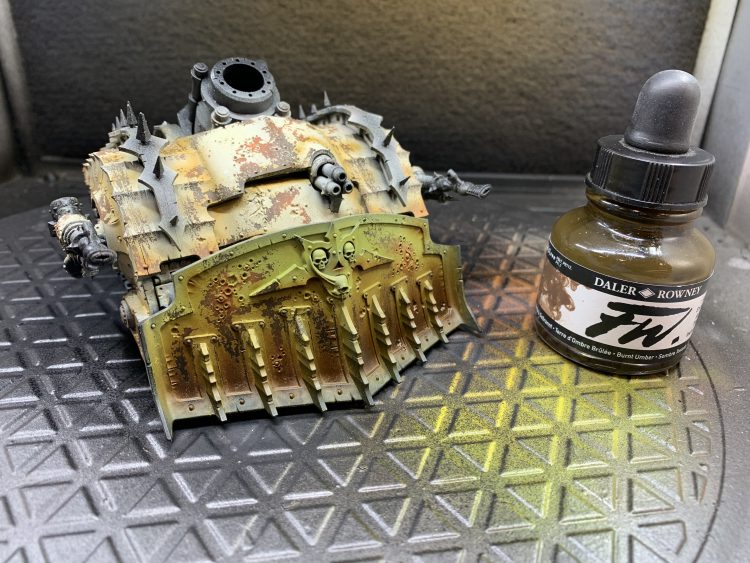
Plagueburst Crawler – credit Charlie A - Shade/start the grimeWhat we have now is a very clean, very rusted tank chassis. There’s no mud or grime (yet). To start building some of that up on the armoured panels, I like to use a brown Ink to give the panels some depth. Over the white, this ends up a little orange which just helps with the rust effect as well.

Plagueburst Crawler – credit Charlie A 
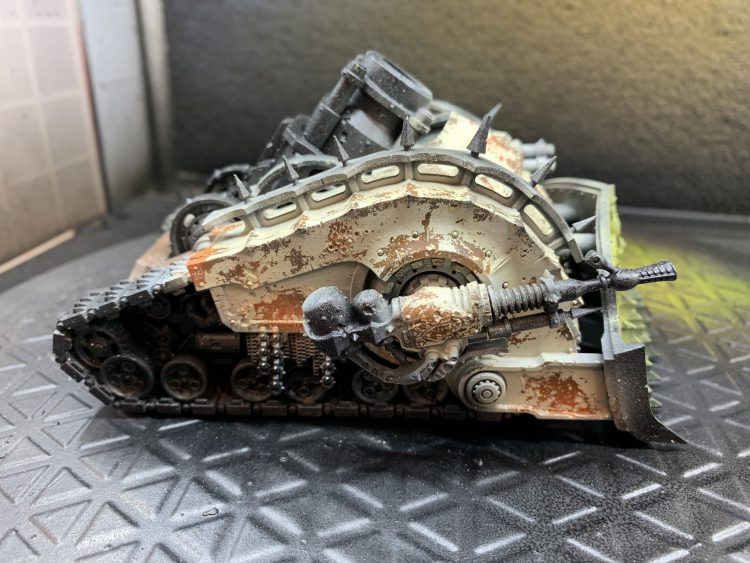
Plagueburst Crawler – credit Charlie A - MetalsWe’re now ready to block in the colors for the metals. I’m going to be using both steel and brass-colors for the various metals and then weathering those too. For the Steels, I used Burnt Iron from VA as a basecoat with a heavy drybrush of Leadbelcher, then Duraluminum from VA. For the brass/bronze areas, I based with Warplock Bronze from Citadel then did a dry brush highlight of Molten Bronze from P3. Quick and dirty is the answer here. We’re going to be getting messy and dirty in the next few steps so you don’t even need to be especially clean or neat.

Plagueburst Crawler – credit Charlie A - Varnish with gloss coatThis is a very important detail and will help with our next step. Make sure you give the varnish about 24 hours to fully cure. I’ve been told to do this by the research I’ve done (i.e. YouTube videos I’ve watched) and while I don’t know the magic number of hours needed to cure, I do know that I’ve never had an issue waiting 24 hours. I used Testors for this, again.
- Oil WashNow that our metals are blocked in, we can do an oil wash. Why not just slather on Agrax, you ask? Acrylic washes are very different from oil washes and we’re going to use the beneficial properties of oil washes to our advantage. Because we used a gloss varnish in the previous step, our model is slightly “slick” from a paint’s perspective. When a wash is placed on this slick surface, it will naturally flow into the creases and crevices. Capillary action or some such magic. This property combined with the fact that oil paint (and thus oil washes) remain workable for FAR longer than acrylic ones gives us an easy to use and nearly limitless forgiveness method to wash our model. Do you know how you get a “coffee stain” from an acrylic wash? Oil washes don’t give you that and can be wiped off or even completely removed within several tens of minutes of their application.I’m using black, brown, and purple for my oil wash, combined with mineral spirits to thin it out. You can’t use water to thin oil paints (duh). I used a 1:1:2 ratio of purple to black to brown. Feel free to use whatever combination works for you but make sure to read and follow all safety instructions for the mineral spirits. Use a synthetic brush for this step as oil paints will destroy sable or hairbrushes. Cheapo ones from Hobby Lobby or the Dollar Tree work great. You want a milk-like consistency in the wash, something that’s transparent on the surface you put it on but not so thin you can’t tell you’ve put it on. For those of you who use an airbrush, you want a similar consistency as the paint thinness you’d use for an airbrush.

Plagueburst Crawler – credit Charlie A 
Plagueburst Crawler – credit Charlie A Slather it on, wipe off what you don’t want on. Go around the model in the crevices and where water or grime would naturally collect. I made sure to wash ever rivet and most pox marks too. Once you’re happy with the grime level (and you can go back again and again over several hours to really build up the oil wash, as it too will desaturate when it dries a bit) clean out your brush with more spirits and then let the model dry for another 24 hours. Oil paint takes a long time to fully dry and you can risk reactivating it if you don’t wait.
- Varnish (dull coat)
- Rust wash
- Oxidation wash
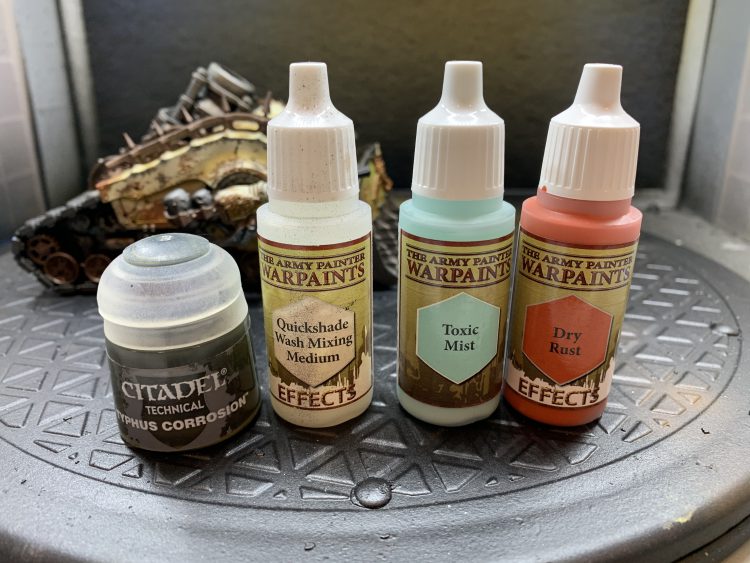
- CorrosionFor steps twelve through fourteen, it’s fairly straightforward. Steel rusts and bronze oxidizes. I thin both the toxic mist and dry rust with the quickshade was mixing medium. The Typhus corrosion goes anywhere that would come into direct contact (or near enough) with the muddy battlefield. Make sure to use a brush you hate for the Corrosion as it has sand in it.

Plagueburst Crawler – credit Charlie A 
Plagueburst Crawler – credit Charlie A 
Plagueburst Crawler – credit Charlie A 
Plagueburst Crawler – credit Charlie A 
Plagueburst Crawler – credit Charlie A - Varnish
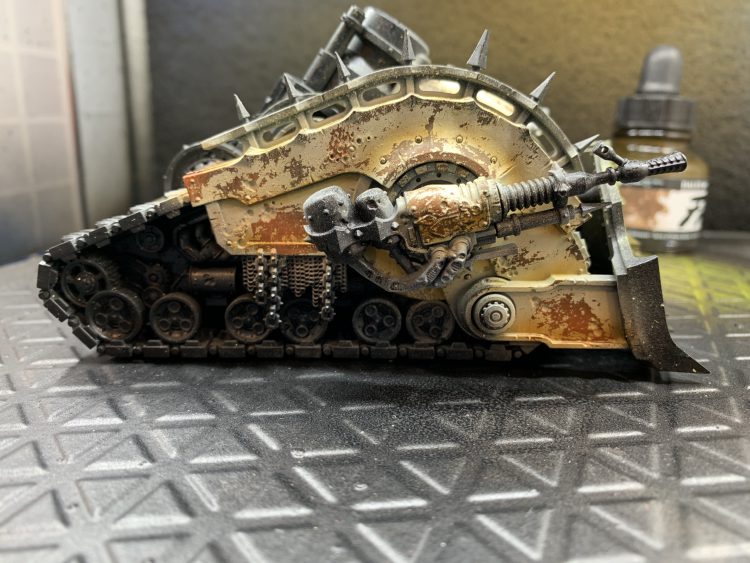
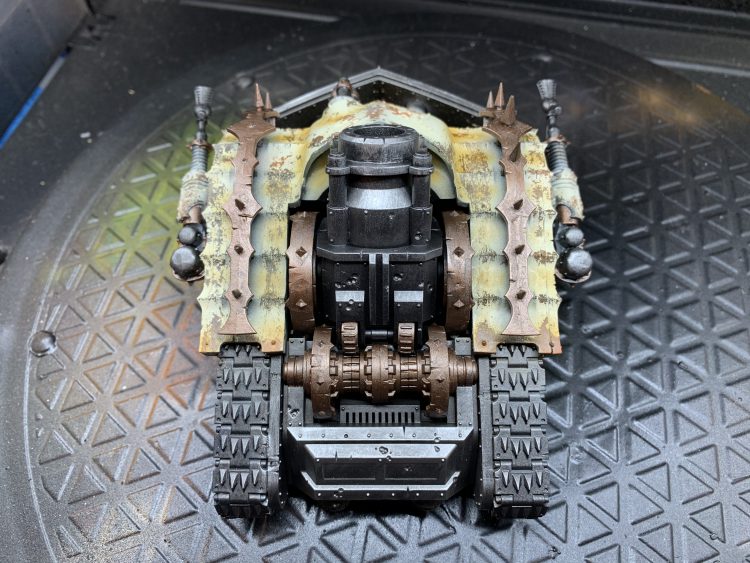
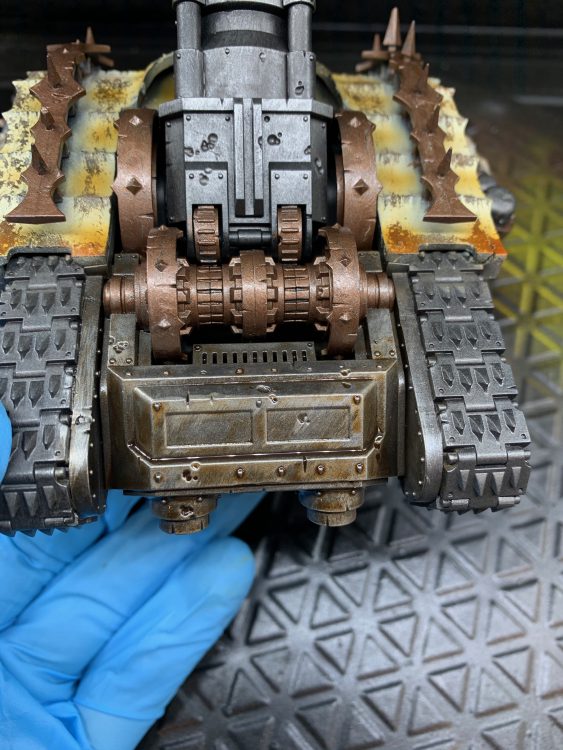
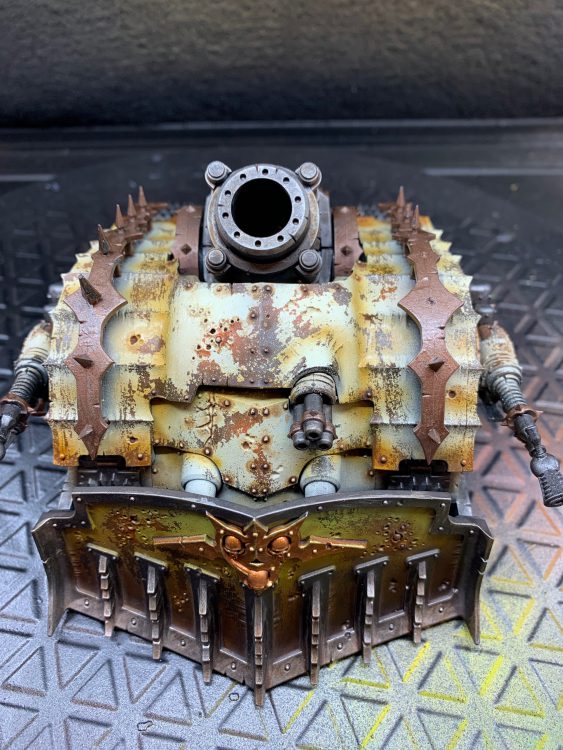
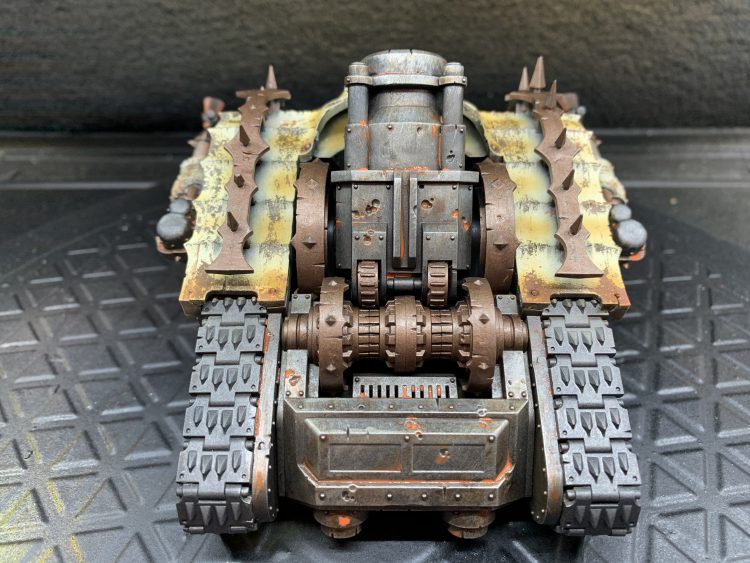
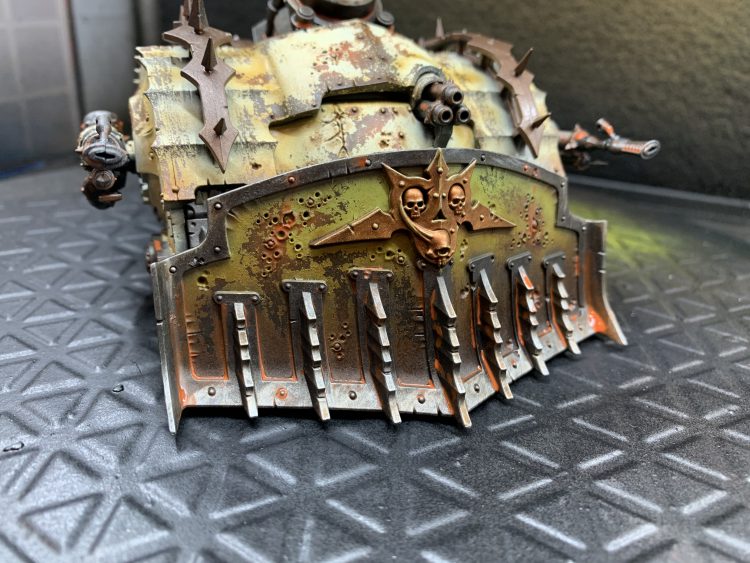
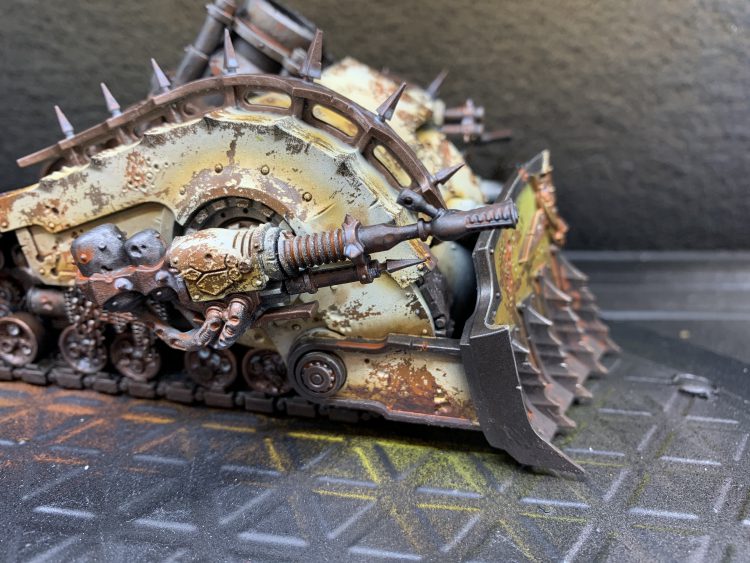
Aaaaaaannnnd you’re done! All in all, this took me about six hours of actual work. The longest steps are waiting for the varnish and oil to cure and fully dry. You can make mistakes and still come out with a great looking model. That’s the best gift Nurgle can give. I’ve found that I enjoy the look of weathering and grime, the more layers are added. It gives it more depth and is generally more interesting to look at.
Hair Spray Weathering – Kevin Genson
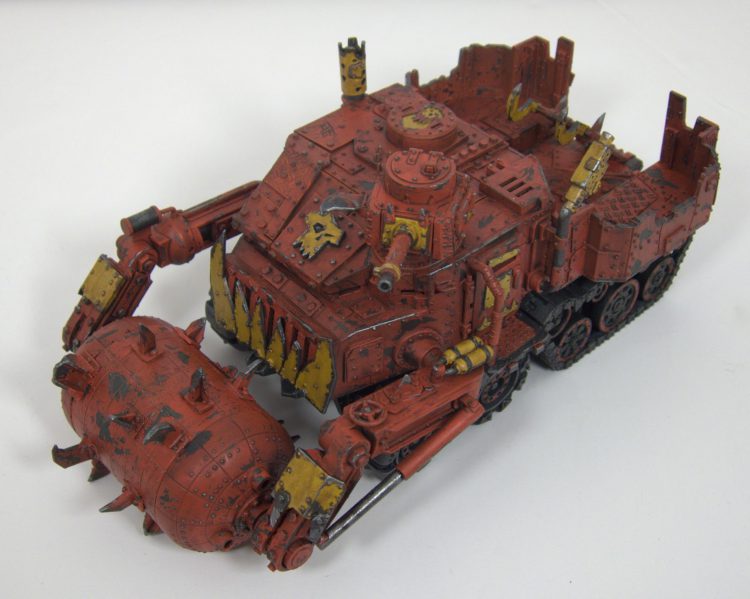
Weathering with hair spray (and salt, which produces a similar effect) is about layers.
- Prime the model and paint the bare metal layer. The Battlewagon above was done with a simple metallic spray, brighter metallic drybrush, and dark black wash. If you also intend to add rust, this is when you would do so. This forms your foundation that will be revealed in the end.
- Apply a layer of varnish to seal in the base layer.
- Spray the entire model with a few thin layers of hair spray. Get the cheapest stuff you can find from a can. Theoretically, you could airbrush liquid hair spray (out of the pump style plastic container), but I haven’t tried it.
- Apply a base layer of paint, highlighting and shading as appropriate.
- Wet the surface with water and use an old toothbrush, toothpick or some other hard item to scrape away the top layer to reveal the bare metal underneath. Go slow, using a paper towel to clean up the excess water. Hair spray can cause large chunks of paint flake off, and once it’s gone it’s not likely to come back.
- Varnish the entire model to seal everything in.
- If needed apply additional weathering steps. Perhaps an oil wash, highlight raised areas with silver to reveal recently damaged metal, apply pigment for dust or concentrated rust effects, etc.
The same technique can also work with a coarse salt like kosher salt. Instead of applying the hair spray, use water to deposit clumps of salt on areas that you want to see weathered. After painting, you can then remove the salt to reveal fine details bits of corrosion. Once you get used to the technique you can get a sense of what does and doesn’t work for your particular style, and combine effects as needed.
Sponge Chipping, Layers, and Slathered Oil Paint – Felime
I did a fairly detailed tutorial on the specific method discussed here, so I wanted to go a bit more in-depth into what makes weathering look good. Pretty much every effective weathering involves layering different textures on top of each other in ways that add to the techniques underneath, as well as covering up mistakes, assuming that you, like me, want to do things with as little effort and precision as humanly possible.
Textures can be anything that adds differentiation and visual interest to the model. When weathering, typically I try to have at least three layers of visual interest that compliment each other. Four is better, but after a certain point, you’ve devolved into historical diorama levels of effort and madness. In the case of my shipping containers, the layers of detail are the transfers, the sponge chipping, and the gradient produced by the oil paints. Each of these three steps is super simple and easy on their own and doesn’t really stand on its own, but together they make things really pop.
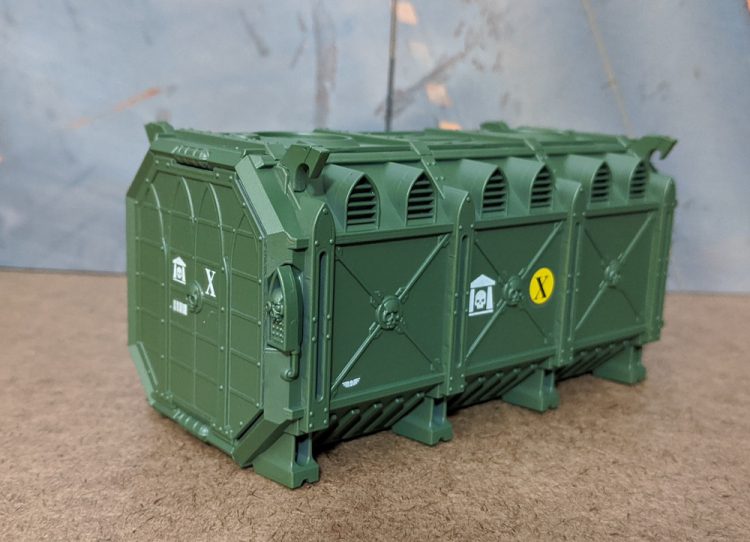
The transfers make the container look a little better, but at this point, it’s a container with stickers on it.
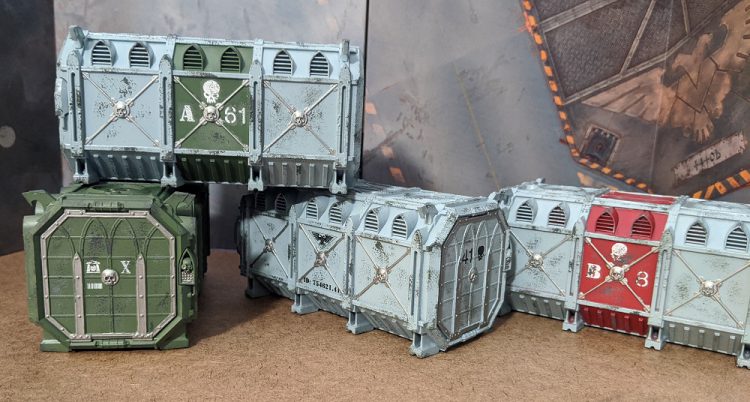
Now we’re starting to get somewhere. The key thing to notice here is that the chipping is interacting with the layer of detail with it, creating chips in the transfers (and covering up spots where I screwed up. Messed up the entire bottom of a skull transfer on one crate? Chipping takes care of that. Layered weathering helps hide your mistakes).
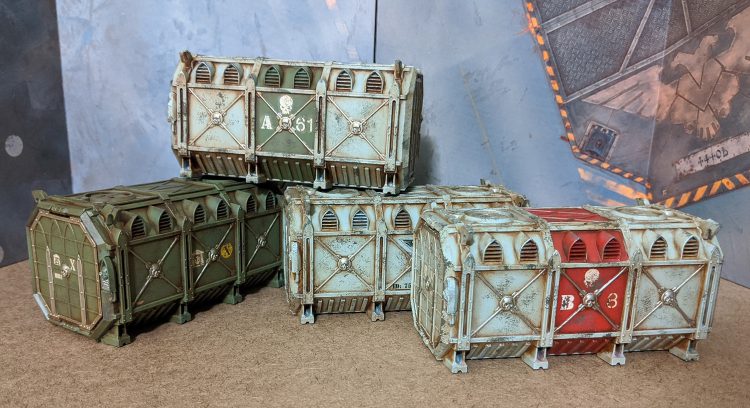
Oh, look, now we have a gradient on the models. This could be airbrush shading, recess shading. You could add mud splatters to the bottom, or slap some weathering powders there. The key is that each layer enhances the layers below it. In this case, the fade gives depth and variation to the chips, and dirties up the transfers, making them more interesting.
Now, I’m going to explain two techniques, so don’t get mad at me. The first is Sponge Chipping. Sponge Chipping is the simplest, easiest, least effort intensive method of chipping. It’s great for adding a spot of texture and edge damage to a model, but it doesn’t really produce an effect that’s amazing looking on it’s own. It’s best used in conjunction with other techniques, or possibly jazzed up by adding highlights to the lower edges of the chips with a brush, little specks of bare metal in the middle of large chips, or streaks of Agrax Earthshade weeping out of your rusty chips.
Take a sponge. The foam out of old blister packs is excellent. If you’re too tidy or young to have any of that, some pluck foam scraps from a model case works as well. Ball it up so you have a little round puff. Then jab that in some paint, gingerly. Then blot that off onto your palette or a paper towel, until you’re leaving a pattern you’re happy with when you press down. Then just jab it onto the bits you want weathered. Instant chips.
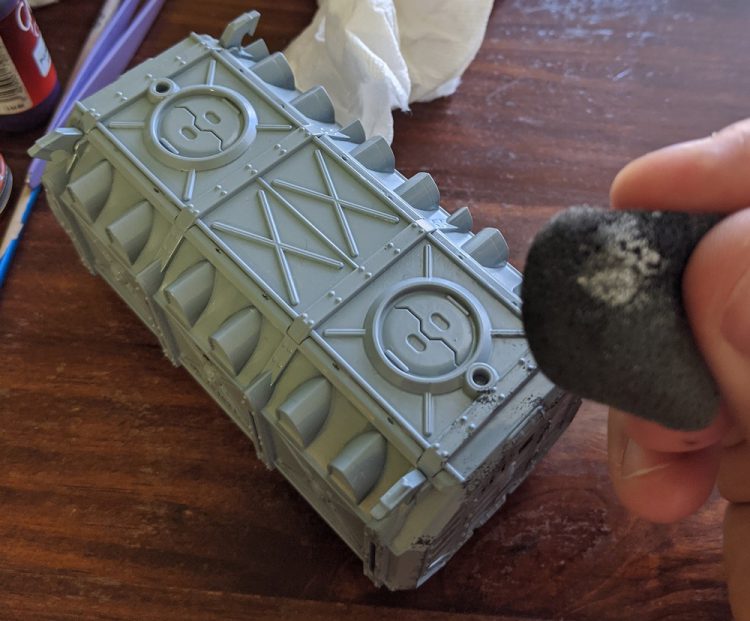
Concentrate along the edges and jab it repeatedly to form larger chips on corners that would see a lot of abuse and wear. The little poof of foam produces a pretty fine chip pattern. If you want bigger chips, you can tear the foam and use an edge to blot on the paint.
The second technique is borrowed from the prop and cosplay world. To put it simply, you take some paint, smear it all over your model, then wipe as much of it off as possible. This has some very significant limitations and caveats. This is most useful for large surfaces, such as vehicles, terrain, etc. It’s very hard to get into the recesses of an infantry size model to clean it out the way you’d want to. It will also tint the color beneath a great deal, so if you want your vehicles to match your Marines’ armor, this is not the technique you want. What it is good at is being dead easy, amazingly forgiving, and quite quick in comparison to carefully shading all your recesses.
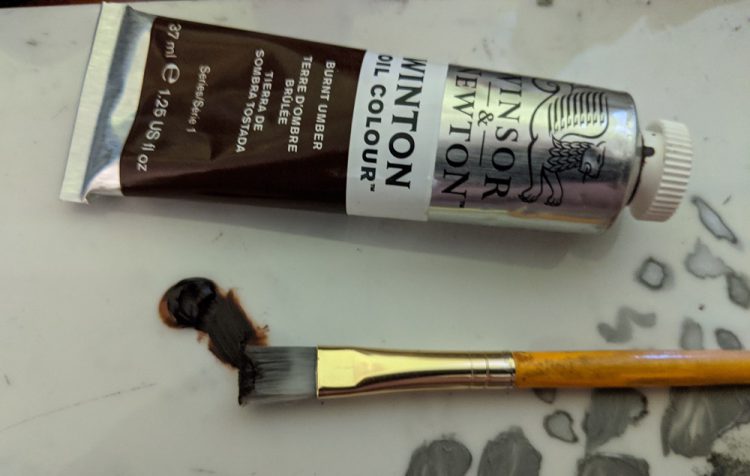
Take some oil paint. Burnt umber is a great color. Not so strong it overpowers things completely like black oil paint, but a nice strong grime color.
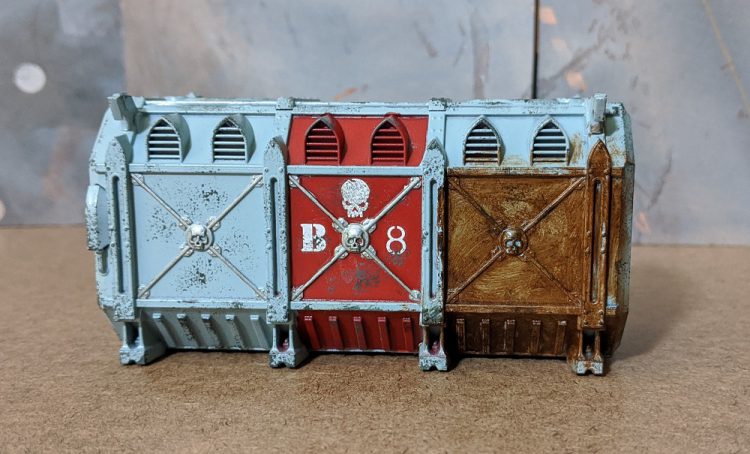
Smear that shit everywhere with a brush you don’t care much about. It is good to work in sections so you don’t get paint all over your hands as much.
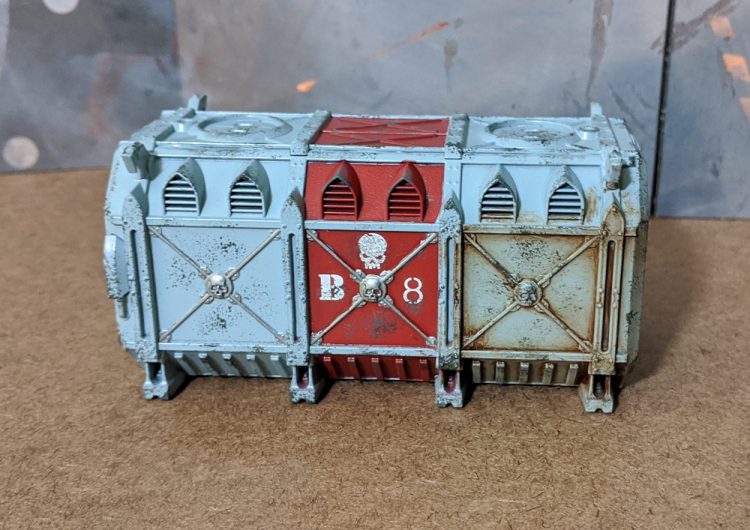
Then wipe it off. A paper towel works for most areas, and a q-tip will get into deeper recesses if you need. You have plenty of time to play with the effect to get it where you want it. Once you’re happy with it, put it inside a cardboard box somewhere to dry for a week or so without getting dust or hairs in the oil paint, and wash your hands. The oil paint will get on your fingers, and it will stay wet and get on things if you don’t wash well with soap and water. Soap and water will also mostly clean your brush, though you’ll never get all of the oil paint out of it.
Fucking It Up Gently – SRM
I’ve swung between extremely neat, 90s ‘Eavy Metal style paint jobs to borderline obliterated models that were more rust than paint. However, I’ve come to really enjoy weathering, and I now do it on almost every model I work on. My reasoning for weathering is twofold:
- It gives the models a realistic, battle-torn look that roots the models in the worlds they fight in
- It covers up my mistakes
I will go over my process on this Repulsor I painted for my Ultramarines.
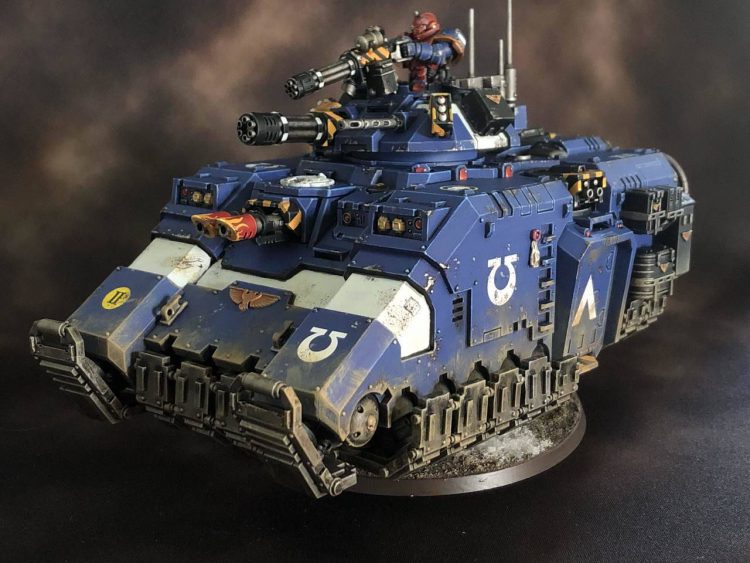
First off, I painted the model completely! Shocker, I know. I make sure all the highlights, transfers, and so on are in place before I even start weathering. I love me some transfers, as they add realism and visual interest to models and flat surfaces in particular. Of course, you can’t paint over them, so usually after the transfers are in place (and they’ve been suitably blended in with Micro Set/Micro Sol) I hit them up with some Lahmian Medium. This means that when we start weathering, we won’t tear or move the transfer, and the paint won’t smear on the slick, plastic transfer surface. It might look kinda milky but don’t worry, that’ll all get worked out when we varnish.
With the transfers down, I sponge weather the vehicle. I figure paint would chip before dust and dirt get kicked up to it, so I always do this first. I take a bit of sponge (a bit of pluck foam will do), dab it in some Rhinox Hide, dab off the excess on a paper towel, and dab it onto the model, focusing on leading edges where dirt, rocks, bullets, etc. would probably hit the vehicle and paint would wear off. I also try to get my decals with a little bit of this step just to tie them into the miniature a bit better. When this is dry, I take Stormhost Silver and a fine brush and fill in some of the larger chips, leaving Rhinox Hide around them. I used to do a Stormhost Silver sponging instead, but I prefer the control of the small brush.
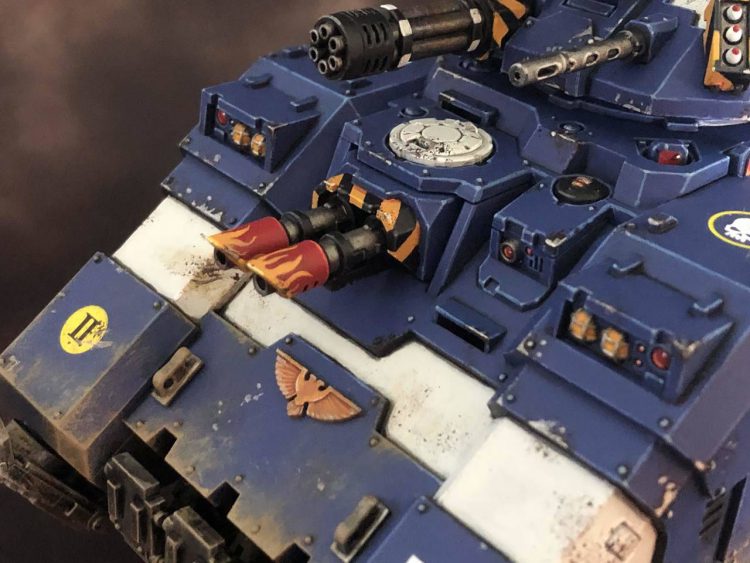 The last bit of weathering I’ll usually do on a vehicle is dry brushing. It can give you a quick, dusty, and dirty look in no time. Usually what I’ll do is start with a drybrush going up about a third of the model with Steel Legion Drab, starting heavier at the bottom and getting lighter going up. I’ll follow that up with a second drybrush about a quarter of the way up the model with Tallarn Sand, going over the areas I already hit before. Finally, I’ll do a third drybrush, roughly a fifth of the way up the model with Karak Stone, following the same process I’ve followed before. Depending on how muddy you want your vehicle to look, you can mess with these ratios or focus around some parts of the vehicle that would contact the ground more (the tops of Rhino ramps, for instance) but experiment with what works best for you. If you’re really in a rush like me, you can even skip edge highlighting the bottom half of a tank if you’re just going to drybrush it! It’s the painting equivalent of putting your essay in 13 point font and pushing the margins in a quarter-inch to hit the page count requirement, but it works here as well as it did in 10th grade.
The fun thing is, you can weather your infantry models as well!
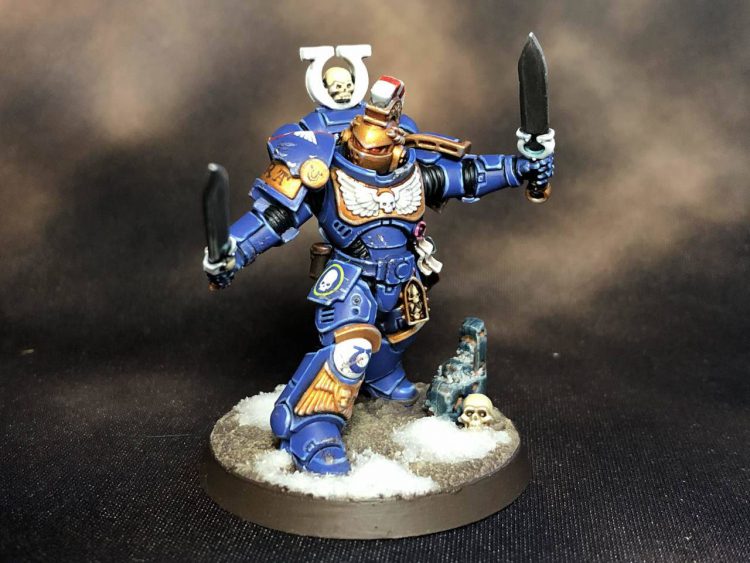
I find heavy dry brushing breaks up the silhouettes of models too much, but some light chipping can go a long way. Again, focus on leading edges, places that would end up taking blades, bullets, or debris the most heavily. I tend to focus on high edges on body armor, not just because it would likely be hit more often, but because it shows up really well and just a little bit will read like a lot. Regardless of the size of the model, start slow with your weathering. You can always add more.



You must be logged in to post a comment.