This week the Vindicator Siege Tank goes up for pre-order. Thanks to Games Workshop for sending a review copy over to make and paint up. As the local Raven Guard player I may not seem like the natural person to review a siege tank, but here goes.Many of you will be familiar with the Deimos Rhino kit on which the Vindicator is based but this was actually the first of these hulls I’ve built. My sneaky Ravens tend to mostly manage without metal boxes to ride around in.
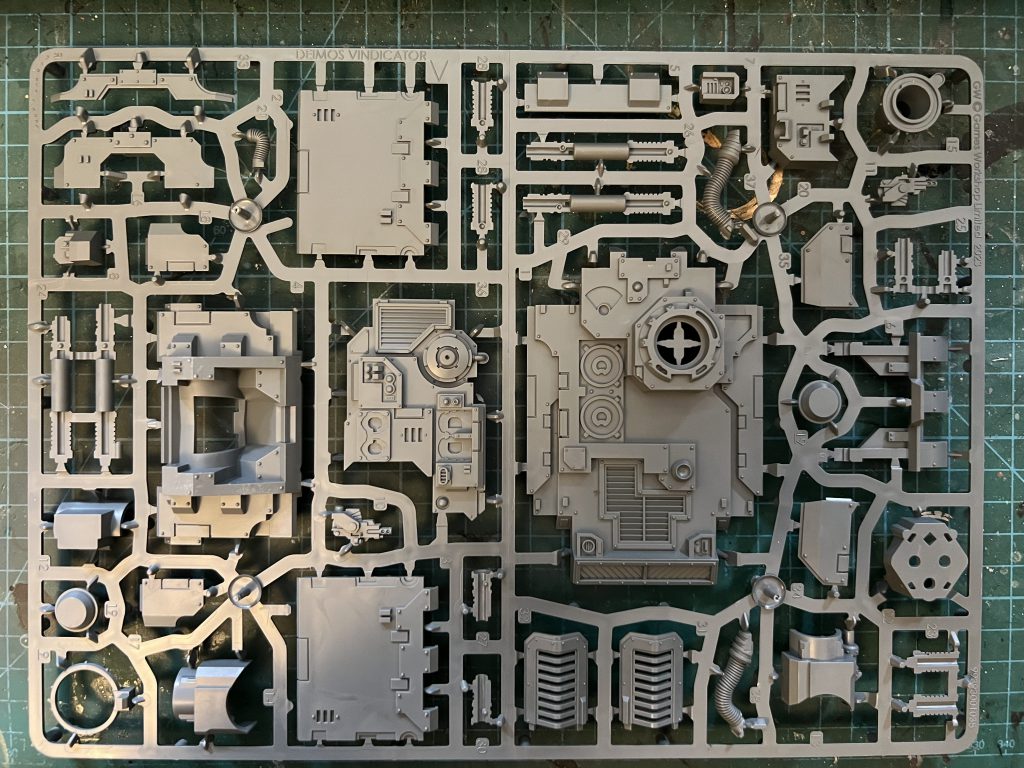
This is the extra sprue of goodies you get for the vindicator, as well as the hull/track and pintle weapon sprues that are used by all rhino variants. Importantly, it includes all the bits to make your Vindicator with either a Demolisher Cannon or a Magna Laser Destroyer.
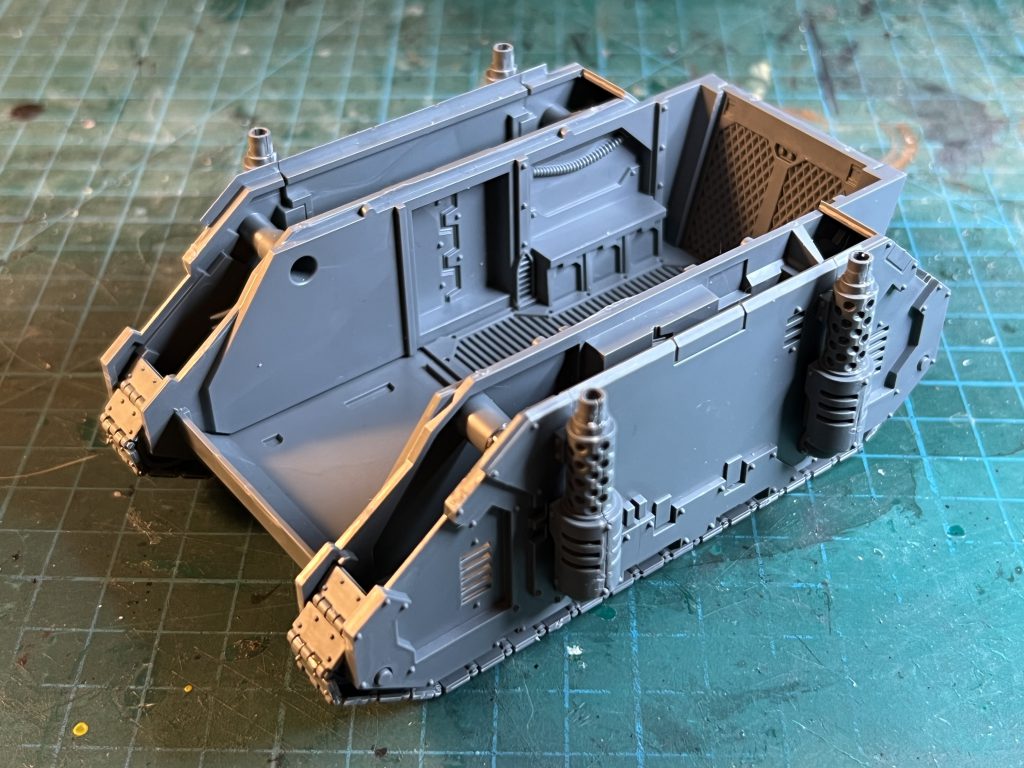
I managed to stick the hull together without too much drama, including wrestling the floor and back door on. One rather nice thing about the kit is that you put together everything the basic rhino sprue and then put it aside to work on the Vindicator-specific stuff. You aren’t always swapping between sprues to find the bits you need.
People who are familiar with the Deimos Rhino kit should be a bit careful at this stage to not put the front side armour and headlights from the rhino kit on. The Vindicator has a completely separate front that won’t fit on if you’ve stuck those rhino bits on. Instead, you should end up with something like this at this stage.
I wanted to know if you could magnetise the kit to swap the guns around. The good news is that you can, and it’s up to you how much effort you expend doing so. This is because it’s not only the gun barrels that are different. There are two different gun shields and two sets of roof bits. You’ll find that the laser destroyer is too wide for the demolisher’s gun shield so you should use the laser destroyer’s shield if you want to swap the barrels.
The guns both attach to the same inner mantlet piece, which is good news. Unfortunately there’s nothing to stop this piece falling inside the tank if you were to remove the gun, which would be a nightmare. You could glue the mantlet in place but then you wouldn’t be able to elevate the gun.
I’ve built my Vindicator with the Laser Destroyer, but these are the parts for the Demolisher version. You’d need to magnetise some or all of these if you wanted to swap things over.
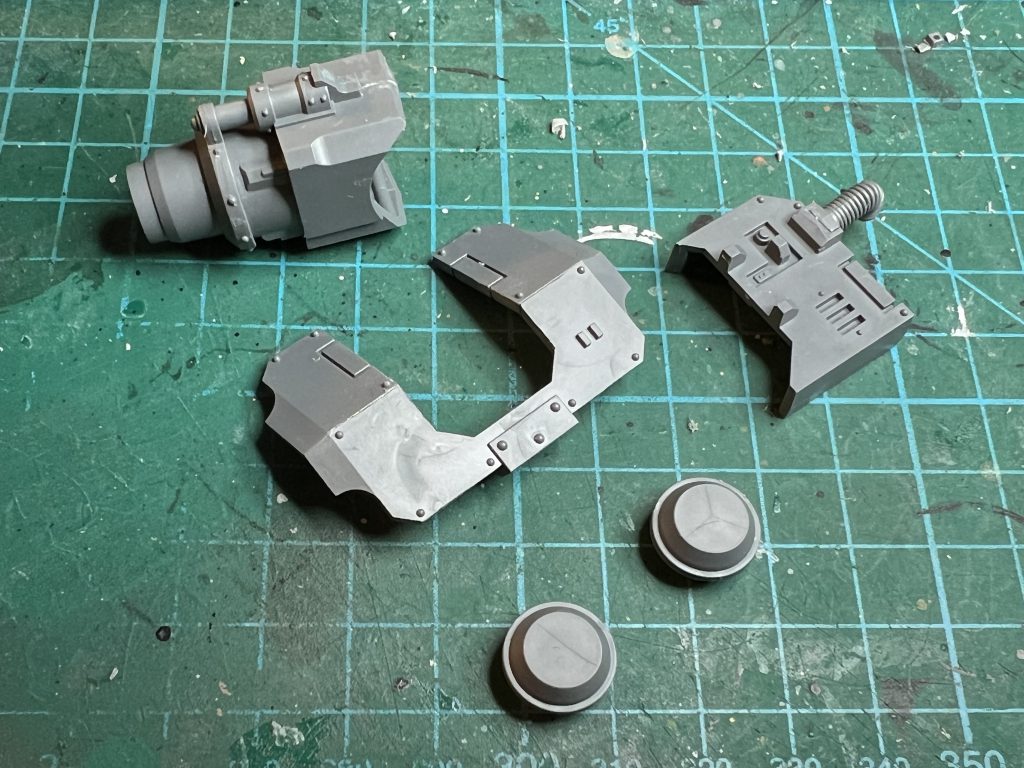
I haven’t magnetised my Vindicator, partly due to time and partly because I knew I wanted the laser version. But I’ve built the sub-assemblies for the demolisher version here so you can see what you’d be adding, though For the roof I honestly don’t think anyone would know the difference between the two types. There’s nothing stopping you having those bits swap over if you want but I’d be inclined to pick your favourite option and stick it on.
Here’s the tank built before I set about painting it. The gun shield and the radiator things that go on the sides of the gun are magnetised here, so I can get at the gun to paint it. I decided against a pintle weapon because I think it makes sense for it to be buttoned up. In-game you’d be snap-firing a pintle weapon if you moved, as the main gun is ordnance, which decreases its value. The bits might come in handy for other kits though.
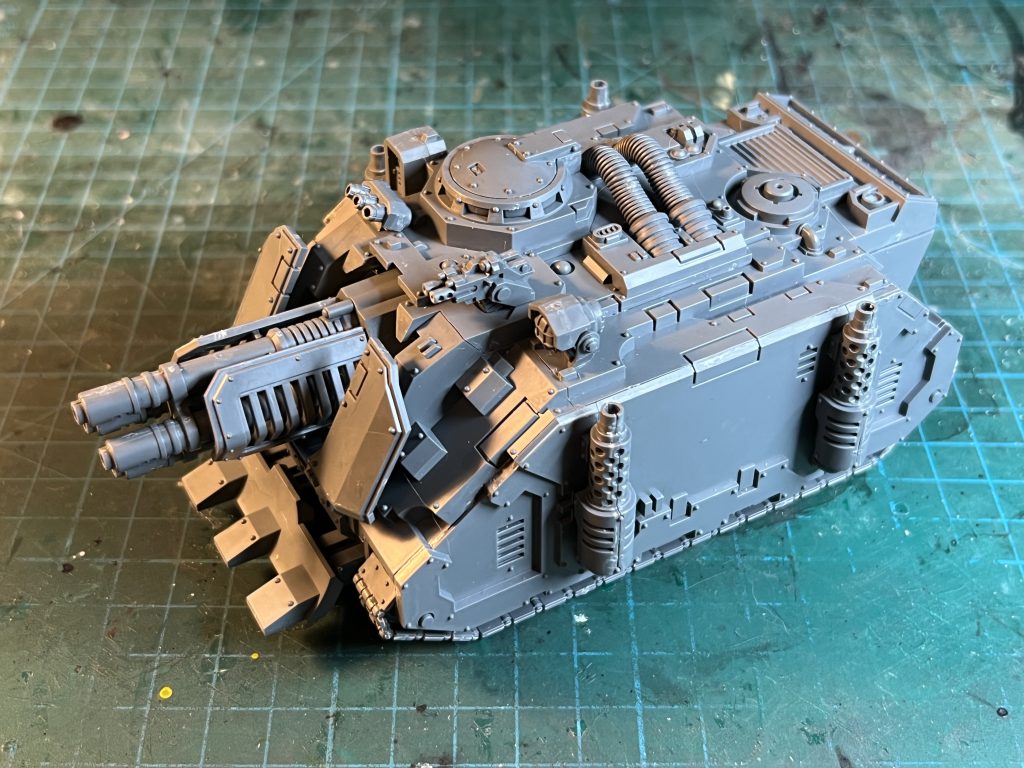
I found that I had to trim the lower tabs for the radiator thingies for it to fit on properly. Otherwise they clash with the mantlet and stop the piece fitting on properly. I’m not sure if I mucked something up here but all seems well now that I’ve trimmed it.
Painting the Vindicator
I had a think about what my Raven Guard would be doing with a vindicator in the first place. I decided they’d use it as an ambush predator, lying in wait to pop enemy tanks and transports rather than charging about the place. As such it ought to be hidden, which calls for camouflage. My Raven Guard army is based on urban rubble so I wanted a scheme to match, and decided to have a go at a modern digicam scheme.
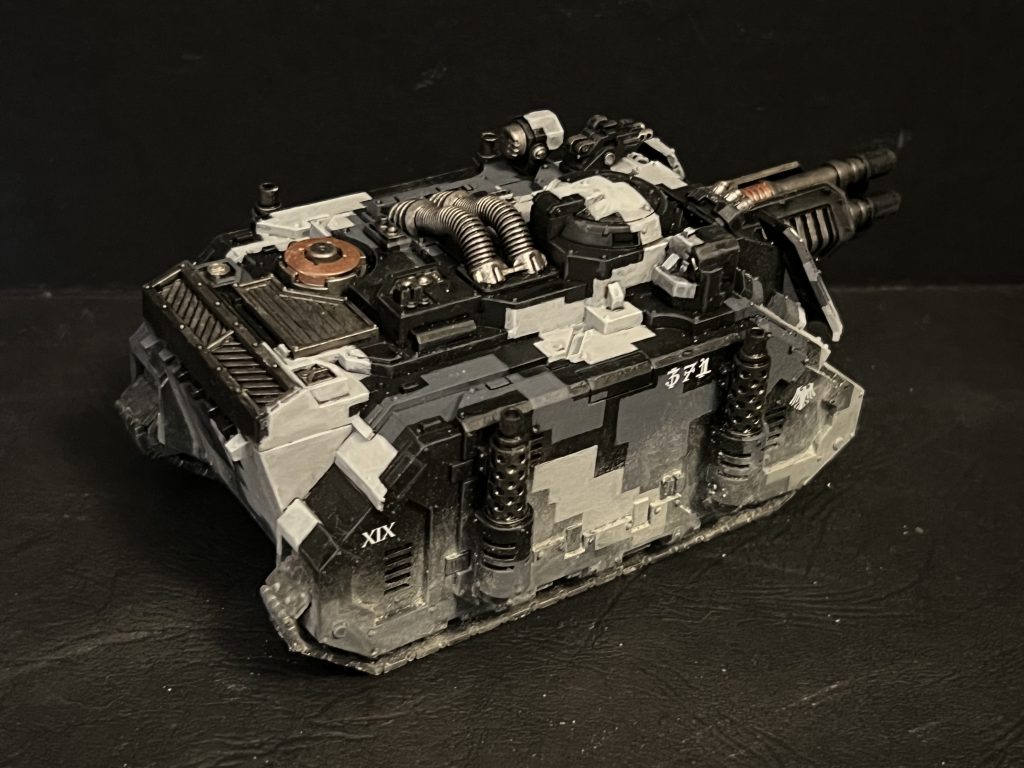
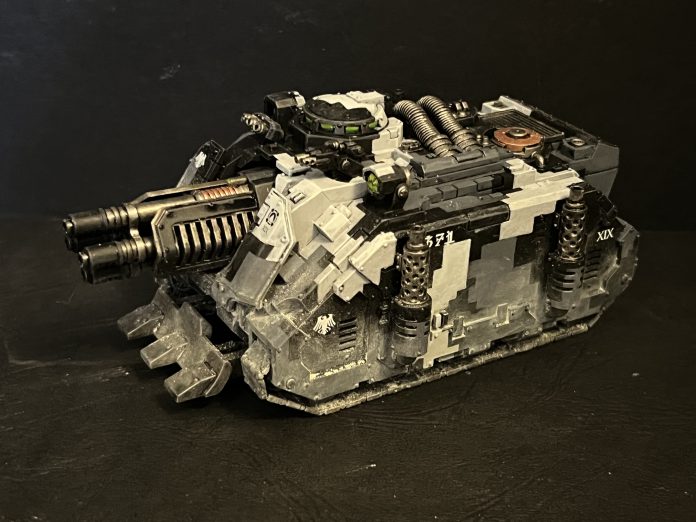
I had practiced this a bit on an old Mars class rhino that I’d wanted to use for Mor Deythan, but never actually finished it (or the Mor Deythan actually. One day!). I’ve painted the pattern in freehand using a flat brush. After a black undercoat I used Mechanicum Standard Grey and Grey Seer for the pattern and Vallejo exhaust manifold for the metal, before an all-over black wash. I then went over the camo again to tidy it up, did some edge highlighting, lens details, some small transfers and vigorously applied concrete pigment.
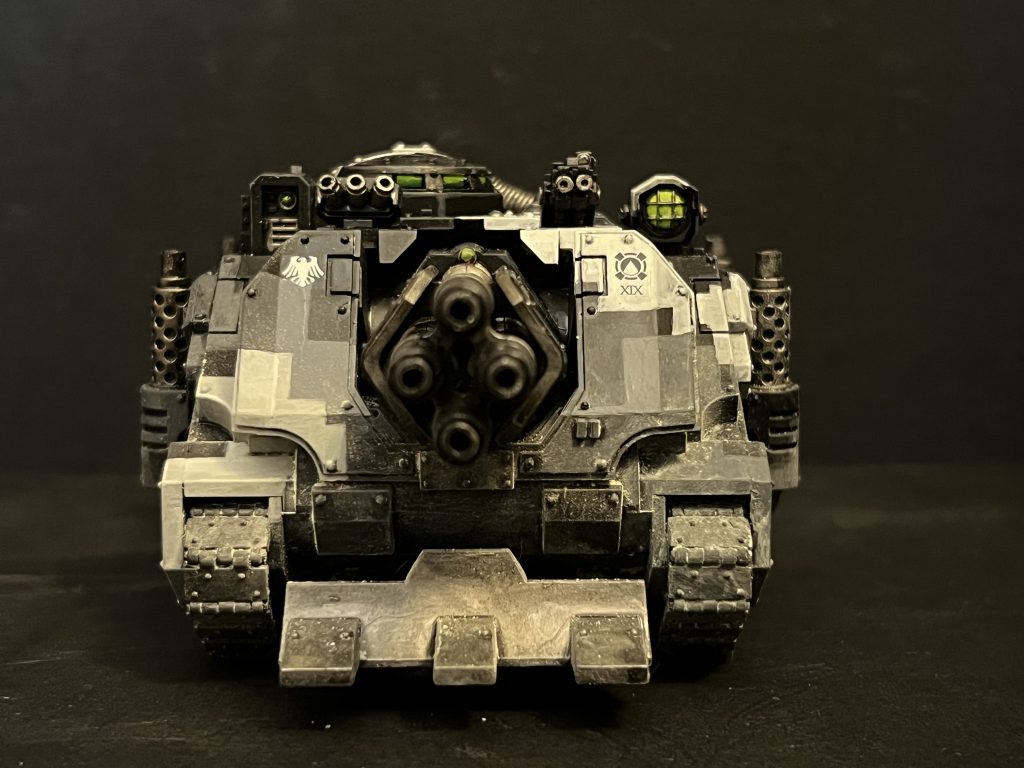
This isn’t really what a properly camouflaged tank would look like. You’d paint all the shiny metal parts and probably try and get a smaller pattern than I’ve bothered to do. But I think this manages a decent balance of getting the idea across, while looking more interesting than if I’d covered the whole thing in camo and nothing else. I’m quite pleased with the result and I think I’ll use it on more vehicles in future.
Comments, Questions, or want to declaim that camouflage is the colour of cowardice? Contact@Goonhammer.com


You must be logged in to post a comment.