A whole bunch of new Age of Sigmar models go up for pre-order today, both a huge wave of reinforcements for the Flesh Eater Courts and a new hero for Soulblight Gravelords.
Games Workshop sent us review copies of these, and we’ve had our team take a crack at painting them. You can see the results and our thoughts below.
Flesh Eater Courts – Chimp
Flesh-eaters were my first army in Age of Sigmar, and I’ve loved playing every iteration of them, so I leapt at the chance to paint some of the incredible new wave of miniatures. We’ve been waiting a long time for the FEC Mortarch, and good lord was Ushoran worth the wait, it’s an instant classic of a mini. Games Workshop have already shown off lavish, impeccable takes on the Summerking, but how does he go getting painted quickly to match an existing army project?
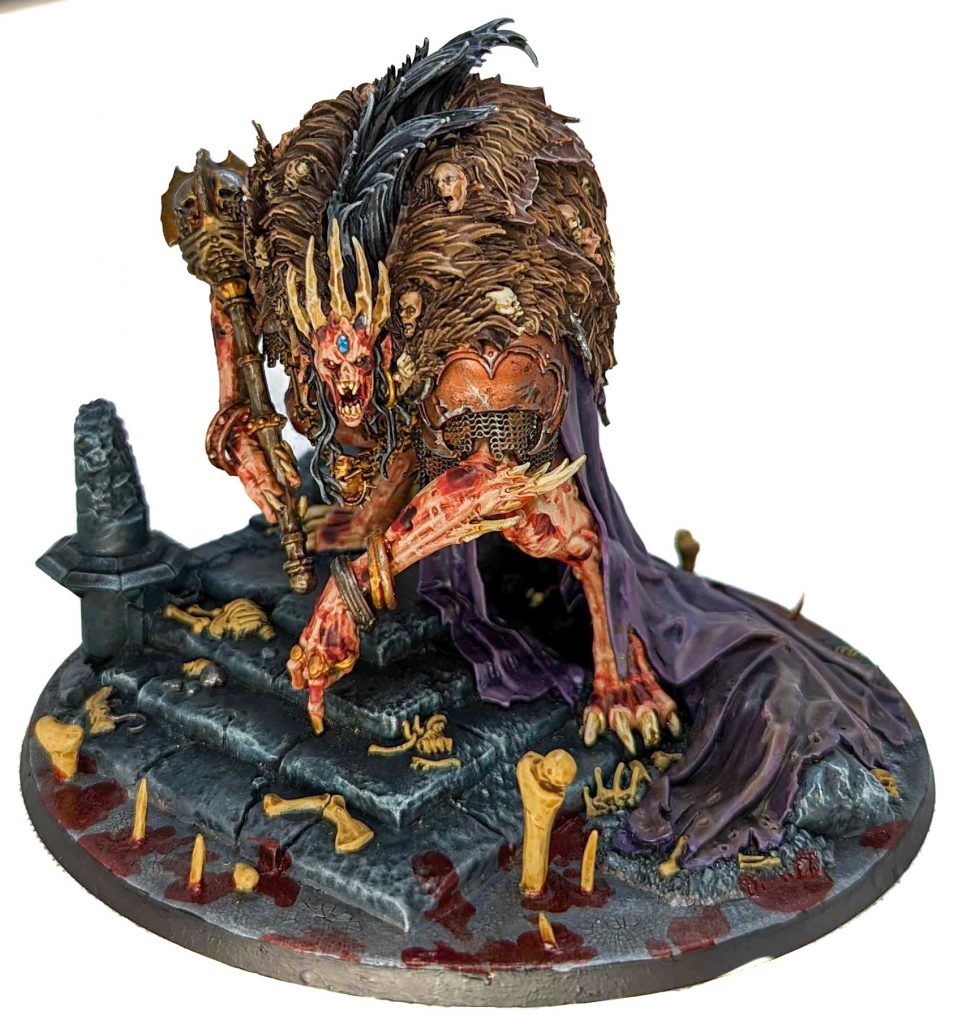
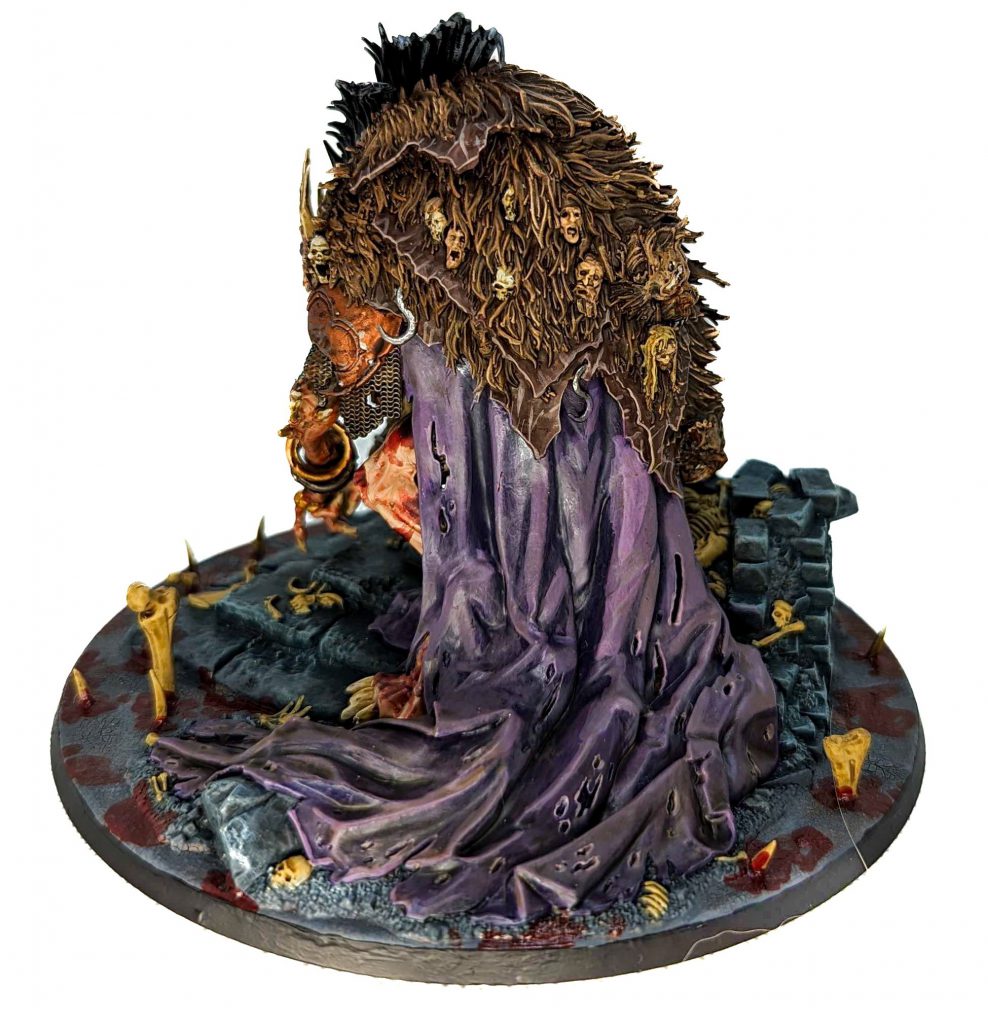
Ushoran is an interesting one. The engineering on the kit is (mostly) excellent and he’s very well designed for being painted in sub-assemblies, the back piece is all cloak and the fur section overlaps sits over the join to the main body – hiding it perfectly. This is a model with seriously dense detail, and it can be very easy getting lost in the weeds of highlighting a rotting face half-submerged into the fur, which can actually give him a cluttered feel. Sometimes less can be more, and I like the muted approach of letting the cloak-heads mostly fade into the fur.
It’s not the approach that I took for the most part, but all of that sculpted detail and organic texture means he’ll probably turn out pretty well with a pre-shade, contrast and a couple of well placed highlights job.
In terms of matching him to my existing force, I struggled a bit. I found matching him to the red skin tone of my Blisterskin themed army limited the palette of what I could bring to other details, and I didn’t want any major element of the piece to get lost. With hindsight I think the overall read of the paint job is that it’s too dark, I think Ushoran does benefit from some pop of bright colour somewhere, and that combinations of browns and bronzes gets a bit muddy viewed from the usual gaming angle & dim lighting. All that being said, I’m pretty happy with how sits as a centerpiece for FEC, and I’m very excited to get him on the table!
I’d also like to briefly sing the praises of the new foot heroes that are coming with this wave. Monopose foot heroes get a bit of a bad rap in AoS, getting wheeled out as band-aids for armies waiting for their second wave.
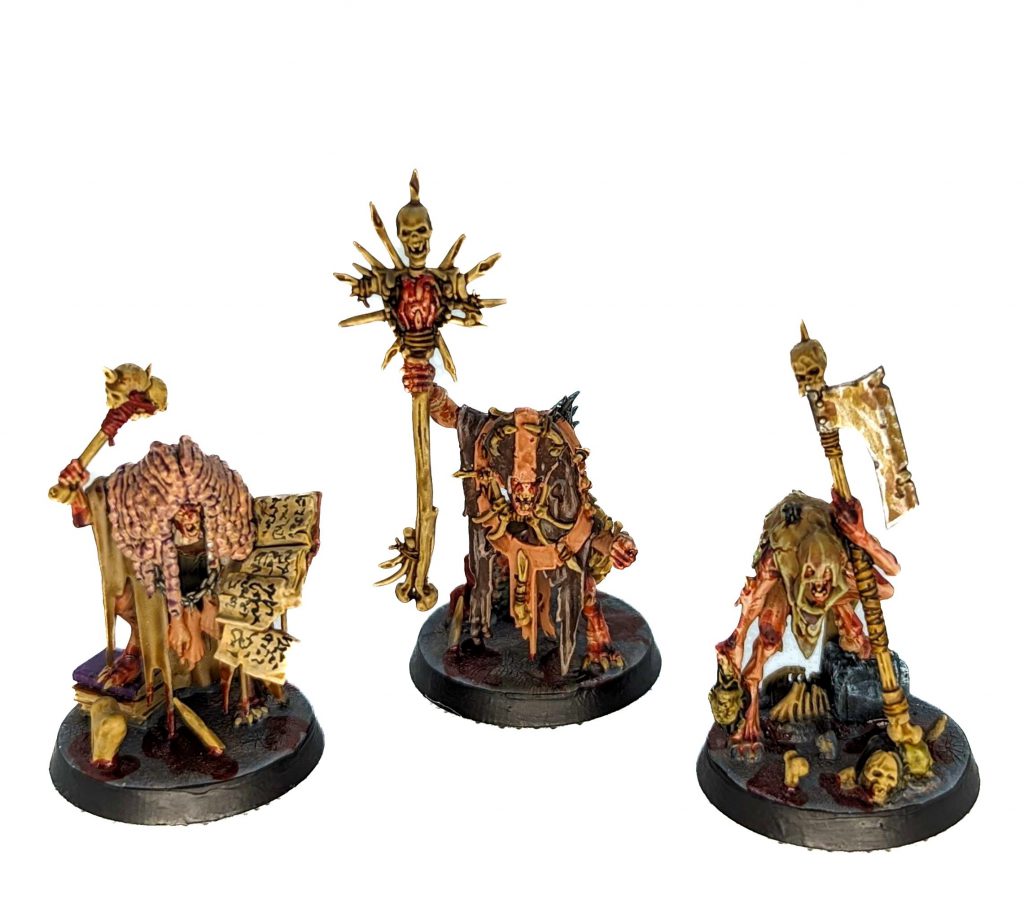
These three new heroes rule. FEC went from having probably the worst selection of hero models in the game to one of the best. They’re characterful and they’re great fun to paint. Grand Justice Gormayne is a particular favourite of mine and has incredible lore to go along with it.
Sekhar, Fang of Nulahmia – Wings
You might be asking yourself “What is Wings doing here? How did he escape from the Competitive Innovations mines?”. Well, while my primary engagement with the hobby is competitive 40K, very occasionally Games Workshop put out a model that grabs me so much that I’m willing to put the meta chasing on the back burner and paint it for fun, and Sekhar was one of those. Happily, the stars aligned that I was able to paint our review copy, and you can see the result below:
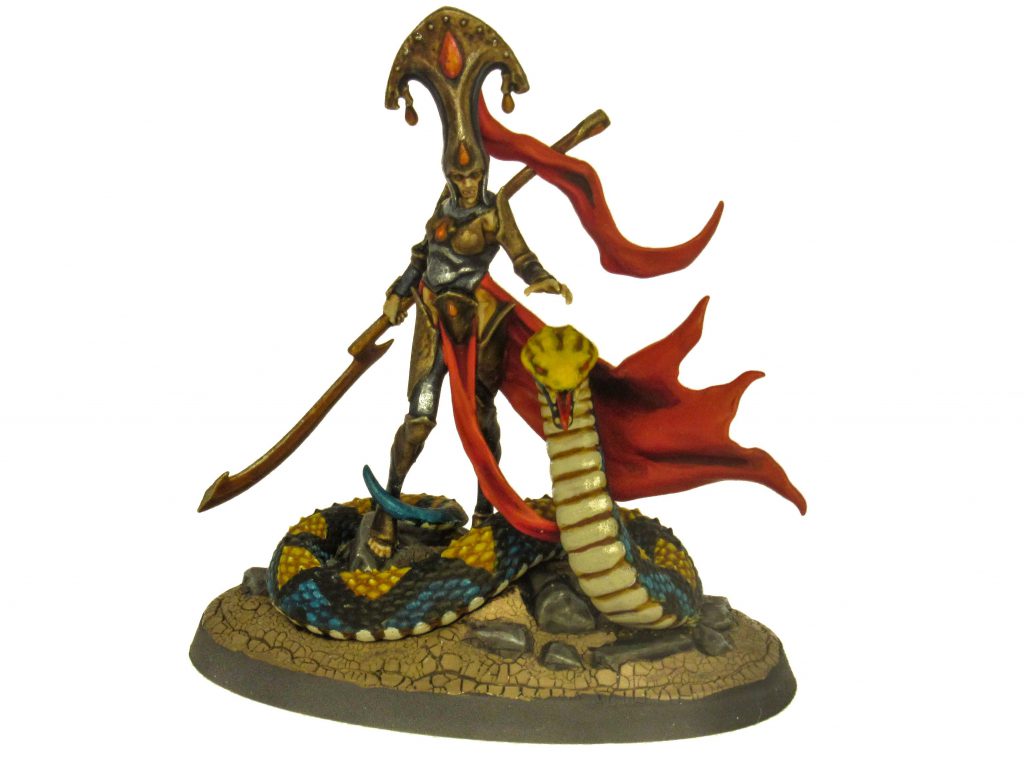
This model is, in fact, cool as hell and I had a good time working on it. There is one dire warning and caveat to go with that, which I’ll cover after going through the painting process.
Where relevant below, assume if I’ve said I thinned a Contrast Paint it’s with Contrast Medium, metallics always thinned with Lahmian Medium.
I started by subassembling the whole of Sekhar and the snake separately, and sprayed everything with Wraithbone.
For Sekhar, the process was then:
- Block in everything that’s going to be metal in thinned Black Templar.
- Tidy up the bits of exposed skin where this had reached with Wraithbone.
- Thinned Darkoath Flesh on the skin.
- Small amount of re-highlighting on the skin with Kislev Flesh.
- Paint the underarmour Grey Knights Steel.
- Wash this in Drakenhoff Nightshade.
- Rehighlight the raised areas with Grey Knights Steel.
- I decided I wanted the hat bi-metalic, so the lower bits of it were also done with this method. I then used careful lining with Ultramarines Blue and Black Templar to create the impression of a “join” between the two metals where the natural lines of the model didn’t make one.
- Paint the overarmour and front of the hat Runelord Brass.
- Wash this in Agrax.
- Re-highlight a little bit with runelord brass (particularly the line on the front of the helmet).
- Paint the cloak Baal Red.
- Use thinned Blood Angels Red and Carroburg Crimson to darken recesses appropriately.
- Make the raised folds of the cloak pop with Evil Sunz Scarlet and edging with Wild Rider Red.
- Blade of the Halberd in Retributor Armour, handle in Balthazar Gold.
- Wash the whole thing with thinned Darkoath Flesh (this on top of gold has become my preferred method for flatter surfaces, as it’s easier to make work on those than the classic Druchii Violet).
- Edge highlight it with Canoptek Alloy (you can substitute 50:50 Stormhost Silver/Retributor if you don’t have that one, as it’s fairly niche).
- Paint gems with Stormhost.
- Thinned Blood Angels Red on all except the most protruding part of the gem surface.
- Magmadroth Flame on top of that.
- Line around the edges of gems with Wyldwood.
- Very light drybrush with Yriel Yellow on the big hat gem.
- Paint the top edge of the hat in Canoptek Alloy, and dot the rivets with this.
- Fucked around with the eyes in several ways till I had something I was happy with that does not show up in the picture at all.
- Wyldwood in the mouth.
- Dot Wraithbone on the teeth.
- Done!
For her loyal serpent Ouboroth, I did the following:
- Used Black Templar to paint the criss-crossing black pattern.
- Used Akhelian Green to do the blue parts of the pattern (I’d probably use Kroxigor Scales if I had it).
- Used Bad Moon Yellow to do the yellow diamonds on top and the head.
- Washed the Bad Moon Yellow with Seraphim Sepia.
- Rehighlighted the top of the head with Yriel Yellow.
- Washed the bands on the forbidden tum with Seraphim Sepia.
- Re-highlighted the centre of the scales with Wraithbone. I’m particularly happy with how this came out, as this was one of the parts of the model I was worried about making look good!
- Used Wyldwood to make lines more defined anywhere needed on the belly, particularly on the bits of the bone colour that poke above the base groove around the edge.
- Used Black Templar to darken the inside of the mouth, re-applied Wraithbone to the tongue and teeth, and did a bit of detailing.
- Used Sotek Green to make sure the turquoise on the tale tip and the underside of the jaw was clean and popped.
- While painting this I’d handled it quite a lot, so Black Templar had rubbed off the bits of black on the top of the snake. Used Incubi Darkness to fix this.
- Done!
Now we get to the dire and terrible warning. I painted this in two sub-assemblies – the snake, and Sekhar, and had glued the latter to the base. Do not do this – the snake is so entwined with her feet that it’s not possible to get it into position once she’s glued to the base – I ended up having to break her right foot join then faff around re-glueing and then correcting the impact of re-glueing, as Contrast gets obliterated by plastic glue. Learn from my mistakes, don’t do this to yourself.
Anyway, to finish up, the base was:
- Wyldwood on all the brown gravel.
- Decided this looked terrible, and just used Agrellan Earth to hide a multitude of sins, plus gap fill where the snake wasn’t sitting quite right in the groove due to aformentioned subassembly disaster.
- Painted rocks in Dawnstone.
- Washed with thinned Basilicanum Grey.
- Edge highlighted with Fenris Grey.
- Black base rim.
- Done!
All in all, other than the entirely self-inflicted issue with subassemblies, I had a really good time with this. After assembling it and priming it I was looking at it wondering what I’d gotten myself into, but it turned out that the Contrast, washes and metallics style I tend to paint in nowdays went really well on the model, and it’s pretty restrained in terms of excess detail compared to some AoS pieces.
Is she good in the game? No idea, ask the AoS team.
