In this article McBill shows us how he painted the Dark Side of his Shatterpoint Core Set. To see his tutorial for the Light Side follow this link, and for our review of Shatterpoint click here!
Star Wars: Shatterpoint is nearly upon us. With its release this weekend, many of us at Goonhammer are looking forward to fast, dynamic skirmish games from the developers of the excellent Marvel: Crisis Protocol.
In the run-up to release, Atomic Mass Games provided local game stores with a demo copy of their massive Shatterpoint Core Set starter box. My own local game store contacted me about painting the contents of their demo copy, with the caveat that they needed it turned around in one week, so they could host demos the weekend prior to release. I’m the first to admit I am often incredibly slow at painting my own models, but I was up to the challenge. I picked up the box on a Saturday, and was able to turn it back in the following Friday with all models (and terrain, but these articles will focus on models) painted. How did I, an acknowledged slow painter, achieve this? Read on, dear reader. Part One here will detail the villainous models, followed by a Part Two covering the heroes.
Prep Work
First and foremost a huge help here was quite simply that the LGS owners had already assembled the models for me! Shatterpoint models mostly assemble quite easily according to the LGS owners (thought there was some grumbling about droids), as well as general sentiment on the internet. Atomic Mass Games have clearly improved over time in sculpt quality and easy of assembly. Nonetheless, assembling sixteen models would have eaten up at least one evening’s worth of my hobby time. This did mean there was some sprue scarring and mold lines on the models, but in the interest of time I turned a blind eye and pressed on.
Since they were already assembled, I immediately moved to the next step and glued some magnets under all the bases (6x2mm round magnets work great for both sizes of base) to make priming and transport easier. With the models safely stuck to my trusty old beat up baking pans, I hit them with the most important part of this process: white primer. Nothing will get miniature hobbyists arguing like the merits of various primer colors. When I was first learning, black primer was considered the one true way (and still is by many people). Later, a friend and the best hobbyist I’ve known turned me onto white primer. Today, especially with zenithal priming, the ‘slap-chop’ fad, and speed paints like GW Contrasts, white primer is more common. If like in my case you want to paint models in a hurry, white primer is your best bet in my opinion.
Finally, before you start painting a speed project like this, take the time to do a little planning. Think about what paint scheme(s) you want, and how best to achieve them quickly. In my case, I wanted to focus on Contrast paints, or at least brighter colors I then hit with washes for a similar effect. These would provide good tabletop results quickly and easily. I also thought a demo set should hew to the studio colors as much as possible. I had most of what I needed, and the LGS provided me with a handful of Contrast paints as well. I used GW paints whenever possible here, as they are the only line my LGS regularly stocks, and will be what many readers have easiest access to as well. Unless indicated otherwise, all paint names are GW paints. I also mentally prepared myself with regular reminders that this was about speed, not the highest quality. If something looked good enough, then I needed to move on and not fiddle or tweak things. In most cases, I was successful.
B1 Battle Droids
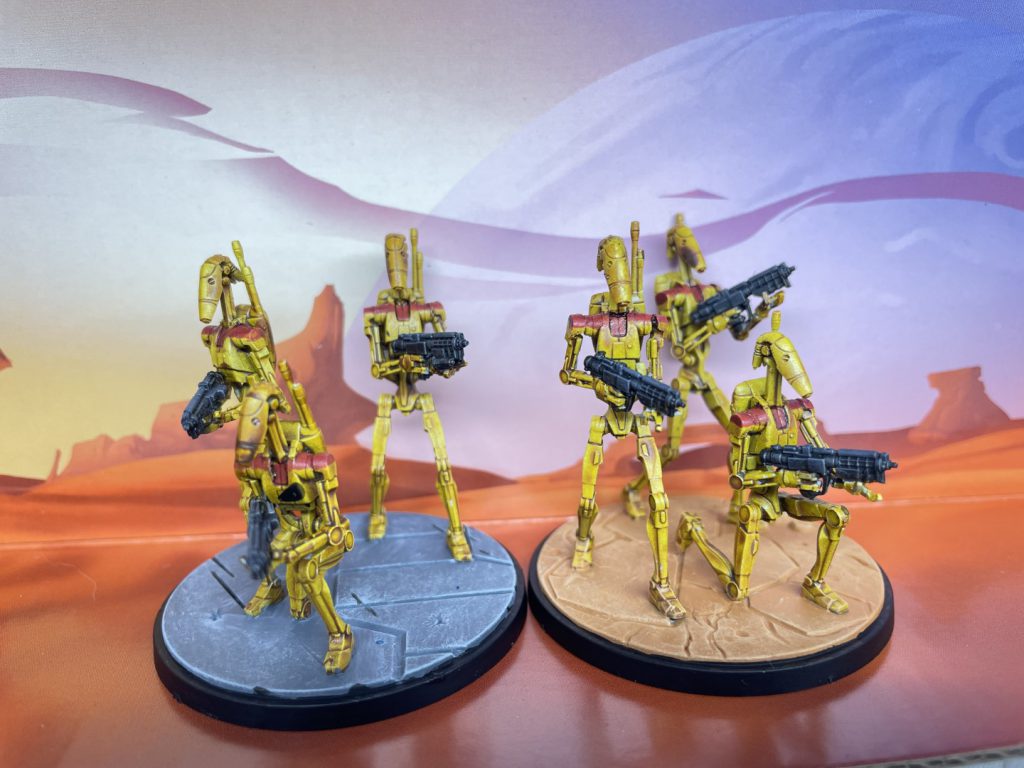
I started with the droids as they looked especially easy to do quickly. It’s not a bad idea to start with a confidence builder, especially if you’re under the gun painting quickly for a convention or what have you. For these, I covered the entire model (except for the blaster) in Contrast Nazdreg Yellow. This was one I picked up for the purpose, and while the color isn’t quite what I wanted, it’s close enough. It provided good shading (a little too much on the front left droid’s head in fact) and while a little too yellow, I was happy with the results. I followed that with a quick coat of Contrast Black Legion on the blasters. That color doesn’t quite give enough contrast on its own, so I followed that with a drybrush of Eshin Grey to bring out raised edges. Finally, I did the trim on the upper body with P3 Skorne Red. The end result wasn’t quite as crimson as I wanted, but a quick hit of Carroburg Crimson wash fixed that and provided more definition. With that, I was done except for bases, which I did all at once at the end. Accordingly, I’ll go into that process at the end of this article.
Kalani
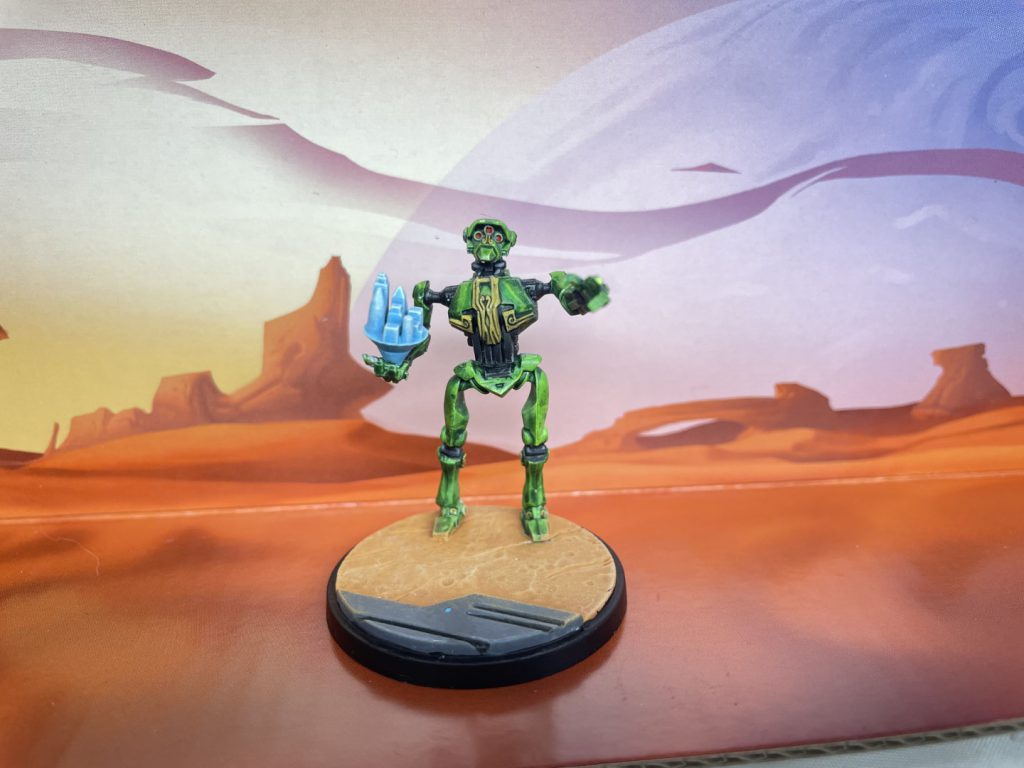
I decided to work in the primary / secondary / supporting framework that the game rules use, meaning I moved to Kalani next. I didn’t have a green Contrast paint that was as dark as I’d like, and I’d never tried mixing them before, so I decided to give that a go. Here I mixed a roughly 2:1 ratio of Contrast Warp Lightning and Contrast Black Legion. You can see what this looked like below:
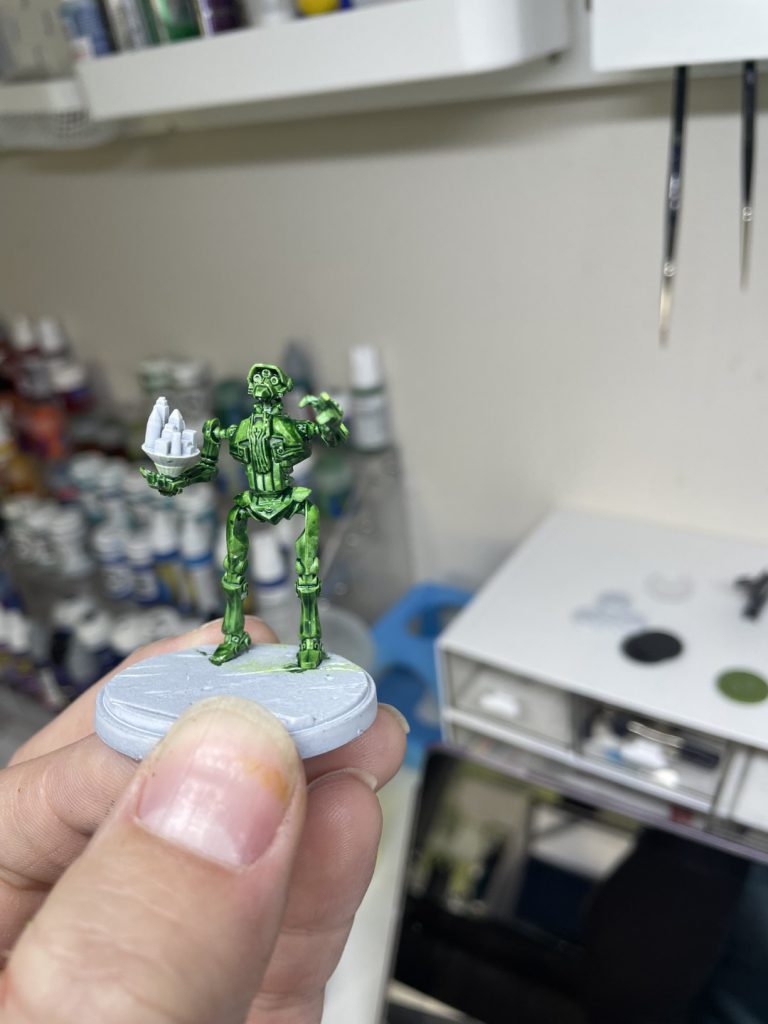
This got me close to what I was looking for, though I did follow with a drybrush of a much brighter P3 Necrotite Green. The armor trim was painted with Iyanden Darksun, a sadly OOP shade that it somewhat replicated in Contrast Iyanden. I wouldn’t use a contrast paint for trim like this, however. Consider Averland Sunset here instead, for example. Once I painted the trim, I hit some areas of trim (such as on the torso) with Nuln Oil wash to give a little more definition. Joints and internals were painted with Contrast Black Legion with a little drybrush of Mechanicum Standard Grey. Eyes got a quick dot of Mephiston Red. Finally, the hologram was base coated with Lothern Blue, then drybrushed with P3 Menoth White Highlight (i.e. the best off-white I’ve ever used). A wash of Drakenhof Nightshade might also work here, but I was worried it would darken things too much. With my mantra of ‘good enough is just that’ in mind, I moved on to my first primary model.
Assaj Ventress
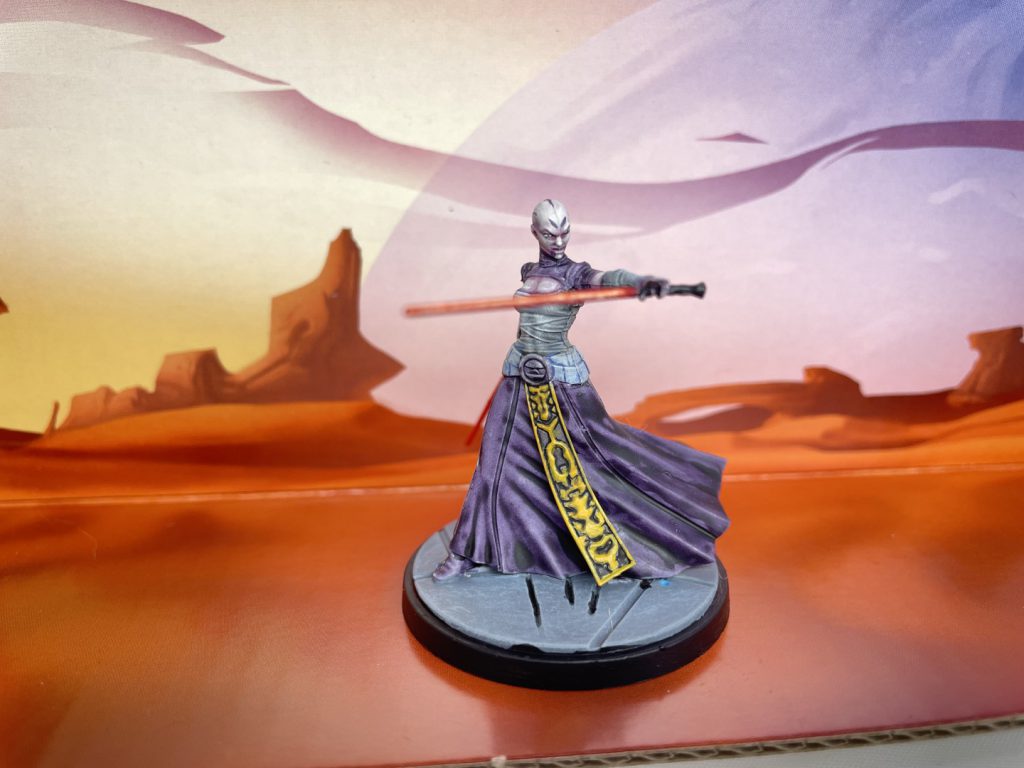
My plan all along was to spend a bit more time with each primary model- a little more highlighting and shading, effects like OSL, etc. Asajj is a good example of how this played out. Her robes, boots, and weird crop top thing were done in Contrast Shyish Purple. I planned to do some additional highlighting, but the effect was pretty good as is. Moving to her cloth wraps and belt, I based both of these with Contrast Apothecary White (more on this in Part Two when I cover the clones!) mixed with a drop of Contrast Ultramarines Blue. The end result was too blue for my liking, however. To fix it, I gave the fabric wraps (not the belt) a wash of Nuln Oil. I followed that with a drybrush of Vallejo Game Color Stonewall Grey, on both the fabric and belt this time. They still needed a little more highlighting, so I mixed in a little VGC Ivory with the Grey and did a lighter drybrush with that. By not washing the belt with Nuln Oil, the idea was the blue tinge there would help contrast it with the cloth above. Here’s a closeup to show these better:
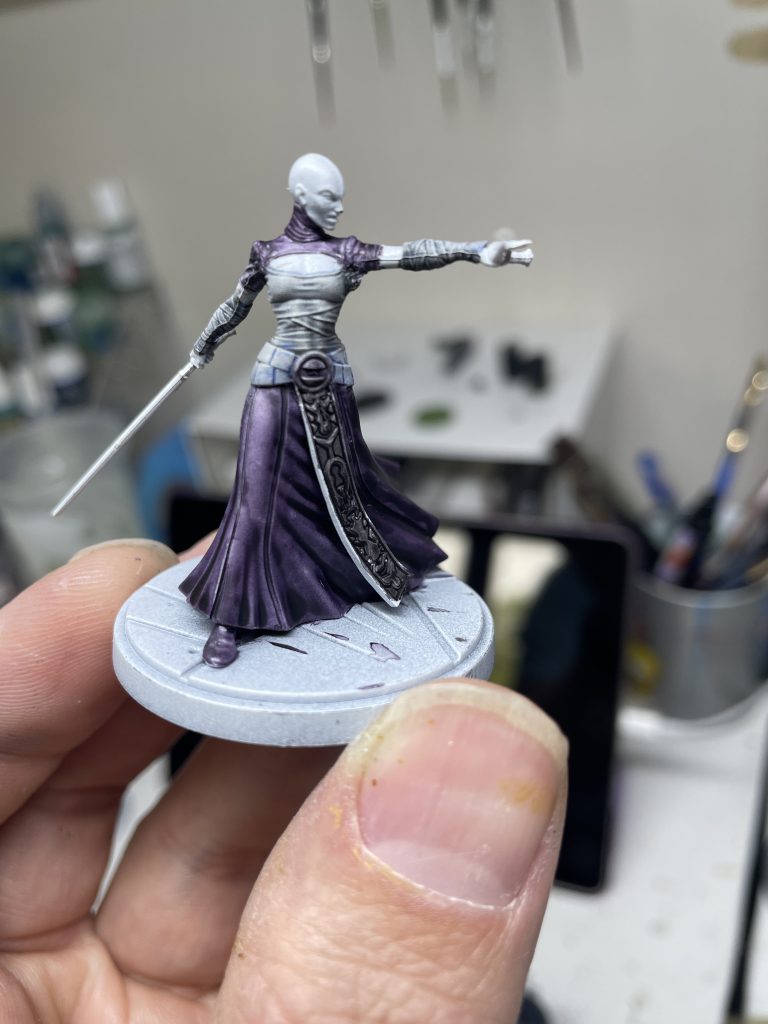
Moving to the sash, I painted that with a mix of Contrast Black Legion and Shyish Purple. It looks mostly black in the end, but there’s enough variation to be a little more interesting to the eye. The runes and trim were done in Iyanden Darksun (see above for alternatives). Like with Kalani, I used some Nuln Oil wash in recesses to give a little more definition. In a few spots, I went back with some black paint to really emphasize the recesses.
Asajj’s skin is where I am most happy with the model, and also the most annoyed at myself for not taking lots of work in progress pics. The studio paintjob and of course official depictions have her with a very pale skin, yet slightly tinted towards what I see as a purple tone. This took more work then a quick Contrast coat, but wasn’t too bad to pull off. I started with a 50/50 mix of Scale 75 Pale Skin and Huge Miniatures Pale Rose. I then washed all the skin with a 50/50 mix of Reikland Fleshwash and Druchii Violet washes. After that, I layered back up with my base color mix then slowly mixed in small amounts of P3 Menoth White Highlight, highlighting increasingly small areas of the skin. I did a small wash of Drakenhof Nightshade around the lips to set them off a bit. The end result is maybe shifted a little more pinkish then I originally wanted, but I really like how it looks. I’ll be stealing this recipe for my personal model for sure.
I’m terrible at freehanding usually, but I wanted to try some for Asajj’s tattoos. For this, I mixed a black paint with Army Painter Alien Purple. My attempt is a rough approximation of her actual tattoos, but the shade is pretty decent in my opinion. If I had more time, I would start with the same mix but with some fleshtone mixed in to start, then layer the pure tattoo mix on top.
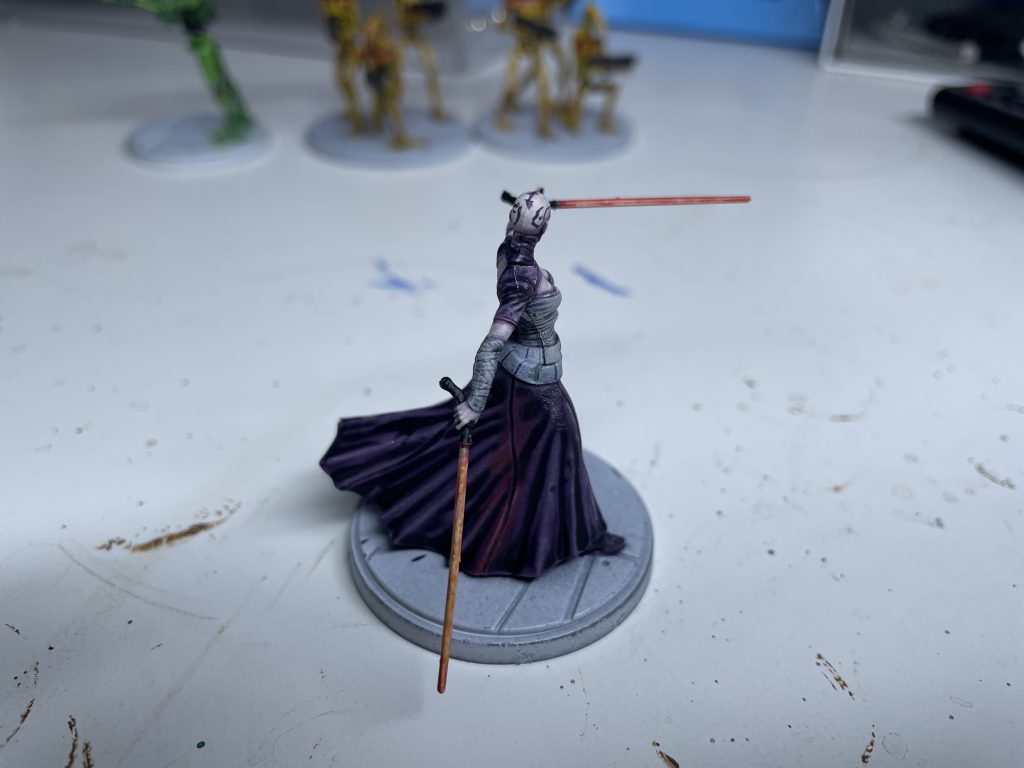
Finally, her sabers. The hilts were done in a grey, though regrettably my notes are missing which. I would guess Mechanicum Standard Grey, though any grey that’s not too dark will work. You want the wash to provide contrast, so lighter colors will work better with them. I washed that with Nuln Oil. The blade was based with P3 Khador Red Base, though any good bright red will work here of course. I then mixed some orange ink and VGC Ivory. In lots of small, short strokes, I went up most of the blade. I then glazed that over with a pure orange ink. This is a version of the technique Dallas Kemp, AMG Creative Director and paint wizard, explained in this video.My end result wasn’t as good as his of course, but it’s a fairly straightforward technique to do. For a glowing OSL (object source lighting) effect, I drybrushed with my base red color wherever I thought light from the saber might hit. It’s a very simple OSL technique, but works well enough from tabletop height. You can best see it on her robes in this WIP picture:
With Asajj done, that was my first big chunk of work done. No rest for the weary though, as I next moved immediately to Darth Maul and his Mando buddies.
Gar Saxon and Super Commandos
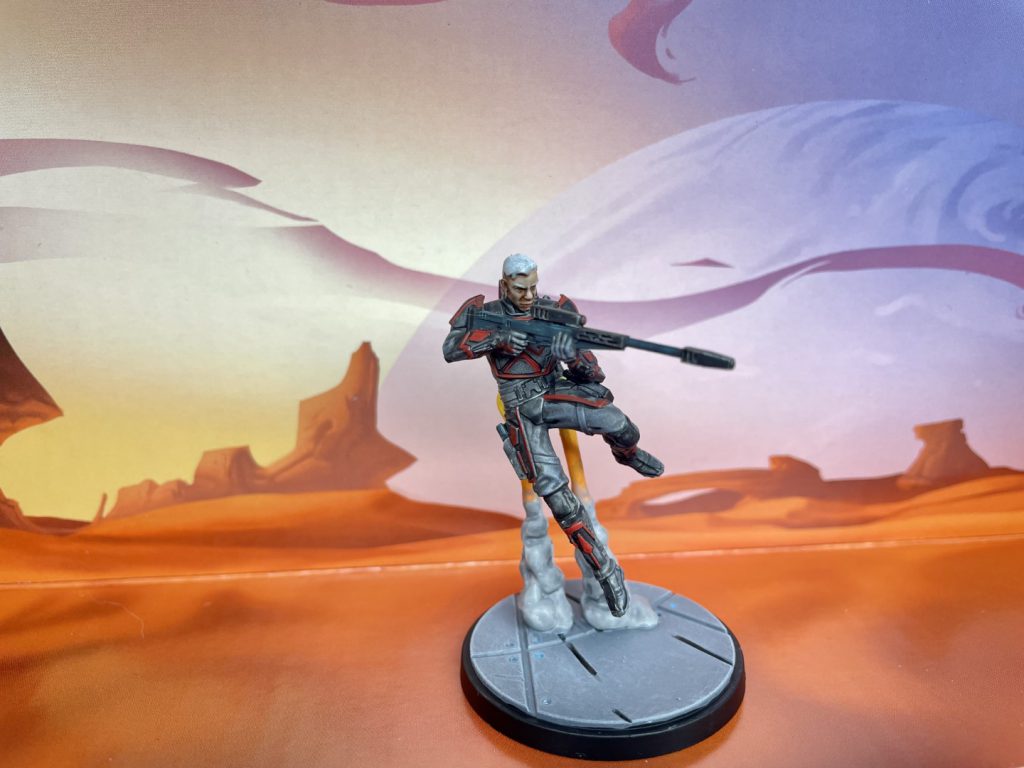
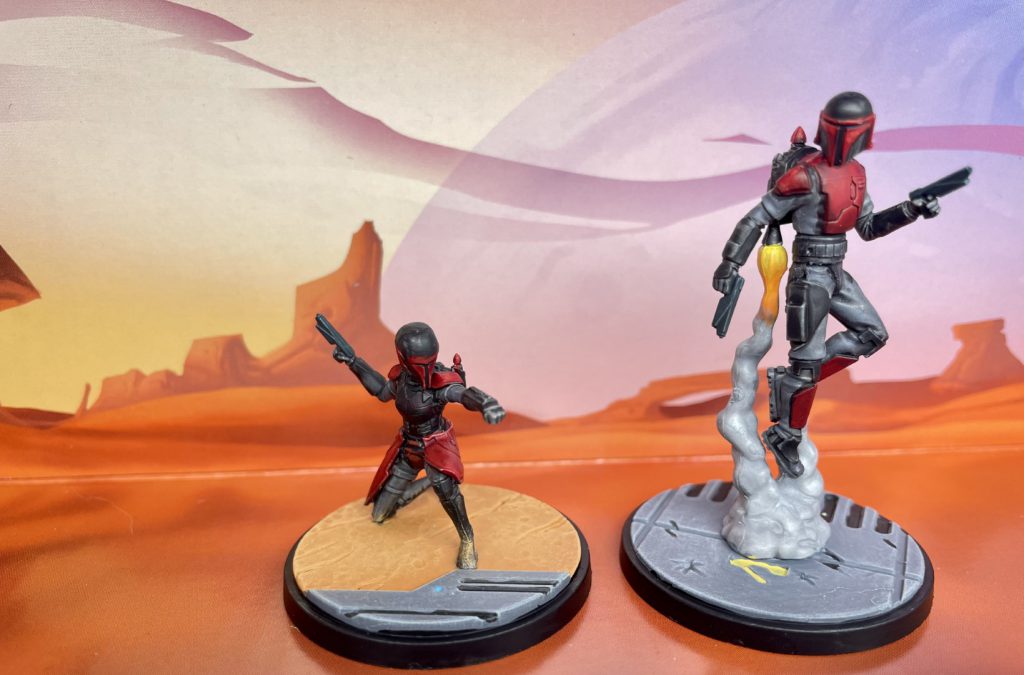
I painted the secondary and support units here all at once, as they shared a color scheme. Remember, efficiency is your friend when painting in a hurry! Unfortunately these are a potentially challenging set of models with all the black on top of black. To provide some visual contrast, I cheated and did the bodysuit under the armor in a dark grey instead. These were based with Eshin Grey, washed with Nuln Oil, then drybrushed Mechanicum Standard Grey. The armor plates were done with Contrast Black Legion mixed 4:1 with Contrast Ultramarines Blue. The blue doesn’t show all that much, but like with Asajj previously, you still get something a little more visually interesting. Red armor parts were done with Contrast Fleshtearers Red. For any touchups to the red and for Gar Saxon’s red trim, I used Mephiston Red to have more control over the paint. To be honest I think this red armor is some of the weakest stuff I did in this project. It would benefit with brighter highlighting, and more separation from the elements around it. For my personal models, I’ll use my usual blacklining method to help with that. Remembering my ‘good enough’ mission for these demo pieces, I moved on.
Guns represented more black color to try and keep from blending together visually. To avoid this problem these got painted with P3 Coal Black, a very cool bluish/greenish dark paint that when washed with Nuln Oil like I did here, gives you a cool tinted black sort of color.
The LGS owners built the helmet-less sniper variant of Gar Saxon, aka the superior choice. For his flesh, I just did a simple coat of Contrast Guilliman Flesh. Hair was painted in Contrast Apothecary White.
Finally, I painted the fire starting with P3 Sulfuric Yellow, then wetblending P3 Khador Highlight so the colors blended in the middle. The raised ‘ridges’ of flame close to the emitter got a little orange as well. Remember the key is that fire is brightest where it is hottest, so you have to highlight the most recessed regions and bits farther away are darker. That’s directly opposite from how you typically paint miniatures, so keep it in mind if you can. The grey exhaust was done with Dawnstone, deliberately thinned enough to let some primer show through as a highlight. It took 2-3 coats in some places to get the opacity I wanted in more recessed spots. A little thinned grey over the end of the flame, leaving a little orange poking out, helps tie together the smoke and flame.
Darth Maul
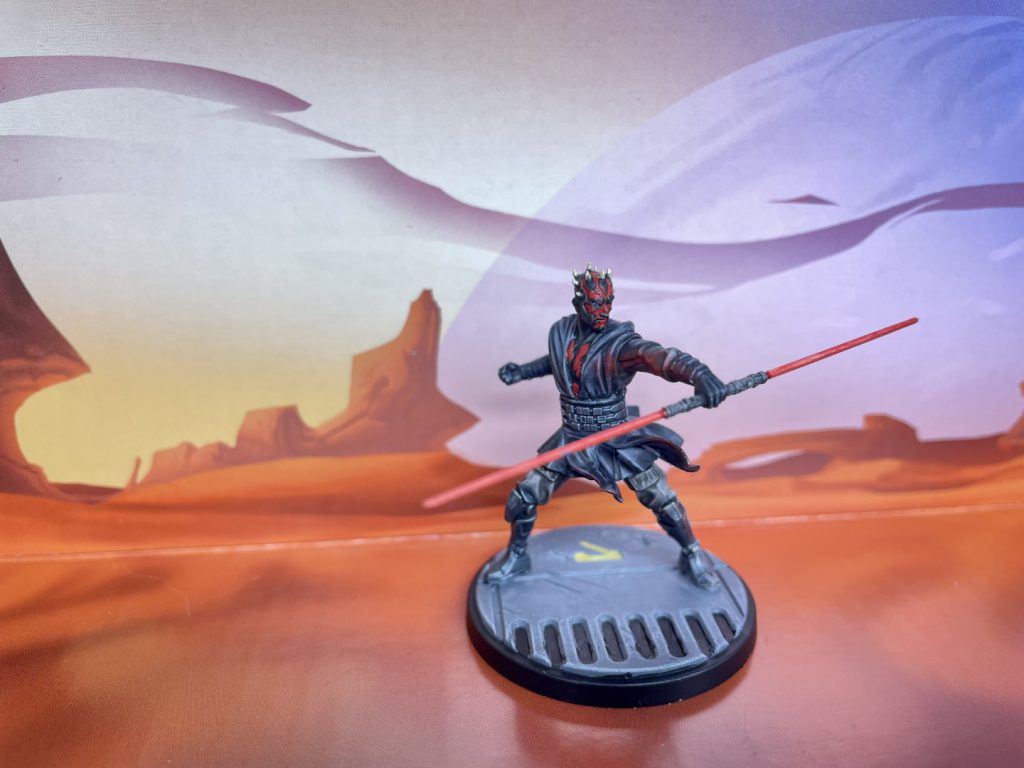
Hey, look at that, more black on top of black! Ol’ robolegs here was another challenge to paint for this reason. I again needed to show some contrast between different elements all colored black, including his skin this time. In addition, I wanted to emphasize the ridiculous plot element of his cyber legs.
To start, I painted the visible legs with Scale 75 Black Metal. I used an actual metallic to emphasize them more in comparison to most of the other models where I avoided metallic paints. To create some interesting shades and avoid so much black, I washed the metal with Drakenhof Nightshade, rather than the standard Nuln Oil. I highly recommend getting creative with how you shade metallics. There are some neat effects you can get that way! After the shade dried, I drybrushed all the metal with Scale 75 Heavy Metal.
The cloth pants/bodysuit or whatever that is was done in Dawnstone washed with Nuln Oil. You could wash more than once to get a stronger, darker color if you wanted here. The robes were done with a more aggressively blue version of the super commando armor: this time with a 1:1 ratio of Contrast Black Legion and Contrast Ultramarines Blue. His skin was done with pure Contrast Black Legion. You can see the contrast between these pretty clearly here:
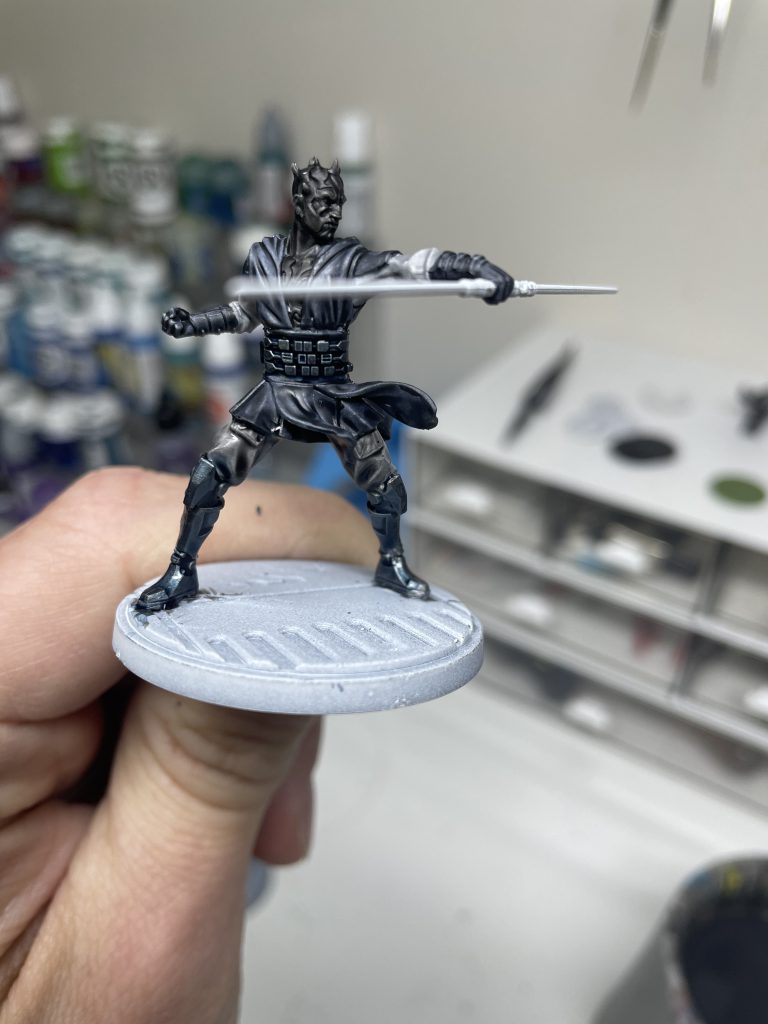
Maul’s red tattoos were done with Mephiston Red as a base, followed by some highlighting with P3 Khador Red. A Contrast paint was not the way to go here, as I needed precise control over the paintflow. Finally, his horns with done with P3 Menoth White Base. I could have shaded them with some like Agrax Earthshade or a sepia tone, but they seemed good as is and I needed to move on. See the entry for Asajj above for how I did his saber and the OSL on his torso.
And with Darth Maul done, I was halfway through the core set contents. Stay tuned for Part Two, where I detail my quickpaint techniques for the heroes, cover how I based all these models, and probably gush too much about the merits of Apothecary White!
For how to paint the Light Side heroes, click here!
Have any questions or feedback? Drop us a note in the comments below or email us at contact@goonhammer.com.


You must be logged in to post a comment.