In Hobby Heresy we look at particular conversion projects, following them through from concept to planning to execution. Today we’re looking at Charlie B’s excellent Primaris Librarian conversion.
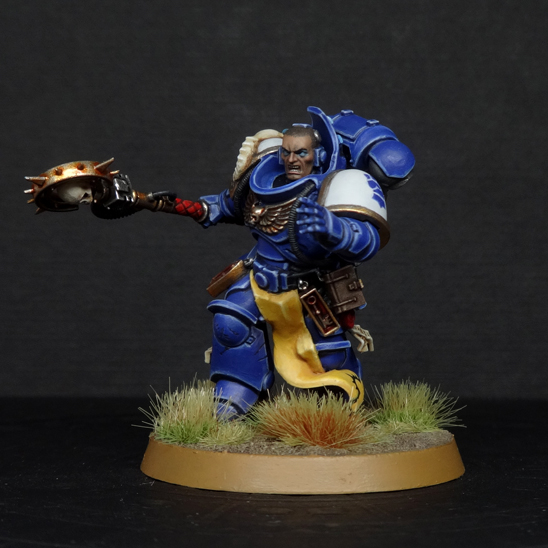
The stock Primaris Librarian kit is fine, particularly if you enjoy a guy who can’t quite be bothered to close his dressing gown, but I wanted to make something unique. I set out armed with parts from six different kits, some guitar wire, and some green stuff. Here’s how he turned out:
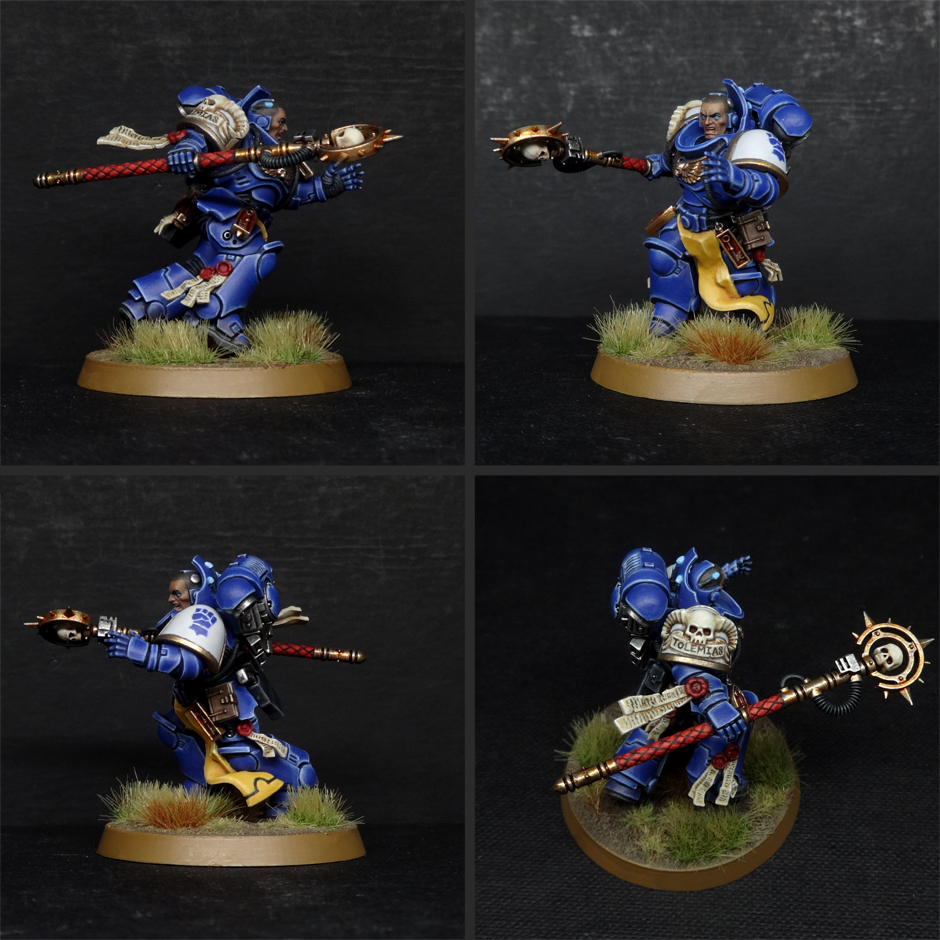
This article will cover the second edition 40K inspiration, the planning and bitz sourcing, how I did the conversion itself (pinning, sculpting, etc), and then finish with some quick notes on the painting.
Inspiration
Having established that I was indifferent about the stock kit, I took to browsing old codexes for ideas. Between that and Warhammer 40K turning 35 years old recently, I found myself nostalgically thumbing through the second edition Ultramarines Codex. Back then, in the heady days of extremely primary colours, Librarians wore classic Ultramarines blue with yellow tabards. They also had some nifty iconography for the various ranks of Librarians, like so:
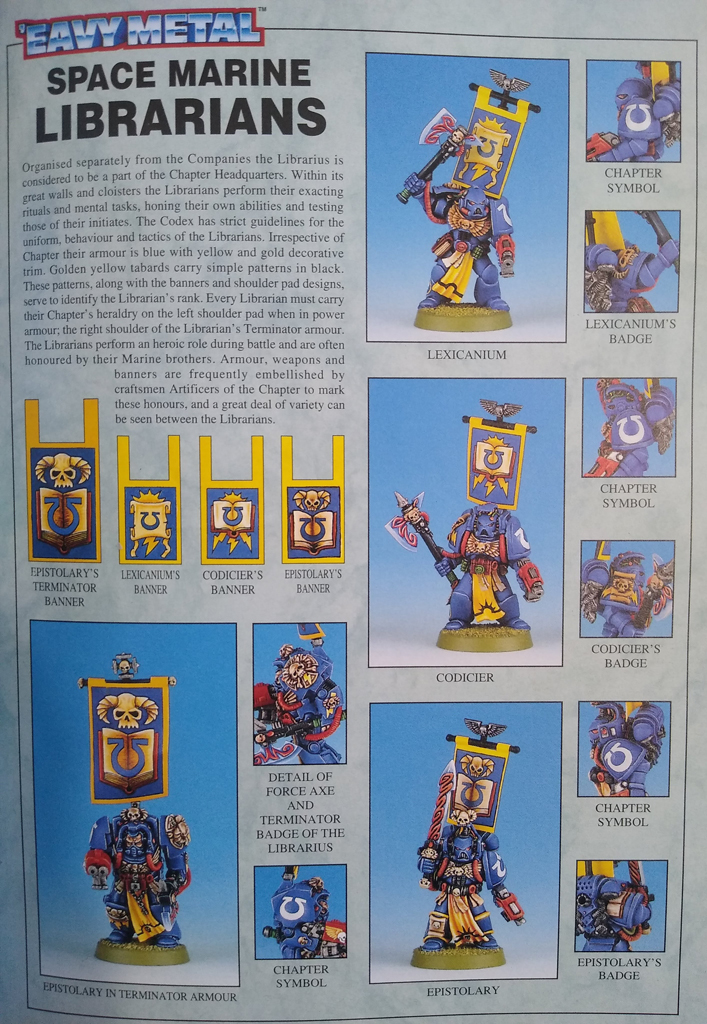
Following this older, brighter style meant painting the blue armour just like all the other marines in my army, but the addition of a yellow tabard would definitely stand out. As would his wizarding stick.
Planning and bitz hunting
The first thing to consider when scratch building is other gamers. Technically, you’re making a proxy for the official kit, so your job is to clearly signal what this dude represents. In making a mini entirely different to the stock kit, it needed to read as a librarian, with visual clues that the average 40K gamer would get.
I figured a staff is a good start. A psyker is the only kind of Space Marine likely to use a staff, so that’s 70% of the battle won right there.
The tabard only works as a 2nd edition reference, and in my army, the fact that it’s yellow certainly makes him unique, but I can’t expect everyone to understand what it signifies. A more consistently iconic part of the Space Marine Librarian look is the psychic hood. I wasn’t confident that I could sculpt something that rigid and mechanical from scratch, so that’d need a component. Another key element of the Librarius look includes keys and books, plus a healthy smattering of purity seals.
I also knew that I wanted to create something very different to the stock kit, since it’d be uniquely mine, and you don’t often see Librarians going for a headlong charge. This also served as an amusing counterpoint to the rather staid marines in his chapter, so it immediately tells you he should probably be named Jeeroy Lenkins.
Having had those initial thoughts, I dove into my own bitz box, the bitz boxes of my friends, and the virtual bitz box (eBay).
The bitz lizt
- Assault Intercessors: body, backpack and right arm.
- Grey Knights Strike Squad: head and psychic hood.
- Grey Knights Terminator Squad: force staff.
- Vanguard Veterans: right hand (originally holding a thunder hammer).
- Intercessors: left arm, keys, book, pistol holster, purity seals.
- Primaris Librarian: right pauldron, long purity seal on right vambrace.
Other materials
- Green stuff (epoxy putty)
- Guitar string
Doing the Conversion
The psychic hood & head
Turns out the curvature of a Grey Knight’s power armoured psychic hood fits the curvature of an intercessor’s collar almost perfectly. I used a razor saw to get the hood off its original torso, then used a judicious amount of poly cement to affix it to the assault intercessor’s collar. Once that was fully dry, I used a mould line remover to sand down the join both inside and out.
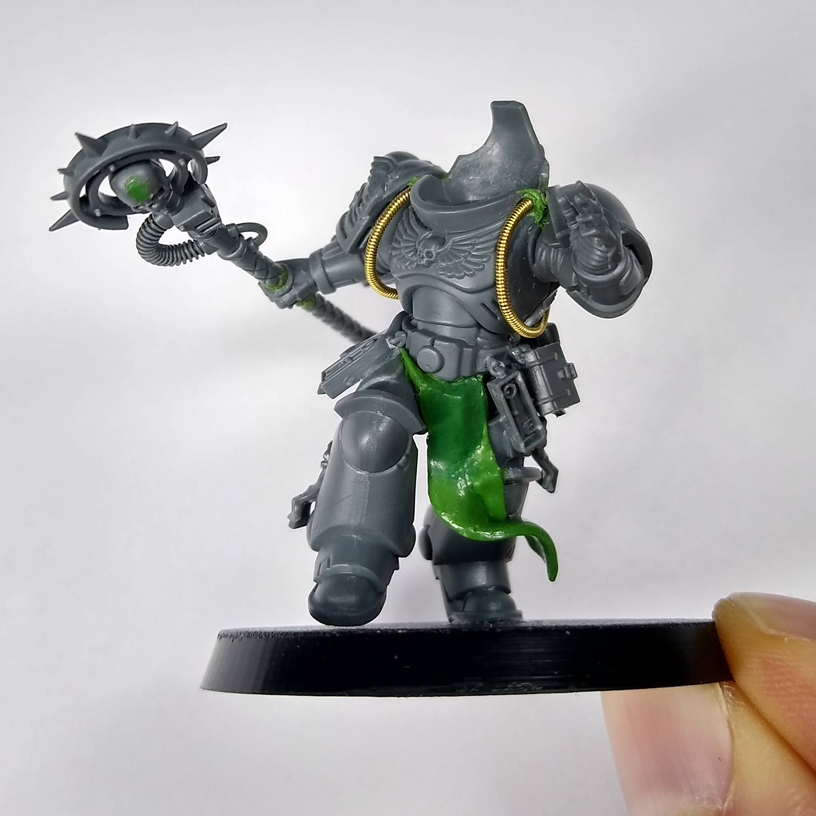
Since the wires on the back led to nowhere, I did some fairly loose sculpting to integrate the back of the collar to the power unit jack. I didn’t need to be very exacting, since this bit is mostly hidden once the power unit is attached, it just needed to look like stuff was in there.
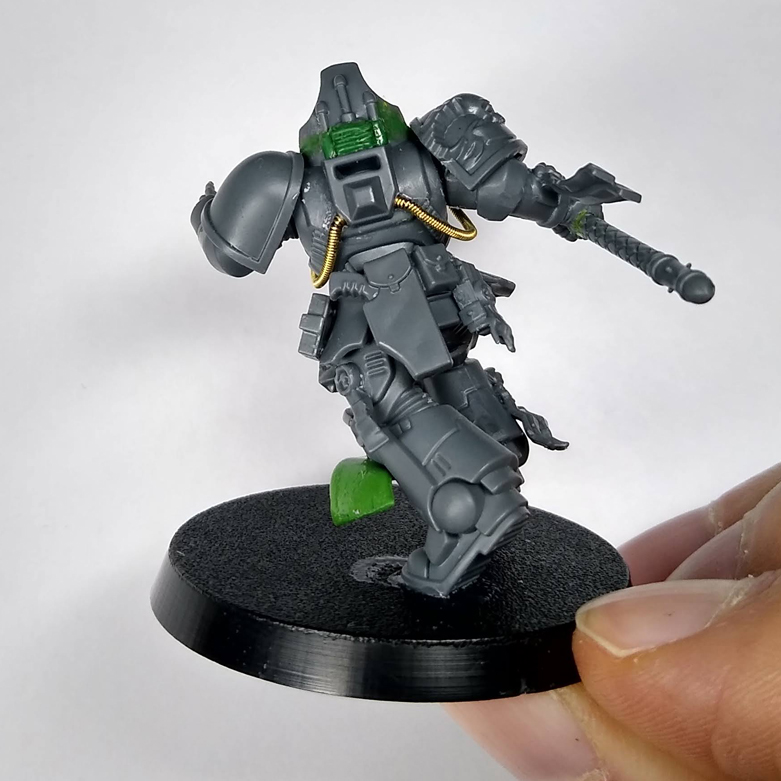
Likewise, I didn’t worry about making things perfect inside the hood, since it’ll be in shadow once the head is in.
The head itself was a Grey Knights head for that psychic hood look. I snipped off the cable so that it wouldn’t donk up against the hood.
The final element of the hood was a tad trickier, since I hadn’t worked with guitar string before. I initially sculpted the iconic under-arm tubes linking the hood to the power unit, but my mate Tom convinced me to go with guitar string instead, and it’s definitely an improvement. Being a top-tier enabler, he not only had a supply of said wire, but also leant me some clippers hench enough to go through it without sustaining damage (using your normal side cutters really wouldn’t be good for them). He also leant me some round-nosed pliers, which were very helpful for shaping the wire.
Generally you need to over-bend the wire, and have good solid holes for it to go into and hold it if there’s a little residual tension. Happily the green stuff cable collars I’d already sculpted were just about hench enough, so after some drilling and some swearing, that was all fine. Since the cables hang free, I bent them to emphasise the character’s speed and movement, with the right cable flying more free of the torso since it’s on the trailing side.
The easy bits
Elements of this conversion are just straight up kitbashing. My friend Drew kindly donated the Primaris Librarian components she had left over from her Deathwatch Librarian, which gave me a highly legit pauldron and a long, flappy purity seal for the right arm, which would help convey a sense of speed.

I also added iconic librarian things like purity seals, keys, and books, all of which were on the standard Intercessor sprue.
The force staff
Surprise! Grey Knight terminators have large, manly hands. Even larger than Cawl’s enbiggened Primaris boys. This only became clear when I was dry-fitting the conversion; it was a fairly subliminal difference, but once you saw it, you couldn’t un-see it. Luckily Tom once again jumped to the rescue and dug out an offcut hand from the Vanguard Veterans kit.
I snipped the staff off its original hand, drilled all the way through the new hand, and pinned the staff in place. Once that was dry, I did two bits of greenstuffing. First, I filled in the ‘I’ on the skull’s forehead, then I smoothed over the join where the new hand met the handle, since the pattern on the grip wasn’t a good match.
The tabard
Technically this isn’t a tabard since it’s only the front, but I don’t see James Workshop using the term ‘penis curtain’ any time soon, so here we are.
The technique here was deceptively simple: I put some greenstuff on a ziplock bag and flattened it by using a pen as a miniature rolling pin. I then used a scalpel to cut out a sharp rectangle and, wearing gloves to avoid fingerprints, affixed the tabard to the belt by pressing it up against the codpiece. I then bent it to shape using a mix of sculpting tools and my still-gloved fingers. To help give the sense of the fabric flattening against the marine’s greaves, I sculpted a hint of the kneepad rim’s shape showing through the cloth.
Once this was dry and very much attached to the model, I added more green stuff and did a second stage of sculpting to smooth things out a little.
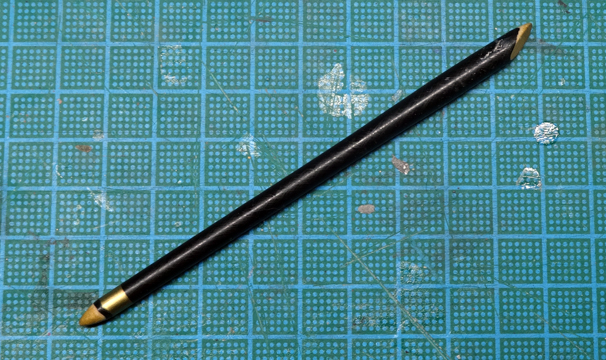
Side note on sculpting tools: you can use all sorts of objects for sculpting greenstuff, but for smooth shapes like fabric you’re going to want curved objects more than edged implements. Years ago I attended a sculpting tutorial by miniatures sculptor Kev White (formerly of Hasslefree Miniatures and now working for GW). He made some sculpting tools for the attendees out of old paintbrush handles, and despite the various tools in the box I now do most of my initial sculpting with this thing:
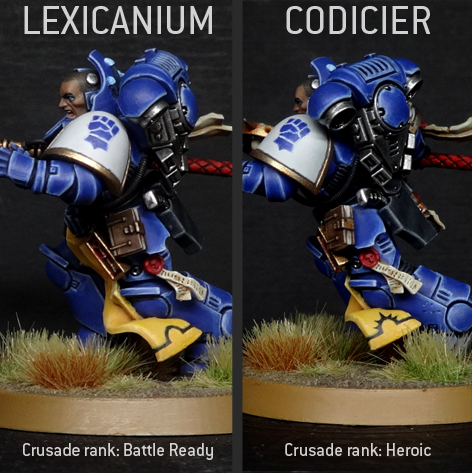
A key requirement of the sculpting was that the bottom of the tabard, where the 2nd ed-style rank heraldry goes, would be accessible for a paint brush. My plan was for the librarian to earn promotions as he levels up in Crusade. Here you can see the alteration I’ve made after an intense week of playing Crusade against Jeff’s Word Bearers:
Notes on the painting
It’s a fairly standard recipe for painting blue armour, and I’ve written about that elsewhere. The skin started with a basecoat of Vallejo Beige Brown, then layered up by mixing in increasing amounts of Citadel Cadian Fleshtone, then Kislev Flesh for the uppermost highlights. I used a very dilute red glaze over the nose and cheeks to add some depth, and Citadel’s Bugman’s Glow for the lower lip.
A mix of the Beige Brown with some Matt Black was added as a stubble glaze, and then more heavily for the cropped hair. Finally, I stippled a little of the skin mix onto the scalp to reduce the extent to which the hair appeared uniform.
Normally I emphasise the lines on a face, but this lad is meant to be a headstrong youth, so I kept his skin pretty smooth.
If you’re not sure how to get started with freehand painting, Rob and I previously put out an article on that very thing.
A final note on painting guitar string: your brush hairs could get trapped in the wire unless you’re painting perpendicular to the grooves. You can avoid this hazard with a thick basecoat on the wire, thus filling in the grooves a bit.
In closing
I somehow avoided the temptation to name this dude Jeeroy Lenkins, instead settling for Tolemias (toll-em-eye-yas). Like any proper nerd, he’s already been shaken down for lunch money by a Word Bearers Venomcrawler, and ganked by a flappy gaggle of Night Lord mall goths, but he’s given as good as he’s got. Fatally smiting the Night Lords’ Lord to death was pretty satisfying, for one.
If you’ve got any questions about this conversion, or if you have feedback, Drop us a note in the comments below or email us at contact@goonhammer.com.


