In our How to Paint Everything series we look at how to paint, well, everything, with a look at different approaches and techniques, and some of the lore behind the schemes. In this article we’re looking at the most famous of the renegade chapters, the Red Corsairs.

The Red Corsairs were first introduced in the 2nd edition Codex: Chaos, primarily as an example of a more “modern” Chaos Space Marine force, showing us that even in the 41st millennium, space marines could fall to Chaos. Led by the warlord Huron Blackheart, the Red Corsairs were made of both the remnants of the Astral Claws chapter and renegades and traitors from other chapters across the galaxy. Rather than spending time in the Eye of Terror, the Red Corsairs make their home in the Maelstrom, a naturally occurring warp storm at the galaxy’s core.
The story of the Red Corsairs starts with the Astral Claws, a loyal chapter of Space Marines tasked with defending the Eastern Fringes of the Imperium from threats coming from the Maelstrom. They built a powerful fortress on their homeworld of Badab and were considered staunch adherents to the Codex Astartes, save for one key element – under chapter master Lufgt Huron they ignored the restriction on the size of their fighting force, growing to well beyond a thousand battle brothers. Huron aspired to lead a force with the power of the legions of old, and hungered for more and more power.
This became clear when, after ending a rebellion on the Hive World Badab Primaris, Huron stepped in and took over as planetary ruler, naming himself “The Tyrant of Badab.” Annexing the other planets in their system, Huron continued to expand, asking for more resources from the Imperium to bolster his forces. His requests were declined. When Huron decided not to send the Imperial tithe in protest, it set into motion the seeds which would blossom into a deadly war of insurrection known as the Badab War.
The Badab War saw space marine infighting on a scale not seen since the Heresy and when it was over the Astral Claws had been defeated and forced to flee into the Maelstrom. Their Chapter Master, Lugft Huron, managed to survive the ordeal (though not unscathed), and they would rename themselves the Red Corsairs. Under Huron’s command, the Red corsairs have become pirates and raiders, attacking the Imperium and ransacking their supplies. They’ve become a haven for traitors and renegades from across the Imperium, and Huron commands power second only to Abaddon among mortal Chaos Lords.
Covered in This Article:
- How to paint Red Corsairs Chaos Space Marines.
- Notes on the heraldry of the Red Corsairs.
- Thoughts on converting a model for Huron Blackheart.

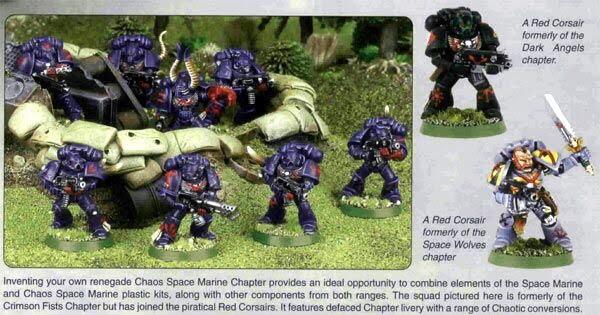
Red Corsairs Heraldry - Click to Expand The Red Corsairs are distinct from the original nine traitor legions in that they defected well after the Heresy. This means that while they’ve still abandoned the squad and company markings of the Codex Astartes, they’re far more likely to be wielding more modern equipment and power armor than marines in the original traitor legions. This means that if you’re building Red Corsairs, they can provide a lot of unique conversion and modeling opportunities. In particular, I like to use loyalist space marine backpacks when building my Red Corsairs, as well as Chaos Marine backpacks which keep the exhaust ports closer to the main backpack. I also like to use heads which more closely resemble Mk. VII marine helmets and the Mk. III Heresy shoulder pads, which feature thick trim but less of the standard markings of Chaos. One other thing to note is that the Red Corsairs are similar to the Emperor’s Children in that they have a less defined color scheme – they can use any mix of red, black, and gold in their armor or trim, in any combination. While I’m of the mind that you should generally focus on red armor with black trim mixed with a few black armor elements with gold trim, you can do this however you want, such as with the marines I painted below. Here the primary focus is red armor with black trim but you can see some places where I used gold trim on red armor, and there are models I’ve done with red trim on black armor. You can play around with it to figure out what you like best, and save gold trim on red armor for characters and champions like Huron Blackheart. One final, fun note: It’s worth looking at the Red Corsairs image presented in the second release of Codex: Chaos Space Marines 3rd edition, which featured Red Corsairs who marked their armor with big red “Xs” and featured red pauldrons and other elements. I don’t think this works well for building a cohesive army but if you want to go this route, there’s precedent for it.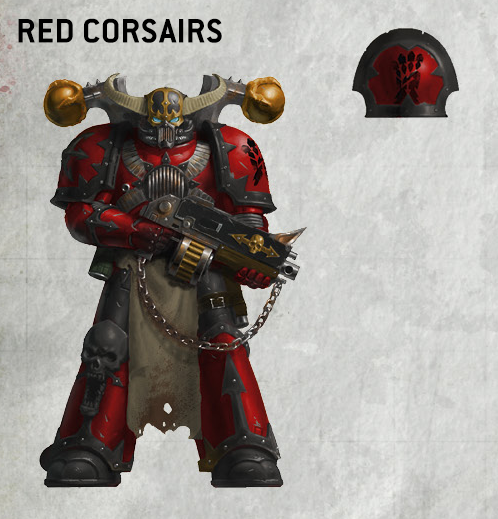
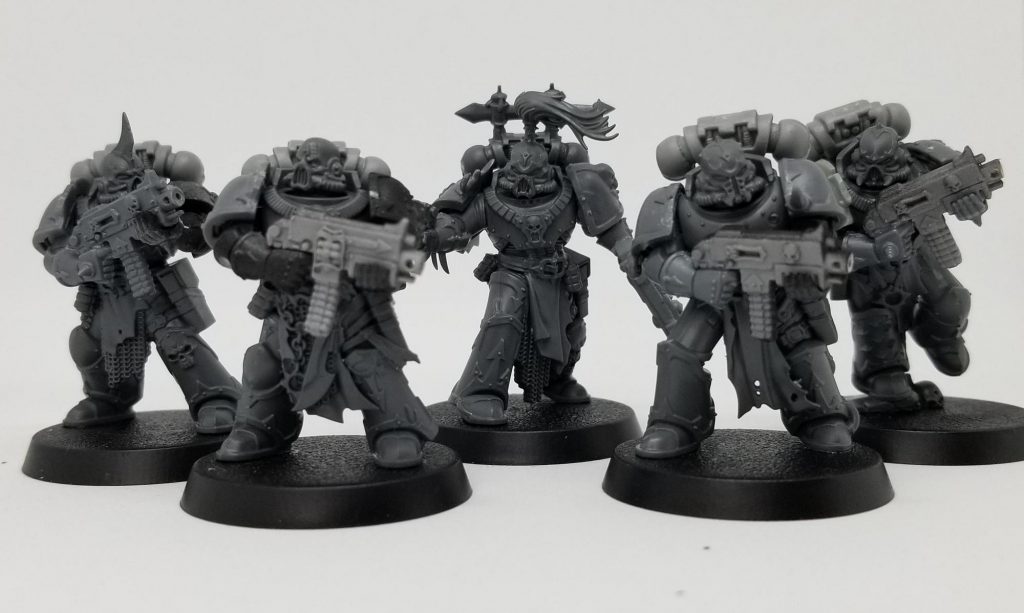
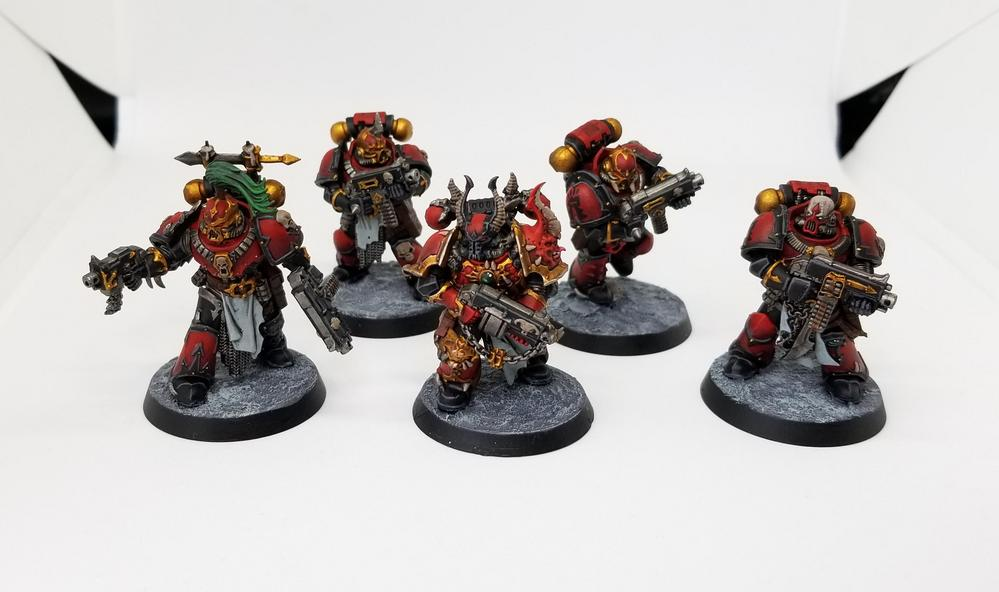

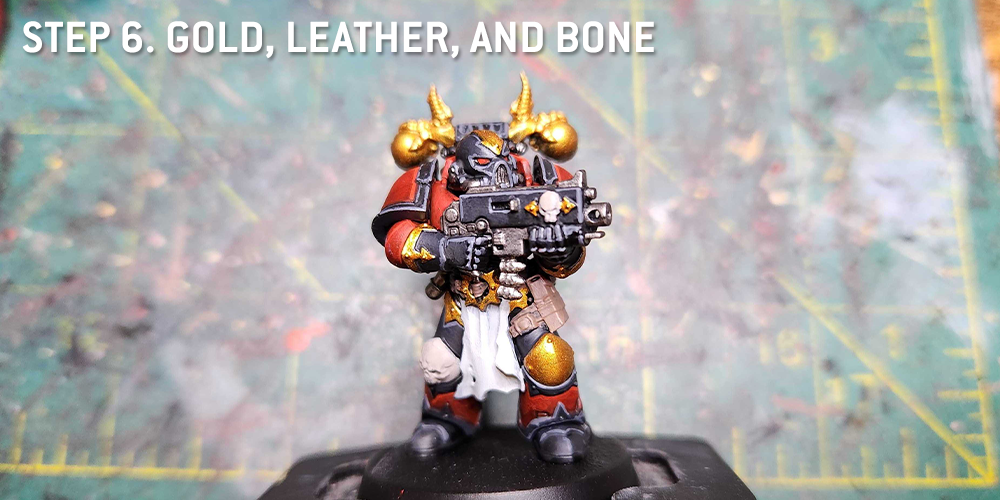
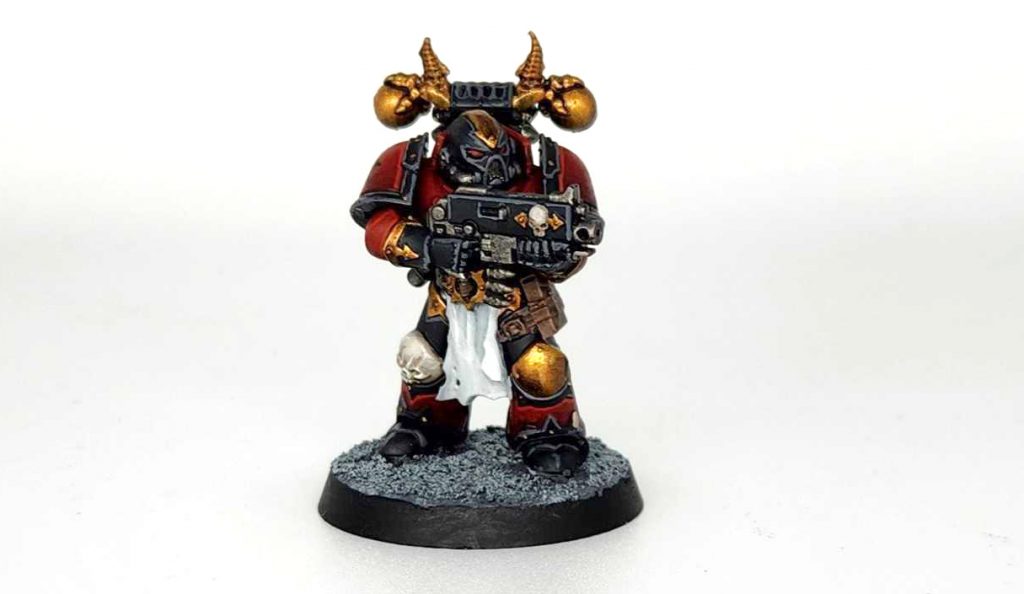
TheChirurgeon's Method - Click to Expand The Red Corsairs are a cool faction in the 40k lore and I’d wanted to do them for a long time, but they never really fit in with my plan to do the nine traitor legions. That changed back in 2019 when it turns out that every competitive CSM list in 8th edition needed a Red Corsairs Battalion detachment to proc an extra 3 CP. Truly wild times. So I set out to paint a few squads of Red Corsairs for my army. This was right after the now-current plastic Chaos Space Marines had released, and I had a pretty fun time converting them and picking bits for them. For more on that process, check out the Heraldry section above. I started by priming this model black. This starts by laying down the red basecoat. For this guy I went pretty simple, with red armor on the greaves, pauldrons, arms, and chest plate using Mephiston Red. This is pretty much what I’d do as a “default” on my Red Corsairs. The general idea is to use black trim on red and gold trim on black. The other combos look OK but aren’t really fitting the aesthetic I ‘m goin for. Next I shaded the red armor using a few thin coats of Carroburg Crimson. The idea is to shade it by doing progressive layers moving downward on the armor to create a smoother transition from lighter red to darker red. Next comes the metal bits – these are just painted Leadbelcher. You can swap steps 2 and 3 if you want, but this step has to come before you highlight the black parts, as you want to get things like underarmor and the mouth grill painted before the black armor. Now it’s time to highlight the black parts. This is done with Corvus Black, and I’ll do this on not just the gauntlets and helmet but also the black trim on the red armor. In darker light you can’t really see the transition from this to Abaddon Black, but it’s worth smoothing the transitions, which I do with mixes of Corvus Black and Black Legion and some shades of Nuln Oil. I also shade the metal bits with Nuln Oil. Next up is to do all the edge highlights. On the red armor, this is done with Evil Sunz Scarlet, doing interior panel lines around the trim. For the black armor, gun casing, and black armor trim, I’ll do edge highlights with Mechanicus Standard Grey. If you’re going hard enough on these to do a second edge highlight, then I’d recommend Wild Rider Red for an additional corner highlight on the red parts and Celestra Grey for additional corner highlights on the black parts. Step 6. Gold, Leather, and Bone Next up is basically filling in the basecoats on all the other details. I paint the bone parts with Rakarth Flesh, the leather with Gorthor Brown, and the gold parts with Retributor Armour. These all share a common element in that I’m going to wash them with the same color. I also paint the loincloth at this point, giving it a coat of Grey Seer that I’ll wash with Apothecary White and highlight with Grey Seer and Reaper Pure White. Time for the finishing touches. Those gold, bone, and leather elements all get a wash of Agrax Earthshade, then they’re highlighted with their base colors. For the bone parts, they’ll get a second highlight pass of Reaper Polished Bone. Depending on how hard I’m going, I’ll also do rivets here. For gold trim and red armor, I’ll do silver rivets with Runefang Steel. For black armor and trim, I’ll paint the rivets with Retributor Armour, which just looks way better. And that’s it – I’m happy with the final model and I think the bit selection really goes a long way to communicating that this was a loyalist marine more recently. Now they just need a leader…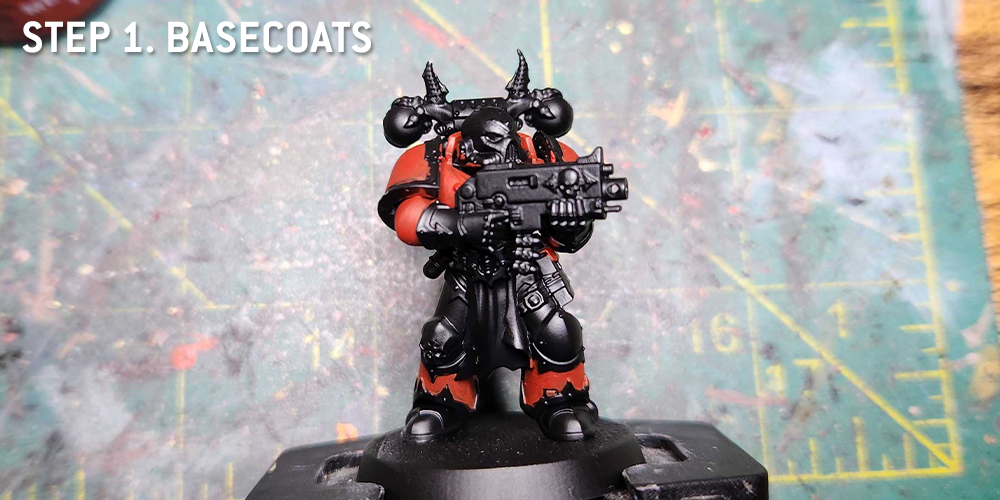
Step 1. Armor Basecoats
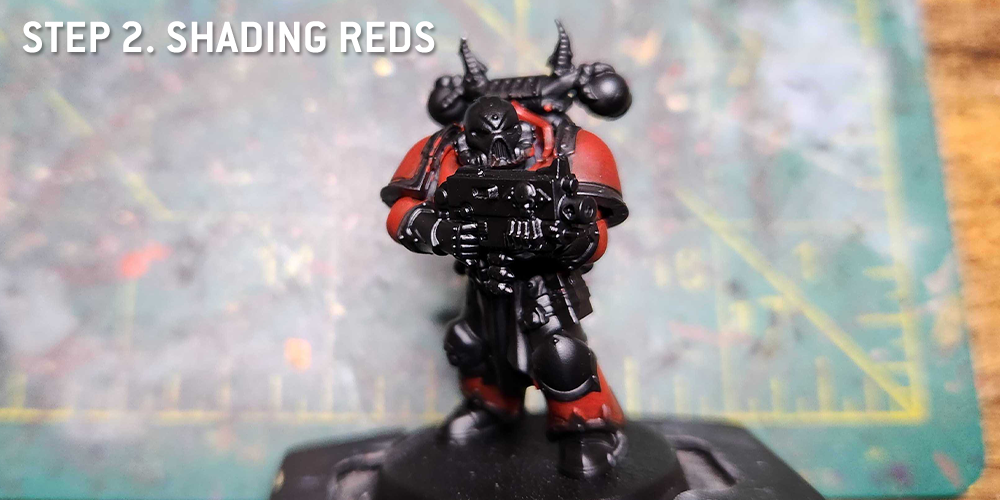
Step 2. Shading Reds
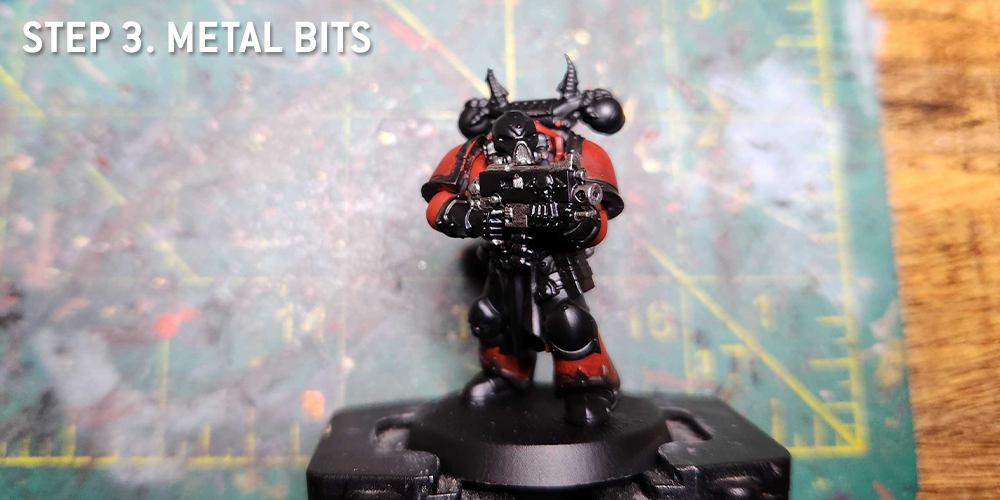
Step 3. Metal Bits
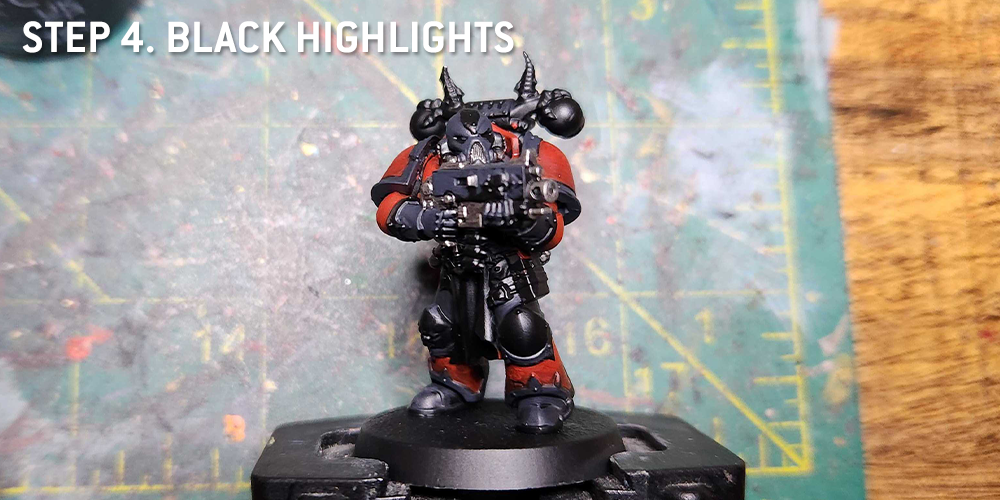
Step 4. Black Highlights
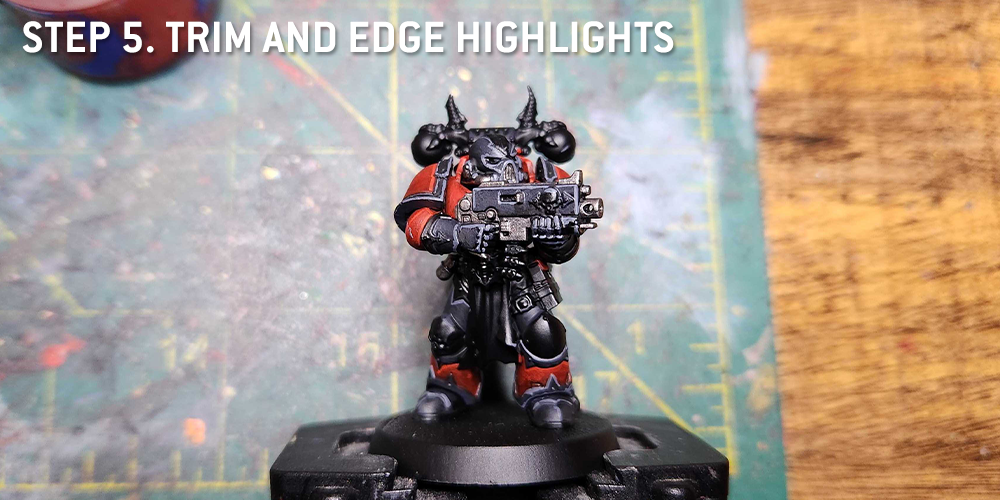
Step 5. Trim and Edge Highlights
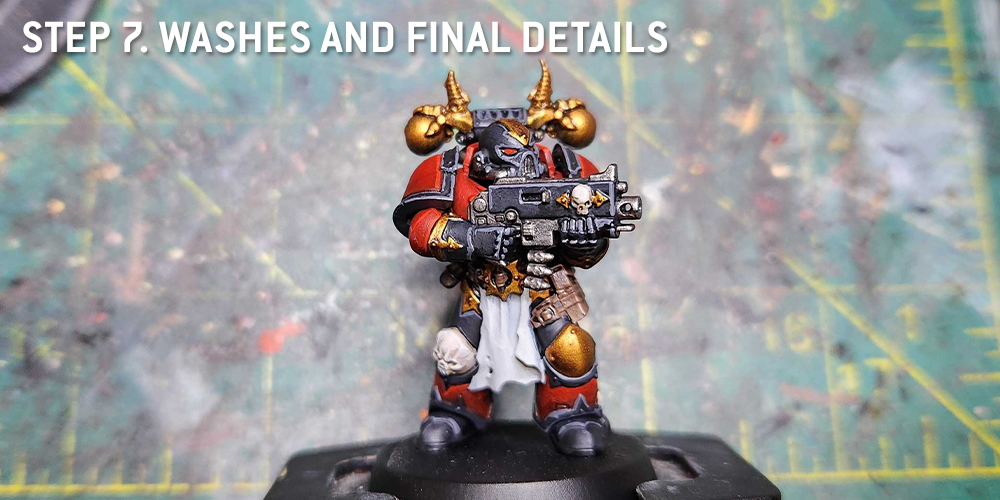
Step 7. Washes and Final Details

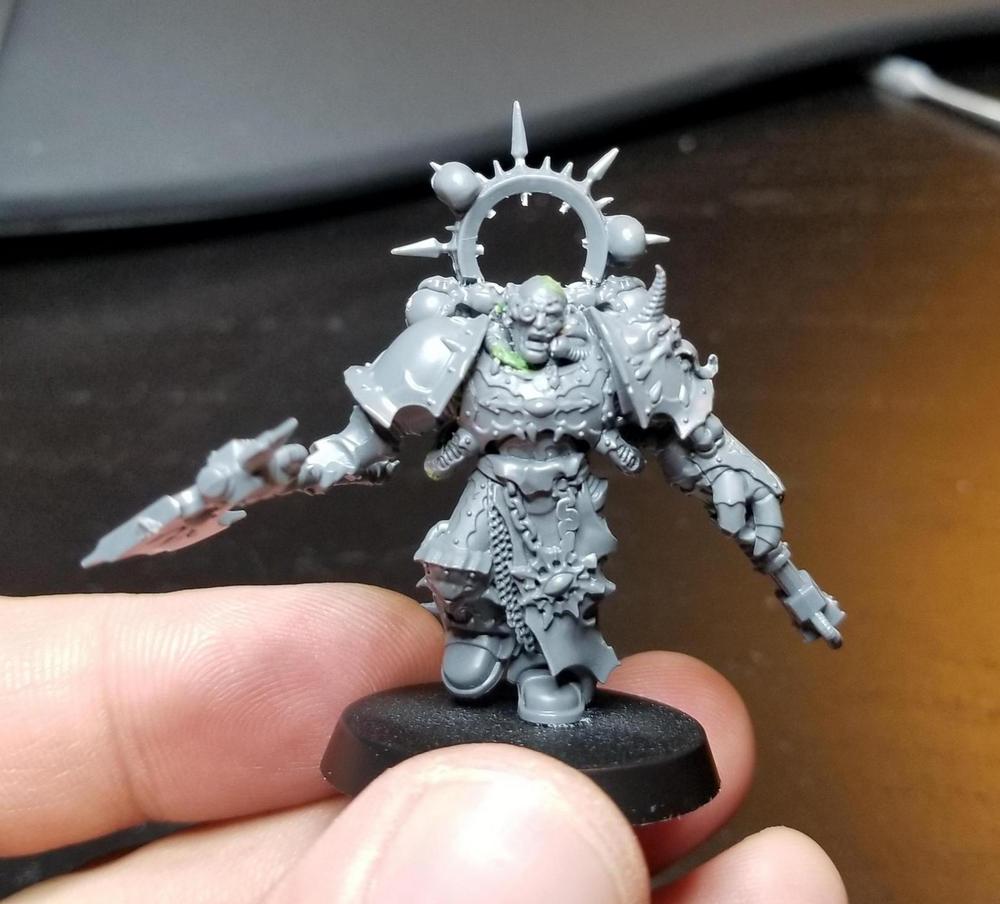
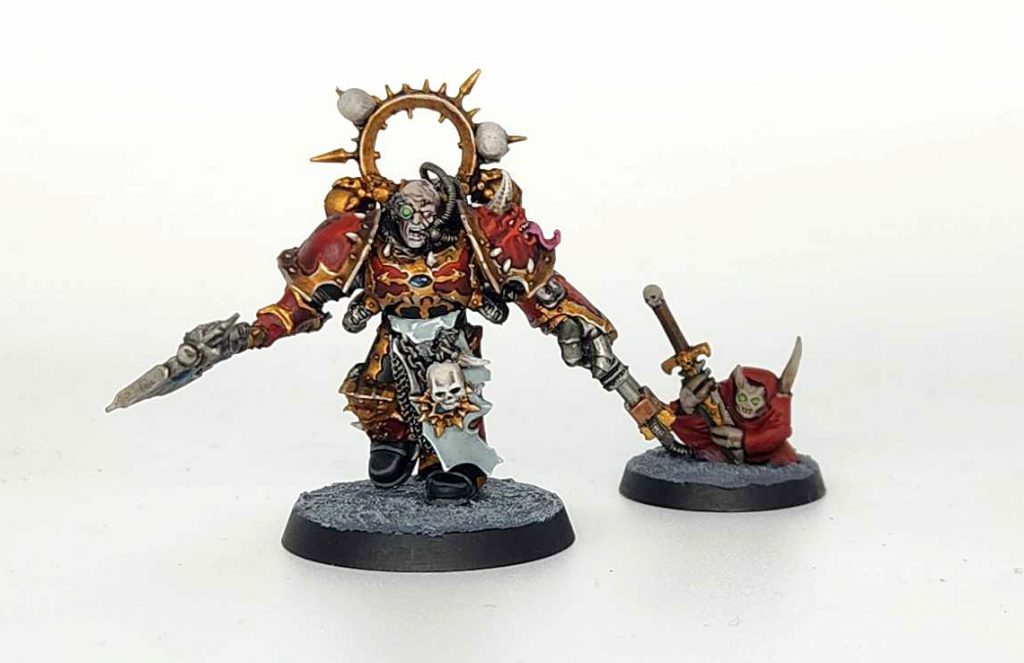
Huron Blackheart - Click to Expand You might have noticed my Huron isn’t the official model. I built this Huron as a conversion back in 2019 for my NOVA army, and decided to just convert him after looking at the official model, which I felt was too short and stunty compared to the newer Chaos Space Marine kits being released. A lot of the inspiration for my Huron conversion came from the Eternal Hunt blog, which continues to be a great hobby blog for Chaos-related conversions. I decided to use the same base for my Huron – the Dark Vengeance Chosen with Power Fist. Although shortner than modern Chosen, at the time these guys were among the bulkiest options for Chaos Space Marines and visually they still fit pretty well with the modern chaos marine sculpts. That said, it was also a pain in the ass to cut them up – I’d definitely recommend starting with one of the newer Chosen or the Blackstone Fortress Chaos Lord these days. I started by cutting the head off the model and replacing it with a Space Marine head with a bionic eye. The eye is important, though this was ultimately the best head I could get ahold of at the time. I think there was a better option in the Devastator kit, but no one had it. Leaving the cables from the former head in place worked well here as it gave me some cables I could connect into Huron’s mouth. The next step was Huron’s wargear — I used the Dark Vengeance Chosen power axe arm to do his axe, and cut up and glued a Raptor flamer to his Power Fist to make the custom weapon for the Tyrant’s Claw. A Chaos Warrior icon over his backpack completed the principle look that I was going for, and I used green stuff to fill some remaining gaps. In retrospect, I should have turned the halo around – it looks like it’s backwards now. Not too bad, though I wasn’t happy with how he looked yet. His head wasn’t suitably messed-up, and there wasn’t anything connecting the fist and the flamer. Looking to do a bit more, I dug up some guitar string I had in my bitz box and cut that up to make some piping that would connect the flamer tank on his backpack to the heavy flamer, and also added some to his head to make him look more fucked up and machine-like. I still need to file down a bit of the green stuff, but between the wires and some final bits I added, I really like how he turned out. For his familiar, just ended up using the familiar that comes with the Chaos Terminator Lord model, cause I had a few of those and have never used them for anything anyways. Painting Huron wasn’t particularly different from the rest of the Red Corsairs. I followed the studio scheme for him to make it a bit more obvious what his deal was, giving him gold trim across the model. This gives him a bit more of a red-and-gold scheme than I’d normally prefer but it works out OK, and the armor on his arms, legs, and feet is black. I went with paler skin for his face – Rakarth Flesh as the base – looking to emphasize his pale, wretched state.Converting Huron
Painting Huron
Final Thoughts
The Red Corsairs seem like a standard red-and-gold chaos marines army at first glance but they have a lot going on with them and offer a ton of opportunities to do cool conversions and use more modern space marine kits. Whatever scheme you end up choosing, we’ve hopefully provided you some instruction and inspiration for how to paint it.
Have any questions or feedback? Drop us a note in the comments below or email us at contact@goonhammer.com. And if you want regular updates in your inbox, subscribe to our newsletter.


