In our How to Paint Everything series, we take a look at different armies of the Warhammer universe, examine their history and heraldry, and look at several different methods for painting them. In this article Rockfish revisits his Tau bring us up-to-date on what’s changed in the intervening time since we last saw them.
While this isn’t the first time I have written a guide for this scheme, I feel its been long enough that I should knock out a modern article. If you haven’t seen my Tau before, this is actually the second time I have painted a tau army after I started the game with them all the way back in 2017, but I have already spent long enough on the rest of that story back when I showcased the army last year.
This scheme isn’t specifically based on any particular existing sept but I am quite fond of it, I will admit that the joking name is shamelessly stolen from someone’s description of them a few months back but its quite fitting. I have been on a bit of a tau bender lately, mostly fed by repainting old damaged models that had been lurking around for a while. I am hype for the new book and its gotten me to paint up about another thousand points worth of stuff so far despite my knowing nothing much about it.
Now lets get to putting paint on models!
Step 1 – Base coats and washes
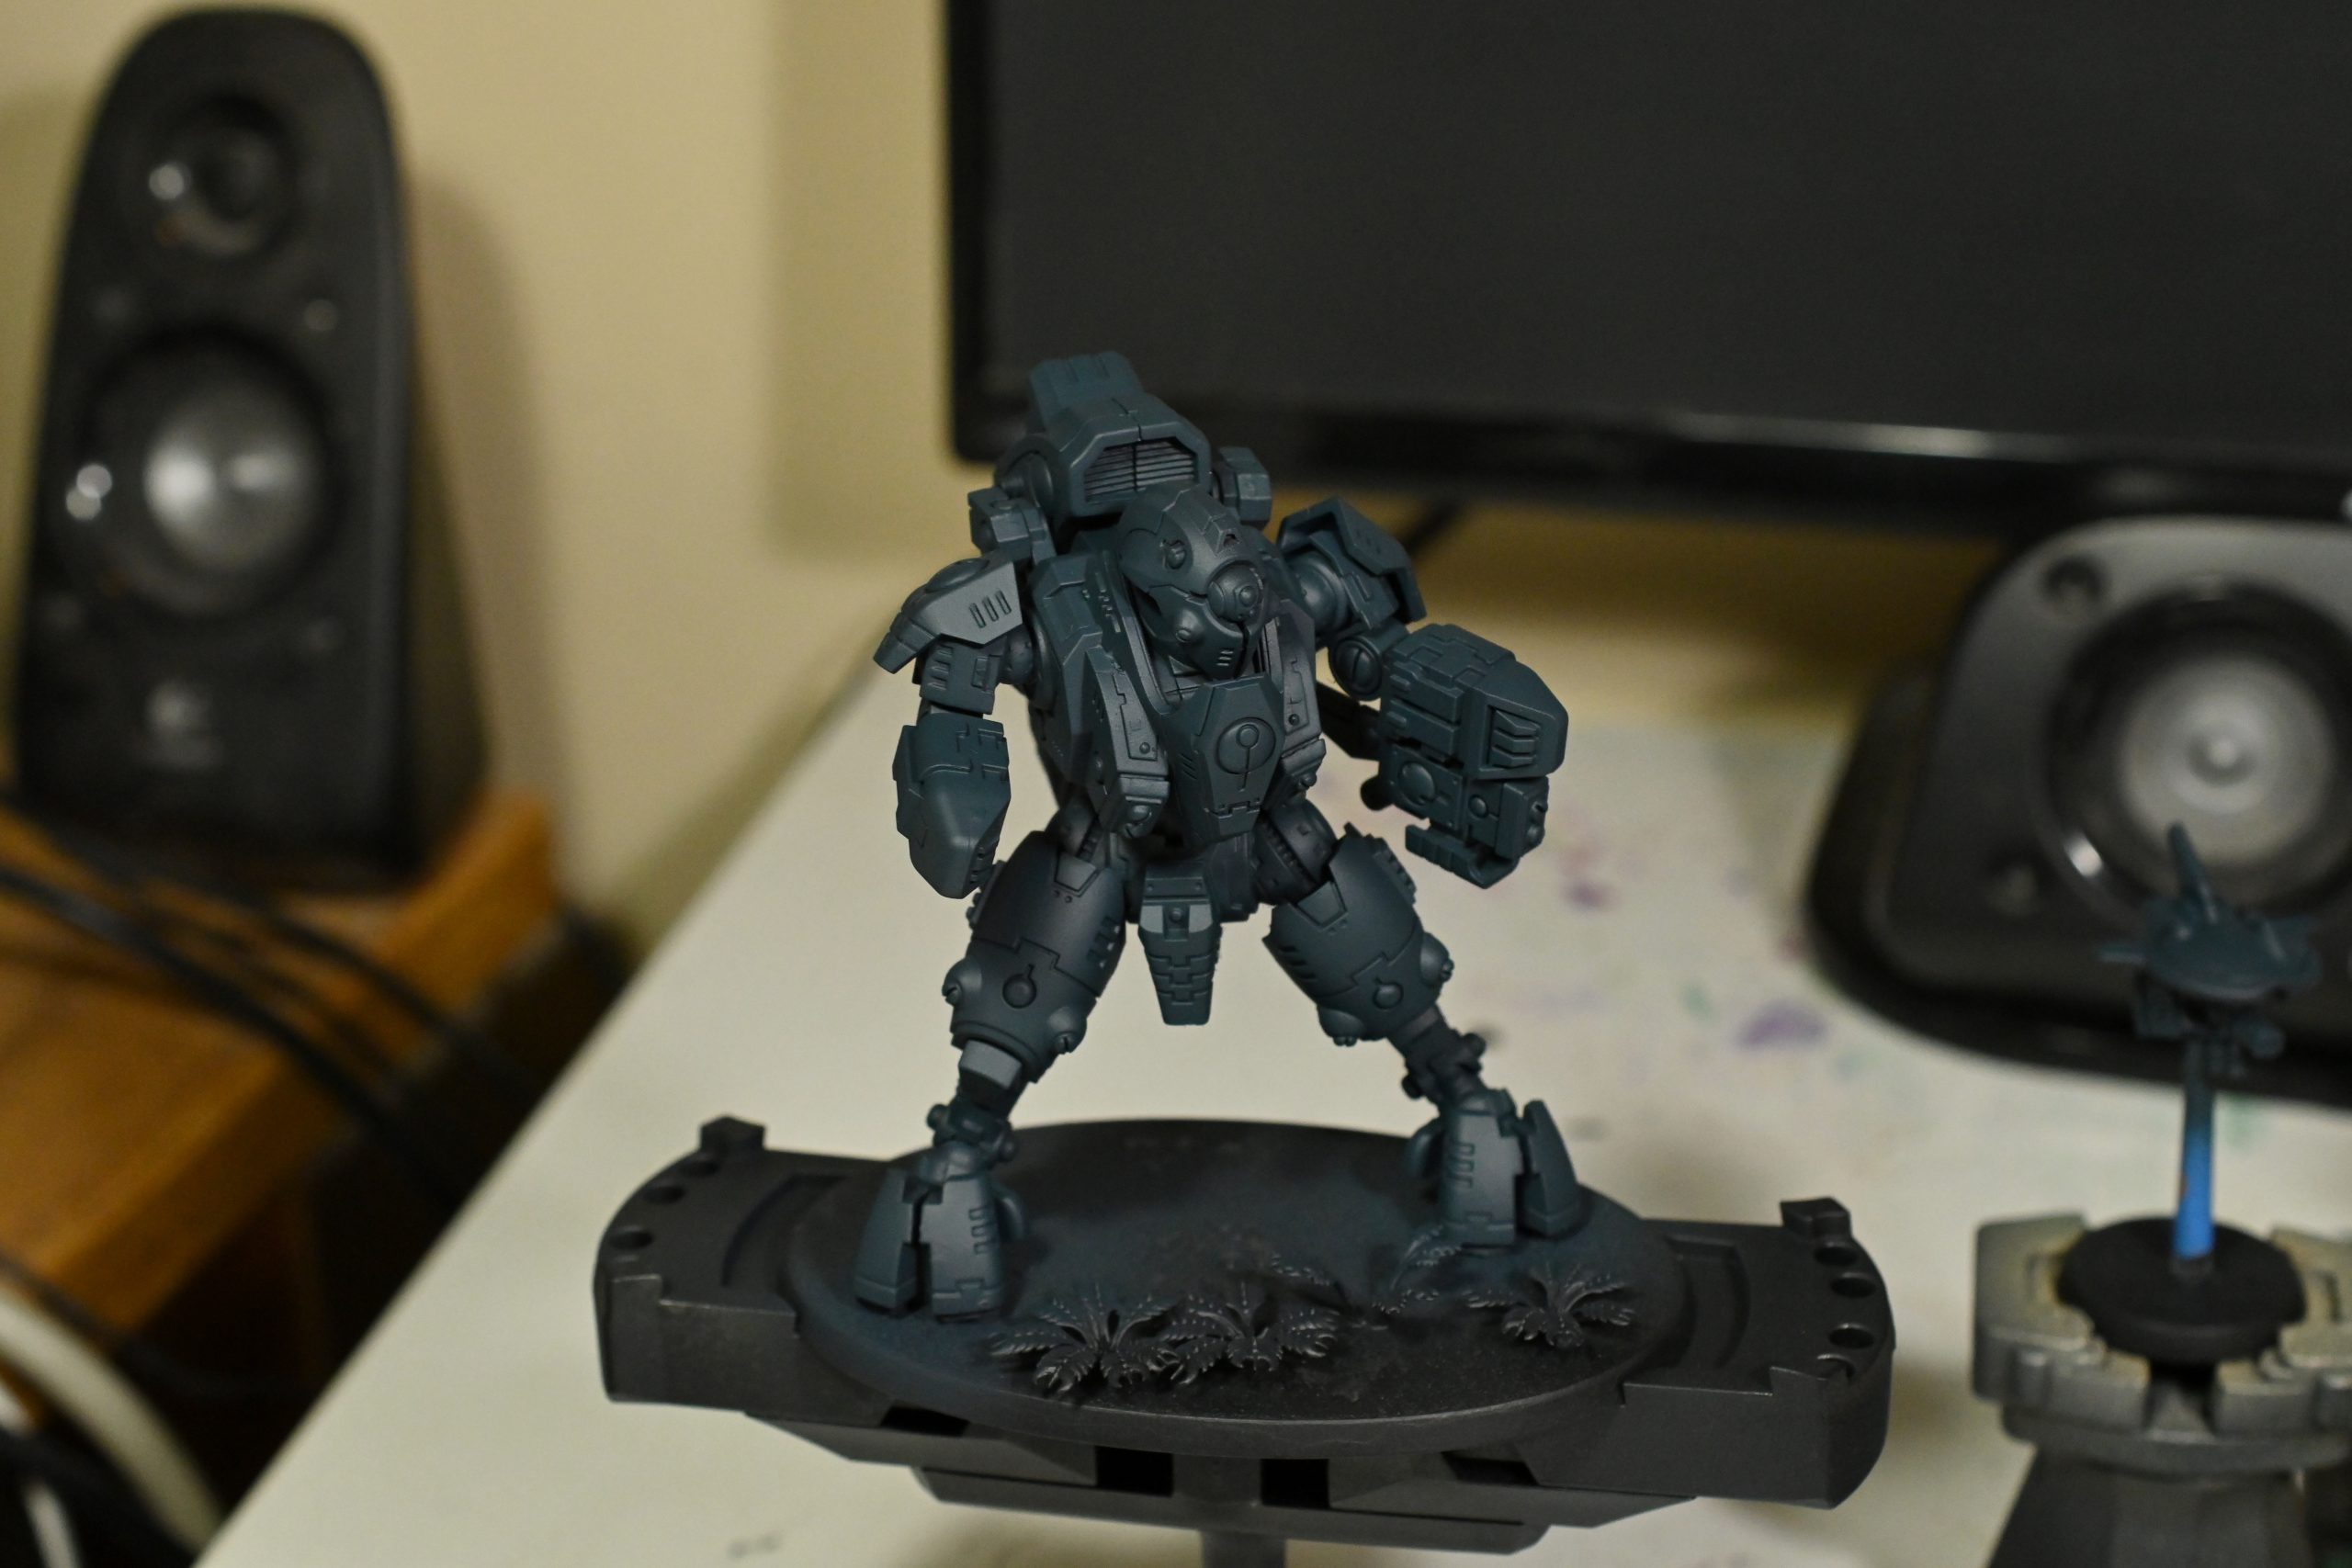
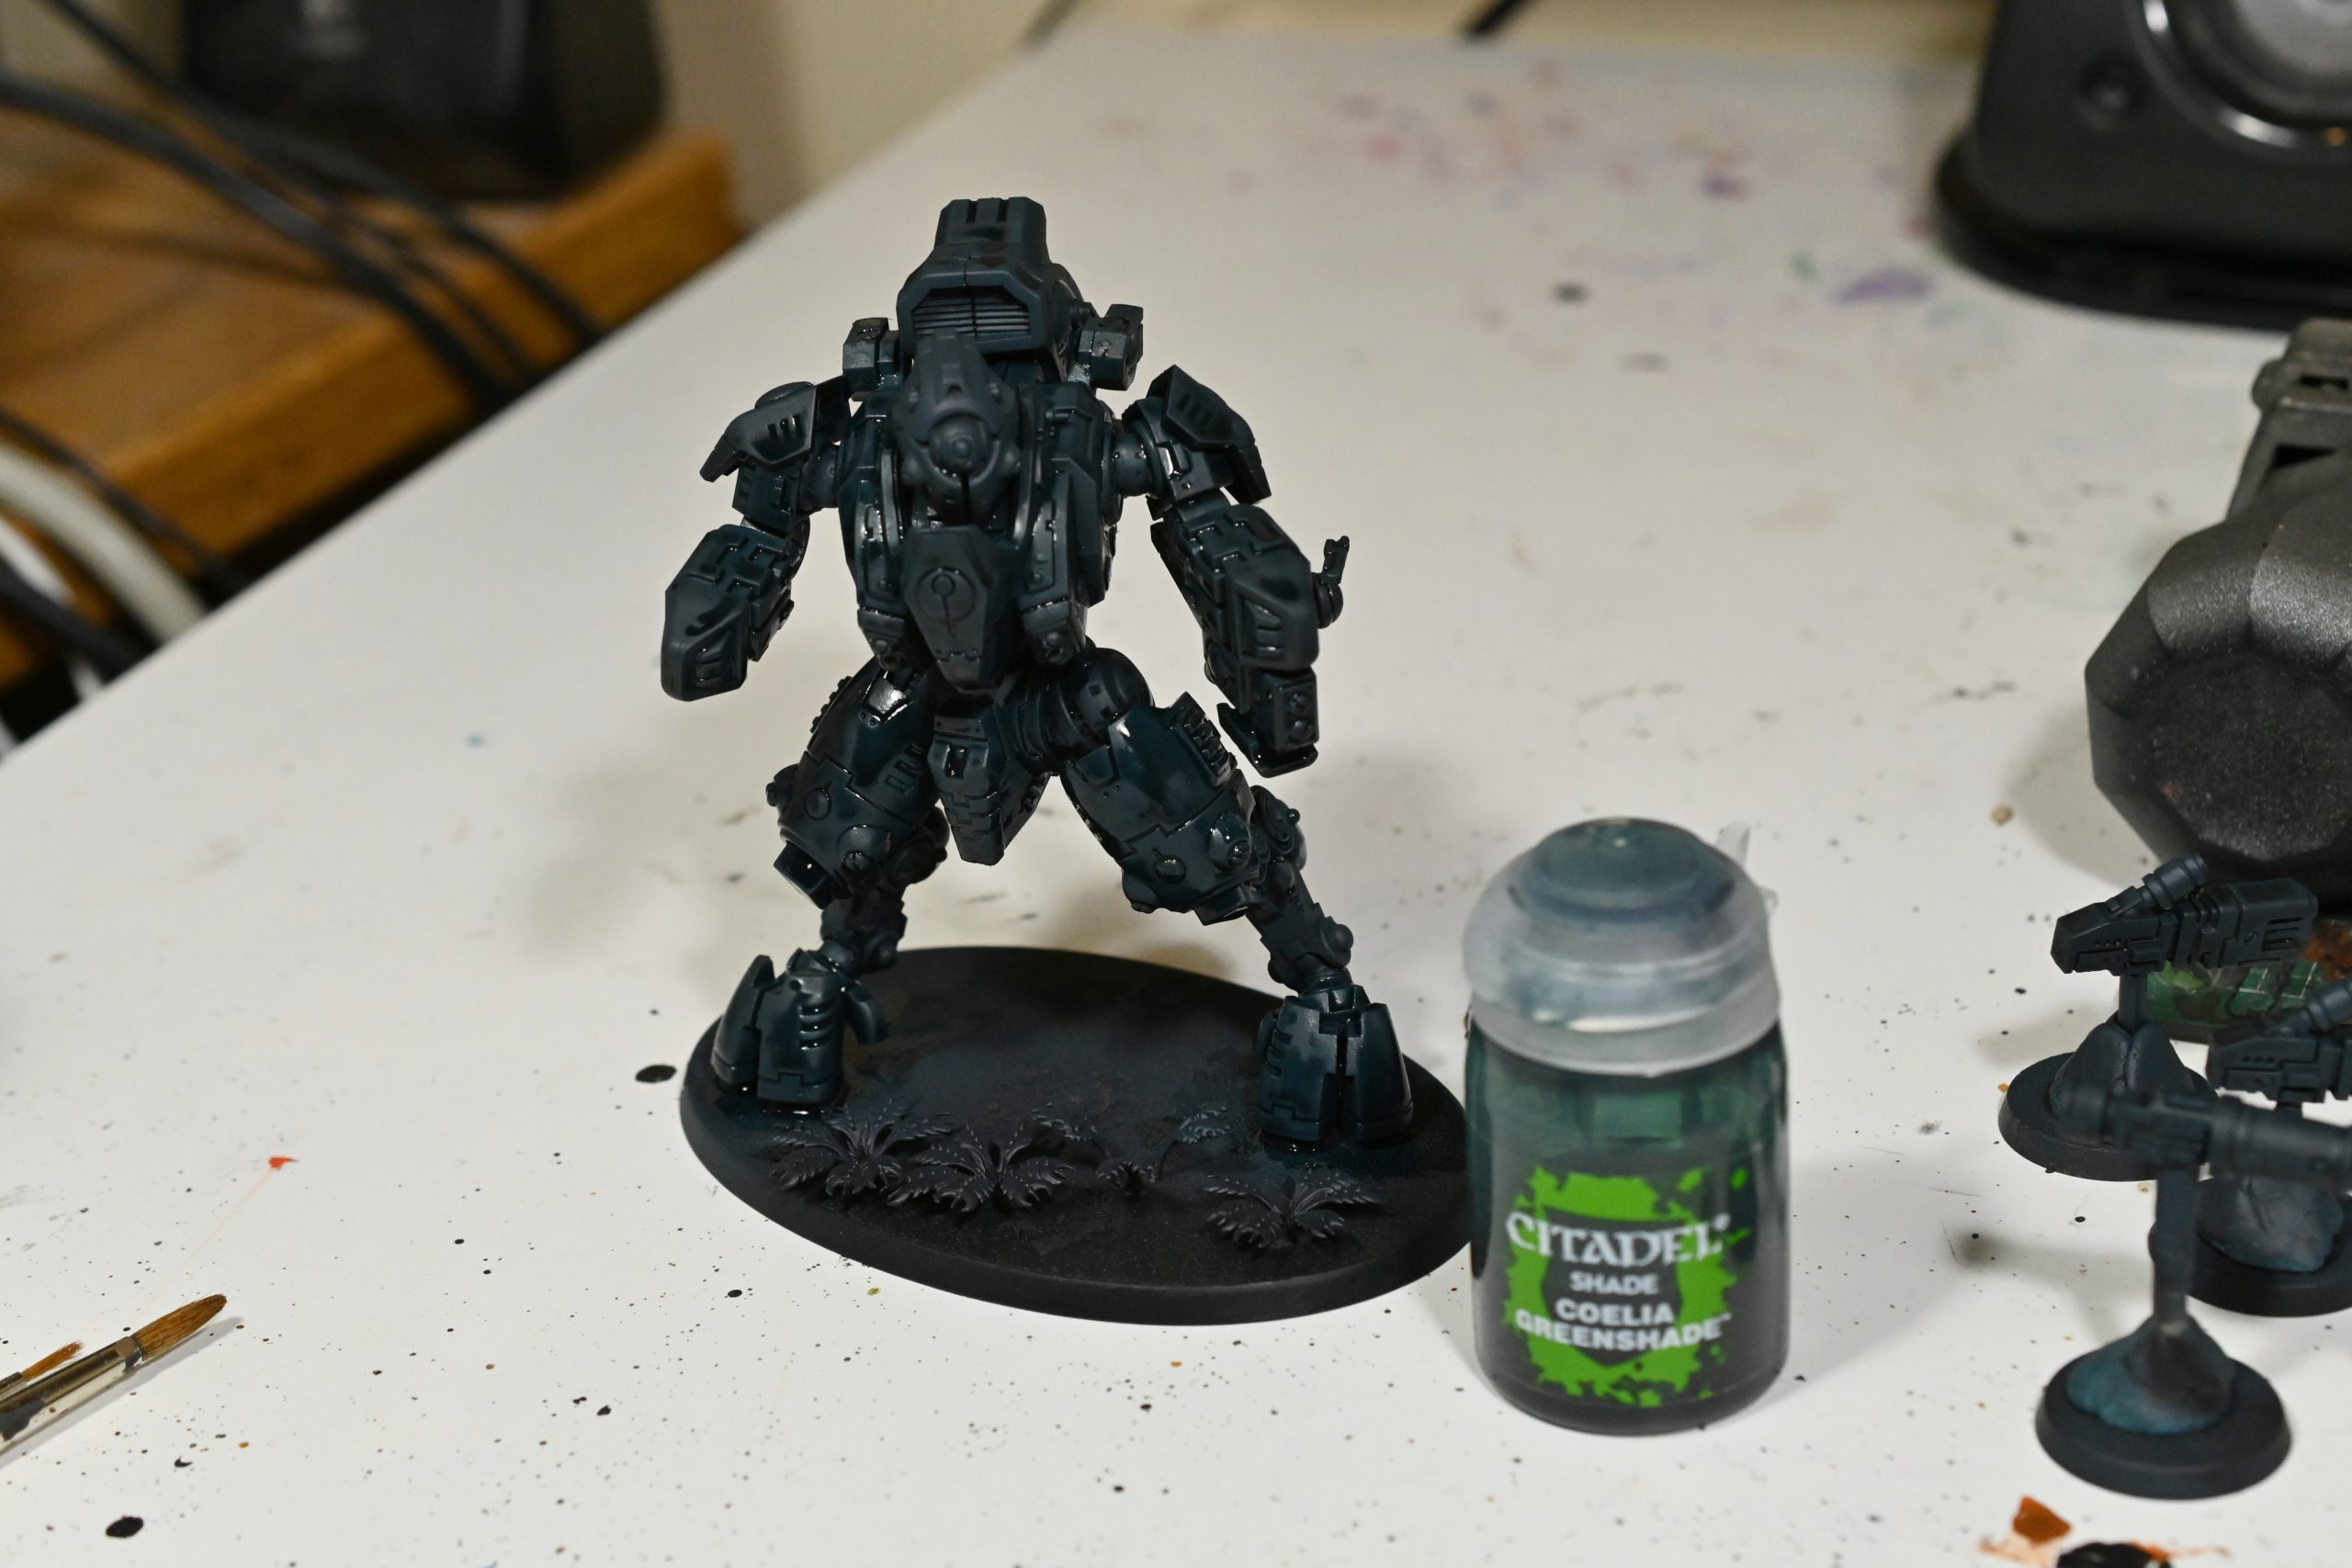
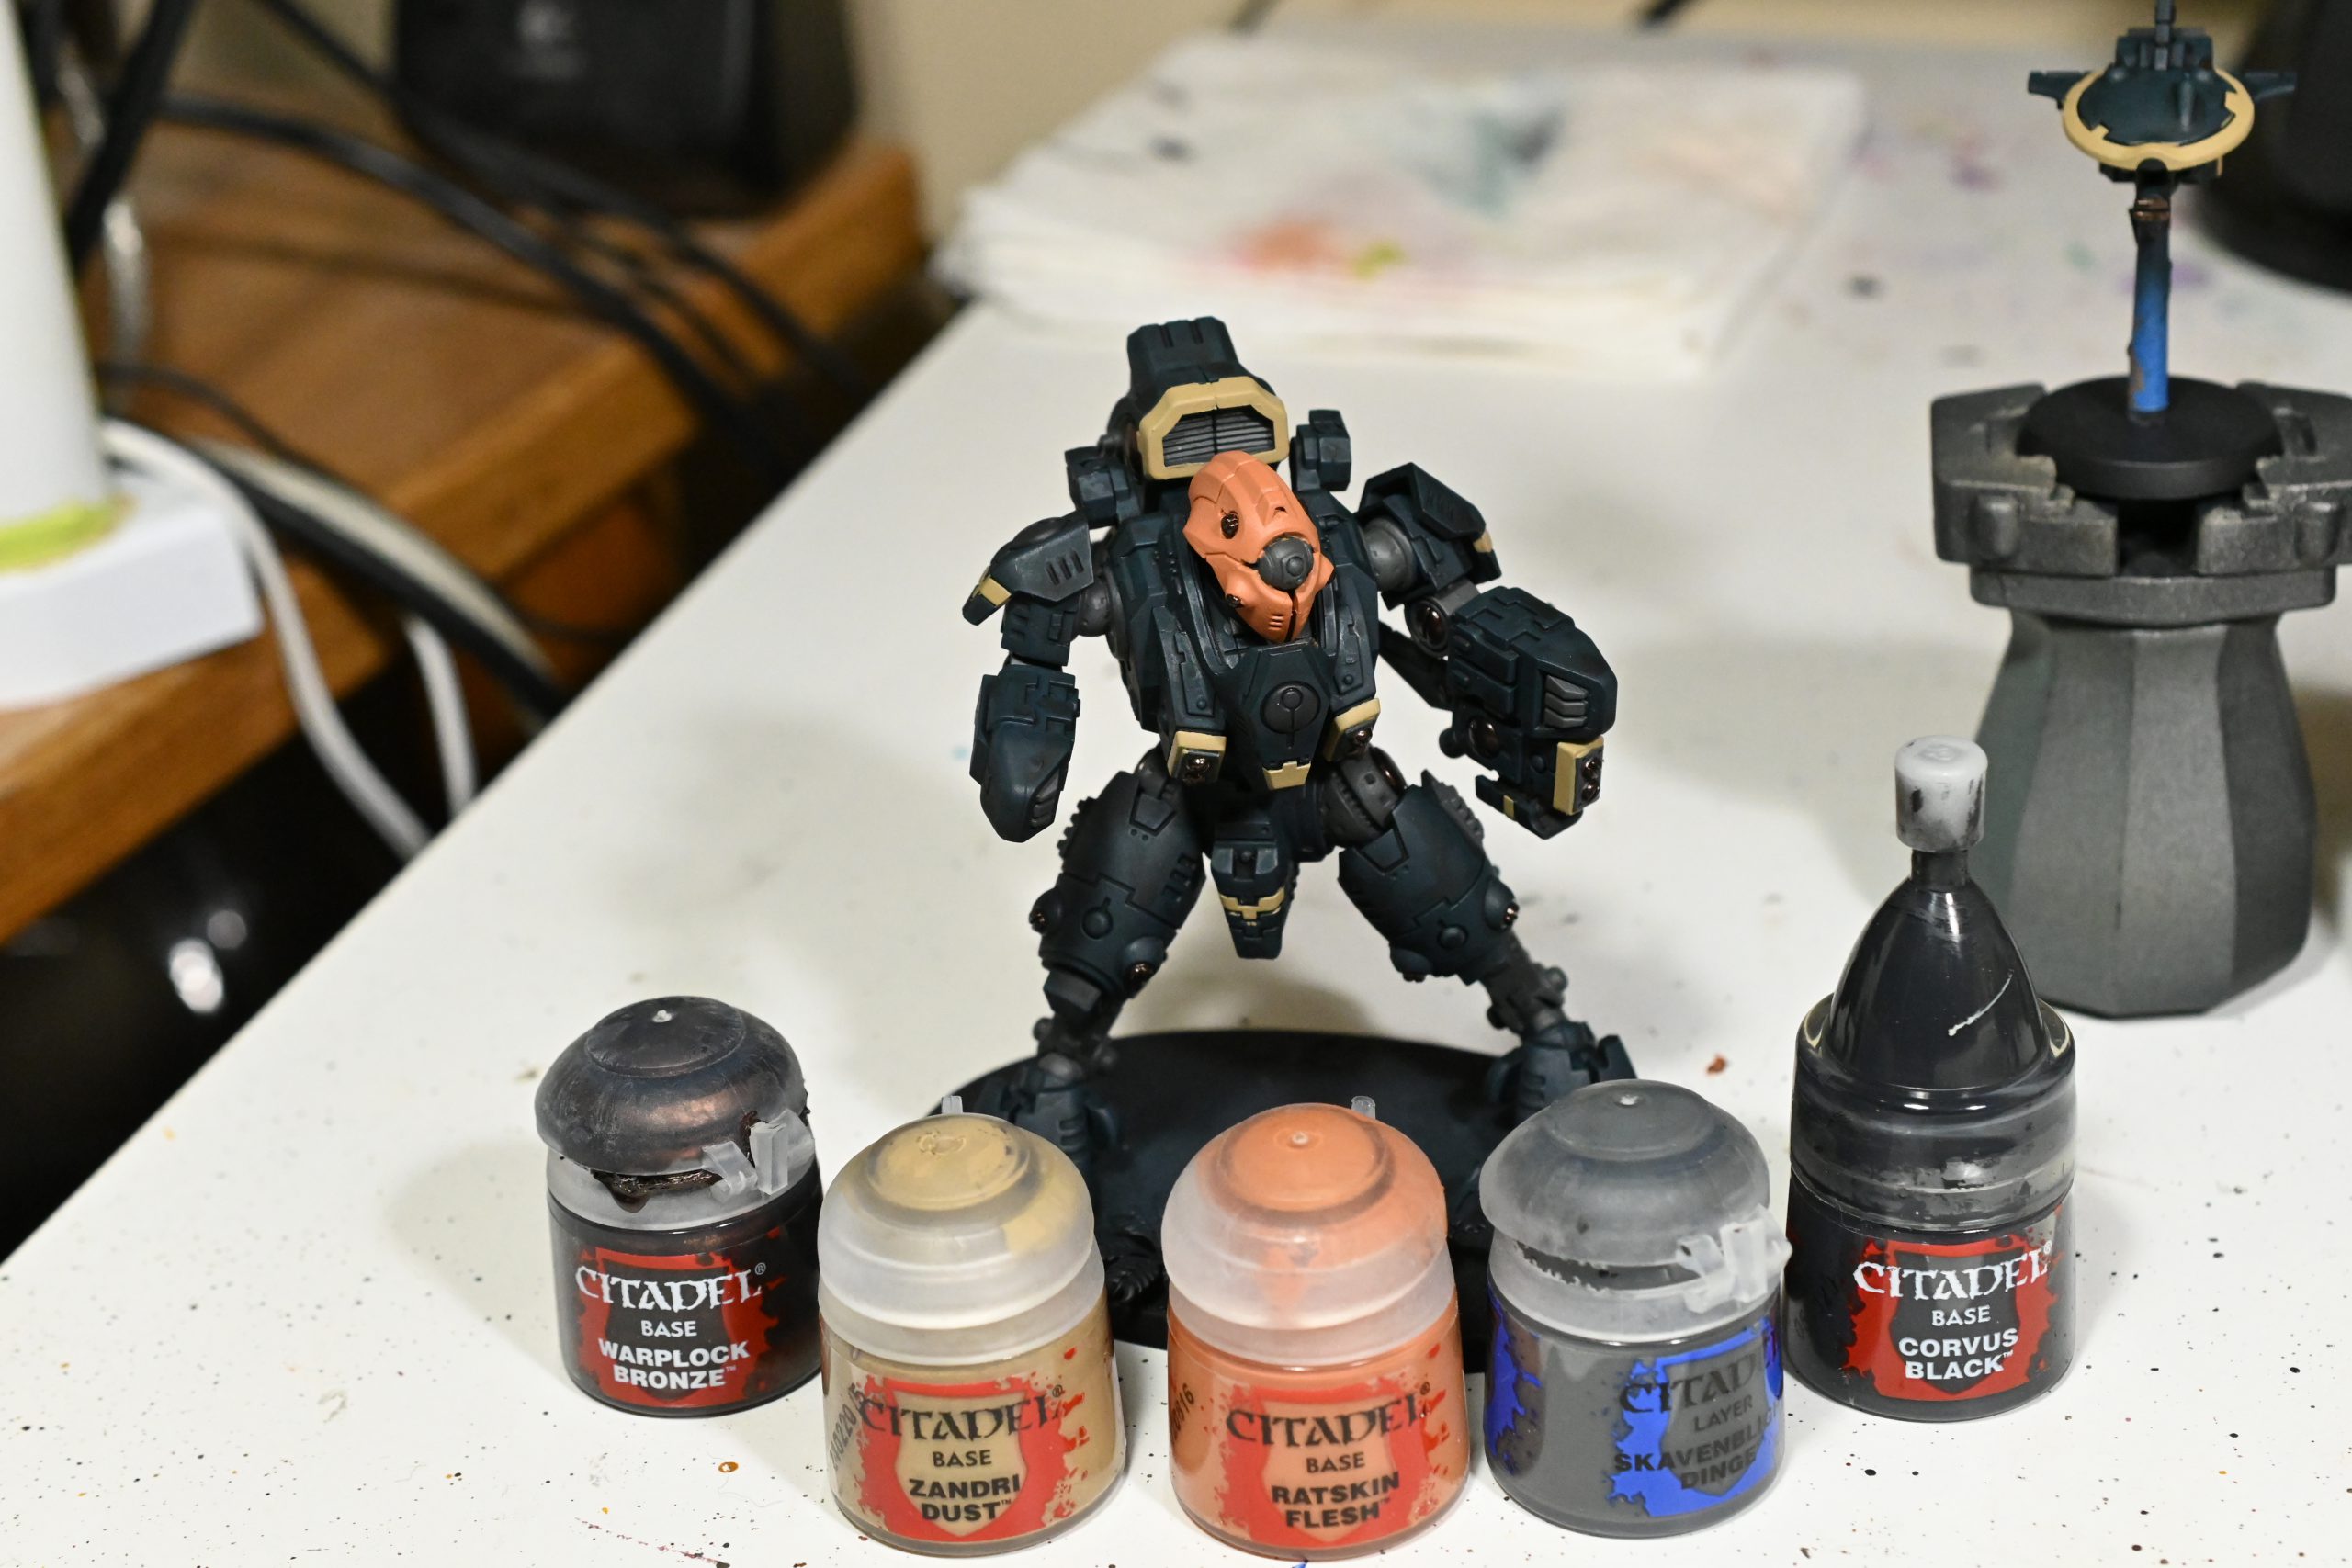
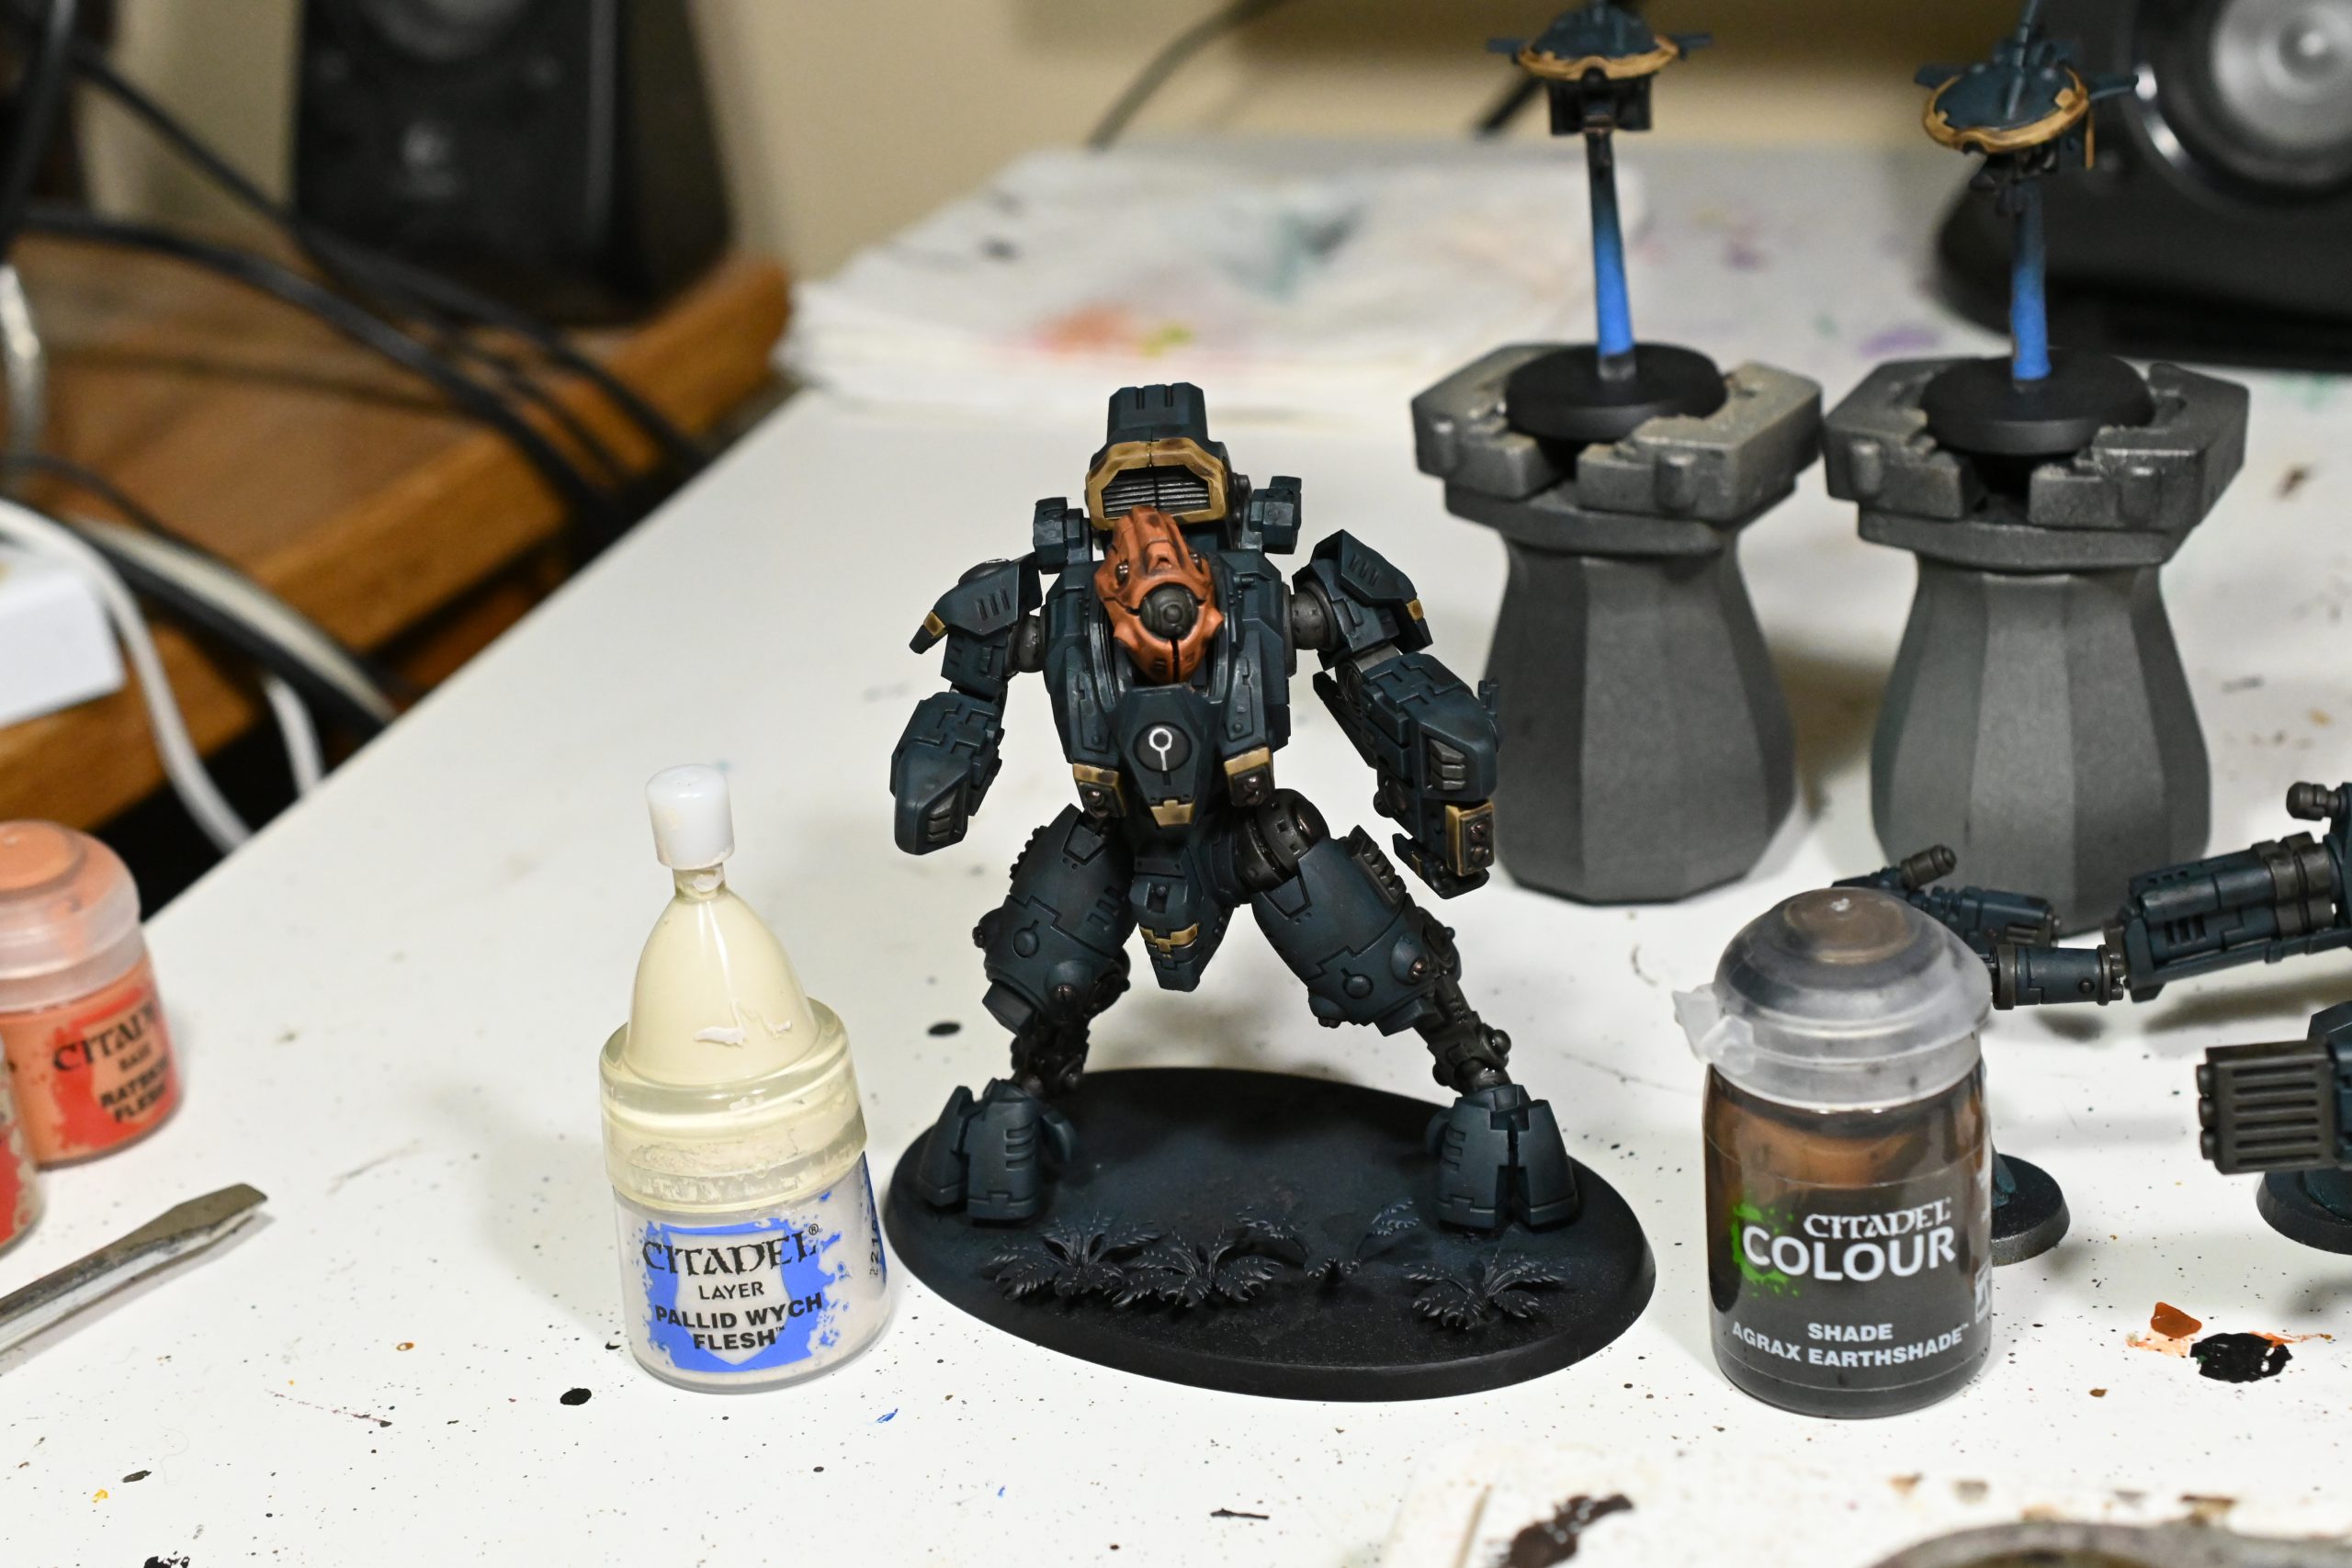
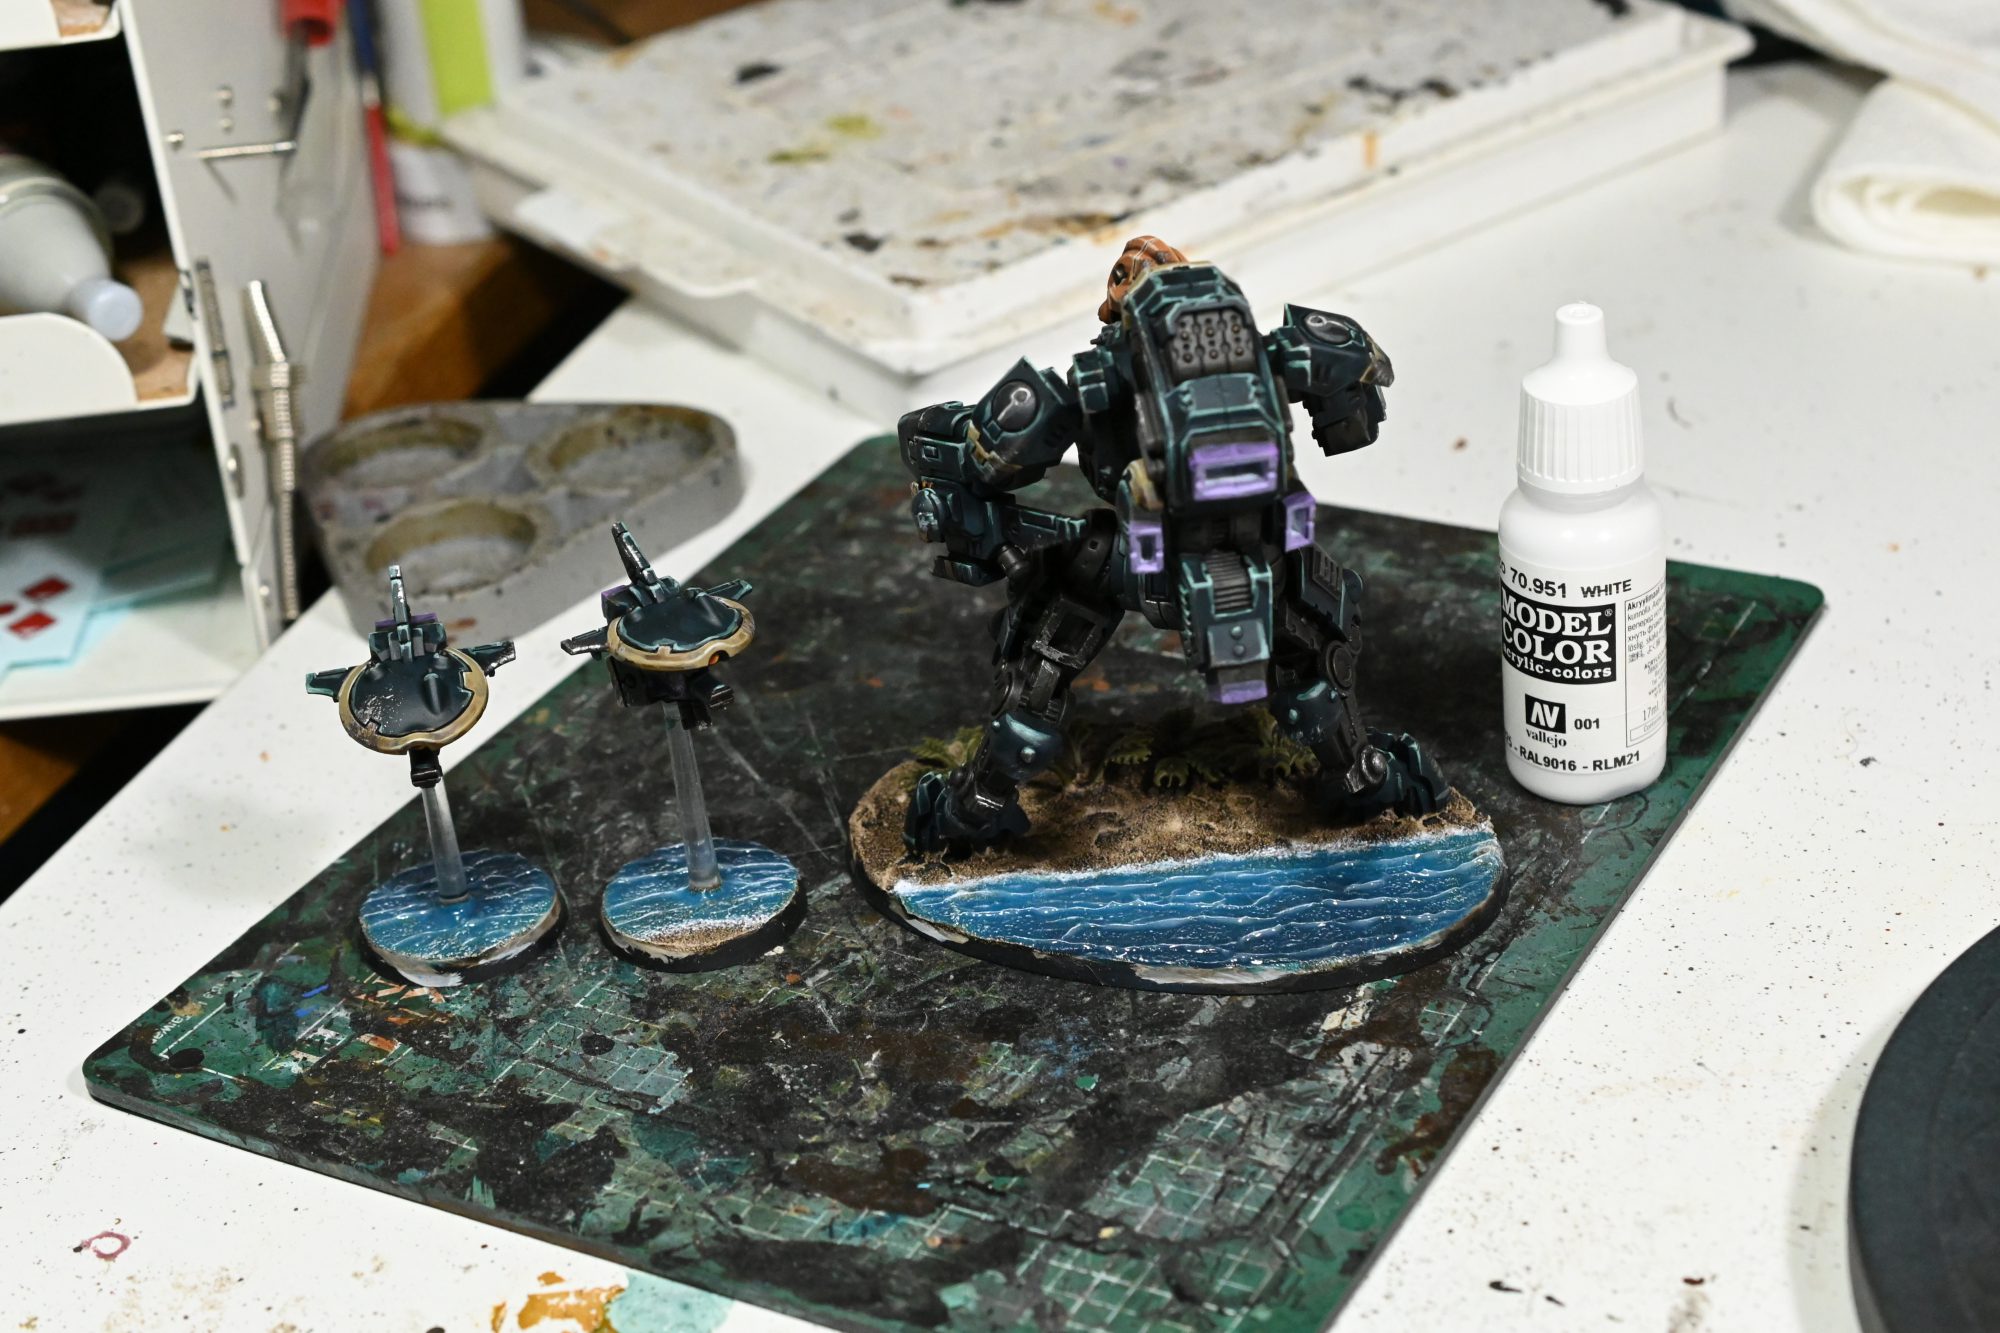
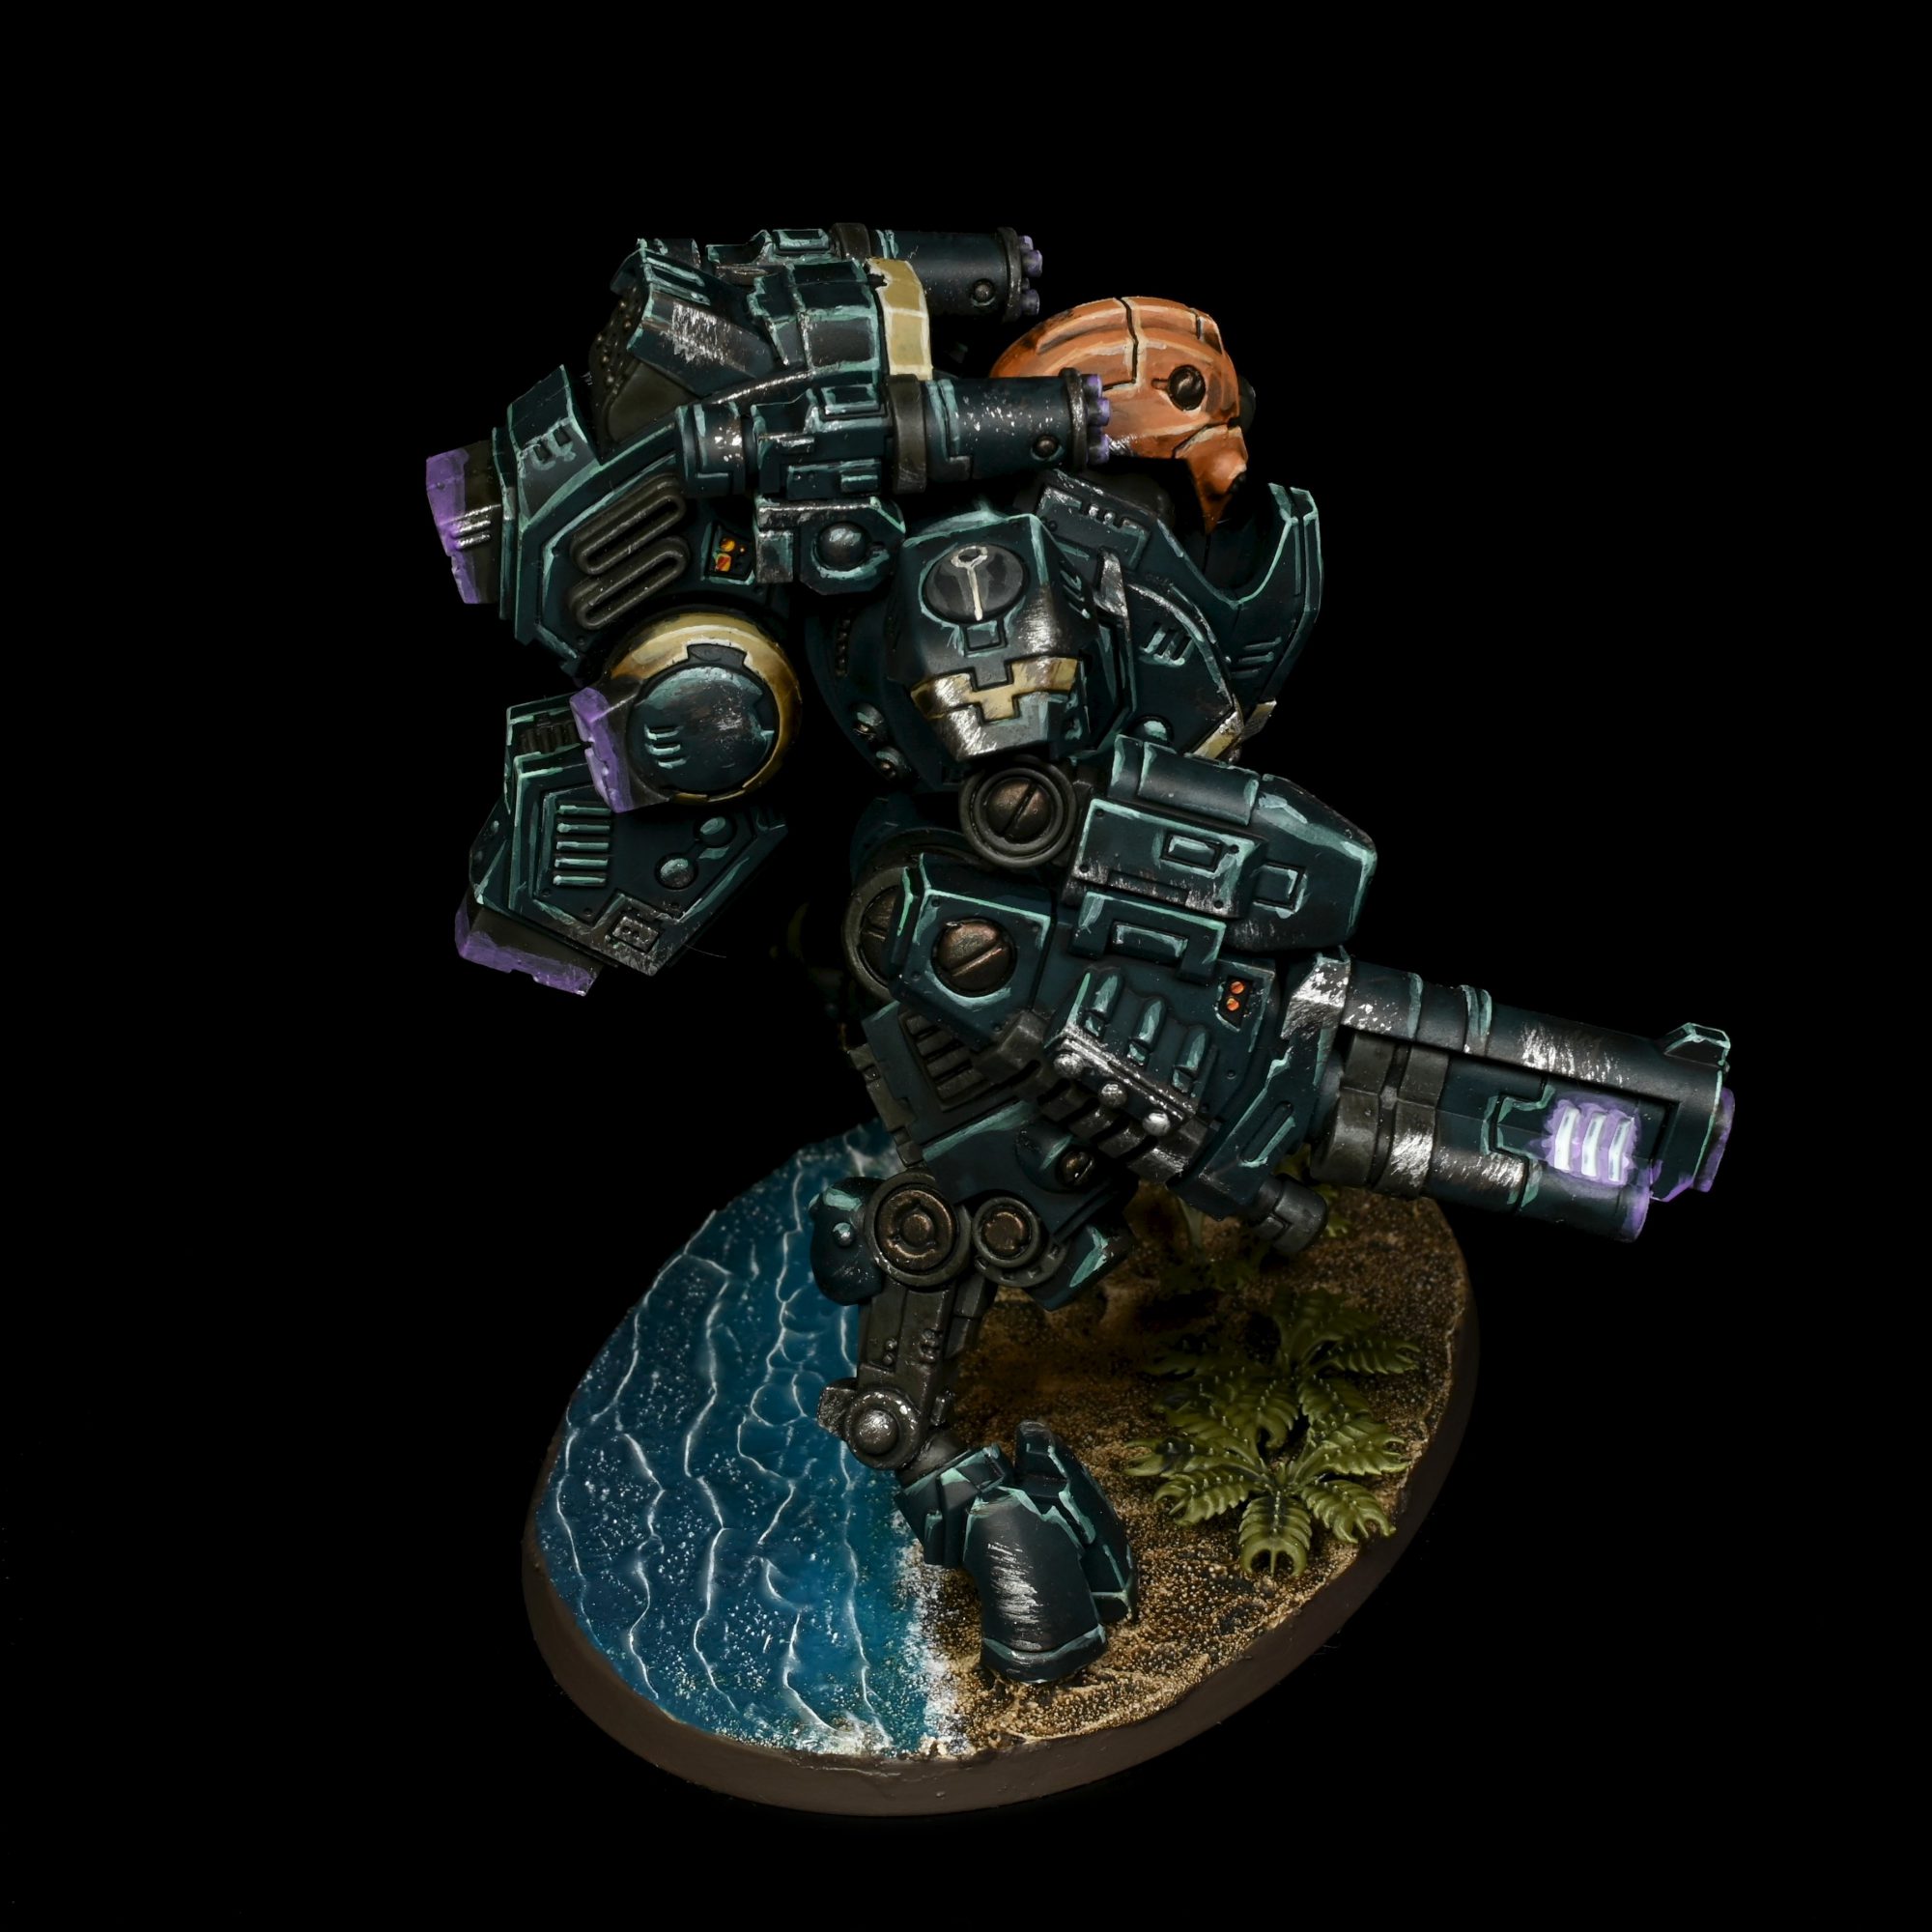
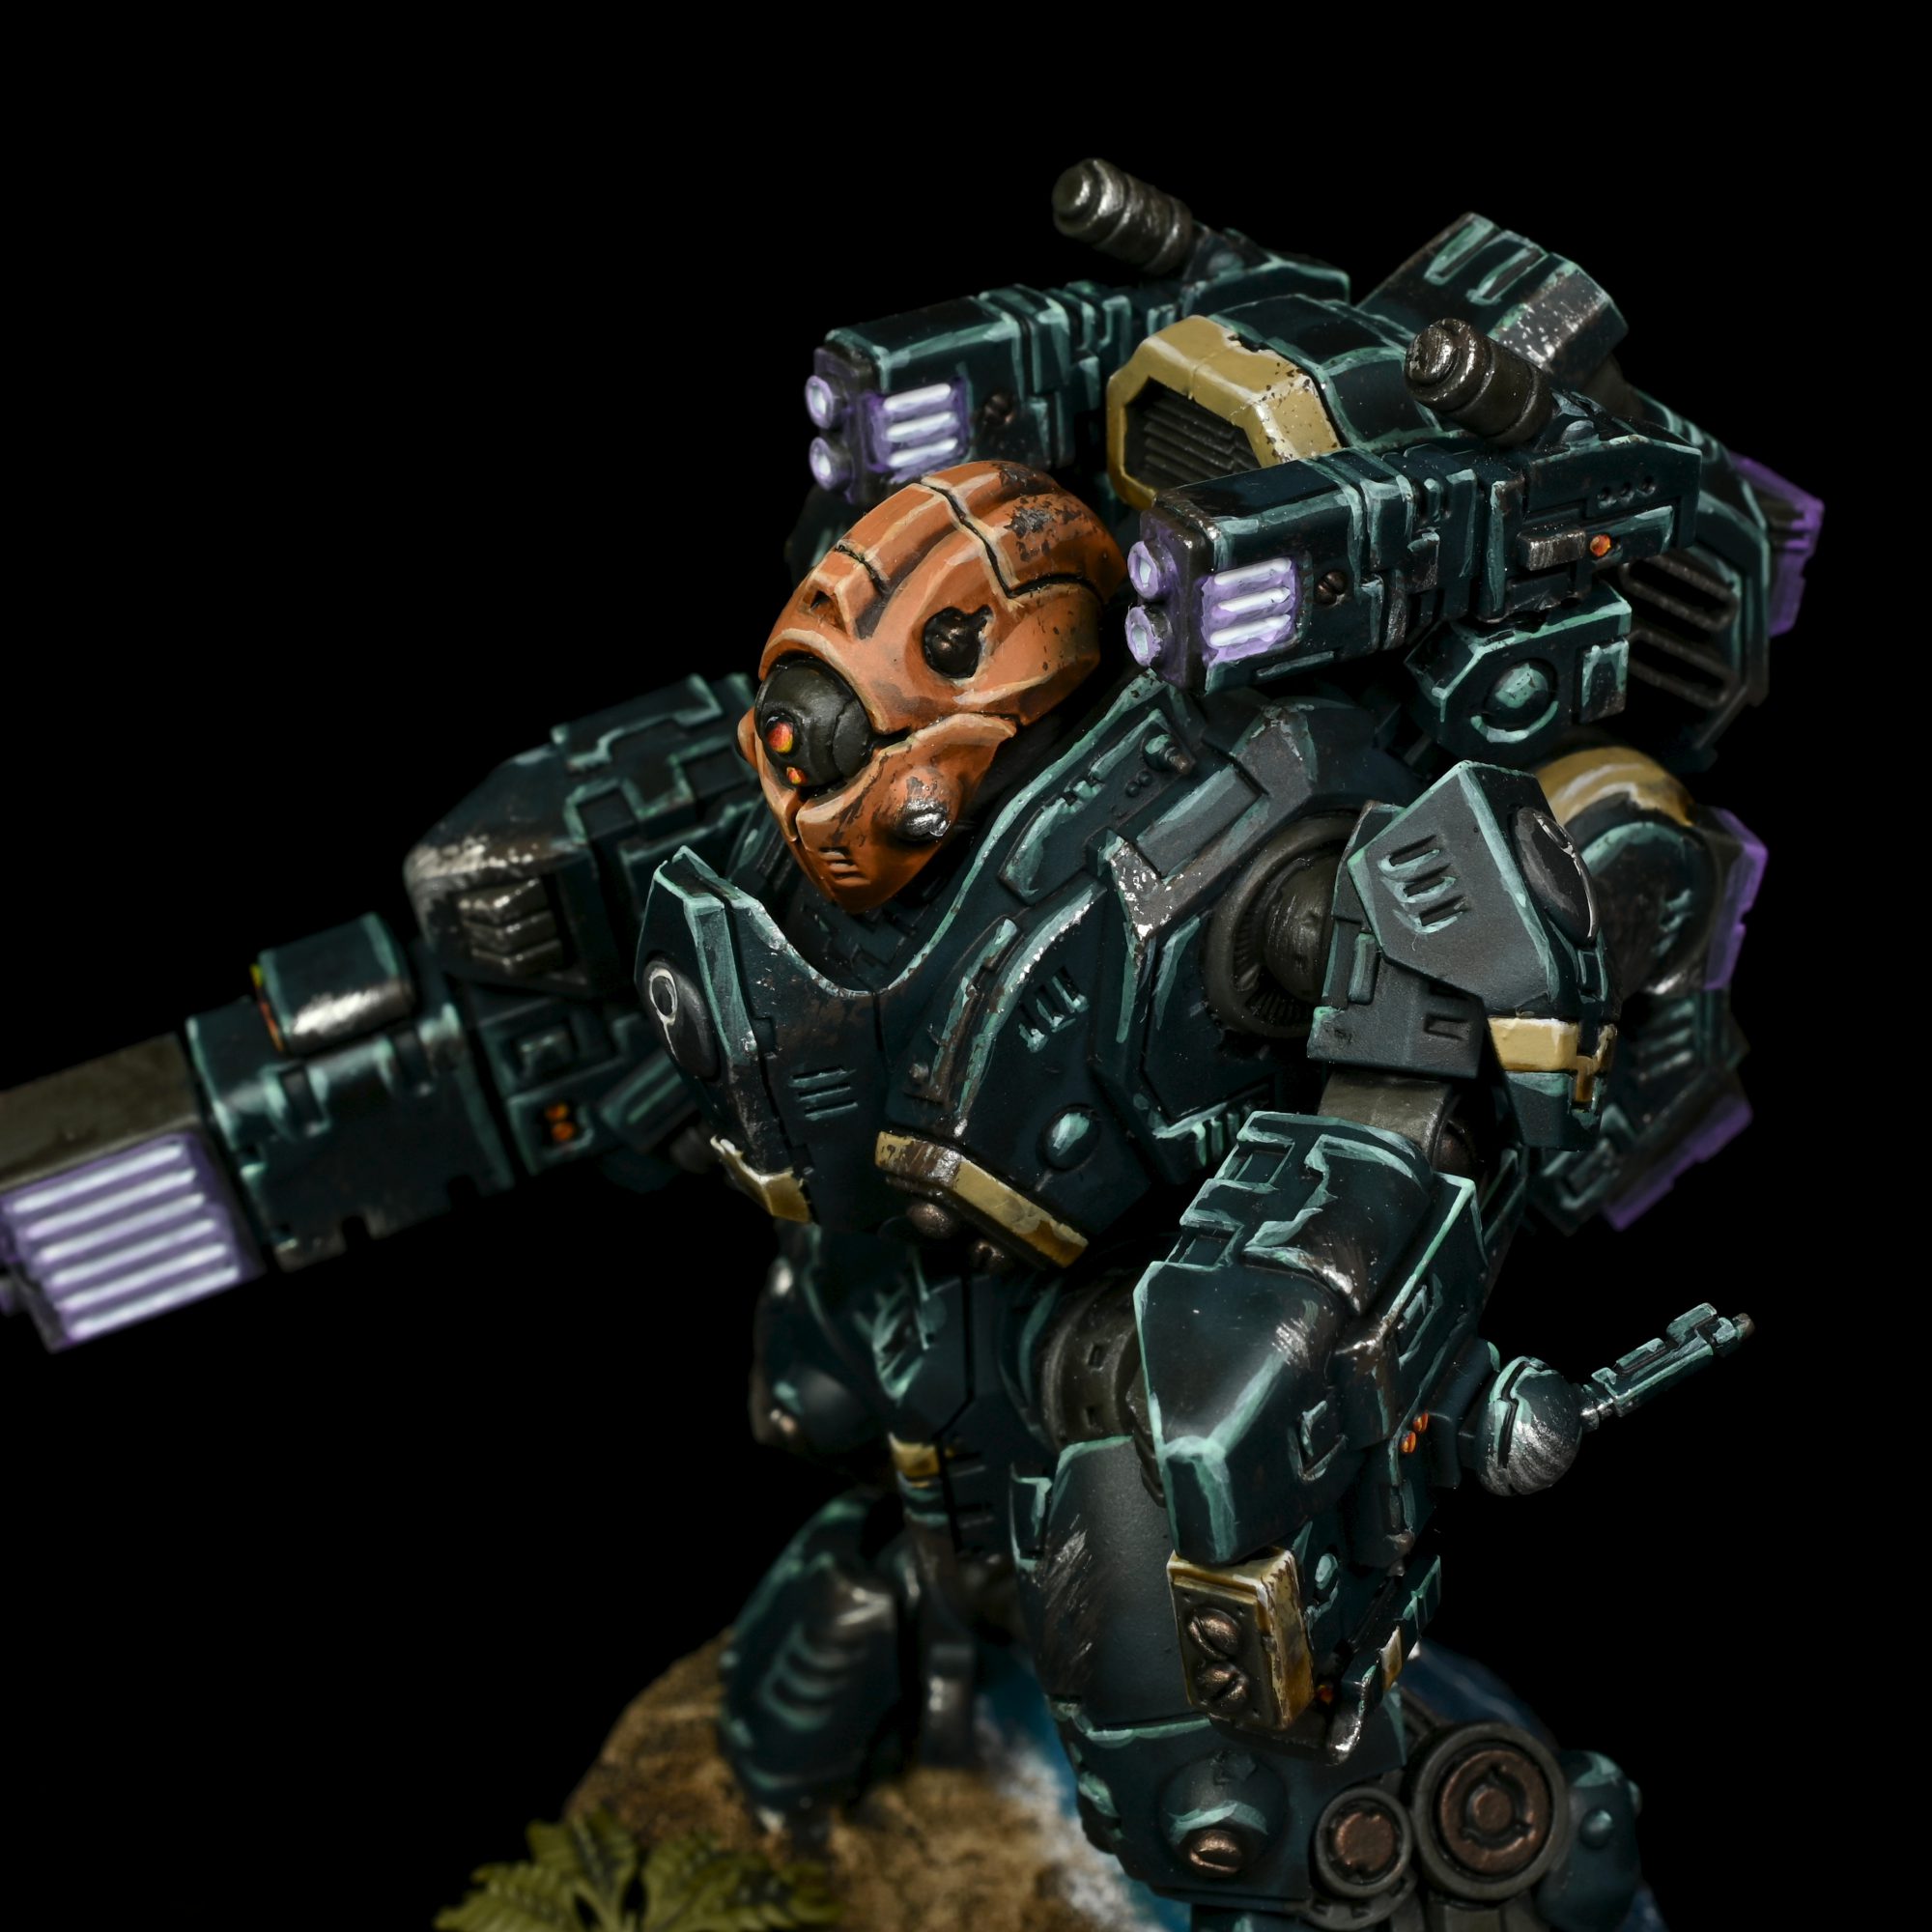
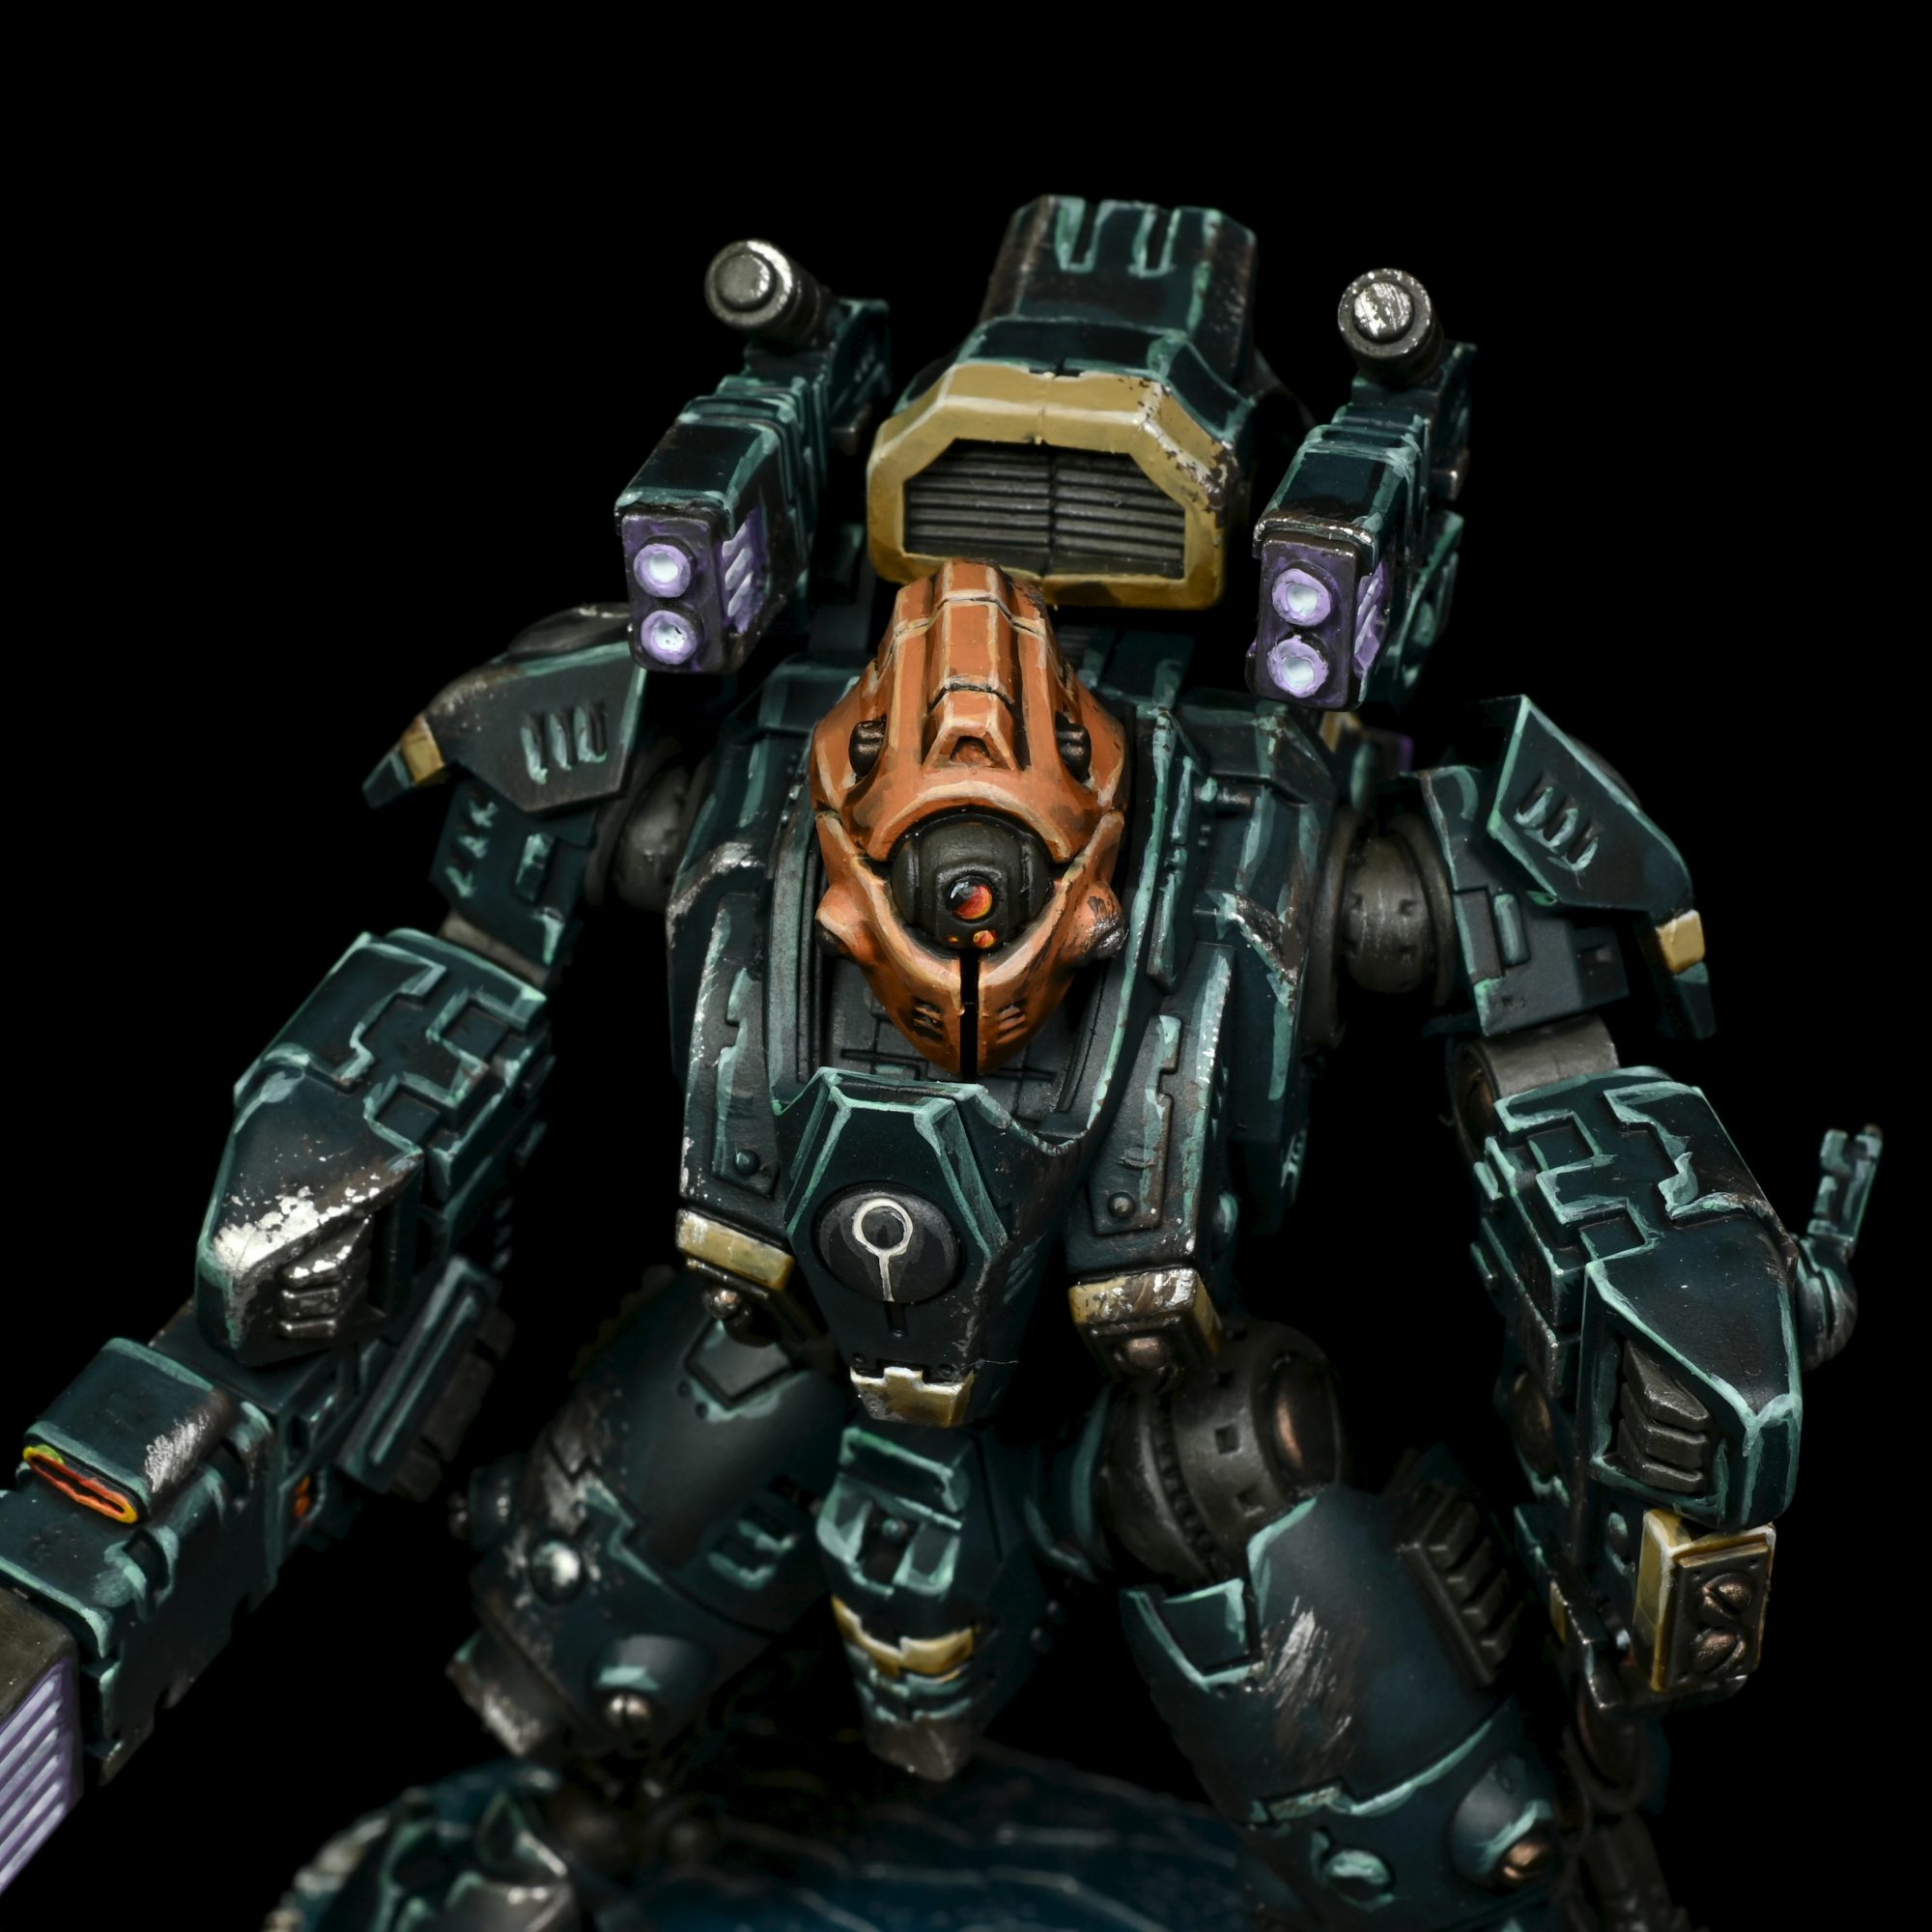
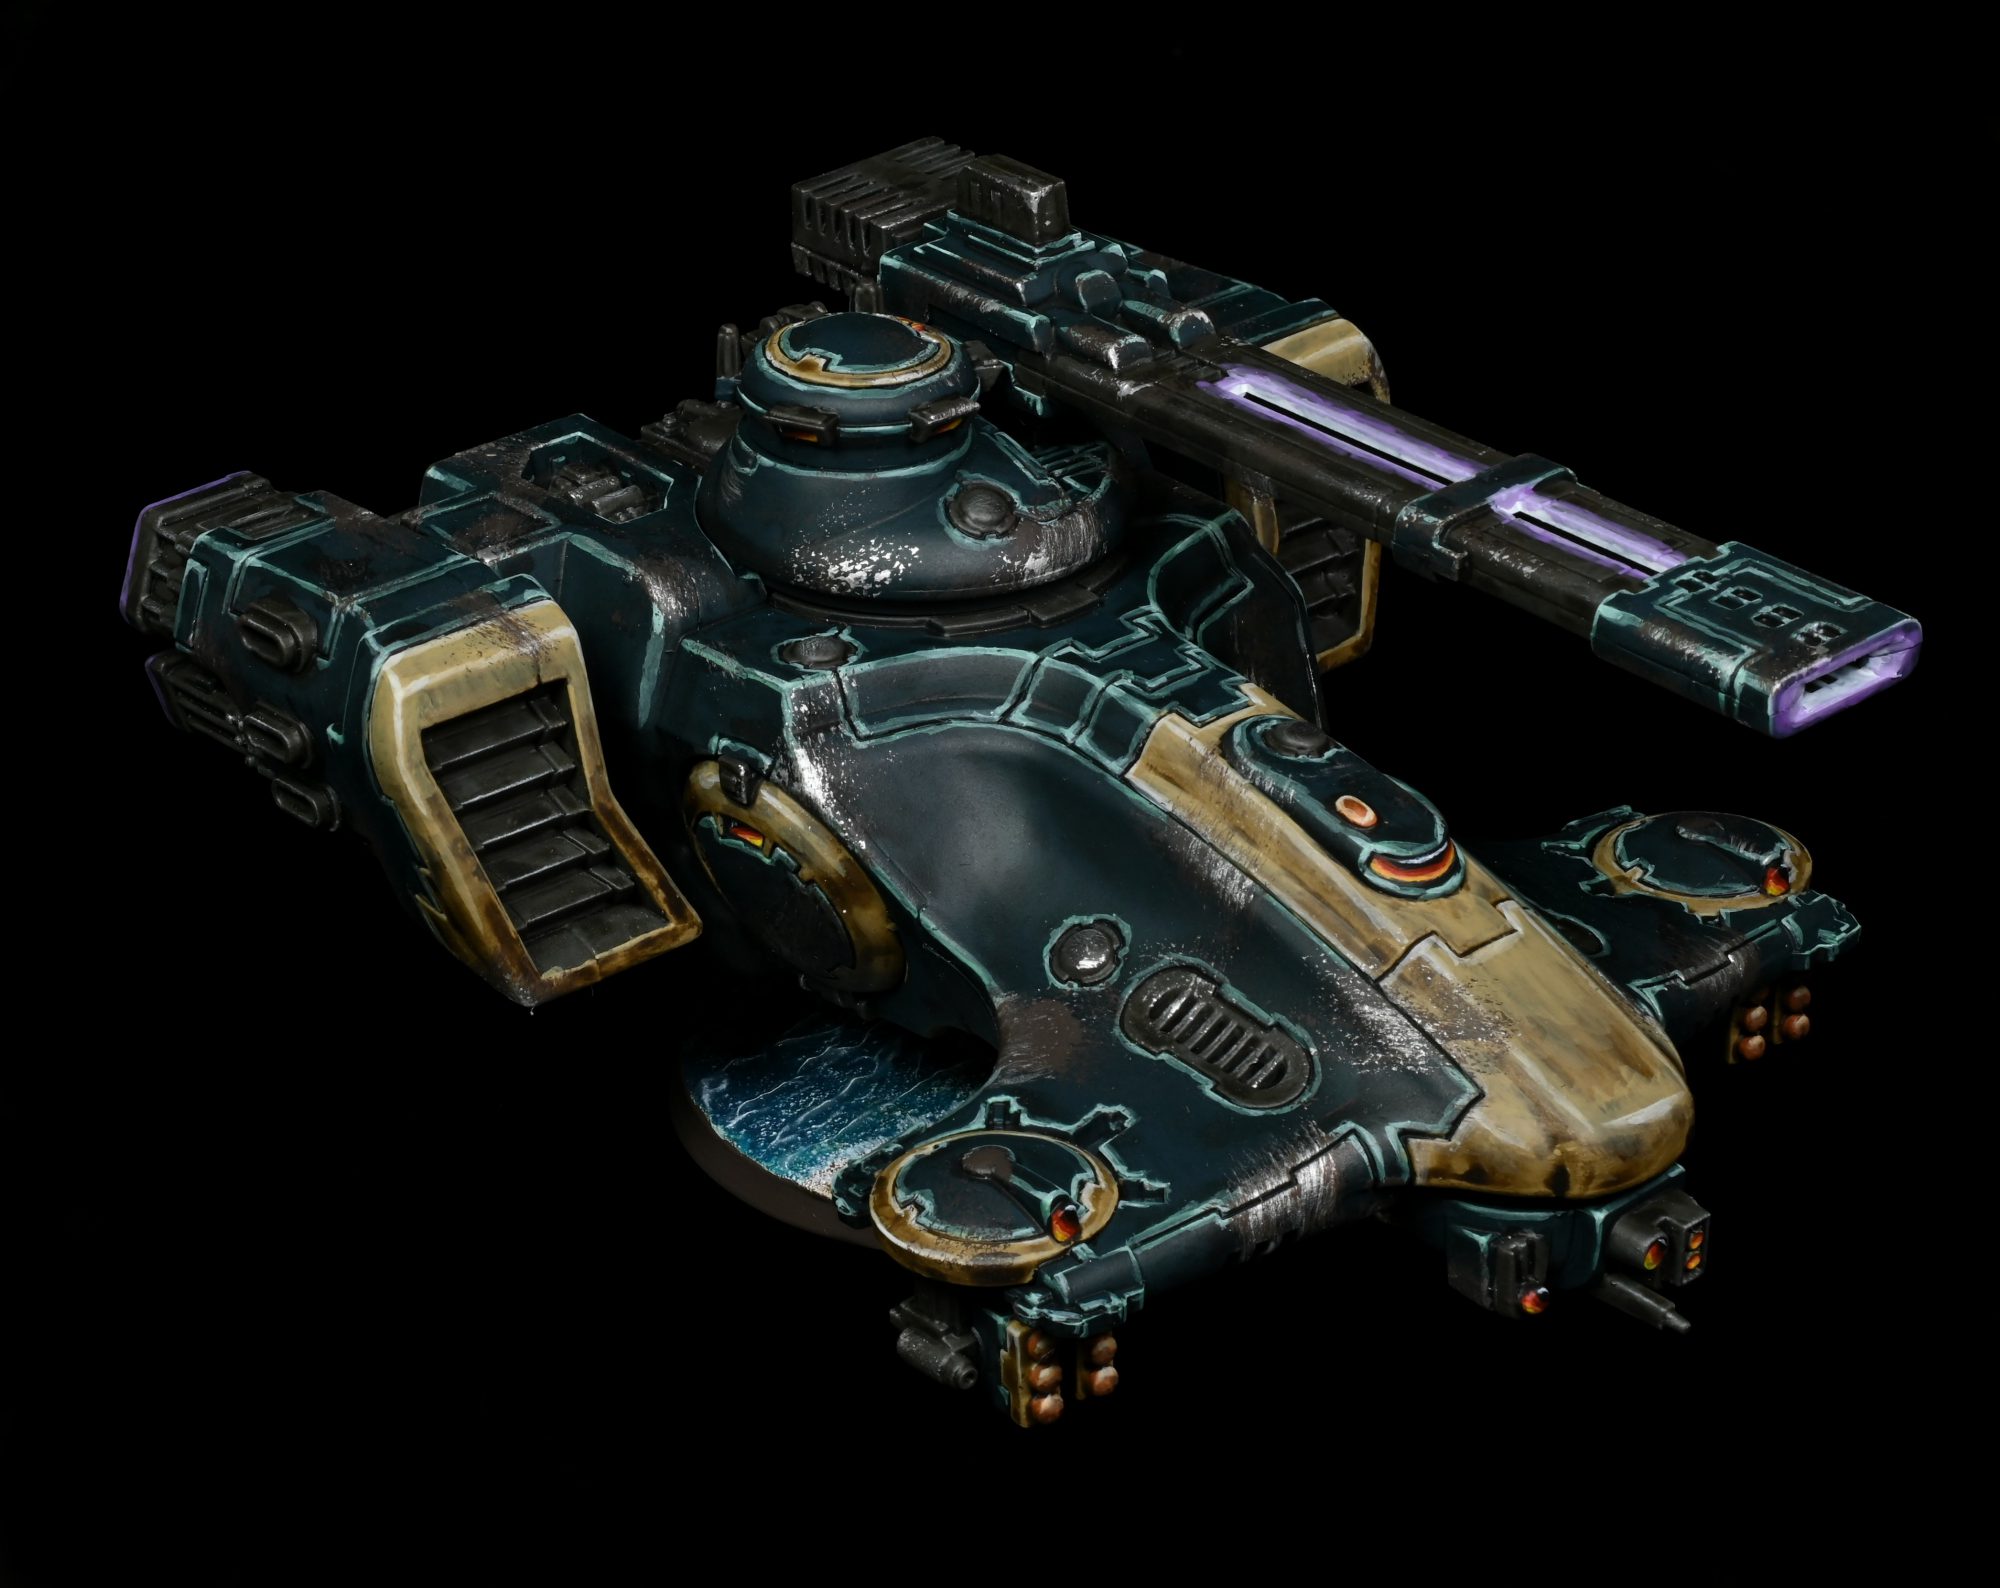
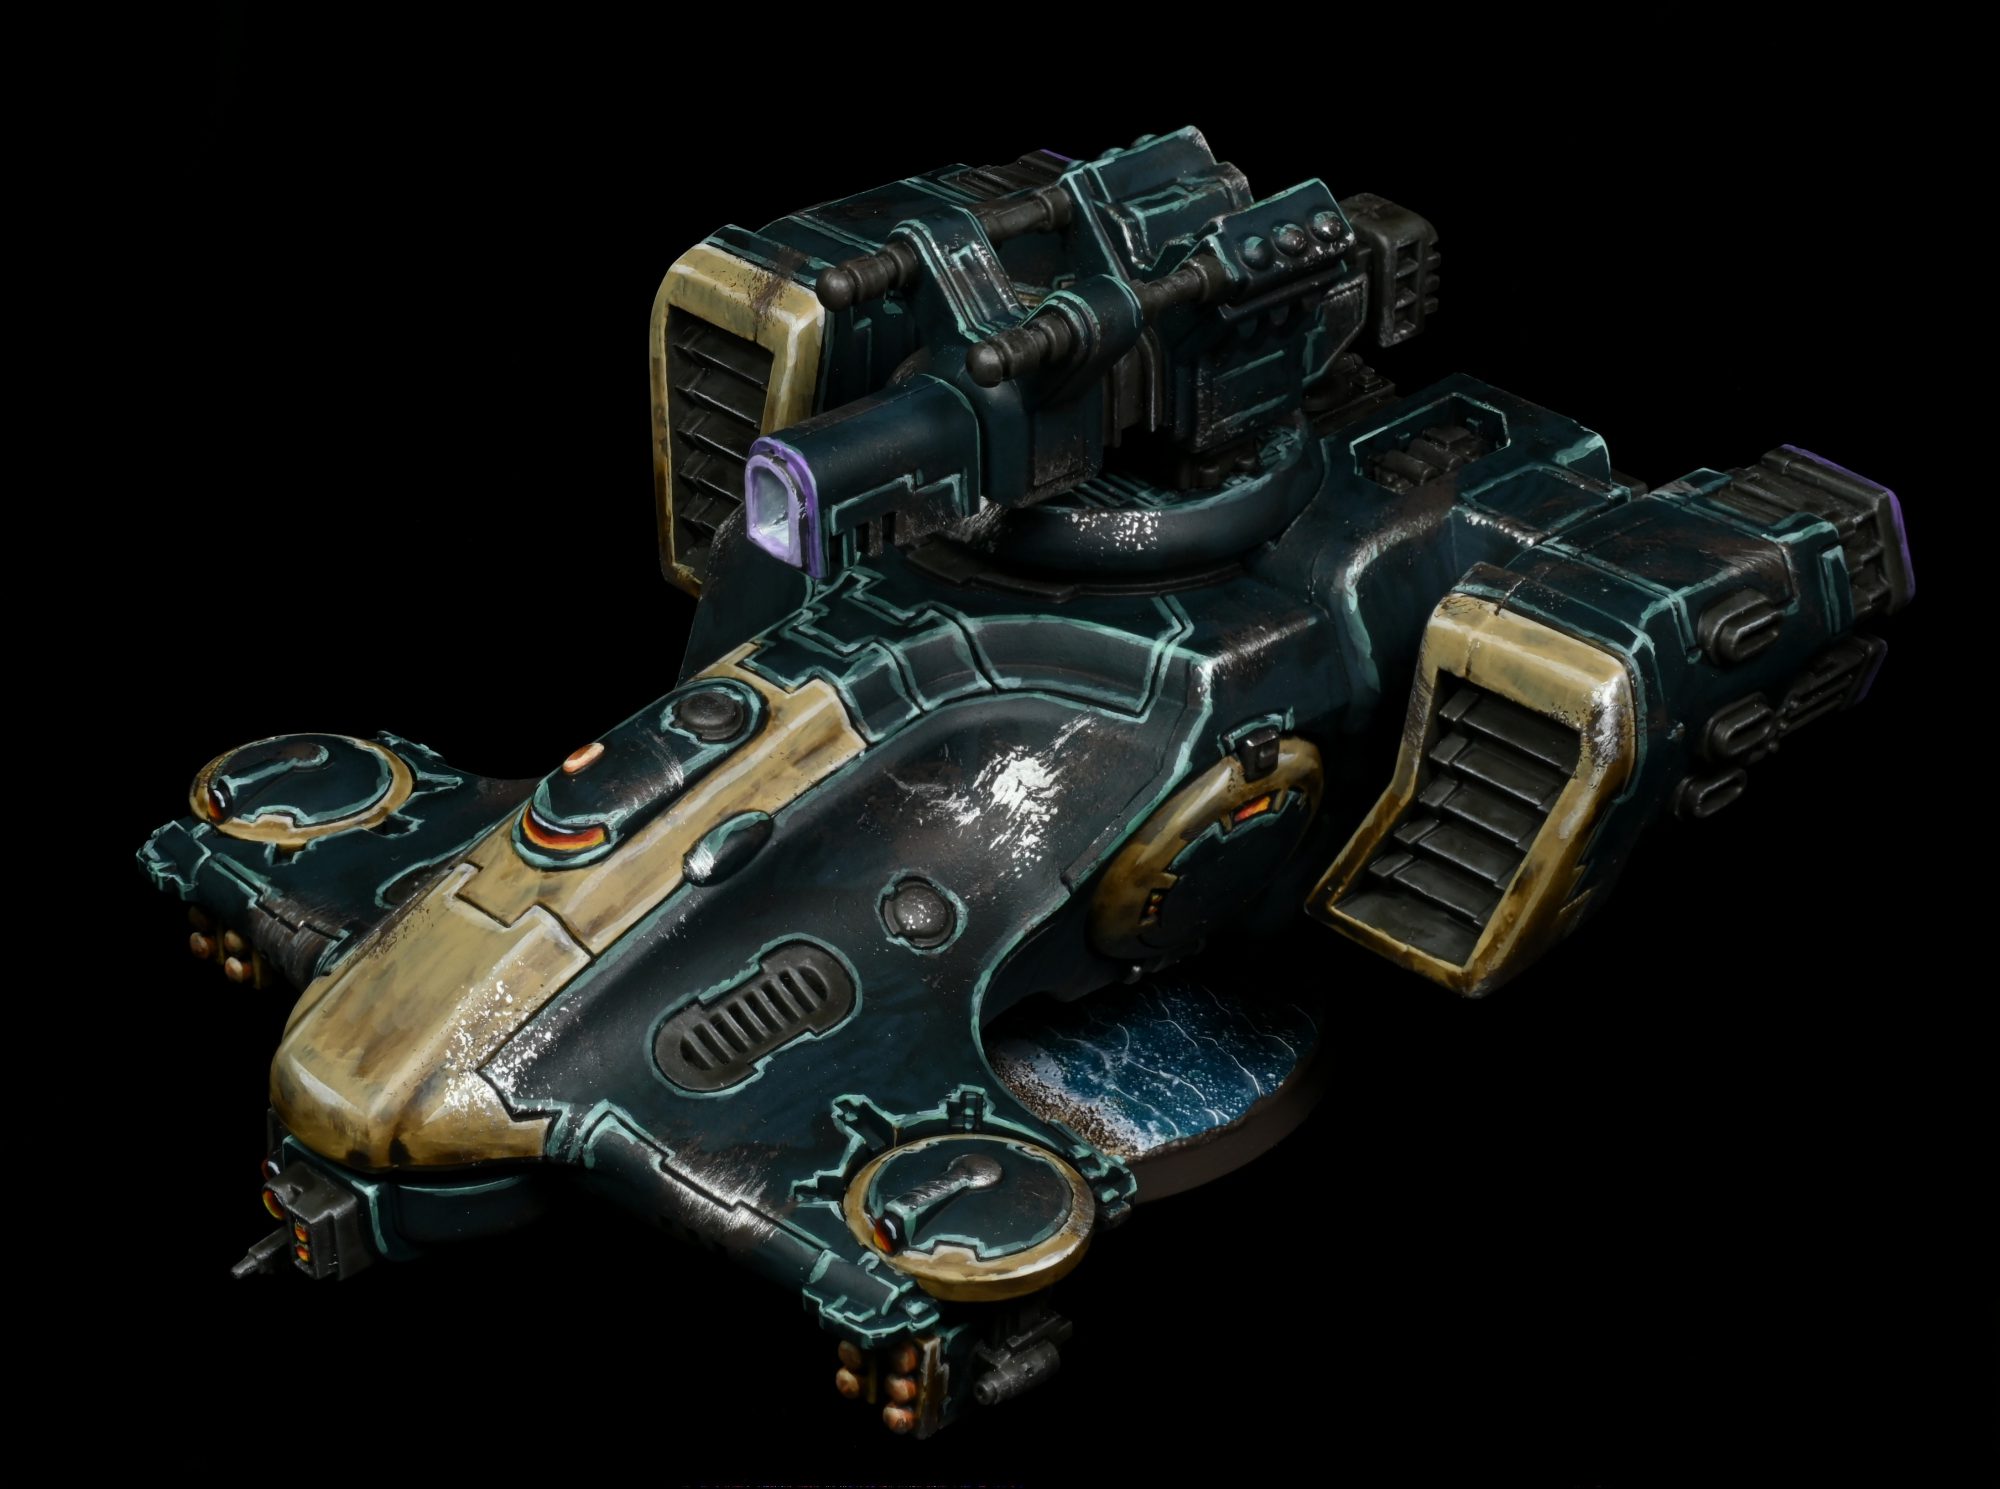
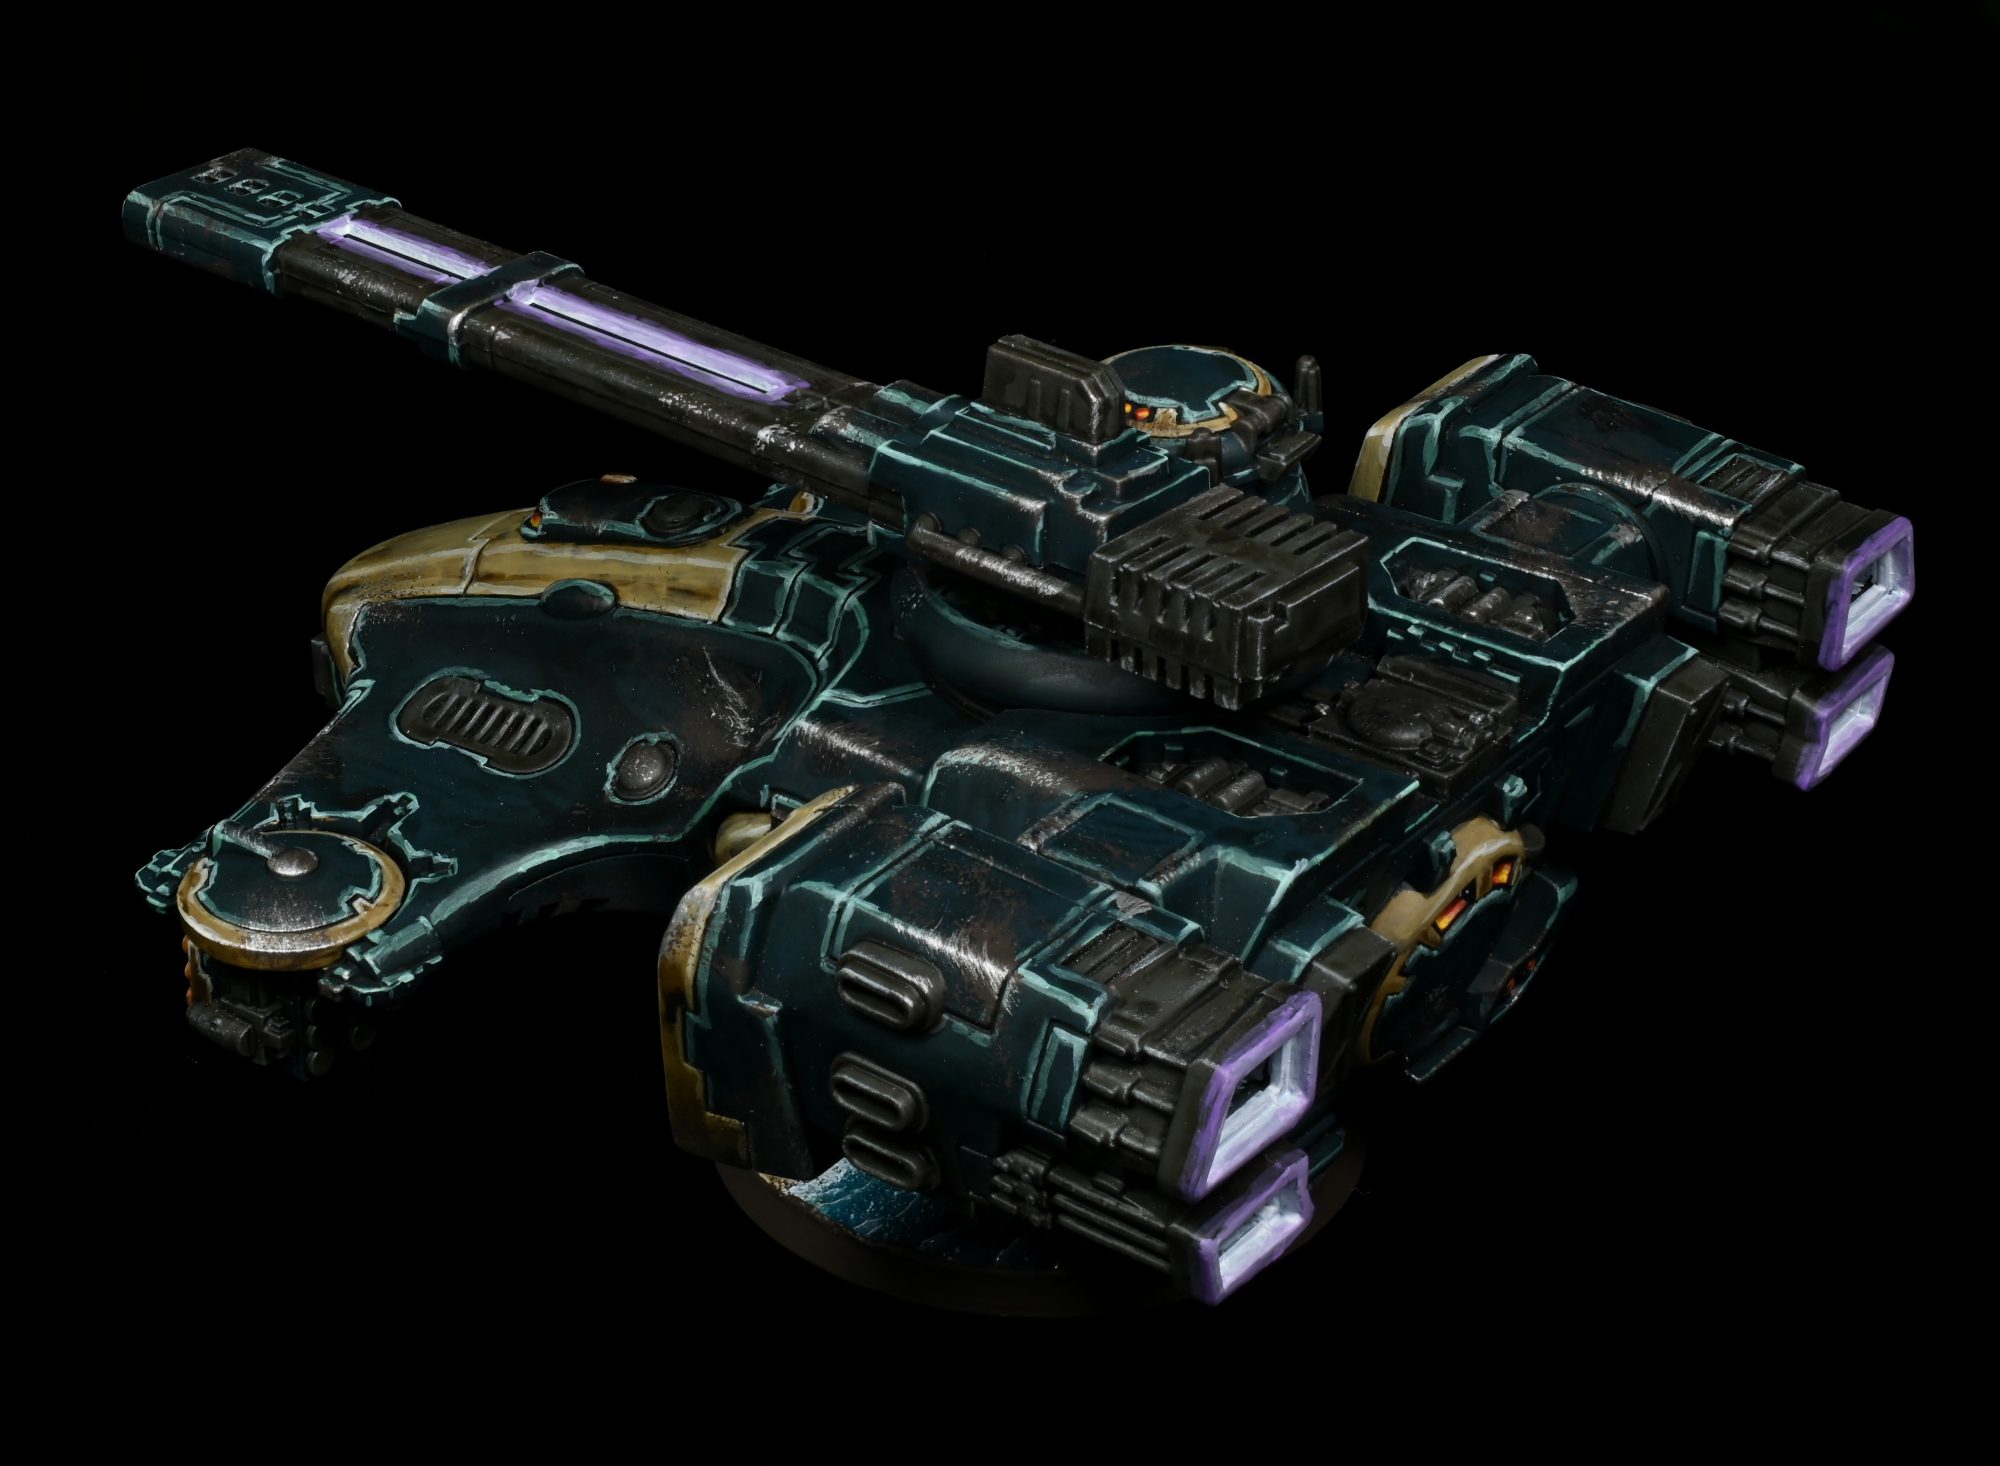
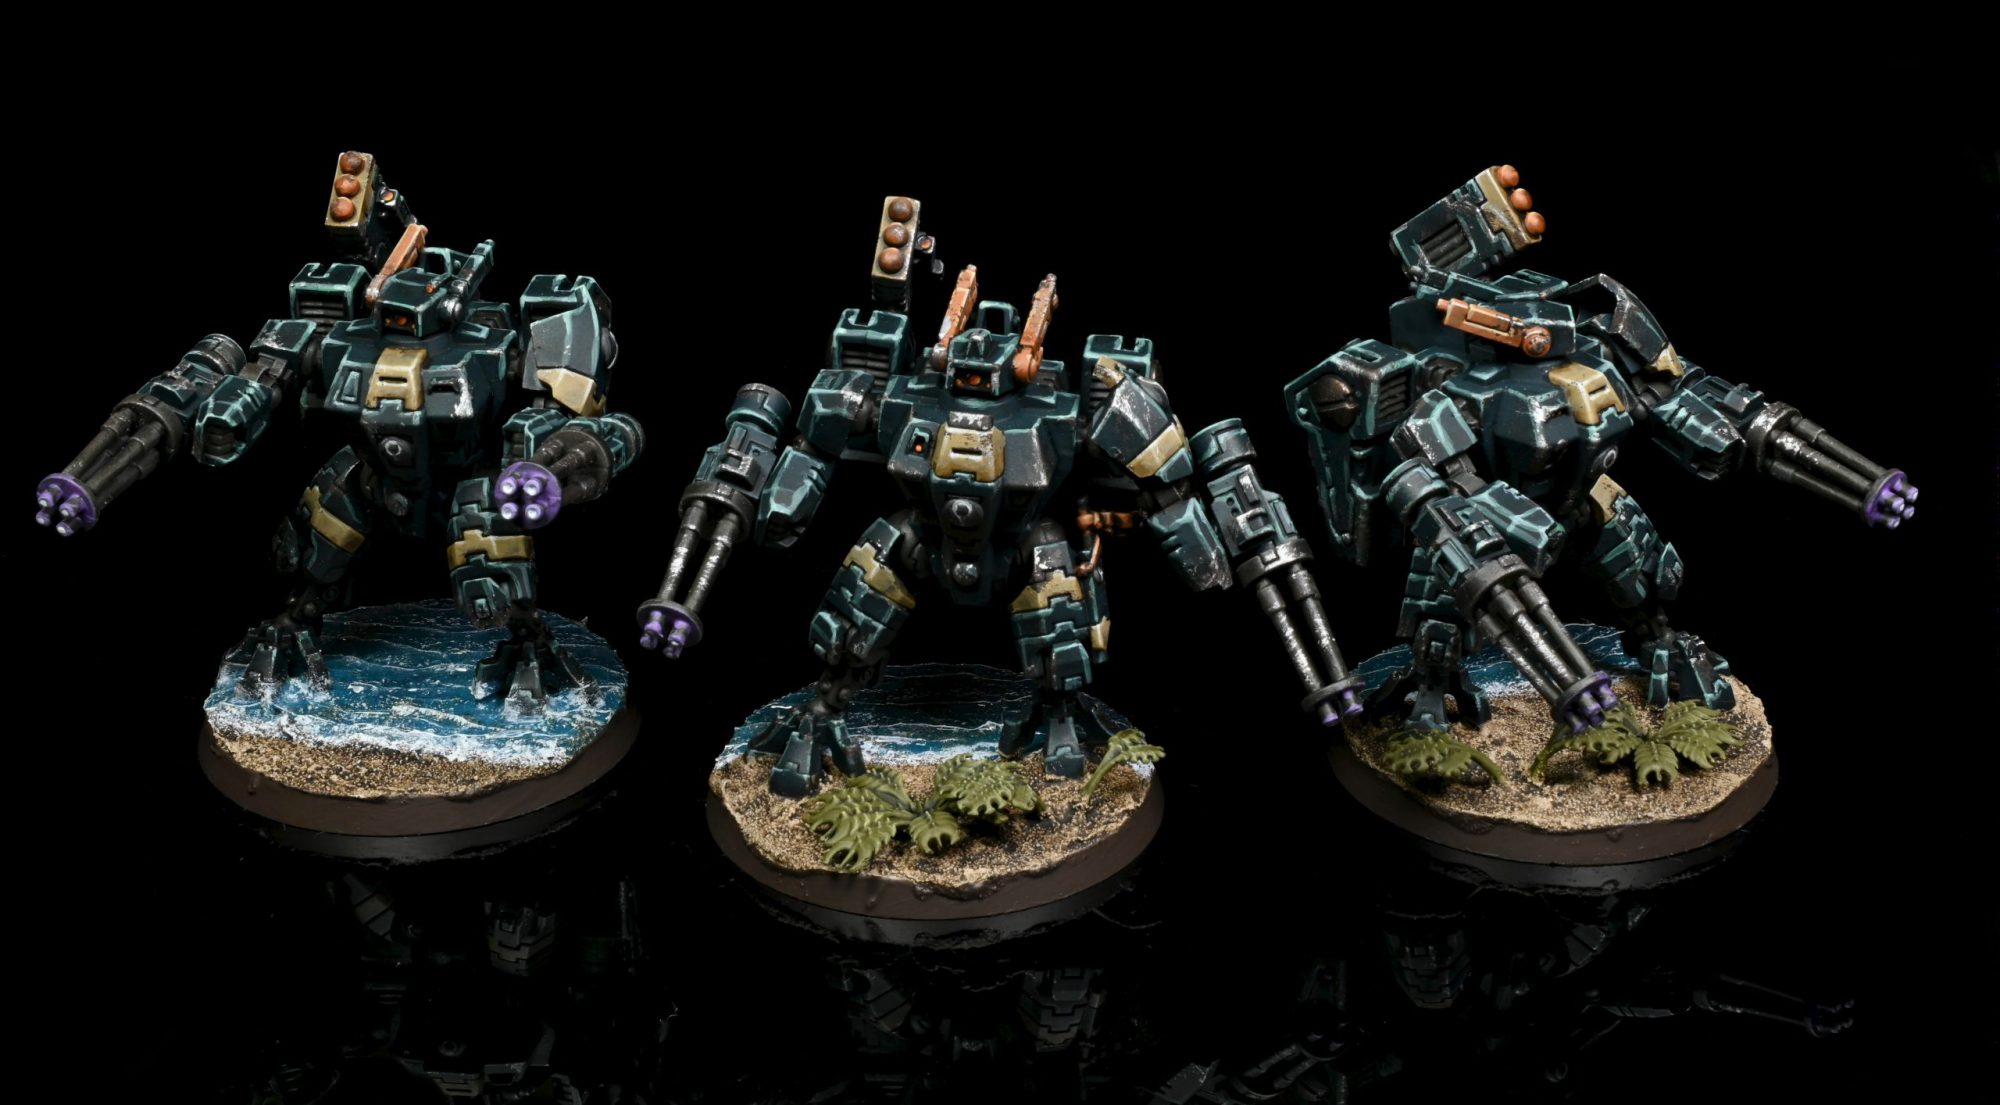
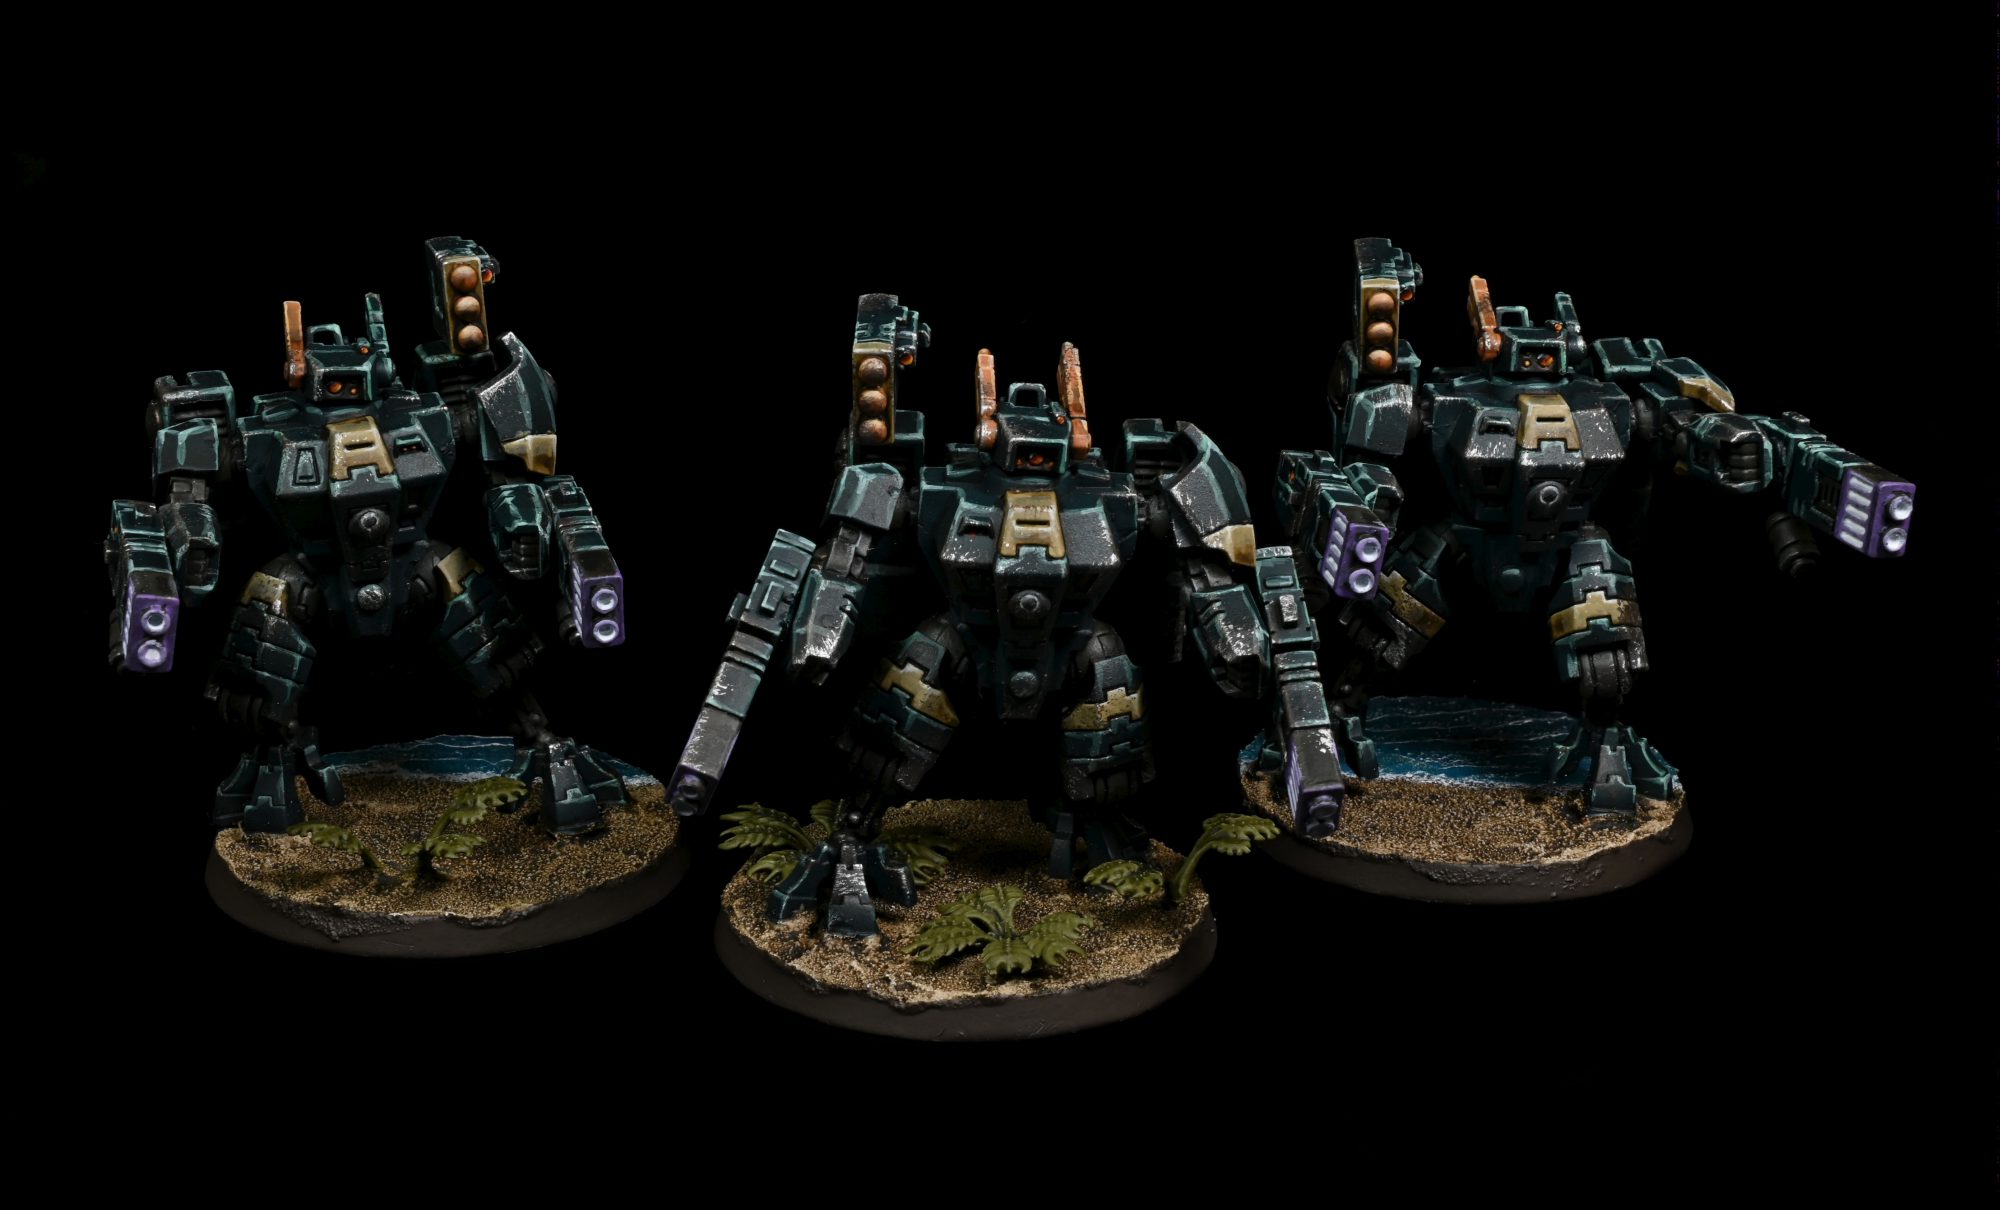
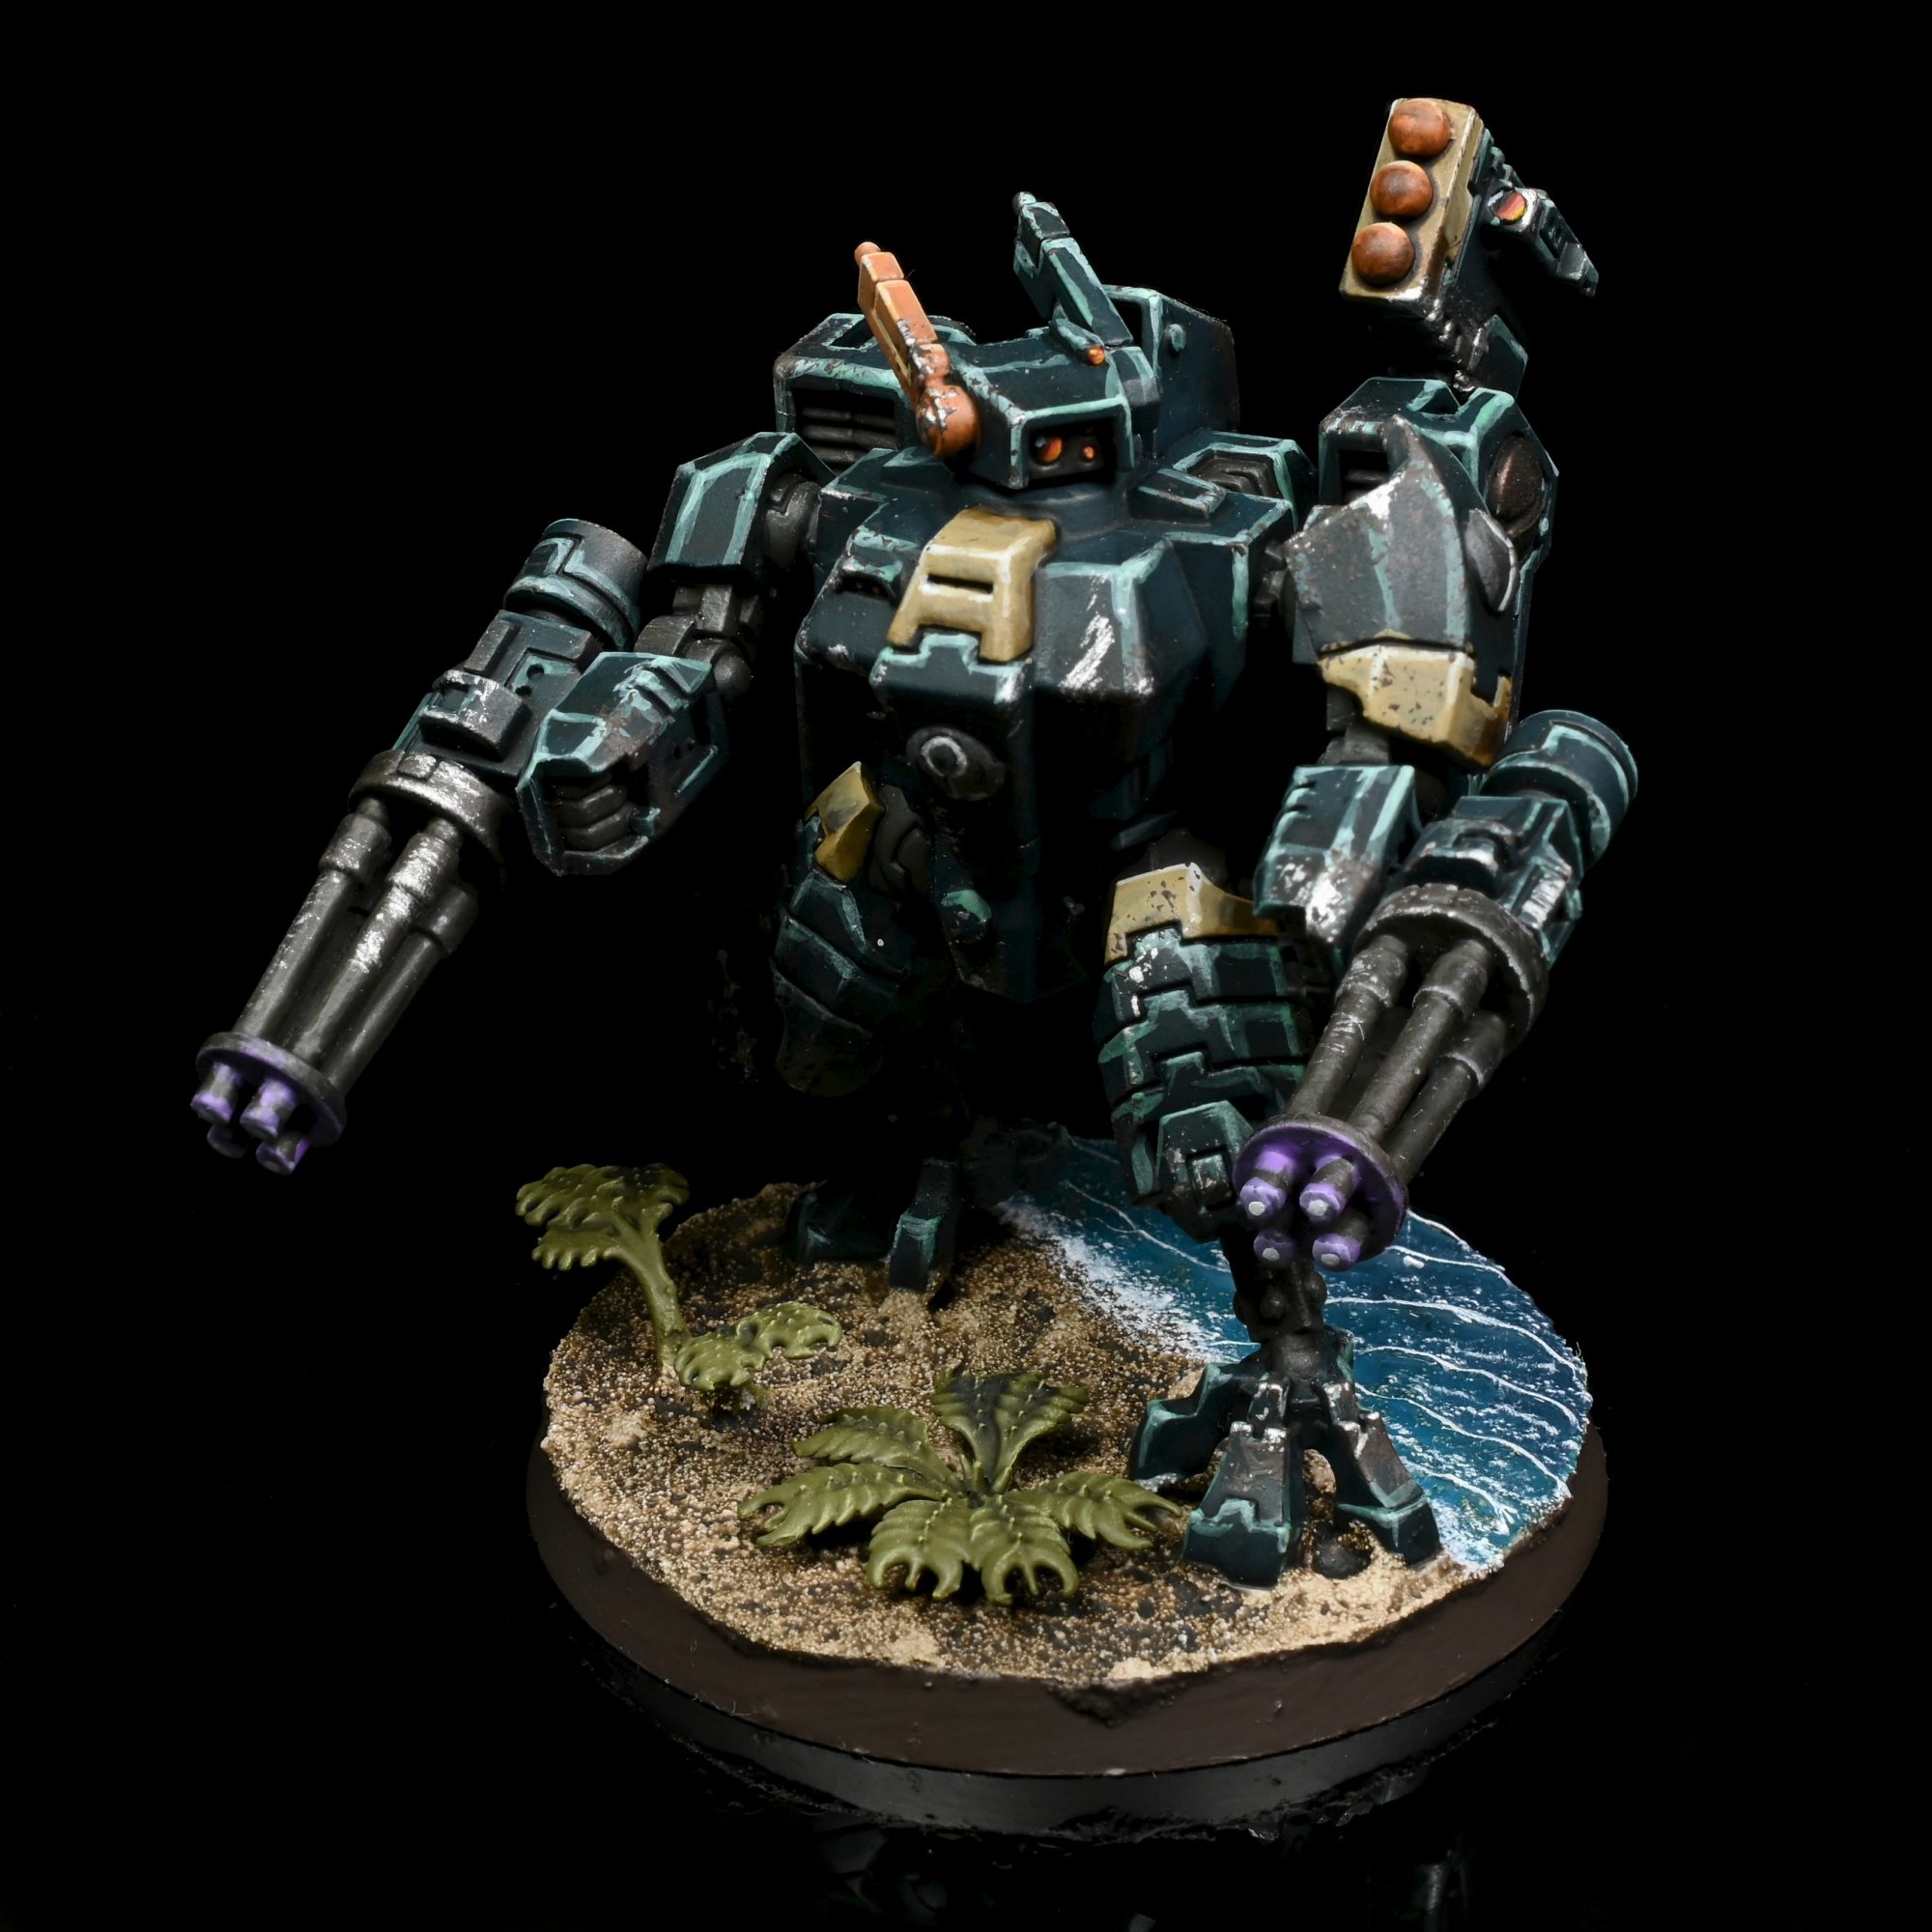
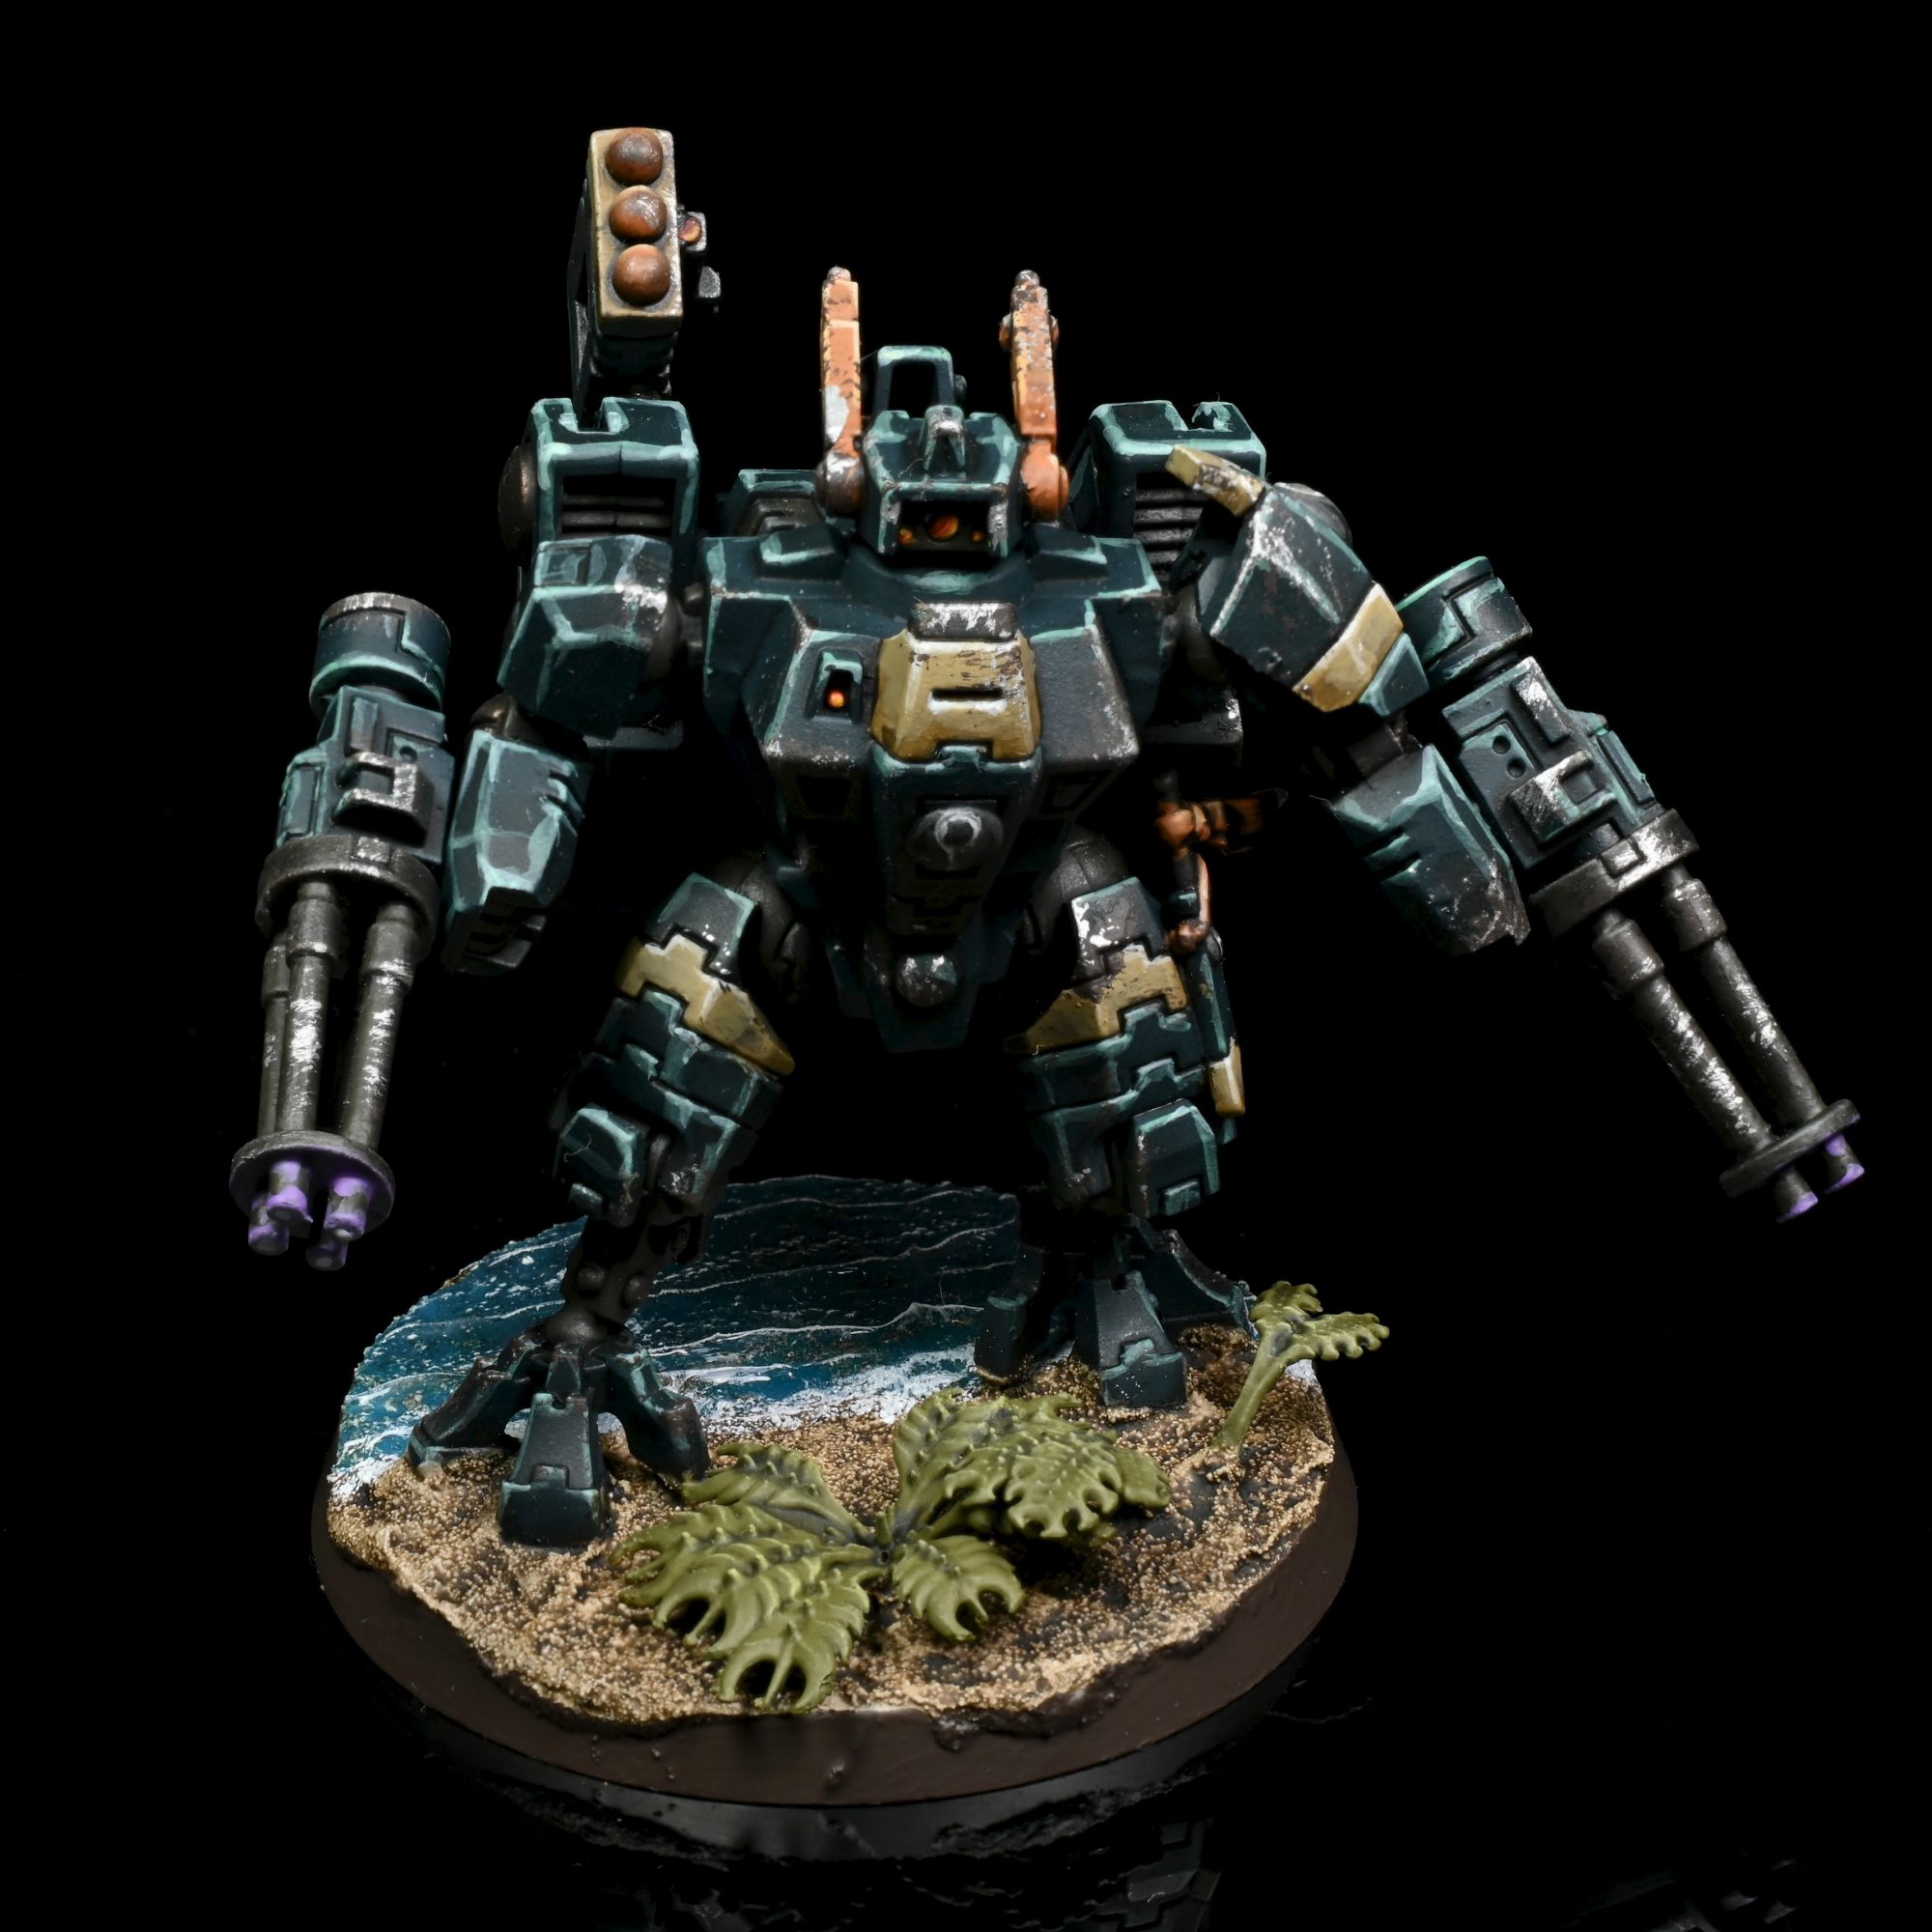
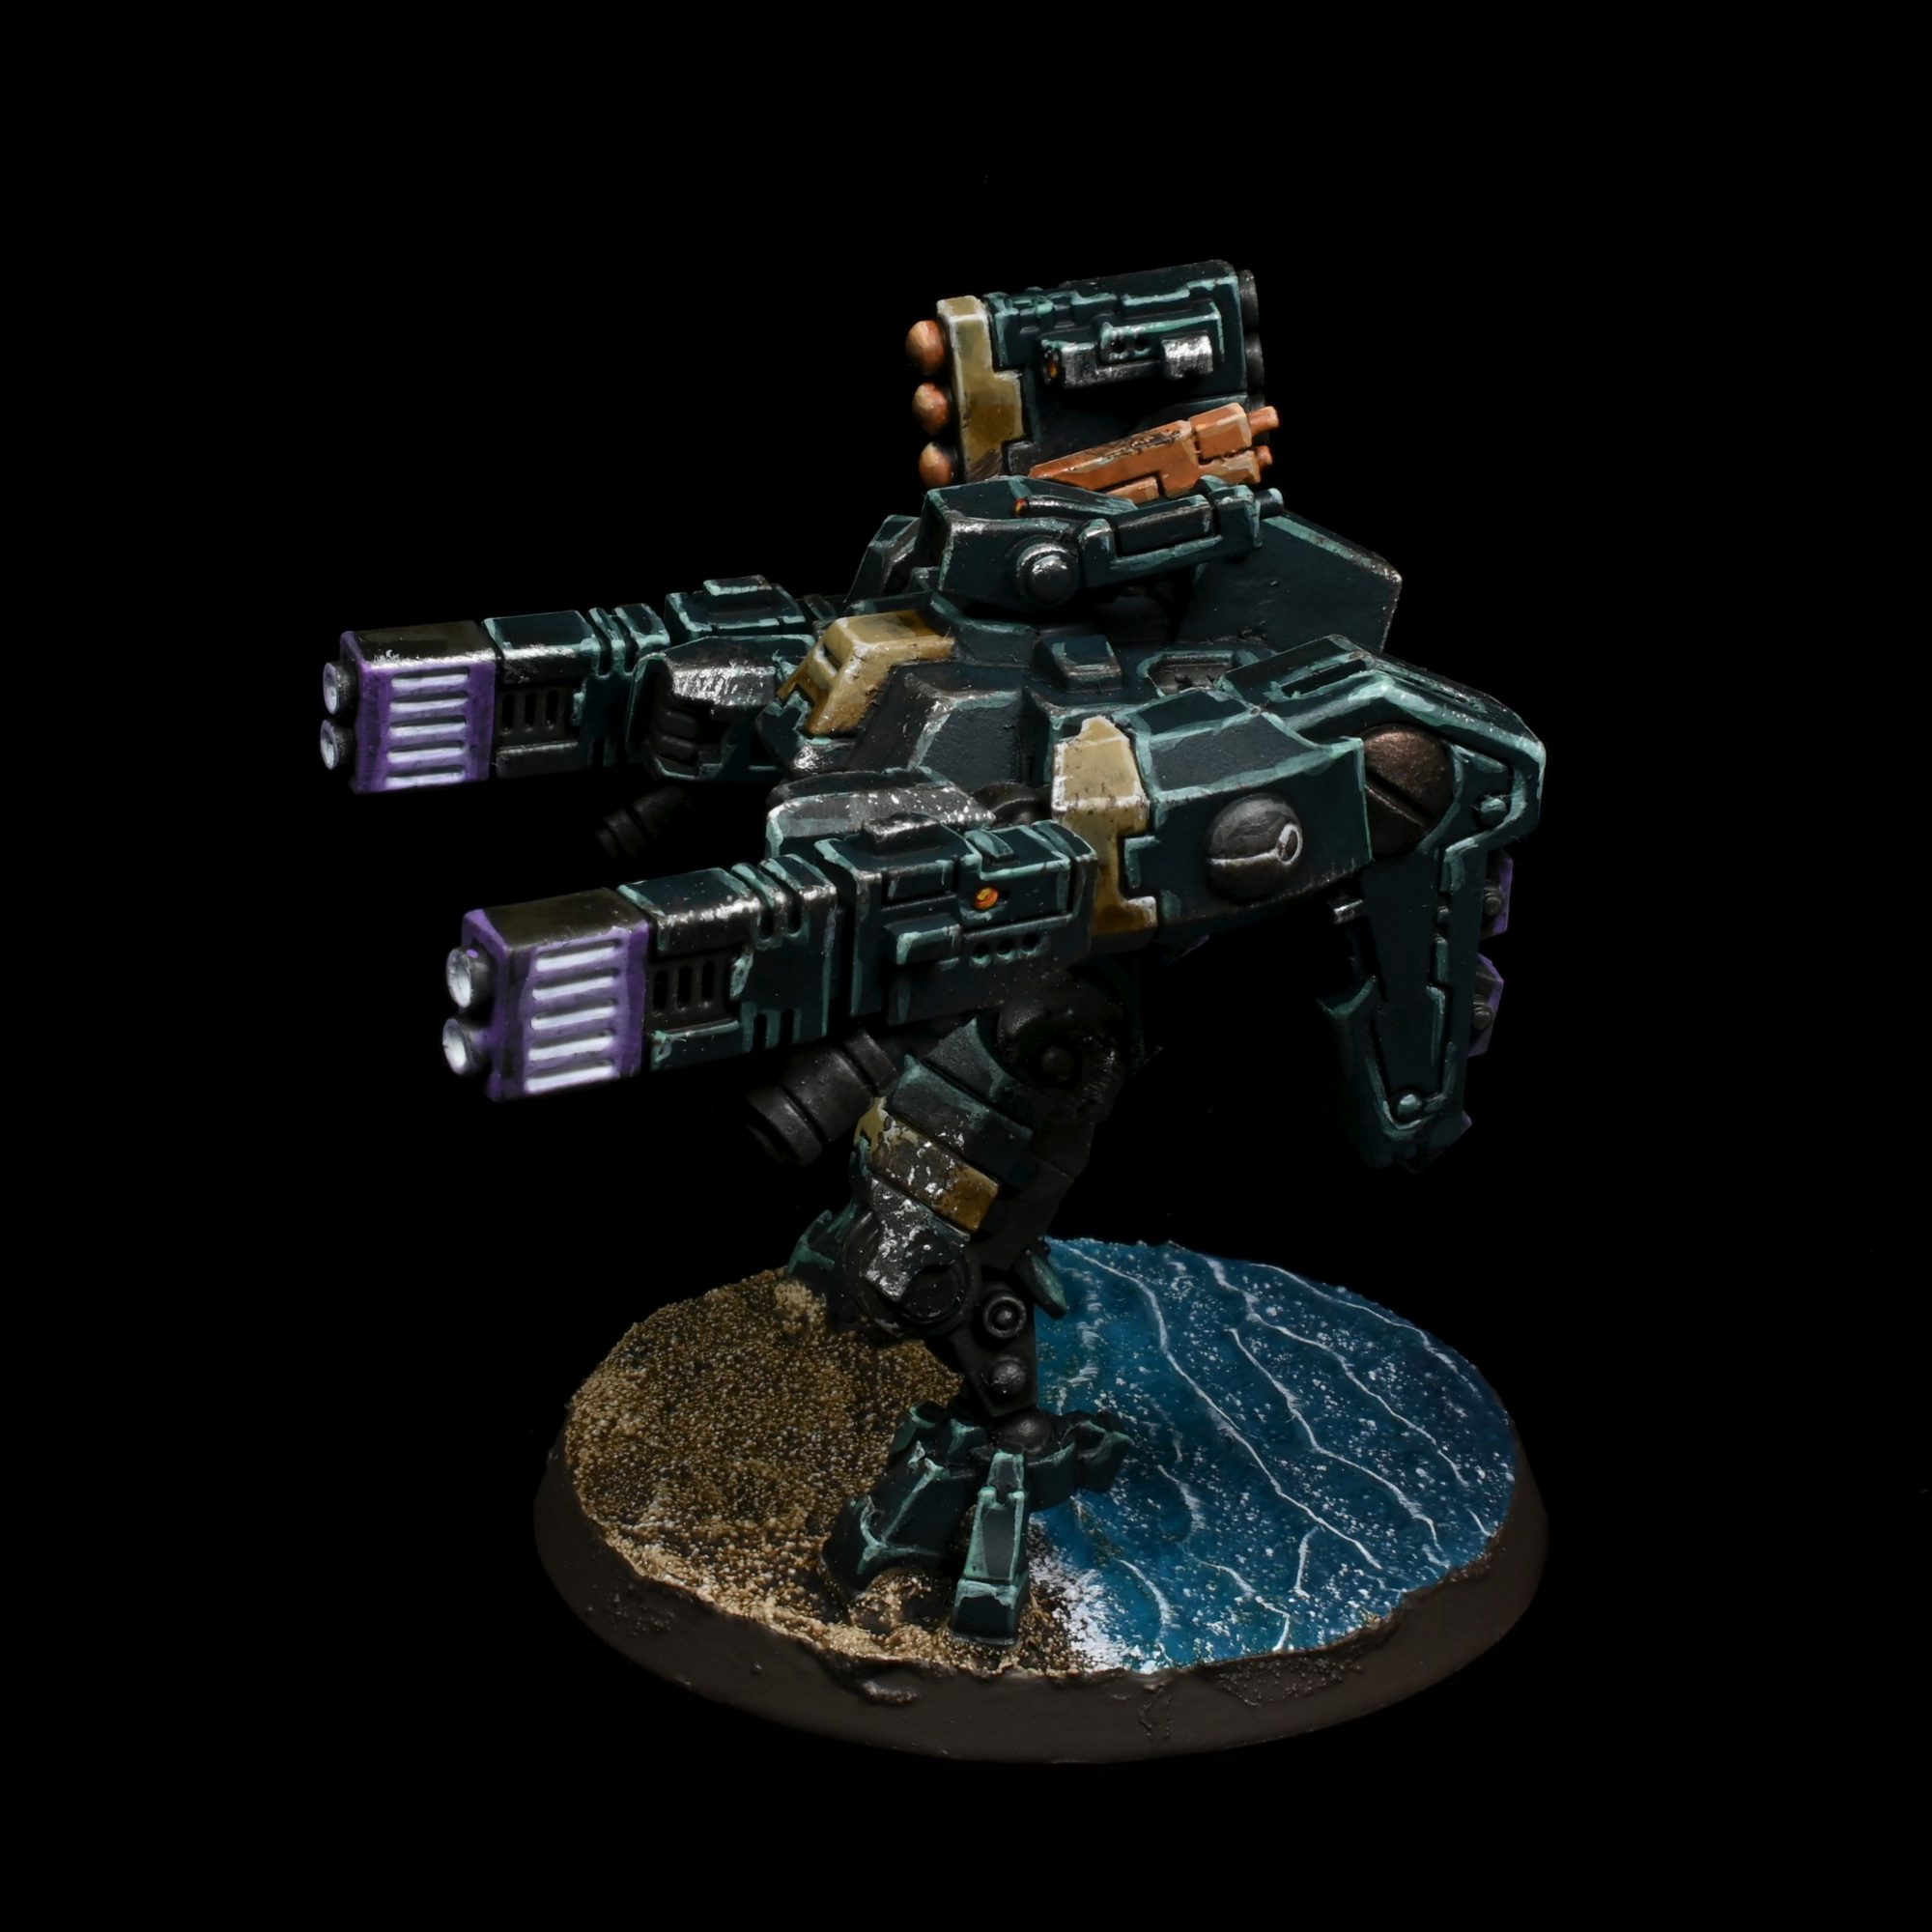
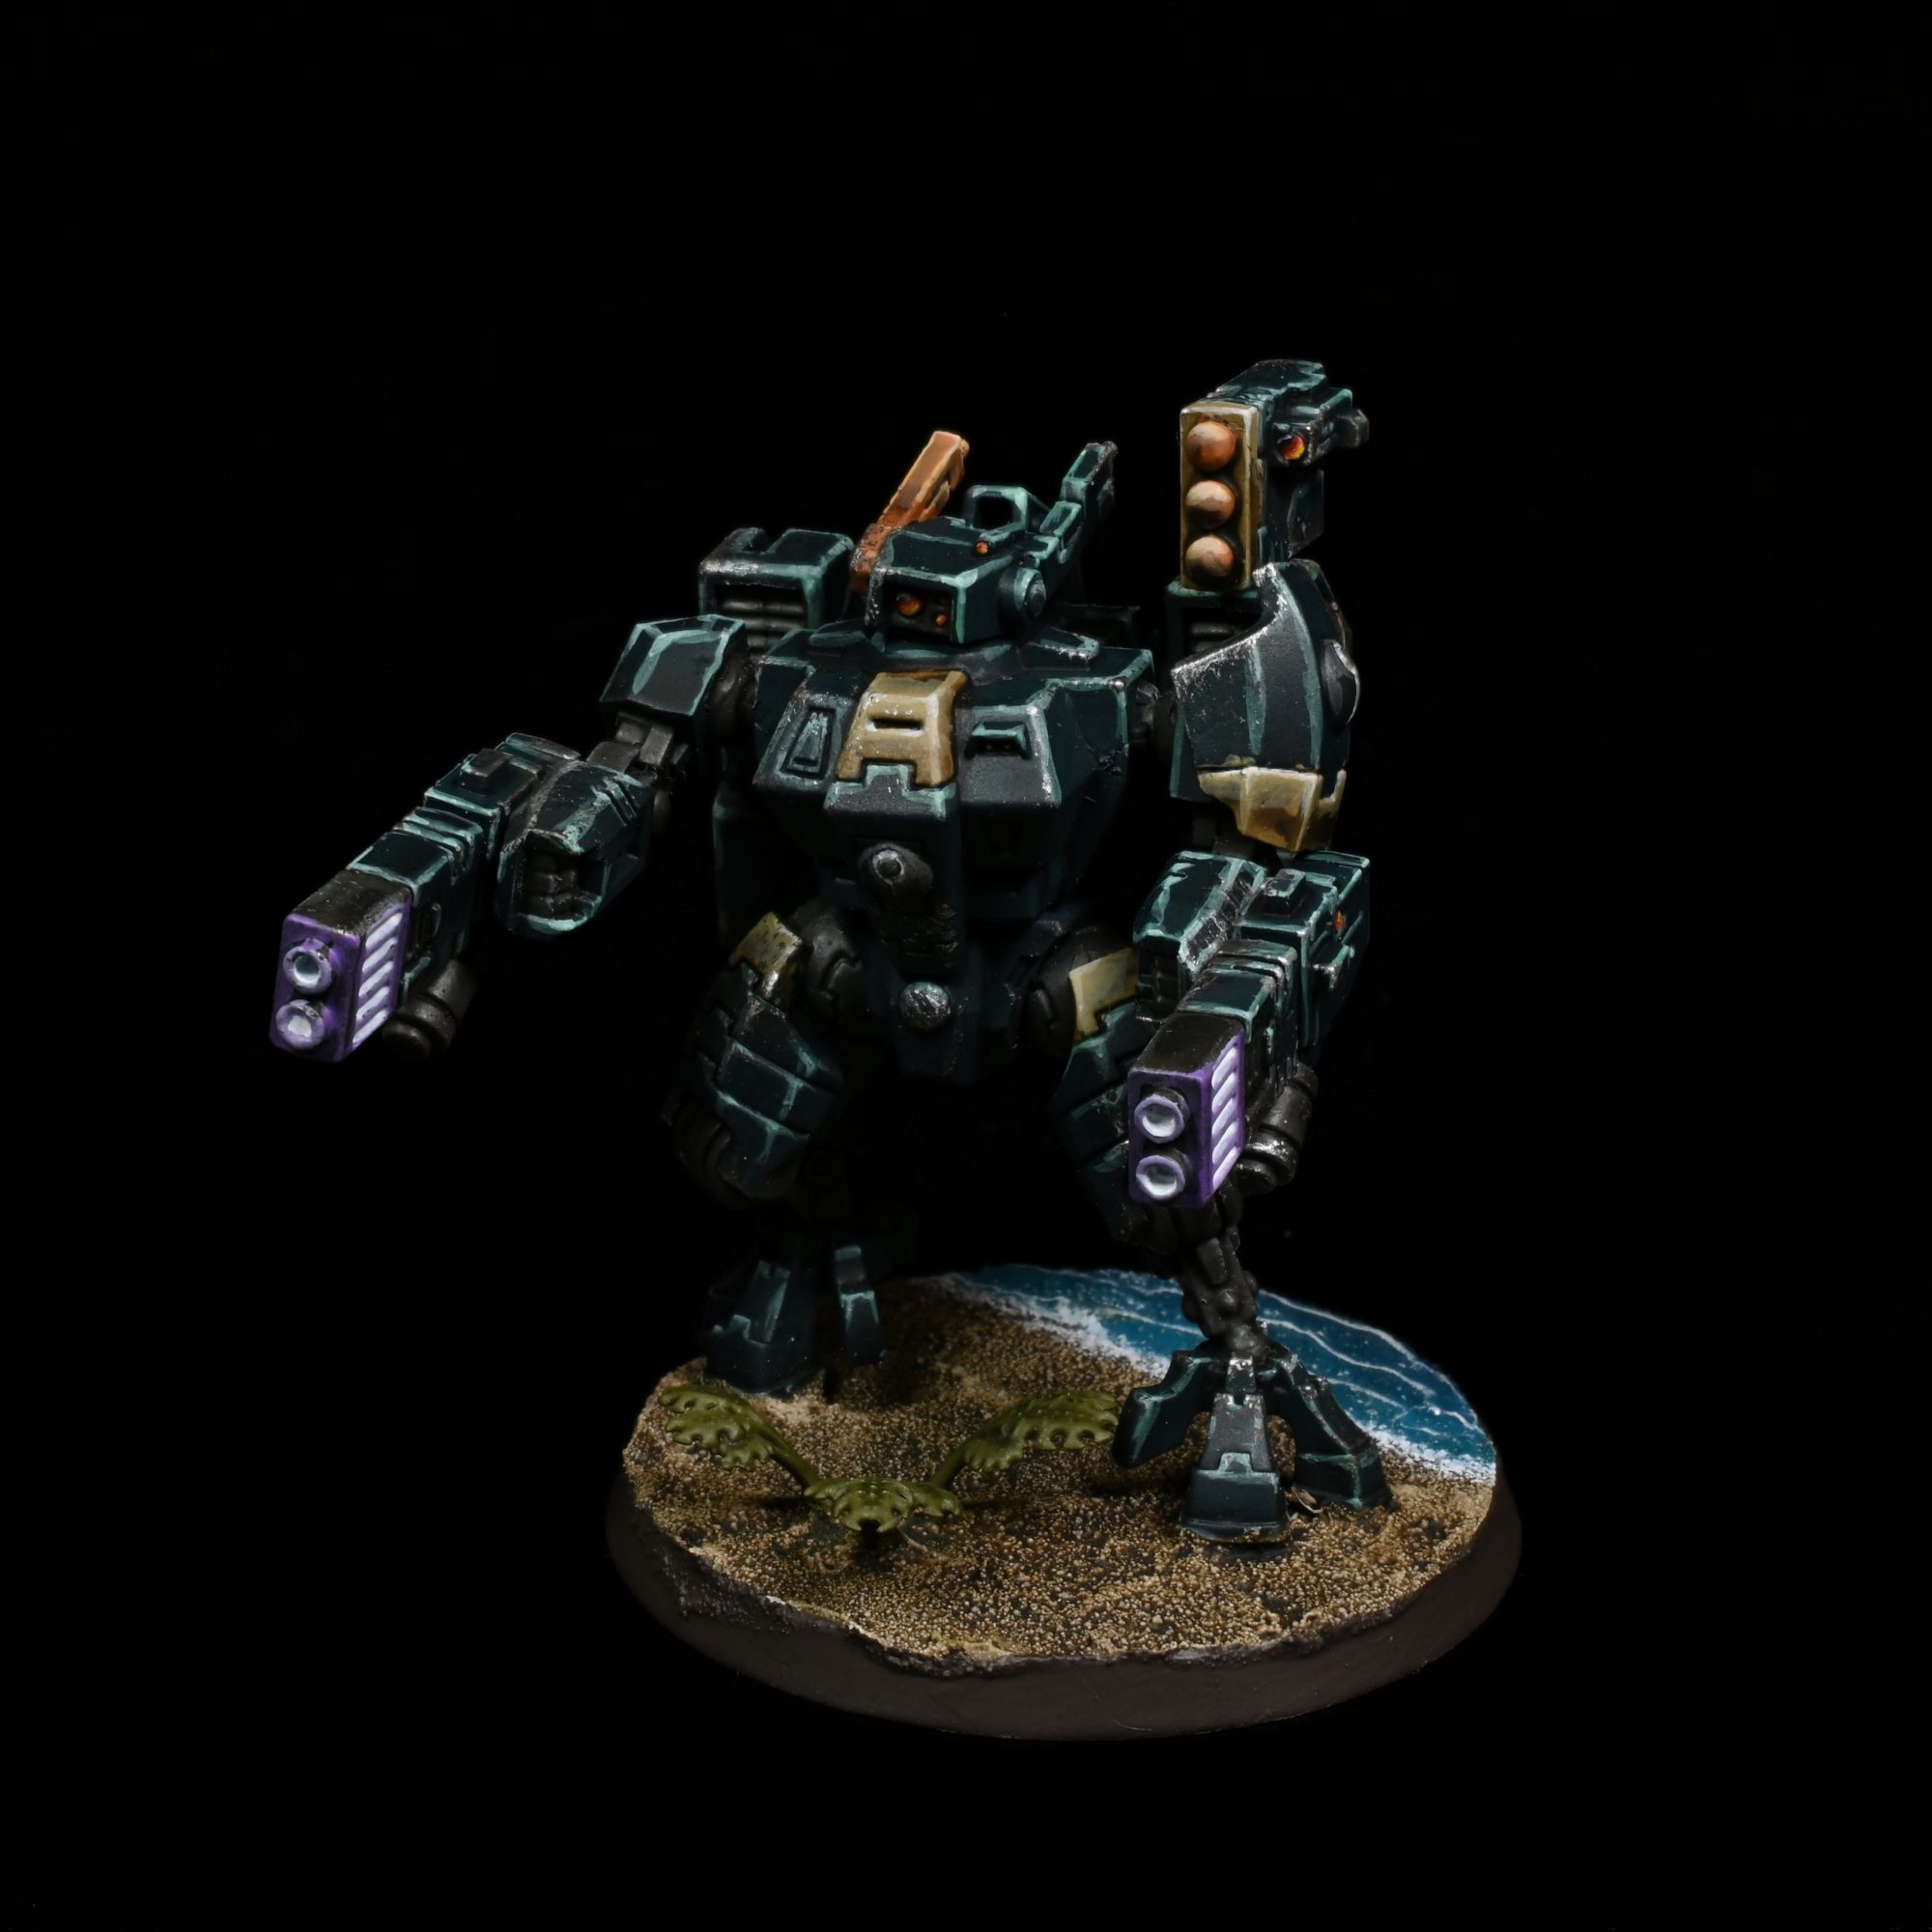
I start by airbrushing the model with Incubi Darkness and then washing it with Coelia Greenshade, after that we can pick out details starting with the Skavenblight Dinge under frame since other colours can some sometimes go over it. I don’t really follow any lore stuff with my colour placement the Ratskin/Orange sept colour mostly just goes on the ‘heads’ of fancy units, and otherwise on the right vane of normal models. I like doing borders and some random little panels in Zandri dust to add some visual interest. I do the big gear-ey looking things in Warplock and then the Tau symbols get base coated with Corvus Black and the recess pinwashed with heavily thinned Pallid Wych, after that wash the other details with a heavy dose of Agrax.
Step 2 – Highlights
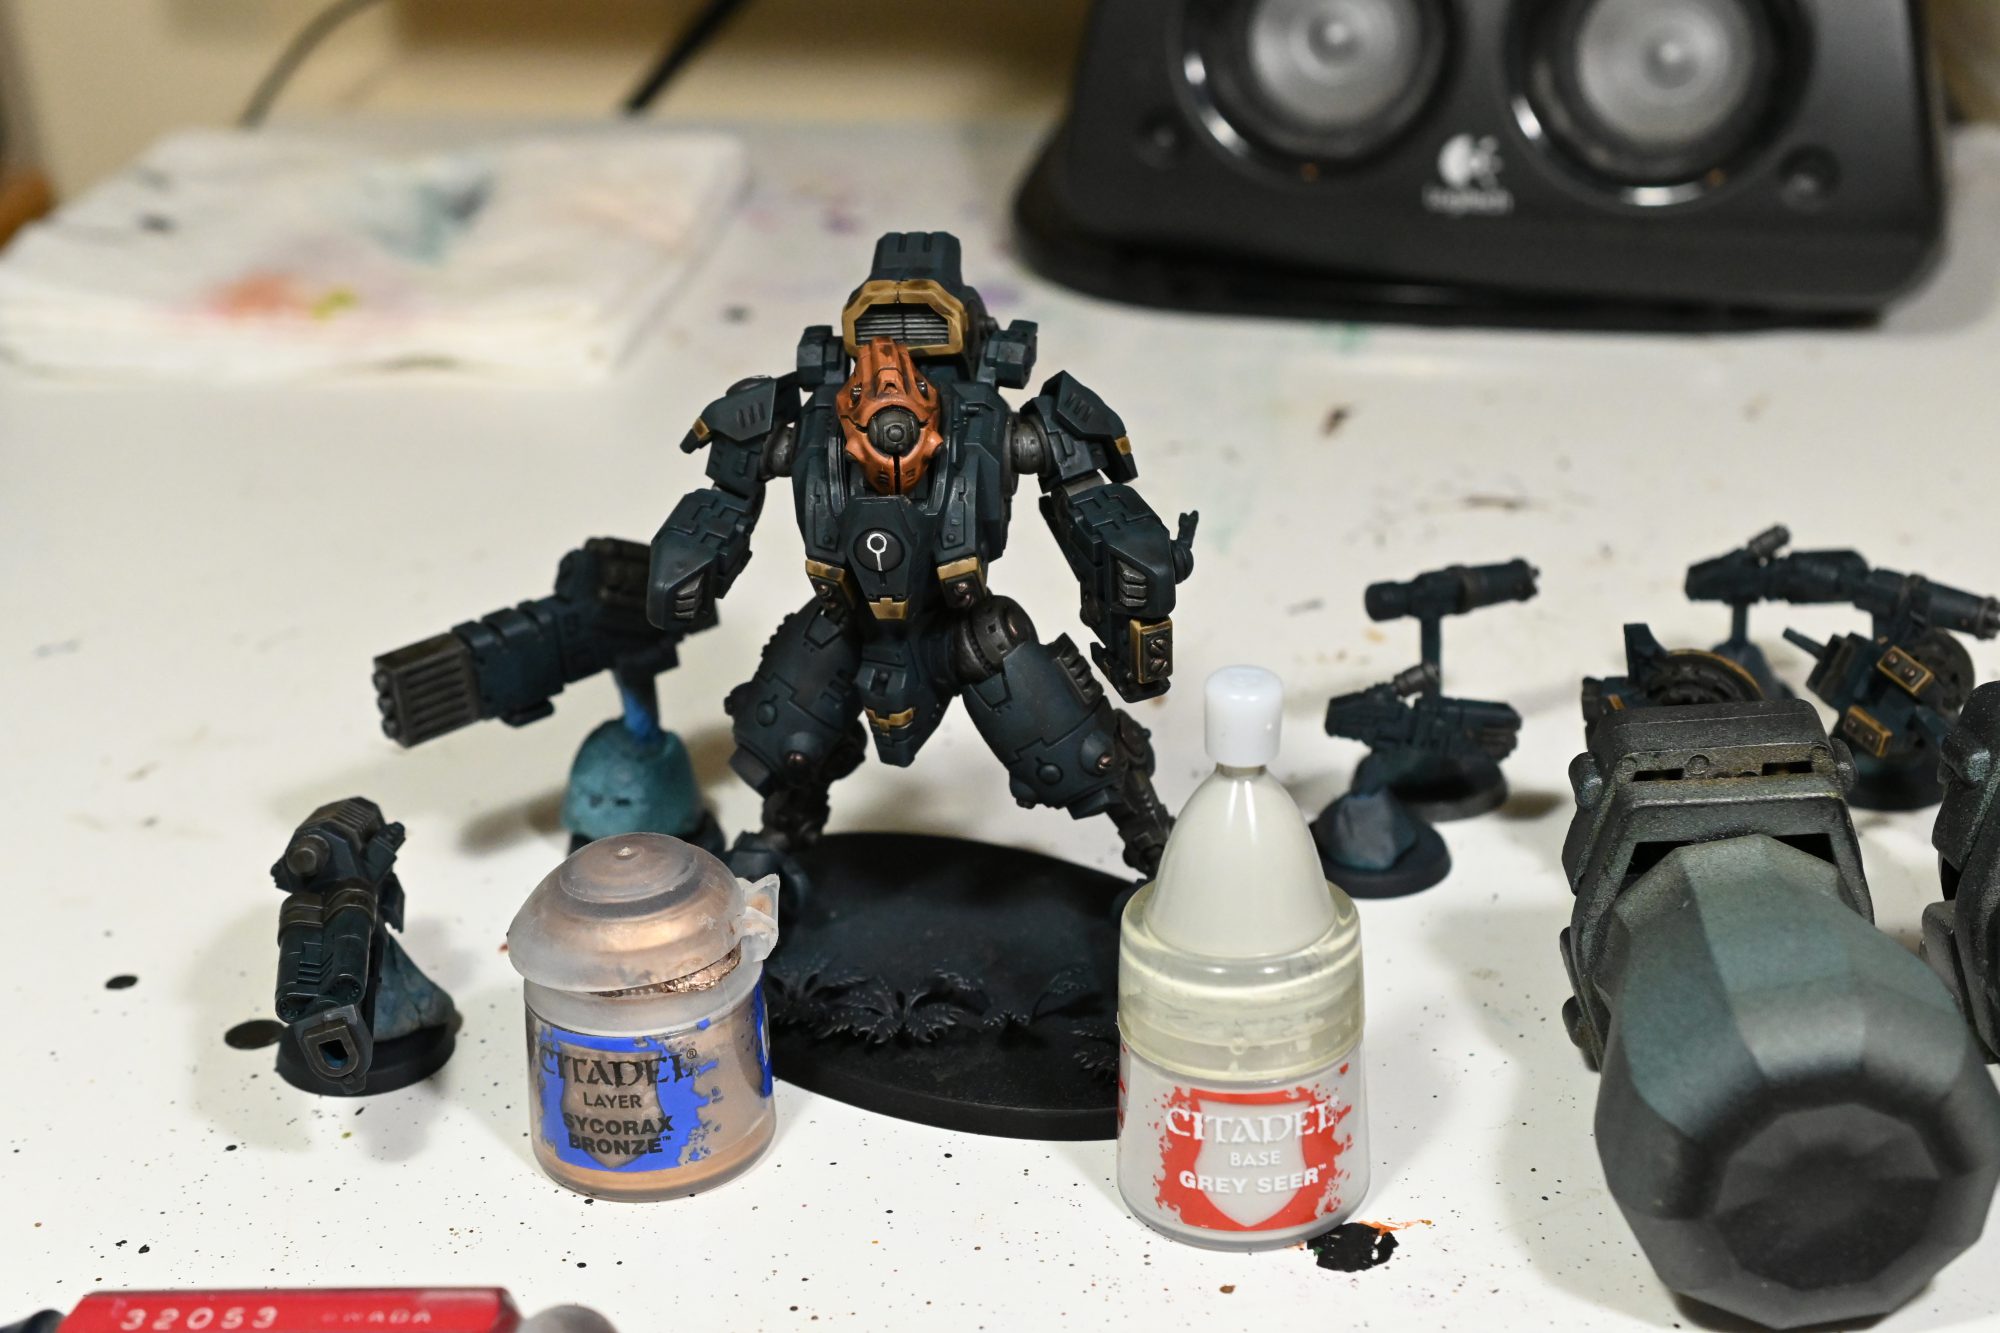
I start by drybrushing the underframe with Greyseer and the metal with Sycorax, before moving on to cleaning up the tan and orange. I like to glaze Ratskin and Zandri back onto their respective materials to give them a smooth area highlight, you could in theory do something like that for the main green but it would take a while and the wash does a lot towards giving it a specific colour so it might take a bit to find a suitable colour for it.
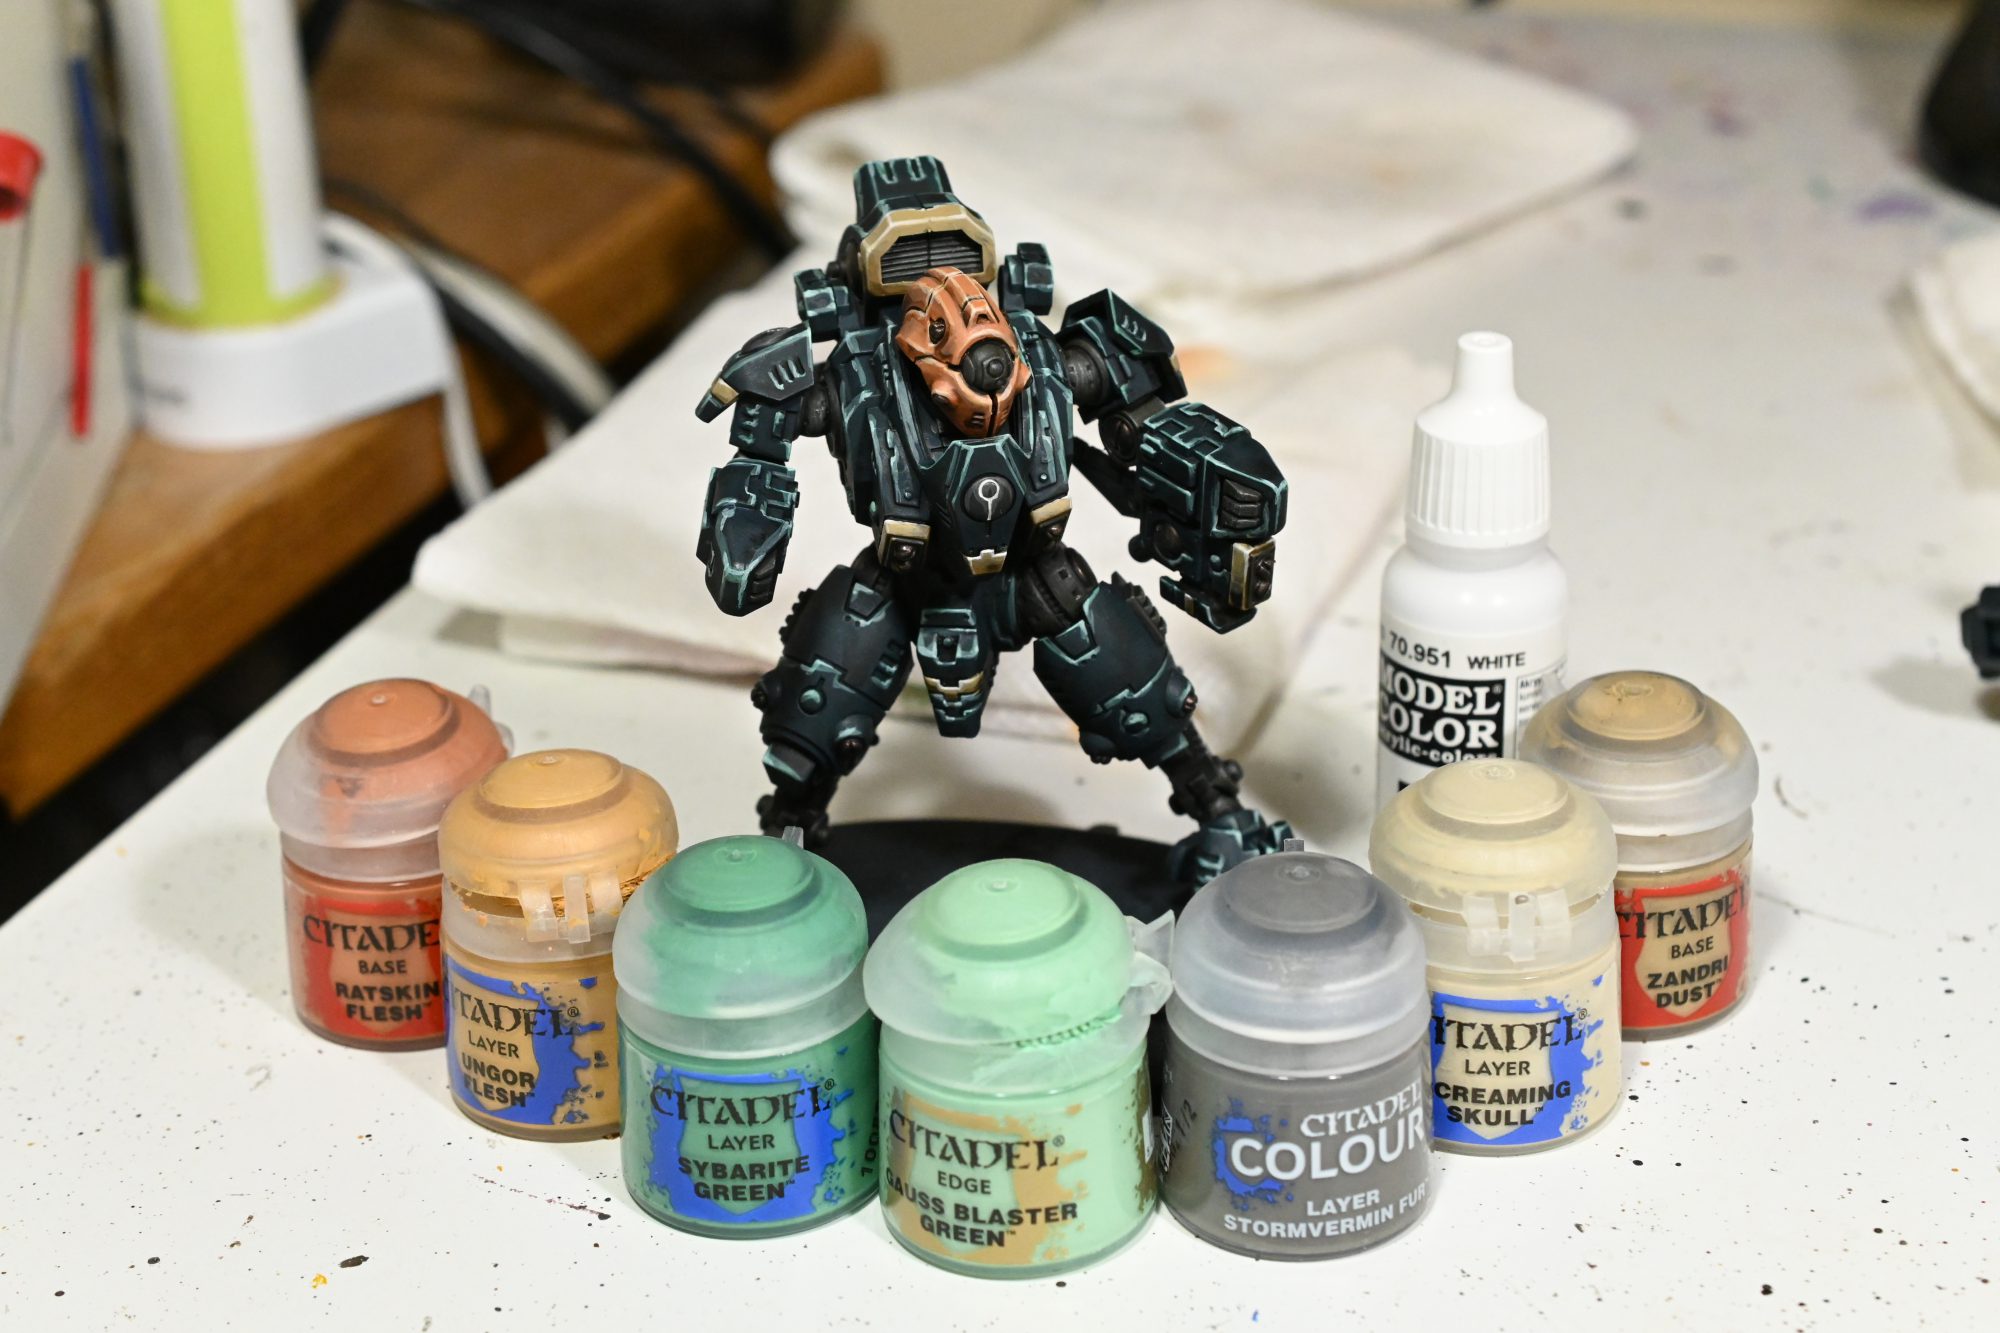
The edge highlights are mostly straight forward, I do Ratskin, Ungor and Screaming Skull on the orange, the tan is Zandri, Screaming Skull and White, and the green is just Sybarite and Gauss Blaster. I like to do a bit of a highlight on the tau sybols with Stormvermin too.
You may note that I basically only do zenithal highlights, even with the drybrushing, that’s mostly because I find it looks far more impactful and even more importantly it halves the time in this step. For a model like this, it probably takes me like a hour and a half to do the highlights instead of like 3 hours to edge highlight everything.
Step 3 – Battle Damage
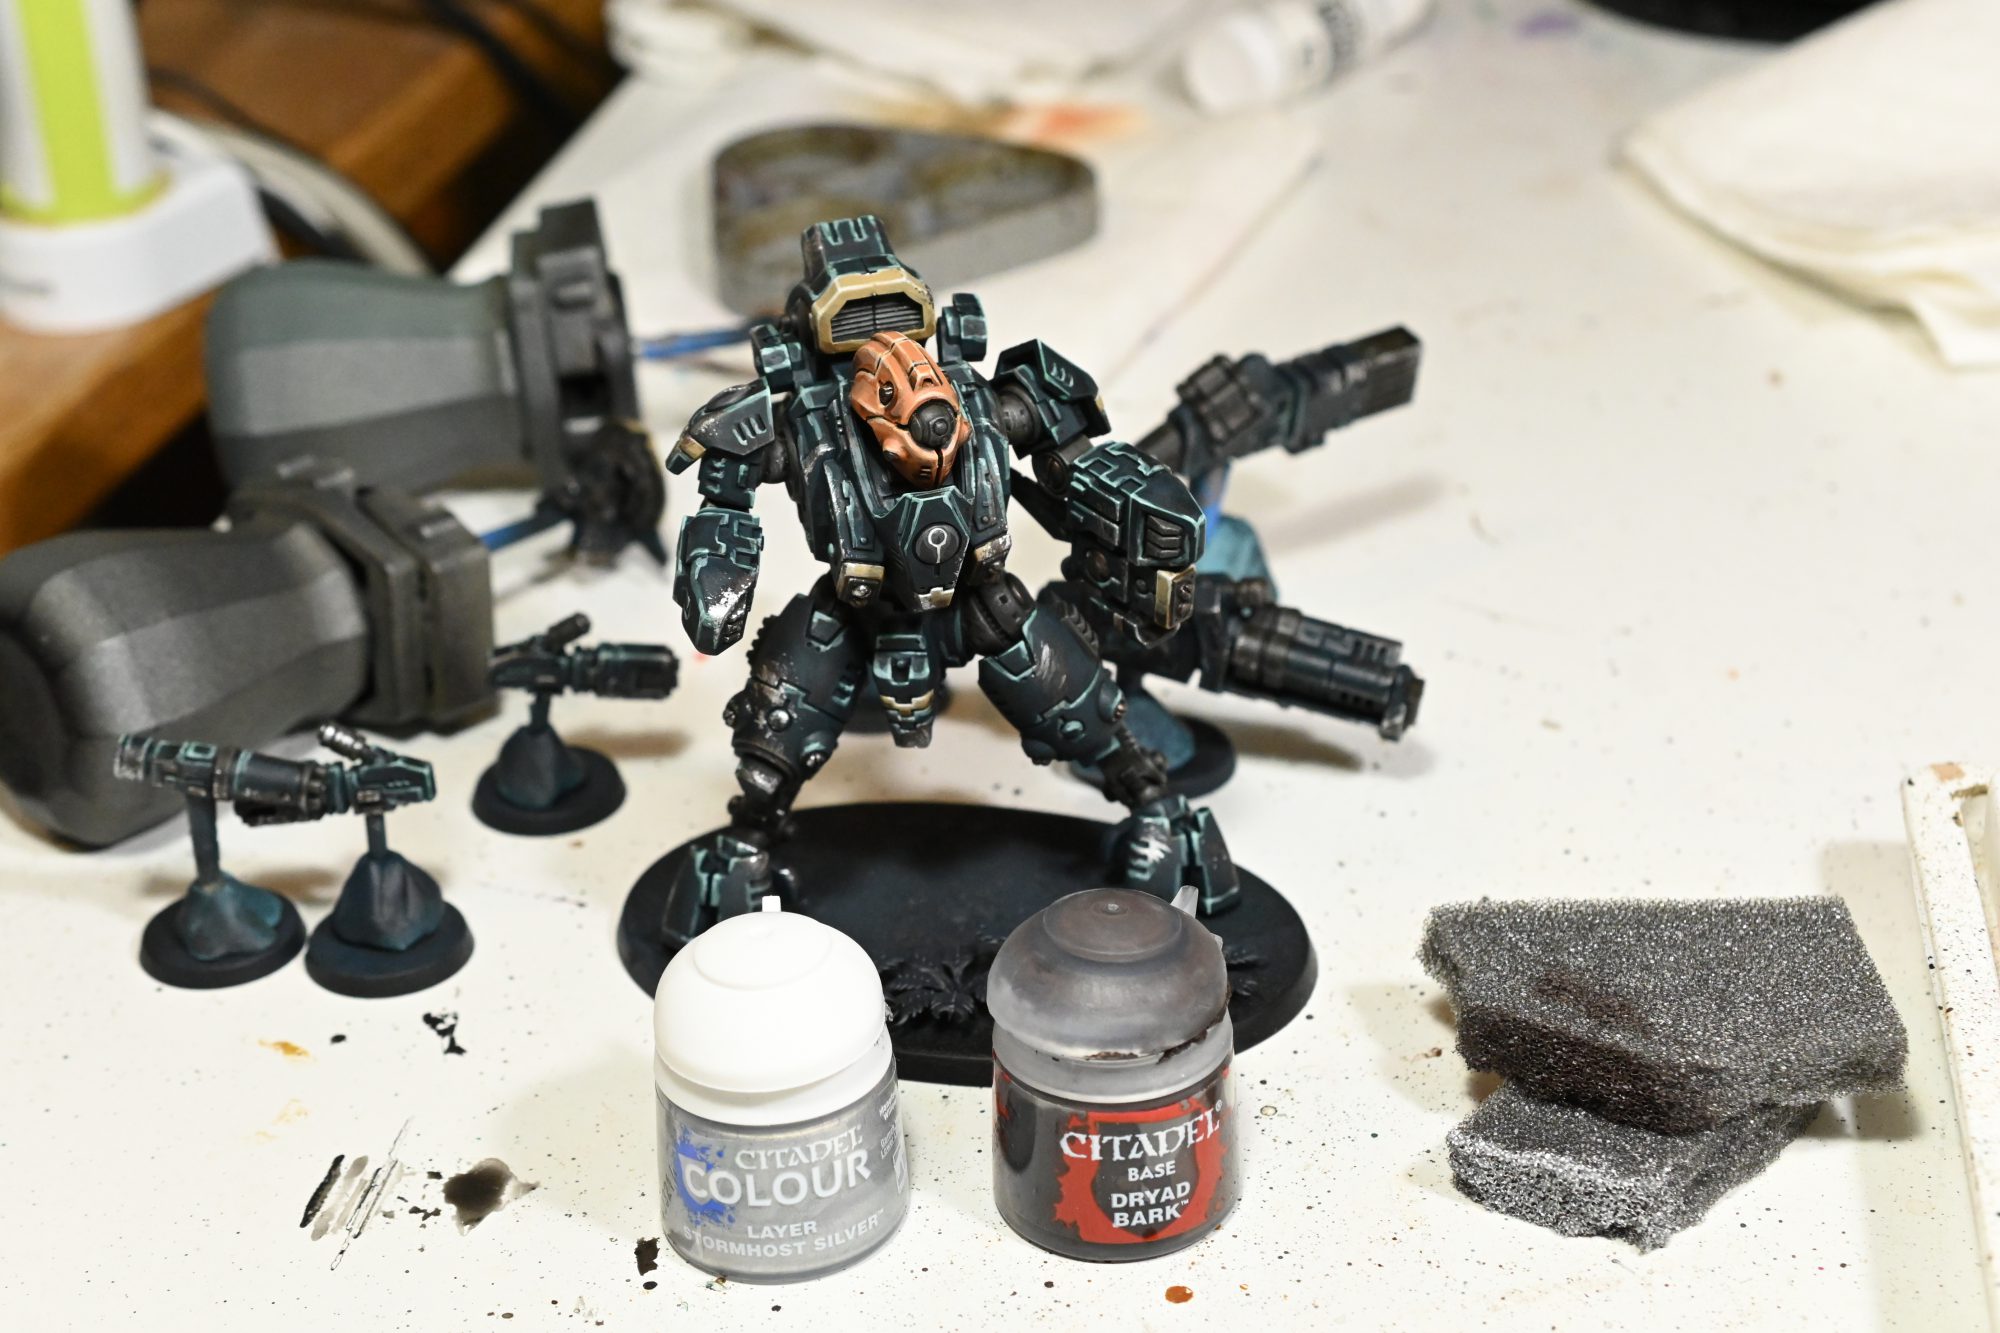
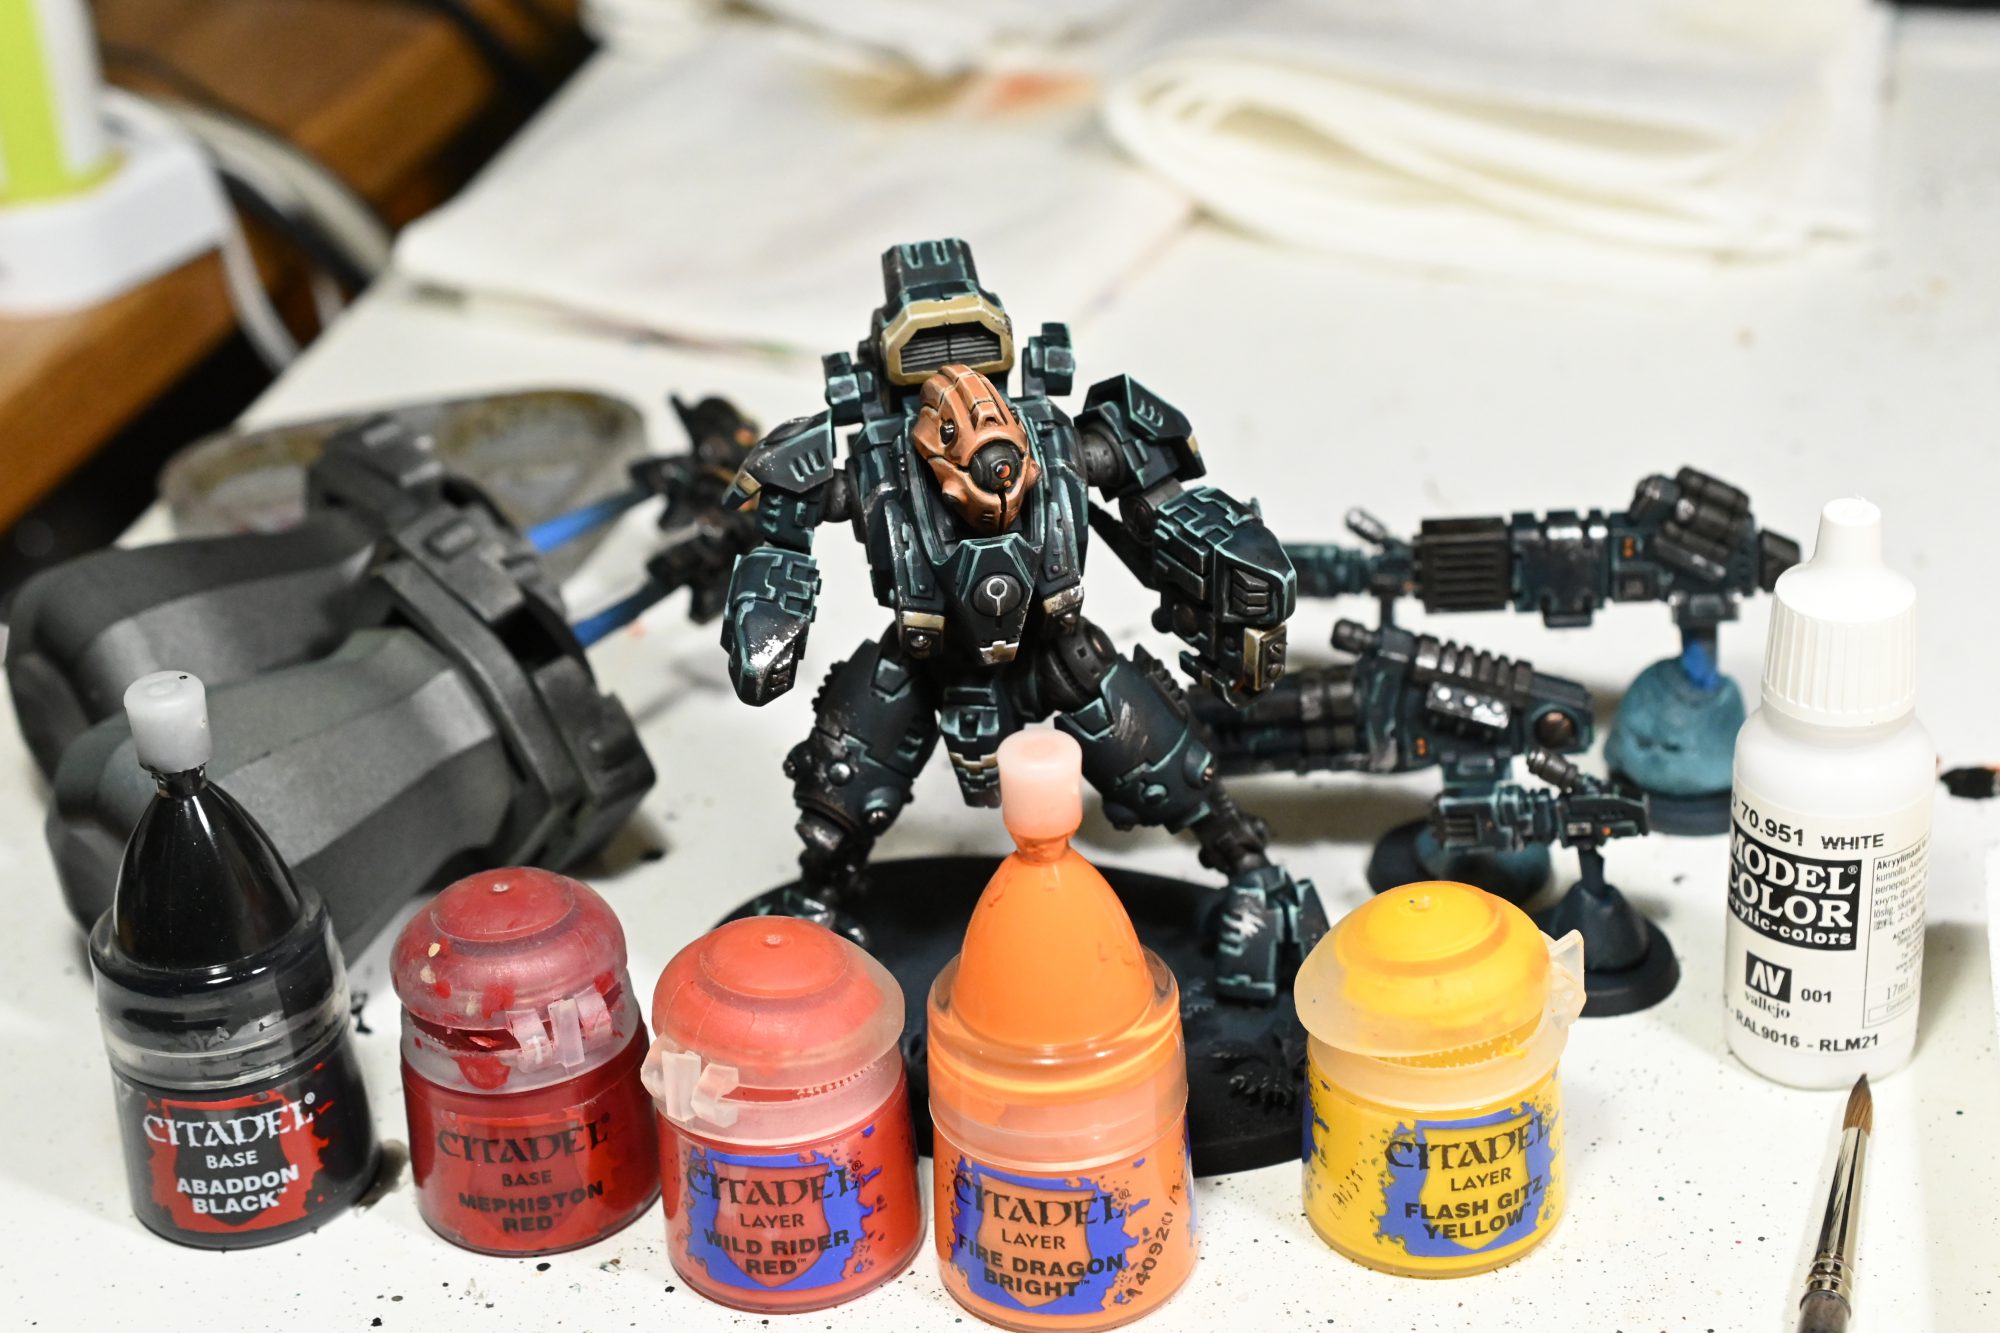
This might be the step where there is both the most options as to approach and potential controversy. The biggest thing is that you will be sad about covering up edge highlights with this, I have found it ends up taking longer to do the highlights after damage as its tricky to avoid covering the damage and get appropriate highlights. I am also doing this before the final varnish which will dull the stormhost a bit, you could potentially varnish before that as that will protect most of the model and you could just hand varnish the lenses and glow later on. I am lazy however, so I just accept the dulling of the shine.
I use bits of sponge to apply the damage, you can actually get a bunch of different looks with them as you can vary how much paint you are using, dabbing versus dragging and the size of the contact area. I like to reuse the sponge by pulling off the dry paint and then using scissors to get it vaguely flat again, as this produces less predictable patterns then a smooth cut with the scissors only.
Step 4 – Lenses and Glow
The lenses are just a very basic Gem Effect, I don’t really bother with glazing or mixing as most of the tau lenses are small enough that the transitions in colour aren’t too jarring. I start with base coating the whole lense Abaddon Black, then work my way up through Mephiston, Wildrider, Fire Dragon and finally Flash Gitz, before finishing them with a reflection of white. There is a variation I do on this for the glowing screens and little lights scattered around the model where I drop the black and whit, essentially just basing with Mephiston and also using Flash Gitz for the ‘reflection’.
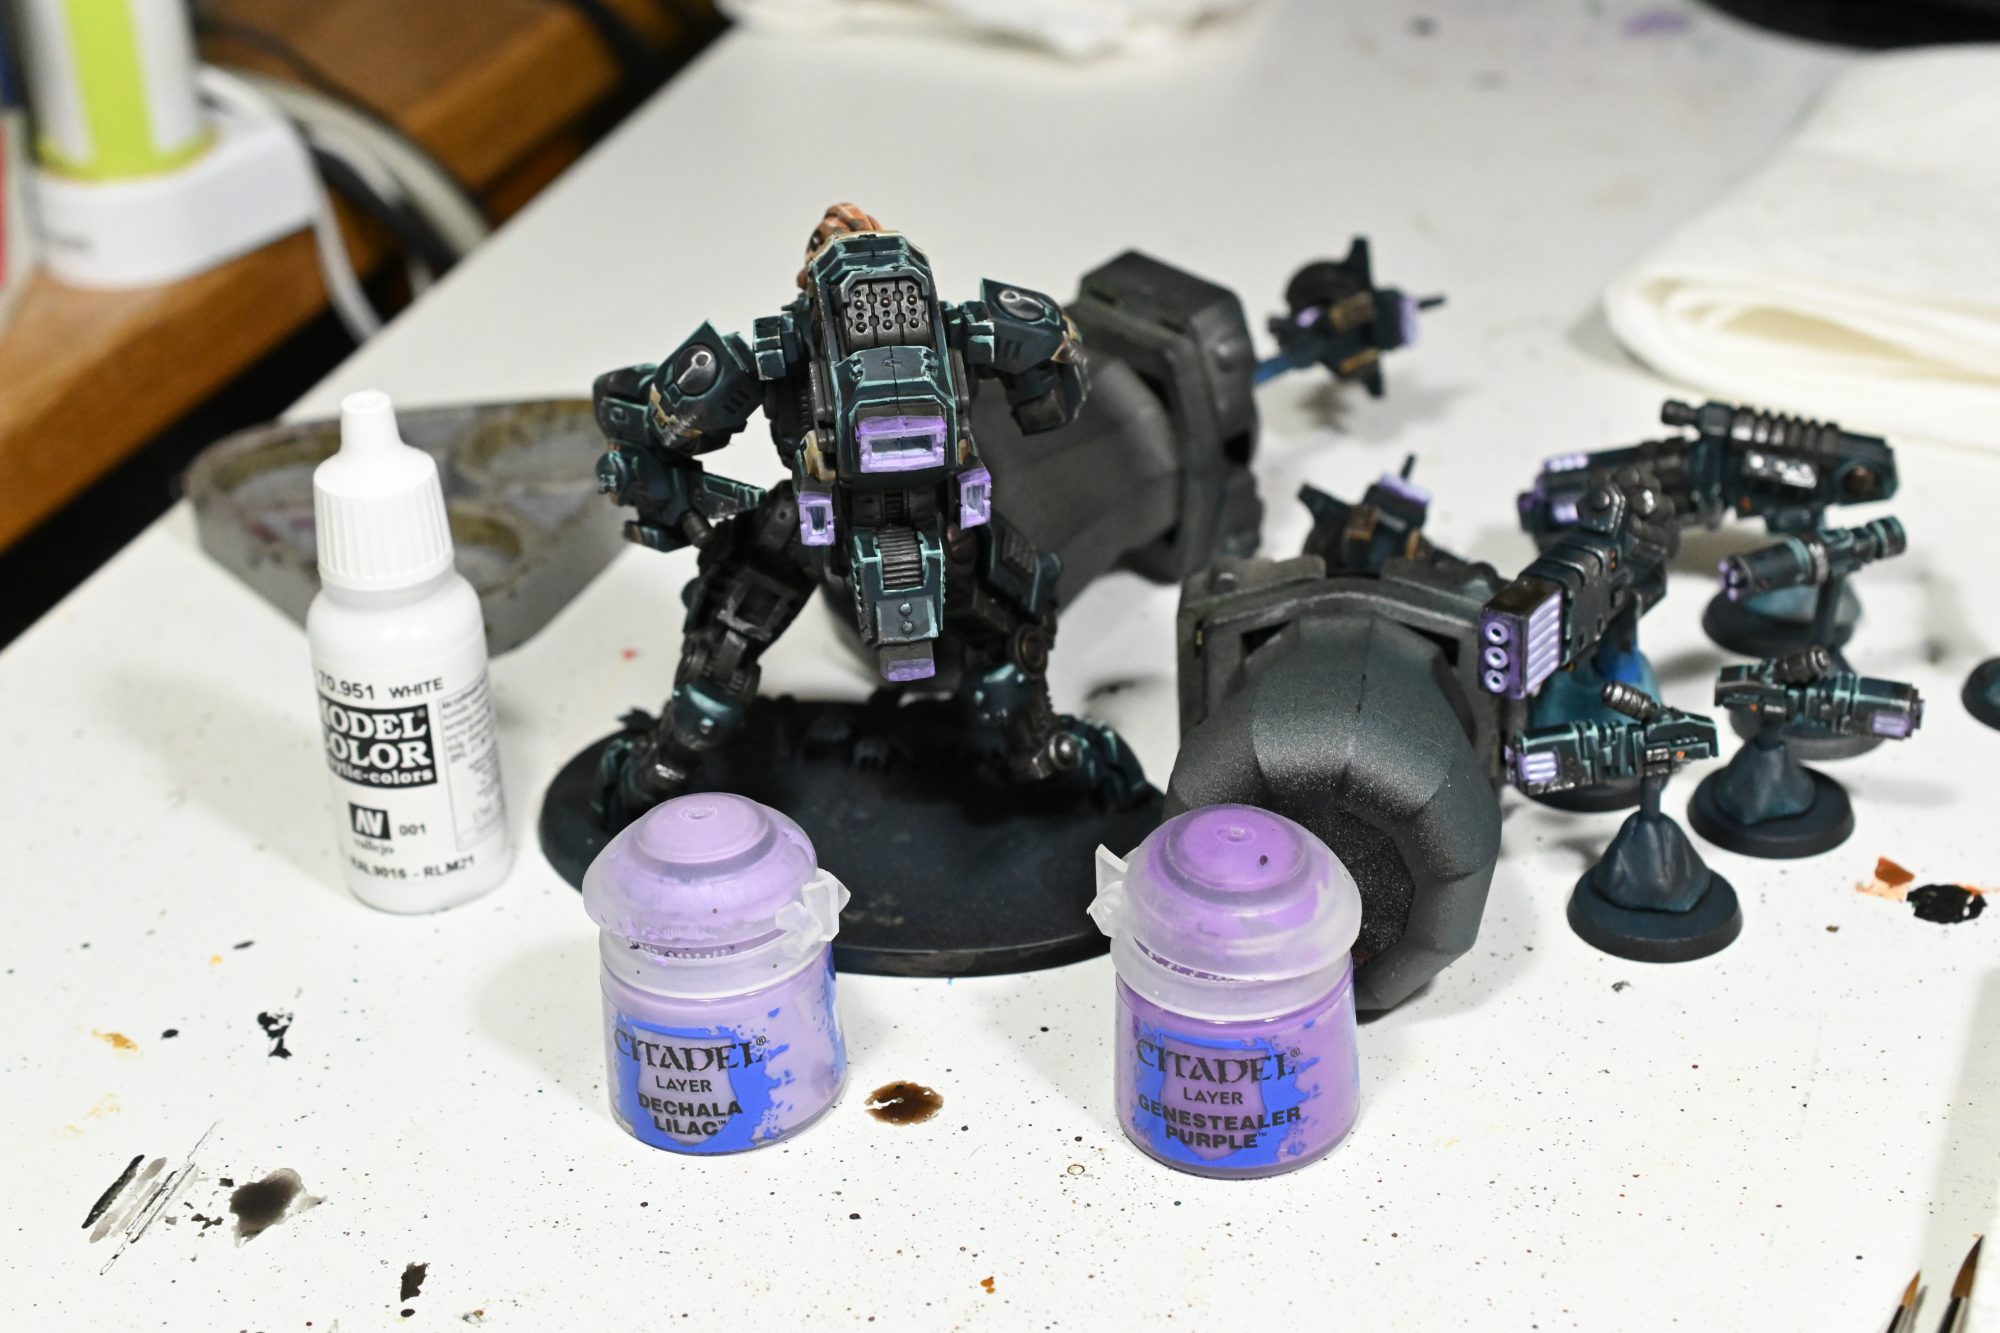
The glow I did is honestly the crudest part of the whole scheme, but tau have a absolute ton of it going on and anything more complex drives me insane. I do the colours in a slightly odd order, I start by covering the surrounding/illuminated surfaces in a fairly thin coat of genestealer purple, after that I water down the white a moderate amount and fill in the sources of illumination before going between the two colours with a band of Dechala. This helps hide mistakes with the purple or white and minimizes having to be precise with any given colour.
Bonus Step – Skin
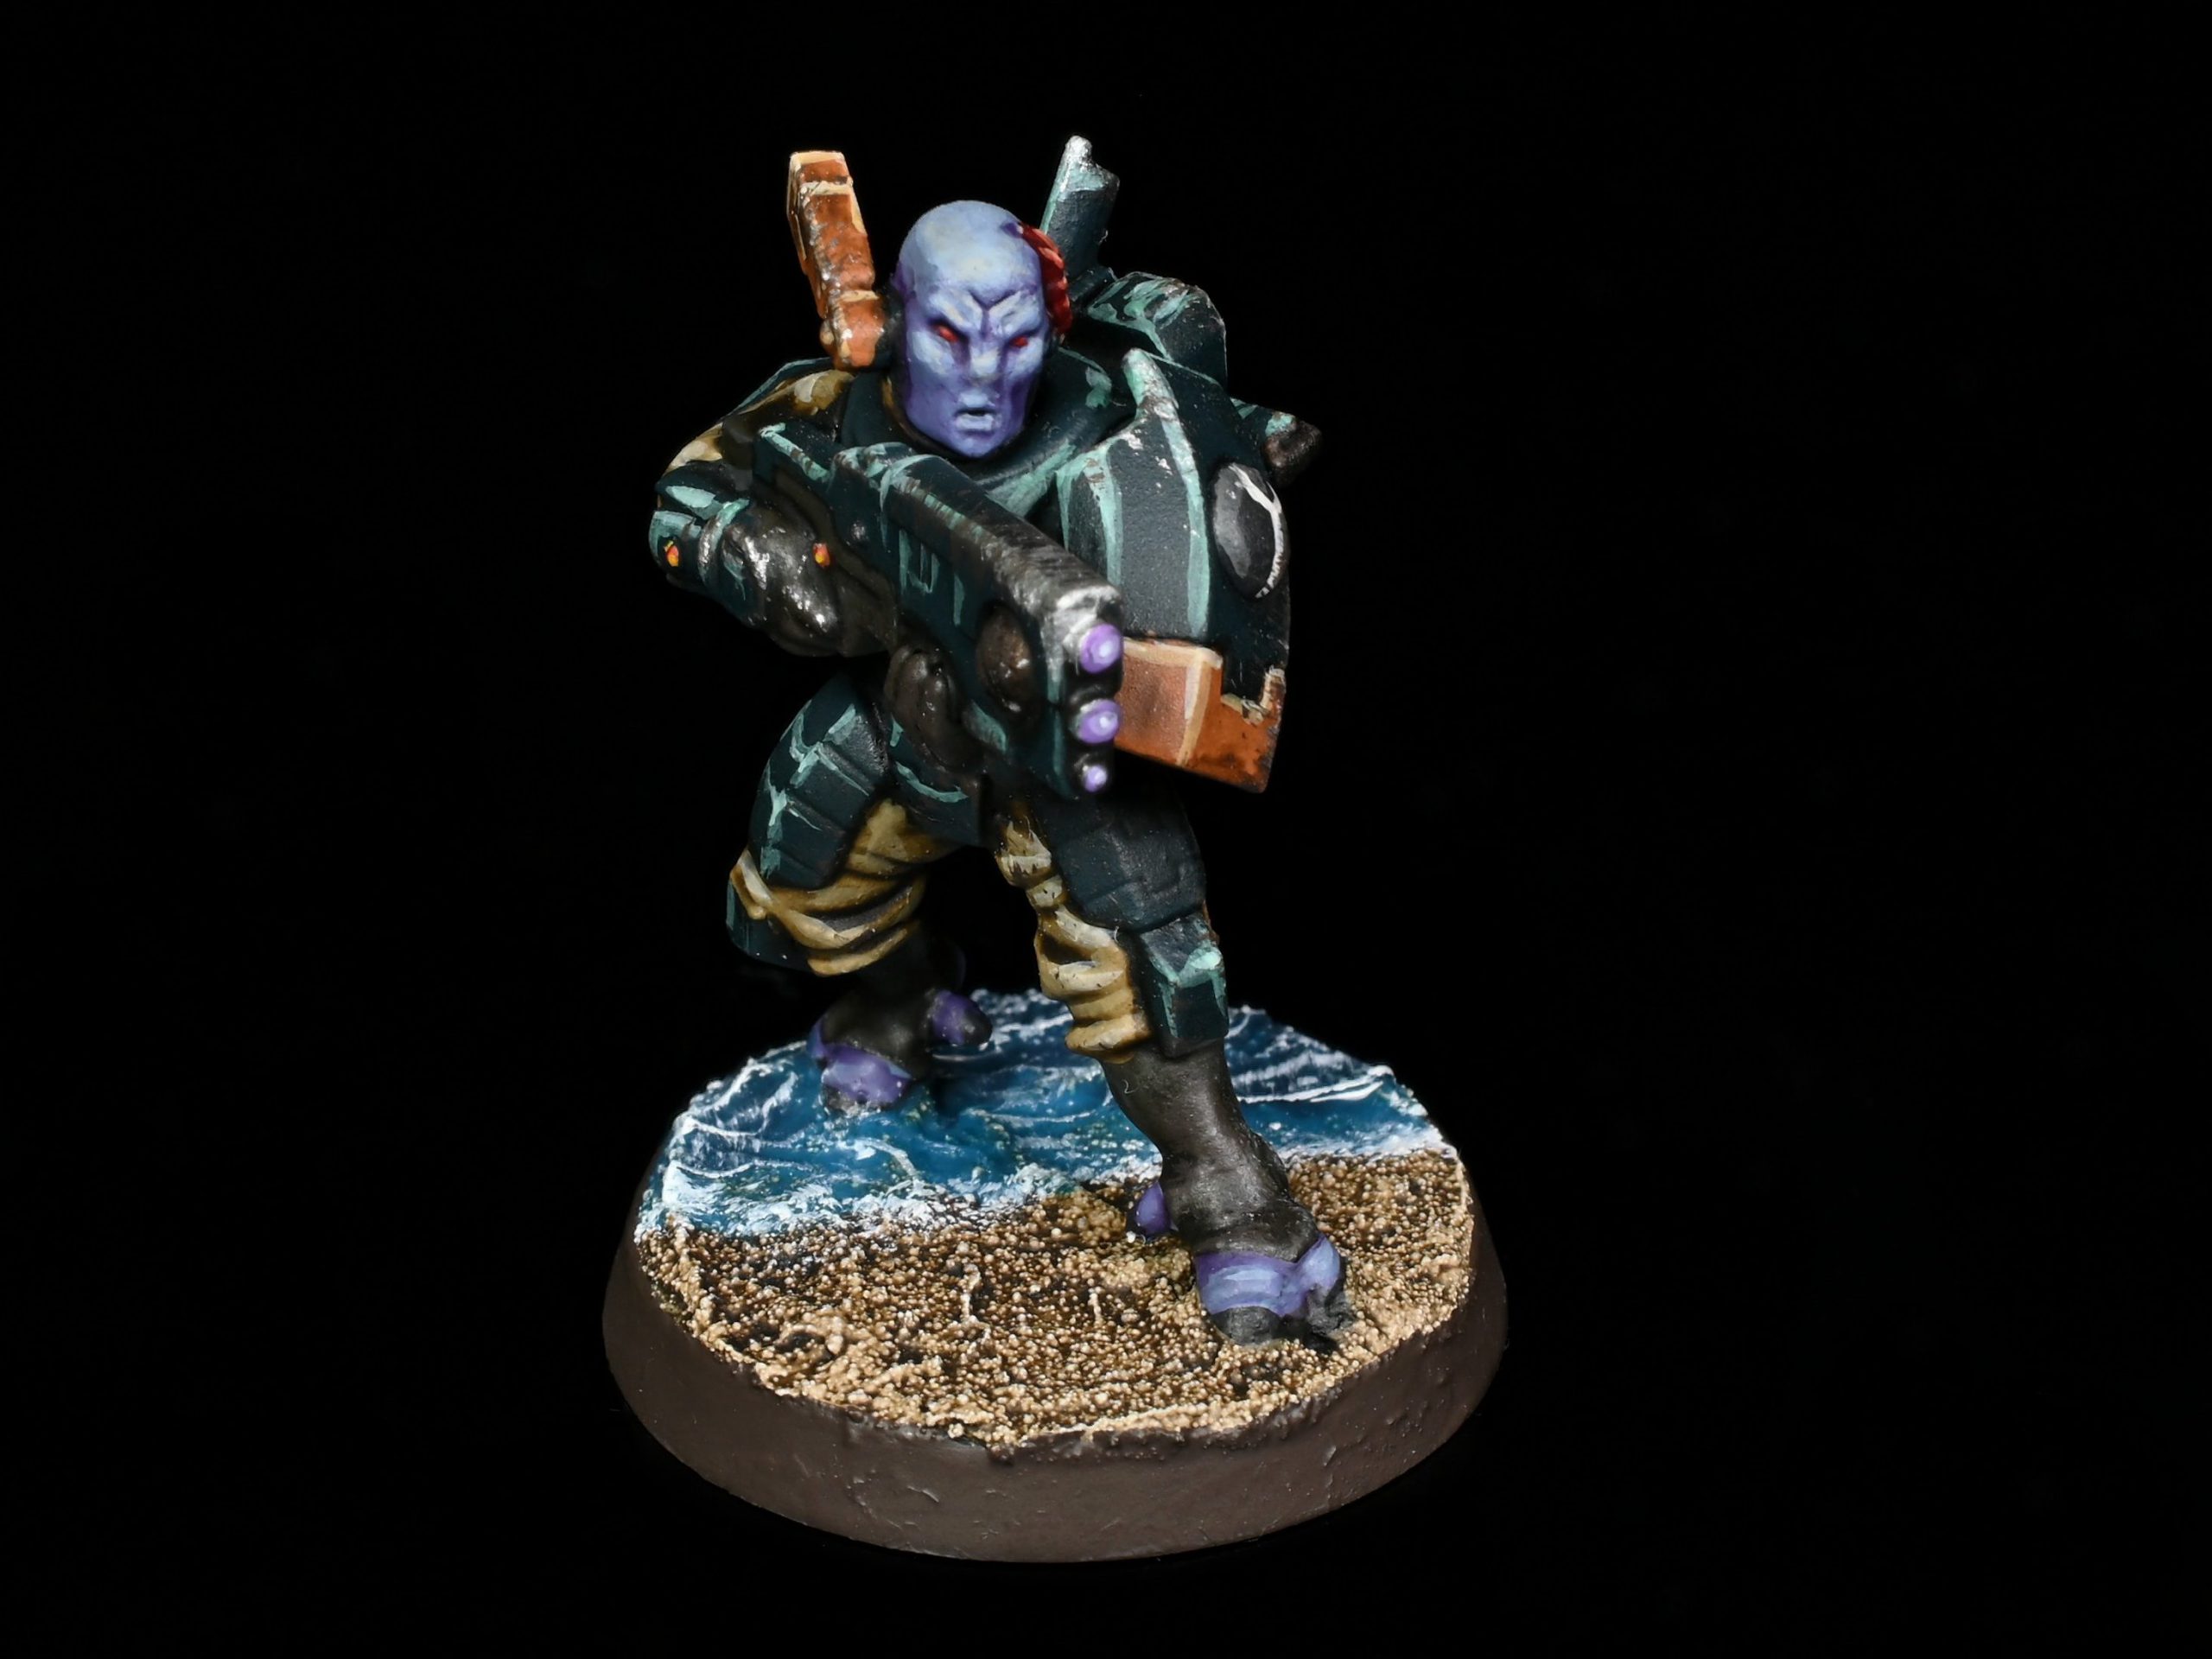
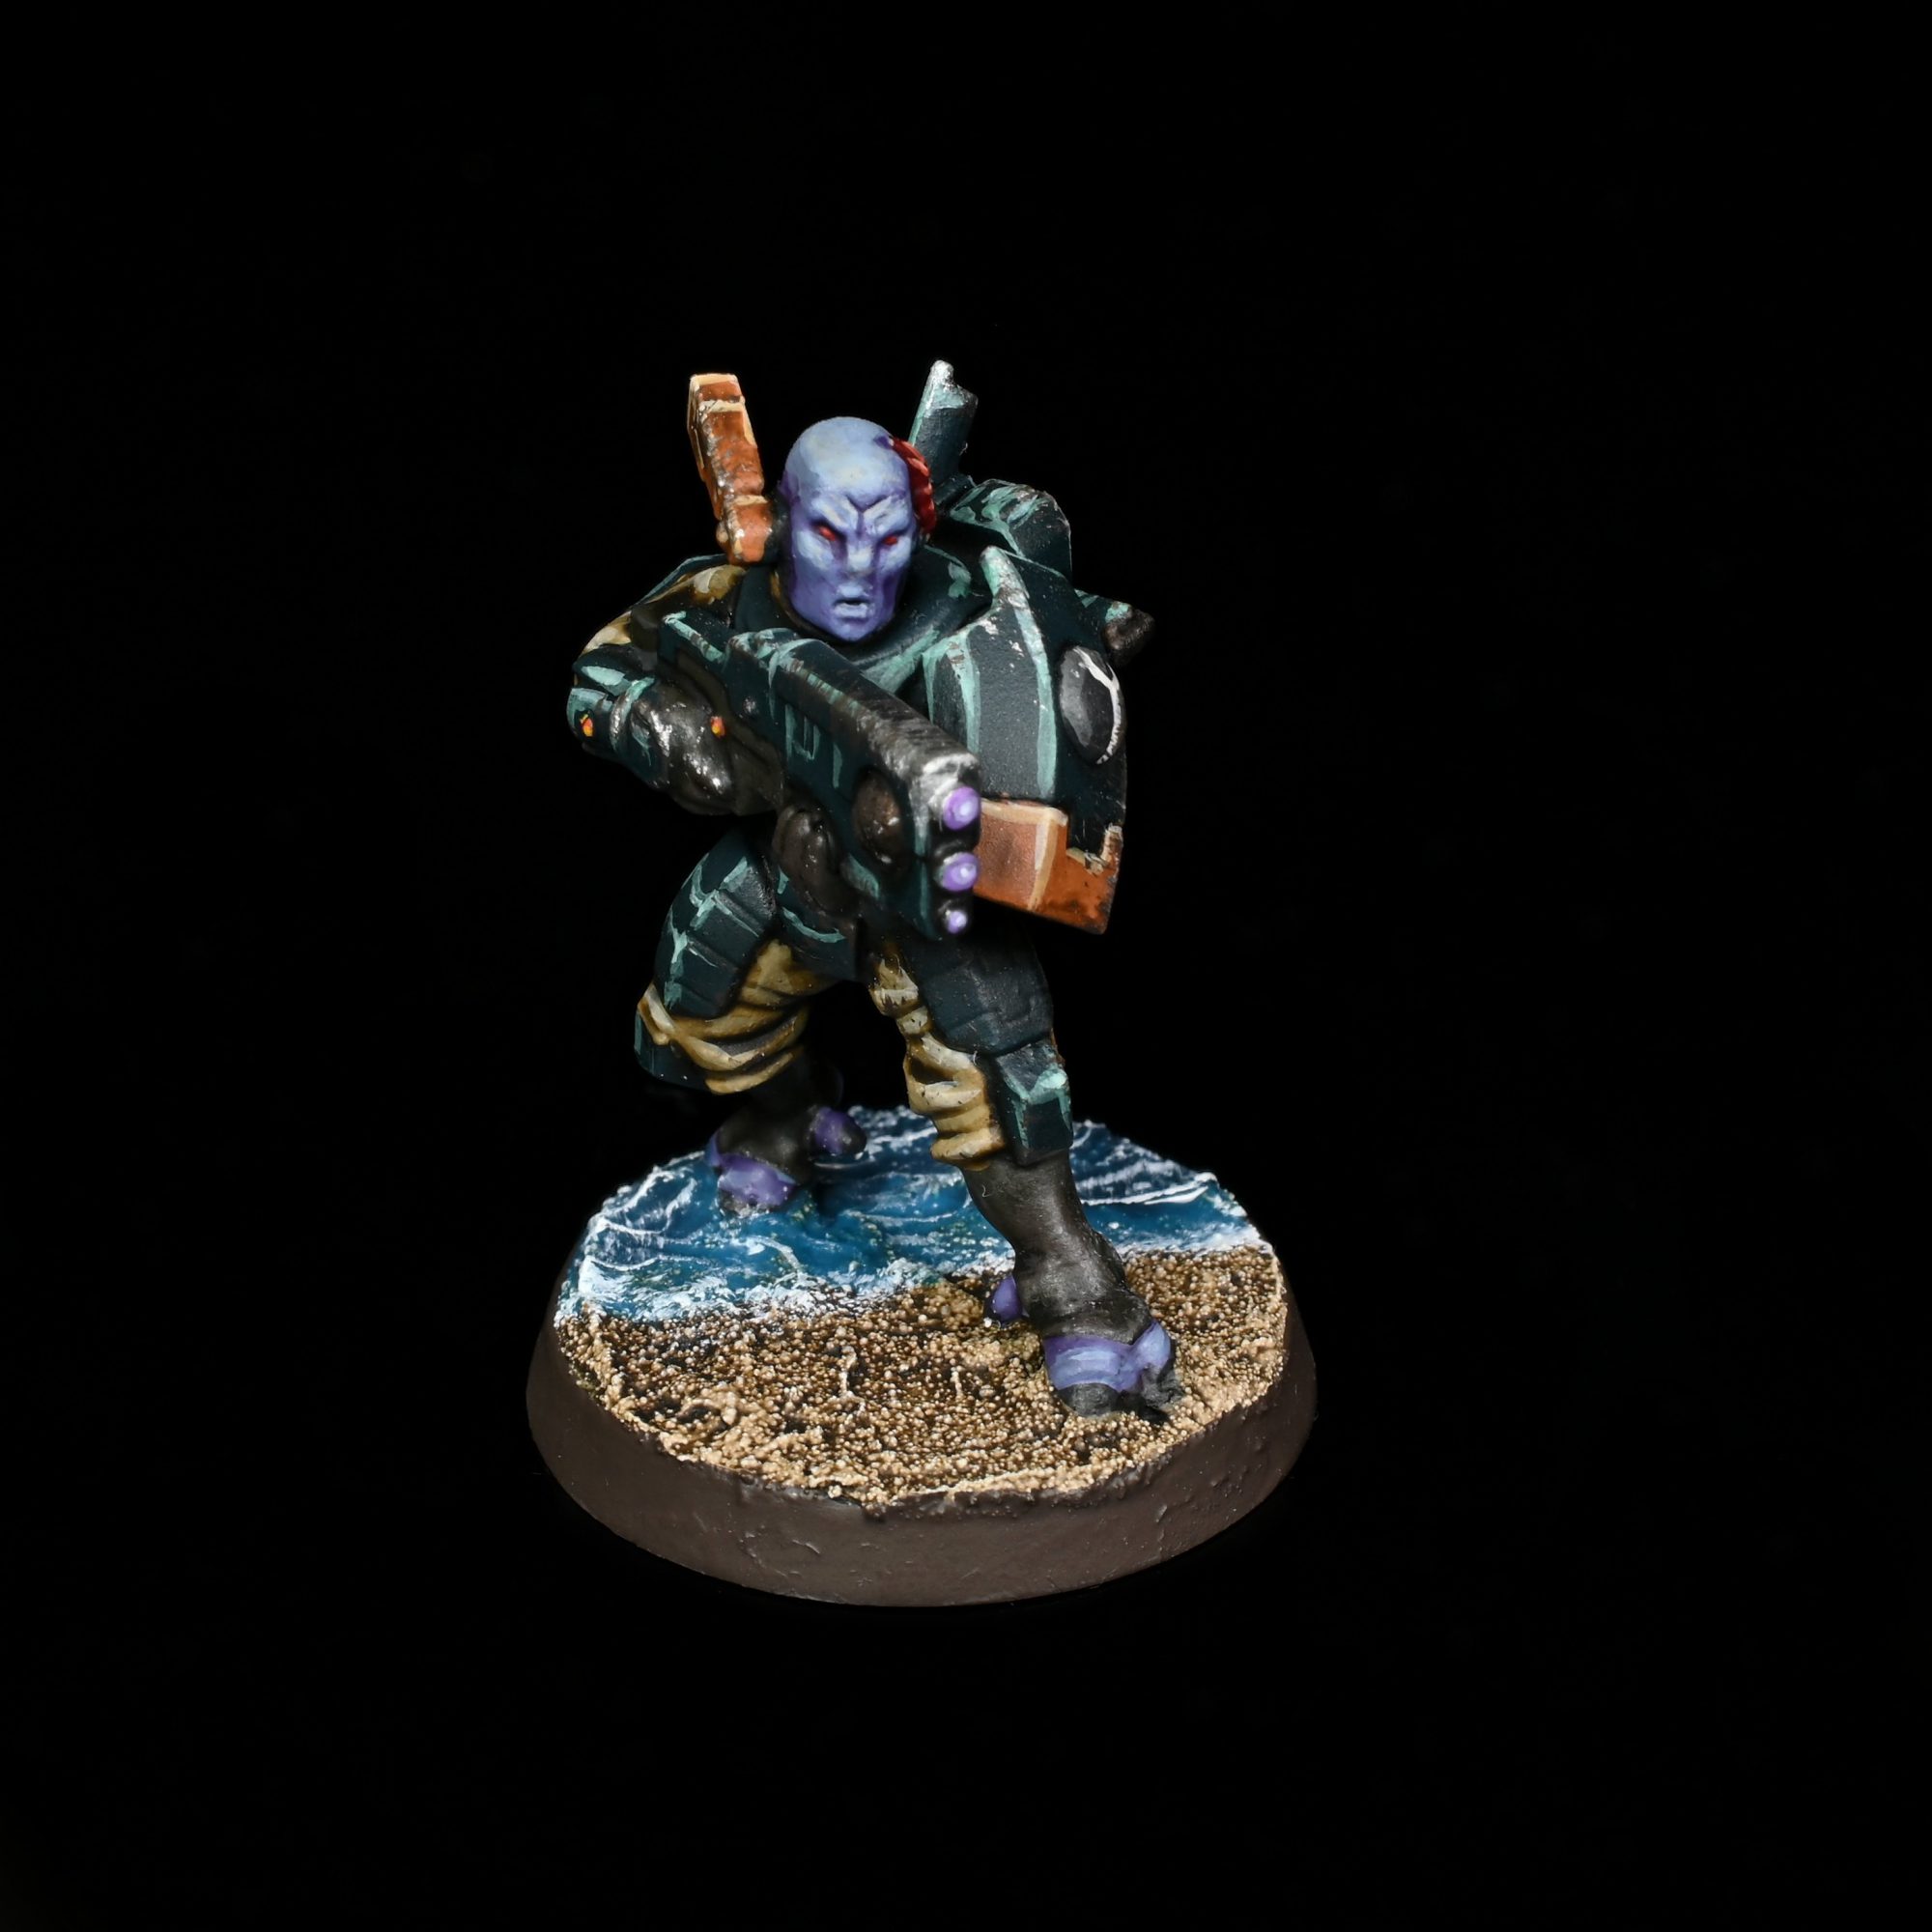
Throwing in a extra model here as the Ghostkeel ain’t exactly showing a lot of skin. The current skin I do is pretty simple, its Russ Grey washed Druchii and then glazed up through Russ, Fenrisian and then just a hint of Kislev, then I just dot the eyes with Mephiston. I do the hoofs in the same colours as the tau logo, and the hair is just Flesh Tearer Red highlighted Wild Rider and Kislev
Step 5 – The Beach Sand and Plants
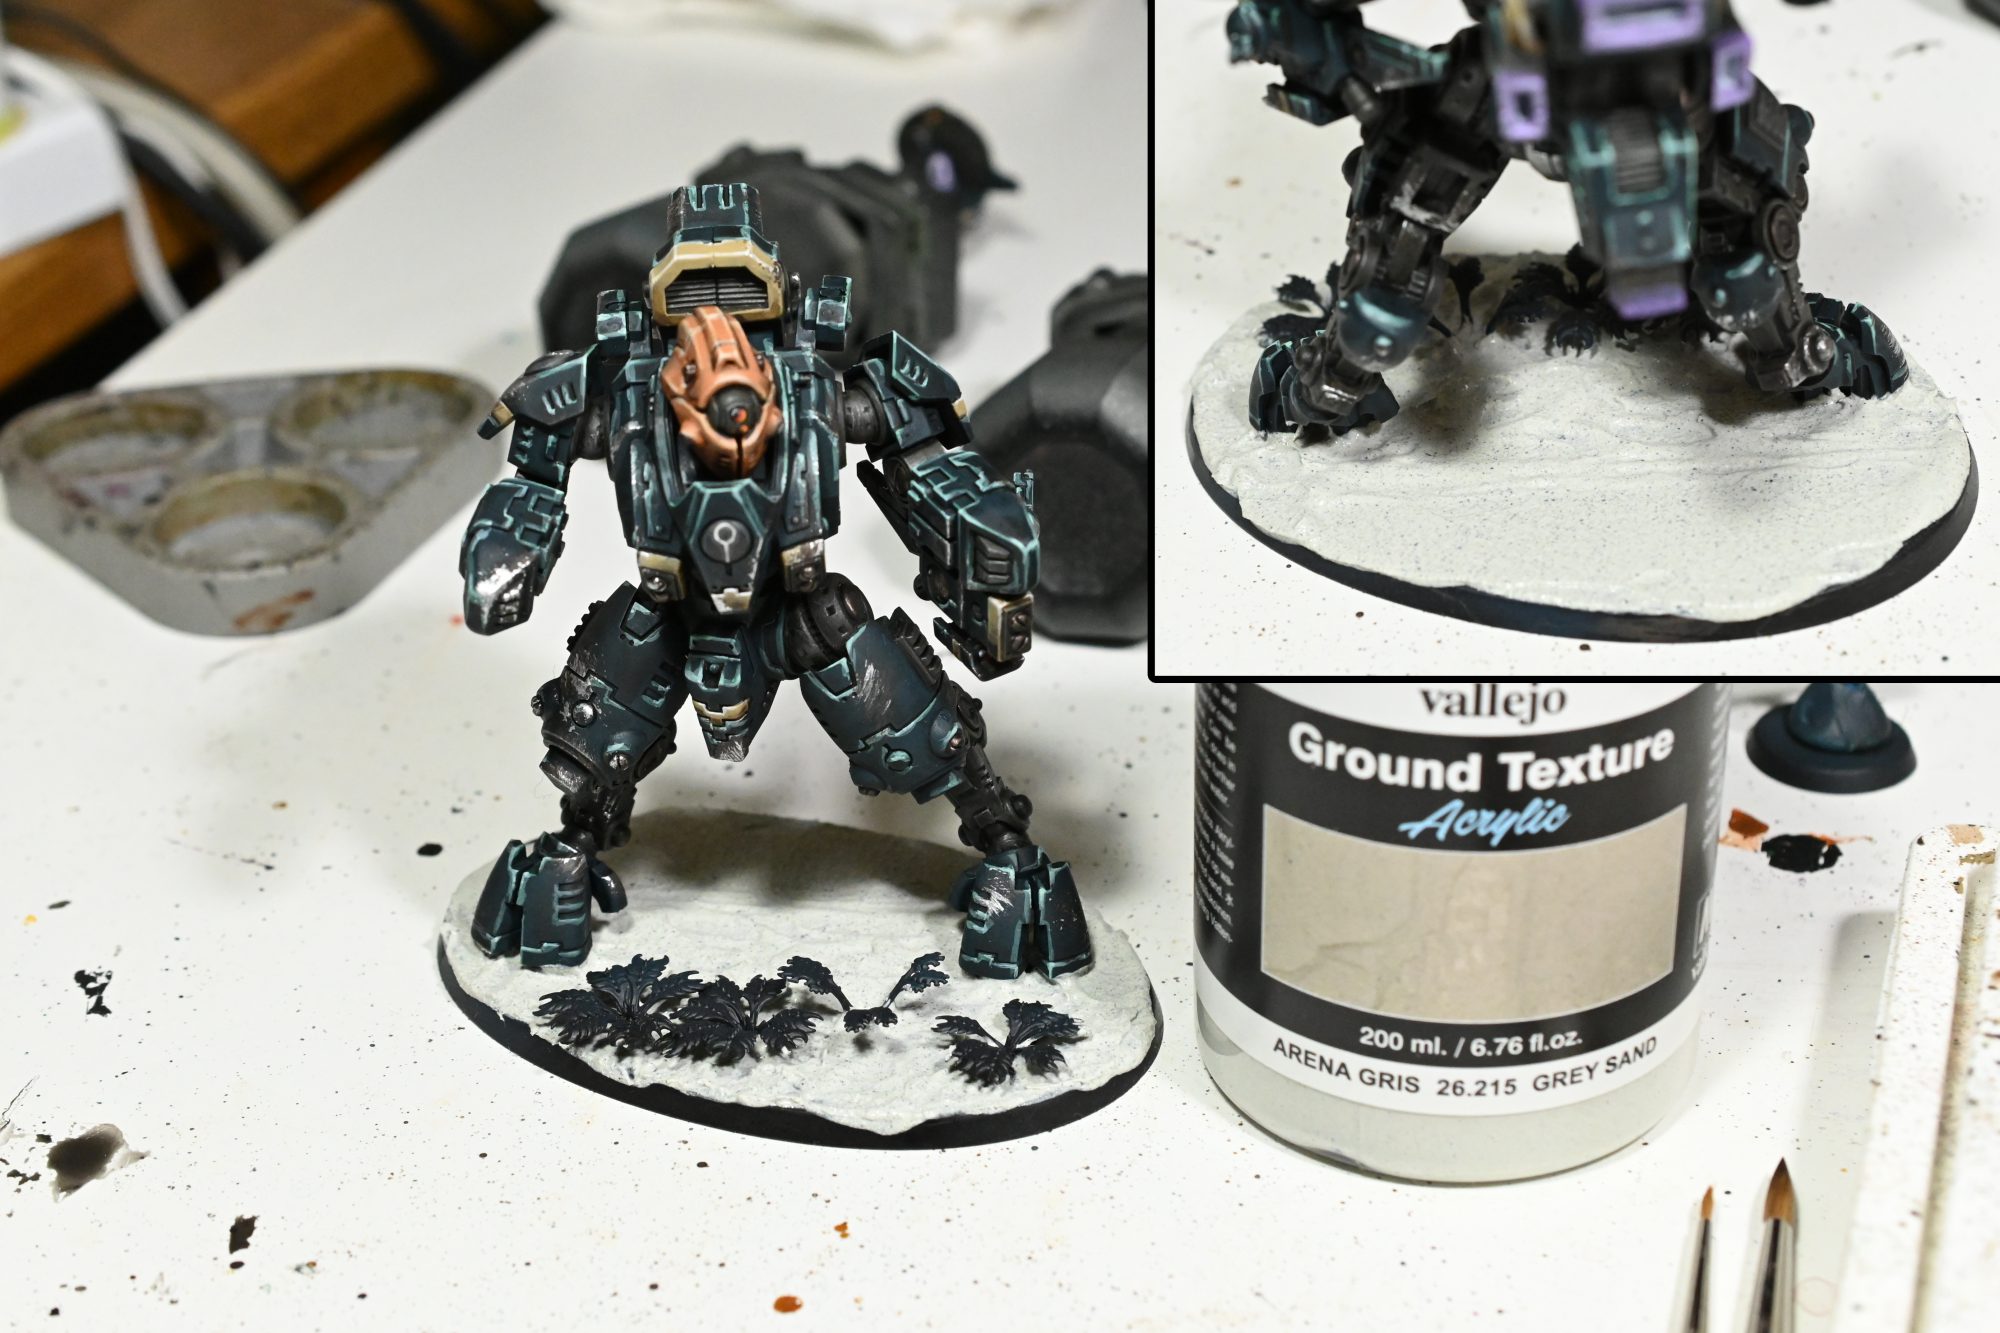
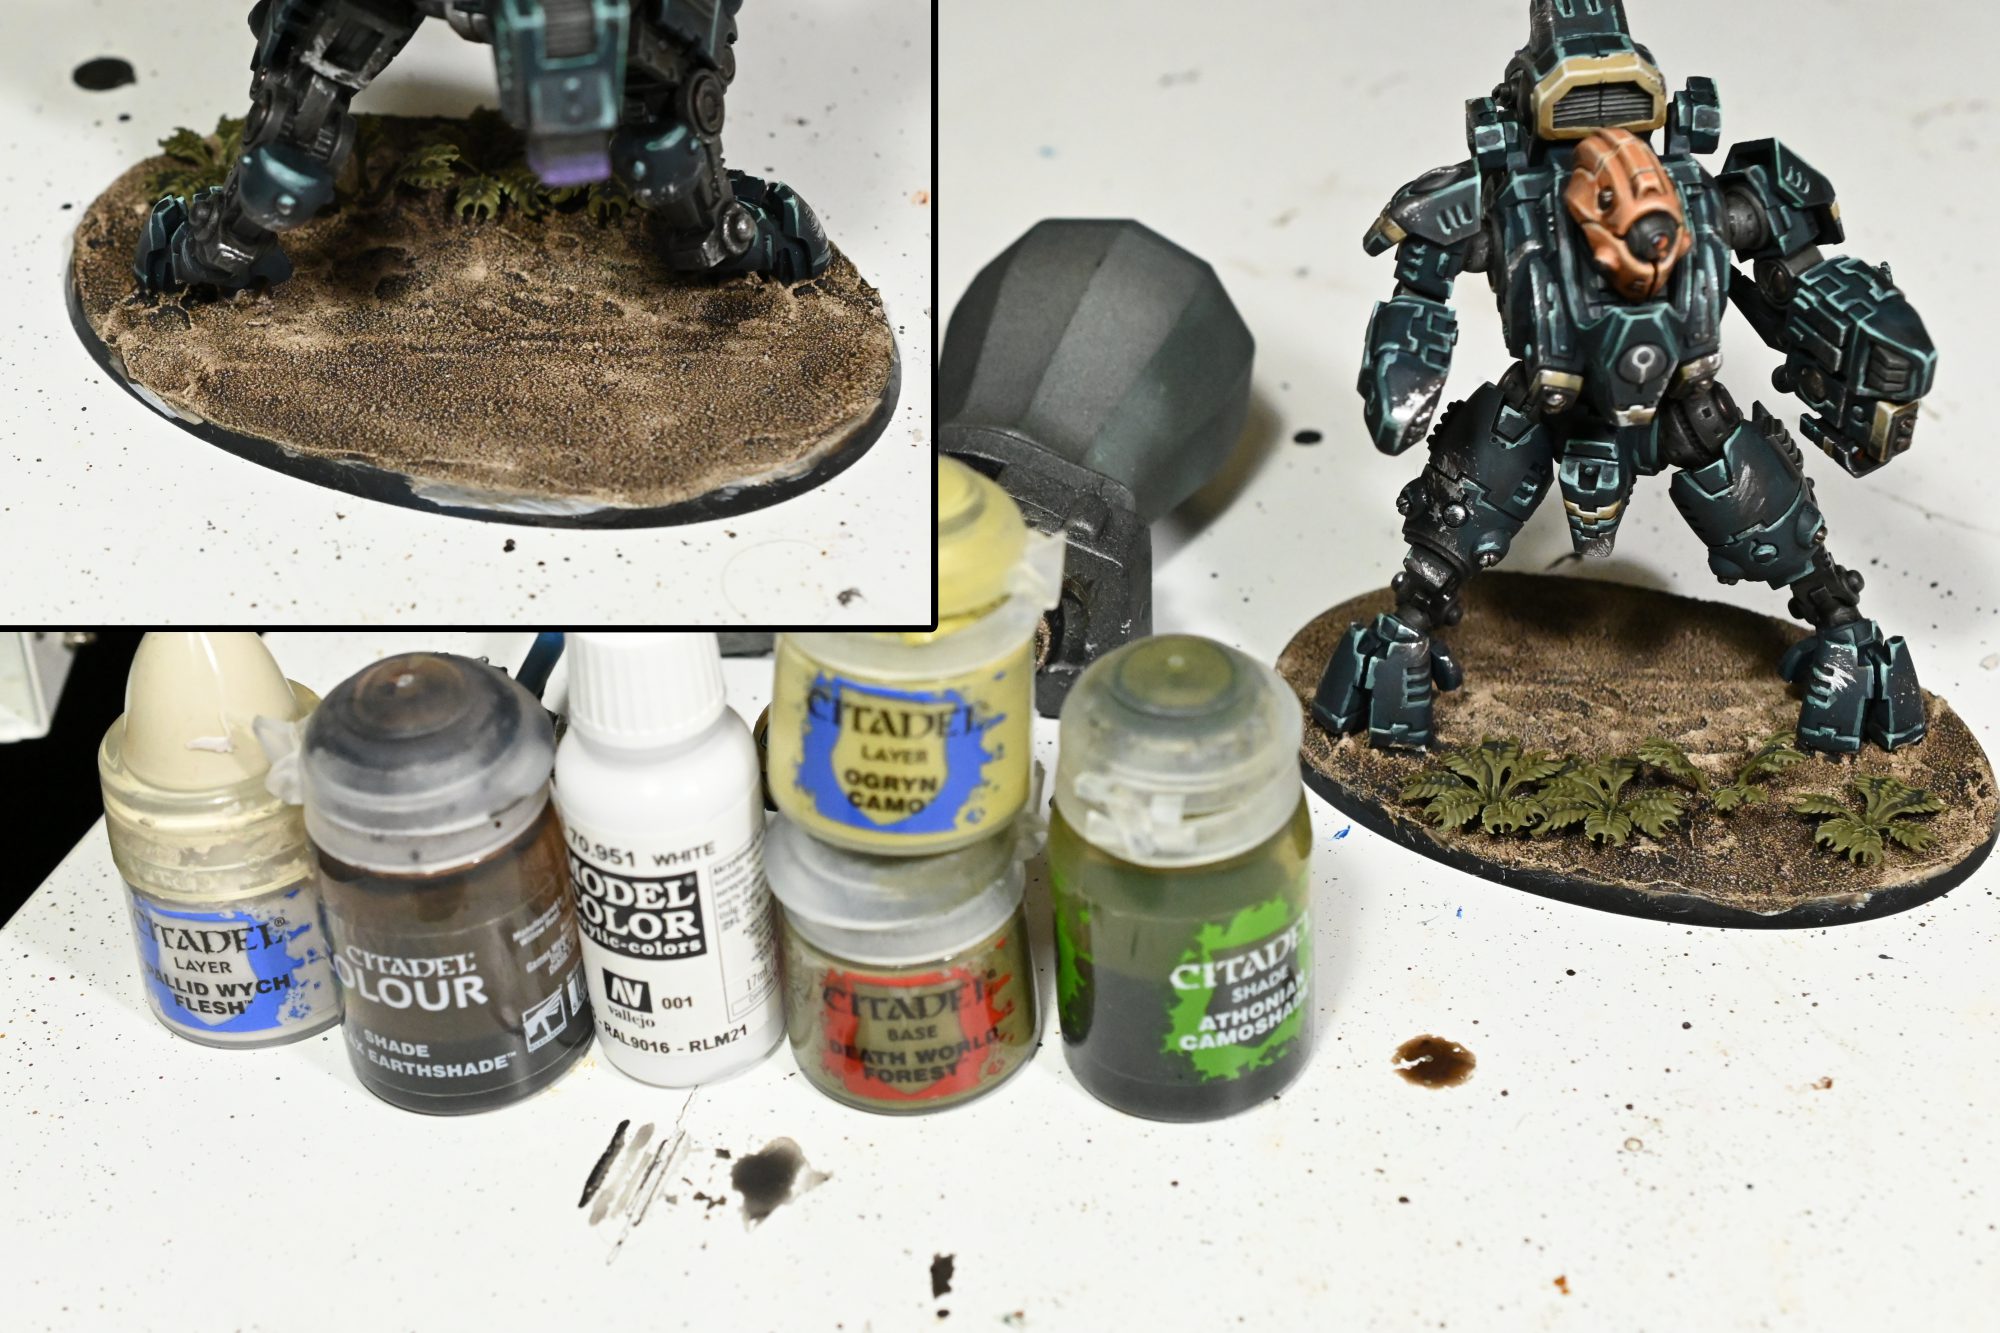
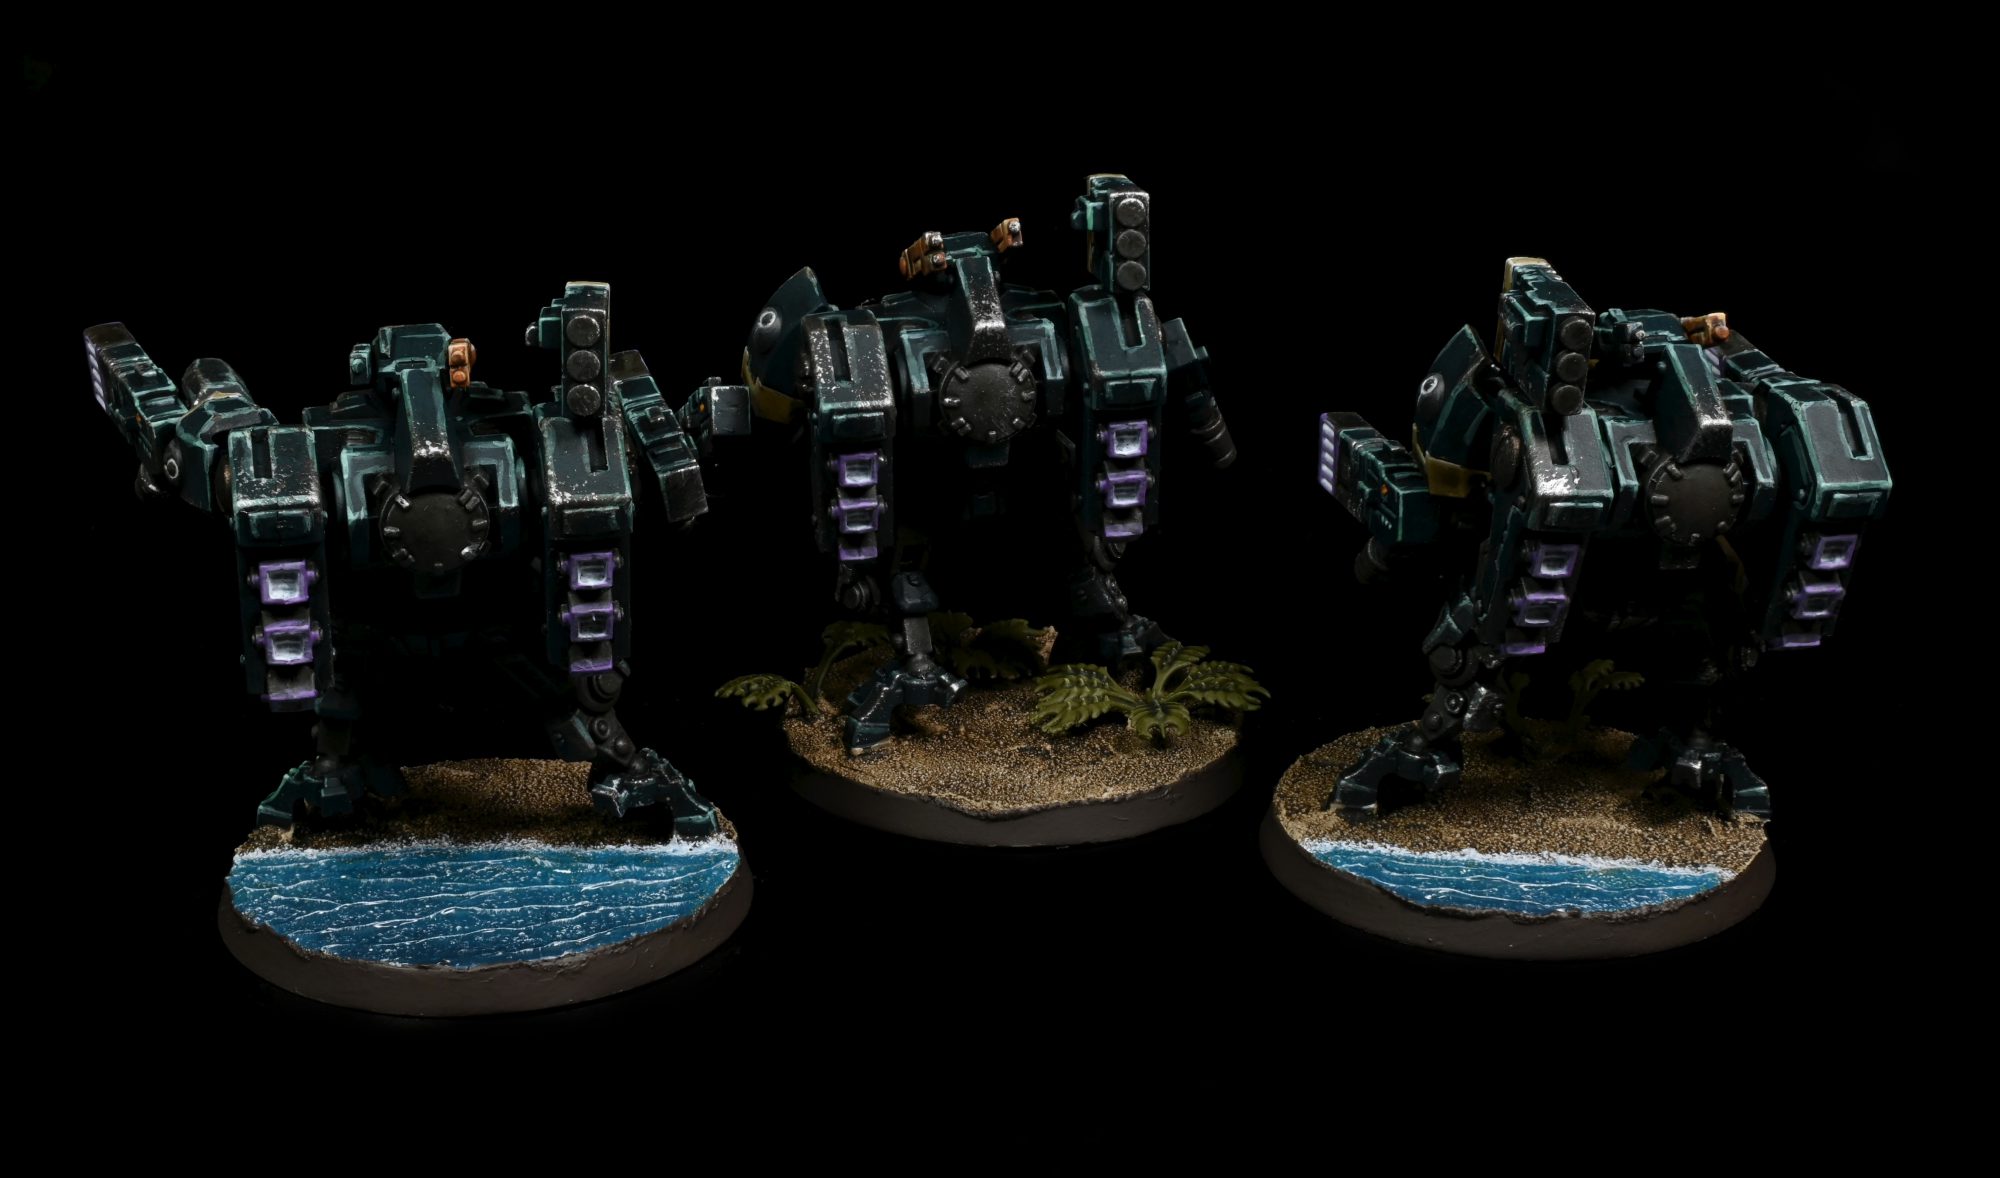
I start the base by covering it with Vallejo Grey Sand, being careful to smooth out where the ocean water will be in a bit. Once that dries I base coat the sand with a coat of Pallid Wych and the plants with Death World Forest, after that they get washed Agrax and Athonian respectively. Then its just drybrushing the sand with white and the plants with Ogryn Camo.
Step 6 – Water
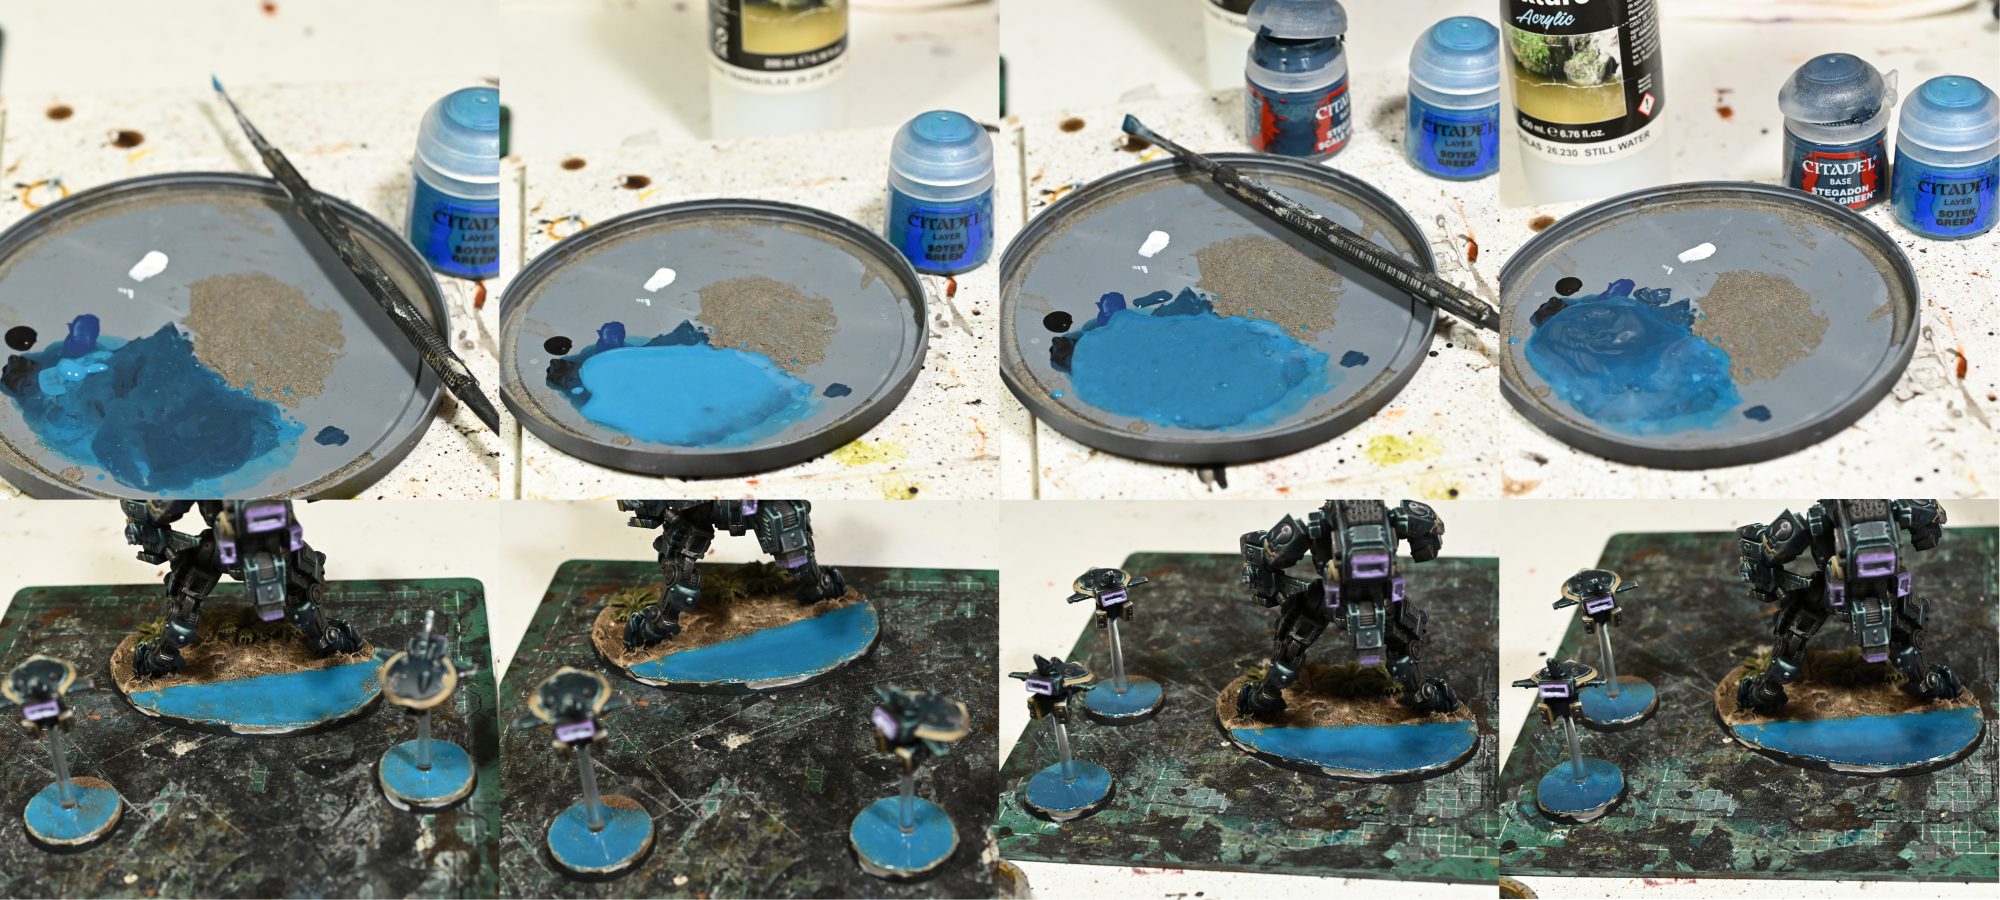
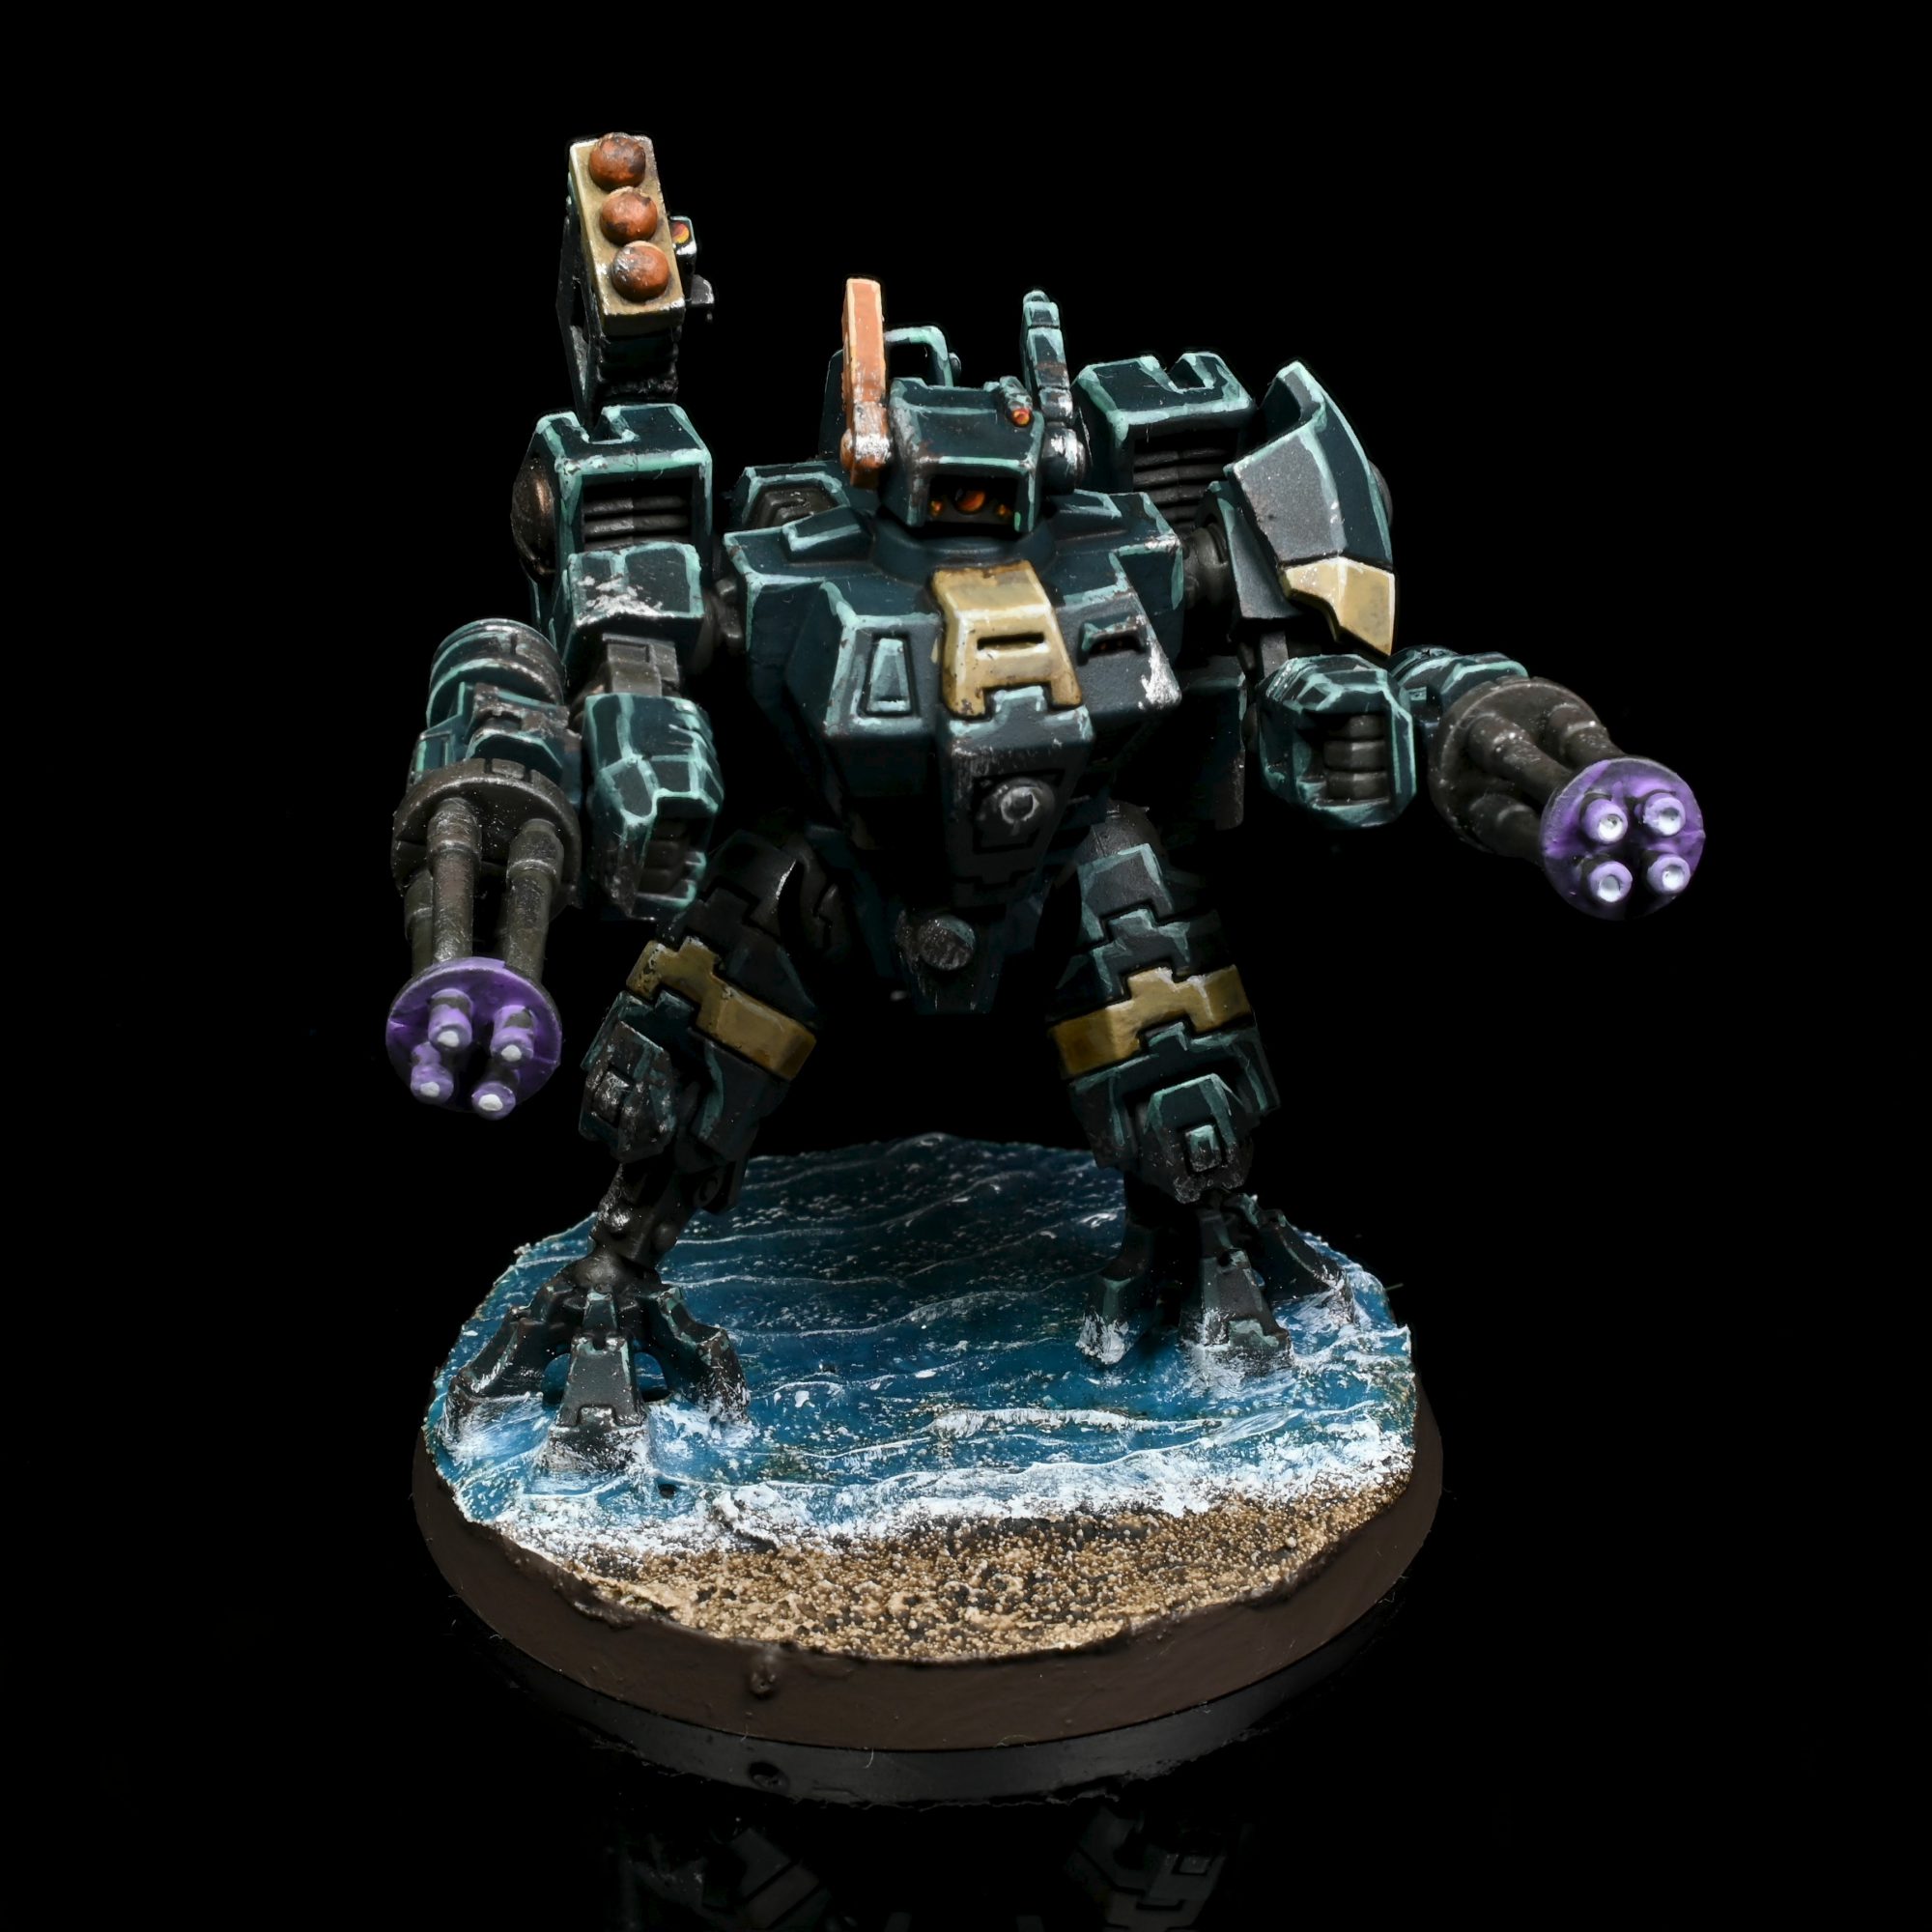
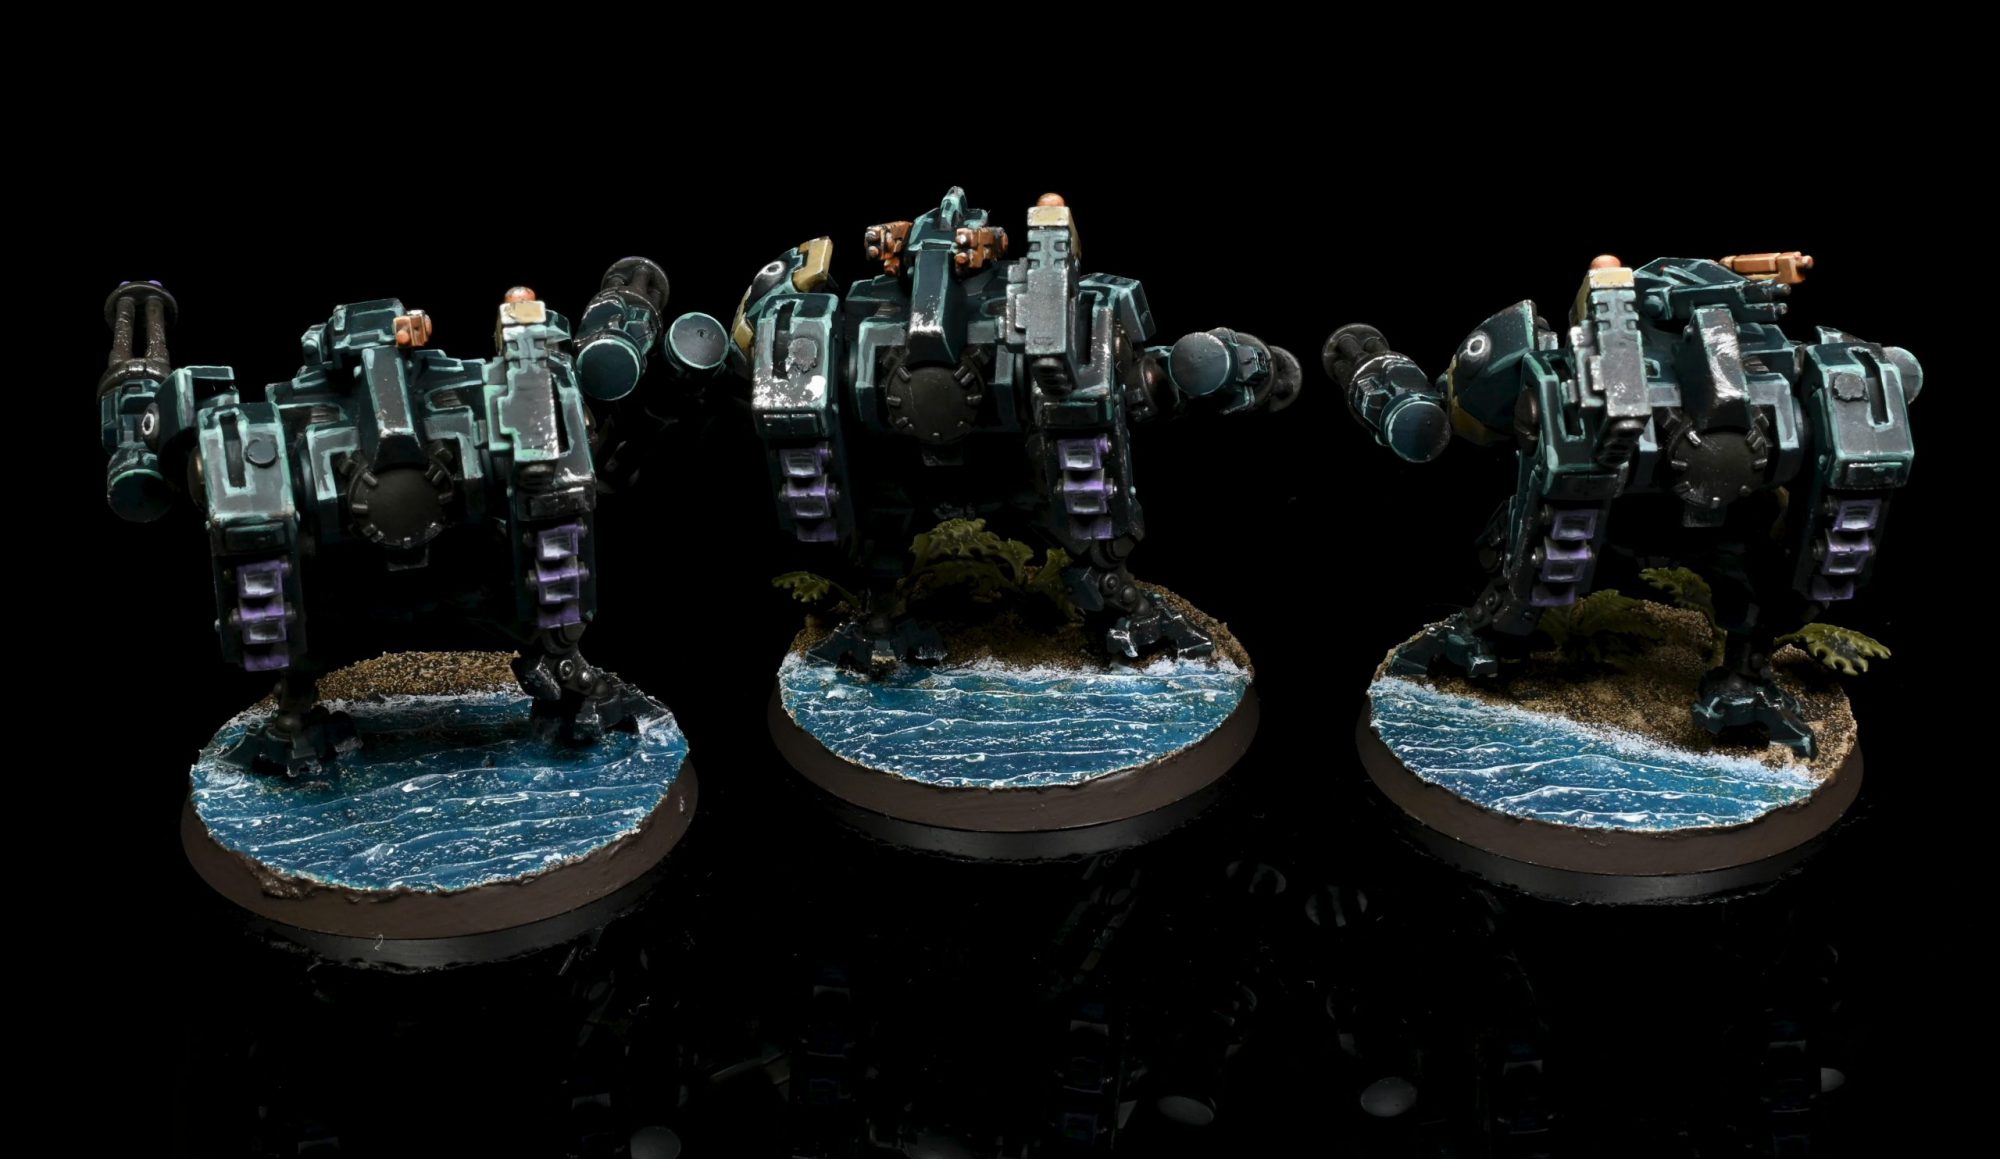
This step is simpler then it might look at first glance, I start by getting a good blob of Sotek onto a ‘palette’ before creating a big puddle of Vallejo Still Water, there should be enough sotek in the water to tint it pretty signifigantly but leave a hint of the beach beneath it. After that in as many steps as you have patience for introduce a bit of Stegadon to the water and create a gradient getting darker further away from the visible beach. This has a couple of interesting effects going on, the obvious thing is that the water gets darker which in of itself implies depth, but the other thing is that it gets more opaque which means the hint of beach beneath the waves fades away further reinforcing the perception of depth. Something you might notice once it dries is that there will still be a bit of texture from the paste underneath the water effects, this is just fine and will help imply smaller waves in the final base.
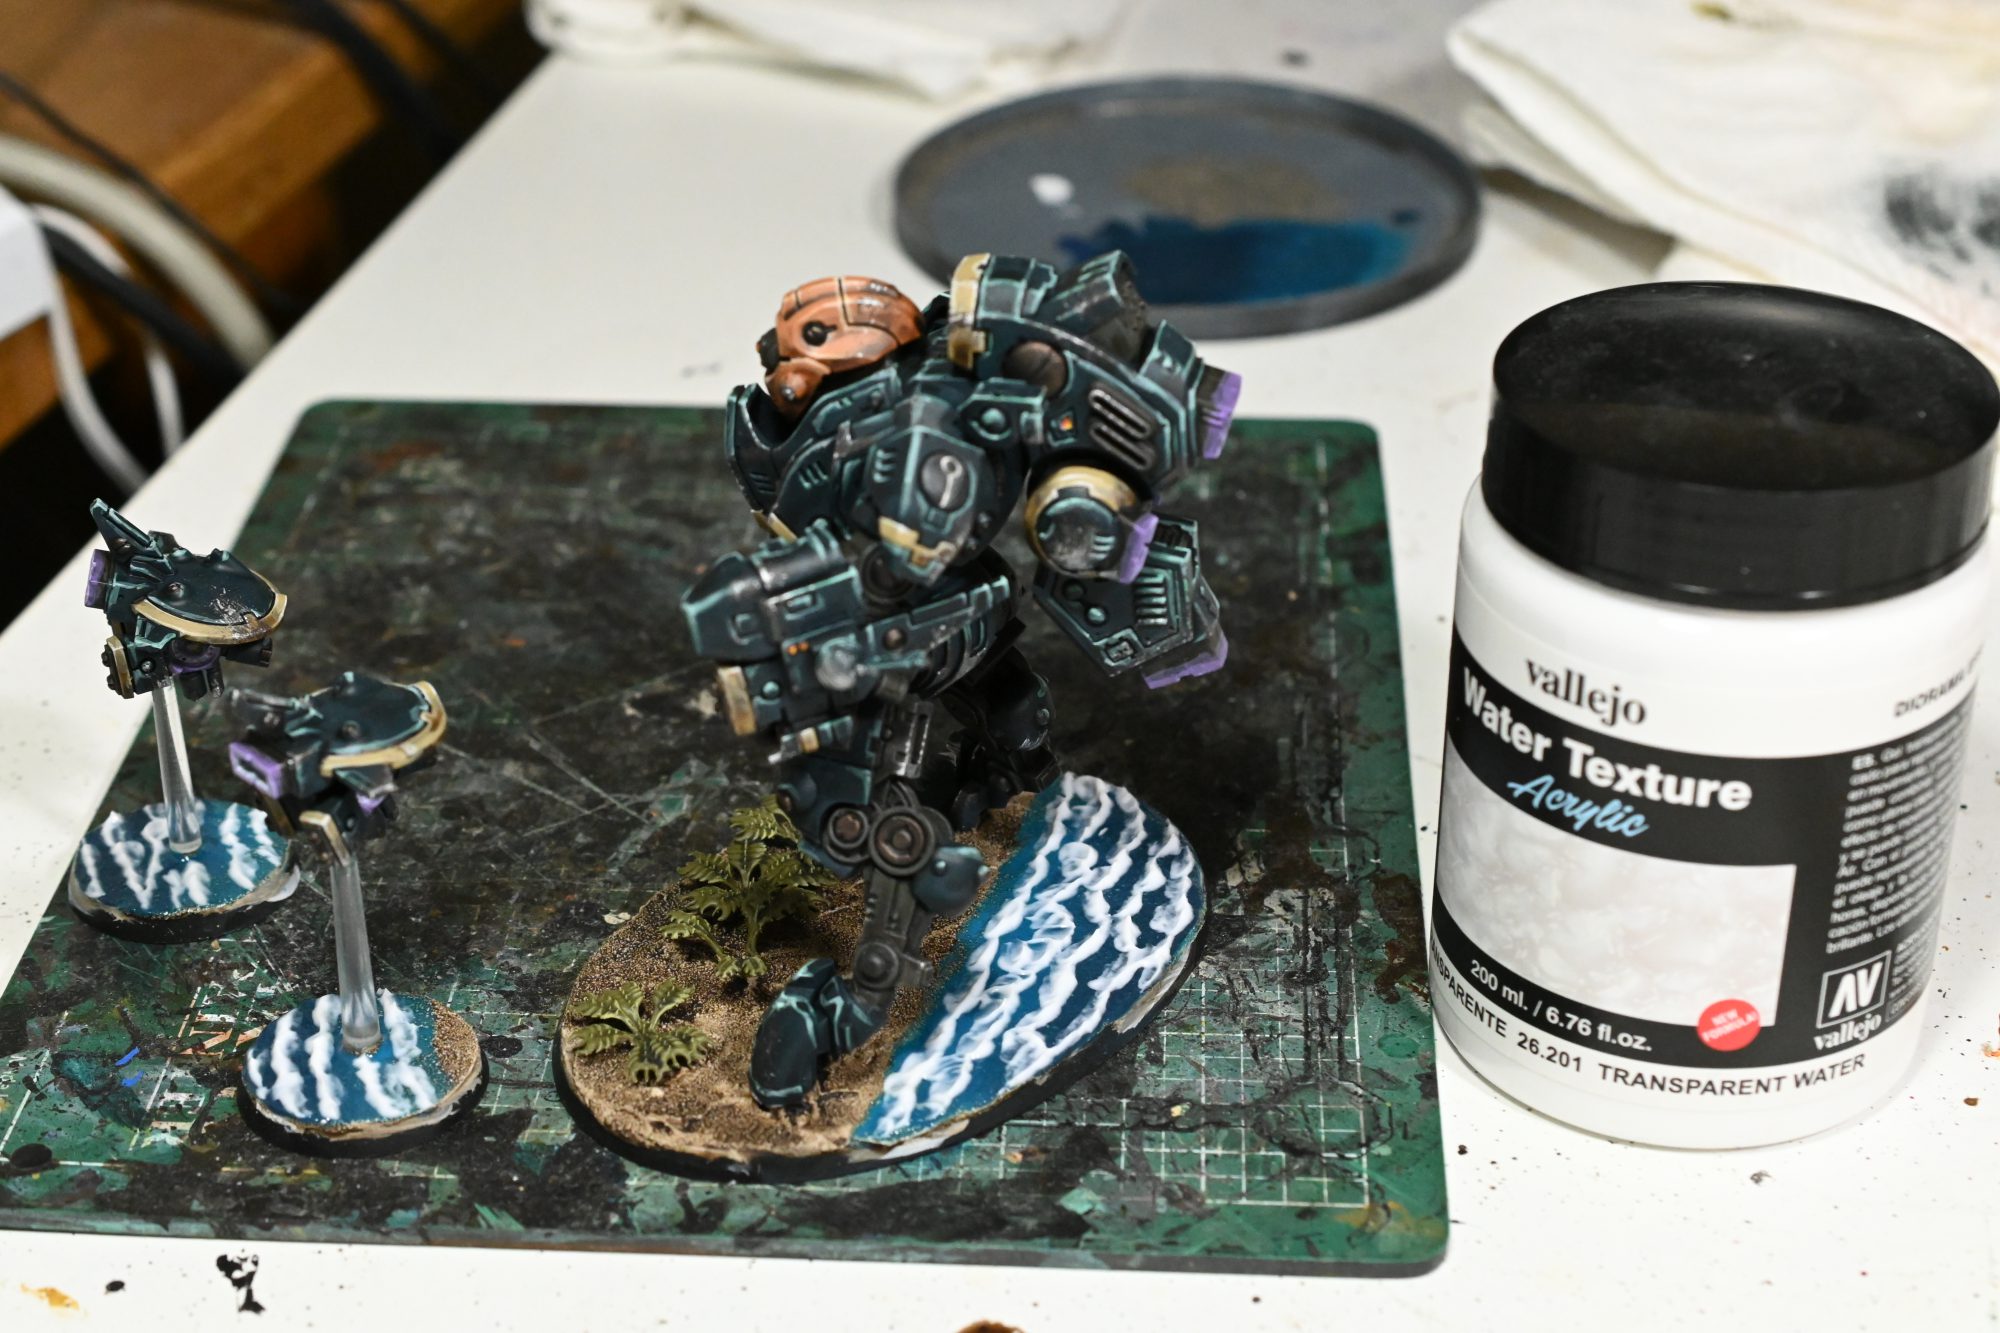
Give the water a few hours to dry before sculpting the waves onto the water with the confusingly similarly named Transparent Water texture with a little spatula, I like using the GW one and just covering the back of the wide end with the texture paste and then dabbing it down onto the surface of the water and lifting up with a bit of rotation to the motion. Despite their claims, I have found this stuff doesn’t dry quite clear when there is any significant amounts, which isn’t really a problem in this case but is something to watch out for.
After that dries all we have left is to drybrush the crap out of the water with white and paint the rims of the base, I used Dryad Bark but that is up to you.
Gallery
-

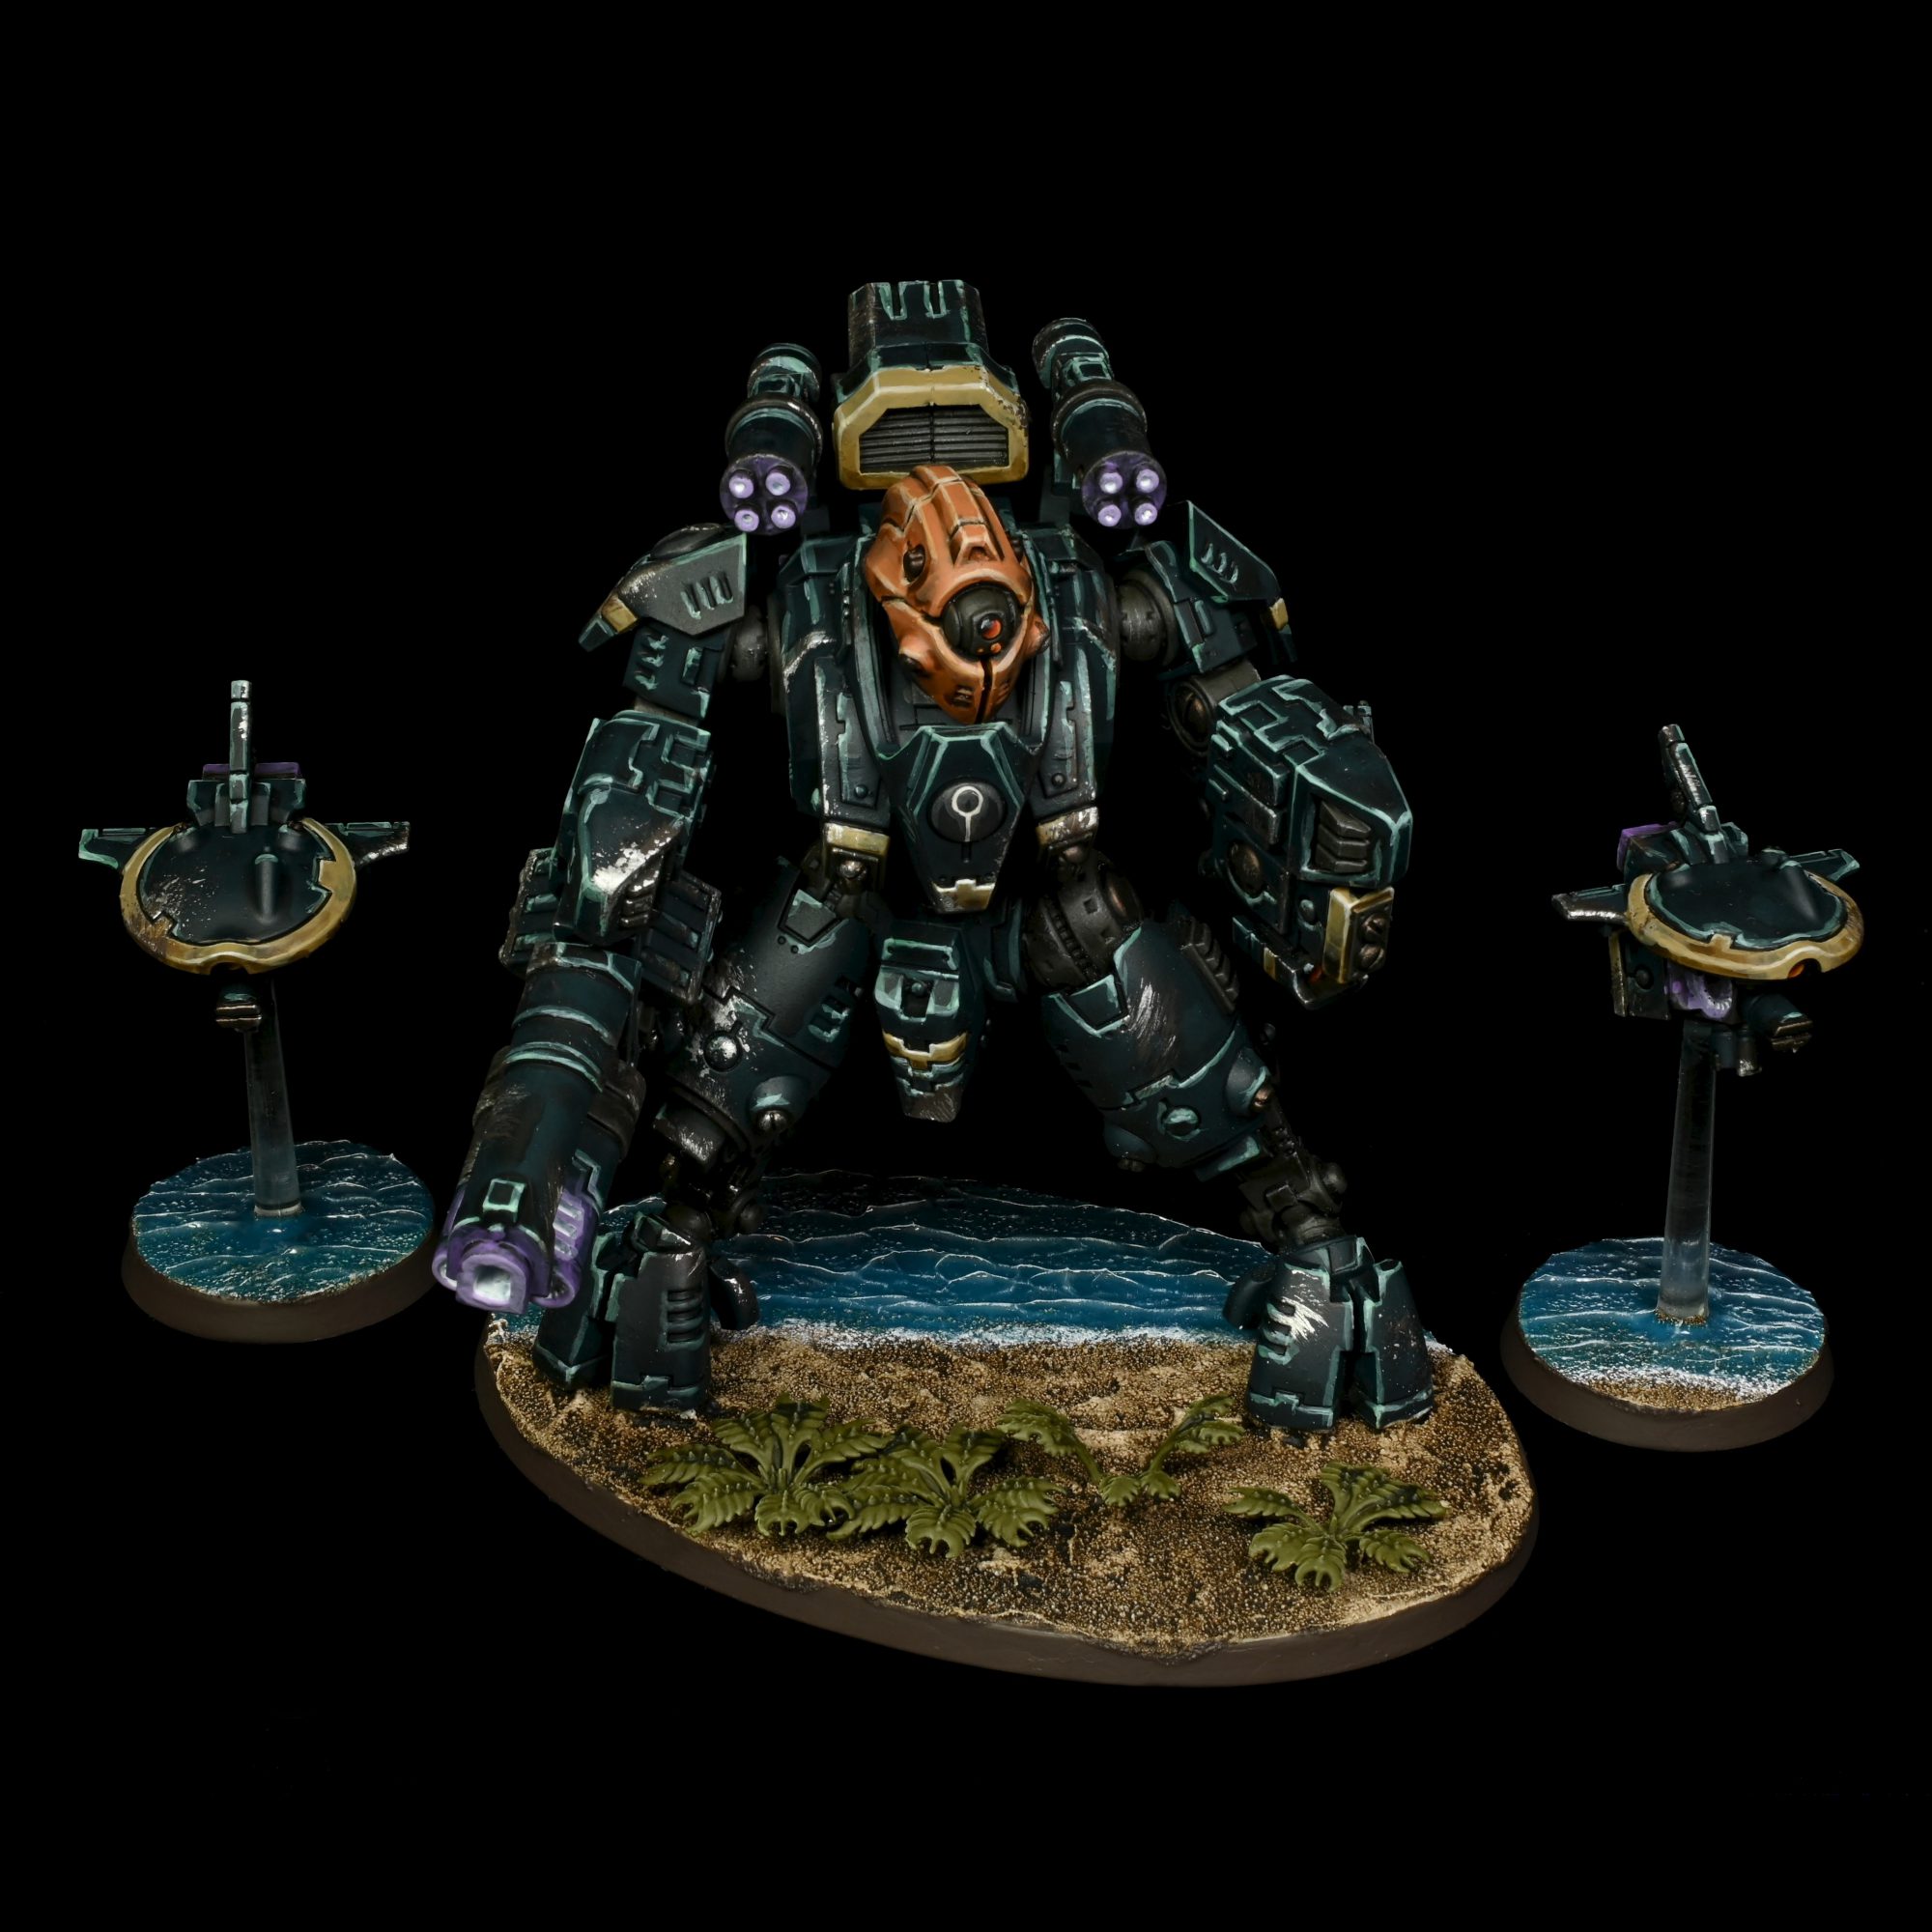
Ghostkeel. Credit: Rockfish -

Ghostkeel. Credit: Rockfish -

Ghostkeel. Credit: Rockfish -

Ghostkeel. Credit: Rockfish -

Ghostkeel. Credit: Rockfish -

Ghostkeel. Credit: Rockfish
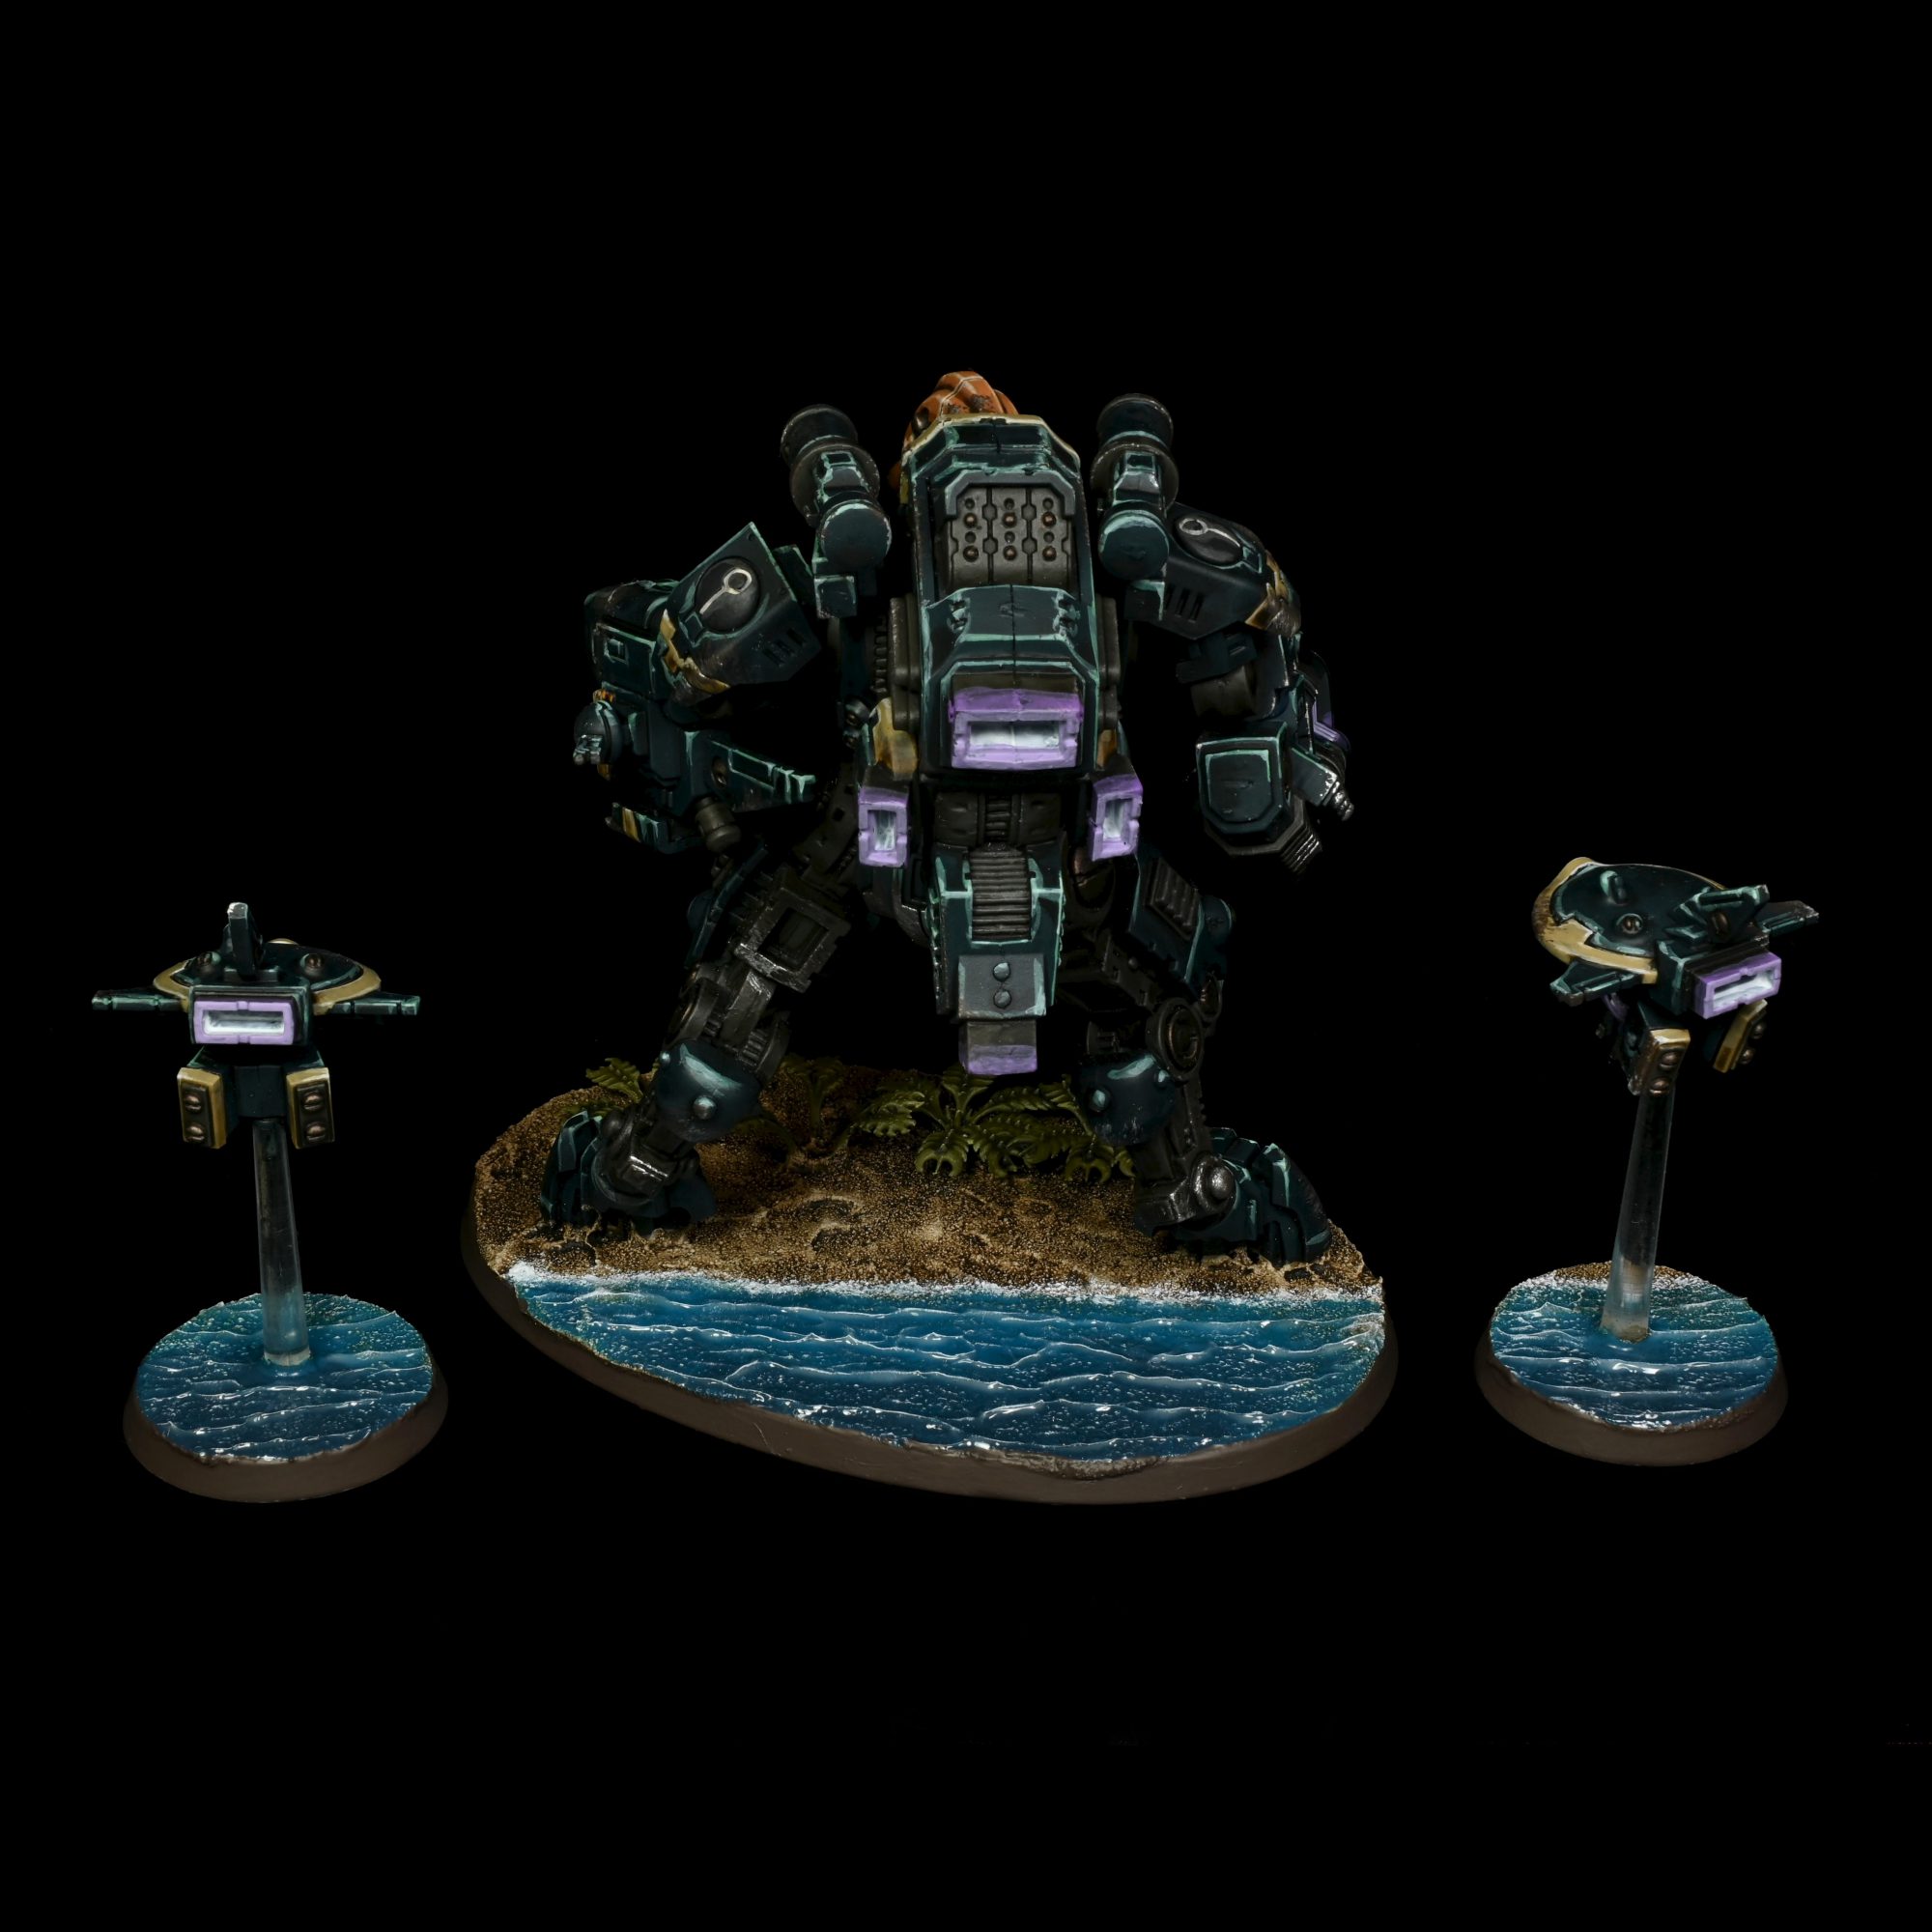
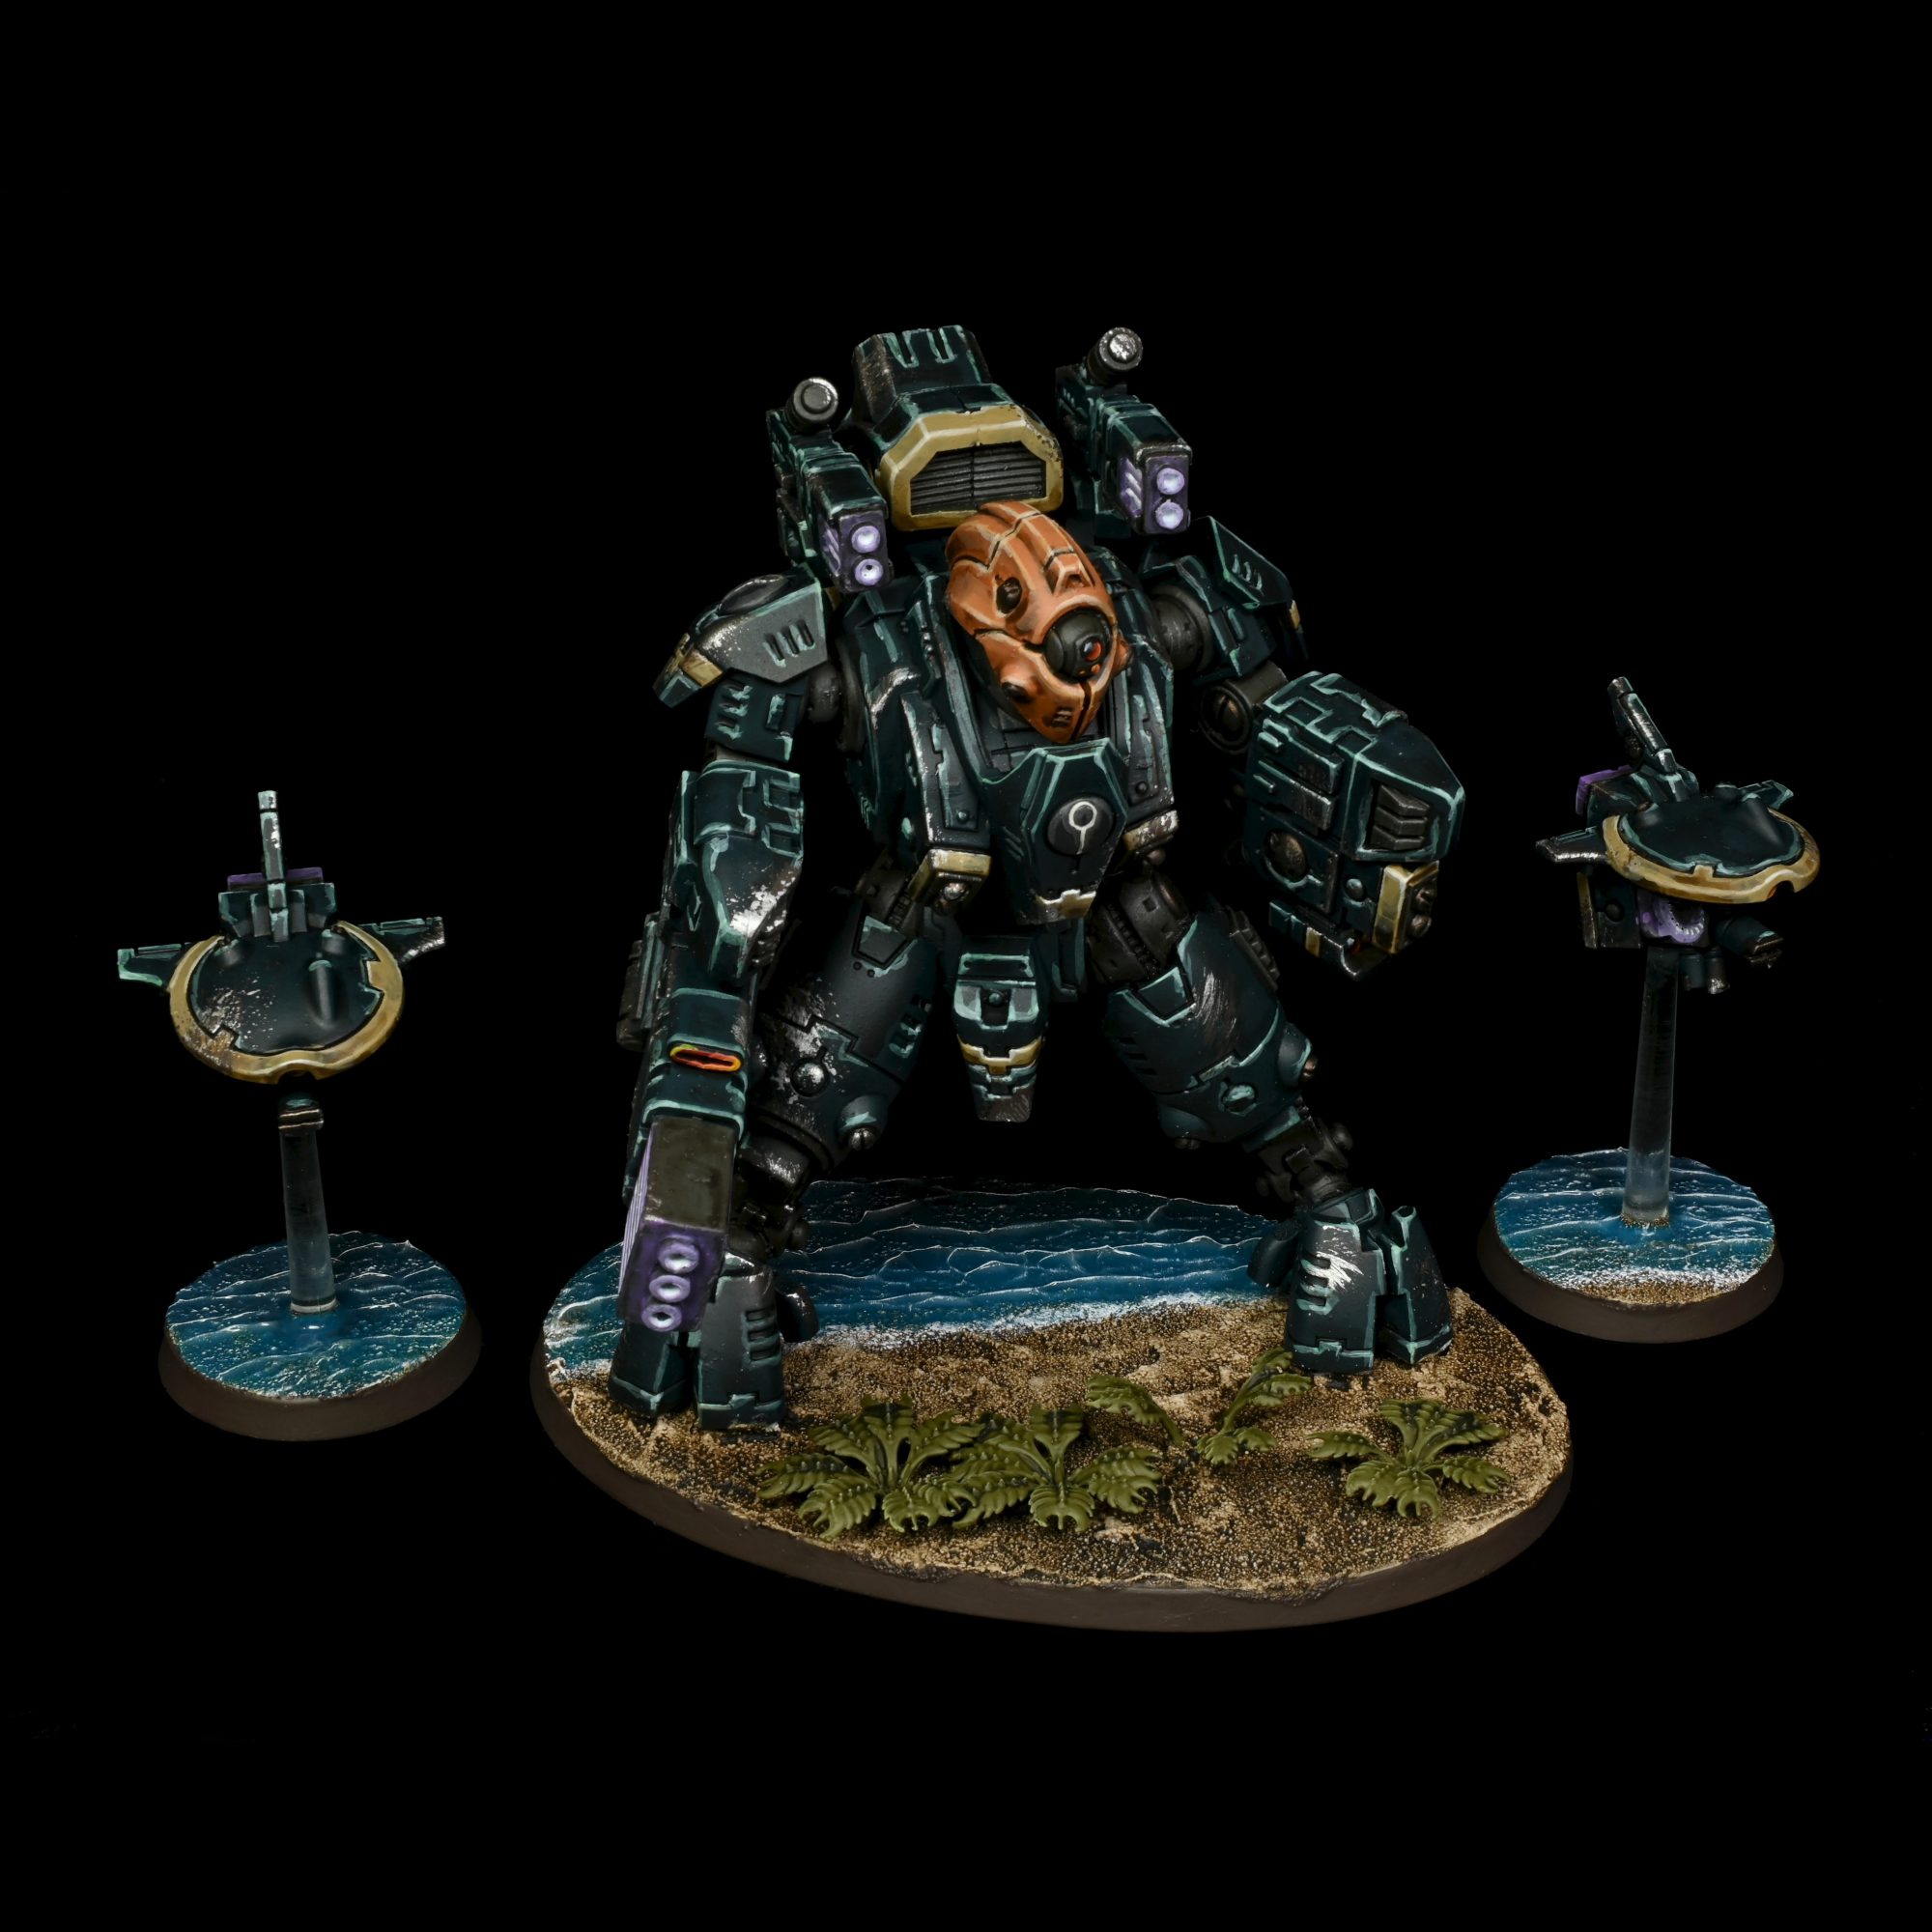
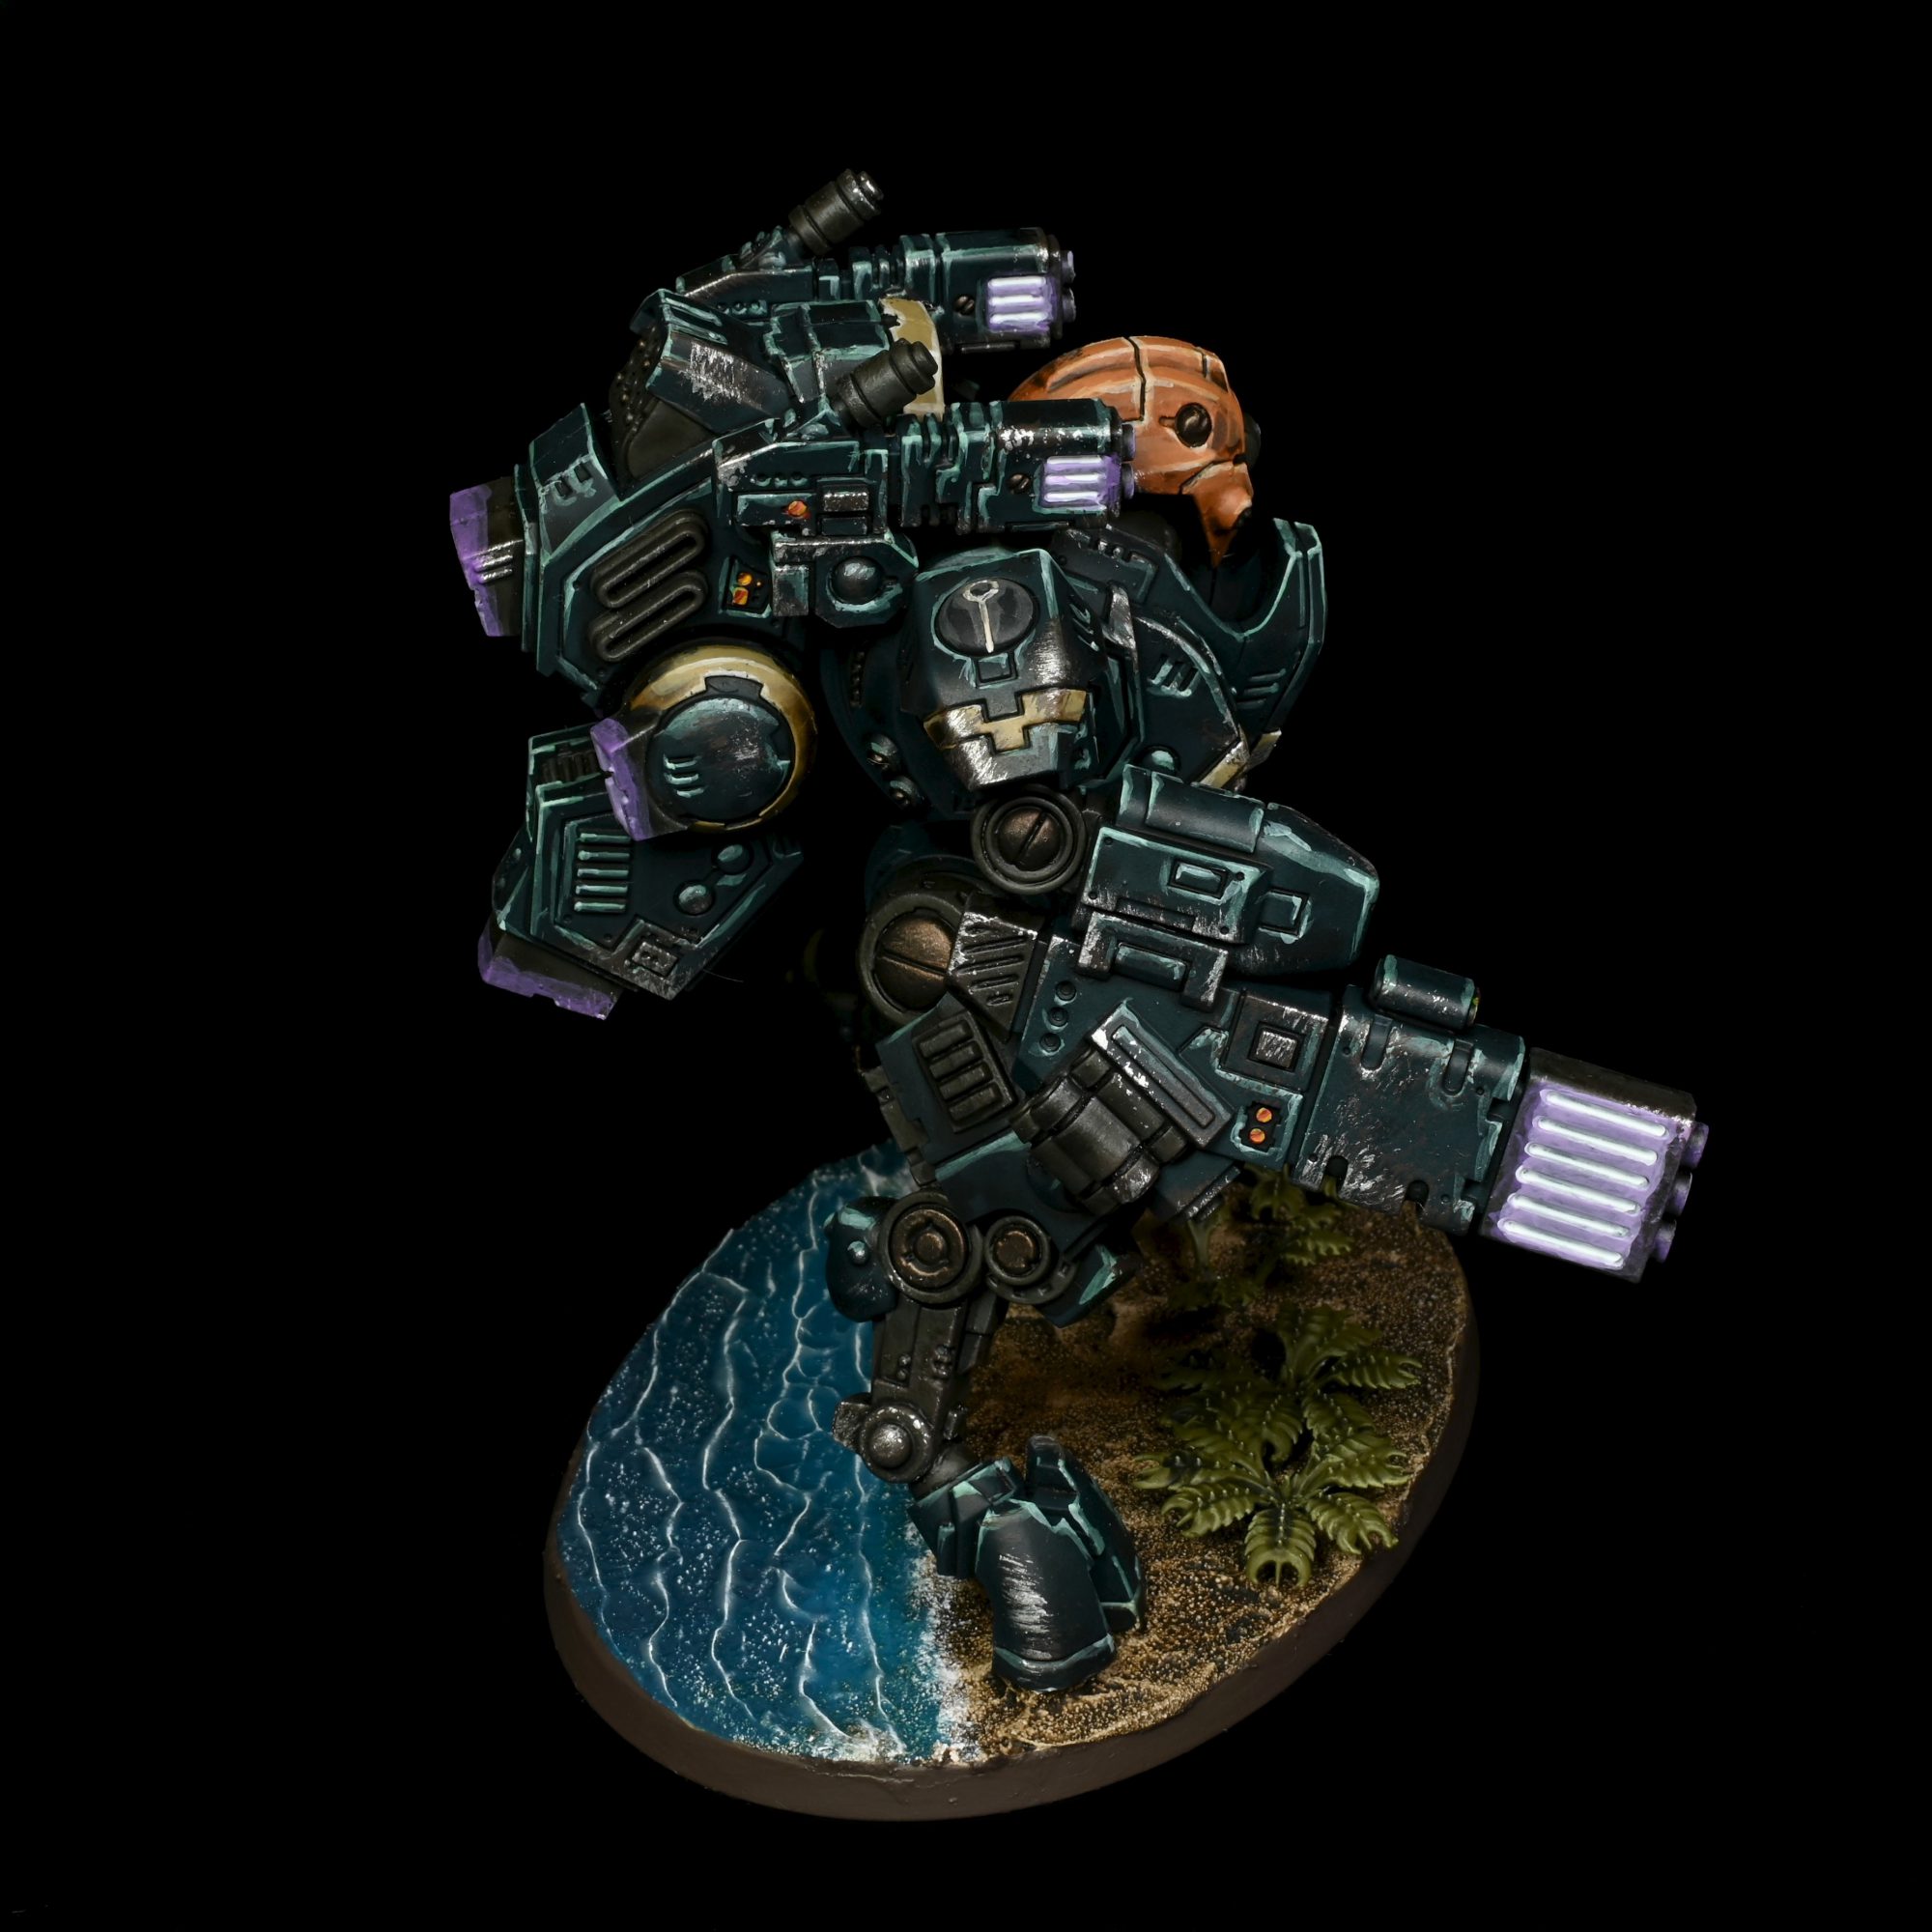
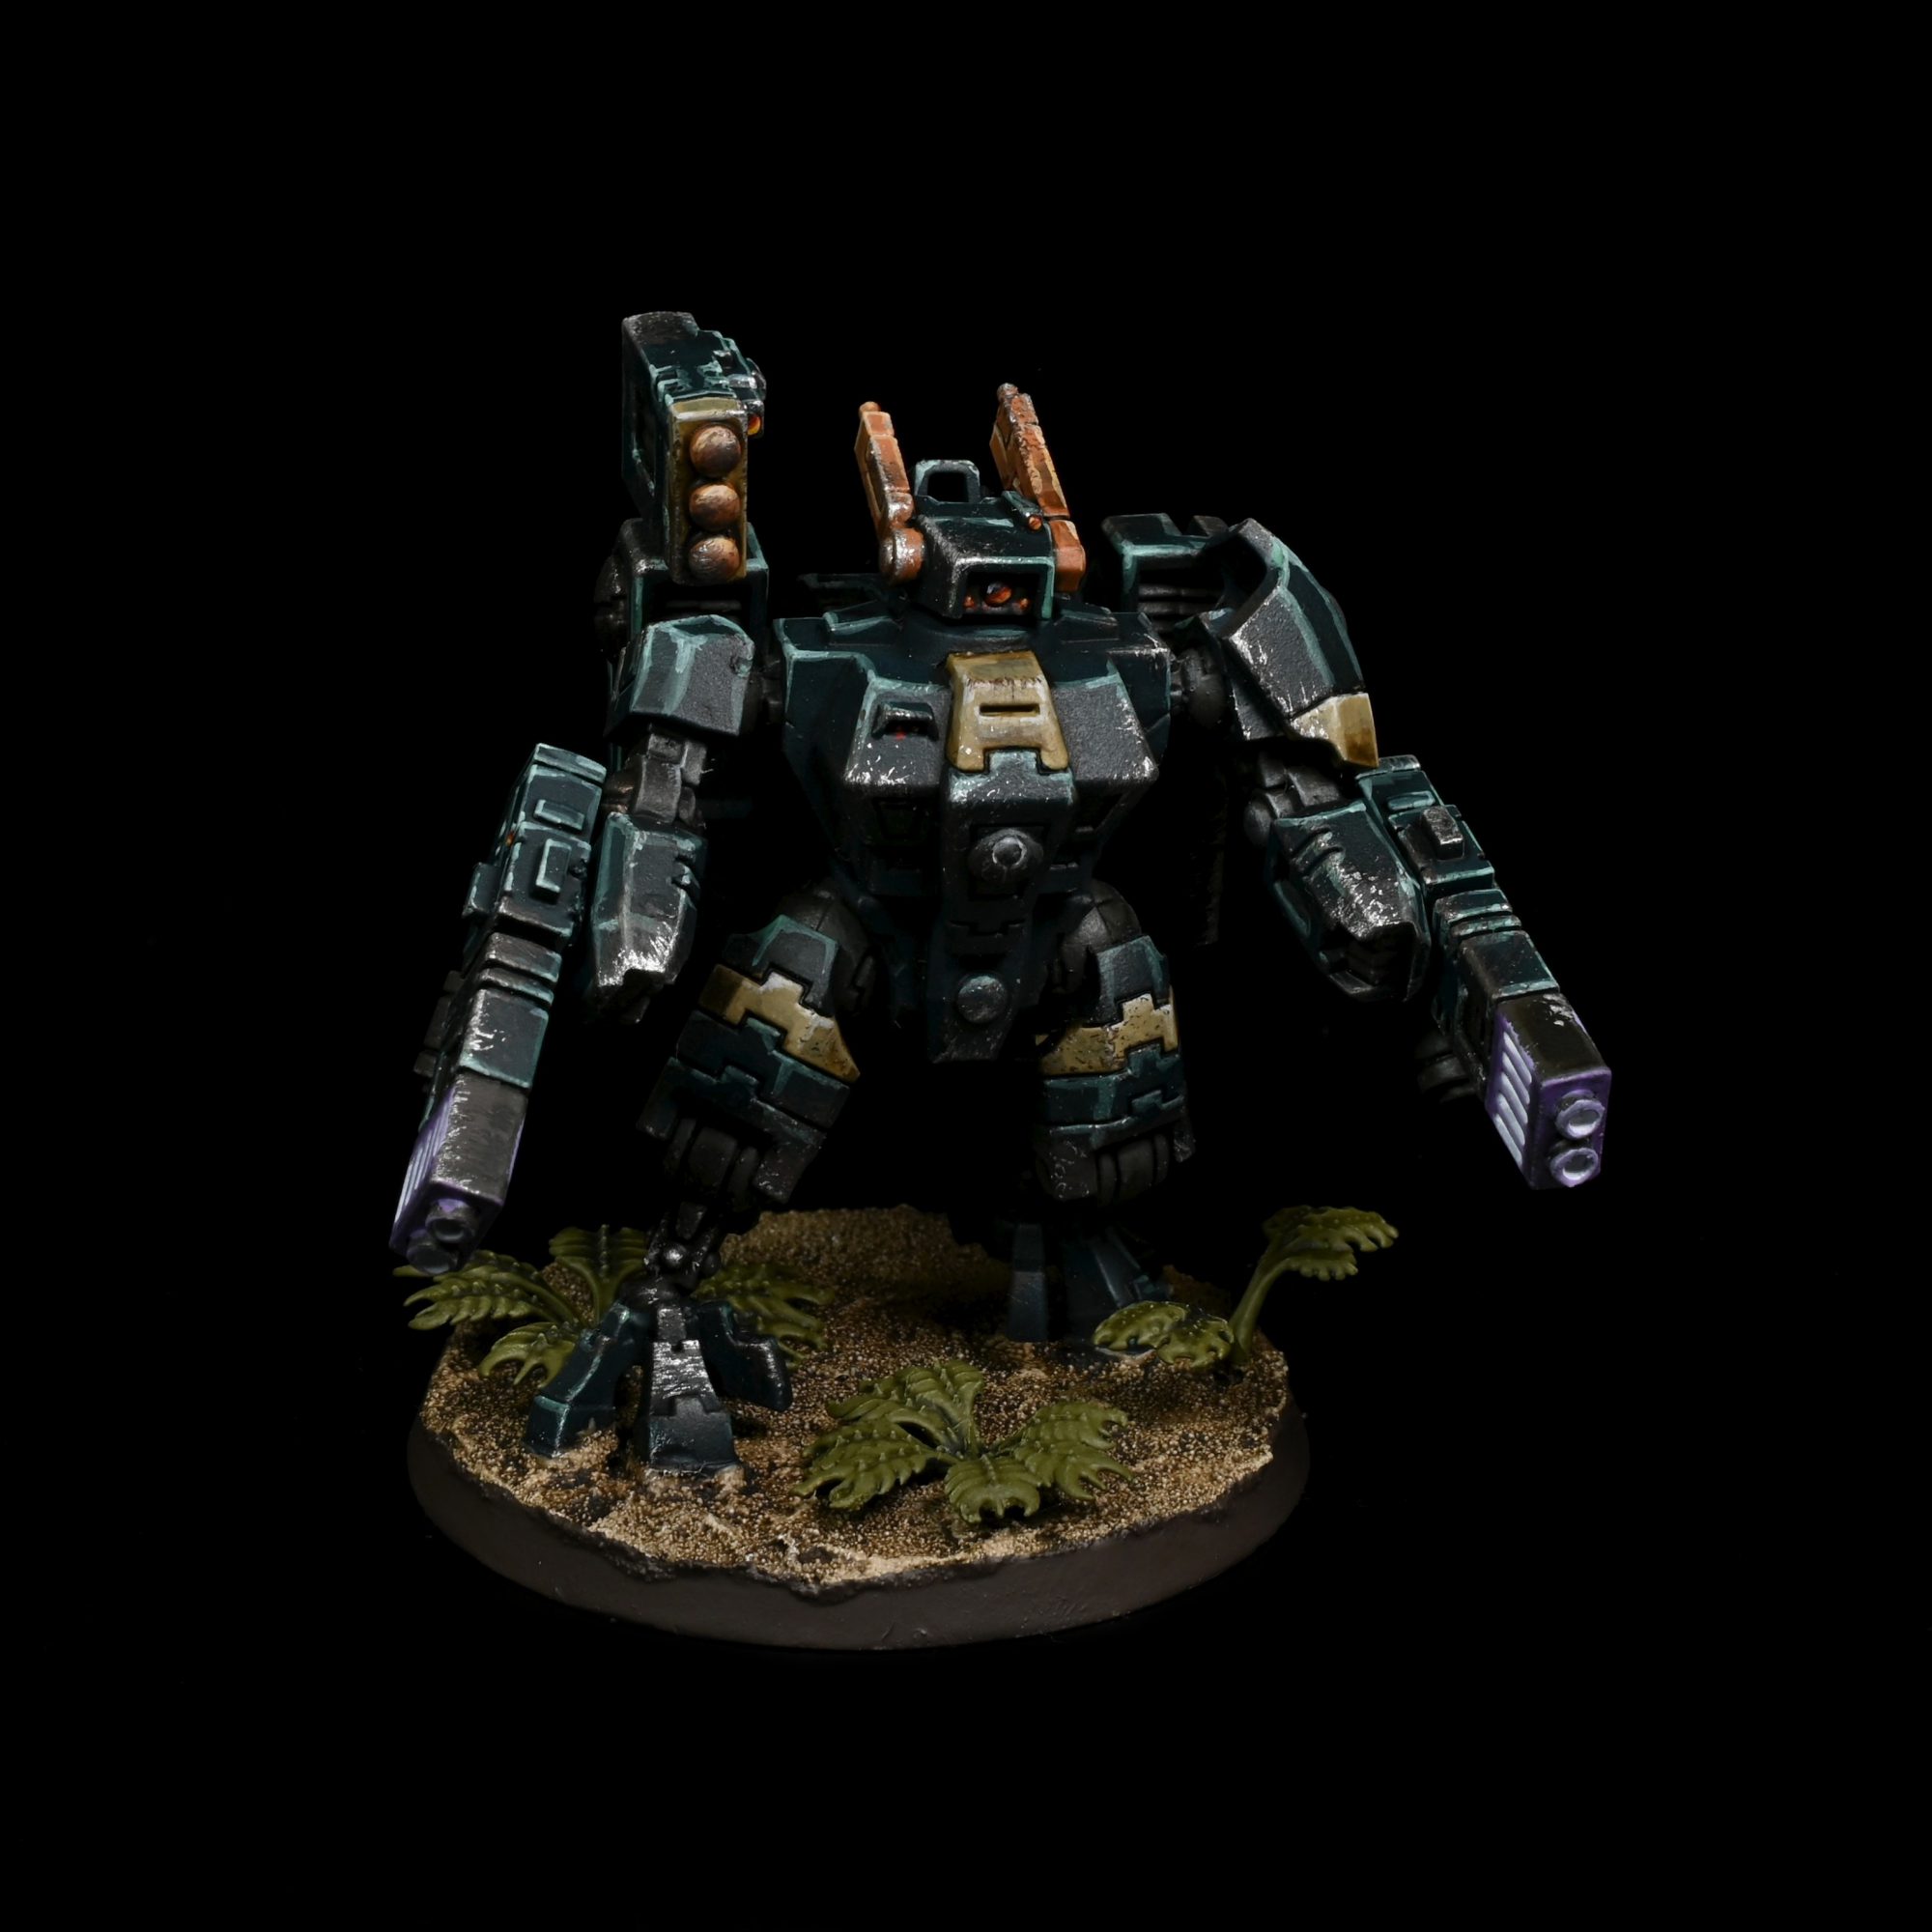
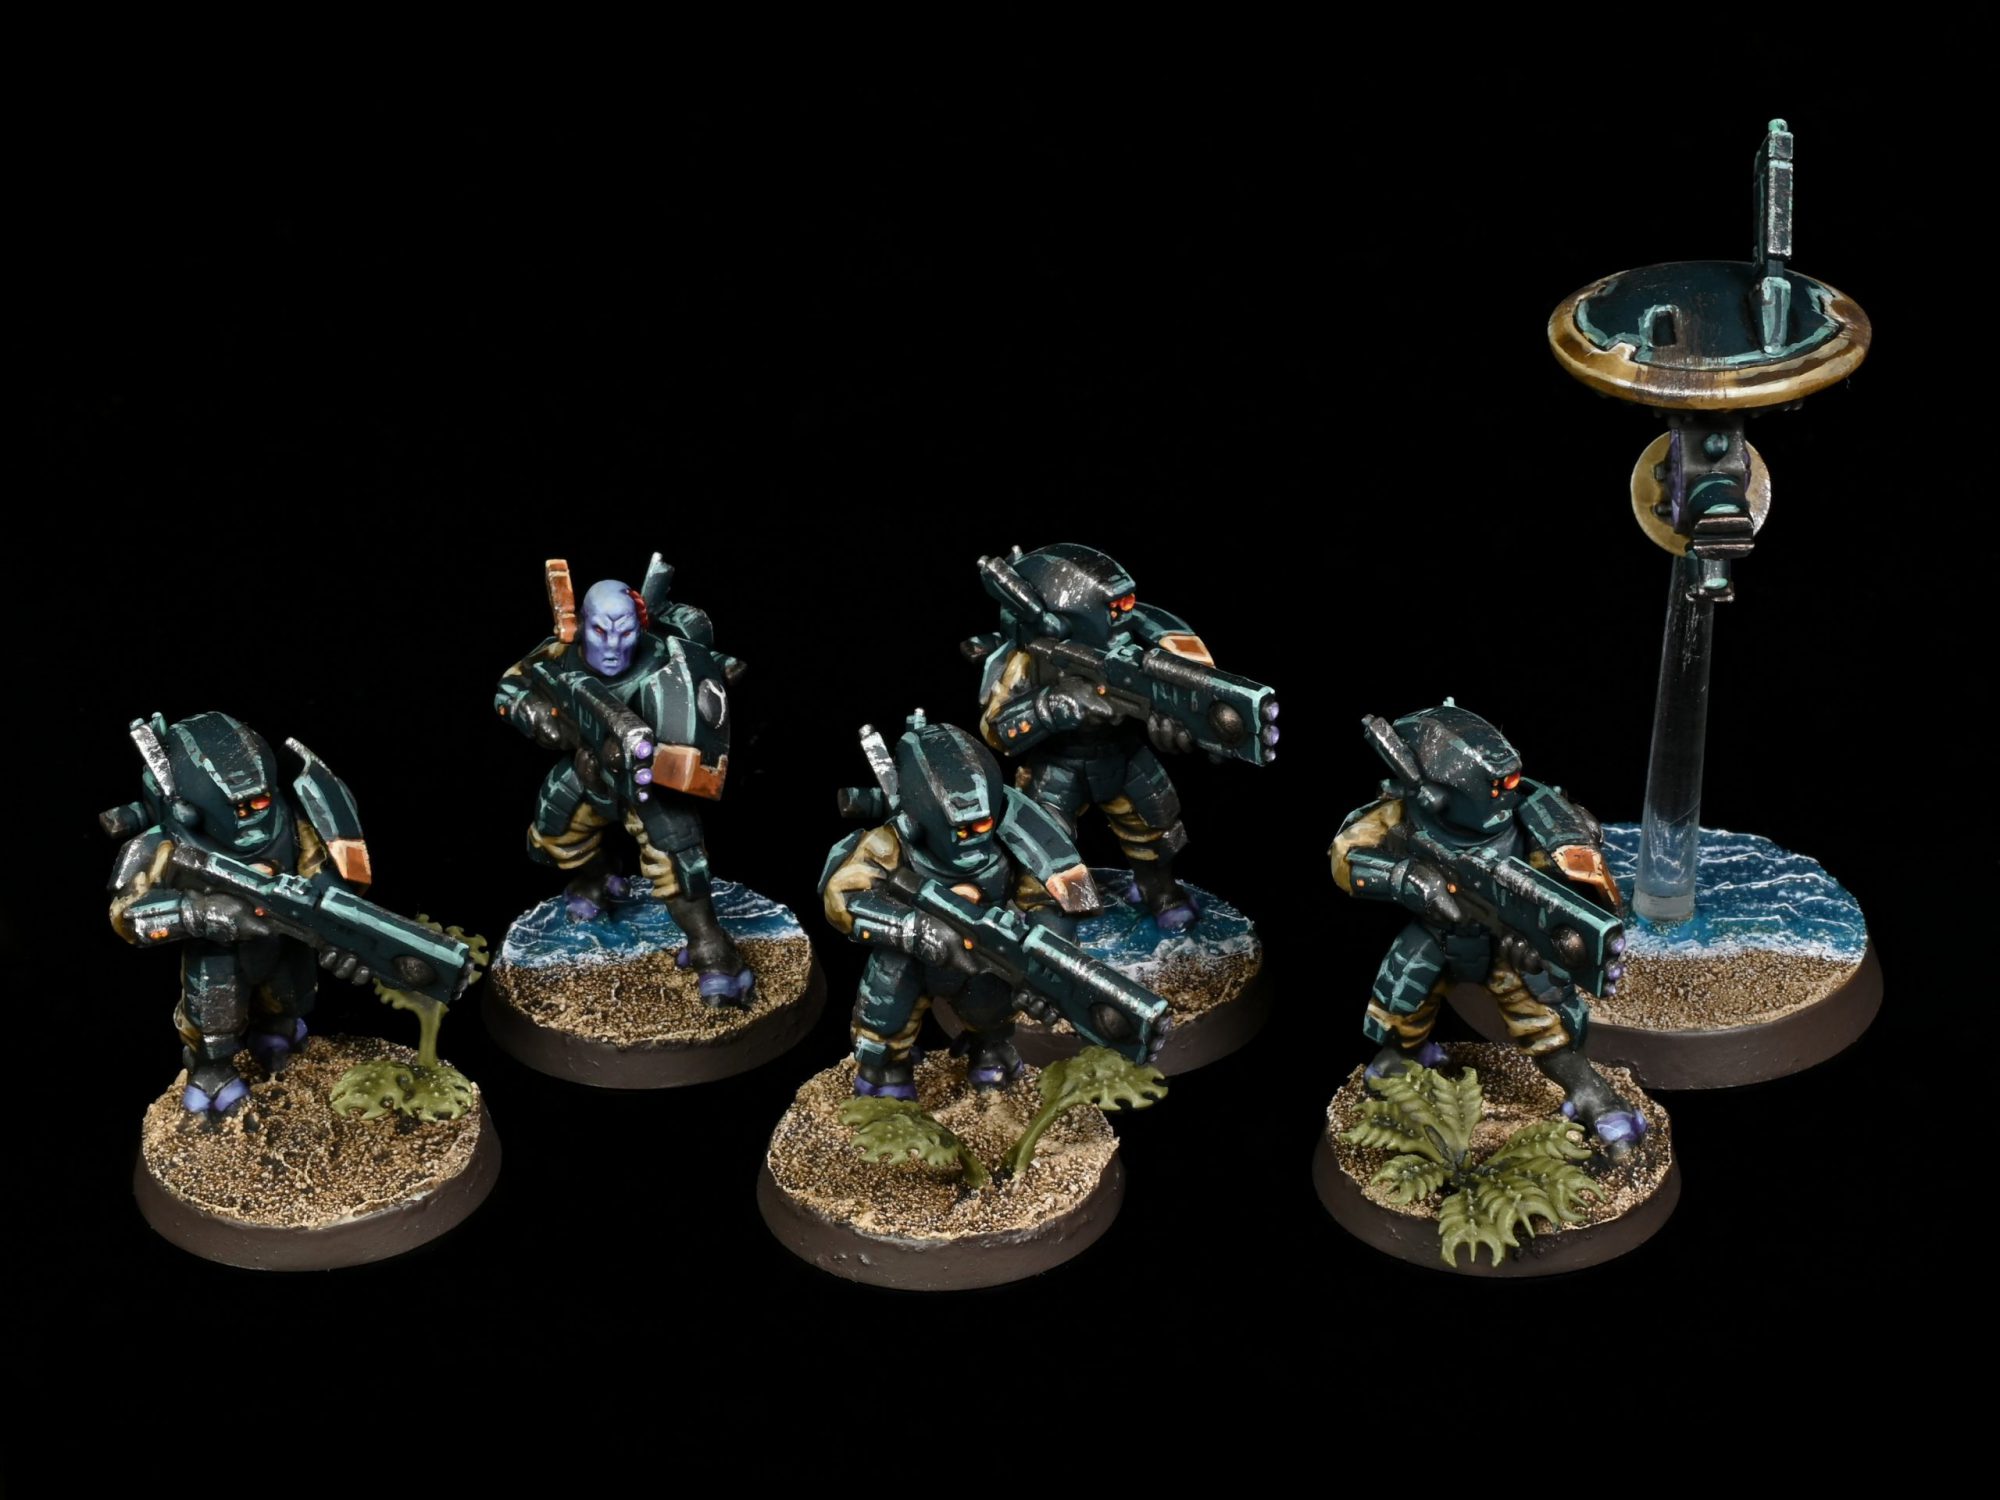
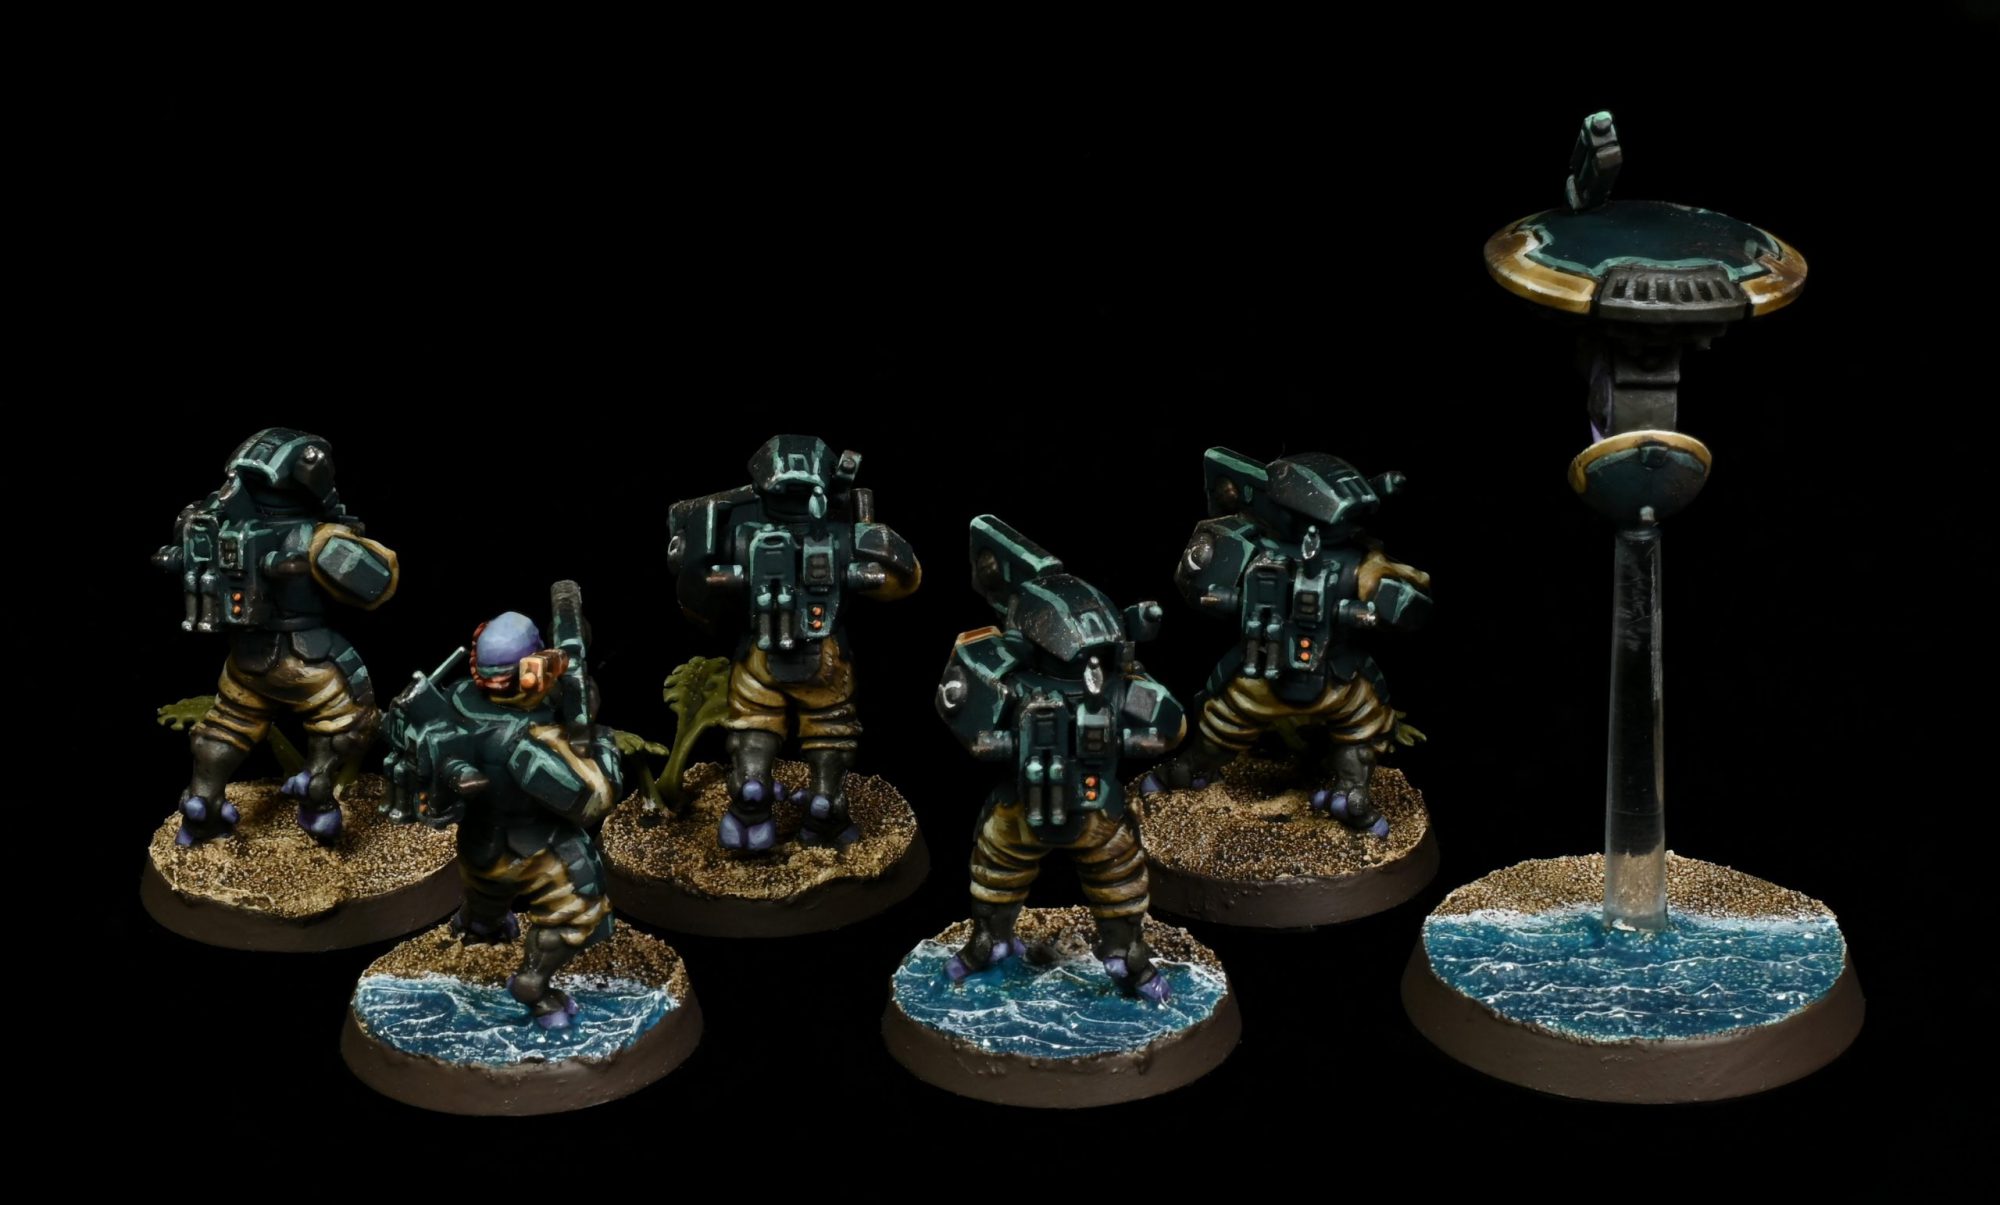
I will say I am quite pleased with how the model turned out, particularly given its spent the last few years collecting dust after suffering some damage in its old colours.


You must be logged in to post a comment.