This article is part of a larger series on how to paint Space Marines. To return to that series, click here.
The Silver Templars are an Ultramarines Successor Chapter created during the Ultima Founding, composed entirely of Primaris Space Marines. This was an important part of their creation, as their introduction in White Dwarf 456 focused primarily on this feature and provided rules which required players field only Primaris models in their army.
The Silver Templars have a lot in common with the Iron Hands, being known cold, focused warriors on the battlefield who display little emotion. They’re known for being accomplished weaponsmiths, crafting their own weapons and establishing links with machine spirits. They call this link the “Bond Martial,” and losing a bonded weapon or tank is a mark of great dishonor.
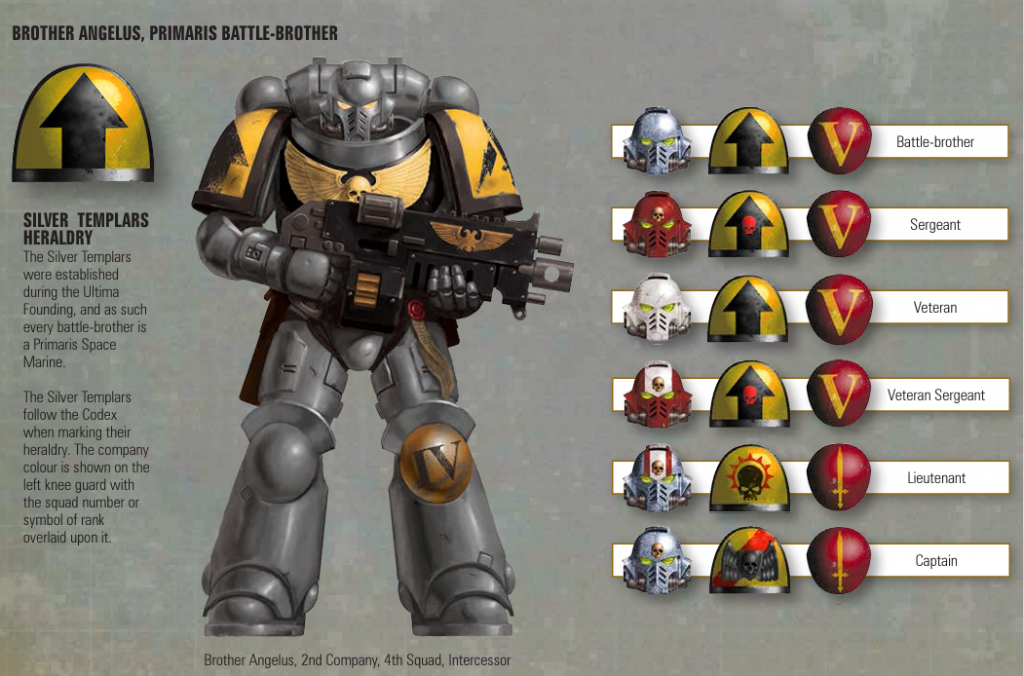
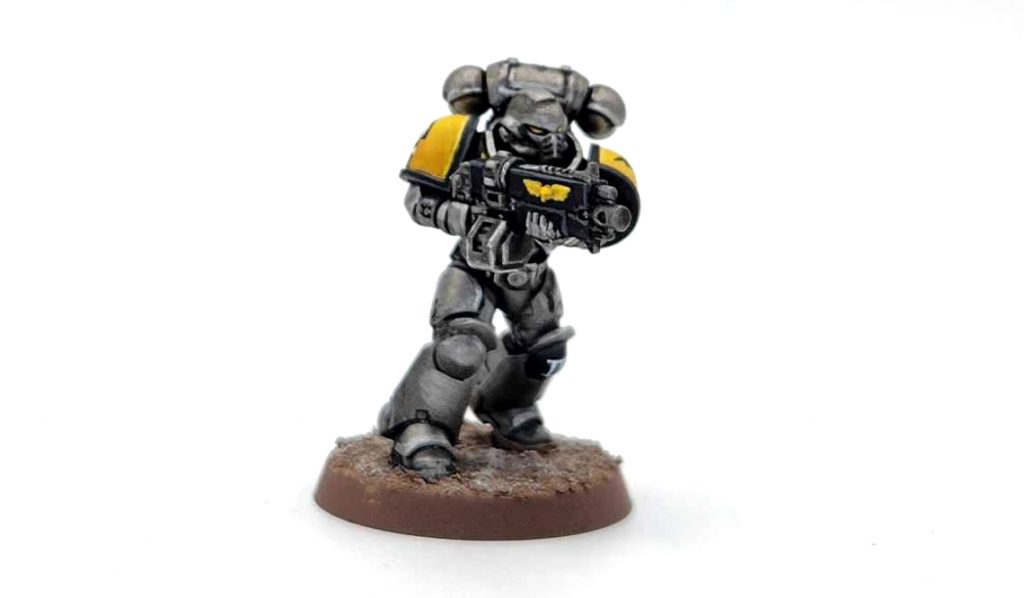
Heraldry - Click to expand Color-wise, the Silver Templars wear silver armor with black chestpieces and yellow shoulder pads and aquilas. The original article in White Dwarf 456 shows their heraldry, which is a little off from the standard Ultramarines scheme but still hews to the Codex Astartes. The left kneepad is used to display company color while the squad number is overlaid on top of that. That said, I’ve also seen versions of the scheme which use the white gothic script to do squad number over the squad designation and that looks pretty great too.
The Silver Templars have a remarkably simple scheme that looks pretty striking on the table. They’re a great scheme for beginners as large, mostly silver marines can be quickly primed with Leadbelcher, then washed with Nuln Oil and highlighted with Runefang Steel.
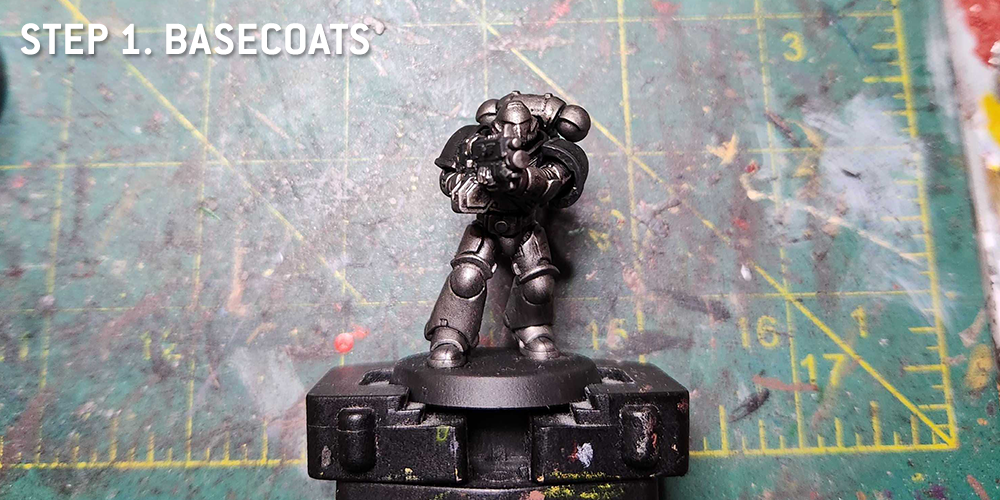
Step 1. Basecoats
For my example I started by priming the model with Chaos Black, but that was largely unintentional. If I had to do this again I’d start by priming the model with Leadbelcher, but in this case it was largely fine – that means step 1 here is basecoating the model with Leadbelcher. I’m trying to miss the chest plate during this process, but after I do that I’ll come back and paint it with Black Legion Contrast paint. I’m holding off on the yellow for now – those parts come later.
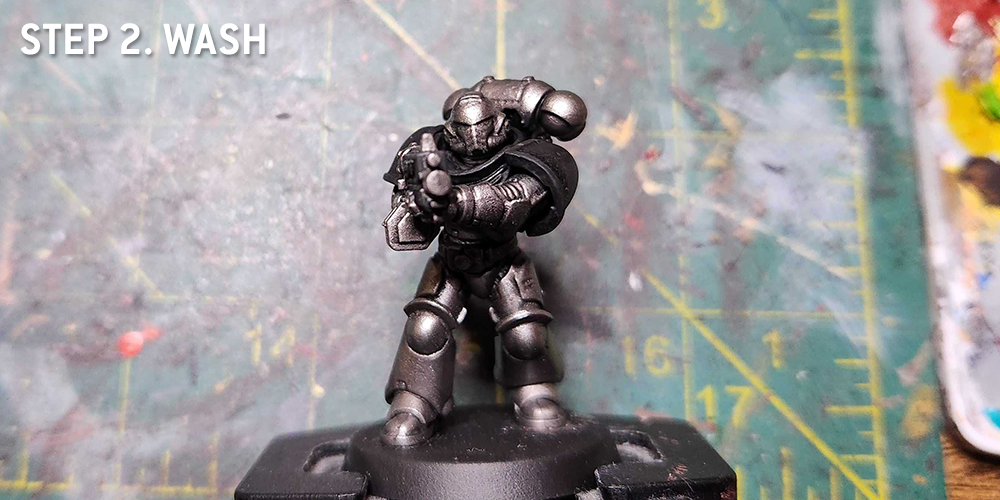
Step 2. Washes
I wash the metal parts of the model with Nuln Oil, making sure to get in all the recesses. This will darken the model quite a bit, and I’ll come back and hit the raised parts of the armor with Leadbelcher again after washing it. If you primed your model Leadbelcher, you can mostly skip to this step after you paint the black parts of the model.
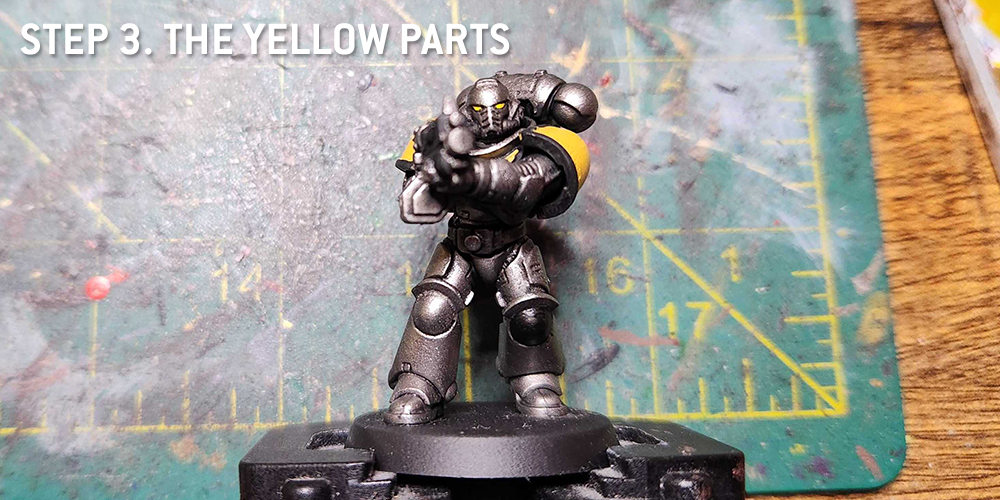
Step 3. The Yellow Parts
Time to tackle the yellow parts. This starts with a few thin coats of Averland Sunset, covering the shoulder pads, the chest aquila, and the eye lenses. We’re going with yellow eyes on these bad boys.
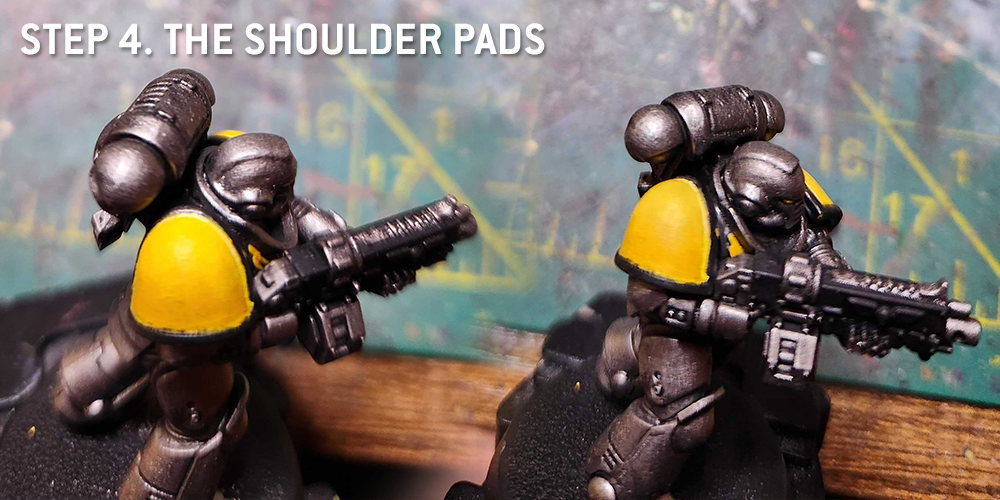
Step 4. The Shoulder Pads
I do a blend here fromm Averland Sunset up to Flash Gitz Yellow, working in 3-4 layers. Once all that’s done I do a thin interior edge highlight line of Dorn Yellow to finish things off. This is pretty much copied over the rest of the model – I’ll highlight the eye lenses with Flash Gitz as well.
Once that’s all done I’ll come back and paint the rims with Black Legion contrast paint and edge highlight the rims with Mechancius Standard Grey.
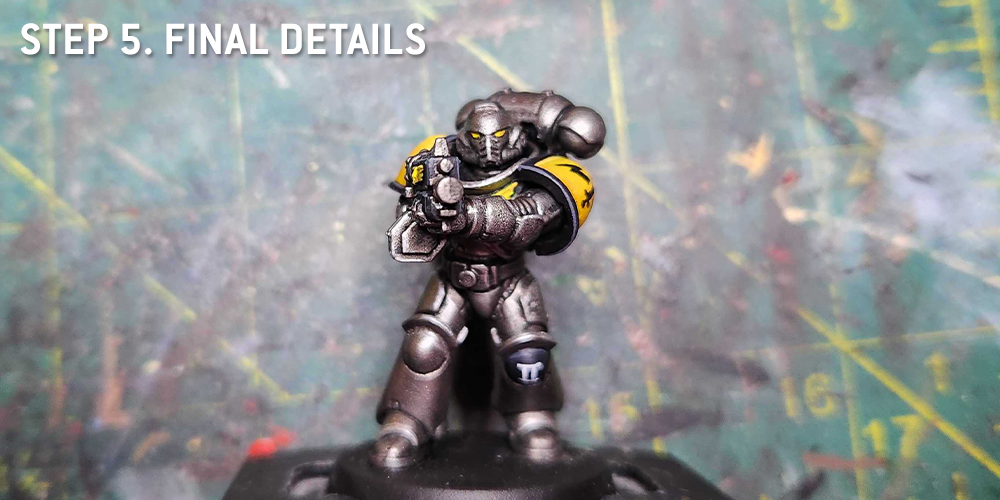
Step 5. Final Details
Time for some final details. I paint the gun aquila with Averland Sunset, wash it with Reikland Fleshshade, and highlight with Averland and Flash Gitz Yellow. The gun gets edge highlighted with Mechanicus Standard Grey. And the most important highlights also happen here – I edge highlight the metal parts of the model with Runefang Steel, which really makes them stand out.
And that’s it! A pretty easy process that’s easy to do in large batches, especially if your’e smart enough to start with Leadbelcher spray to save time.
This article is part of a larger series on how to paint Space Marines. To return to that series, click here.

