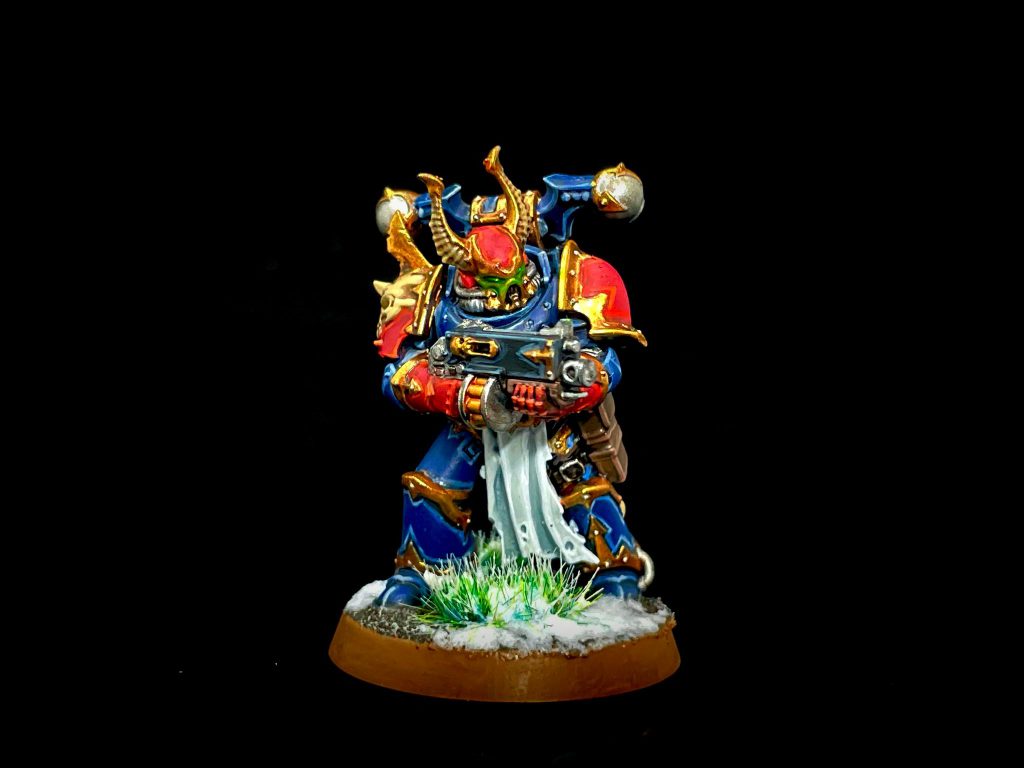
In our How to Paint Everything series we look at how to paint, well, everything, with a look at different approaches and techniques. In this article we’re looking at how to paint the Scourged, a renegade chapter of Chaos Space Marines.

The Scourged are a Chaos Space Marine renegade warband dedicated to Tzeentch, chaos god of magic and trickery. Before their fall to chaos, they were a loyal Space Marine chapter called the Seekers of Truth. After being called by the inquisition time and again to kill the innocent, the chapter prayed for a way to discern truth from lies so only the guilty would know their wrath. Tzeentch answered their prayer in the most monkey’s paw way possible, and the chapter became plagued by voices whispering every lie of mankind. The chapter fell to chaos soon after, driven insane by the Imperium’s countless lies.
The Scourged was also the warband of Shanker Gord, the Dark Apostle and chaos leader during the 2023 Goonhammer global narrative campaign. Given an Ark of Omen by Abaddon to conduct his dark work in the Vandinax sector, Shanker Gord met his end on Attos during the GHO Narrative that same year.
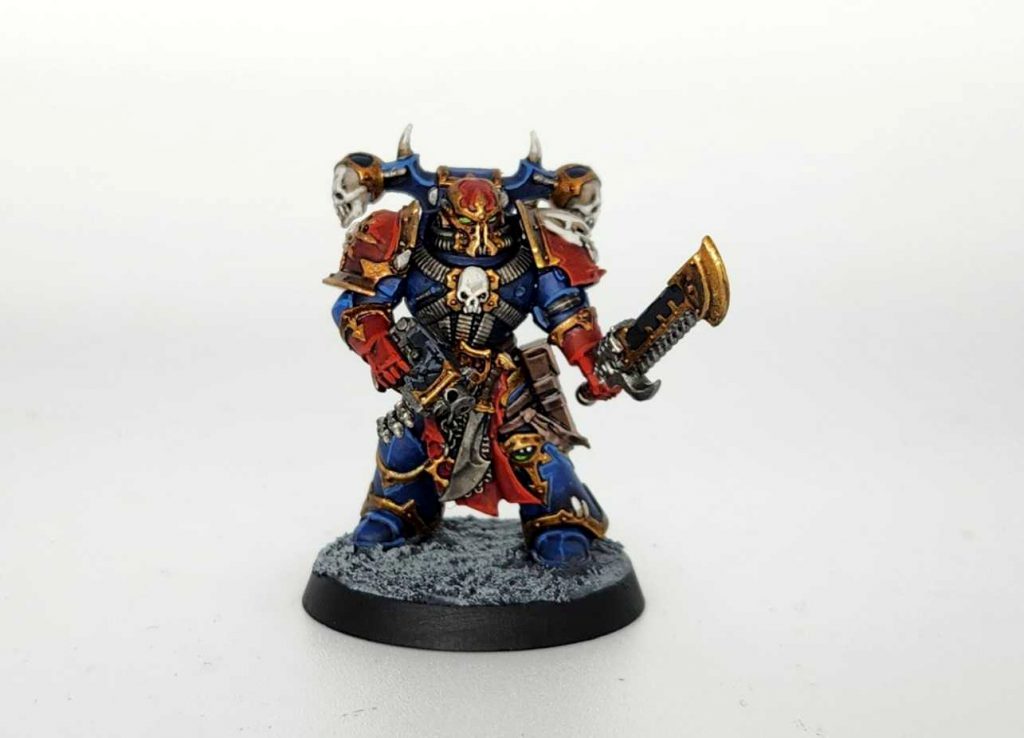
The Scourged are a unique scheme for Chaos Space Marines. Most of the original traitor legions only have one base armor color, but the Scourged have both blue and red panels as a part of their scheme. For those who want a color scheme that lets you explore some extra colors, the Scourged are a great choice.
Covered in this Article:
- How to paint The Scourged Chaos Space Marines, with multiple methods for painting their blue and red armor.
- Notes on the heraldry of the Scourged.

The Scourged Heraldry - Click to Expand Formerly the Seekers of Truth chapter of space marines, the Scourged have followed the path of other traitor and renegade chapters by jettisoning their adherence to the Codex Astartes and with it, any notions of squad marking or unit designation. The Scourged are notable for their two-tone color scheme, pairing darker blue armor with deep red helmets, gauntlets, and pauldrons. They’re exclusively devoted to the chaos god Tzeentch, and as such will often employ more sorcerers than other warbands. Their current chapter icon resembles the mark of Tzeentch with a stylized eye as its main focus.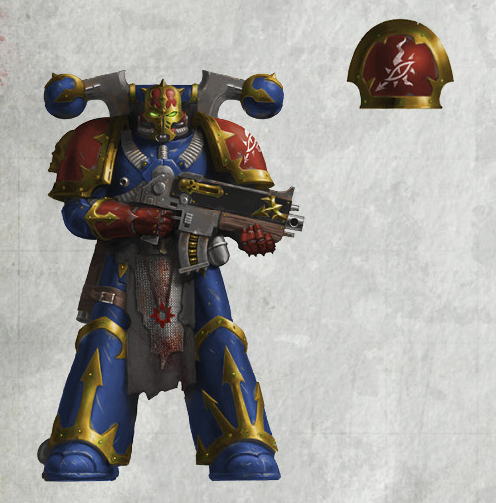

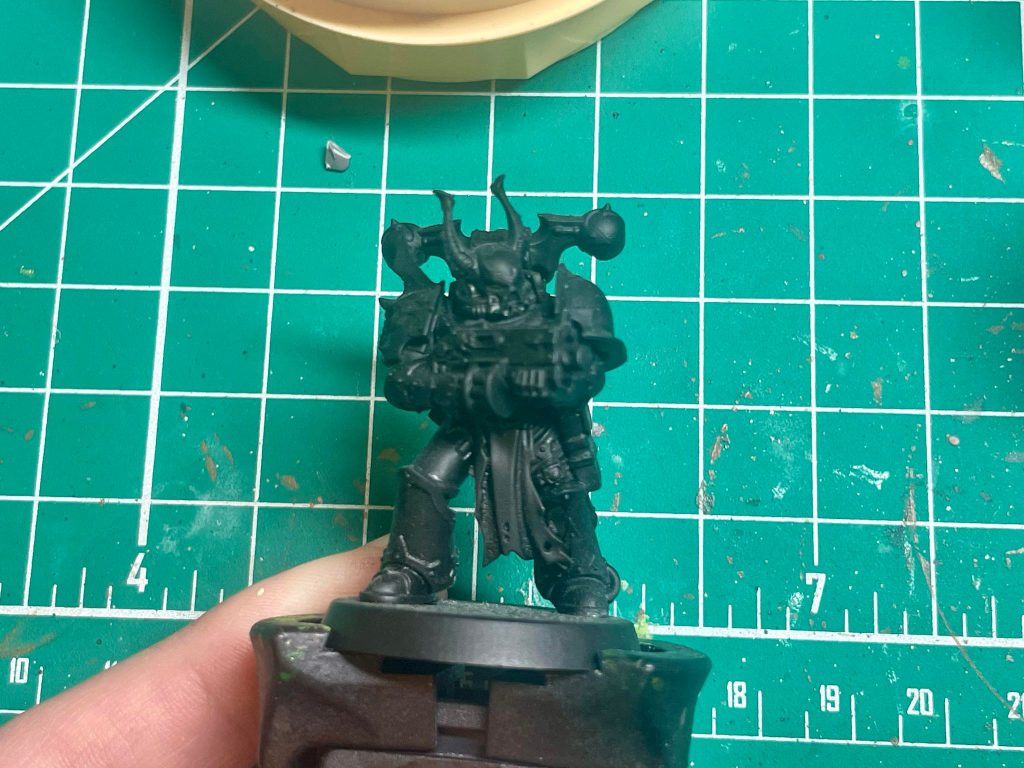
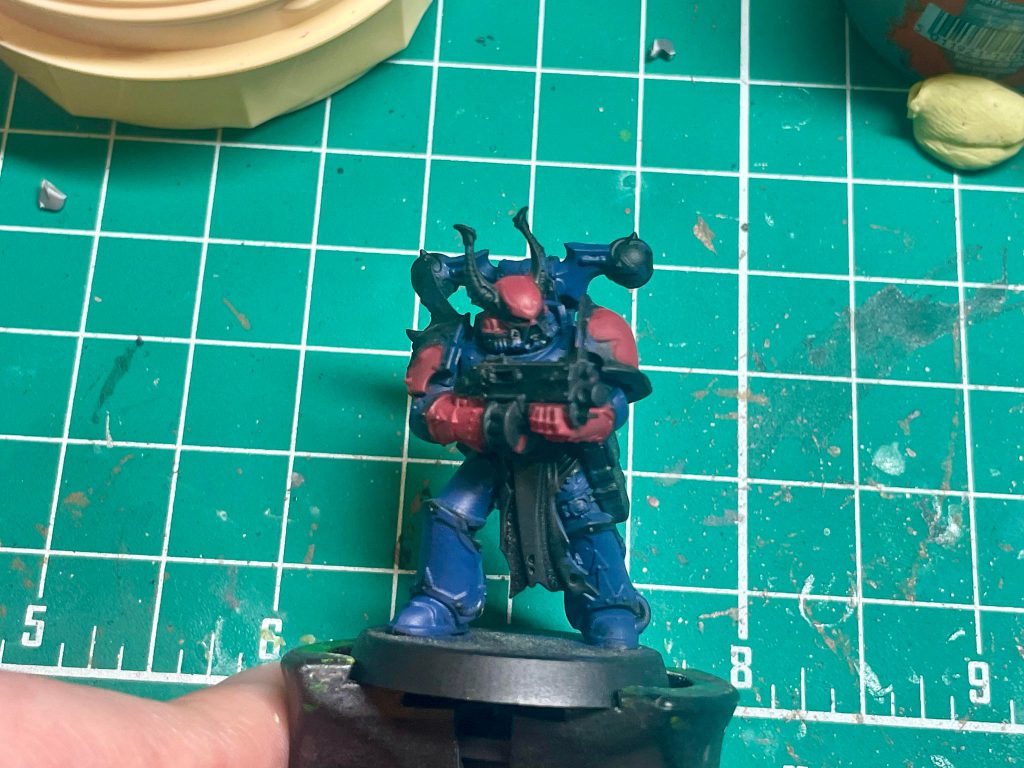
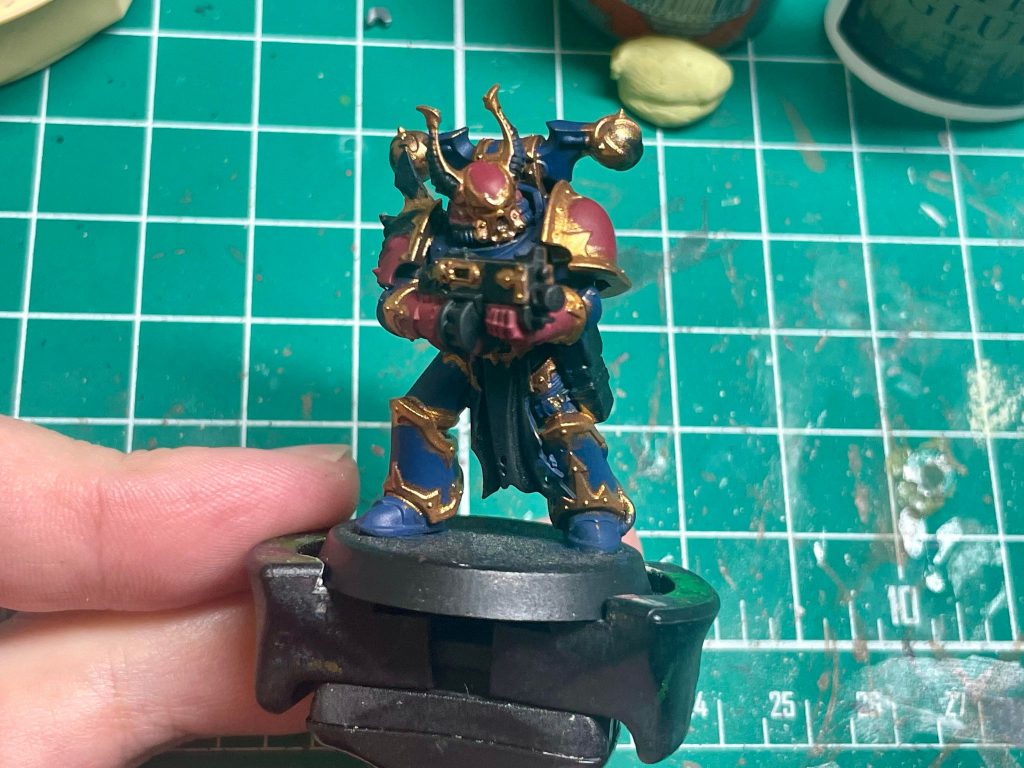
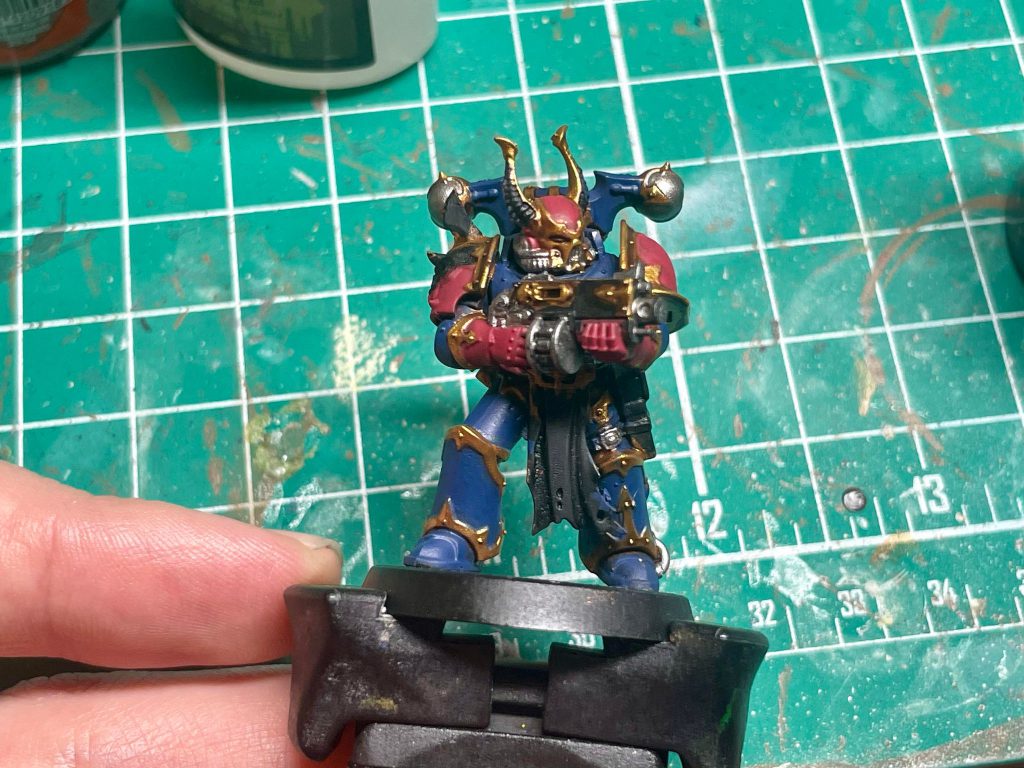
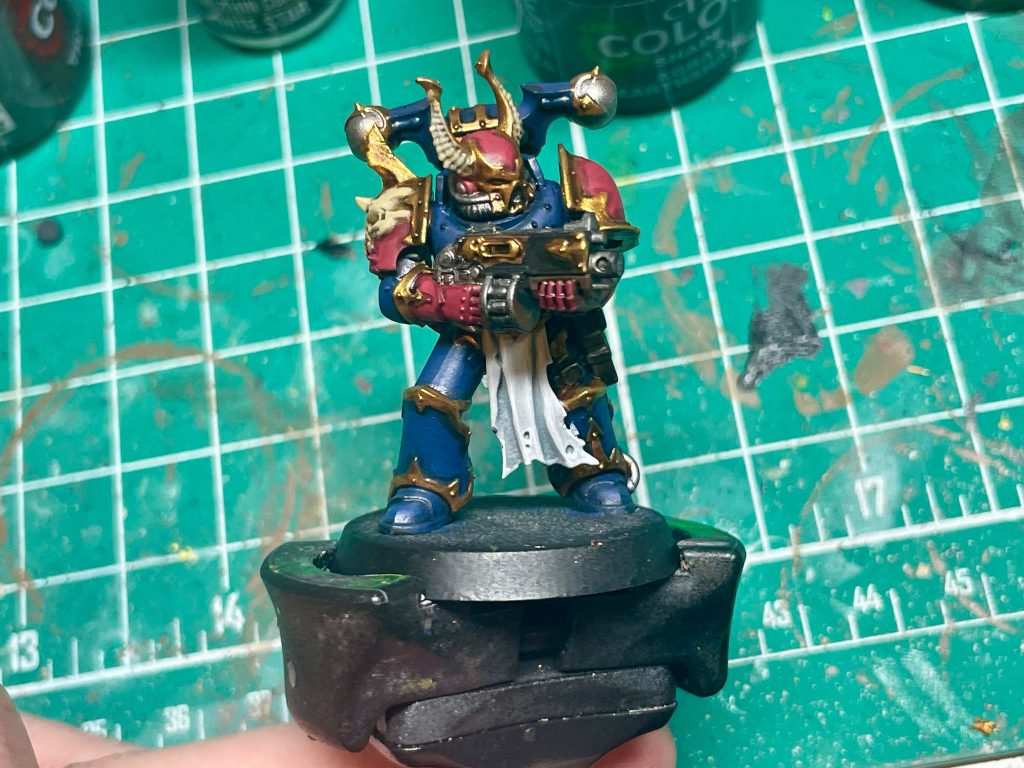
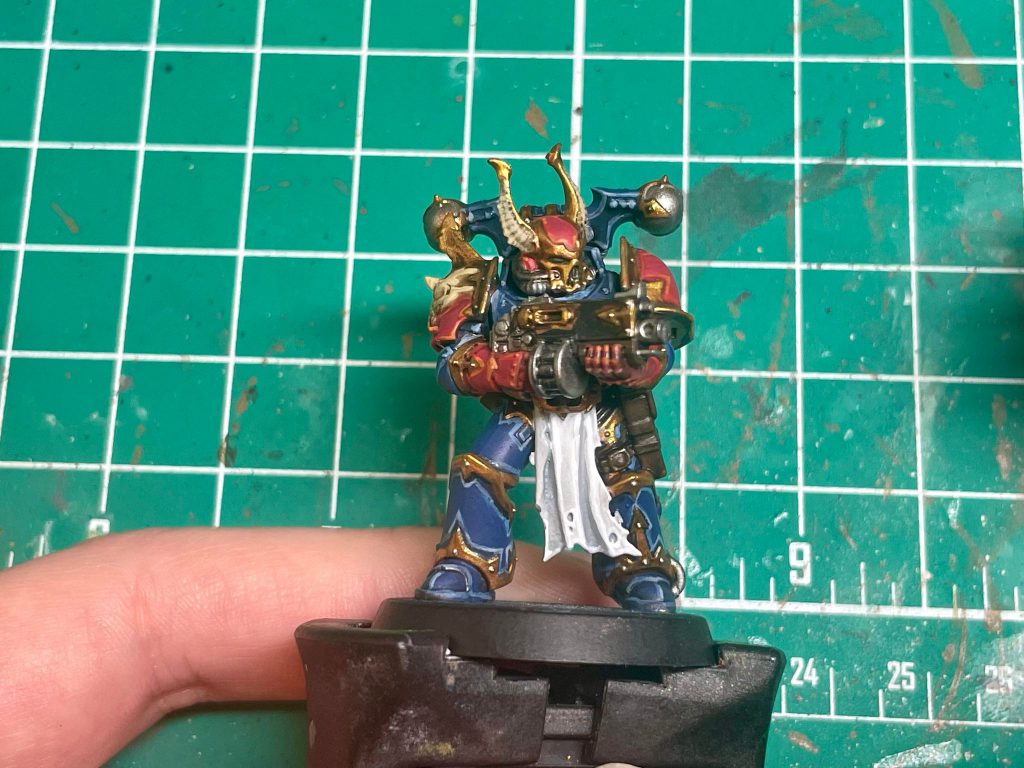
Swiftblade's Method - Click to Expand The Scourged scheme is a little more complex than some other warbands, but only because there’s just a few extra colors involved. As for the color’s themselves, they aren’t too difficult to work with, so painting the Scourged won’t drive you as insane as its warriors already are! We’re going to paint a Legionnaire armed with a trusty bolter for this guide. You don’t see Legionaries with bolters on the table too often these days, but it’s an iconic weapon and looks slick on the modern sculpts. We start by priming the whole model black. Unless there’s some good reason not to, it’s almost always easier to work with a black basecoat. Our next step is the armor panels. I just want to put a basecoat on them here, and don’t actually want to shade or edge highlight yet since we will be using the Agrax Earthshade for both the armor panels and trim. For the blue areas, I use Kantor Blue, and for the red, I start with Khorne Red and then add a layer of Wazdakka Red to brighten the red areas up a bit without being too bright. For the trim, I want a bit of a more burnished gold look. So I start with Balthazar Gold and then layer on Ghenna’s Gold, avoiding the recessed areas as much as possible here. I’m not too worried about getting any paint on the armor panels, I will clean those up later. Since it will also be getting an Agrax Earthshade wash, I apply a coat of Leadbelcher to the areas I want to be silver. While I paint the joints silver, I wont wash them with Agrax. Instead, I use Basilicanum Grey Contrast Paint to make the joints almost black with a little silver shining through, like it’s the undersuit of the power armor. Everywhere else gets a careful Agrax Earthshade wash, except for the blue, which gets a wash with Nuln Oil. For the bone details on this model, I start with Zandri Dust, and apply a layer of Duncan Rhodes Skeleton Legion before I apply a wash of Agrax Earthshade. I touch back up the Skeleton Legion, before highlighting with Duncan Rhodes Vampire Fang. White can be an intimidating color, but fortunately I’ve found a way to make white look pretty good without too much trouble. I start here with Grey Seer, before applying my secret weapon to make white look good: I wash with two slightly thinned coats of Apothecary White Contrast Paint. It adds a nice cool touch to the Grey Seer that I really like. I then highlight the raised parts of the cloth with Ulthuan Grey before highlighting with Duncan Rhodes White Star. Now I can focus on highlighting the armor panels and the trim. For the gold Trim, I do some Ghenna’s Gold touch ups before highlighting with Army Painter Glistening Gold and painting the rivets on the trim with Duncan Rhodes Plate Armour. For the red armor panels, I edge highlight with Evil Suns Scarlet and then highlight the most prominent edges with Fire Dragon Bright. For the blue, I edge highlight with Hoeth Blue before highlighting the most prominent edges Duncan Rhodes Gravestone Blue. Legionnaires can be kinda busy models, so here I just go around and grab all the details I missed earlier and touch up some things where I can. For example, I touch up silver areas where I can to brighten them a bit with Duncan Rhodes Plate Armor. For the leather details, I base with Thondia Brown, wash with Agrax Earthshade, and highlight with Gorthor Brown. For the eyes, I base with Dark Angels Green, then carefully apply some Moot Green, followed by Warpstone Glow near the corners of each lens. I put a dot of White Star as well to sell the lens effect, with some thinned down Striking Scorpion Green Contrast Paint to give a little glow effect. I clean up the black on the bolter with Black Legion Contrast Paint before edge highlighting with Dark Reaper followed by Gravestone Blue. After painting my base Steel Legion Drab, applying some Astrogranite Debris and Agrax Earthshade, and a quick drybrush of Dawnstone followed by Screaming Skull, we’re just about picture ready. Just gotta add some snow and flock to taste here, and viola! Step 0: Prime Black
Step 1: Base Blue and Red Armor Panels
Step 2: Start on the Trim
Step 3: Paint the Tabard and Bone
Step 4: Highlighting the Armor and Trim
Step 5: Other Details

TheChirurgeon's Method - Click to Expand I went for a darker shade on The Scourged than Dan, going with something more akin to the version of them shown off in the 6th/7th edition books. It’s not quite as dark as those, where they’re almost black, but I’m mostly going to shade my colors rather than highlighting them, and that’ll give my model a darker feel. I started by priming the model black. I start with the base colors for the armor panels. That’s Kantor Blue on the body and backpack, and Mephiston Red on the pauldrons, gauntlets, and helmet. Next up I wash those sections of armor. The blue sections get a couple coats of Drakenhof Nightshade, while the Red parts get a couple of shades of Carroburg Crimson. In both cases, I’m doing these progressively, creating a bit of a layered shading effect. Next up comes the metal bits – the chainmail, under armor, cables – these all get painted Leadbelcher. Next it’s time to do some of the highlights. I highlight the blue armor sections with Kantor Blue, and do another layer mixing in a small amount of Altdorf Guard Blue. Then I’ll edge highlight those sections with Hoeth Blue. The red sections get an edge highlight of Evil Sunz Scarlet, but I am otherwise not brightening them. I’ll paint the loincloth Mephiston Red and wash it with Carroburg Crimson as well. Everyone’s favorite part, the gold trim. This is a coat of Retributor Armour. I’m basically grouping elements that will get washed the same color. Next up I do the bone parts – skulls, teeth, horns – with Rakarth Flesh. The leather straps and holster get a coat of Gorthor Brown. Then that all gets washed. I wash the silver metal parts with Nuln Oil, and I wash the gold trim, bones, horns, and leather parts with Agrax Earthshade. I’ll come back and highlight the leather with Gorthor Brown mixed with a little Reaper Polished Bone. Time for the finishing touches. I highlight the skulls and bones with Rakarth Flesh, then again with Reaper Polished Bone. The eyes are just a spot of Moot Green. The black casings on the gun and chainsword are painted Corvus Black, then edge highlighted with Mechanicus Standard Grey. And that wraps up the Scourged. I could stand to make the scheme darker – starting with more of a Night Lords blue and Khorne Red and really shading it – but GW doesn’t really make the kind of dark red that’d require to do well and this worked better with the paints I had. I’m happy wit the result, either way.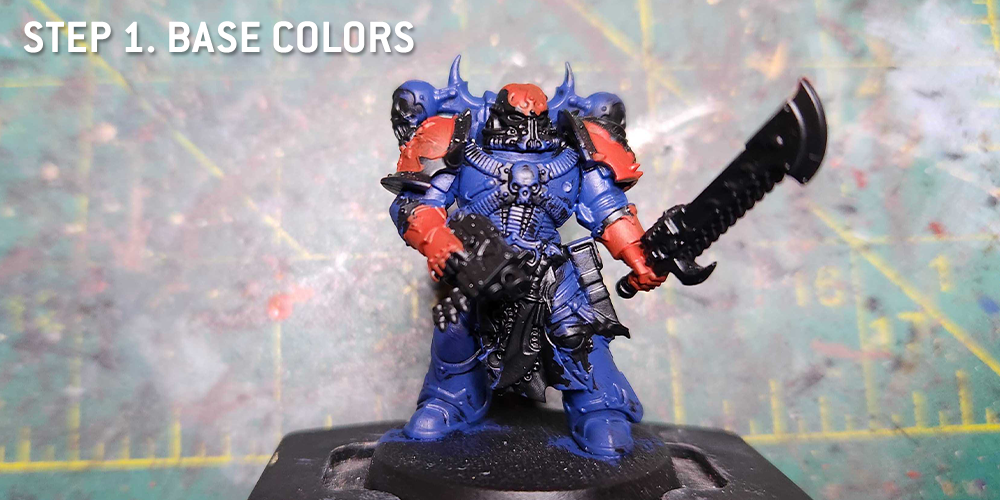
Step 1. Armor Base Colors
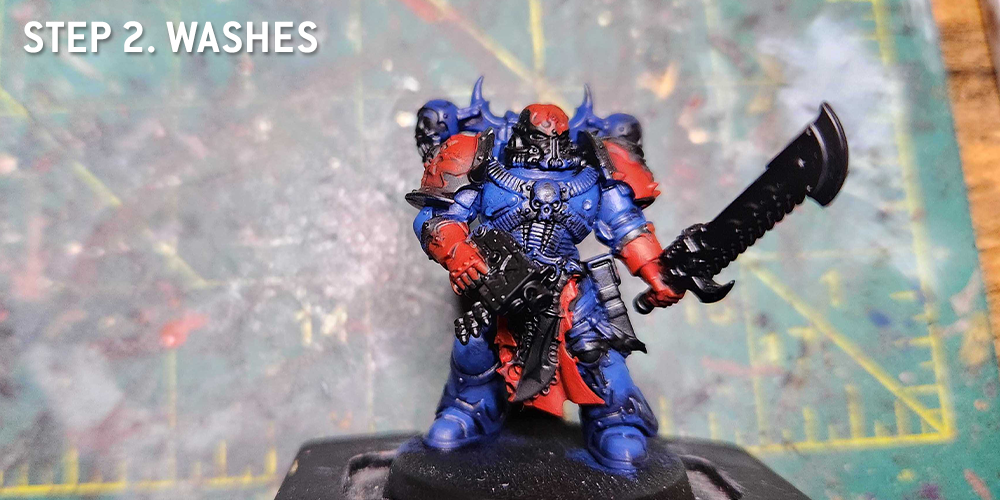
Step 2. Washes
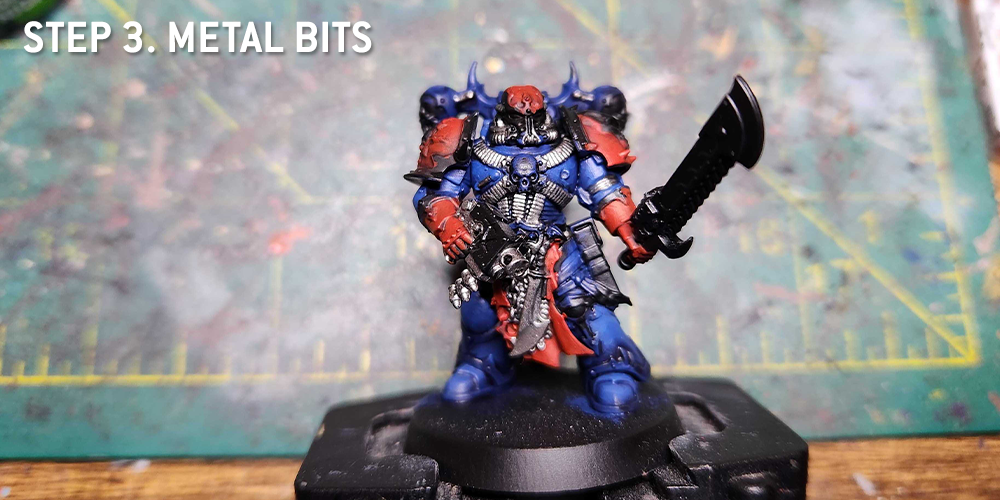
Step 3. Metal Bits
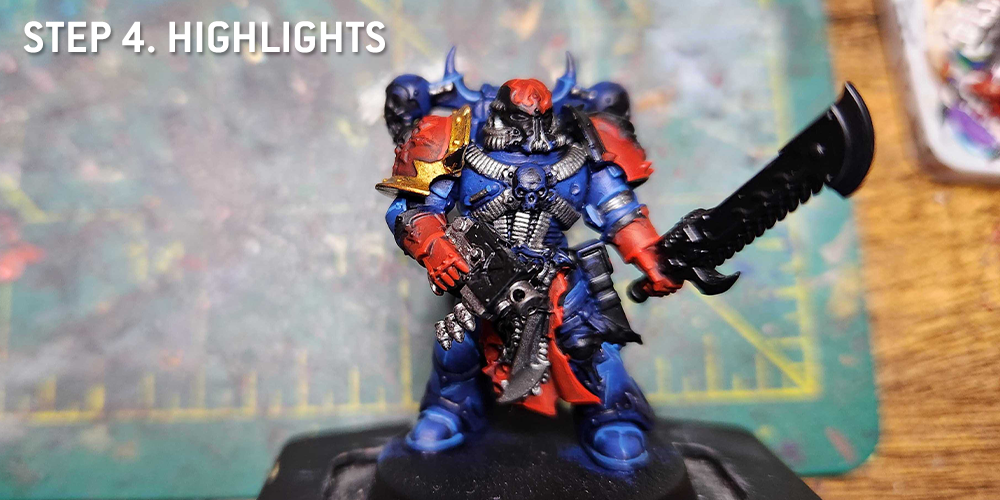
Step 4. Highlights
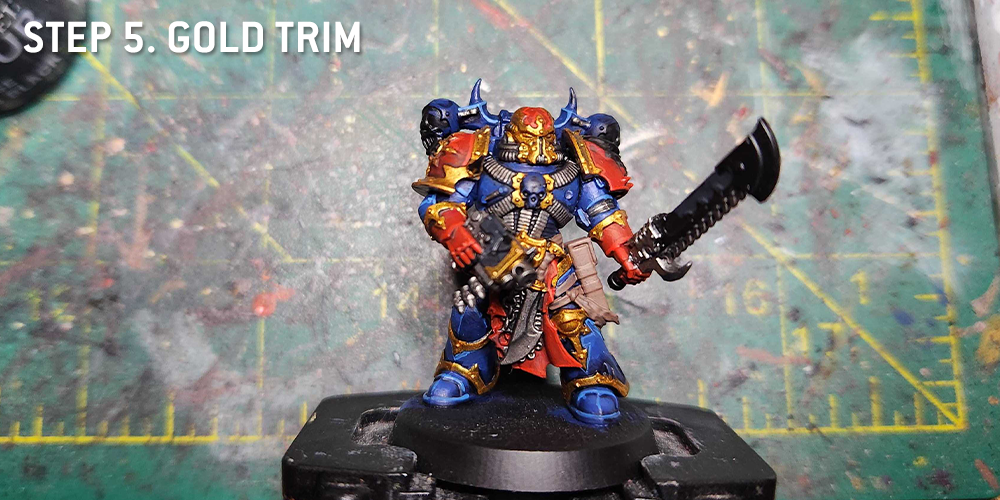
Step 5. Gold Trim
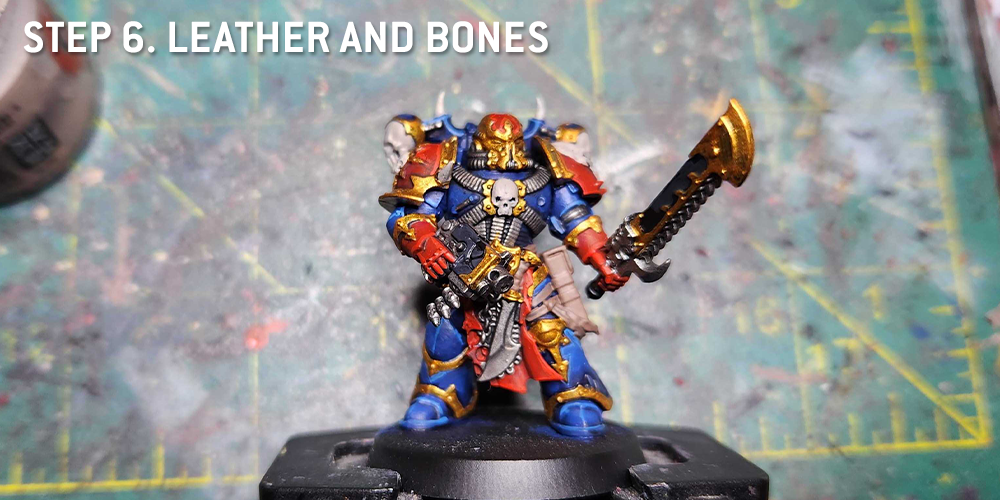
Step 6. Leather and Bones
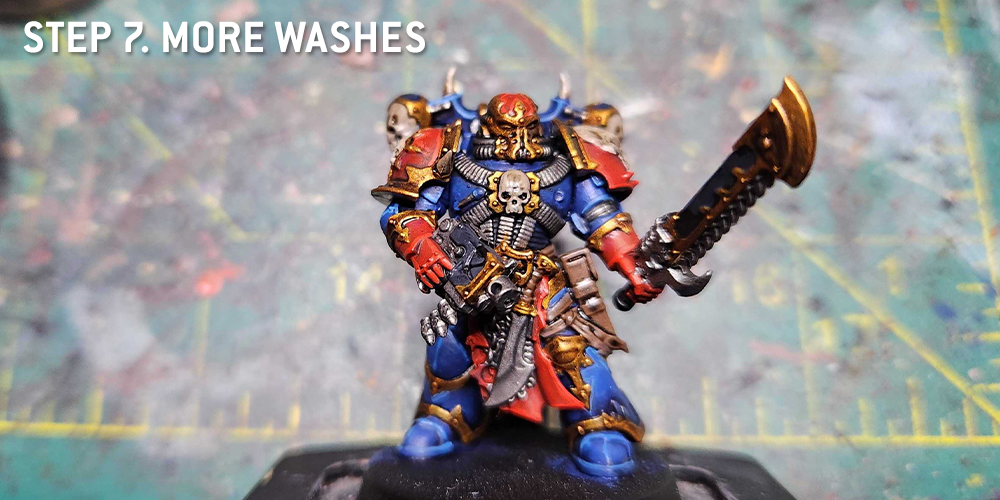
Step 7. Washes, Again
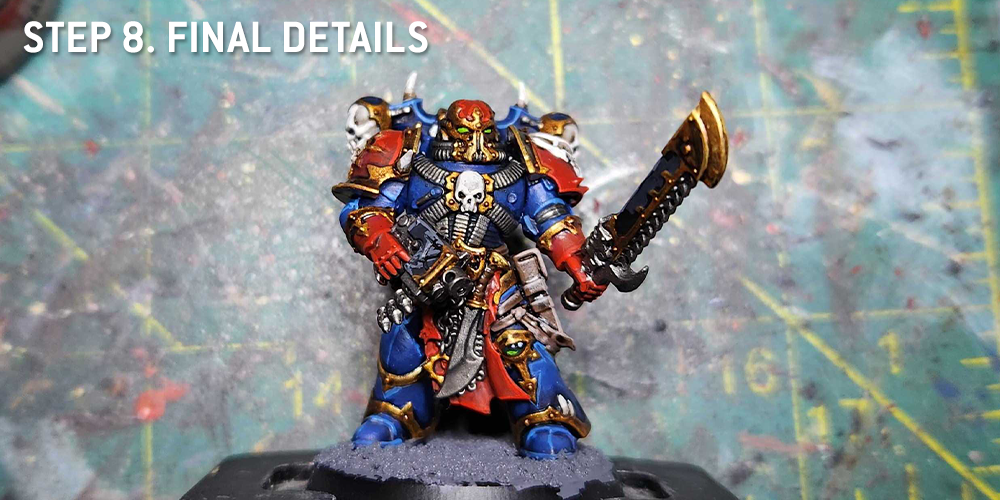
Step 8. Final Details
Final Thoughts
The Scourged have a unique scheme, and they can be rewarding to paint. It’s nice and colorful too, which really stands out amongst some other legion colors. Thanks for reading this guide on painting The Scourged; we hope it helps your own journey through all the lies, the lies, the lies…
As always, if you have any questions or feedback drop us a note in the comments below or email us at contact@goonhammer.com.
