This article is part of a larger series on how to paint Necrons. To return to that series, click here.

The Novokh Dynasty are close combat monsters on the battlefield, and are visually distinct with a striking red color scheme that uses splashes of white.
The models in the Indomitus box were my first Necrons – I’ve previously thought about doing Necrons but never pulled the trigger on them. I’m kind of glad I waited now because these models are awesome — they wonderfully combine the creepy eldritch horror of the 3rd edition Necron fluff with the character of the Tomb Kings-style 5th edition reboot. I’ve always really liked the red Necrons that one of my college roommates painted, and so I wanted to do something similar in style to his Necrons, albeit with a little more visual flair on the characters. I also wanted to get away from the green energy rods, since the red/green combo can end up looking a little too Christmas-like. So the general scheme – and I’ve decided they’ll be Novokh – is to do deep red shoulder plates, chest armor, and heads for the core warriors, with more red plating for higher-ranking models in the army. I’ve decided to do the heads on my characters with a bone color, because it looks bad ass and gives them more of an undead feel.
Necron Warriors
For the Necron Warriors I went with a really simple scheme that can be easily replicated across a large number of models. Metal bodies, Red chests/shoulders/helmets. It’s roughly a 9-to-12 step process. 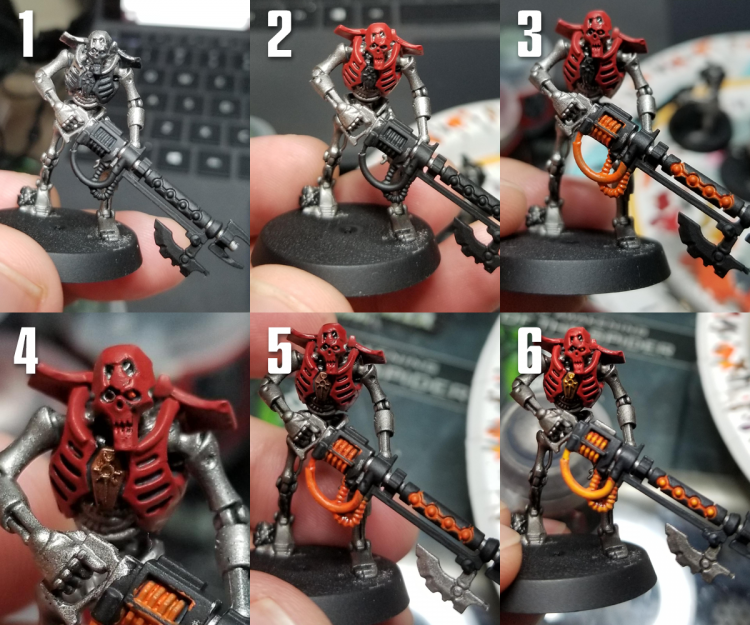 Step 0: Prime black. Always black.
Step 1: I start by doing a base coat of Leadbelcher all over the main parts of the body that won’t be red. My reds have pretty good coverage, so I can afford to be a bit sloppy here. I also want to get the spots on the head where the mask is broken.
Step 2: Time for the red. This is Mephiston Red covering the chest, shoulder, and head plates. The back of the head is still kept silver.
Step 3: I’m doing orange weapons. I do a few thin coats of Trollslayer Orange to start. Dot the eye, do the glowing parts of the gun and the cables.
Step 4: The chest emblem gets painted Balthasar Gold.
Step 5: Time to wash everything. Nuln OIl on the Leadbelcher parts, Carroburg Crimson on the Red, Agrax Earthshade on the gold, Contrast Gryph-Hound Orange on the orange parts.
Step 6: Highlights. I do layers of Mephiston Red on the red armor on the raised parts of the chest, helmet, and shoulder pads. I highlight the orange with Trollslayer and Fire Dragon Bright, edge highlight the gold with Retributor Armour, and drybrush the metal armor with Necron Compound. This is also when I’ll hit the gun’s black parts with Corvus Black.
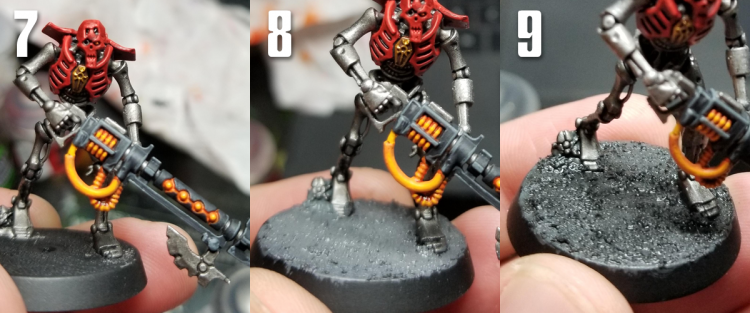 Step 7: Edge Highlighting. I edge the red with Evil Sunz Scarlet. The black gun gets edge highlighting with Mechanicus Standard Grey, and the orange gets a final touch of Fire Dragon Bright mixed with Yriel Yellow.
Step 8: The base! I slather it all in Astrogranite texture paint. I also paint the stone by the foot and the scarab with Leadbelcher.
Step 9: Wash the whole thing with Nuln Oil. Once that dries, drybrush it with Celestra Grey.
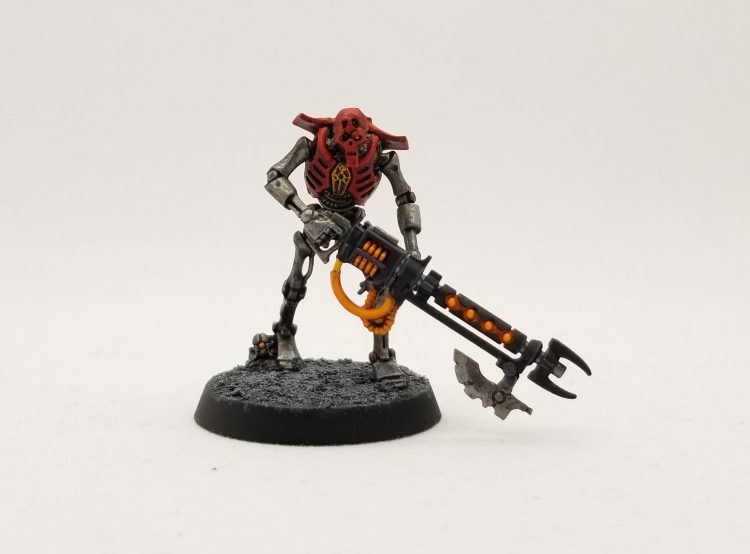
And that’s the finished Necron Warrior! This was pretty fast and easy to do, and I’m very happy with the result. Despite using bright colors, they come across appropriately menacing, which is the goal.
The Characters
My characters tend to follow the same process, with some minor variations and more complicated schemes.
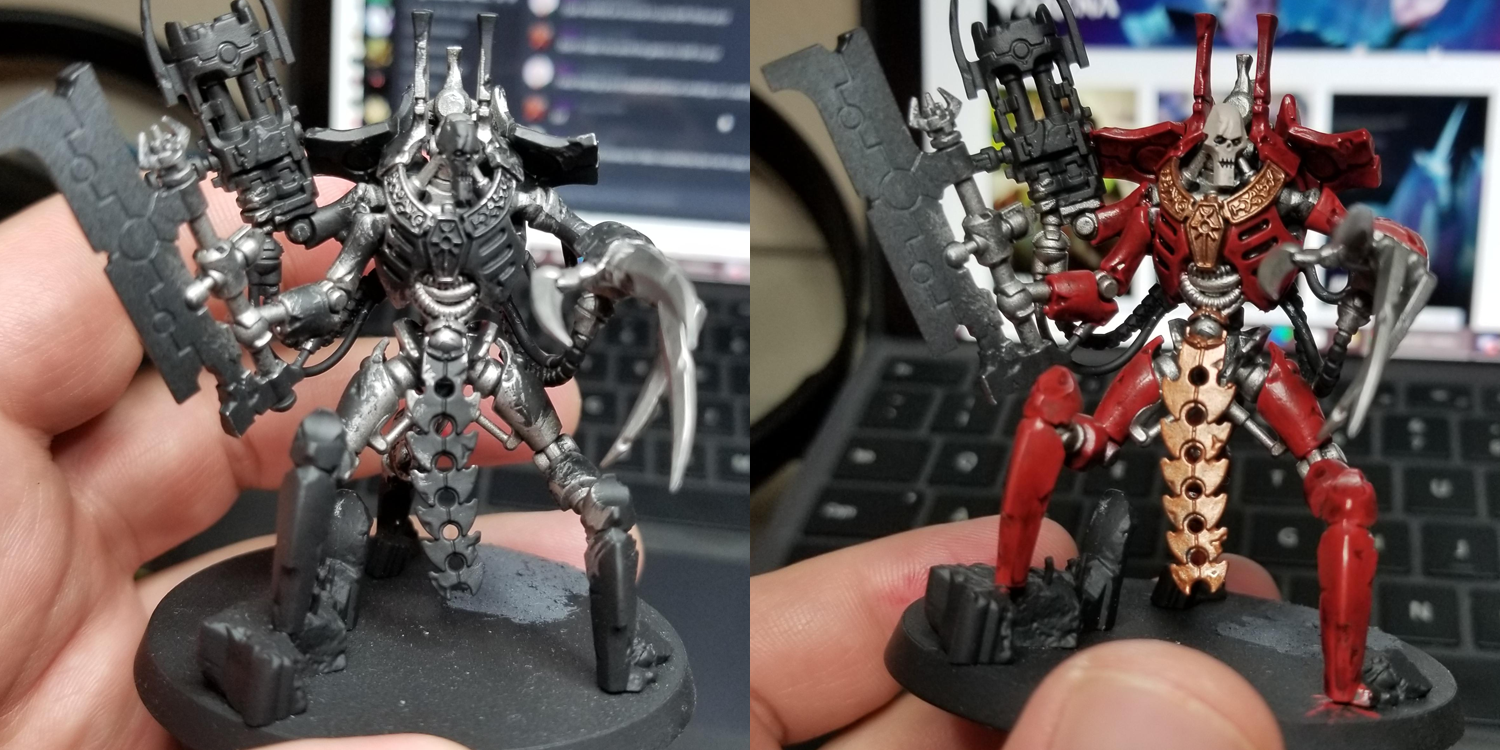 For these characters, the process is largely the same to begin – I cover the metal parts with Leadbelcher, but then they get significantly more red armor, where it will cover all of their non-joint areas. For the top leaders I’m also doing bone-colored skulls. When I do these, I start by painting them with Rakarth Flesh, then I wash them with Agrax Earthshade. I come back and highlight them with Rakarth Flesh and edge highlight them with Reaper Polished Bone. I’ll also mix a little Agrax with Rakarth Flesh to do some wet blinds on the sides and tops of the skulls to get a smoother transition from brown to bone.
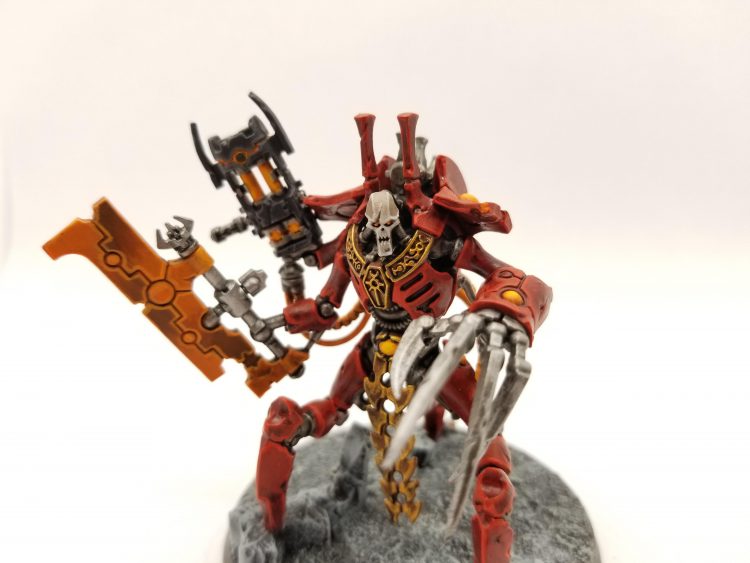
The other major difference between my characters and my rank-and-file jerks is that my character Necrons have orange hyperphase weapons. These took a bit of trial-and-error to figure out before I got a process for doing them that wasn’t particularly hateful.
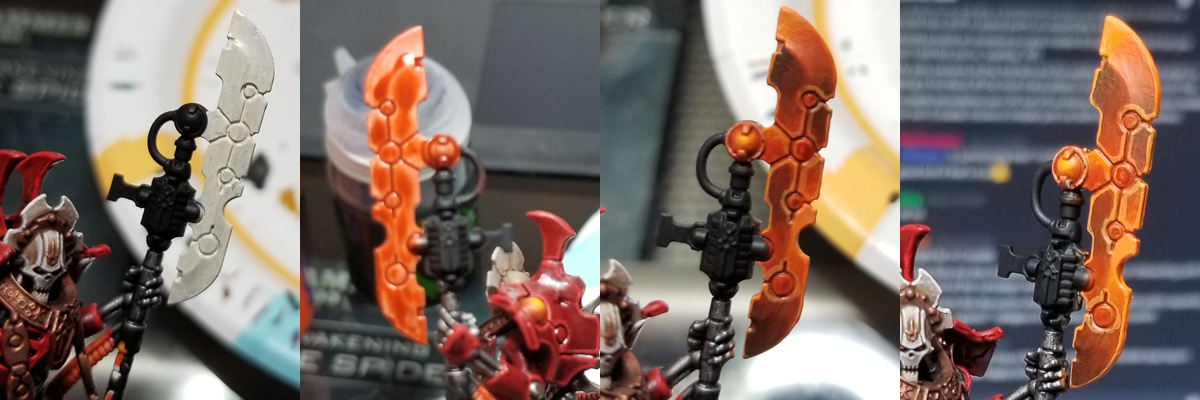 So I started by painting the blade with Wraithbone, then coating that in Contrast Gryph-Hound Orange. I didn’t love how that looked though so I ended up doing a few solid coats of Trollslayer Orange over that, and on later blades I just started with Trollslayer, which gave me a better effect. Next I shaded parts of the blade with Nuln Oil to create some obvious darker parts of the blade, doing the old standard “opposite lighting patterns” that frequently gets used on power weapons. Doing this in several layers and blending with Trollslayer gives you a brownish blade, so after that I started using thin coats of Contrast Gryph-Hound Orange, mixing it with Trollslayer, to coat the gradient parts and add saturation, giving a deeper orange hue. I shaded up a bit toward Fire Dragon Bright and used Fire Dragon to edge highlight the blade. I’ve done this a few different ways now and I think starting with Wraithbone is probably the right call, and I’m getting to where it doesn’t take hours to do, which helps a lot.
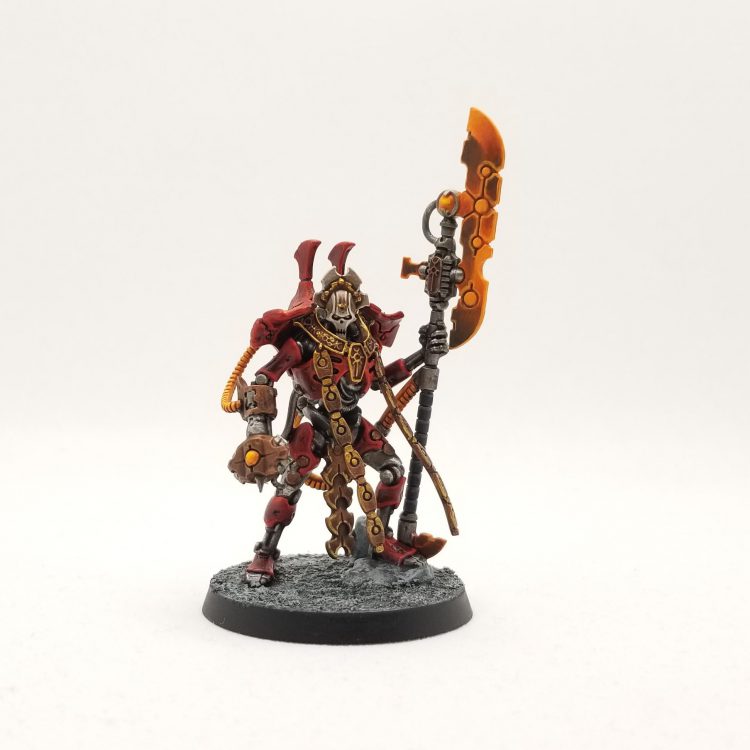
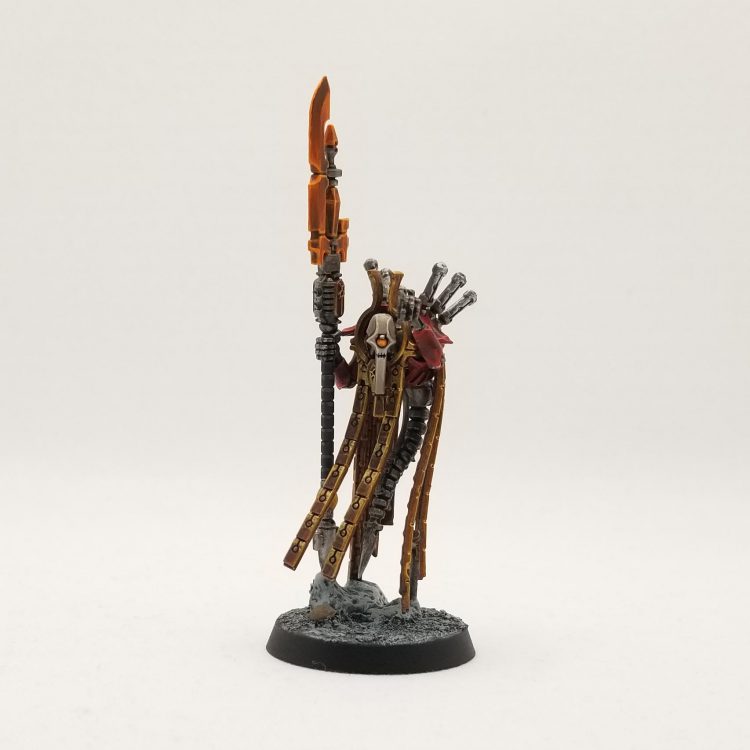
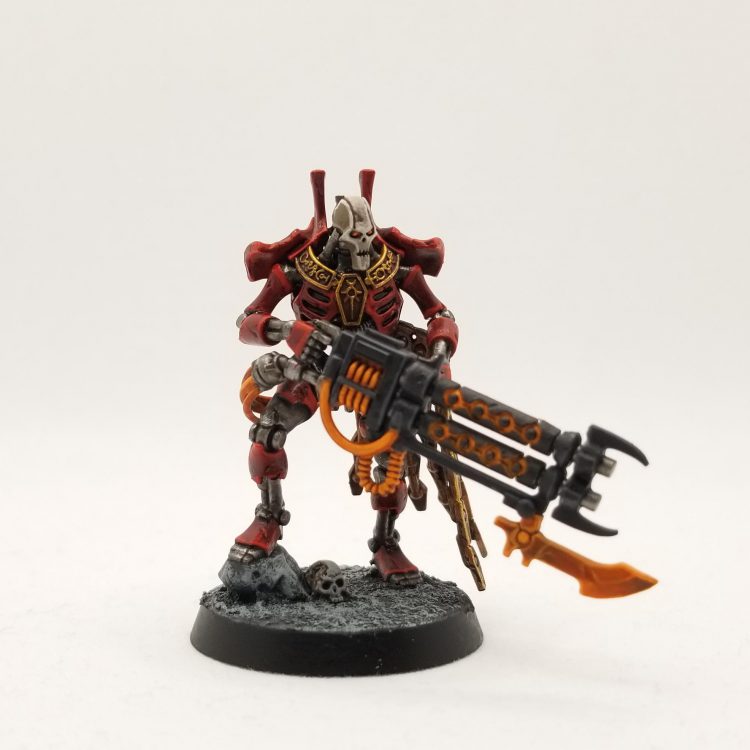
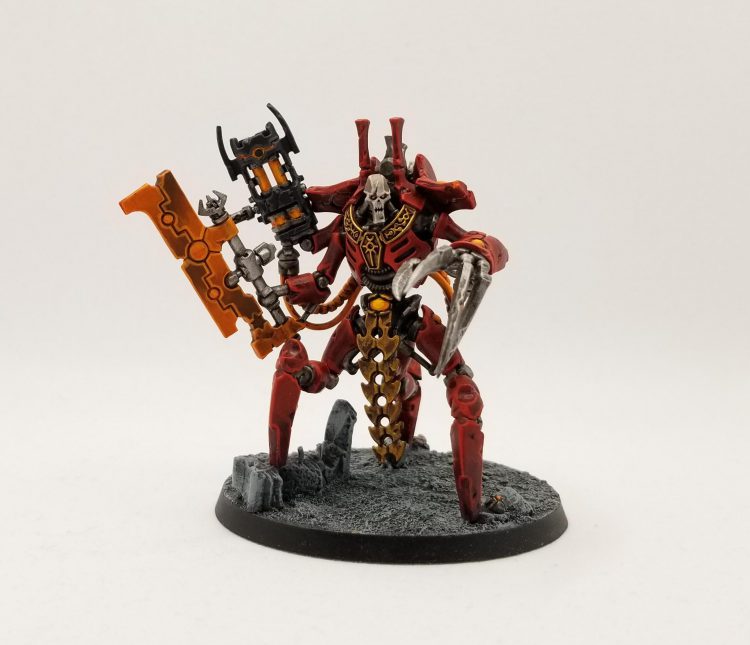
Overall I’m very happy with the Necron lads I’ve finished up to this point, and I’m eager to paint the rest of the box!
This article is part of a larger series on how to paint Necrons. To return to that series, click here.

