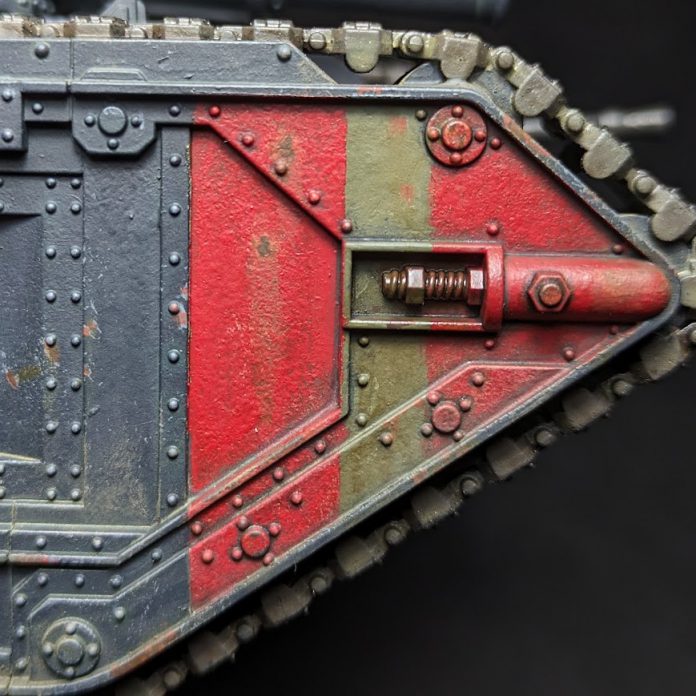
The Solar Auxilia’s armoured fist is most populated by the venerable Leman Russ, but though the new Solar Auxilia kits for those are impressive they’re a tank that fundamentally a lot of us are very familiar with. The Malcador, its heavier cousin, is a different beast – until now confined to resin and thus the purview of the most passionate hobbyists (even if you enjoy resin miniatures, large resin tanks are a challenging prospect). With the release of the plastic Malcador, the Solar Auxilia now has serious armoured might at its disposal in a more accessible form.
Thanks to Games Workshop for providing this kit for review.
Design and Aesthetic
Based on the same hull as the Dracosan, which we reviewed previously, the Malcador shares many of the same design notes. It has the same later World War I aesthetic, the same riveted construction, and it is a really long lad. However, the addition of the “turret” (we’ll get into that in a minute) and the loss of the track armour changes the aesthetic quite considerably.
In some ways it’s more historically authentic – that fully exposed run of tracks on the running gear is pretty much exactly as WWI tanks were. But by allowing that track to be exposed the entire length of the tank it throws into sharp relief some of the oddities of the design. These tracks are extremely narrow – curiously so. Narrow tracks are nothing new on Horus Heresy vehicles, but somehow it looks particular odd on this one. Widening the tracks to half again the width would have done little to alter the build of the tank but would have, in my opinion, improved the aesthetics massively, and addressed a little the odd proportions of the thing.
In other ways it’s decidedly less authentic – the strange half-turret construction that sits atop it isn’t remotely like any armoured fighting vehicle in history I’m aware of. I don’t, in fact, know of any vehicle that mounted a turret remotely like it, and the more I worked on it the more confused I was by it. Why would you have a turret with a 90 degree arc of fire, combining almost all of the complexity of a turret with barely more utility than a fixed gun? I assume “because it looks cool” is the answer, but it’s the only one. Personally, I’d have liked to have seen the Malcador updated with a full turret, but that’s firmly a matter of taste.
You know what it really reminds me of? The tank in Indiana Jones.
Building
Here’s where we start running into serious problems with this kit. For the most part this is a pretty easy build for a kit of its type, and though laborious (especially cleaning up all that trim) it’s not especially challenging. However, there are some errors in the instructions which I really can’t comprehend. It feels like the kind of thing that should have been picked up in a quick editing pass. Here’s the kind of thing I’m talking about:

This isn’t particularly a barrier to construction if you’re an experienced modeler (though there are other points where pieces shown just aren’t the same shape as the actual piece, which had me scratching my head for a bit) but if you’re a relatively new builder then it’s going to be unnecessarily confusing. Moreover, it’s the kind of error you just don’t expect a company like Games Workshop to make.
Building the main hull is pretty smooth, though there are some odd slices on the sprues, leaving places where trim is broken very close to where a run ends and so on. These are presumably just “the best we can do” and I’m sympathetic to that, but it’s a little sad to see when it’s so close to being much nicer.
Once you start building the upper hull and turret though, the build quality drops. There’s a surprising amount of old school style “just glue these flat pieces together and make sure they line up by eye”, which isn’t something I’ve seen much in GW kits for a long time. There are also a lot of fiddly joins and corners and some places where the trim is a separate part but is not optional, as there are recesses that need to be filled with it.
It feels like a situation like the one we commented on with some of the dreadnought kits, where an absolute adherence to the resin models has created weird problems in the plastic kit that just didn’t need to exist. Some minor changes to design would have been preferable here.
There is also an odd issue where I assumed I must be missing a part for most of the build, because the hull demolisher cannon connects to the mount on the hull itself by the tiniest little corners of contact imaginable, but I was eventually forced to conclude that no, there just wasn’t a piece in the kit; there’s nothing in the instructions about it and there’s no obvious piece on the sprues to help. Particularly strange because Lenoon informs me there is a piece for this in the Dracosan kit.
However, despite these difficulties, the build didn’t take too long and the finished product is great. Don’t expect to paint in sub-assemblies here though – with the “turret” mounted into the whole casemate style, the only things you might leave off are the sponson and hull guns.
Painting
I decided when I approached this piece to try my hand at applying some scale modelling techniques to the build. As such, I applied some cast hull textures to panels, and added a weld bead around the storage box at the rear of the turret. Nothing too fancy, just enough to add some visual interest to the big panels on the sides.
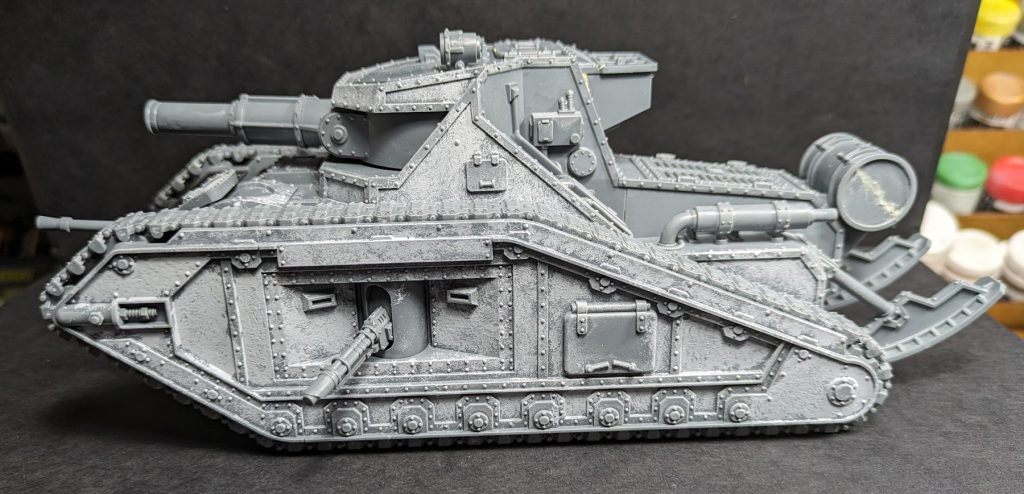
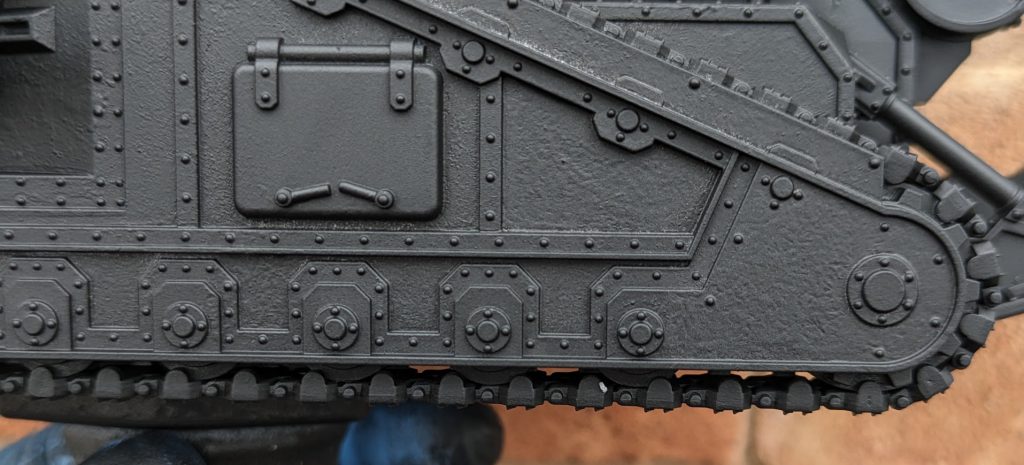
I followed this up with a matte black prime, which brought out those hull textures very nicely.
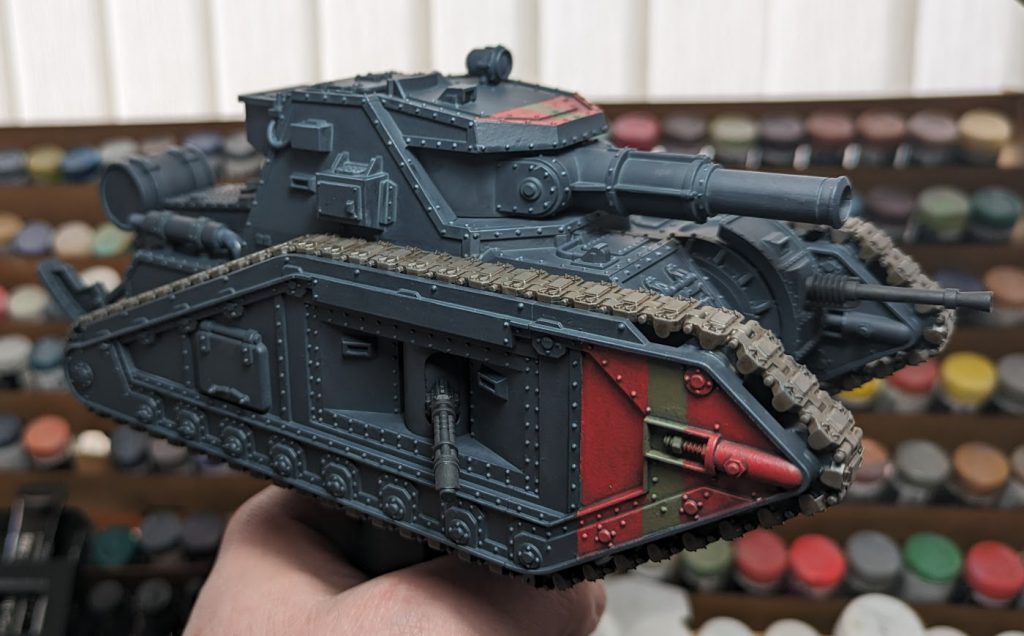
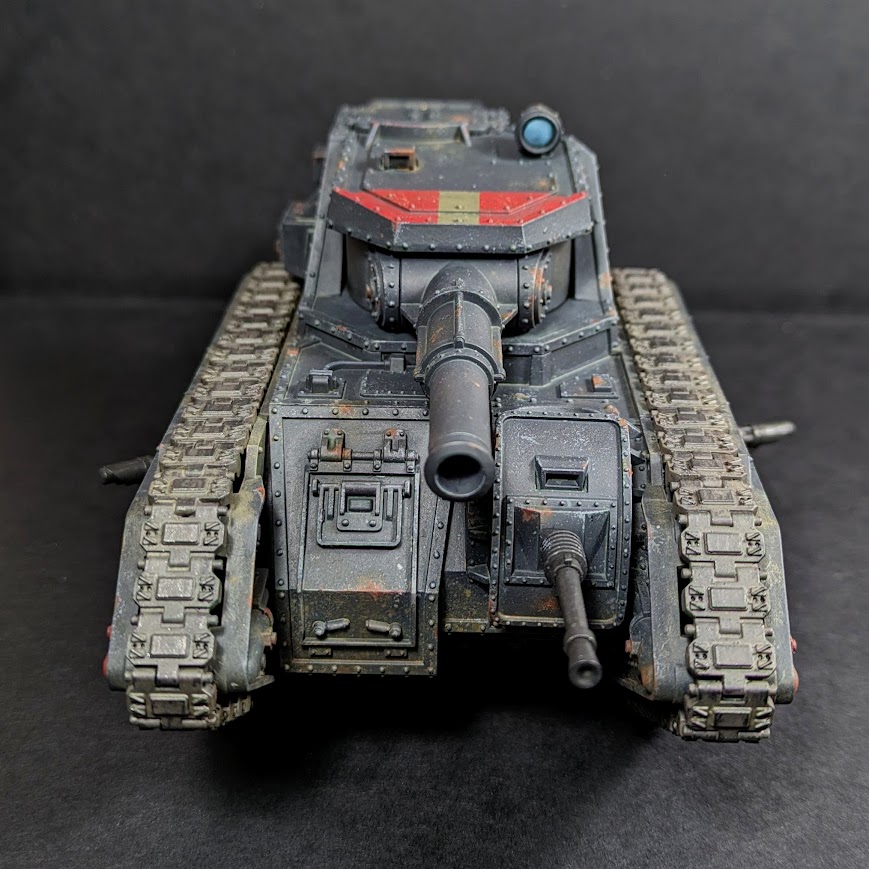
I decided quickly that since I don’t have a Solar Auxilia force and I don’t want the temptation of starting one, I’d paint this up in the colours of a friend of mine’s army and donate the piece to them after this review (it’s very important that miniatures are loved and get a good home). So I switched my original plan from a yellow-green WW1 British inspired scheme to a Panzer grey one. I basecoated the armour Vallejo Black Grey, with Mephiston Red and Vallejo Olive Drab flashes, and then applied enamel washes – Panzer Grey-Green for the grey, and Black for the Red and Olive Drab, both from MiG. Cleaning them up and then going back and applying highlights (edge and rivet highlights with the base colours with a little white mixed in) left me with this crisp-looking beast.
With that in place it was time to get on with the most fun part of any tank build: weathering. I applied chipping with a sponge in a light grey, then expanded the largest areas of chipping by bleeding the chips together with the same light grey, then carefully brush painting in a Vallejo Cavalry Brown chip (the primer used under Panzer grey in WW2 was this colour and I thought having a red brown primer show through would be fun) and then finally a dark brown rust (Vallejo Dark Rust) in the largest and “deepest” chips. I applied some streaking rust to those deep chips and then used a little thinner to make them run, and we were left with this:
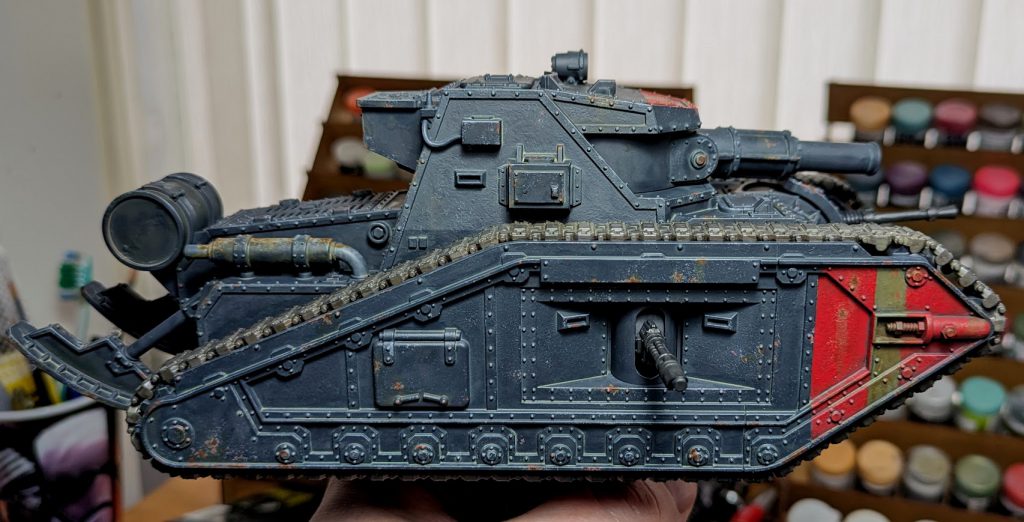
You can also see I started work on the rust on the exhaust mufflers here – these rusted heavily on the tops, as the heat in them rises and caused the paint to flake. But we’re not done with weathering yet!
I next applied some dust effects. These enamel products are used to allow a little build up of dust in the recesses where it would collect over time. I also applied a subtle dirt filter to the lower areas of the tank, to give the impression of grime. Finally I added a little intermediate step of weathering powder, just to smudge things in and get some subtle textures down. This will mostly be knocked back with the next step of oil weathering, but adding it now does improve the overall effect.
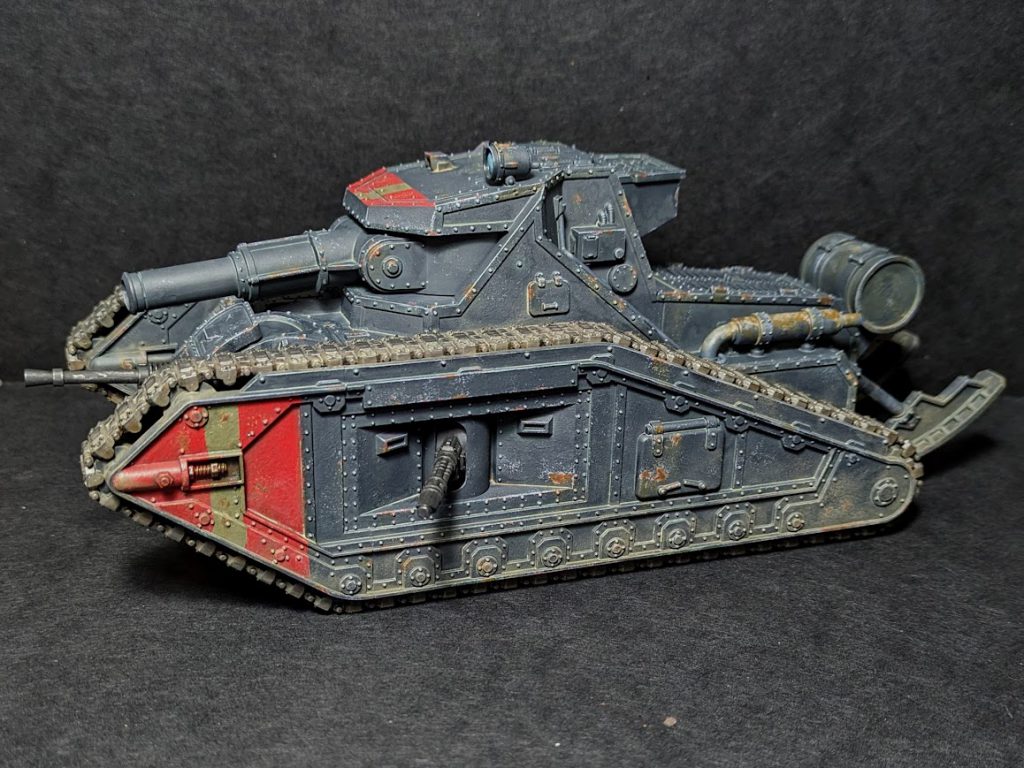
Now it’s time to hone in on the final touches. I added some more pigment powders to the model, this time on the largest areas of rust, to give those some texture. This was particularly prominent along the mufflers:
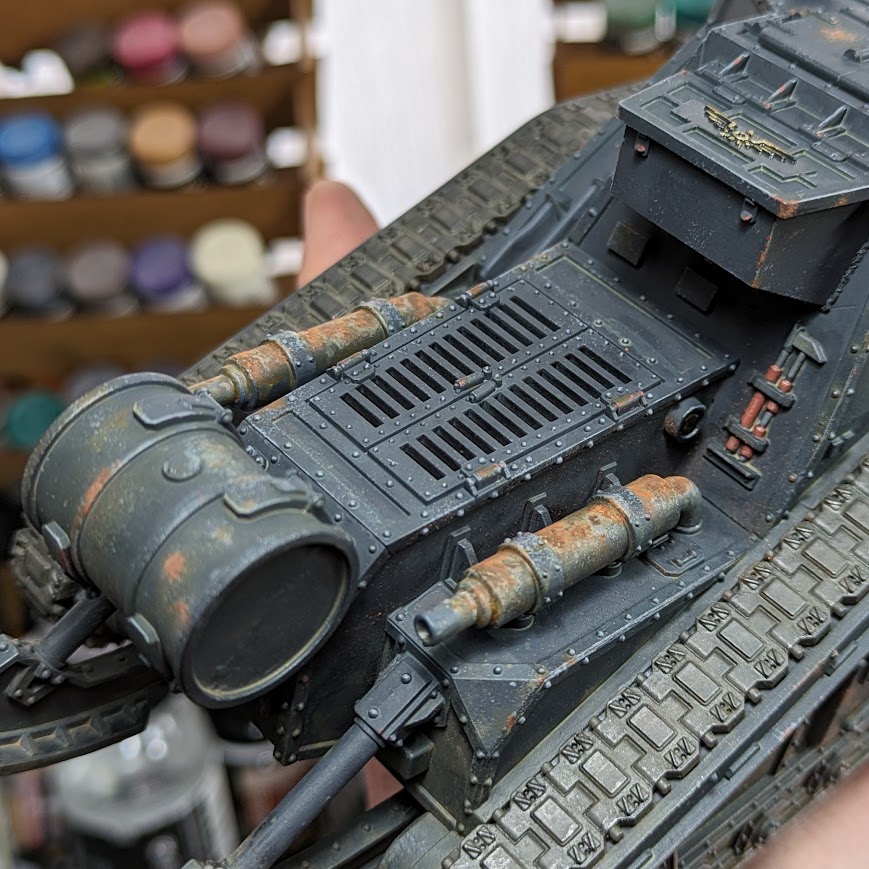
You might also notice there that the tracks have suddenly come together – that was just Vallejo Track Primer (I swear by this stuff), some dark brown oils, some dust effects and then graphite applied carefully.
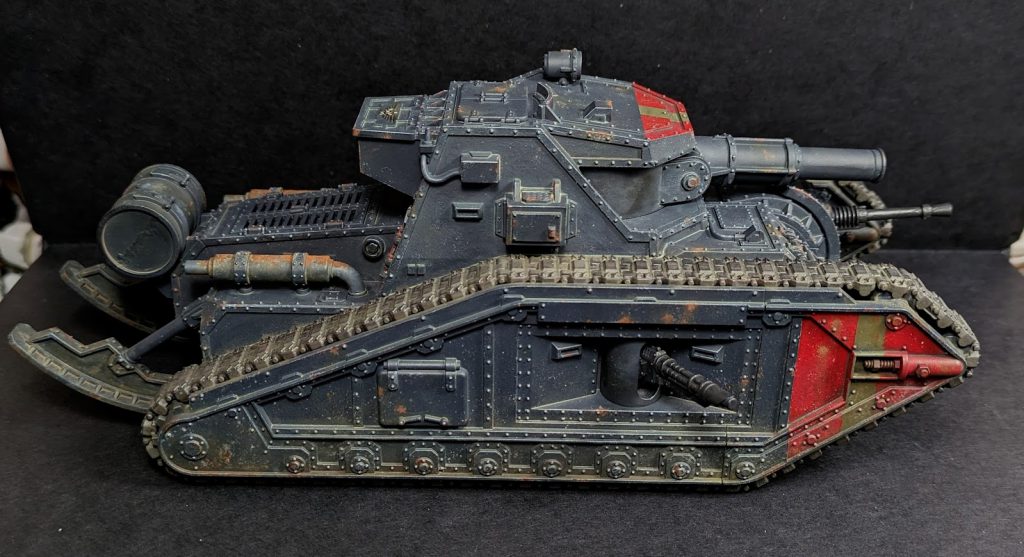
Finally, I laid down some oils for dirt and mud. Normally I’d put some more weathering powders on here, but this is a gaming piece so skipping that stage means less mess on hands.
Conclusions
If you’re playing a Solar Auxilia force this is kind of a no-brainer – you’ll be buying one of these at some point, in all likelihood. But as a kit? It’s a mix of triumph and weird misses. There’s a lot to love about it, and as a canvas for some really fun painting it’s great. There’s also some strange choices here, and some very lax work in the instructions, that mean it’s not an unqualified recommendation.
Have any questions or feedback? Drop us a note in the comments below or email us at contact@goonhammer.com.
