
Like Chaos but feel like it’s a bit too…orderly? Do hierarchal barbarians or secret covens seem anathema to Chaos? Beasts of Chaos might be for you. Ignoring all the “rules” and “hierarchies” of other Chaos factions, Beasts of Chaos worship Chaos in its purest form, as nomads who seek nothing but the thrill of desecration and destruction before moving on to inflict some more. You can never truly destroy something if it has no structure, after all, it will just dissipate and reform, again and again.
Table of Contents
Faction Overview
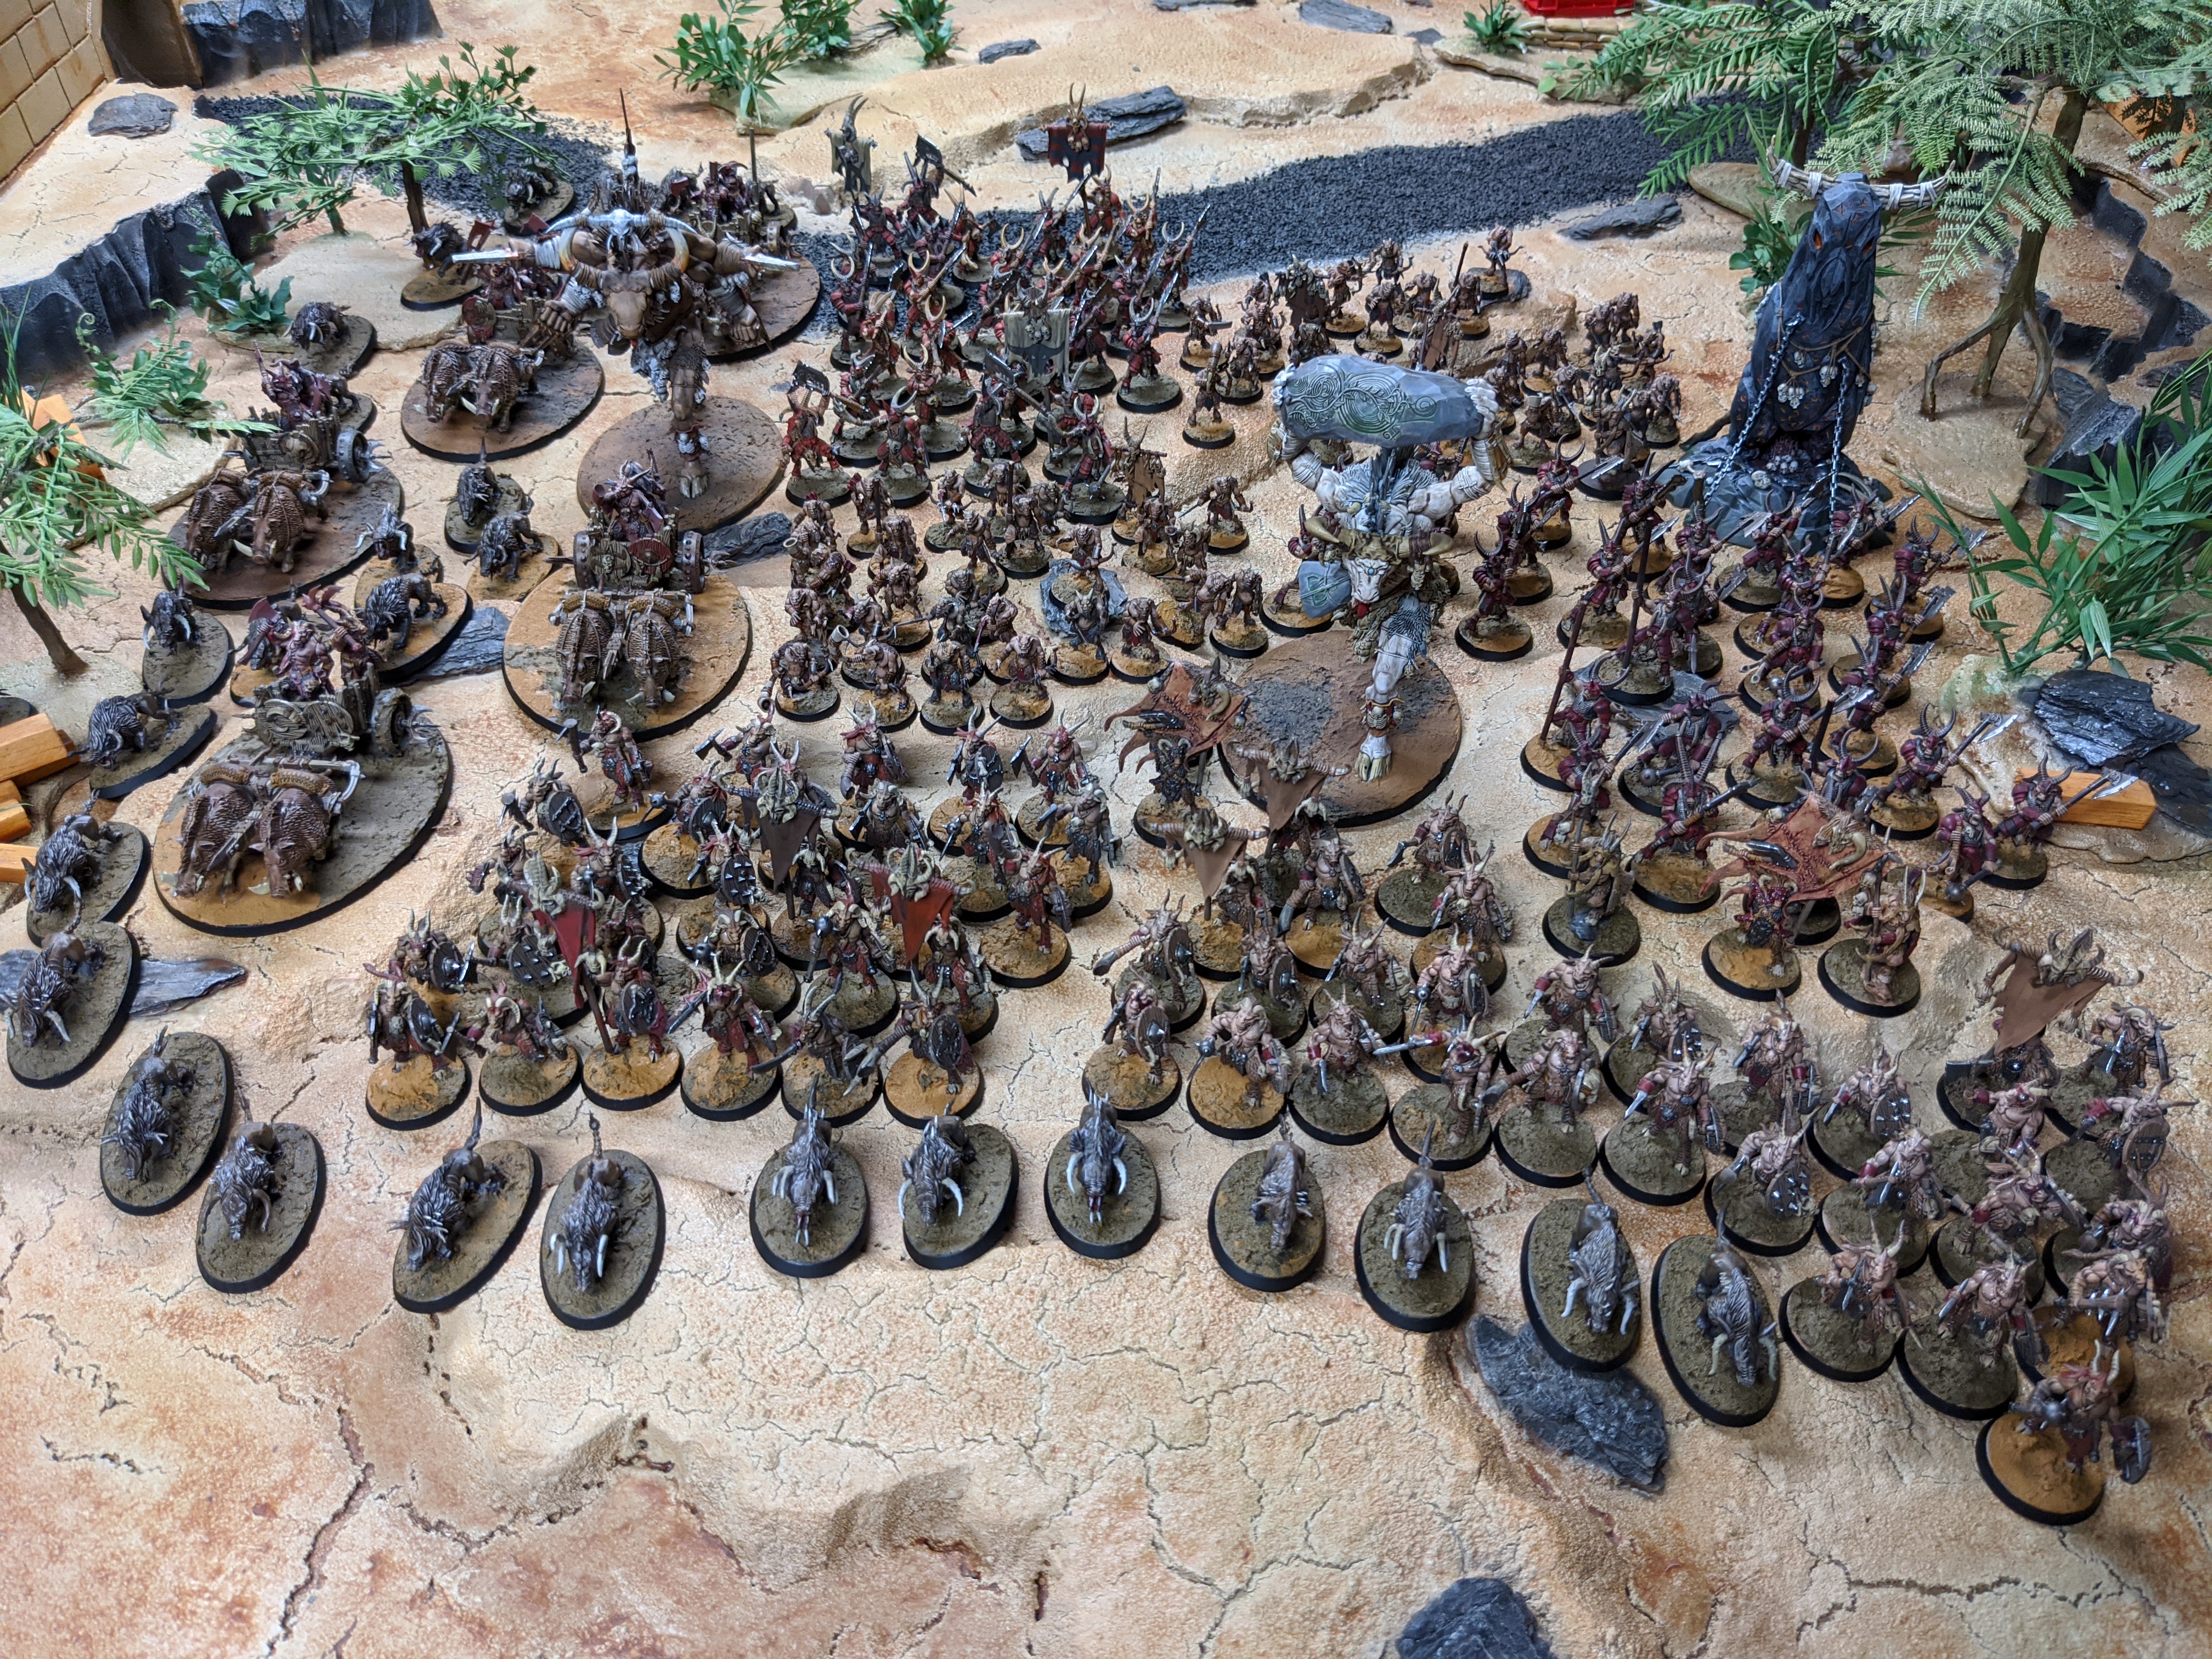
Beasts of Chaos believe that they are the true ambassadors for Chaos in the Mortal Realms. Even the most barbaric of warbands has some kind of structure or formal hierarchy, and many even form civilizations. Beasts of Chaos think that pure anarchy is the only true way to express ones devotion to Chaos. They rule only by strength and destroy and defile any monuments to civilization they come across. They swarm from the trees and hills, burning and pillaging and leaving nothing in their wake. Their playstyle reflects this, with tons of cheap, disorganized cannon fodder who charge the enemy while their biggest and strongest tear through the enemy. If this sounds a lot more fun to you than the Beasts of Chaos may be what youre looking for.
Strengths
- Numbers – Your units are generally quite cheap, giving you a numbers advantage over most opponents.
- Cheap Heroes – You have access to some extremely good heroes for their cost
- Access to powerful buffs and debuffs – Your units aren’t so great on their own but have access to many ways to make them stronger, and mess with your opponent.
- Behemoths – A number of pretty solid Behemoth choices to help add a big old hammer to your troops.
Weaknesses
- Poor Saves – Most of your units have a 5+ or 6+, and only your most expensive units get 4+. With few ways to improve saves this makes you very vulnerable to rend.
- Low Bravery – While your Heroes have pretty good Bravery, many of your units do not, getting as low and 4 or 5. You can get around this with your Herdstone, but that has limited range.
- Command Point Thirsty – Your rely on some powerful command abilities to get the most out of your units but don’t really have many ways to generate CP. This becomes a problem if you rely on CP generating artefacts and the dice hate you.
- Old models – You didn’t get anything new with Age of Sigmar so almost everything you have is really old. The only new thing is Tzaangors which were put out for Tzeentch, but you get the scraps.
-

Credit: Robert “TheChirurgeon” Jones
Competitive Rating
Weak. I wont mince words, the book was a mess when it came out over 2 years ago, the first post-launch codex, and time hasn’t improved it much. The book is a strong victim of power creep but even before then the powers felt a little undervalued. There are multiple unit types which can seem in competition with each other, fulfilling similar roles which leads to redundant units. One of these unit types, Thunderscorn seems to have been giving extra attention and yet consists of a whopping 2 units. While you can pull some wins with the book expect it to be a real uphill struggle.
Allegiance Abilities
Brayherd Ambush
Essentially it lets you set up to half of your Brayherd units (which compose most of your army) in reserve, and bring them in within 6″ of a battlefield edge (but more than 9″ from an enemy unit) but they must be deployed by the end of your first movement phase. This is slightly more advantageous if you go first turn 1, as it gives you more board area to establish a forward vanguard, but has some perks if you end up going second. It forces your opponent to be more cautious about their first move, if they move everything forward at once they open up their back line for your entry, so keep an eye out for tactical moves if your opponent gets to go first on turn 1.
Creatures of the Storm
At the start of your turn, roll a die. Thunderscorn units that are not locked into combat get to move an additional number of inches equal to that die, but not if they move within 3″ of an enemy unit. Thunderscorn are the most limited list, only applying to Dragon Ogors and their Wizard counterpart, the Shaggoths.
Bloodgorge
Any Warherd units that destroyed a unit that turn can restore D3 wounds. Warherds are your big boys, so restoring those wounds is often important as many of them have degrading statlines so you want to keep them as high as possible to get the most of them.
Primordial Call
Your summoning mechanic. The system behind this is a bit weird compared to the mono-god ones, where some action performed by you or your opponent grants you points. In this case, you get one free “Primordial Point” each turn, and the rest are gained by a bloody ritual performed in your Hero phase. This one requires three things:
- A Herdstone (your free Terrain feature)
- A Hero within 3″ of the Herdstone
- Another unit within 3″ of the stone.
Once you’ve fulfilled those requirements, your Hero can bash some heads against the rocks and deal D3 mortal wounds to that unit, and for each mortal wound dealt gain a Primordial point. This mechanic is a bit of a mixed bag, it seems like a bad exchange, because youre sacrificing models to summon more, but the exchange rate is pretty good. The real downside is since it has to be tied to your herdstone, so that requires both a Hero and a unit to hang back, likely away from where the actions happening. It’s up to you how to utilize this, you might wanna ignore it but it may also be worth considering keeping a Wizard in the back, since they can cast from the far back, and some Ungors to bash against the rocks and convert them to something better.
Once they come in they follow the same rules as Brayherd Ambush, 6″ from the board edge and more than 9″ from enemies, so always be looking for holes in the enemy’s defense to plant a unit.
Greatfrays
Your subfactions, you know the deal here: Bonus Allegiance Ability and Command Ability, mandatory Artefact and Command Trait. All three subfactions are pretty good here, benefitting a wide range of units and playstyles rather than “niche” subfactions dedicated to swarms of one or two unit types. The most popular from a competitive standpoint is definitely Gavespawn.
Allherd
- Allegiance Ability: Bestial Might – Subtract 1 from battleshock tests for your units if they fought in the fight phase. That’s likely where most of your losses came from anyway so it’s not a bad perk. Your units are kind of varied in bravery so its a good perk for many units, less so for others. Most of your bigger units have lower leadership so it’s most useful for those units.
- Command Ability: Booming Roar – Basically lets you burn a CP to get a primordial point. Useful if you’re close to summoning that unit you need.
- Command Trait: Dominator – Reroll charge rolls for all friendly units within 18″ if the General is within 3″ of an enemy unit.
- Artefact: Blade of the Desecrator – Improves rend of one of the bearers weapons by -1 when attacking an enemy unit with 10+ units, or -2 when there’s a unit with 20+ units (Capped at -3 Rend). Good for clearing out big hordes, slap it on something with a lot of attacks or high damage to get the most out of it.
A pretty solid jack of all trades greatfray. It doesn’t do anything great but has tools to benefit just about any list. It doesn’t quite stack up against Gavespawn but it’s not an awful choice either.
Darkwalkers
- Allegiance Ability: Shadowbeasts – Thunderscorn and Warherd gain the Braystalker keyword for the sake of the Brayherd Ambush ability, which drastically increases your options on what you’re allowed to bring in. It also lets you hold units in reserve until the end of your second move phase instead of your first, allowing a little more versatility if the time isn’t quite right to strike.
- Command Ability: Savage Encirclement – Pick a unit within 18″ of a friendly Hero, but more than 9″ from an enemy unit. Remove that unit and drop them off anywhere more than 9″ from an enemy unit. The limitations make it more difficult to use than a lot of deep strike powers, as you can’t use it if you’re already close to an enemy unit, try and find openings to put your units, such as unguarded objectives.
- Command Trait: Nomadic Leader – +1 to run (but not charge) rolls when within 12″ of this leader. Not exciting, but good for mobility when combined with the allegiance and command abilities.
- Artefact: Desolate Shard – Once per battle, use this artefact when you’re within 3″ of a terrain feature. Roll a die for each enemy unit within 1″ of the terrain and on a 4+ deal D3 Mortal wounds. Pretty swingy, but if your opponent is hiding on a big piece of terrain, like the Seraphon Realmshaper Engine, chuck this and hope to take a few models out.
A mobility based faction but some of the restrictions do hamper it. The ability to use Brayherd Ambush with pretty much your entire army and waiting until turn 2 to deploy if it would let you hold off for a better approach is pretty good, though it drops off a bit after that. The Artefact isn’t great and the command trait is merely ok. The Command ability has some niche use but thats about it. If you favor outsmarting your opponent with heavy mobility, look toward Darkwalkers.
Gavespawn
- Allegiance Ability: Gift of Morghur – If a Hero dies, roll a die, on a 2+ turn them into a chaos spawn. Chaos spawn are extremely swingy, they can do a lot or basically nothing, but its free and rather than an excuse to deliberately send Heroes to their death, it lets you get a little more out of them before they finally bite it.
- Command Ability: Propagator of Devolution – Pick a friendly unit within 12″ of a Chaos Spawn and add one to the attack characteristics for melee weapons for that unit. Chaos Spawn are cheap so its very easy to keep one around as a totem to buff a powerful unit.
- Command Trait: Unravelling Aura – Your general can unbind one spell per enemy Hero phase as if they were a a Wizard. If they are a wizard, unbind an additional ones. Decent for expanding anti magic coverage, but note it wont help dispel Endless spells.
- Artefact: Mutating Gnarlblade – Choose a melee weapon on the bearer, and add 2 to the damage characteristic, but deal a mortal wound to the bearer on a 1. Ideally put this on a weapon with fewer attacks (and ideally high hit, wound and/or rend) to lower the number of 1s you get.
The goto for competitive play, it has some powerful abilities between its artefact and command ability, while the allegiance ability is a solid boon if a hero goes down unexpectedly. Chaos Spawn are cheap so you should try and throw one in a list as a buff bot for Propagator of Devolution.
Command Traits
The book has a running theme of dividing units up amongst 3 keywords: Brayherd, Warherd and Thunderscorn. These aren’t subfactions in the meaningful sense, they more help detail roles in your army. Brayherd are your rank and file units and Heroes, Warherd are the big monsters and Thunderscorn are Ogors. These only matter if you don’t take a Greatfray however, which isn’t likely.
Brayherd Alphabeast Traits
- Bestial Cunning – Up to half of your reserved units can show up in turn 2 instead of turn 1.
- Useless under Darkwalkers, under everyone else it has potential but it’s going to matter how poorly your opponent plays to give you an opening to use this C
- Indomitable Beast – Add one wound.
- One wound isn’t going to save you in most cases C
- Apex Predator – Reroll Wound rolls of 1 for this general.
- Solid take on a melee centered Hero. B+
- Malevolent Despoiler – Enemy units cannot receive cover when within 12″ of this general.
- This can mean a lot on a terrain covered map if your opponent is just refusing to come out of hiding. B-
- Oracle of the Dark Tongue – Subtract one from Bravery from enemy units within 12″ of the general.
- Rarely will matter on its own but can stack with other abilities. C+
- Shadowpelt – Subtract 1 from hit rolls that attack the General from more than 12″ away.
- Stacks with Look Out, Sir!, as most of the traits here are better for melee heroes, this is a good one for keeping your wizards protected. B
Warherd Alphabeast Traits
- Eater of Heroes – Reroll failed hit rolls that target an enemy Hero.
- Hero hunter traits are kinda iffy so I’d look elsewhere C
- Rampant Juggernaut – Reroll charge rolls for friendly Warherd units within 12″.
- If you’re warherd heavy in your list, you’re gonna want to make sure they get in there, so this is a solid take. B
- Gorger – For the purposes of the Bloodgorge Allegiance Ability for Warherd units within 12″ you do not have to roll, instead you automatically get 3 wounds back.
- Awesome! Keep your monsters topped off, as their degrading statlines can make a difference. B+
- Gouge-tusks – After charging with this general, roll a die. On a 1 nothing happens, on a 2-5 deal 1 mortal wound on a 6 deal d3 mortal wounds.
- A little tap before the battle starts in earnest but probably not enough to help C
- Roaring Brute – Subtract one from Bravery from enemy units within 12″ of the general.
- Rarely will matter on its own but can stack with other abilities. C+
- Rugged Hide – Reduce the rend of attacks against this general by 1, to a minimum of -.
- Opponents are often going to come at your General with high rend weapons so this will keep you alive a bit longer. B+
Thunderscorn Alphabeast Traits
There’s only one unit which is both Thunderscorn and a Hero, the Dragon Ogor Shaggoth. So we can analyze this purely as they apply to this Hero. The Dragon Ogor Shaggoth is a fairly potent warrior wizard so it can fit many roles. However you probably won’t bring one because he is expensive and his exclusive spell list, while good, probably isn’t good enough to justify what you’re paying.
- Tempestuous Tyrant- You can re-roll failed wound rolls for attacks made by this general that target a monster.
- Monster hunter traits are a real wash as your opponent is likely to not have one, wasting a trait C-
- Magnetic Monstrosity – Enemy units cannot retreat while they are within 3″ of this general.
- Good if you can catch an enemy unit flat footed, but dont get greedy B-
- Father of the Storm – When using the Creatures of the Storm allegiance ability you can re-roll the dice that determines how far units can move if this general is on the battlefield.
- If you have a lot of Dragon Ogors, it can make a huge difference on a bad roll. B+
- Lightning-fast Monstrosity – This general fights at the start of the combat phase if it made a charge move in the same turn.
- Probably not worth it. There’s a lot of good traits here and going first isn’t usually going to make or break you, just be smart. C-
- Adamantine Scales – Add 1 to the Save characteristic of this general.
- Basic but reliable, giving you a meaty 3+ save B
- Ancient Beyond Knowing – At the start of the first battle round, you receive D3 additional command points.
- A bit swingy, but this is a CP hungry army. B-
Artefacts
Again, artefacts are divided under Brayherd, Warherd and Thunderscorn and you get 6 for each. This is a little more important since getting a second artefact under a Greatfray is fairly easy to obtain while a command trait isn’t possible, so we need to look closer at these.
Spoils of the Brayherd
- Ramhorn Helm – After the bearer completes a charge move, pick an enemy unit within 1″ of them. That unit suffers D3 mortal wounds.
- Guaranteed D3 mortal wounds on the charge isnt a bad deal on a more combat orientated hero, but you have better options here B-
- Brayblast Trumpet – Add 1 to hit rolls for attacks made by friendly units while they are wholly within 18″ of the bearer if those units used the Brayherd Ambush battle trait to set up that turn.
- Has potential use in a Darkwalkers list due to its heavy reliance on Brayherd, but due to needing to be wholly within 18″ of the bearer that kind of screws up the main use of the ability, which is to maneuver into hard to reach places plus after the first or second turn, its done. C
- The Knowing Eye – At the start of your hero phase roll a dice and on a 4+ you receive a command point.
- Often an auto-take if a battalion is used. Beasts of Chaos are CP hungry but don’t have a ton of ways to generate it, so this is highly worth considering. A-
- Volcanic Axe – Add 1 to the damage characteristic of a bearer’s melee weapon. Also, each time you make an unmodified hit roll of 6, the target suffers 1 mortal wound.
- Nice buff to your beatstick heroes, no real complaints here B+
- Bleating Gnarlstaff – If the bearer is within 1″ of a terrain feature at the end of your movement phase, roll a dice. On a 3+ each enemy unit within 1″ of that terrain feature suffers 1 mortal wound.
- Like the Darkwalkers relic, but multi-use. It requires setting up but has a similar use to that relic. B
- Troggoth-hide Cloak – At the start of your hero phase, you can heal 1 wound to the bearer.
- Keep your softer guys alive a bit longer B
Spoils of the Warherd
- Cleaver of the Brass Bull – Pick one of the bearer’s melee weapons. Improve that weapon’s Rend characteristic by 1. Also, if the unmodified hit roll for an attack made with that weapon is 6, add 1 to the Damage characteristic of that weapon for that attack.
- Solid choice. More rend is helpful and extra damage if you get a 6 will be more likely to cut through with the improved rend. B-
- Gilded Horns – After the bearer has made a charge move, pick an enemy unit within 1″ of the bearer and roll a number of dice equal to the charge roll for that charge move. For each roll of 5+, that enemy unit suffers 1 mortal wound.
- Too difficult to set up properly. You need to risk a longer charge to get any wounds out of this and why would you take that risk? D
- Glyph-etched Talisman – The bearer can attempt to unbind one spell in the enemy hero phase in the same manner as a wizard
- You got access to cheap wizards, don’t waste an artefact slot on this. C-
- Blackened Armour of Chaos – 4+ Feel no Pain on Mortals
- Your warherd units are your bulkier units, so your opponent will likely try and whittle them down with Mortals. This will work against that B
- Champion’s Doomcloak – Add 2 to charge rolls made for the bearer.
- Herdstone Shard – When BULLGOR units wholly within 6″ of the bearer use their Bloodgreed ability, it activates on an unmodified roll of 5 or 6.
Spoils of the Thunderscorn
- Ancestral Azyrite Blade – Pick one of the bearer’s melee weapons. Improve that weapon’s Rend characteristic by 2.
- The Shaggoth has poor rend so this is a pretty solid pick if you want to make him a little scarier B+
- Lightning-chained Bracers – You can re-roll failed hit rolls for attacks made by the bearer.
- Good stuff, hard to argue with something as no frills as this B
- Thunderstrike Lodestone – Once per battle you can heal D3 wounds allocated to the bearer and roll a die for each enemy unit within 1″ of the bearer. On a 2+ that unit suffers 1 mortal wound.
- Timed right, this could make a major difference, but why settle for something that might help one time? C+
- Horn of the Tempest – Friendly Thunderscorn units wholly within 18″ of the bearer at the start of your charge phase can make a charge move in that phase even if they ran in the same turn.
- You won’t be bringing enough Thunderscorn units to get nearly the use out of this you’d think. C-
- Tanglehorn Familiars – Once per battle, at the start of the enemy hero phase, you can pick an enemy WIZARD within 12″ of the bearer. That WIZARD cannot cast any spells that hero phase.
- This can be useful if you end up against someone with a wizard with a lot of casting, like Tzeentch, Ossiarch Bonereapers or Legions of Nagash. Once per battle and needing to get uncomfortably close at 12″ means you need to consider it carefully B
- Ruinous Icon – This artefact is anathema to sorcery, warding the bearer from spells. Each time the bearer is affected by a spell or endless spell, roll a dice. On a 4+ ignore the effects of that spell on the bearer.
- Too niche to be useful, even if your opponent likely will direct spells onto your Heroes, they’ll just redirect their attacks elsewhere. C
Spells
There are 2 schools, Twisted Wilds for Brayherds and Dark Storms for Thunderscorn plus 3 endless spells.
Lore of the Twisted Wilds (Brayherd)
- Viletide – Casting value 6. Pick an enemy unit within 12″ of the caster that is visible to them. That unit suffers D3 mortal wounds. If the unit is within 6″ of thecaster, it suffers D6 mortal wounds instead.
- Solid “shotgun” spell though by its nature it requires you to get a bit close for comfort, and your brayherd wizards are delicate C-
- Vicious Stranglethorns – Casting value of 7. Pick a terrain feature wholly within 24″ of the caster that is visible to them. Each enemy unit within 3″ of that terrain feature suffers D3 mortal wounds.
- Continuing with the defiler theme, this is another way to pick on enemy units hiding on terrain. This one has wider range, reach and deals more wounds. Not a bad take as it might make your opponent second guess hiding in terrain, or help root them out. B-
- Savage Dominion – Casting value of 5. Pick an enemy monster (single model units only) within 18″ of the caster and visible to them, and roll 2D6. If the roll is equal to or greater than that model’s Bravery characteristic, it immediately moves 3″ towards the closest model. You can then pick a unit within 1″ of the monster and roll a number of dice equal to the monster’s Wounds characteristic. For each 4+, that unit suffers a mortal wound.
- I want to like this spell because it’s fluffy and clever. However it first requires your opponent bring a single Monster unit, hardly a guarantee and then hope it remains closer to its allies than to you. Even then you must pass the bravery test and then roll for mortal wounds. It’s a great spell but there’s a lot of factors you simply cannot control that can make this a wasted spell slot. D
- Tendrils of Atrophy – Casting value 6. Pick an enemy unit within 12″ of the caster that is visible to them, that unit has -1 to saves until your next Hero phase.
- Incredible, basically this should always be your first pick and makes up for a pretty lackluster spell list. Many lists will run 2 with this spell, just in case one goes down. A
- Wild Rampage – Casting value 6. Pick a friendly unit within 12″ of the caster that is visible to them. Until your next hero phase, you can re-roll failed wound rolls for attacks with melee weapons made by this unit. However, subtract 1 from save rolls for attacks that target this unit.
- Good spell, low casting value and the benefits are incredible. But the drawbacks are obvious, so if you run in with a vital unit, don’t miss. B+
- Titanic Fury – Casting value of 7. Pick a friendly monster within 12″ of the caster that is visible to them. Until your next hero phase, add 1 to the Attacks characteristic of that monster’s melee weapons.
- If you got a Monster, this isn’t terrible, you have much better more widely useful spells however C
Lore of the Dark Storms (Thunderscorn)
As the relics and warlord traits before it, this only applies to one character, the Dragon Ogor Shaggoth. It’s not a bad list, all told, but it’s one your most expensive leader so consider carefully, you probably will only get one.
- Thunderwave – Casting Value 7. Each unit within 3″ of the caster suffers D3 mortal wounds. This includes your own guys, though it bypasses Thunderscorn models.
- This is a pain to set up in any meaningful way and sending in your Shaggoth alone will probably resign it to go back to your carrying bag. D+
- Hailstorm – Casting Value 6. Pick an enemy unit within 21″ of the caster that is visible to them. Until your next hero phase, halve the Move characteristic and run and charge rolls for that unit.
- Variable utility, good for slowing enemy units down early on with its long range, and keeping them away from an objective they might try and cap next turn. B
- Sundering Blades – Casting Value 7. Pick a friendly unit wholly within 18″ of the caster that is visible to them. Until your next hero phase, improve the Rend characteristic of that unit’s melee weapons by 1.
- If I was talking a Shaggoth, I’d want this. Improved rend is really useful and it works on anything. B+
Endless Spells
- Ravenwing Direflock – Casting Value 5. Place 1 model within 12″ of the caster, and then the other 2 models within 6″ of that. It does two things:
- Subtract 2 from the Bravery characteristic of units while they are within 6″ of any of the models (Beast of Chaos ignore this)
- If a unit finishes a move within 1″ of amodel, remove that model. The player whose turn it is must move it exactly 3D6″ , and then set up the two remaining models wholly within 6″ of the first model. This is a wordy way to say “if you try and catch it, it flies away”.
Stacked with your other bravery effects this can potentially do some serious harm. It’s extremely cheap too, at only 30 points, if you have leftover points you could do worse. B
- Doomblast Dirgehorn – Casting Value 6. Subtract 1 from the hit rolls of non Beast of Chaos models within 3″. Then, each round, the range increases by 3″
I like this one in theory but the short range, and low casting value means you’ll never get decent coverage out of it, it’s 50 pts when that can be your chaos spawn or almost another unit of Ungors.C+
- Wildfire Taurus – Casting value 6. Predatory endless spell, moves 12″ and deals D3 mortal wounds to whomever it passes over, D6 if the unit has 10 or more models.
The scaling damage actually makes this one of the better endless spells, though that comes with the same caveats of being careful not to let the hammer get dropped on you if your opponent gets control. B
Battalions
The battalions in this book are interesting. There are 4 pretty normal ones, and then 4 “God specific” ones which permit a pretty flexible variety of units, grant each unit within the name of the Chaos God it represents (Khorne, Nurgle, Slaanesh and Tzeentch) as a keyword. The actual utility of this is actually kind of limited, and seems to exist mostly for fluff as there’s scant few times the keyword is important. The most realistic time it’s going to come up is if you ally in Slaves to Darkness, which can be fickle about keywords. It’s also the closest thing you’ll get to Slaangors etc. at this point, as those models are long gone. Only Tzaangors remain.
Marauding Brayherd
Requirements
- 1 Beastlord
- 1-3 Great Bray-Shamans
- 2-6 units of Bestigors or Tuskgor Chariots in
any combination - 3-9 units of Gors
- 4-12 units of Ungors, Ungor Raiders or Centigors
in any combination
Abilities
Add one to Brayherd units that were set up during the same turn.
I think this is an awkward of saying to treat units that came in later under Brayherd Ambush as seperate “Waves”. This is about as close as the book gets to a “Super Battalion” and it’s…a little more practical than those, since it doesn’t require other battalions in its pre-requisites. But the bonus isn’t quite good enough to go and build a list around.
Hungering Warherd
Requirements
• 1 Doombull
• 3 units of Bullgors
• 1-3 Cygors or Ghorgons in any combination
Abilities
Units within this battalion can pile in an extra 3″.
If you’re seeking to run a Warherd heavy list this is a reasonable asking price, as these are units you’d bring anyway. The actual ability is so-so, and likely is more useful in its ability to get you another relic.
Thunderscorn Warherd
Requirements
- 1-3 Dragon Ogor Shaggoths
- 3-9 units of Dragon Ogors
Abilities
Roll a die for each model in this unit, on a 4+ heal a wound, then roll a die for each enemy unit within 1″ of a model from this battalion. On a 4+ deal a mortal wound.
If you wanted to run a Thunderscorn list this is basically what you’d do anyway. I actually like the ability, and if you want to run a gimmick list of Dragon Ogors this is worth considering.
Desolating Beastherd
Requirements
- 1 Beastlord or Doombull
- 1-3 Great Bray-Shamans
- 1-3 units of Bestigors or Bullgors in any combination
- 1-3 units of Gors or Tuskgor Chariots in any combination
- 2-6 units of Ungors or Ungor Raiders in any combination
- 0-1 Ghorgon or Cygor
Abilities
If you roll an unmodified 6 to hit for any units in this battalion while in enemy territory they make 2 hits instead of 1. Make a wound and save roll for each hit.
The requirements to this look nastier than they are at first glance. While initially it seems like a lot it’s actually very flexible and many are units you’d take anyway. Most of these units cost a pittance, too so the stuff you don’t want you can skimp on and focus on what really matters. The ability it comes with is very good and encourages you to push the attack early, which is what Beasts of Chaos should be doing.
Brass Despoilers
Requirements
- 1-4 HEROES chosen in any combination from the
following list:- Beastlord
- Doombull
- 3-8 units chosen in any combination from the
following list:- Bestigors
- Bullgors
- Gors
- 0-8 units chosen in any combination from the
following list:- Centigors
- Dragon Ogors
- Tuskgor Chariots
- 0-2 Cygors or Ghorgons in any combination
Abilities
Reroll hit rolls of 1 for all units in the battalion, and once per battle you can allow all units wholly within 9″ of another unit from the battalion to reroll all wound rolls for that phase as well. In addition they all get the Khorne keyword
This is a really good one. It has all the necessary ingredients for a Warherd list, if you’re leaning that way and the ability is powerful in its own right.
Phantasmagoria of Fate
Requirements
- 1-4 BEASTS OF CHAOS HEROES in any combination
- 3-9 units chosen in any combination from the
following list:- Bestigors
- Gors
- Tzaangors
- Ungors
- Ungor Raiders
- 0-9 units chosen in any combination from the
following list:- Bullgors
- Centigors
- Dragon Ogors
- Tzaangor Enlightened
- Tzaangor Skyfires
- Tuskgor Chariots
- 0-2 Cygors or Ghorgons in any combination
Abilities
All units within this battalion can unbind as if they were a wizard, but only within 9″. They also gain the Tzeentch keyword.
A weaker one of the god battalions, if Slaanesh didn’t exist. While every unit having unbinding has potential for board coverage, it’s a lot of points to invest that can be spent on a better battalion, particularly when many of the units are shared.
Pestilent Throng
Requirements
- 1-4 HEROES chosen in any combination from the
following list:- Beastlord
- Dragon Ogor Shaggoth
- Doombull
- Great Bray-Shaman
- 3-7 units chosen in any combination from the
following list:- Bestigors
- Gors
- Ungors
- Ungor Raiders
- 0-7 units chosen in any combination from the
following list:- Centigors
- Bullgors
- Dragon Ogors
- Tuskgor Chariots
- 0-2 Cygors or Ghorgons in any combination
Abilities
When a unit from this battalion is destroyed, roll a dice for each enemy unit within 7″. On a 2+ they take 1 mortal wound. All units in this battalion gain the Nurgle keyword.
An interesting bomb list, if you can surround yourself with a lot of enemy units then this could be a fun way to mess with them. Your units are pretty fragile and will likely die en masse so you could make them hesitate to surround you too much, even if 1 mortal wound per unit isn’t exactly going to devastate them, the fear will make them second guess it.
Depraved Drove
Requirements
- 1-4 HEROES chosen in any combination from the
following list:- Beastlord
- Dragon Ogor Shaggoth
- Doombull
- Great Bray-Shaman
- 3-6 units chosen in any combination from the
following list:- Centigors
- Gors
- Tuskgor Chariots
- Ungors
- Ungor Raiders
- 0-6 units chosen in any combination from the
following list:- Bestigors
- Bullgors
- Dragon Ogors
- 0-2 Cygors or Ghorgons in any combination
Abilities
Reroll failed charge rolls within 12″ of enemy Heroes with an Artefact, additionally you can reroll failed hit rolls against an enemy Hero with an artefact of power. All units in the battalion also gain the Slaanesh keyword.
Bleh. Too niche to ever be seriously useful, as you’d likely have at most 2 artefacts on the enemy’s side. Just blow them up the old fashioned way.
Units
Leader
Beastlord
Your basic beatstick hero and priced to move at only 90 points. A solid 6 attacks at 3+/3+, -1 rend with reroll hits of 1 (and 1s to wound against Heroes) he will definitely dish out damage for his point cost. His command ability is incredibly powerful, when he kills a model he can activate it, causing all friendly Brayherd units in 18″ to reroll wound rolls, plus hit rolls if it was a monster or Hero! So have him attack early, or time the killing blow against a Monster or Hero and watch the casualties roll in.
Great Bray Shaman
Your trusty default wizard option. At 100 points he’s one of the cheapest options, it’s not uncommon to take 2 of them. In addition to being a wizard, he makes Brayherd units within 12″ move 3″ faster, which is going to be most of your army. His default spell is a great one too, making an enemy unit within 18″ move 2D6″ toward the closest friendly unit of yours. Line things up right and you can lead an enemy away from an important objective or right into a unit they cannot hope to win against. Just make sure to keep him protected, he has an awful 6+ save and at 5 wounds your opponent will seek him out fast and early.
Tzaangor Shaman
If you bring any Tzaangors, he makes them all work better. Skyfires and Enlightened will hit better, and his unique spell can add models to a unit of the battleline variety. His sorcerous elixir is also a really good once a game ability, giving him an extra spell and rerolling the casting roll on the spell. Not quite as mandatory as Disciples of Tzeentch as you’re not forced to bring Tzaangors as you would be there. If you do run a Tzaangor list though, you want this guy.
Doombull
The premium warrior hero and supporter of Warherds. His axe sports an impressive 3 attacks at 3+/3+, -2 Rend and 3 Damage, on top of the free mortal wound all 6s to hit from this guy get. He also gets to add +1 to wound for a friendly Warherd unit within 12″. If you want to run a lot of hefty monster types, this guy is crucial. As a general he also makes Bullgors battleline
Dragon Ogor Shaggoth
Games Workshop seems to really want this guy to be a thing, but he struggles pretty badly. He’s your most expensive Hero, even after being reduced to 170 and exists as a warrior-wizard. The problem is he’s pretty bad at it, compared to the Doombull (and Beastlord, at least for his price) he doesn’t hit nearly hard enough and as a Wizard he can only cast one spell. He has his own school, which isn’t bad but not worth the cost. This becomes especially true when he’s really only useful leading a band of Dragon Ogors, another expensive unit which further inflates their cost. You can pretty much never take this guy and be fine.
Grashrak Fellhoof and Grashrak’s Despoilers
The Warhammer Underworlds warband who must be taken as a set. A named Great Bray Shaman with a random assortment of beasts in his warband, you’re paying a premium for a unit which will likely contribute nothing. He’s also Allherd, probably not the faction you wanted anyway. Just pass and take two Bray Shaman for only a few more points
Battleline
Battleline options for Beasts of Chaos are interesting. Out of the box, you have Gors and Ungors, two similar units which are differentiated mostly by point cost (with Ungors being the cheaper economy option). You also have Dragon Ogors, Bullgors Tzaangors and Bestigors depending on your General so read those entries as well.
There’s a lot of variance on what battlelines are good to take and a lot of it is managing what units you can fit in once the Heroes are taken care of. Bestigors and Bullgors are popular and are often taken first priority, with Gors and Ungors taken in various combination to fill out the list.
Gors
Your standard rank and file at 70 points for 10, due to low bravery you generally will want to take minimum sized units, though they do gain a bonus attack at 20 models. You can take dual blades for reroll hits of 1 or take shields to make their save a 4+. Take the shields, they’re simply too delicate to not give them every advantage they can get.
Ungors
The cheaper cannon fodder. Everything said about Gors mostly goes for them too, you generally want to run minimum sized units (a steal at 60 points) due to the hilariously low 4 Bravery. They have a 6+ save which is reinforced by their shields to a 5+, and the only real option is either swords or spears. Swords are the clear winner as the only advantage of spears is the 2″ range, and you will not be a big enough unit for this to matter. Use these guys to tarpit your opponent so your bigger guys can put in real work. One other use for the Ungors is as a sacrificial lamb for Primordial call, cashing them out for a much more valuable unit. This can be risky as its possible you won’t deal many mortal wounds, leaving them sitting there doing much of nothing.
Behemoth
Chaos Gargant
Just a renamed Aleguzzler Gargant from the Destruction GA. This boy has hopped around on different lists, nobody was sure what to do with him until Sons of Behemat gave him a home. This is not those gargants though. Look at the data sheet, see all those random dice rolls for statistics? Spend your 170 pts on something better.
Chimera
Pretty brutal beast, and got a price cut after General’s Handbook 2020. As a flying beast with 10″ of movement and +2 on the charge you have a lot of control over how much you can move over the battlefield, with a ranged attack that does D6 mortal wounds at max health and 15 melee attacks divided amongst 3 heads and claws, this thing is pretty nasty and will make your opponent want to take it down quickly. At 12 wounds and 5+ save though it’s a bit on the fragile side so don’t get overconfident.
Cygor
Like an anti-Wizard Ghorgon. It can unbind spells and gets bonuses to hit wizards. While his attack profile is reasonably impressive, you have no shortage of behemoths to choose from so stick to something that has a bit more wide use like the Ghorgon or Jabberslythe
Ghorgon
Hits like a monster truck. Has an respectable attack profile to start but he also deals D3 mortal wounds on a 6 to hit and gets to swallow one model whole at the end of the combat phase if you roll a die higher than the attack characteristic. There’s not much to say because it does one thing very well, and that’s hit stuff.
Jabberslythe
This is an interesting utility beast, on a 4+ he can deal wounds back to the enemy when hit and has a unique ability to functionally shut down all enemy heroes within 6″, leaving them unable to cast a spell, unbind, move or even attack. His attack block is reasonably impressive as well so if you can get him in with the enemy heroes he can be disruptive, if you’re lucky enough to get that 6 on Aura of Madness.
Other
Bestigors
Battleline if a Beastlord or Great Bray Shaman is your General. As Beastlords and Great Bray Shaman tend to show up on lists a lot, it’s very easy to make one your general and get access to this and you will likely want to do this. Bestigors are really good for the cost, while they cost a sizeable amount more than Gors, they sport a better baseline save, better weapon (with actual rend!) and a bonus attack on the charge. Many competitive lists will try and fit as many of these in as possible.
Bullgors
Battleline if a Doombull is your General. A solid alternative choice to bestigors as a battleline if you want a more economic, less model heavy list. You have 3 weapon options, dual axes, axe and shield or great axe. All 3 have merit, though the great axe and its punishing Rend -2 and D3 looks the most intimidating on the table.
Tzaangors
Battleline if a Tzaangor Shaman is your General. Tzaangors end up being their own weird niche within the army due to the interplay of Tzaangor Shaman and the other Tzaangor units affecting each other. Tzaangors are like tankier Gors, with their 6+ Feel no pain on shields. but you’re paying a lot for the privilege. If you want a tzaangor heavy list I’d really reccomend looking at Disciples of Tzeentch instead, as that has more abilities to support them. Their inclusion here feels very “well I guess we have to” on Games Workshop’s part as they’re much more expensive than similar units and tend to only work well when fielded together, which is going to eat up a ton of points.
Dragon Ogors
Battleline if your General is a Dragon Ogor Shaggoth. As has been repeated throughout this article, it’s not that these guys are bad it’s just that to get any real mileage out of them you have to dump a lot into a Shaggoth and at least 3 squads of these guys. Which you can do, but it will set you back a lot in points. How are they on their own? Not bad, they get a lot of attacks per model, and can reroll hit rolls of 1 when within 12″ of the Shaggoth. There are 3 weapon options but statistically they all work out to about the same wounds dealt, so don’t fret too much about that.
Ungor Raiders
Your default ranged option. You don’t have a ton of ranged attacks in Beasts of Chaos so there can be some value here. The problem is the ranged attack is pretty meh and likely won’t do a ton for you. They do get bonuses to rerolls (reroll 1s at 20, and 1s and 2s at 30) which makes investing in at least one large unit tempting. At only 80 pts for 10 they’re basically a steal, and they have a scout rule, letting them move 6″ before the game starts, so you can move them into an ideal sniper perch early.
Centigors
Bit of an odd ball unit. They are cheap, at only 80 pts for 5. They’re basically “Elite” Gors, with 2 wounds a piece and 2 attacks with their spears. They can also chose to engage in Drunken Revelry, which allows them +1 to hit (and to be hit!). Not a bad unit overall, though fails to distinguish itself from its battleline cousins.
Tuskgor Chariots
Your cavalry unit, this one has a few oddities to it though. As is pretty standard for cavalry you get to reroll charges and gain +1 attack on the charge. However you gain 1 to hit rolls when the unit you charged has 10 or more models and reroll hit rolls of 1 against ORDER units, which probably will come up fairly often. You don’t want to get too cocky though, cavalry are best used to hit units you know you can wipe out quickly, as getting stuck in is bad news. The +1 to hit might tempt you into going after large groups, but don’t go too large, otherwise you’ll get stuck with 1 less attack per turn, drastically diminishing your effectiveness.
Tzaangor Enlightened
These guys are deceptively good. Their stat block is impressive on its own but where they shine is their ability Guided by the Past. If the enemy you’re targeting has already attacked (doesn’t have to be the Tzaangor Enlightened, it can be another unit theyre locked in with), then you can reroll all hit and wound rolls. So hold off on selecting these guys to attack until later in the round. You can give them discs or put them on foot. Discs grant an extra wound, in addition to the Fly and increased movement you might expect. If you have the points putting them on a disc is recommended, but if you have to shave off a few points these will still put in the work.
Tzaangor Skyfires
The polar opposites of Enlightened. While Enlightened are skirmishers, Skyfires pick off the enemy from afar with their bows. Whereas Enlightened are given a boon for attacking enemies that already attacked, Skyfires get a bonus for striking first. These guys are better here than in Disciples of Tzeentch, as good shooting is harder to come by for beasts of Chaos. They’re rather costly however, and you’ll want a shaman to support them, further adding to the cost.
Chaos Warhounds
A Chaos-y variant of the Direwolves from Legions of Nagash, these guys serve a similar function as cheap objective grabbers, as they can move 10″, a blinding 16″ if they run (no need to make a roll). They don’t quite fit in as well as Direwolves do because your options for “Cheap objective grabber” are pretty long and varied, but these aren’t bad, just redundant.
Razorgors
Slightly different take on warhounds, works closer to a cavalry unit. They have a 10″ movement speed, can run and charge in the same turn and deal a mortal wound on 6s after the charge. Similar to Warhounds they work as cheap objective grabbers, but you have no shortage of those. Their attack profile is probably not good enough to dislodge units, but might be able to harass some of your enemy’s own cavalry.
Chaos Spawn
On their own? Awful. A lot of random dice rolls that make them unreliable, but if you play Gavespawn, which you probably should be, you want at least one around as a buff totem for your army’s command ability so you don’t have to wait for a Hero to die first. Don’t actually bring them into the fight unless you feel you can win though, as they tend to be killed fairly easily.
Terrain
Herdstone
Your free terrain piece, it has 2 traits:
- -1 to Saves from units within 6″ of this model (Beasts of Chaos ignore this)
- Ignore battleshock tests for Beasts of Chaos units within 6″
The range of these abilities starts at 6 but expands outward by 6″ every round past the first. Because you set up terrain before deciding deployment, this can be a little fiddly to get working in the early game if it lands in a bad place for you, but having a built in buff for you and debuff for the enemy means whichever side it is on it will likely help you in some fashion. It’s free so not reason not to take it. Don’t forget to perform the dark rituals to summon more units if the chance presents itself.
Army Lists
Nathaniel Harrison’s Gavespawn List
Allegiance: Beasts of Chaos
- Greatfray: Gavespawn

LEADERS
Tzaangor Shaman (150)
- Lore of the Twisted Wilds : Tendrils of Atrophy

Great Bray Shaman (100)
- General
- Command Trait: Unraveling Aura
- Artefact: The Unknowing Eye
- Lore of the Twisted Wilds : Titanic Fury

Beastlord (90)
Artefact : Mutating Gnarlblade

BATTLELINE
10 x Ungors (60)
- Mauls and Half-Shields

10 x Ungors (60)
- Mauls and Half-Shields

10 x Gors (70)
- Gor-Blades & Beastshields

10 x Bestigors (120)

10 x Bestigors (120)

10 x Bestigors (120)

OTHERS
6 x Tzaangor Skyfires (400)

6 x Tzaangor Skyfires (400)

BEHEMOTHS
Ghorgon (160)

BATTALIONS
Desolating Beastherd (150)

Total: 2000/2000
This list went 2-1 at Council of Judgement in September 2020 in Missouri. This list pretty much establishes what a “standard” list might look like for Beasts of Chaos. Lots of minimum sized battlelines, with a Great Bray Shaman and Beastlord to back them up. After that you can experiment to taste. Nathan took Skyfires for ranged support, with a Tzaangor Shaman to back them up and a Ghorghon as a massive beast. Since hordes are so cheap in Beast of Chaos there is a lot of room to experiment with other units to try and make something that fits your playstyle.
Ben Kenyon’s Darkwalker’s List
Allegiance: Beasts of Chaos
 - Greatfray: Darkwalkers

LEADERS
Beastlord (90)
- General
- Command Trait : Nomadic Leader

Beastlord (90)

Doombull (100)

Great-Bray Shaman (100)
- Artefact : Desolate Shard
- Lore of the Twisted Wilds : Vicious Stranglethorns

Great-Bray Shaman (100)
- Lore of the Twisted Wilds : Viletide

UNITS

10 x Bestigors (120)

10 x Bestigors (120)

10 x Bestigors (120)

10 x Bestigors (120)

3 x Bullgors (140)
- Pairs of Axes

3 x Bullgors (140)
- Axes & Bullshields

3 x Bullgors (140)
- Great Axes

10 x Ungors (60)
- Mauls & Half-Shields

1 x Tuskgor Chariots (60)

BEHEMOTHS
Chimera (220)

Ghorgon (160)

ENDLESS SPELLS / TERRAIN / COMMAND POINTS
Wildfire Taurus (80)

Ravening Direflock (30)

TOTAL: 1990/2000
The other greatfrays arent nearly as good as Gavespawn but this list is a pretty good example of how you can get it working if you really want some diversity. With the Darkwalkers unique allegiance ability, Warherd and Thunderscorn can be treated as Brayherd for purposes of Brayherd Ambush. So what do you do? Load up on Behemoths like the Ghorgon and other big boys like Bullgors so you can drop them close to your opponent! Sadly this list only went 1-2 At the backyard invitational in October in Ellwood PA, so if you want to stray from Gavespawn it’s going to be a bit of an uphill battle.
Wrapping Up
So that wraps up the Beasts of Chaos, the wild and feral cousins of Chaos. While they may struggle in the competitive circuit it’s possible to overwhelm your opponent with sheer numbers and giant beasts if you’re willing to use clever tactics to leverage your disadvantage. To Beasts of Chaos players, how do things go in your experience? What tricks do you use to get around your weaknesses? Let us know on social media or at contact@goonhammer.com
