Welcome back to Goonhammer’s series for aspiring Titan Principes. We here at Goonhammer’s own Collegia Titanica know that Adeptus Titanicus can seem intimidating to players unfamiliar with its particular quirks, but this series aims to equip you with everything you’ll need to play out epic clashes on the battlefields of the far future with your very own Titan Battlegroup. In this series, we’ll be walking you through how to build your battlegroup and command it to glory, including everything from which Titans to include and how to equip them, through to how to command them on the field of battle to secure ultimate victory.
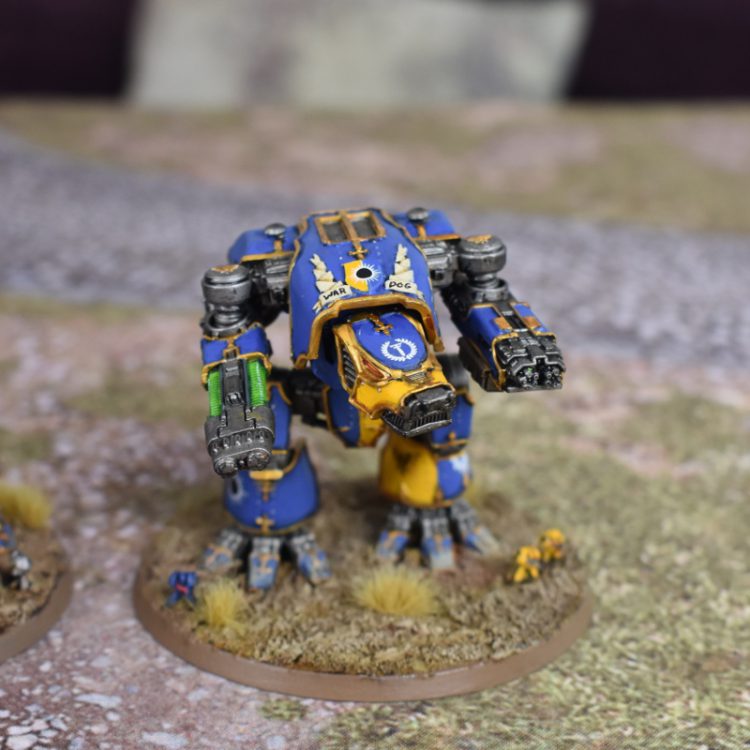
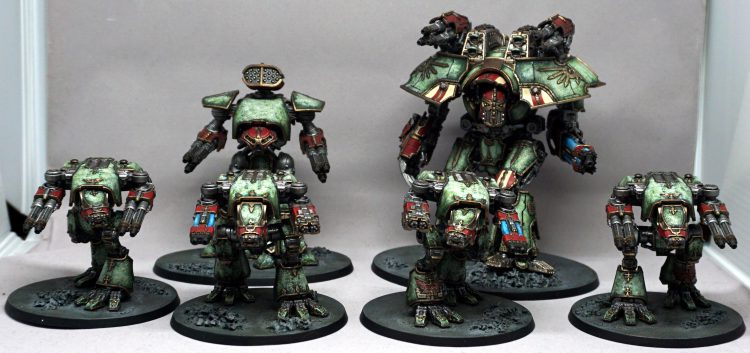
This week, we’re taking a look at the nimble Warhound-class Titan. As the smallest actual Titan that you can bring to the table in AT, the Warhound combines stellar maneuverability with some powerful weapons to present a decent threat. Unfortunately, compared to the other Titans, your Warhounds have paper-thin armor and a small shield track backed up by a mere 2 servitor clades, meaning they’ll fold pretty quickly under concentrated fire. However, between their superior speed and maneouvre values and their ability to merge shields with their squadmates, they can be tougher to remove from the board than you might think.
Warhounds in a Nutshell
Warhounds are the smallest Titan on offer in Adeptus Titanicus, coming in at scale 6. They have relatively low target values for each of their structure locations, and can only take 3 hits to voids without collapsing. However, a Titan’s defenses can only fail if it gets hit, and the Warhound is capable of some incredible feats of maneuvering which it can use to duck behind cover or step out of an enemy’s firing arc at a key moment. As with any Titan, their weapon loadouts are nothing to sneeze at, and while they may lack the raw earth-shattering firepower that their larger brethren can muster, discount them at your own peril: Warhounds excel at outflanking larger and slower god-engines and tearing into their vulnerable rear armor, letting them pose just as much of a threat as any other war machine your opponent might bring to the battlefield.
Strengths
- Speed – Warhounds move 8” and can boost to get up to 12”, letting them keep pace with Knights Cerastus if need be. This is crucial for both offense and defense, as their relatively short-ranged weapons perform best when as close as possible, and their weak defenses mean they need to avoid enemy firing arcs as much as possible.
- Agility – With a manoeuvre value of 3 that boosts to 5, Warhounds can dodge between terrain features and line up shots that larger Titans would find impossible. Combined with their small base size (for a Titan, anyway), their speed and maneuverability mean they can generally get wherever they want to go.
- Squadrons – The squadron rules make your Warhounds more durable and more dangerous – merging void shields lets you shrug off 6 hits across two Titans before voids collapse, and Coordinated Strike gives you a bonus to armor rolls that will let you threaten any piece your opponent has. Clever use of Coordinated Strikes together with your Warhounds’ maneuverability can make even vulcan megabolters into a credible threat.
Weaknesses
- Weak Defenses – Each Warhound can only take 3 unsaved hits to voids before they collapse, and the target values for each of their armor locations are lower than other Titans. In addition, the target values for each of their structure locations are relatively low and they only have 2 servitor clades, which means it’s harder for them to get back to full strength after taking a hit. You’ll need to lean on their superior movement stats to slip behind cover and dodge out of firing arcs if you want to keep them in the fight.
- Overheats Easily – With only 4 spots on the reactor track before redlining, every time you push your Warhound’s reactor is a risk. Even the first time could result in overheating if you get unlucky and roll a 2 on the reactor die.
- Squadrons – Squadding up is a double-edged sword: what you gain from the Coordinated Strike rule and the ability to merge void shields is balanced by the fact that you have to give up an activation to take advantage of this ability. This means that your movement phase will happen in fewer activations, making it easier for your opponent to see what you’re up to and move to counter it.
How to Pilot Your Warhound
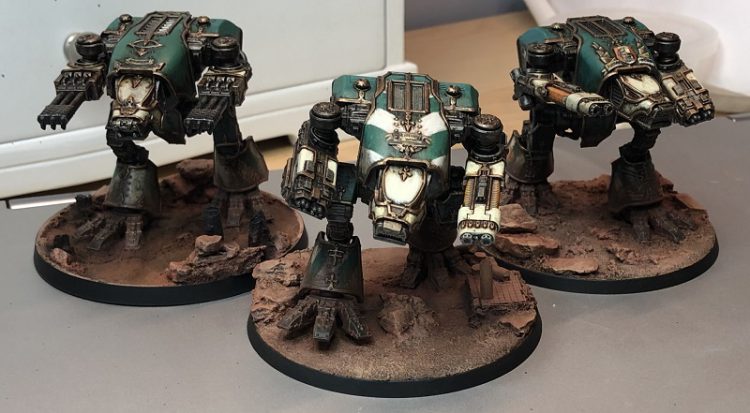
The Warhound Scout Titan is a flanker, skirmisher, and harasser, using its speed and maneuverability to get into the least convenient spot possible and spit hot laser death into its target’s most vulnerable spots. Its weapon choices aren’t as powerful as those on Reavers or Warlords, topping out with the plasma blastgun’s strength 10 on Maximal Fire, but with their ability to easily outflank larger and less maneuverable Titans, any Warhound can reliably threaten other Titans.
Generally speaking, you’ll want to deploy your Warhounds slightly apart from the rest of your battlegroup so they can try to outflank your opponent and stay out of firing arcs. Deploying squadrons in base contact is a decent way to make sure they’ll stay alive through the first turn, though you’ll want to split them up as you get closer to avoid giving your opponent two targets near one another and to make absolutely sure at least one of them is getting an angle on your target’s flank.
Be judicious in pushing your Warhound’s reactor – you’ll have to start taking reactor overload checks starting with your second point of heat, so any push comes at risk. With two servitor clades, you’ll have a 75% chance of being able to vent at least one heat, but that’s still not something you want to have to rely on when it counts. By the same token, you’ll want to try to use your speed and maneuverability to avoid being shot so you don’t have to rely on Voids to Full. Every reactor die you can avoid rolling for your Warhounds is a minor victory in itself.
Weapons
Warhounds have four weapons to choose from, and each of them has their role. Consider how you want to use each Warhound when you’re choosing its loadout – your choice will define how you should use your Warhound.
- Plasma Blastgun: At 30 points, this is the most expensive weapon you can equip your Warhounds with, but it’s worth the price. 2 shots with the blast trait give you a decent chance of putting 4 hits on voids, and using Maximal Fire against armor will do well into all targets, especially if you can get shots into side or rear armor. Two caveats: first, 2 shots at Maximal Fire has about a 30% chance of increasing your reactor track at least once, so be careful with this if your Titans are running hot. Second, the blastgun gets a -1 to hit unless its target is within 8”, meaning you’ll really want to get in close to make the most use of this.
- Vulcan Megabolter: 10 points for 6 shots with the Rapid trait is a bargain – you’ll average 5 hits per volley with each megabolter (assuming no penalties), and bringing more than one will all but guarantee a collapsed shield if you can bring them to bear. As a bonus, if you can close within 8”, you get +1 to hit, making this weapon even more reliable, although it’s unclear how this bonus interacts with the Rapid trait. The downsides here are its pitiful strength of 4 and the fact that its maximum range only extends out to 20”. You’ll need to get in fairly close to get any use out of it at all, and won’t be doing much against armor until you can get an angle on your target’s flank or rear.
- Inferno Gun: Essentially a Titan-scale flamer that uses a template, the inferno gun automatically puts 3 hits on the closest target under its template, then one additional hit on every other model the template touches. At strength 7, it’s fairly strong, but is held back by its extremely short range. This weapon performs decently into all targets, but really shines against other Warhound squadrons and Knight banners where you can get the most use out of its ability to hit multiple targets.
- Turbo Laser Destructor: The odd one out amongst Warhound weaponry, the turbo laser destructor combines a respectable strength 8 with 32” range to let your Warhound threaten nearly any target. Its Shieldbane (Draining) trait lets you push your reactor to impose a penalty on void saves, letting them contribute to shieldbreaking despite their low shot count. All in all, this is a true hybrid weapon that can flex into almost any role, so be sure to think about when you fire them in the Combat Phase so you get the most use out of your dedicated specialist weaponry before using these.
Suggested Loadouts
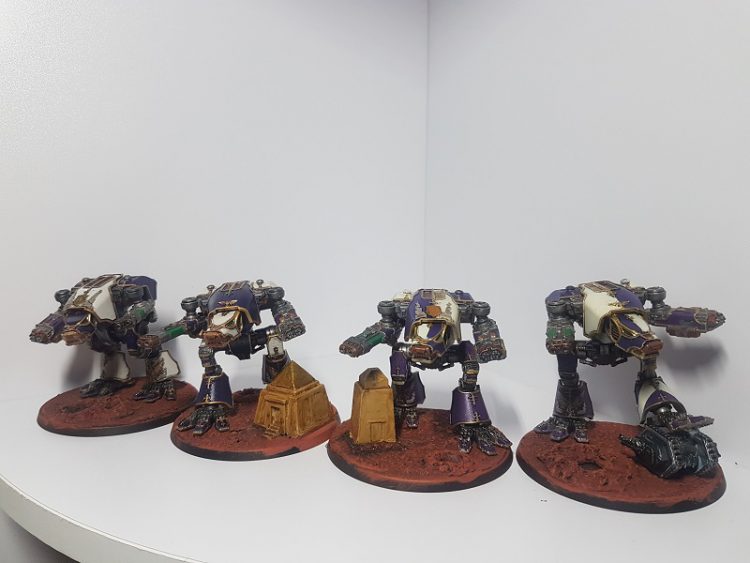
Warhound principes are lucky in that any weapon they may choose to mount has at least one use case that makes sense. It’s hard to go wrong with your Warhound builds, but if you’re not sure what you should be running, never fear: we have a few suggested loadouts that might fit the bill.
All-Rounder
- Vulcan Megabolter
- Plasma Blastgun
If you’re not sure how to equip a Warhound, you can’t go wrong with this loadout. The vulcan megabolter is in competition for the title of best shield breaking weapon in the game and the plasma blastgun, while expensive for a Warhound weapon, is a solid choice both against voids and armor, letting this little guy punch well above his weight. In addition to being a solid choice in any situation, this is one of the better choices for a Warhound that won’t be fielded as part of a squadron, as it lets your Titan pound down shields and then tee its newly-vulnerable target up for a quick kill.
If you’re fielding a Warhound and don’t know how to equip it, this is your go-to. Advance this Warhound aggressively and dodge firing arcs until you can get close, then tear down your target’s shields and go in for the kill. Against targets with active shields, fire the megabolter first to try to open them up for your blastgun. If your victim’s shields are down, fire the blastgun first to try to get a bonus to armor rolls, then follow up with called shots from the megabolter.
Skirmisher
- Turbo Laser Destructor
- Turbo Laser Destructor
If you don’t want to use the megabolter/plasma loadout, this is probably the one you’re looking at. A pair of turbo laser destructors is reasonably effective against all targets, and offers an 8”-12” range bonus over the plasma blastgun and megabolter.
Warhounds with this loadout play a bit differently than usual – rather than moving aggressively to get in close with your target, you’ll want to leverage your speed and maneuverability to dodge firing arcs and attack from a different arc than the rest of your force. Try to bait your opponent into opening their flank to your Warhounds, then call shots into vulnerable locations to hit with a favorable armor roll. Between a pair of Warhounds equipped with these, you can expect to pick up 2-3 hits when you’re calling your shots, each of which will have a good chance of dealing damage when they’re landing with a minimum +2 to the armor roll from flanking combined with the Coordinated Strike rule.
Shieldbreaker
- Vulcan Megabolter
- Vulcan Megabolter
When you absolutely have to break an enemy Titan’s shields as quickly as possible, this is an excellent way to do it. Rolling 12 dice with the Rapid trait will average 10 hits on targets further than 8” away, which is an average of 3 failures on fresh voids, or 5 failures on a Titan that’s dropped to 4+ on its void shield track.
The downside to this build is that you don’t really have the punch to get through armor once those voids go down. This can be somewhat mitigated by flanking your opponent and using the Coordinated Strike rules, but it’s still not very reliable until you’ve racked up some damage from other sources. However, taking one or two of these as a dedicated shieldbreaker can be incredibly effective, especially if your legion or maniple benefits from it. Consider taking this in Legio Interfector to take advantage of their Static Rounds upgrade, or in a Venator maniple to all but guarantee that you’re going to get a free shot with your Reaver whenever this Warhound fires.
Knightbane
- Inferno Gun
- Turbo Laser Destructor
The inferno gun is an odd one: 3 guaranteed hits is nothing to sneeze at, but it’s not particularly reliable either, since against most Titans you’re looking at 1 failed void save, which isn’t great. The weapon really comes into its own when targeting more than one model at once, making it ideally suited to bring down Knights and a decent option into squadrons or Warhounds. The turbo laser destructor’s combination of strength and range will let you throw out some damage as you approach while still contributing in close to finish the job. This loadout can also put some decent damage on an unshielded Titan – make sure to lead with the inferno gun, then call your shot with the lasers once you open up a vulnerable structure point.
Don’t be afraid to mix and match your Warhounds’ loadouts to find what works for you. There are no real trap choices on weapons here as long as you have a plan for using them and give yourself the opportunity to put it into action. The inferno gun is definitely the hardest of the bunch to get mileage out of, but can certainly be used to great effect with a little foresight and some clever play.
Legion Options
Legio Solaria is the most obvious choice for Warhounds – their rules and wargear allow them to take additional Warhounds and make them even more dangerous than they would be otherwise. Their Cameleoline Shrouding wargear choice is expensive, but effective. However, since it only works at long range, you’ll want to consider reserving it for Warhounds equipped with two turbo laser destructors so that they’ll be able to make use of their weapons while still benefiting from the penalty to your opponent’s hit rolls. Wolf Packs is an interesting option, but you’ll want to think carefully before using it – giving up those activations in the Movement Phase could come back to haunt you.
Legio Interfector is a solid choice for traitors looking to field Warhouds, as their Static Rounds upgrade turns a Warhound equipped with 2 vulcan megabolters into arguably the best anti-void shield unit in the game. Additionally, the ability to move your Titans in close with your opponents makes them an excellent choice for your Creeping Madness rule – if you’re in close to the enemy, you’re likely to get value out of it no matter what you roll.
Legio Tempestus has a few rules that pair nicely with Warhounds. Combat Drop only works with Warhounds, and can be a game winner if you play it right. Chasmata-Pattern Laser Destructors gives you some extra range to work with that can make your turbo laser destructors even more reliable and let you hit with your skirmishing laser-hounds from nearly anywhere on the board. Plus, their legion trait is a nice bonus if you get caught out, letting you fire your weapons one last time if you lose a Titan.
Legio Astorum is a choice that may seem odd at first – being all but guaranteed to take at least one heat and about a 30% chance of taking 2 seems risky, but their Veteran Princeps rule makes managing that heat a lot easier while at the same time shoring up their weaker defenses by making you more likely to roll at least one 5+ between your two repair dice. The legion specific stratagems are also nice to have for these weaker Titans, particularly the Machine Defiance stratagem, which will give you a 50% chance to reignite your Warhound’s void shields when they collapse, potentially buying you another round before you start taking damage to structure.
Legio Vulpa is a great choice for a Titan that wants to be in close anyway, rewarding you for closing within range to ignore your opponent’s void shields and shove a plasma blastgun or a pair of turbo laser destructors right up that Warlord’s tailpipe. Distortion Fields is a somewhat expensive but worthwhile upgrade, letting your Warhound’s smash attacks hit as hard as any other legion’s Reavers, which can be utterly devastating. Don’t expect to get much mileage out of Plasma Gargoyles on these, though – you don’t have the room on the reactor track to be running hot, and with only 2 repair dice your vent attack will top out at strength 5, and that’s if you’re lucky.
Maniples
The obvious maniple for the Warhound enthusiast is the Lupercal Light Maniple, which gives you access to 3-5 Warhounds together with rules that let you get the most out of their ability to form squadrons with one another. Being able to change the number of activations in your list from round to round minimizes the downside to fielding Warhounds in squadrons while letting you set up an absolutely devastating alpha strike. When building for a Lupercal, you’ll want to make sure each Titan has at least one weapon that can meaningfully contribute to that killing blow, whether that’s a turbo laser destructor, a plasma blastgun, or even an inferno gun. Just make sure you bring enough megabolters to pound down shields while you’re setting up your killing blow.
Competing with the Lupercal is the Venator Light Maniple. Warhounds in a Venator are generally more focused around pounding down shields so that you can get the most out of the free shots from your Reaver. Megabolters fit the bill nicely, but turbo laser destructors are a close second – they’re decent at pounding down shields and can put in solid work with called shots once your Reaver opens up its target, and having some additional high strength firepower will help you finish off Titans in the same round your Reaver opens them up.
The Ferrox Light Maniple is another option for the Warhound-curious, this time focusing on fighting in close. At scale 6, your Warhounds will need to be within 6” of their target to get any bonus from the maniple trait, making the plasma/bolter loadout even scarier than it would be otherwise. However, the real winner here is the inferno gun – if you’re close enough to hit with it, you’ll often be close enough to benefit from the maniple’s +1 to armor rolls, giving you 3 automatic hits at an effective strength 8 on whatever you point it at.
Finally, the Regia Battleline Maniple lets you pair up to 3 Warhounds with 2 Warlords. However, the way this maniple works is wildly different from other maniples, and we don’t recommend taking it for a spin until you’ve played at least a handful of other games. If you do decide to try this, you’ll likely want to focus on turbo laser destructors so you’ll actually have some weapons to fire while your Titans are Full Striding across the board. Once you get to the midfield, your Warhounds will break ranks and charge, trying to get into flanking position while the Warlords open up to strip shields and put a few hits into armor. Take called shots into those vulnerable shots to try to get the numbers advantage, then move on to the next target.
What’s Next?
Warhounds are blast to play, and have some seriously good options to choose from. They also fit well in nearly any battlegroup, clocking in at around 220 points per model, making them an excellent choice for some supporting fire if you’ve got points left over in your list. However, their weak defenses and minuscule reactor track means that there’s not a lot of room for error with them. Despite their weaknesses, though, they form a core part of many lists and a pair of Warhounds matches favorably with many other options your opponent might have, especially if there’s a decent amount of terrain to take advantage of while you’re closing.
