These models were kindly provided to us by Modiphius for review.
While there have been no shortage of power armored models released for Fallout: Wasteland Warfare, these are the first to be released in plastic. In fact, they are the first multi-part plastic models released by Modiphius, and given their pretty stellar track record in resin, I was particularly excited to tackle them.
Detail
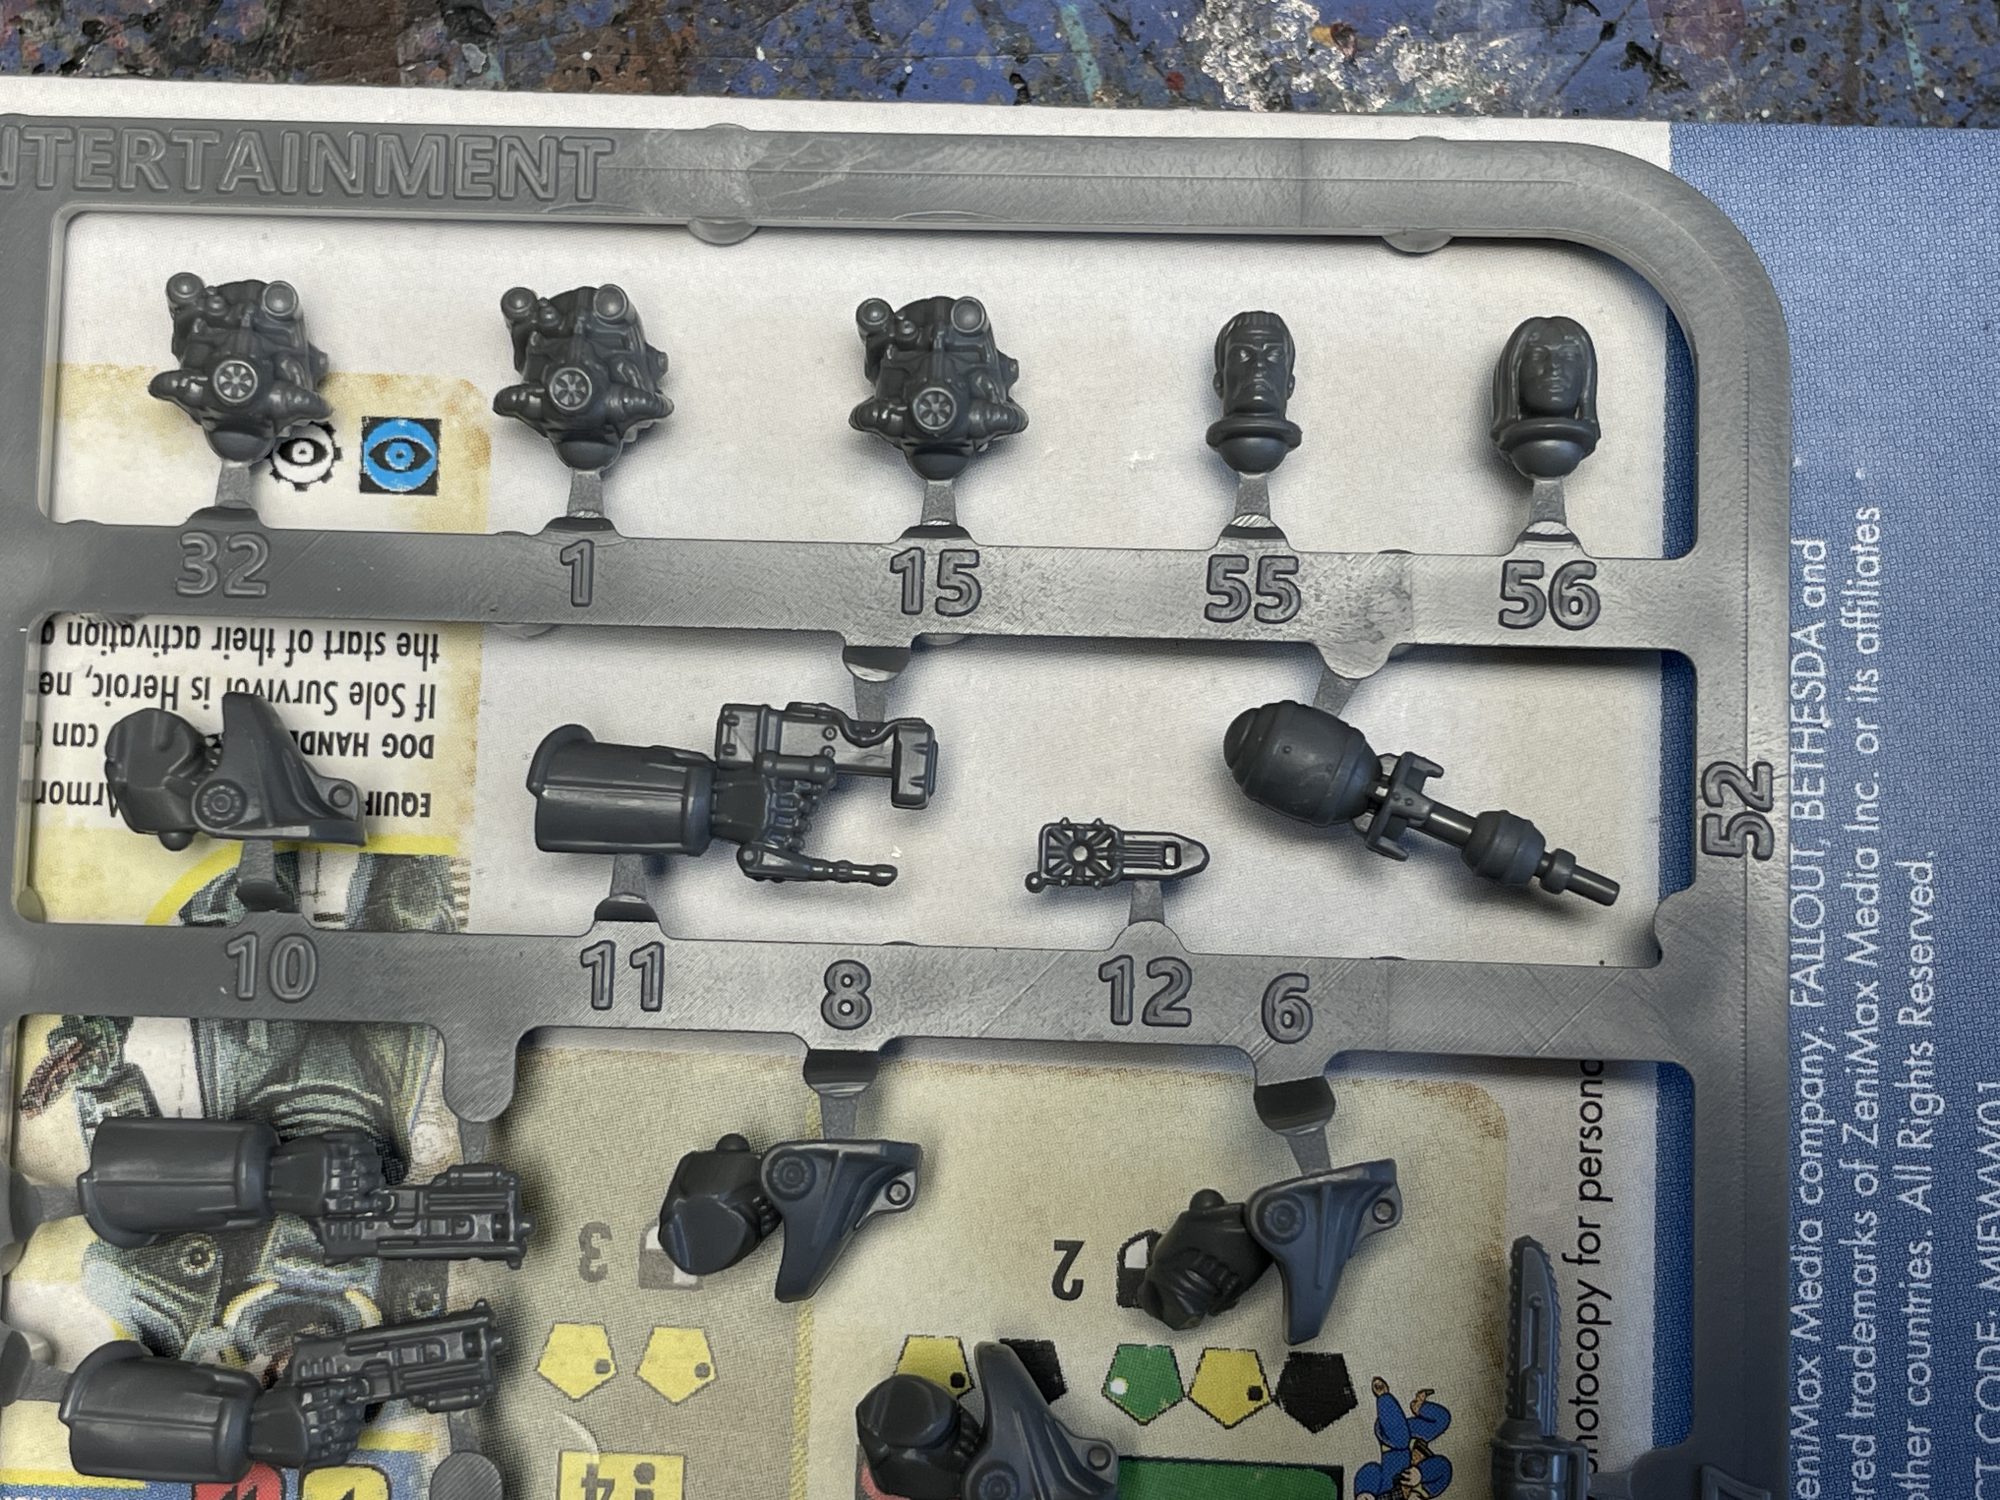
The detail on these models is definitely softer than the range’s resin offerings, with this being particularly noticeable on the bare heads in the box. However, it’s still a plenty appealing amount of detail, and will absolutely read well up close or at a distance. There’s a visible adherence to the source material here, from the vents on the R91 assault rifle to the knobs and dials on the missile launcher. If I were to compare this to other kits, it sits at about the same level as Perry’s plastics – not as overwrought as something like Games Workshop’s offerings, but also not quite as sharp. It’s a pleasant tradeoff, and should make army building with this kit a simple endeavor. Moldlines aren’t too bad, save for a few weird bits on the gatling laser, and the sprue connection points are easily accessible for cleanup.
While the box says “Brotherhood of Steel” in big, graphic designerly orange, there is no actual faction iconography on these models. If you wanted to paint them as Atom Cats, Brotherhood Outcasts, rusted out randos, or some other creation of your own, you’ve got all the license in the world to do so. Hell, you could even go for some of the sicko Nuka Cola-branded armor skins from Nuka World, I won’t tell anybody.
The included 40mm bases are a departure from Modiphius’ usual offerings. Instead of being a sculpted, 3-dimensional base with a whole bunch of scenery modeled on there, it’s completely blank. I’ve heard cases for both approaches – people either like the modeled bases and the stories they tell, or they prefer a blank base for either ease of painting or to tell their own narratives. You can always use your own bases in the latter case, and I dug into my bits box to find some good stuff for these. You’ll see those later, though.
Assembly
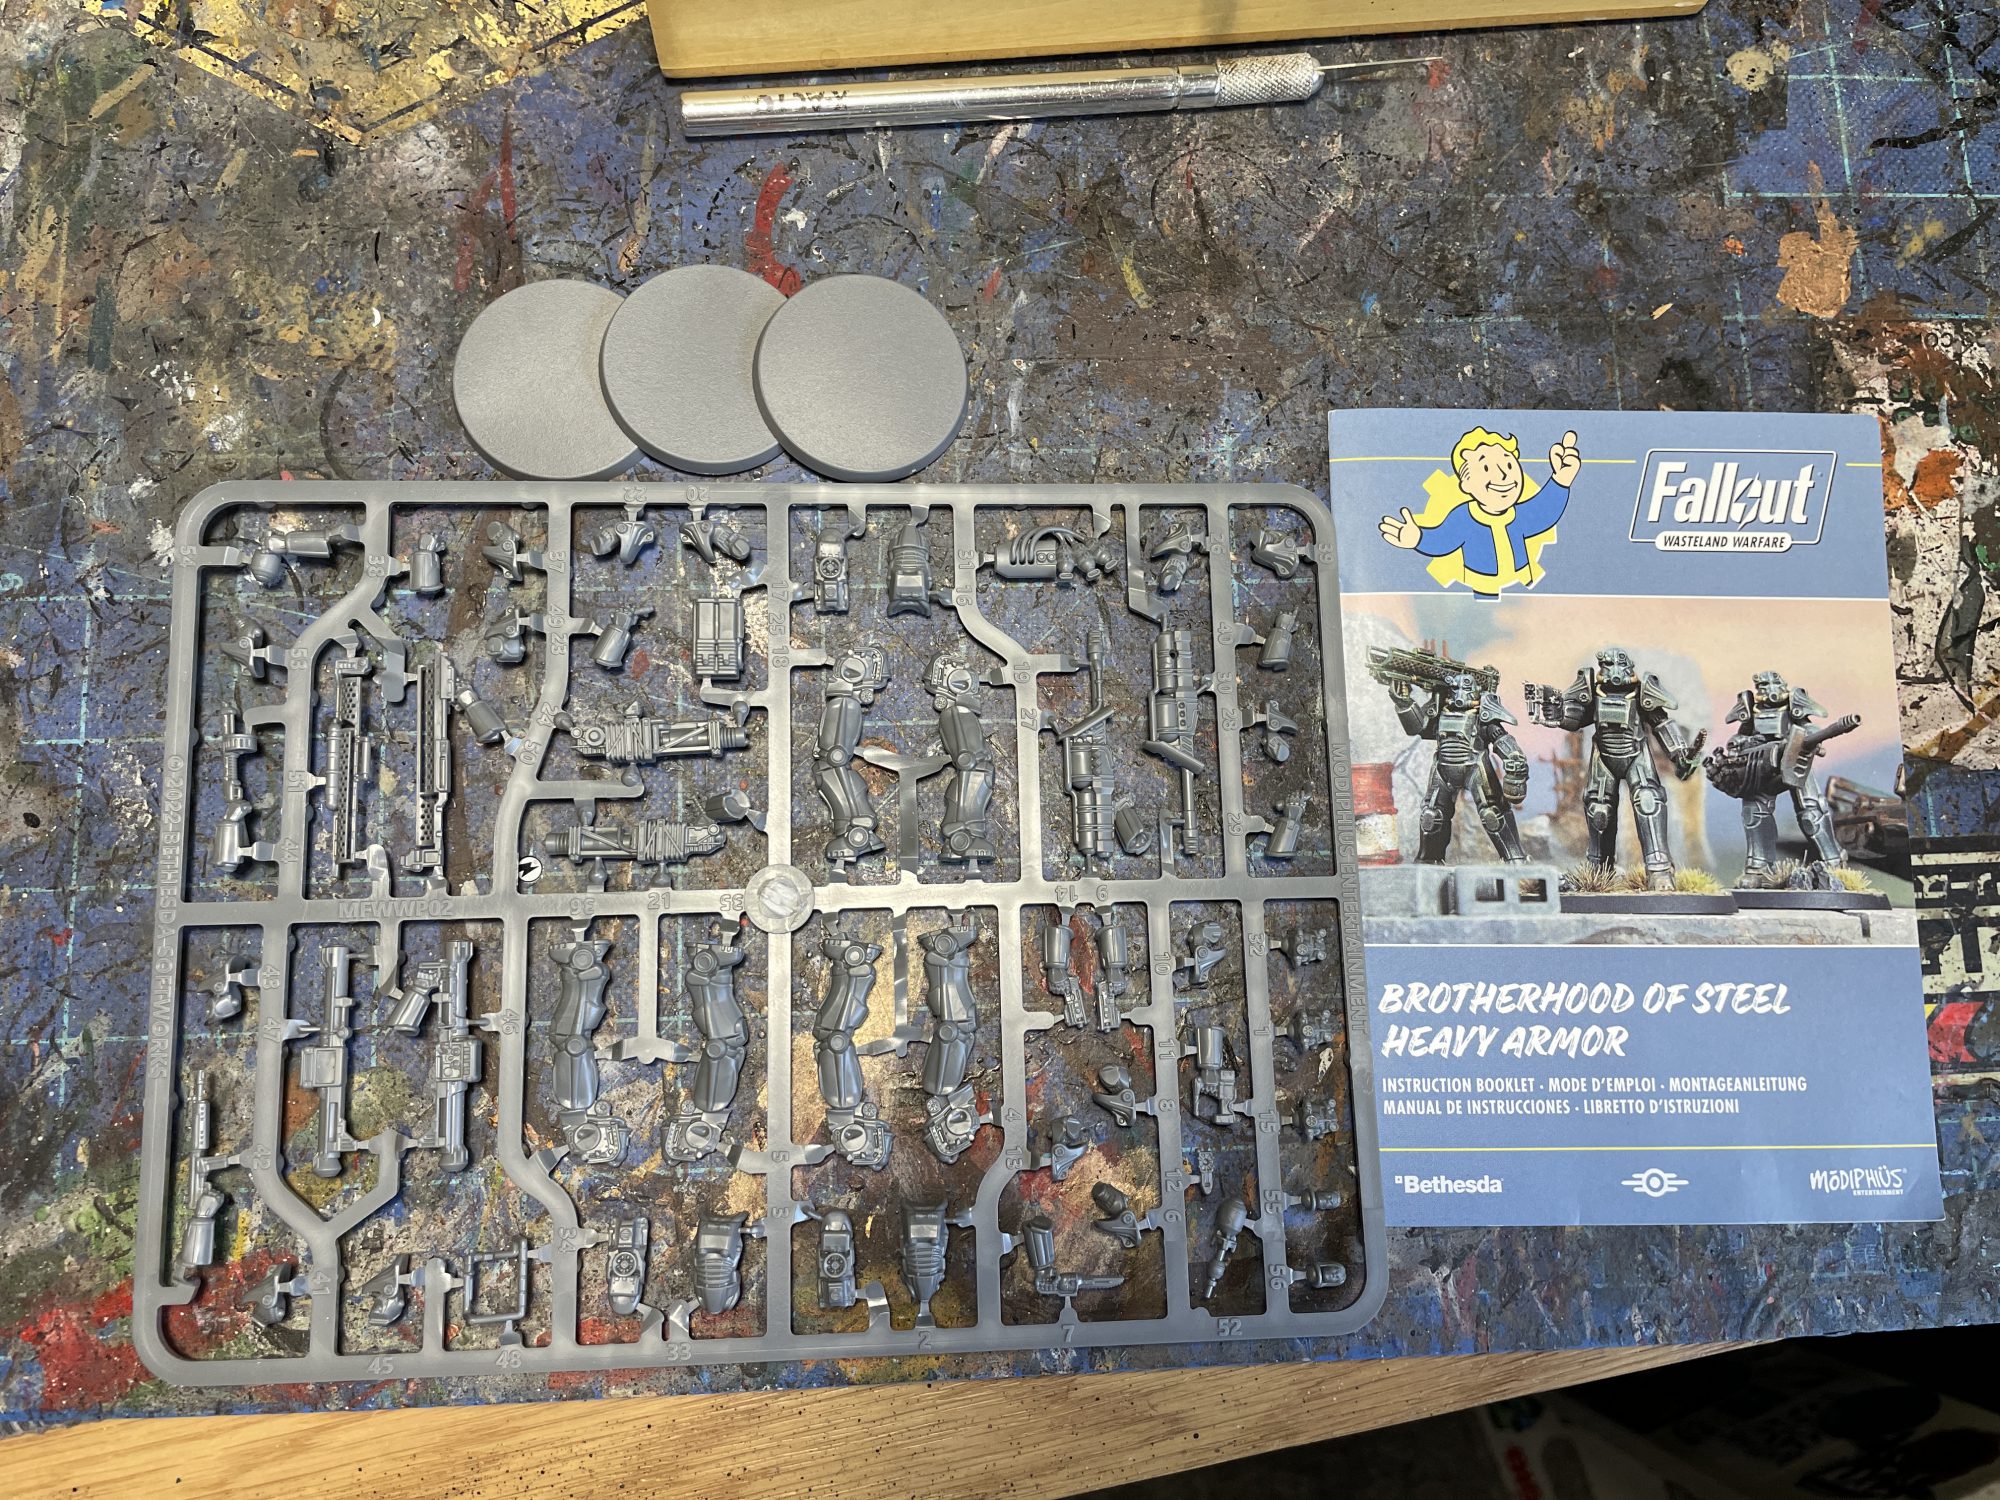
The kit contains a single, logically laid out sprue with 56 pieces, 3 plastic 40mm bases, and an instruction book. Said instructions are similar to those you’d find in a Games Workshop kit, with clearly numbered pieces and some icons denoting options. It’s an easy to read instruction booklet, and I’d like to give credit to the designers for making it so legible. The pieces are also generally grouped together by number. You won’t be trying to find arm A for shoulder B on the other side of the sprue or anything, as they’ll be right next to each other. Honestly, you could build this kit going off numbers and grouping on the sprue, but I appreciate the included booklet just the same.
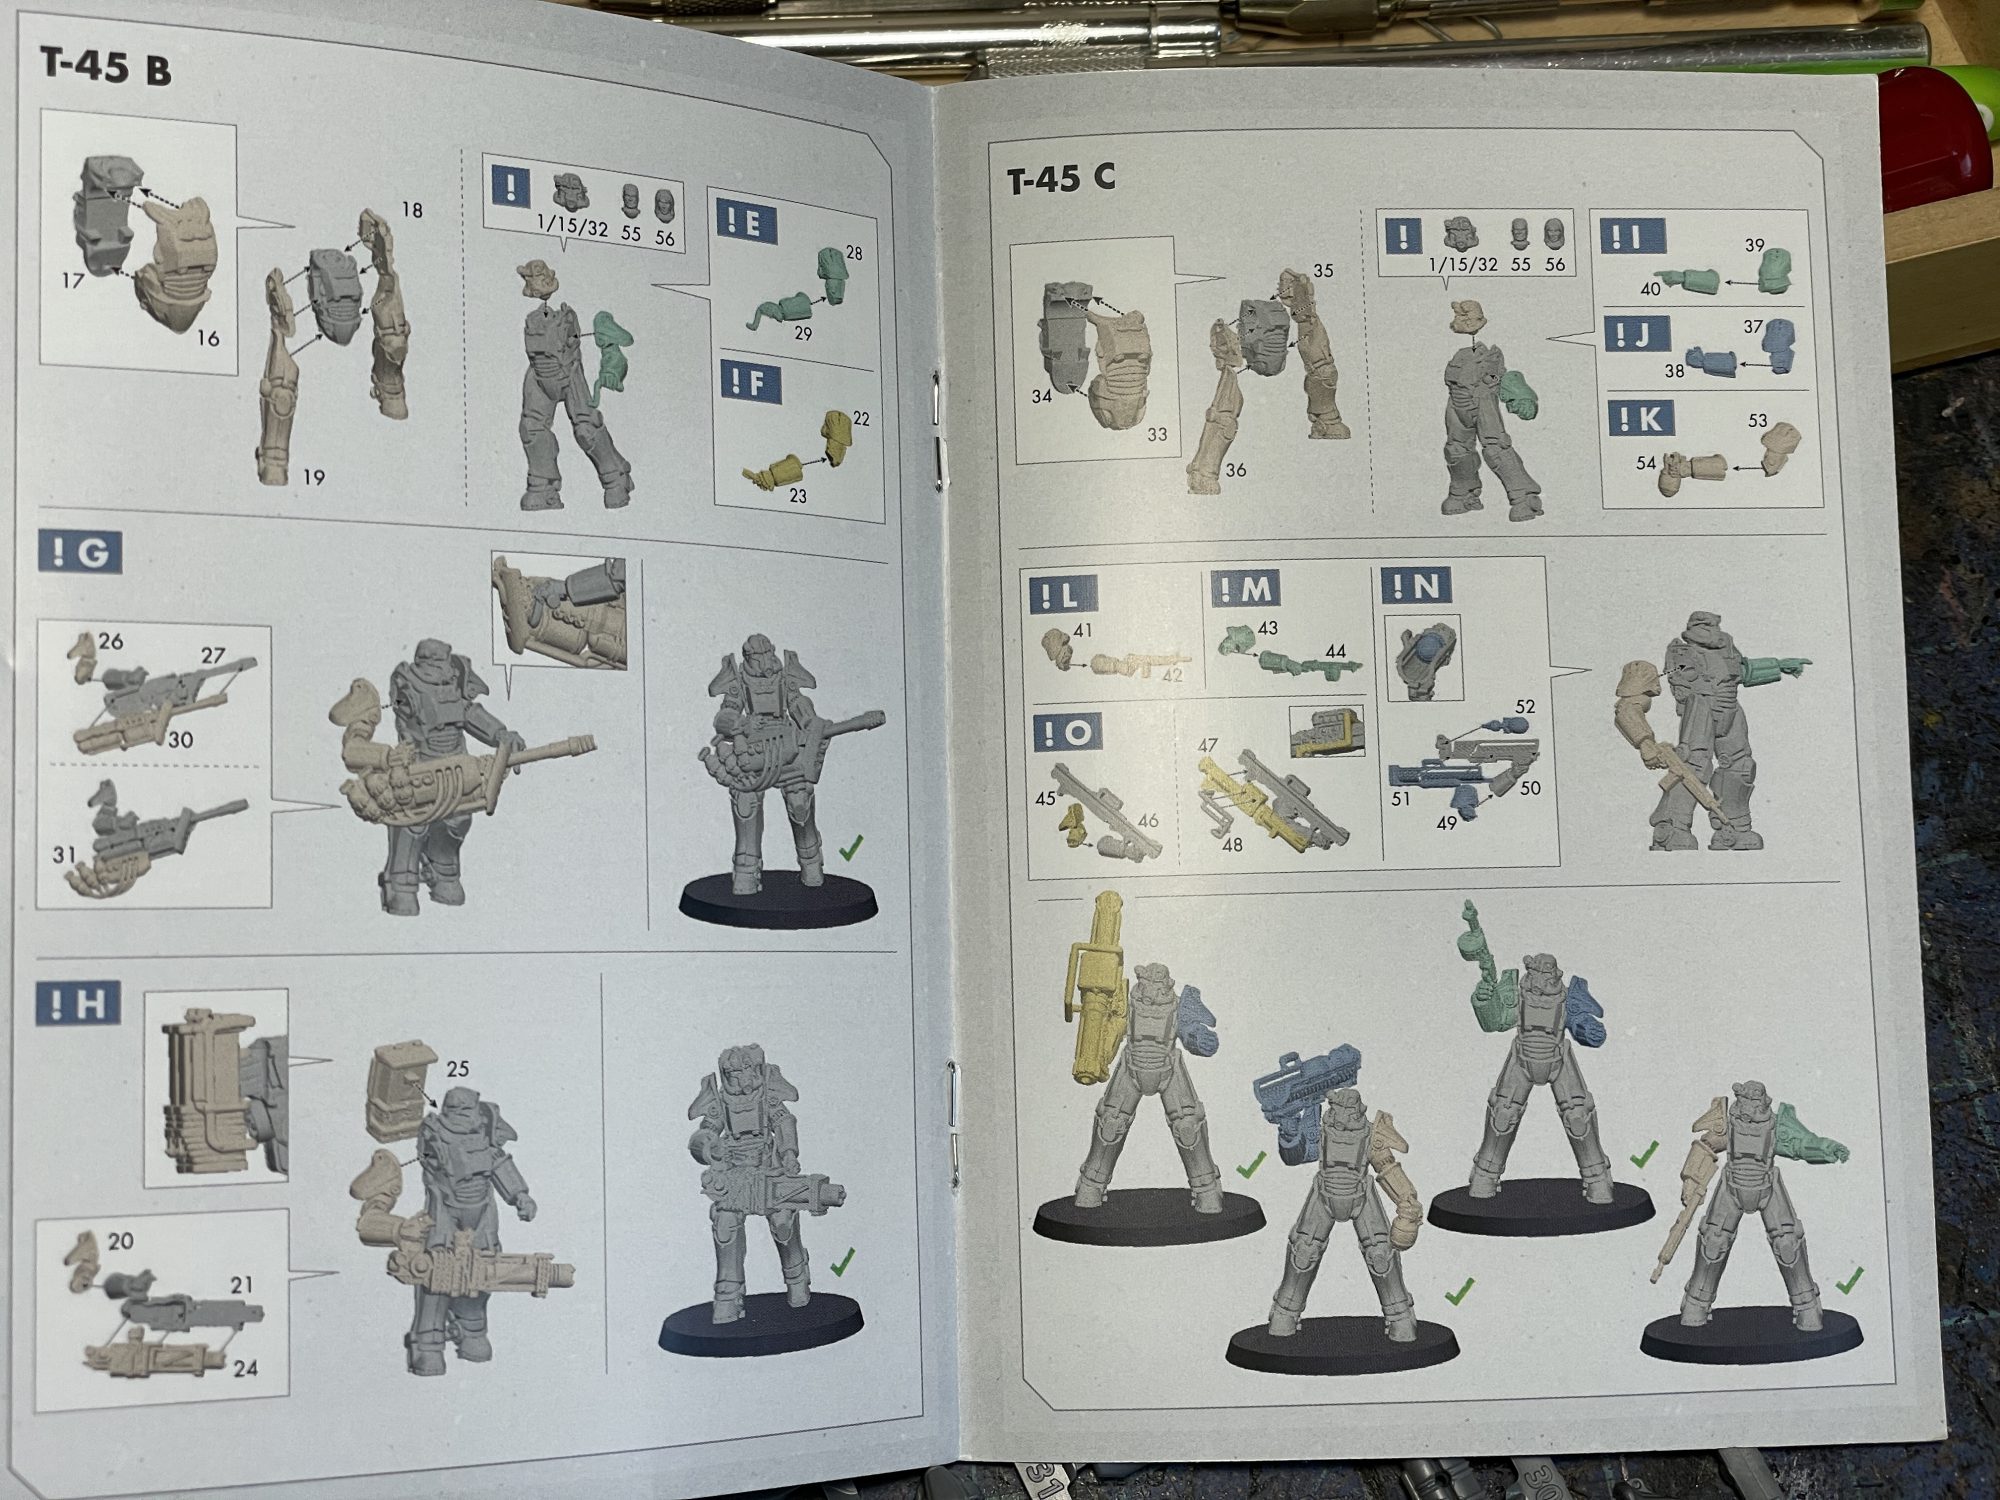
Posing is somewhat limited; the bodies each only go together one way, and then it’s up to you to figure which arms to use and what direction you’d like to turn their head. The arms all have a teardrop-shaped connection point to ensure they attach in a certain way, but you could shave the nub off for a little more freedom. Said arms all attach at the elbows with some oddly shaped flat bits that don’t always fit together as well as you’d like, but are largely pretty okay. Just dry fit beforehand to make sure you’ve got the right bit at the right angle. Getting the grip hand on the gatling laser to fit right also took some effort.
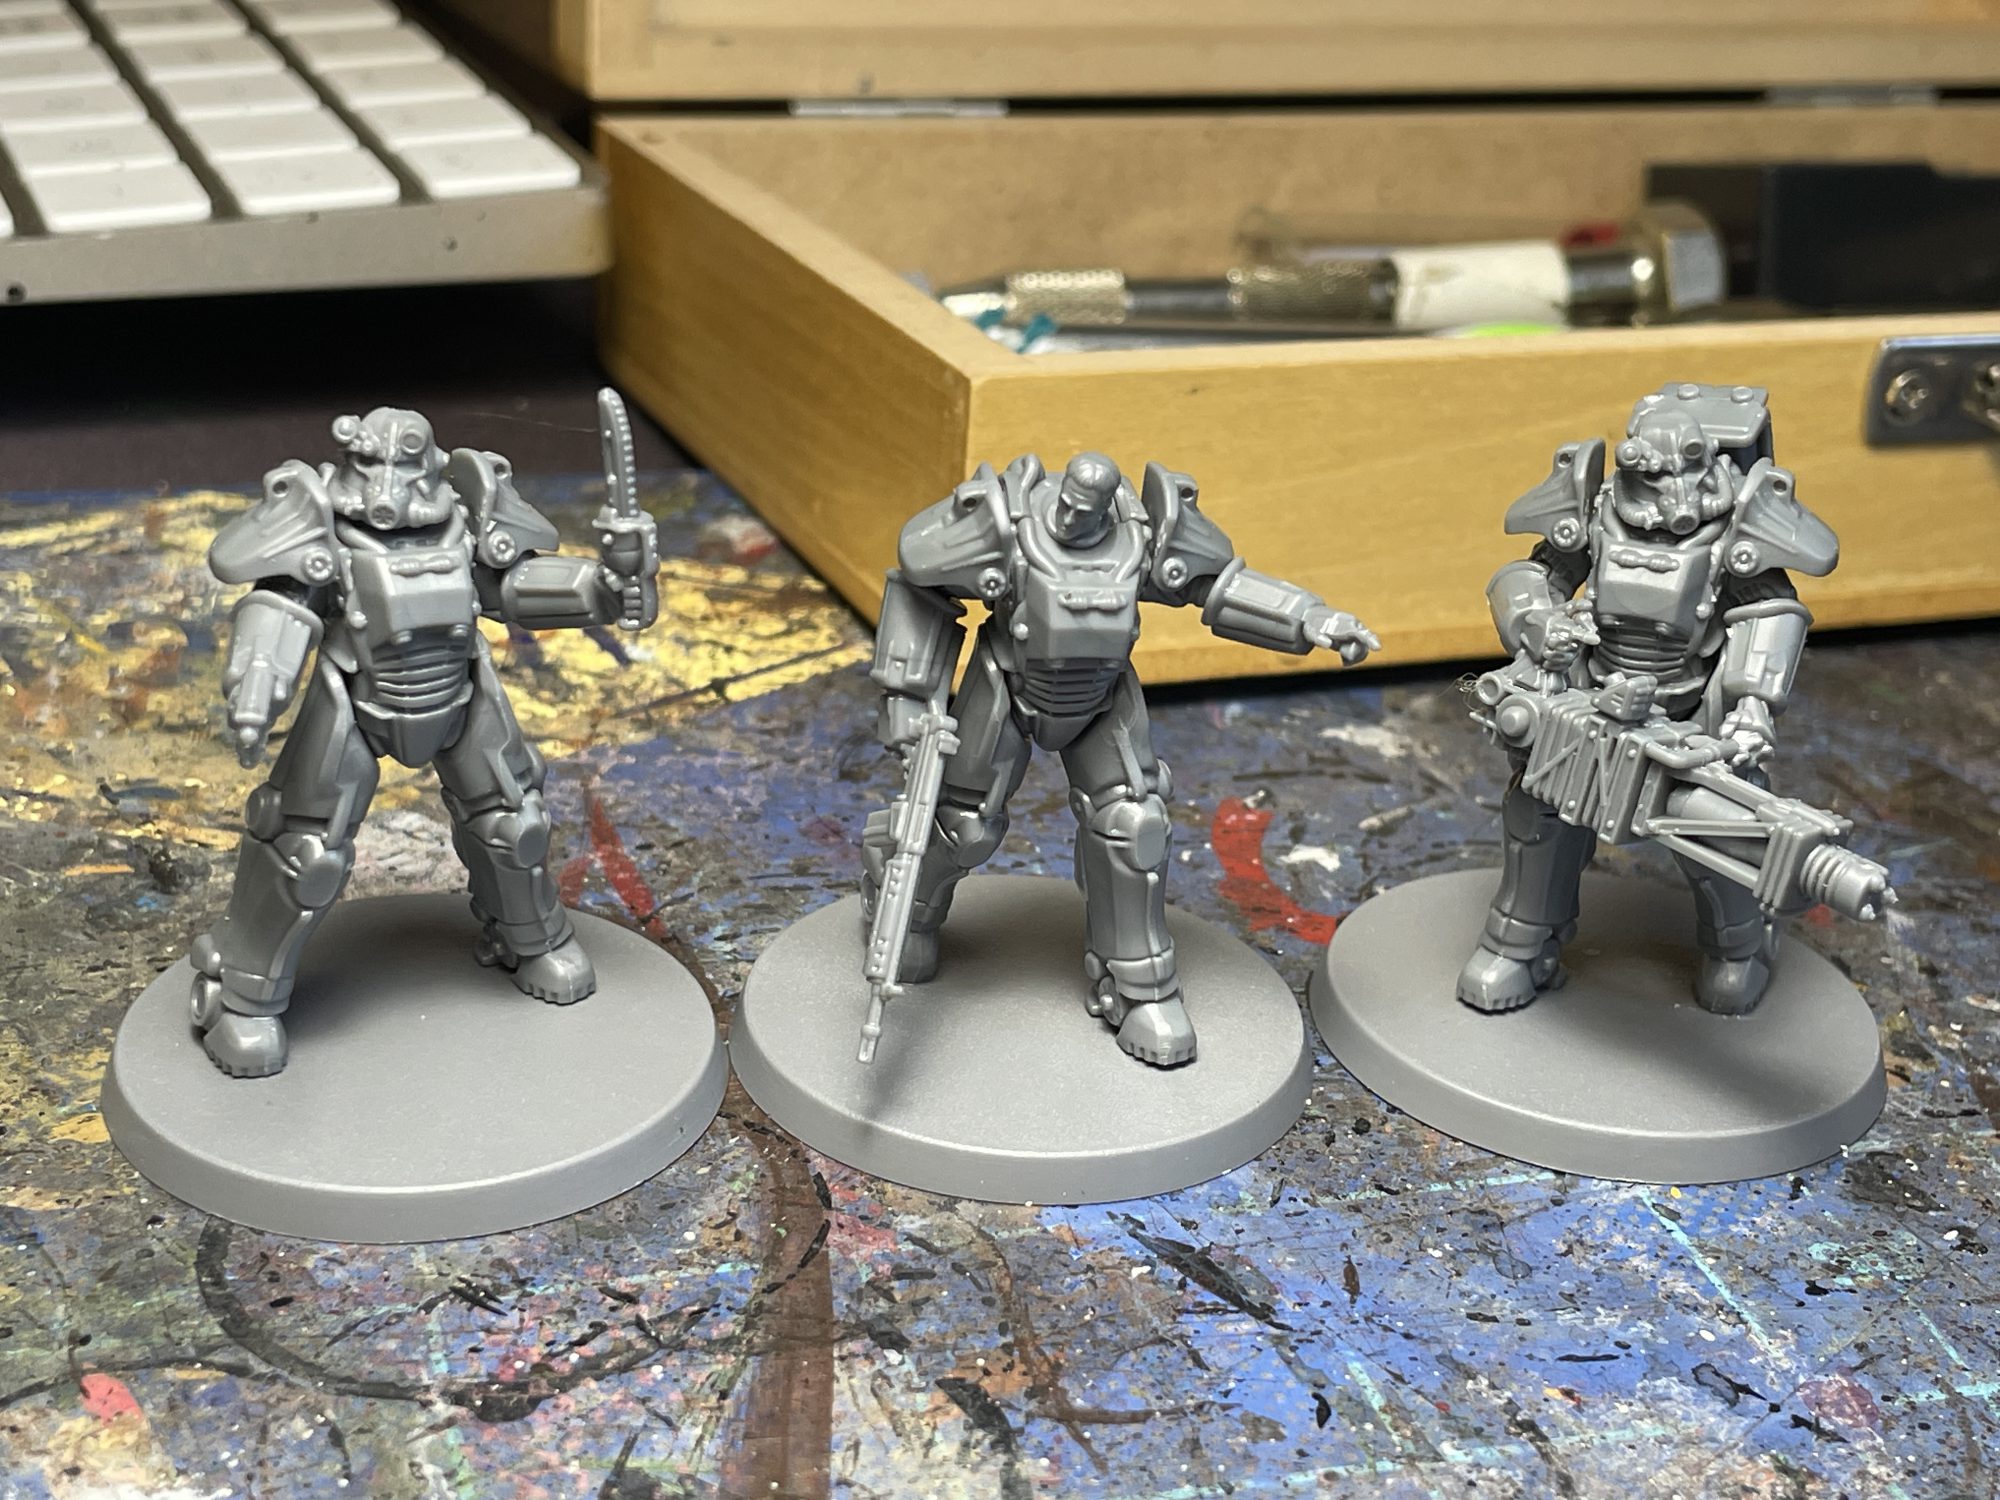
There is an impressive arsenal of weapon options here, which I really appreciate. You’ve got a laser pistol, ripper, heavy incinerator, gatling laser, combat shotgun, fat man, left and right handed 10mm pistols, and the aforementioned missile launcher and assault rifle. They all look just like their Fallout 3 counterparts, maybe upscaled a little bit to fit with the Fallout 4-sized power armor. I do wish more of the weapon options in this kit could be held two-handed, however. Aside from the gatling laser and heavy incinerator, everything is in just one hand, with the other left to do something else. It means you’re gonna have some folks pointing around or doing the Monkey, more likely than not. I also wish there were a few more head options, either wearing the astronaut/knight-esque hoods often seen on Brotherhood members, or just more bare heads for variety’s sake. Those hoods are more of a Fallout 4 thing, but it would have been nice to have another option in there.
Painting
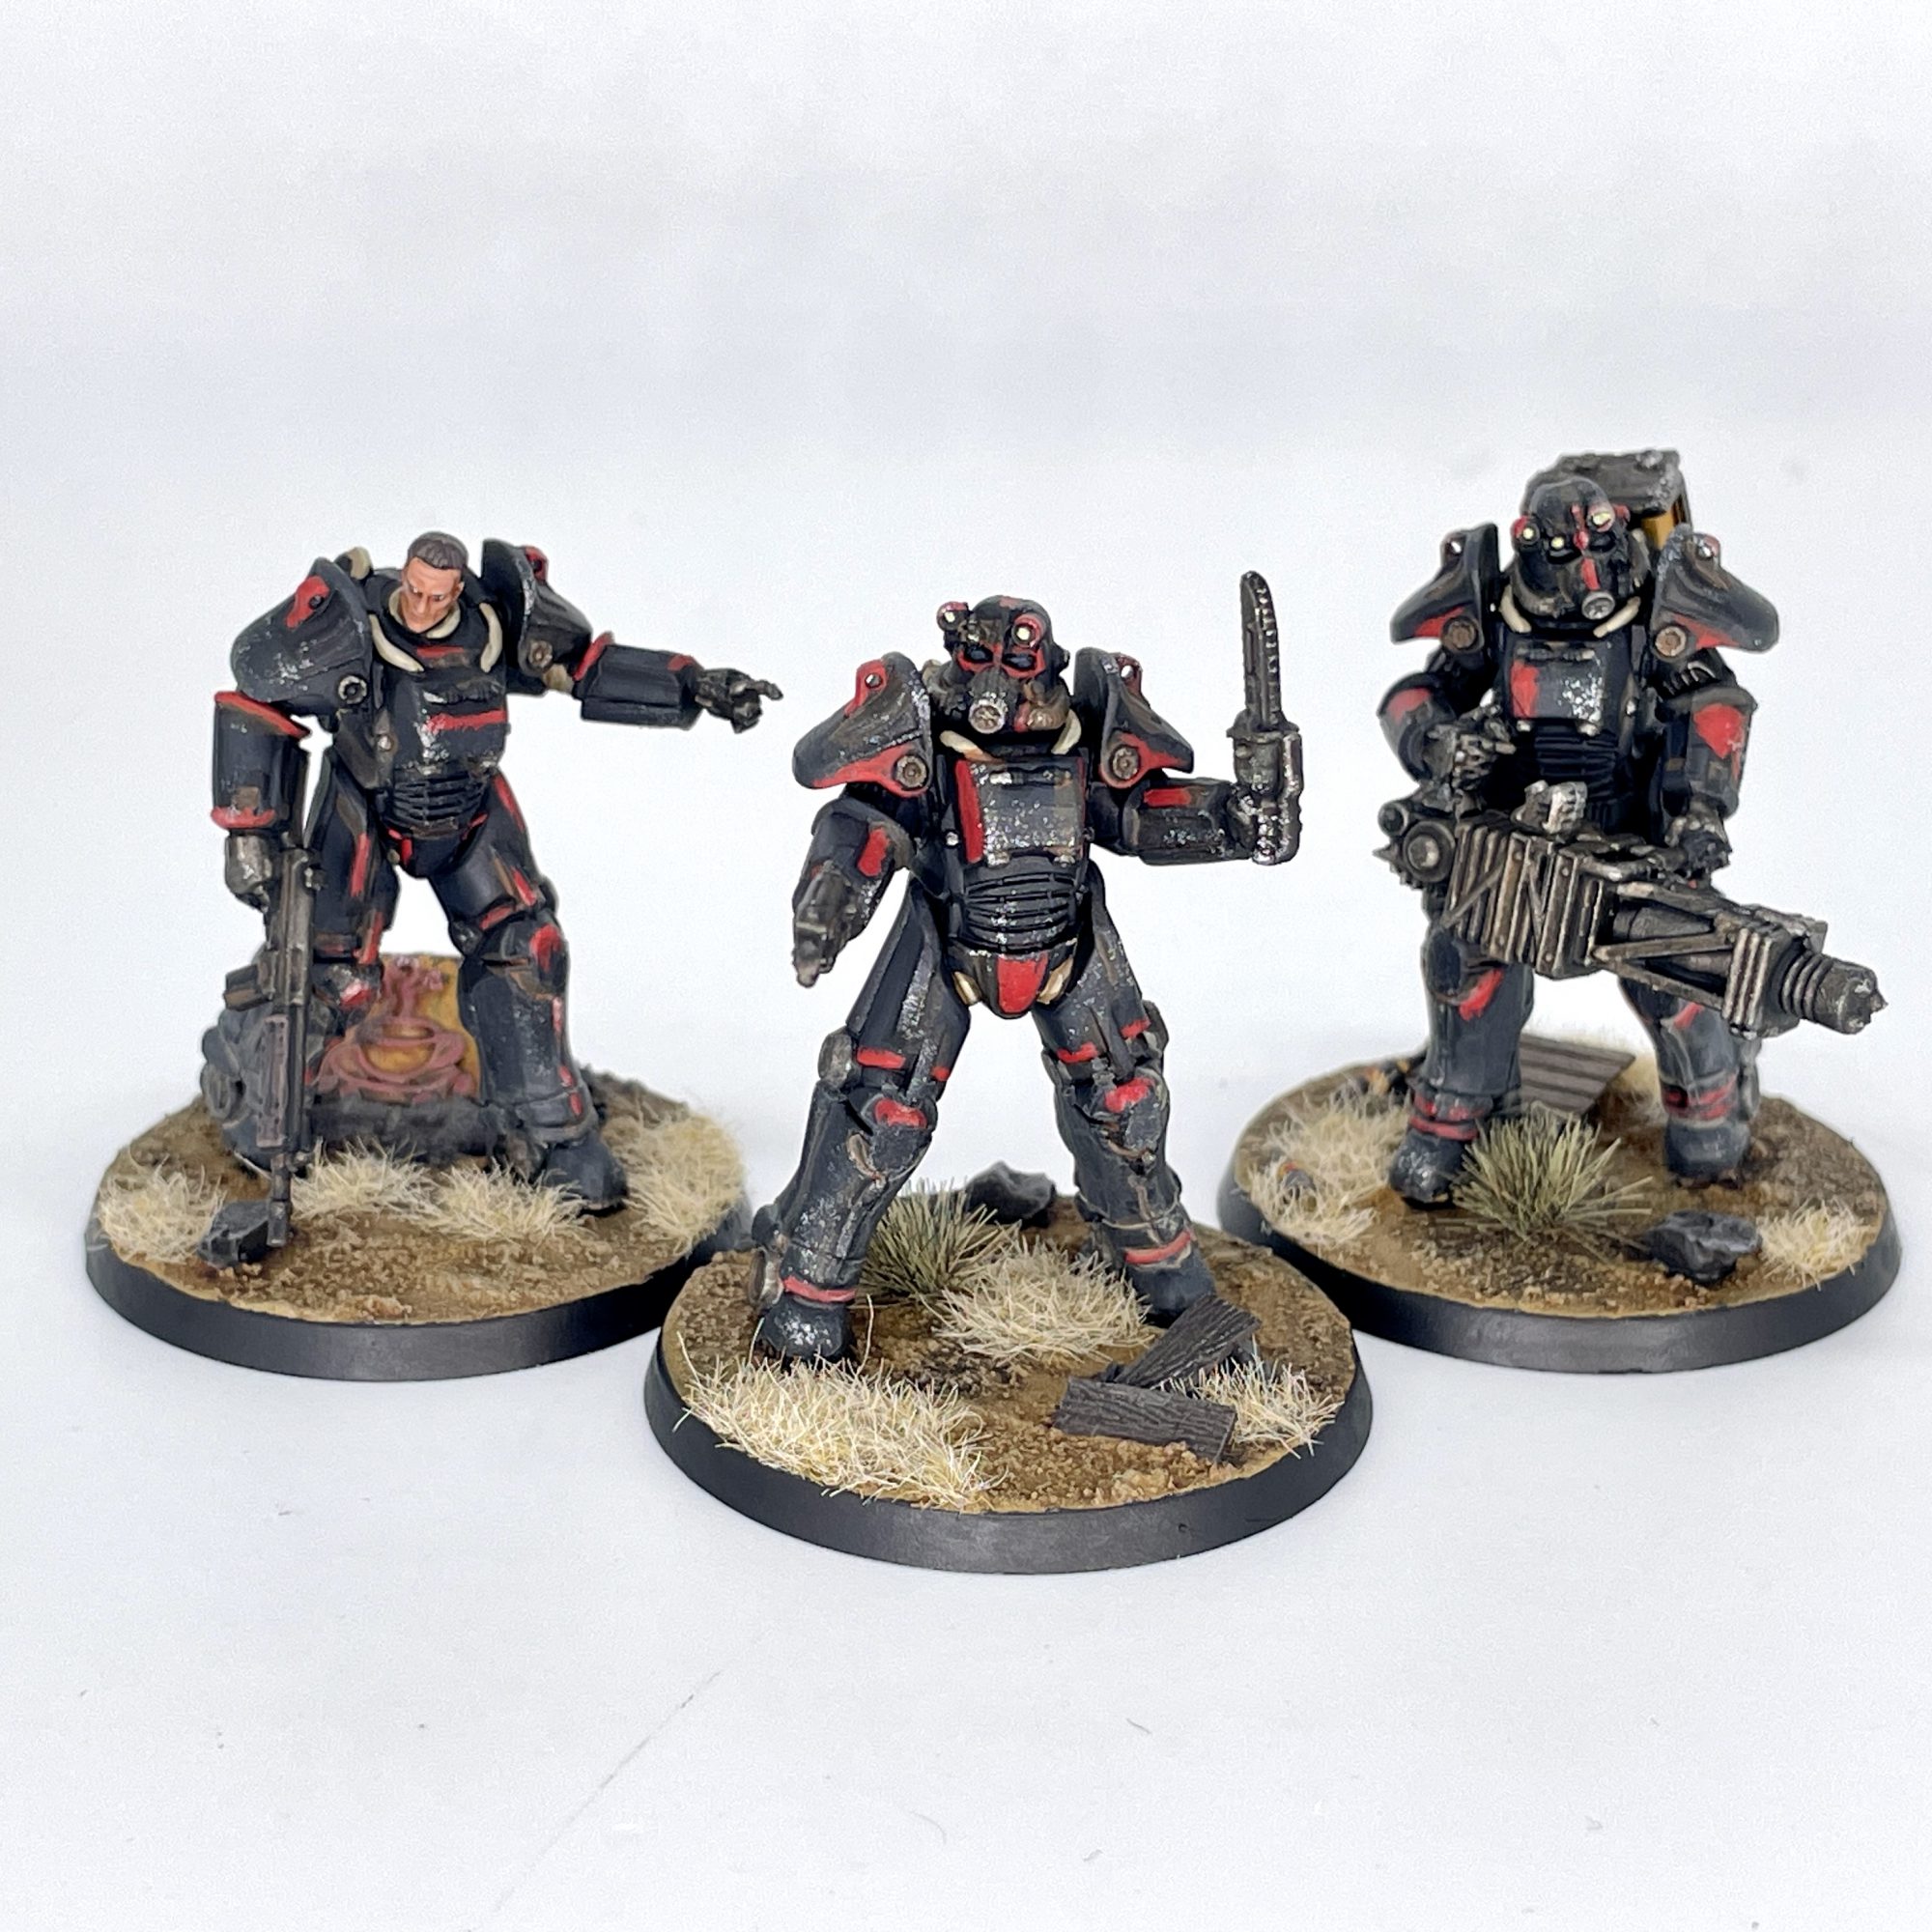
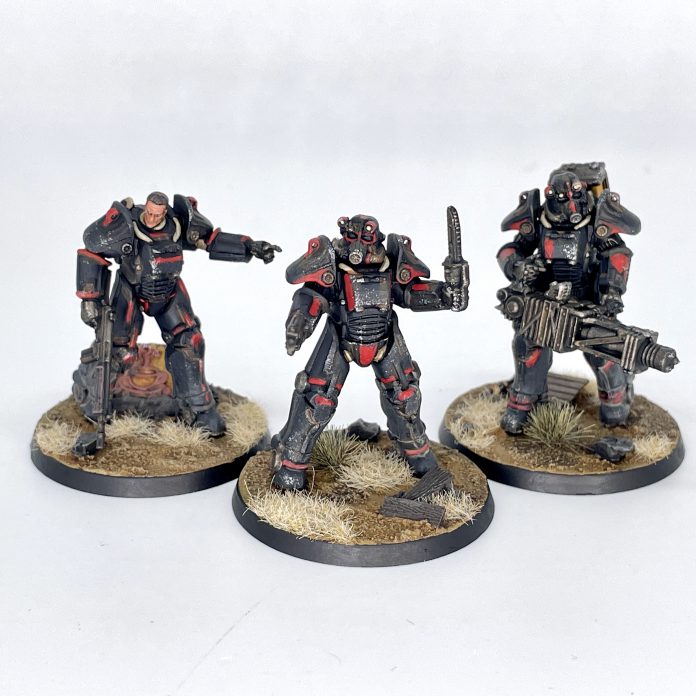
You never would have guessed it, but as Goonhammer’s Resident Black Templars Guy, I decided to go for the black and red Brotherhood Outcasts scheme from Fallout 3. I naturally started from a black primer, and built up to a mid-grey for some of the highlights and a nice, saturated red for the details. If you want to follow along at home, I’ll have a How to Paint Everything: Brotherhood Outcasts out soon, but you can always go the traditional route if you’d like.
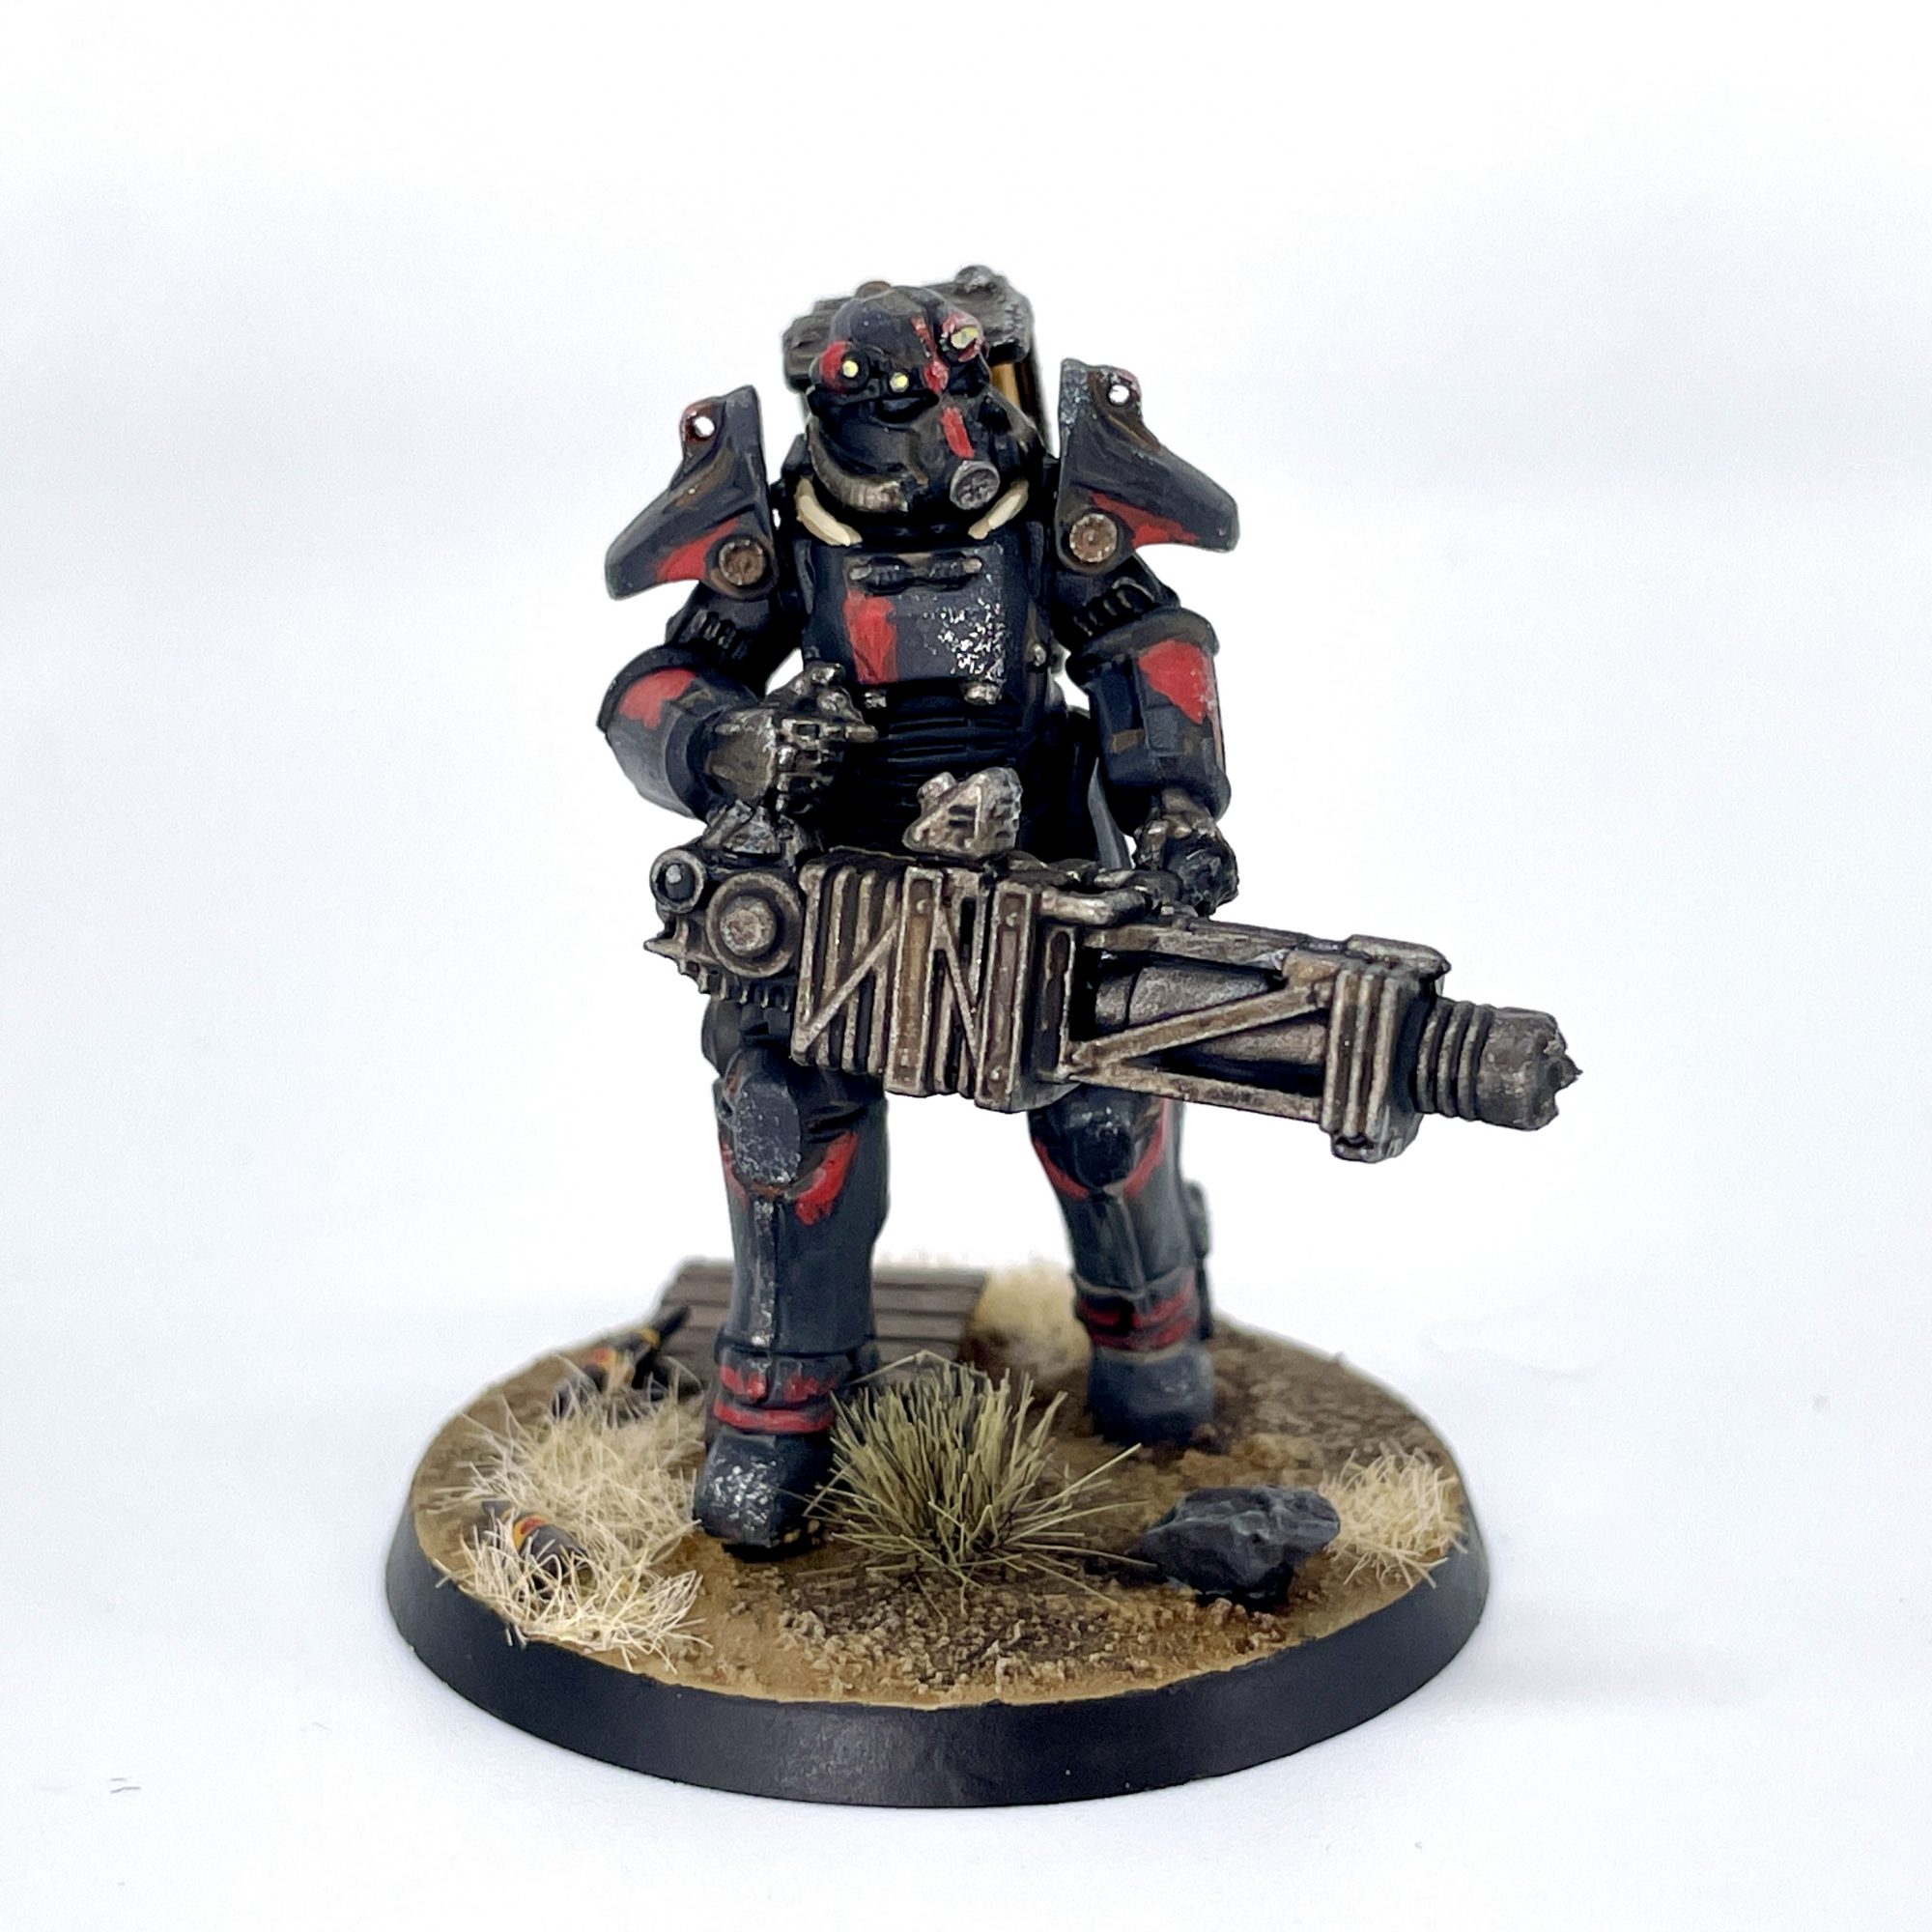
The actual process of painting these models was largely enjoyable, but a few shallow bits of detail were troublesome. The raised detail on their vambraces especially can be pretty shallow, as can some of the pauldron detail. The little lugs on said pauldrons also got clogged up when I was painting, so I had to drill them out with a very tiny drillbit. That’s a me issue, but something to keep an eye out for. I feel like if I was going with a typical all-metal Brotherhood of Steel scheme, these would have painted up in no time flat, but I was still able to go from unassembled sprue to finished miniatures in a weekend. There’s very little in the way of extraneous detail to paint here, which makes for a straightforward and rewarding painting process.
Final Thoughts, Parting Shots, and What Have You
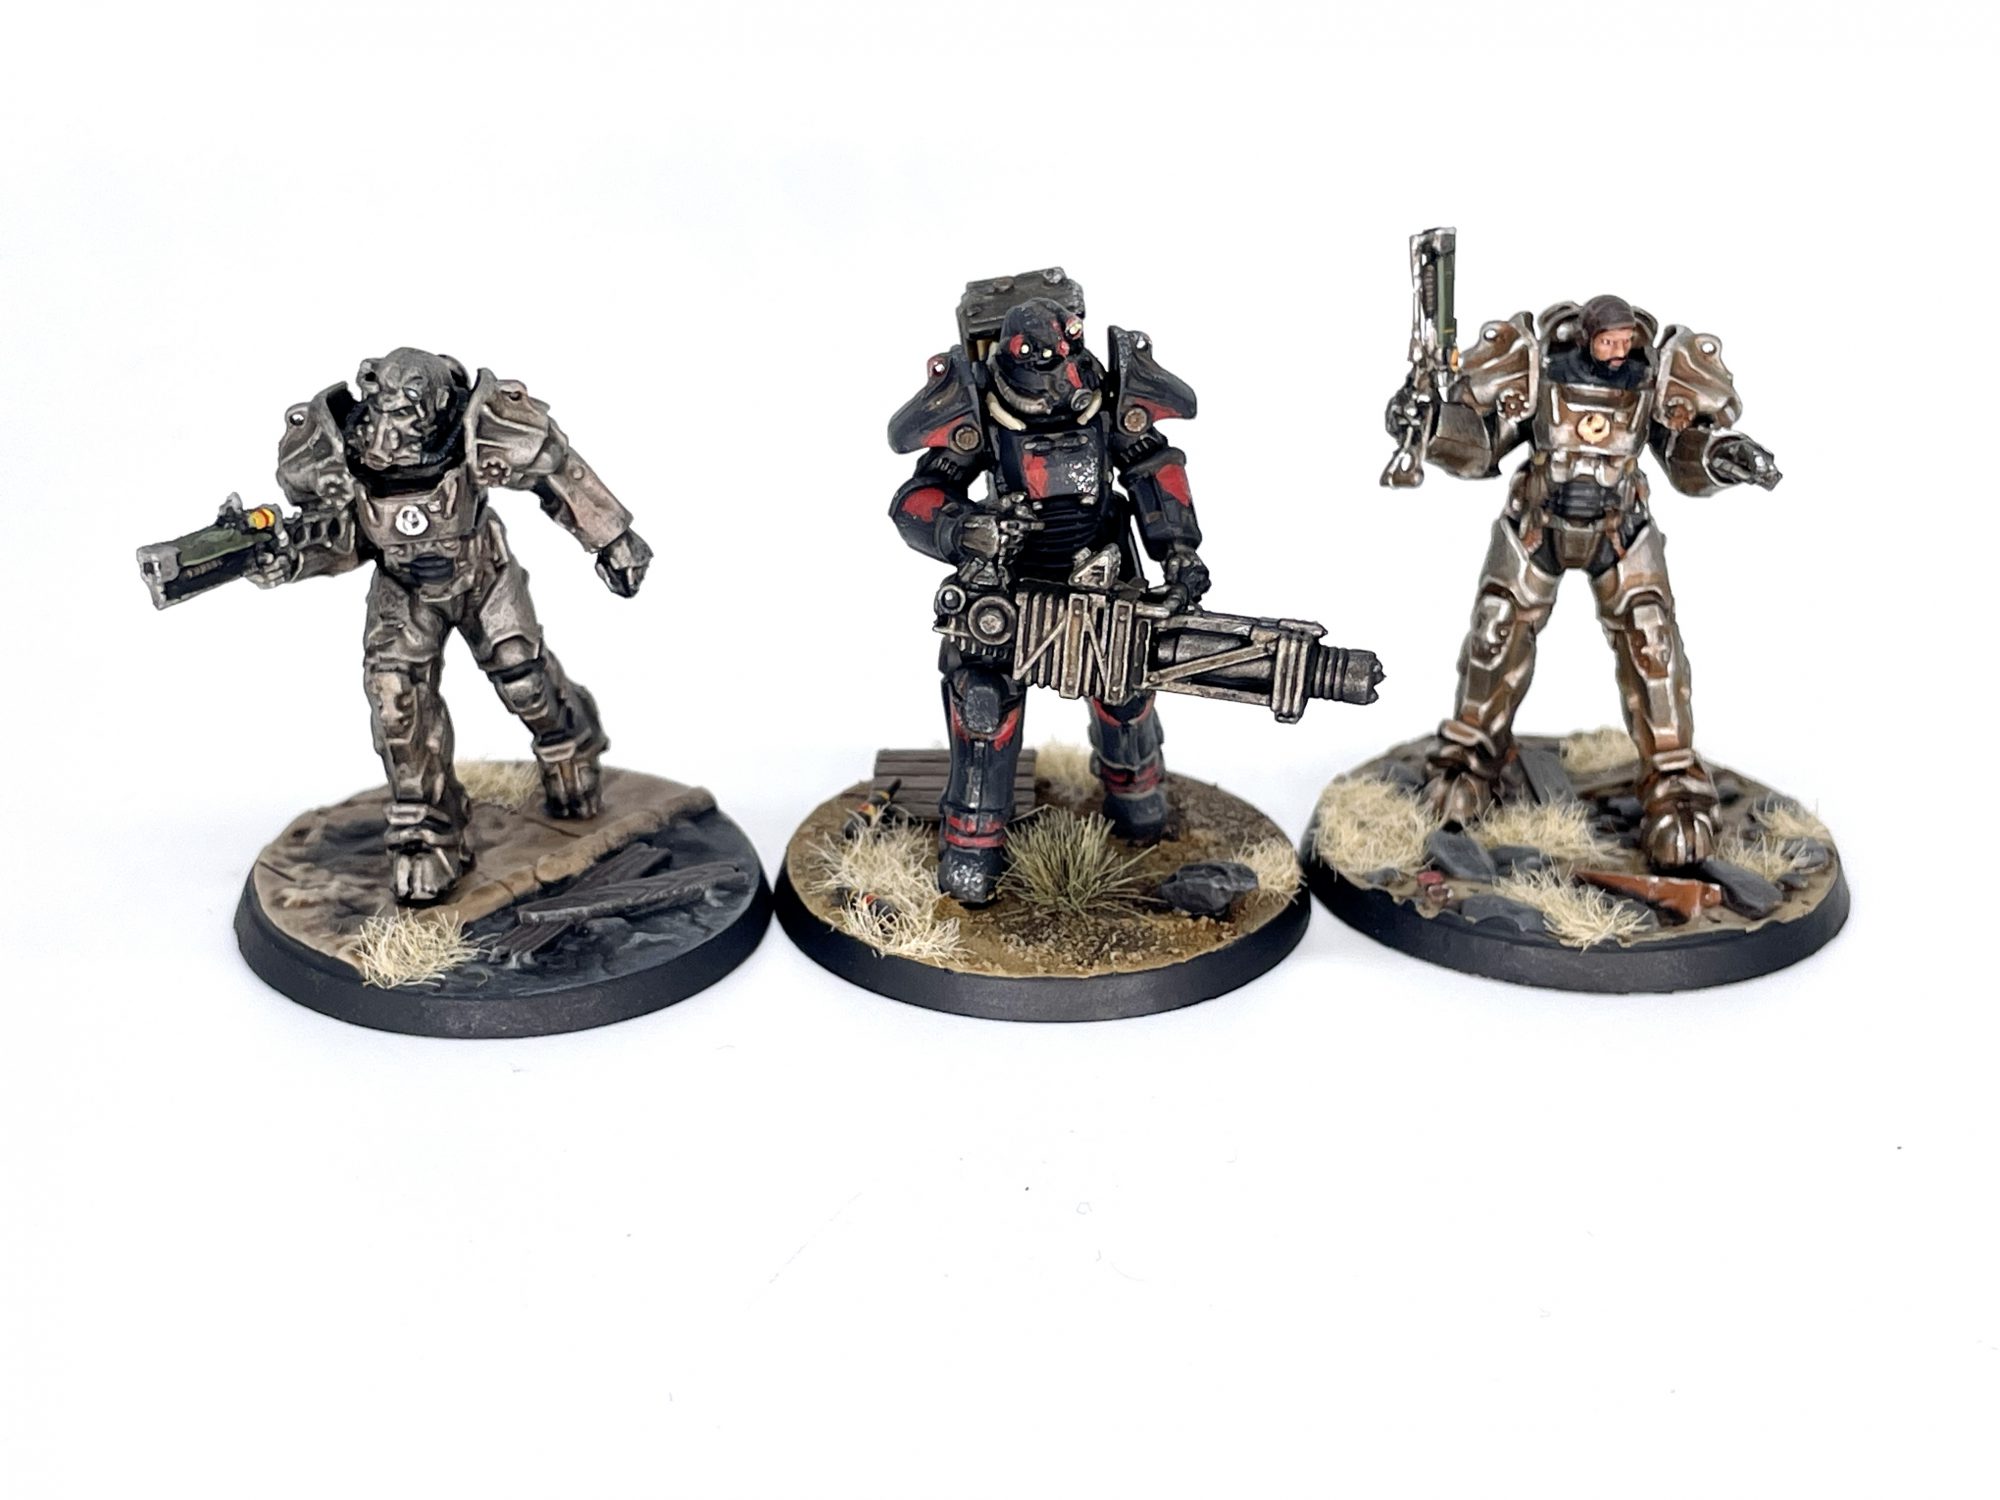
Compared to the PVC and resin models before them, these plastics fall somewhere in the middle. They’re leaps and bounds ahead of the boardgame-level PVC starter set models, but the resins just have crisper detail and definition. For your unit fillers, rank and file dudes, and just for the sheer number of options available, I’d say this kit more than does the trick.
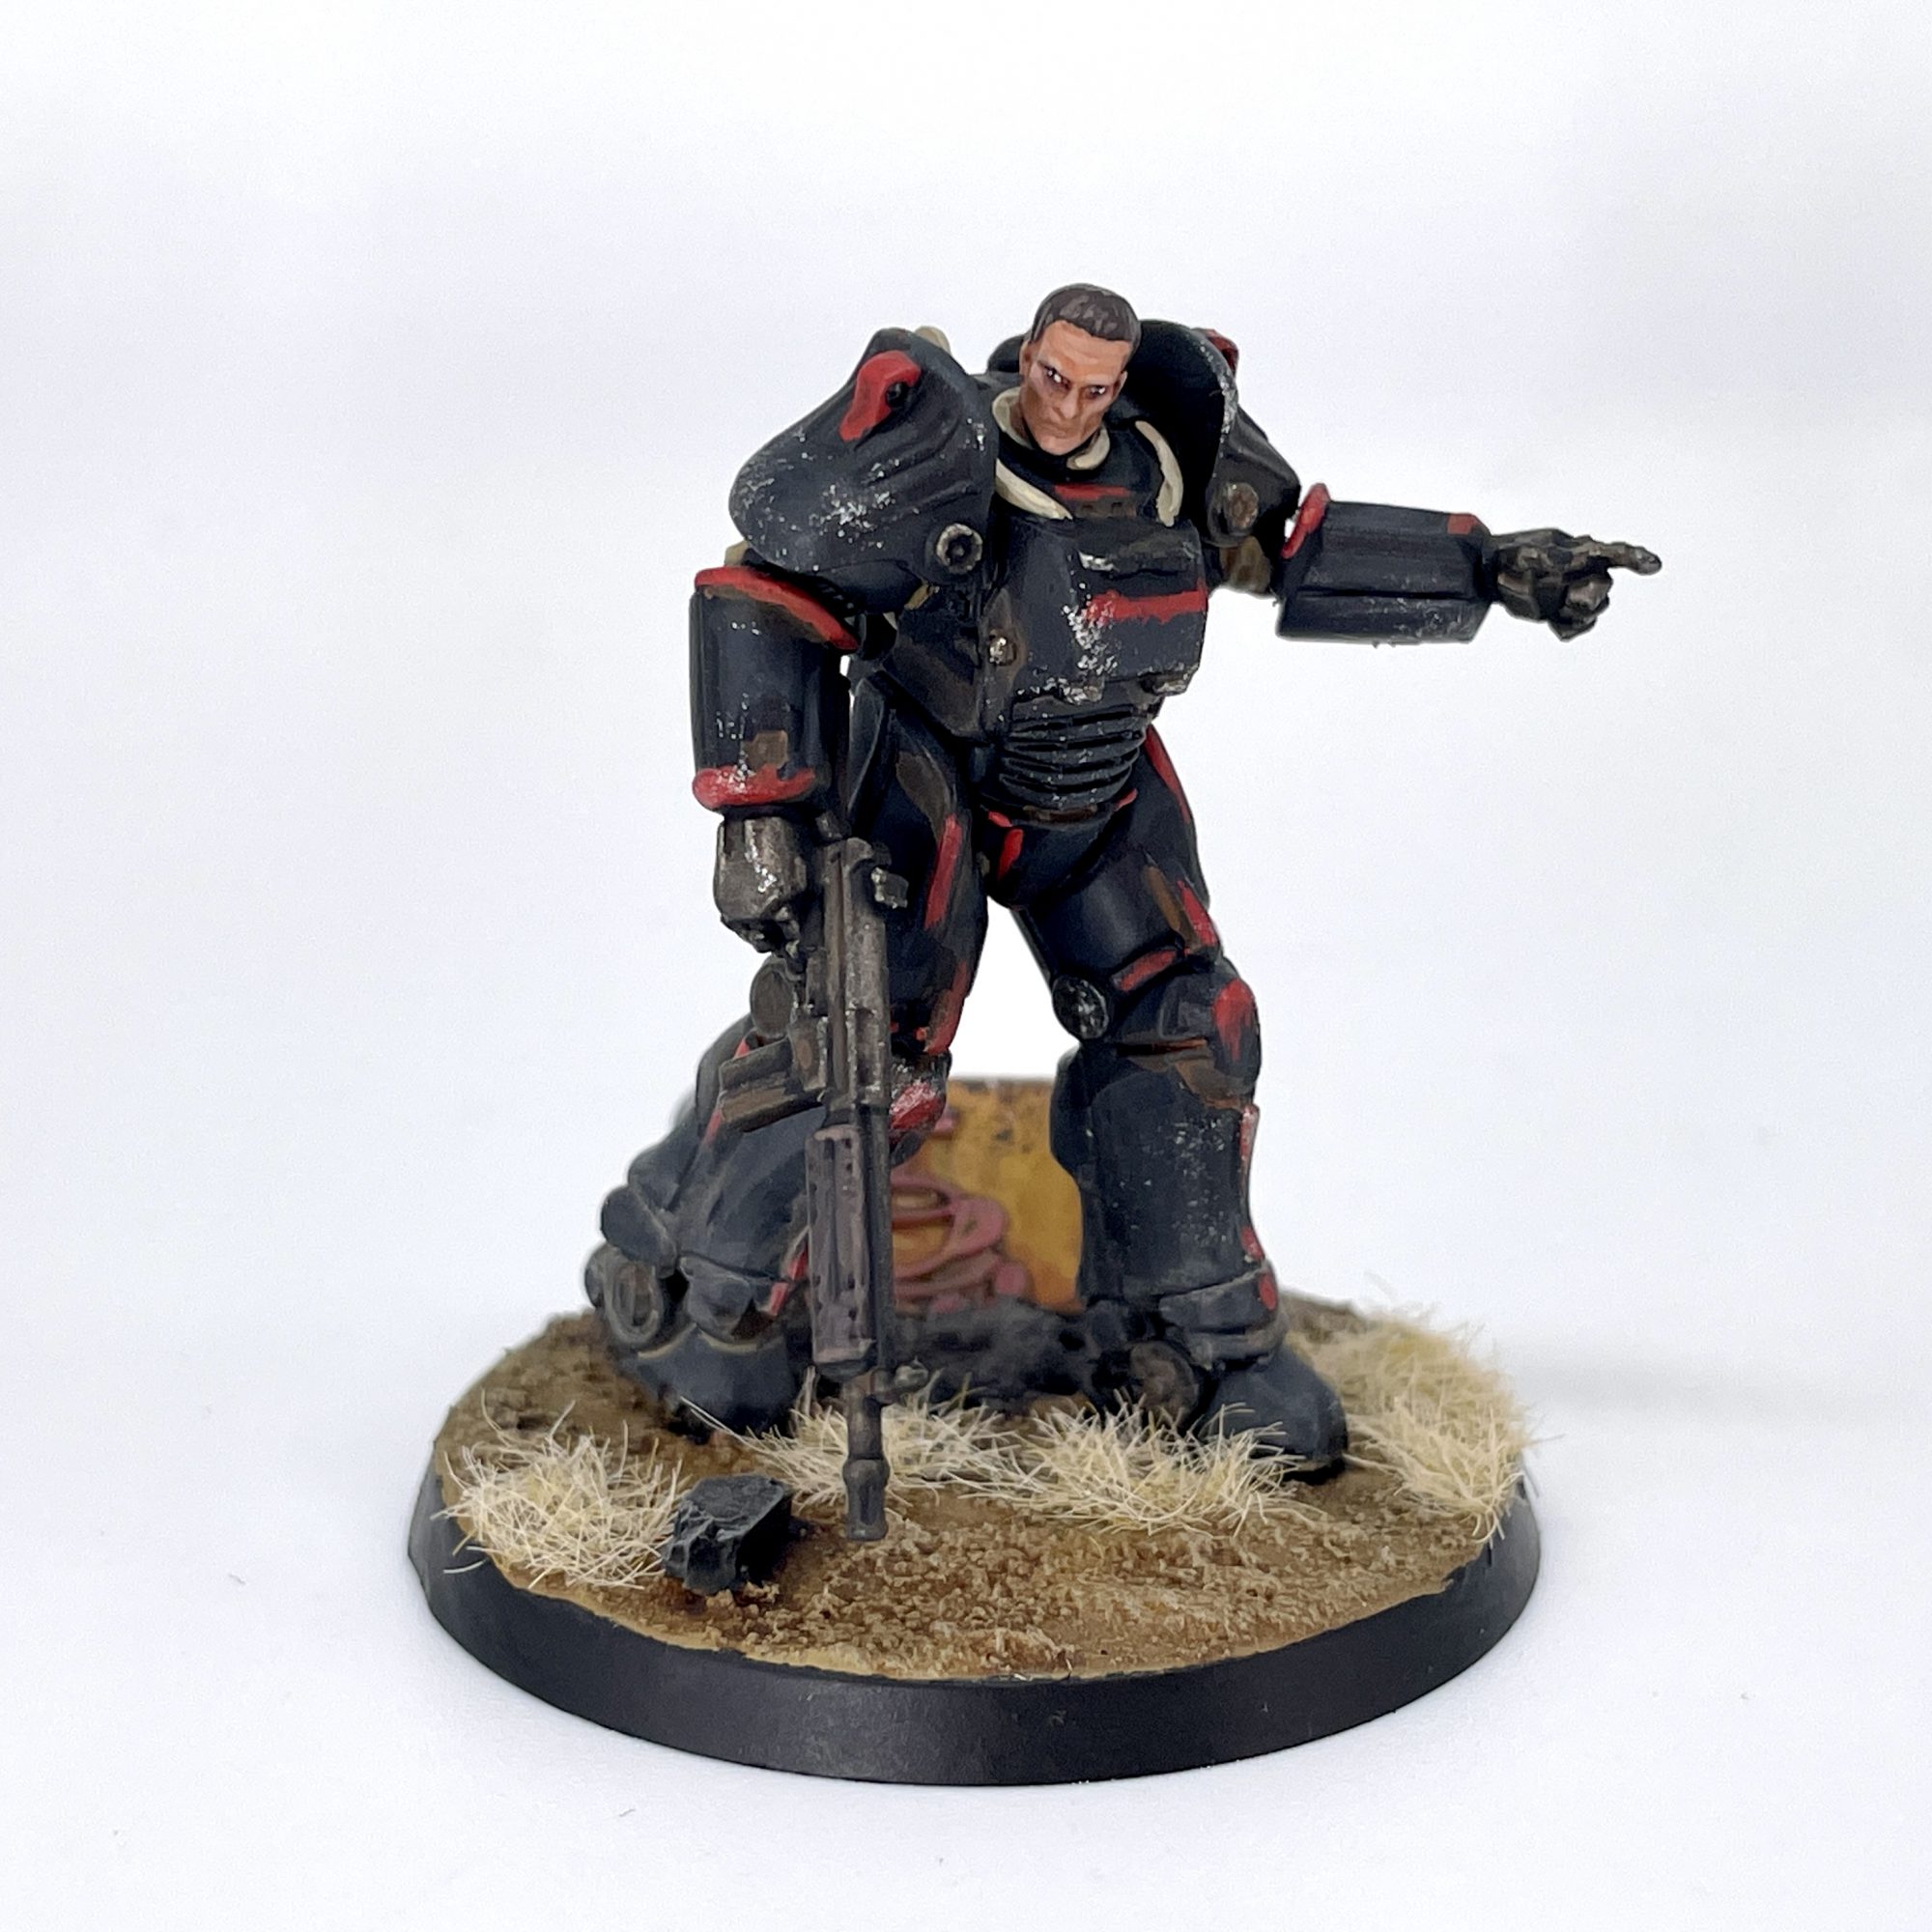
Lastly, this set also serves as a more accessible first purchase for someone finding their way into this game system and model range. Plastic is less intimidating to newcomers than resin, and if they already have experience working with other plastic kits – be they Games Workshop, Gunpla, or what have you – they should feel right at home. I think the kit is modular enough that if Modiphius wanted to put out some resin, plastic, or STL upgrades, they easily could, but what’s here is a solid initial foray into plastics for Fallout.
If you have questions, feedback, or your own band of wasteland weirdos you’d like to show off, drop us a note in the comments below or email us at contact@goonhammer.com.


You must be logged in to post a comment.