This week the Goonhammer Historicals team takes a look at the Aztec miniatures released by Wargames Atlantic. In addition to a review of the miniatures themselves, we’ll talk about how to assemble and paint them for use with the “Flower Wars” skirmish game the Goonhammer team is developing.
Disclaimer: This kit was provided to the Goonhammer Historicals team free of charge by Wargames Atlantic for review purposes.
Wargames Atlantic has a reputation for producing well-designed miniature kits in hard plastic, often for niche conflicts or time periods. Edwin “Lupe” Moriarty has already reviewed their Conquistadors kit, and today I’ll be looking at the Aztec kit that was intended to accompany it. It is designed to allow you to field warriors of the Aztec empire circa the 1500s.
What’s In The Box?
The box contains five identical sprue frames, each of which contains enough parts to build six Aztec warriors, for a total of 30 miniatures. The miniatures are set up for one piece as legs-and-torso with the head and each arm done separately. Of the six bodies on each sprue, there are two each of warriors wearing only a loincloth, two with torsos clad in padded vests, and two clad in full-body suits (more on these anon). The arm options include a variety of weapons and are either bare (for use with the loin-cloth and vest-wearing torsos) or sleeved (for use with the body-suited torsos). Additionally, there are a couple of cool options like a drum (and associated arms ending in hands holding drumsticks) and back-banners.
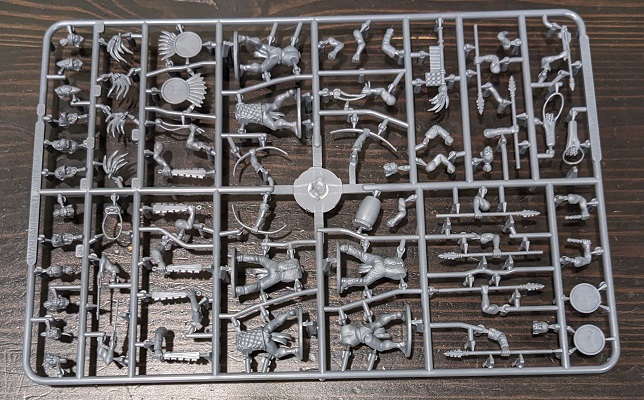
The torsos come with the models standing on the kind of integrated bases that anyone who has ever seen green army men will be familiar with, but it is important to note that the kit itself does not come with any kind of bases on which to mount the miniatures. I put mine on 7/8″ and 1″ steel fender washers, but if you have spare 25mm plastic or MDF bases handy from your other modeling projects that would work well too.
In terms of casting quality, my sprues all looked good – I didn’t see any casting defects, there was no flash at all, and the mold lines were pretty small and easy to clean up. The one exception to this the body-suits, which have just enough texture to them to make it a little hard to hide any filing you’re doing to remove mold lines. But after priming and painting I didn’t find these to be all that noticeable.
The Sculpts
Let’s take a second to talk about the sculpts themselves. Right up front I want to commend WGA for giving us minis that avoid the two most common pitfalls – chunky heads/hands and super-spindly weapons. The figures themselves are fairly well-proportioned but the weapon shafts are just slightly oversized to give them a little additional durability. You know from some of my past reviews that I love the Victrix kits, but the weapons in this kit feel significantly sturdier.
I also really appreciate the aesthetic of the physiques, in that the miniatures read as strong without being jacked. They have the kind of stocky-but-not-fat build that implies healthy musculature without being cartoonish, and that’s something that I thought was a really nice design choice – especially for miniatures with so much exposed skin. So you don’t need to worry about highlighting and picking out individual abs on your mini’s six-pack during painting, because they don’t have really them.
The head options provide various period-appropriate hair styles and head-dresses (or at least those represented in the Codex Mendoza), but be aware that for a couple of them you’ll end up with exposed seam lines where the head attaches to the body if you’re using a bare torso. This is a problem you’ll also have with the individual arms and the bare torsos. If this bothers you, running a quick line of a filler like Mr. Dissolved Putty or the like around the joint after your glue has set will fix the problem.
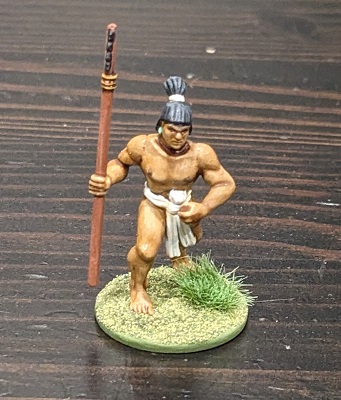
The one drawback in my opinion is that the arms are completely separate. While each sprue includes two pairs of arms that can be used to build a bow-armed warrior with an arrow drawn, these were a little awkward to get into the right position. Further, there are no options that allow for something like holding a spear in both hands. I feel like this detracts from the kind of dynamic poses you can get with some of the the Victrix kits. The problem is compounded by the fact that a couple of the arms give poses that look sort of awkward. The ability to arm your warrior with an atl-atl is totally bad-ass, but I had a hard time attaching the arm in such a way that the pose looked natural.
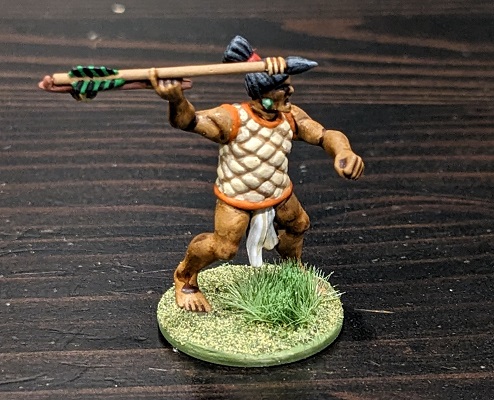
But I’m fairly picky aesthetically, and this is a relatively minor quibble. Overall, I really like the way these guys came together, especially when I finished painting them.
Conclusion
Finding good ranges of miniatures for conflicts outside of continental Europe and North America can be challenging. Often the representations are cartoonish or cater to the worst kind of western stereotypes. In this regard, I have to commend Wargames Atlantic for doing some research up front. Everything in the Aztec kit is based on well-known sources, chief among them being the Codex Mendoza. I don’t want to go into this too much because it will be a topic that Aaron “Lenoon” Bowen will go into in more depth in his upcoming article on researching historical games, but it is worth noting that the way the miniatures look – from their clothing to their weapons to their hair-styles – reflects much of the current historical understanding of how the Aztecs organized and equipped their warriors and the way they fought. And ultimately I think that this is a way more interesting kit than yet another Napoleonic French Dragoon offering or whatever (sorry, Lenoon!), simply because it does represent something unusual in a way that is historically relevant.
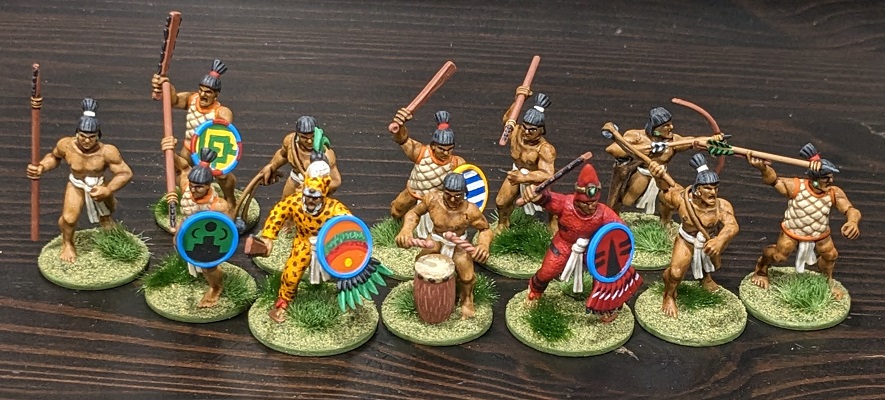
And at a cost ranging from $28 to $35 (depending on where you get them) for 30 warriors, it’s a decent value for the price. While the specificity of the kit may limit its appeal to more niche historical gamers (it doesn’t have the broad medieval/fantasy appeal of the Victrix Normans, for example), I think this is a really cool kit.
If you are just interested in this article as a pure review, thanks for reading! But if you’re interested in the “Flower Wars” skirmish game we’re developing, let’s go into some more detail and talk about specific build instructions for how best to combine torsos and heads and arms to build your war-band for the game!
Building your Flower Warriors
The Codex Mendoza is one of the primary sources for information about Aztec warrior culture, and it has heavily influenced the research that we’re leveraging for our game design work. There are other primary sources for some of the historical context in which the Flower Wars took place, but it forms a really good starting point chiefly because of its detailed illustrations.
Using the Codex and the Wargames Atlantic kit, we’ll look at what we can make – and use – within our Flower Wars game. Now not everyone would have looked exactly like a Mendoza warrior – particularly in colour, patterns and build pieces – but most of us on the team have built and painted ours as some variation of the illustrations straight from the Folio 64 page in most cases.
The Aztec military hierarchy relied on taking captives – giving us mechanical inspiration for the Flower Wars project – and feats of heroism and daring. The ranks described in the Codex may not have been as strict as we – and many other sources – have it (I always distrust anything that says “everyone did this or that”), but we have used them to define the key “ranks” you can build to for Flower Wars miniatures.
Commoners (Yaoquizqueh)
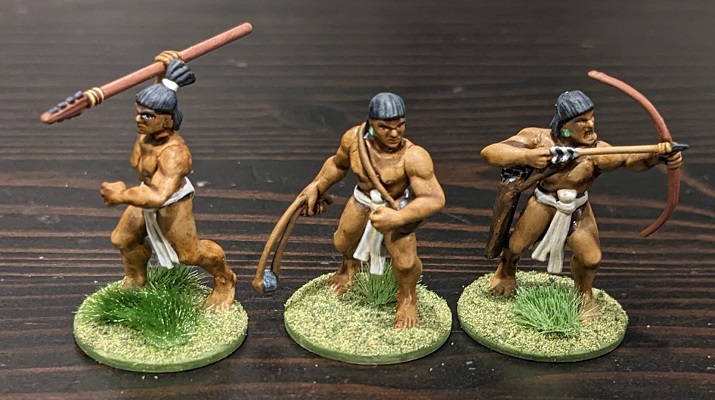
These warriors were not part – or at least potentially not part – of the rank system. Commoners within the ranks of the Aztec army were tribute-paying and possibly levied for battles. They may not have been highly involved in the Flower Wars, but we have used them as our primary ranged troops, the men who would participate in the first initial skirmish and ranged elements of battles according to the generalist Aztec battle plan.
To make these warriors, use the bare-torso loincloth bodies and the pieces with naked arms. The heads for these should generally be those with no top-knot at all or those with a top-knot that still have longer hair in the back, as various levels of shaving the head were associated with higher status. These troops are a good place to build your ranged weapons (slings and bows), but close combat pieces could also be used. In game, these are your chaff pieces used for maneuver and – critically – outnumbering.
If you want to be as historically accurate as possible here, commoners were not allowed to carry the macuahuitl, the vicious, obsidian-edged war-club that is so iconic to the higher ranking Aztec warriors. Instead, they would carry the cuahuitl, a simple wooden club. Arming your commoners with a club is an option in the Flower Wars game, and when I pointed out to Edwin “Lupe” Moriarty that the WGA kit did not include a simple club option his comment was “you just carve or file the obsidian bits off the macuahuitl, mate.” Fair enough!
Low Status Warriors (Telpochyahqui)
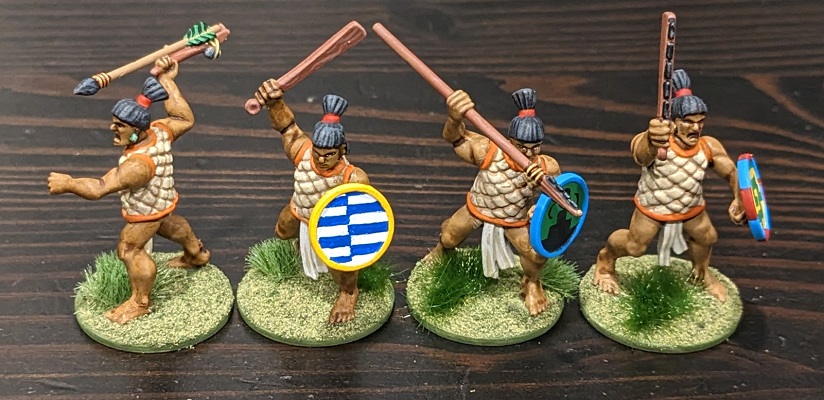
Once a warrior had taken a captive, he entered the ranks of the Telpochyahqui, sometimes referred to as Tlamanih (the Nahuatl term for “captor”). Once this feat of martial prowess was accomplished, a warrior was allowed to wear the ichcahuipilli, which is the vest made from quilted cloth. Additionally, the warrior was allowed to wear his hair short in the back and tied up in a top-knot with a red cloth, and there are several of the appropriate heads on the sprue. To these torsos you’ll want to attach the bare arms.
Additionally, warriors of this status were allowed to carry the macuahuitl, so these weapons and spears will be your mainstay here. Also, because these warriors have proven themselves skilled in personal combat they are less and less likely to be using missile weapons like bows or slings, though notably the atl-atl was still considered appropriate for warriors of all status levels.
Finally, warriors who had managed a single capture were allowed to carry the chimalli, (a shield made from wicker, wood, and leather) though without any feathered decorations. The sprue includes two such plain shields.
Medium Status Warriors (Tiachcauh and Ocelototec)
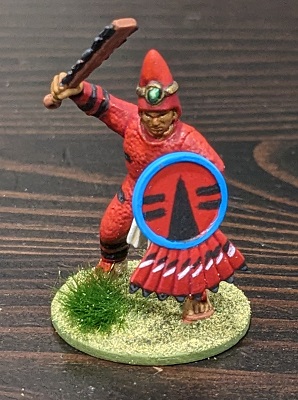
After a warrior had taken two captives he would be allowed to wear sandals in battle, and would generally begin wearing a tlahuiztli. This full-body garment was typically made of cotton cloth to which feathers of various colors were sewn. The Mendoza Codex talks about the dizzying variety of colors and patterns of the tlahuiztli. This is where you’ll start using the body-suited torsos and sleeved arms, and where some of the really fun painting can be had. Bright colors, stripes, dots, etc. are good here, as they serve to distinguish your warriors on the battlefield. Just avoid plain yellow suits, as that had a special meaning in the Aztec warrior hierarchy.
For heads, you have a couple of options here. Illustrations from the Codex show suited warriors with and without headdresses, so either the same style of head you’ve used with the low-status warriors or the heads with the conical hats would be appropriate. Additionally, the coyote head-dresses (distinguishable from the jaguar head-dresses by the shape of the snout and the length of the ears) would be appropriate here as well.
At this rank warriors were also allowed to decorate their shields with feathers and other dangly bits. The sprue includes two shields with feathered adornments.
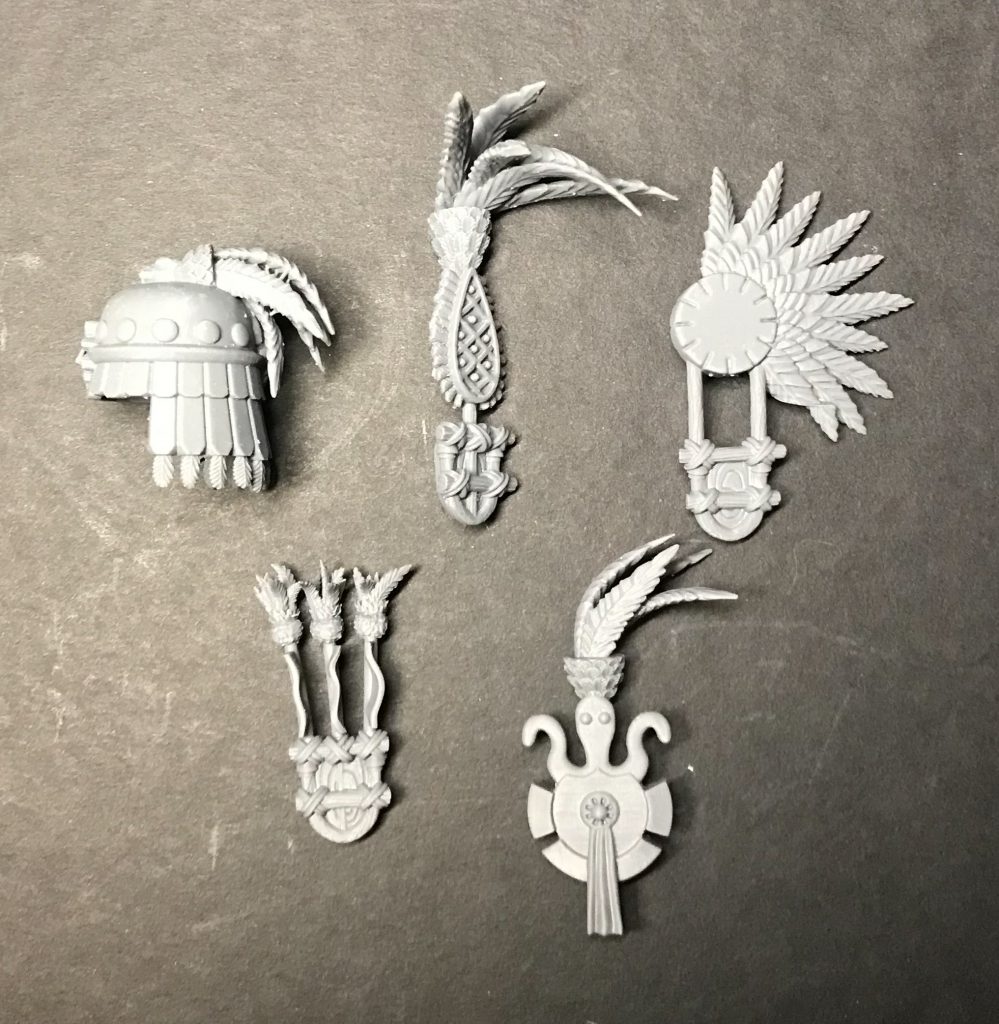
Finally, this is also the level at which the pamitl, or back-banner, becomes appropriate. There are two on each sprue. Not every warrior of this status would carry one, but if you want to add one, this is the time to think about it. If you want to get really fancy, WGA offers more of these from their print-on-demand service, which we’ll talk more about in a moment.
High Status Warriors (Cuauhyahcatl)
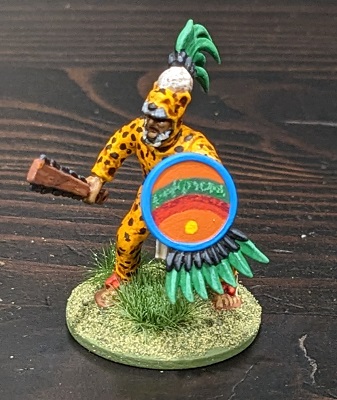
After a warrior had taken four captives, he was eligible to join one of the warrior orders. This is where your iconic Jaguar and Eagle Warriors come into play. Rising to this rank is a difficult and dangerous process, but warriors who achieve this status are treated on par with local nobles and were accorded a variety of privileges within Aztec society. Joining an elite warrior society was one of the few ways a commoner could improve their station in life.
While the WGA Aztec warrior sprue does include heads with jaguar headdresses, it unfortunately does not include any with eagle headdresses. As such, if you want to include any eagle warriors you’re stuck having to model/convert an appropriate head-piece yourself.
There is some debate as to whether Aztec Jaguar Warriors actually used real jaguar hide in their tlahuiztli (some assert that this was limited to only the most wealthy and politically powerful), but even if they didn’t the colors and patterns of feathers used to decorate the suit were chosen to mimic the colors and patterns of the big cats. As such you’re looking at various shades of yellow-orange with black spots. If you’re looking to model your own Eagle Warriors, brown and black will be your colors of choice. Back-banners are optional.
Most of these warriors will be armed with the macuahuitl and will be carrying a shield adorned with feathers. Spears or atl-atl are also still good for these types, and although the kit does not include an atl-atl arm with a sleeve you could make one pretty easily with a hand-swap.
The “Shorn Ones” (Cuahchicqueh)
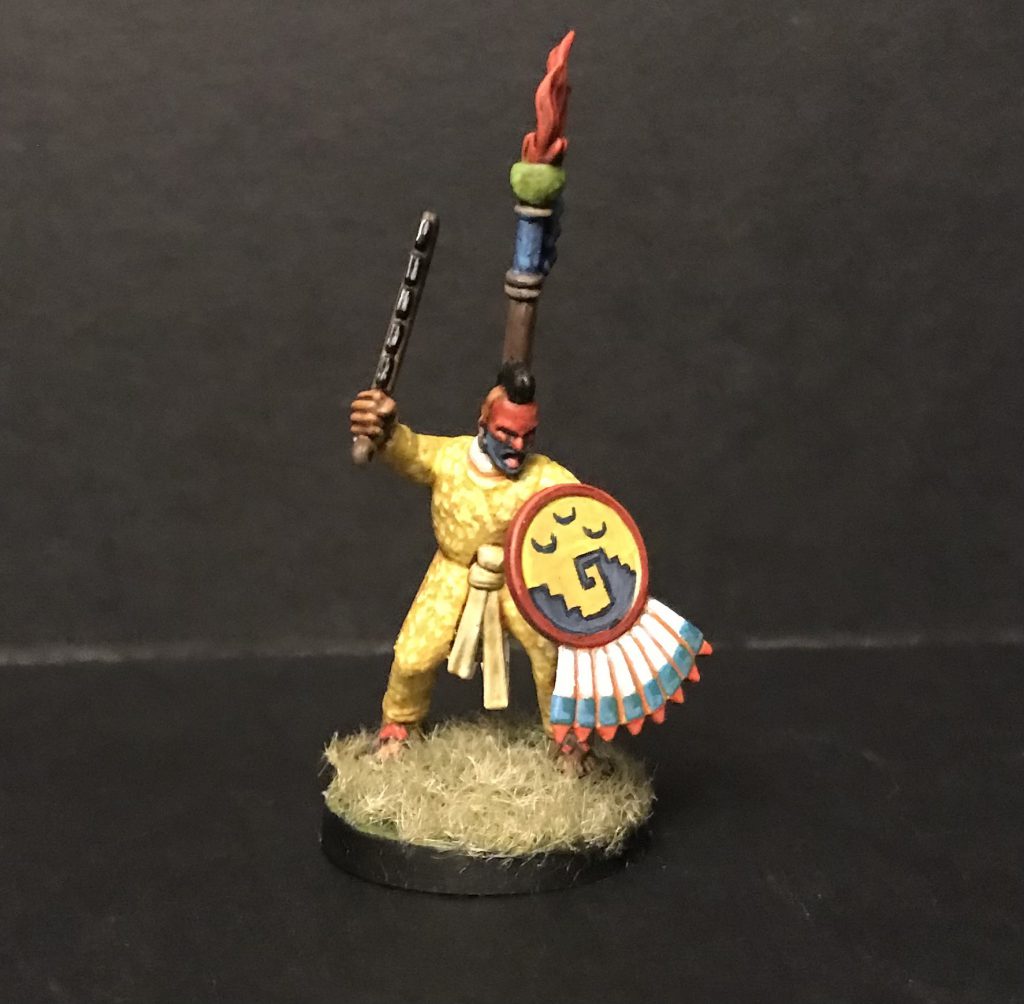
The apex of the Aztec warrior hierarchy were the Cuachicqueh, the “Shorn Ones,” so named because they shaved their heads except for a long braid generally worn over the left ear. These warriors had taken at least six captives in battle and performed numerous deeds of bravery on the battlefield.
For these warriors, you’ll again want to use the torsos wearing the tlahuiztli (which should be painted yellow) and sleeved arms. For heads, use the ones with the sort of mohawk-looking hair. Feathered shields are also appropriate here, and back-banners are again an option if you want to make your highest status warriors stand out.
A Note on Adornment
We’ve mostly been talking about assembly, with a few notes on painting here and there, but I did want to mention adornment. Generally speaking, tattooing, piercing, body-painting, and more ornate/valuable jewelry were allowed as one’s rank and status increased. As such, when painting your commoners I would stick with basic skin tones, then start adding the occasional tattoo to the low-status warriors. Black or red-ochre face or body paint was also common. By the time warriors are wearing the tlahuiztli body-suits they may well have numerous tattoos, but most of these would be covered. Still, this is a good time to think about markings on the face or hands. Ultimately, the Shorn Ones went into battle with their faces fully painted (typically one-half blue and the other half red or yellow). If you want to distinguish your warriors, these little details can be a great way to separate out who is a little more important, especially in the medium status tiers.
As mentioned above Lenoon also picked up the Aztec Banners set through Wargames Atlantic’s print-on-demand service, so if you really want more banners, straight from the Codex Mendoza, you can get them. They’re nicely scaled, well sculpted and crisply printed, giving you additional options for mid-rank warriors (the “butterfly” papalotl) and higher rank officers with the quaxolotl (head/dome) and tlecocomoctli (multi-feather) banners. It’s worth smoothing off the back of your warriors before adding them on, removing a sliver of plastic will make them sit nicely.
What’s Next?
Check back in the coming weeks as we get deeper into the game design process and talk about how to pit your Aztec warriors against each other on the tabletop!
Have any questions or feedback? Drop us a note in the comments below or email us at contact@goonhammer.com.
