
In our How to Paint Everything series, we take a look at how to paint different models, armies, and materials, and different approaches to painting them. In this article, we’re exploring how to paint Fallout’s Brotherhood of Steel Outcasts.
As a companion to my article on regular Brotherhood of Steel models from a few years ago, I thought I’d document the process of painting up Brotherhood of Steel Outcasts from the Capital Wasteland. I recently had the pleasure of reviewing the multipart plastic T45 troopers from Modiphius, and thought this scheme would look great on them.
Research

I tend to treat Fallout models like historicals – I find the uniforms and materials I plan to paint beforehand, then adapt them as closely as I can. Genuinely, nobody else should care how you paint your models, but I like aiming for game accuracy in my own work. This starts with a trip to the Fallout wiki, namely the page for the Brotherhood Outcasts. There are plenty of images showcasing their iconography and some poses you can work with to get a good idea of where to start. If you’re a real stickler for detail you might notice that Modiphius’ models are scaled more to Fallout 4’s chunkier proportions than Fallout 3’s, and fortunately, the wiki’s got you covered there too. There’s a Creation Club release that had Outcast armor available, and that’s documented there with a helpful front and back view. Should you ever need even more research, you can just install Fallout 3 and make a beeline towards Fort Independence, or find some videos on YouTube. With adequate reference material pulled up, it’s time to begin.
Painting the Model
I started with a coat of Chaos Black spray from Citadel, followed by a coat of P3 Thamar Black all over the models to ensure an even base. You can honestly use any black you want here, I just like P3’s. I also knocked out the basing early – it tends to involve a lot of drybrushing and I like to get that messy stuff out of the way at the start of a process, but you do you. I based these guys with a desert feel, using some random bits from my bits box (including the head of a coffee cup plug to use as a sign) but most Fallout models have modeled bases. I slathered down some Armageddon Dust, washed it all over with Seraphim Sepia, let a few drops of Agrax Earthshade and Athonian Camoshade intermix with it freely while it was still wet, then gave it a drybrush of Karak Stone. Armageddon Dust is pretty close to Zandri Dust and Tallarn Sand, so work with what you’ve got and don’t worry all too much about consistency. These are organic landscapes, there’ll be some variation.
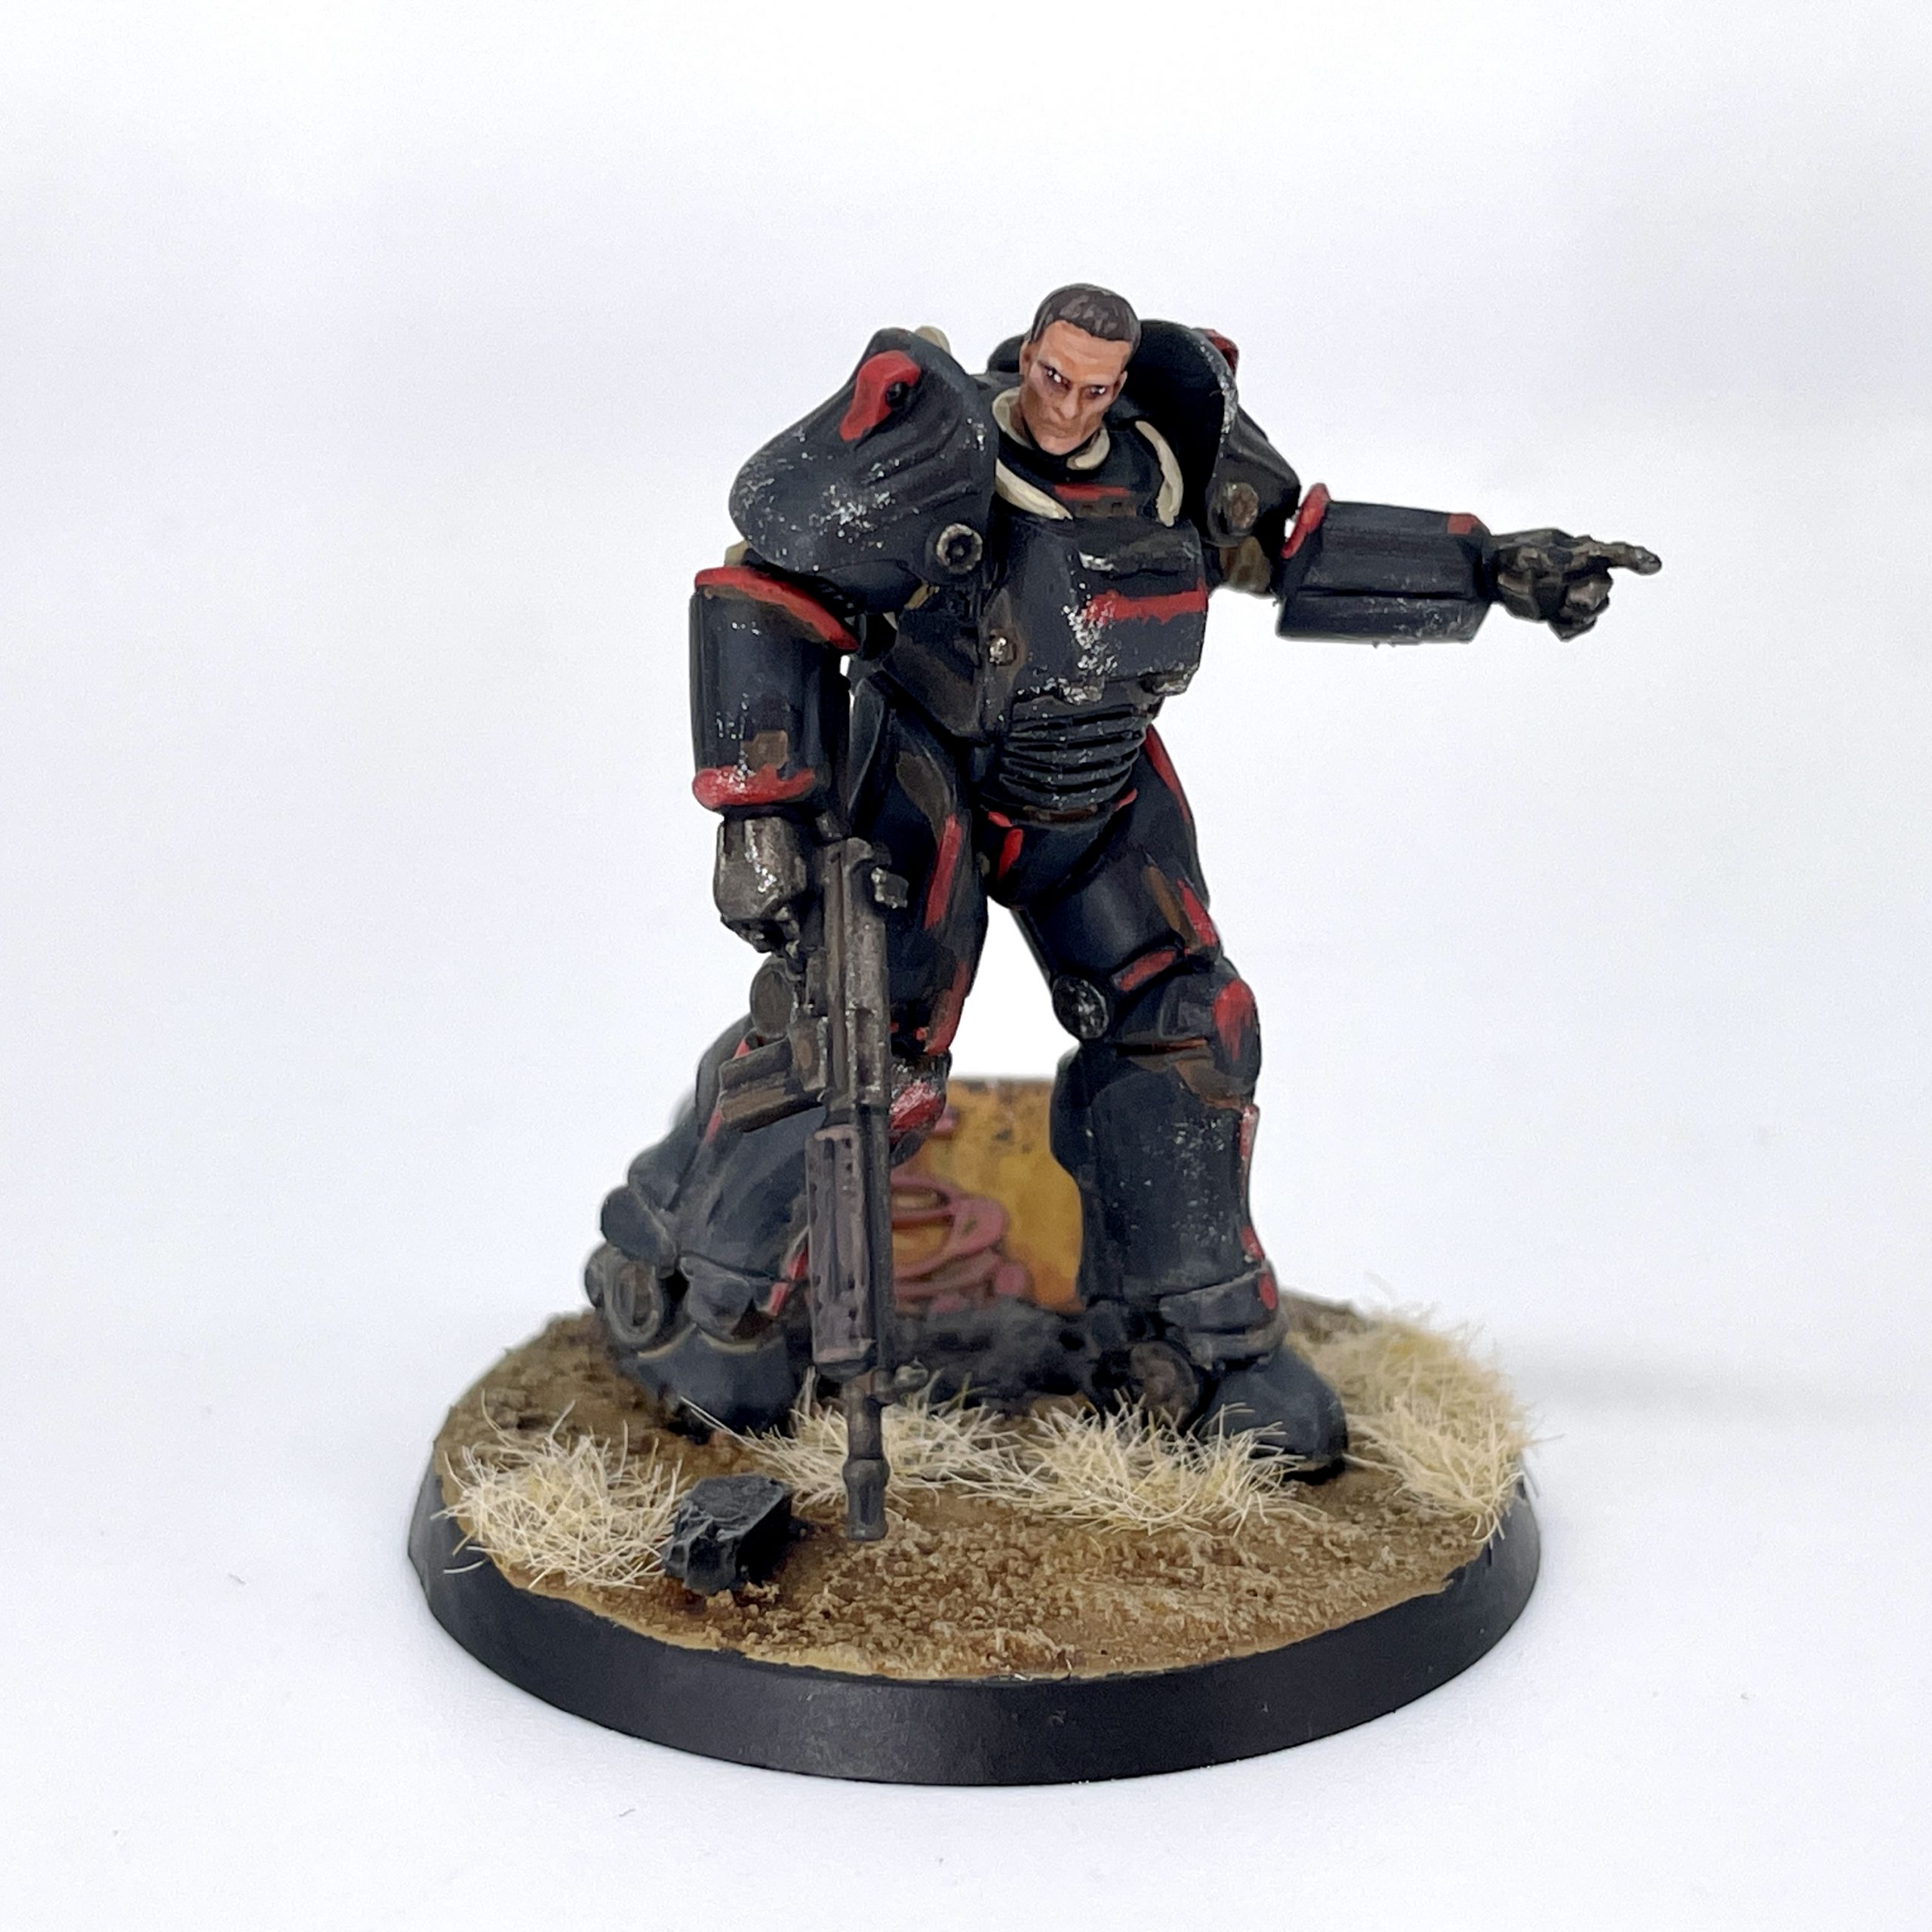
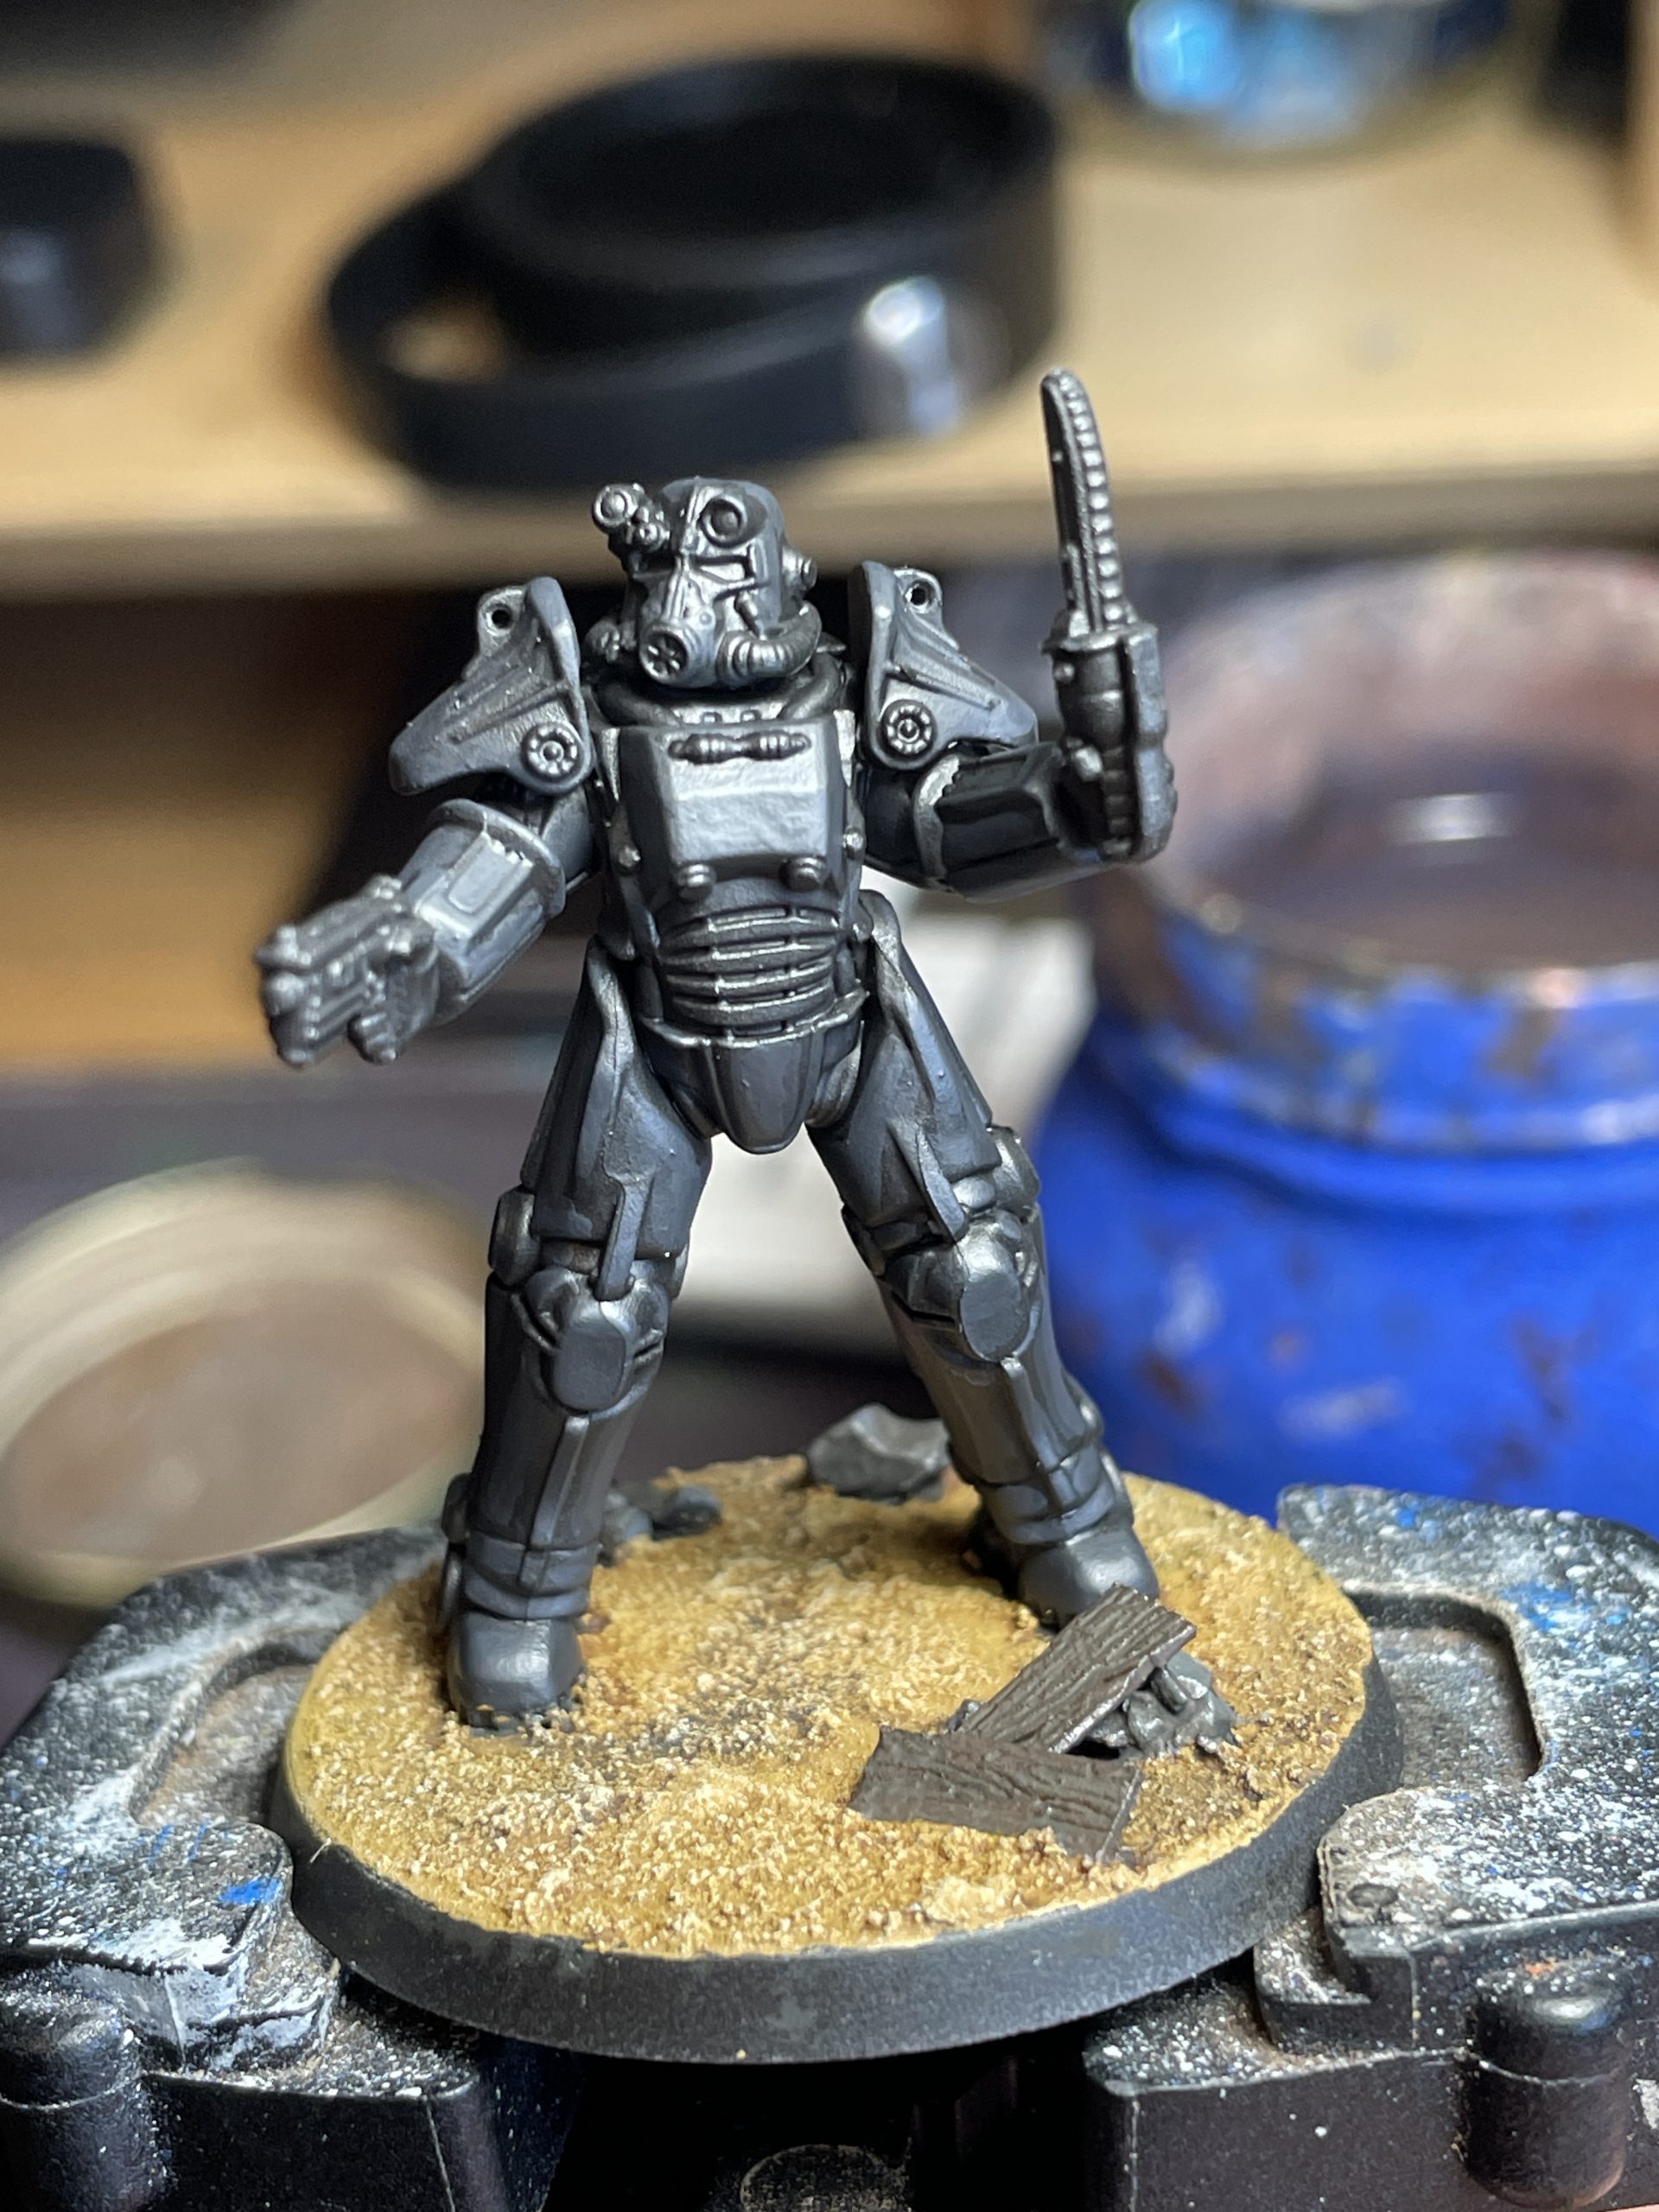 Brotherhood of Steel Outcast WIP. Credit: SRM
For the armor, we’re going to go with a grey black. We’re going to start from our black basecoat and gradually mix black with more and more Corvus Black until we get a dark grey. Each successive layer should concentrate on higher and higher raised areas, leaving pure black in the recesses. I began with a 2:1 Thamar Black to Corvus Black mix, then went with pure Corvus Black, but you could easily add another layer or two between for a more gradual color change. I chose not to highlight further because I didn’t want these to become too grey, and I was going to be dirtying it up later anyway in the weathering step. I then painted the eyes with Dark Reaper for a cool blue-grey that isn’t too distracting, and Dorn Yellow for the headlamps.
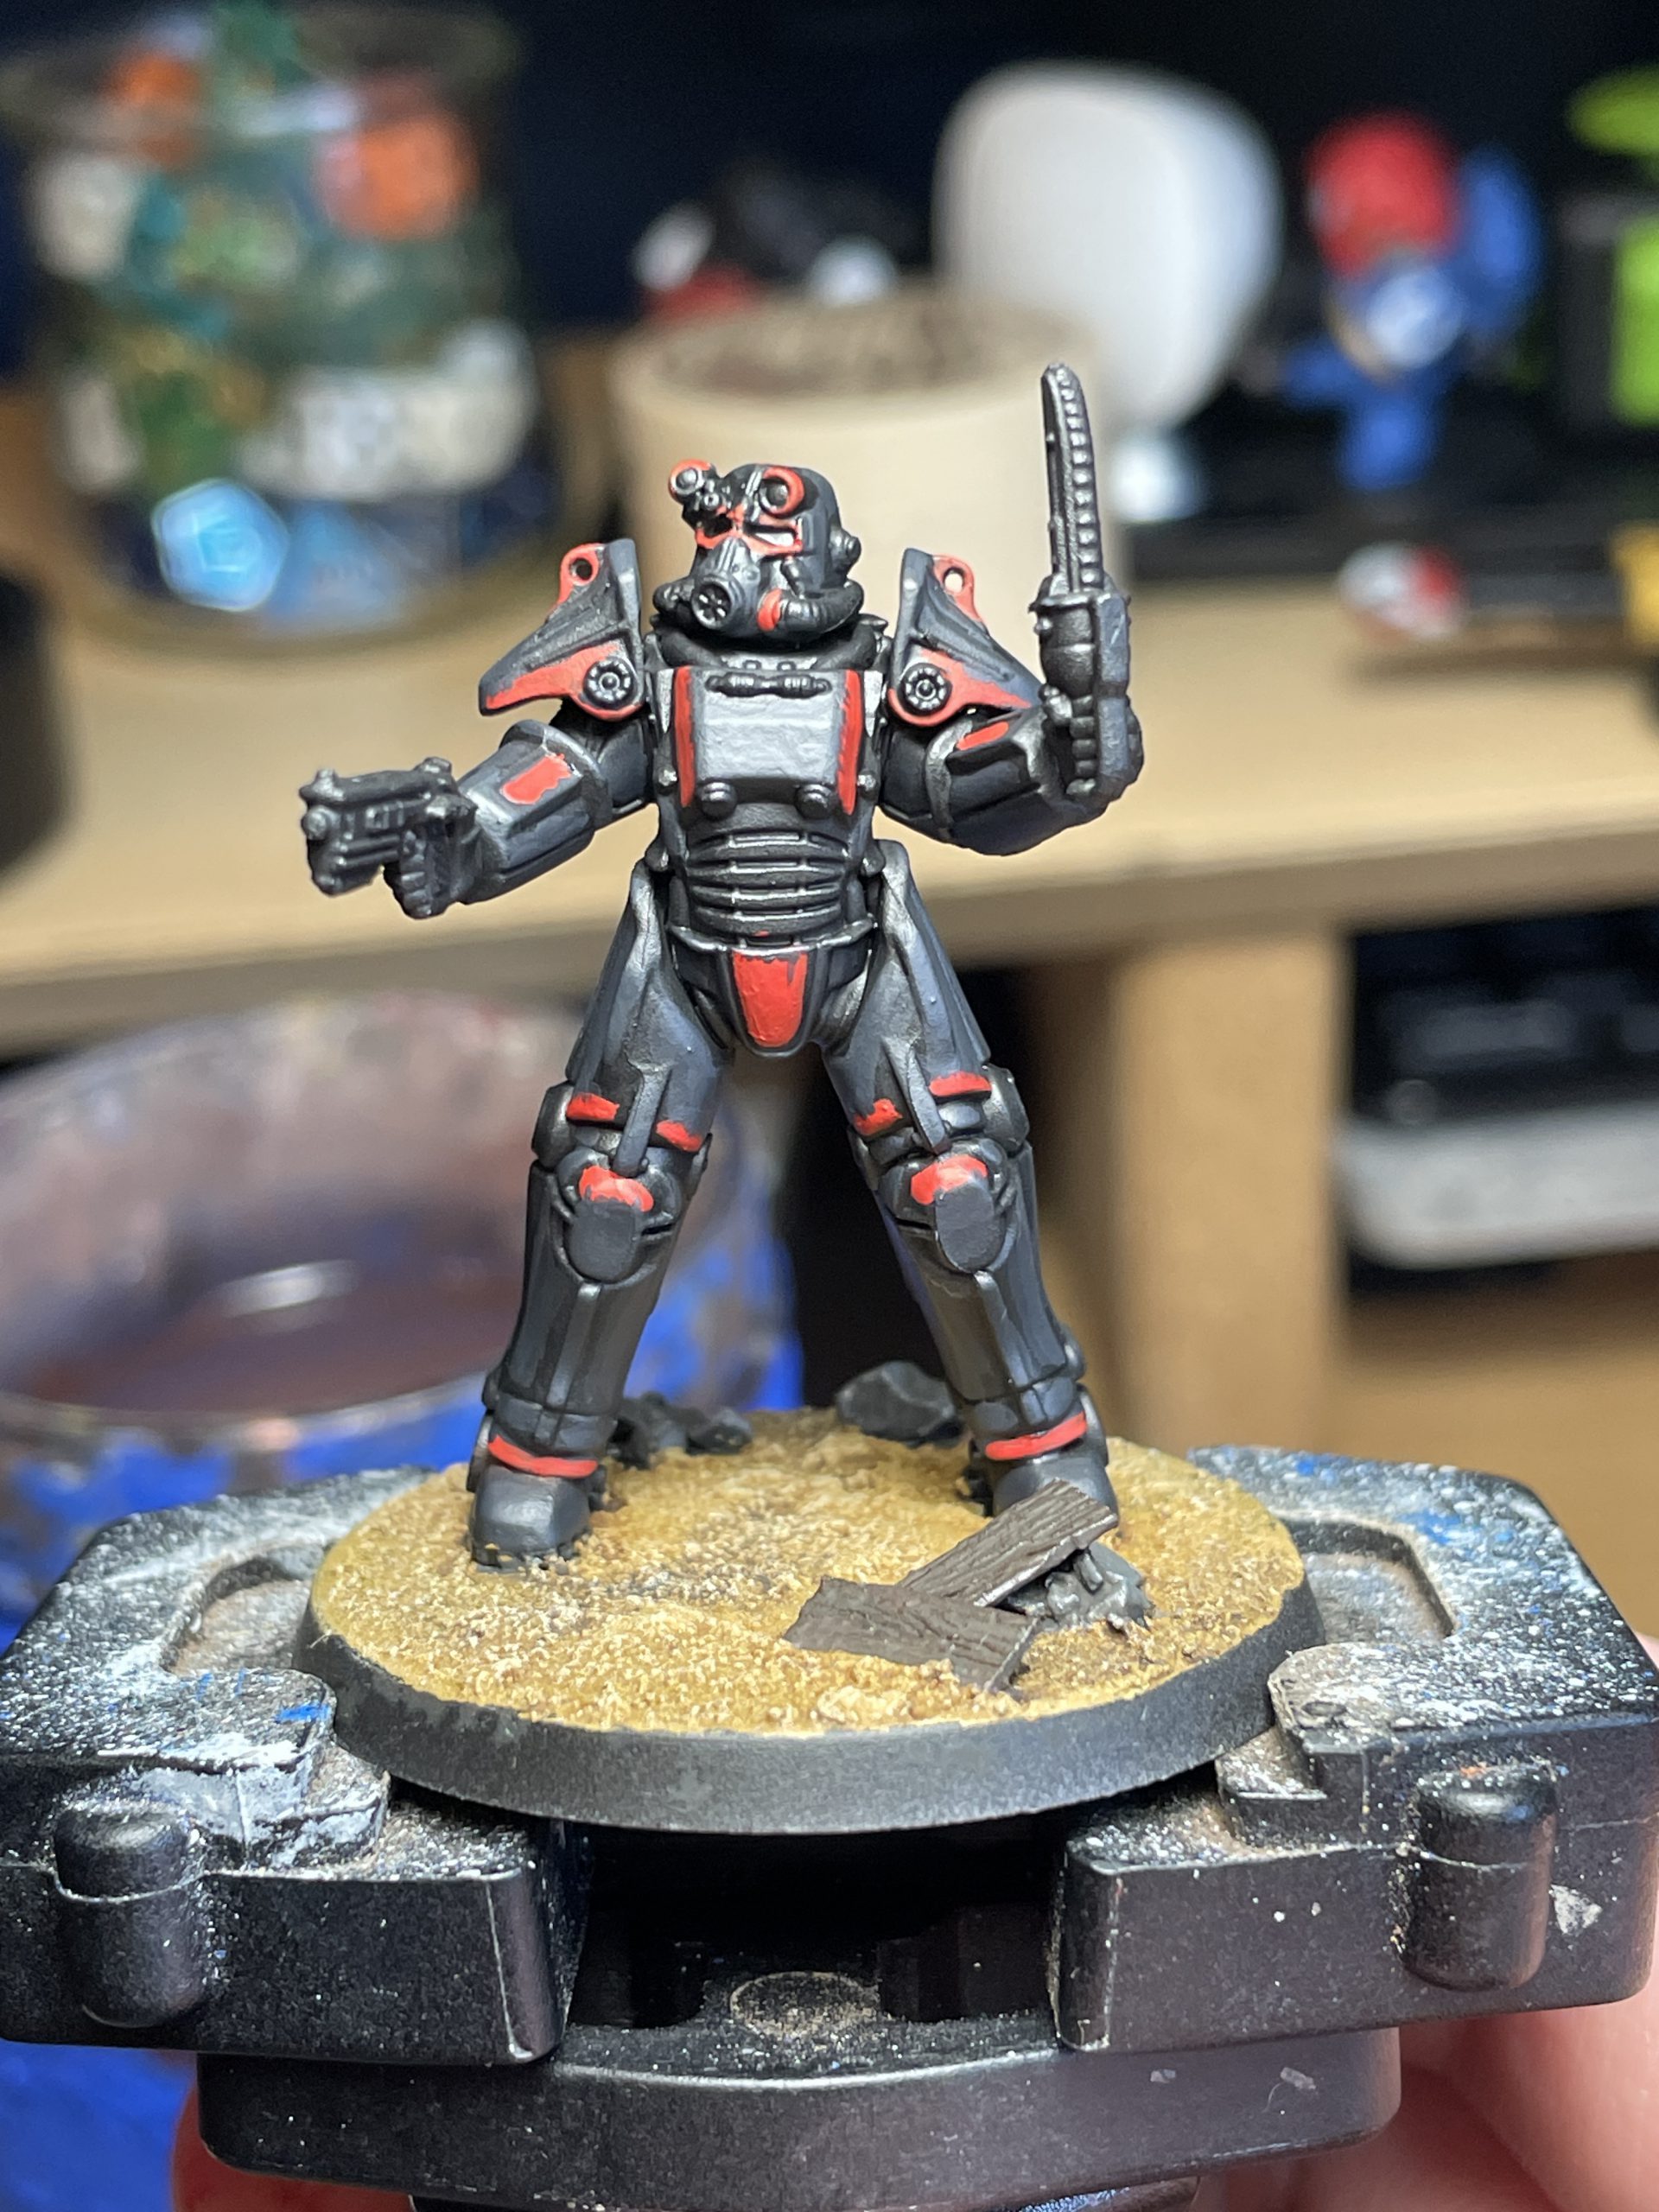
Next up we need to paint in the Outcast red markings. These are one of the trickier parts of the model, as these aren’t well-defined in any reference material, and often look kind of slathered on in-universe. I saw a few of the areas that are typically painted red – parts of the facemask, knees, the edges and vambraces of their armor – and painted them with some ragged hatching of Mephiston Red. I wanted to give them a roughly hand-painted look, like each Outcast painted their own armor with some of these markings. I followed with a 1:1 mix of Mephiston Red and Wild Rider Red focused more towards the edges of these for some highlighting.
There is an undersuit in there, which we’ll paint Zandri Dust. Wash it with Seraphim Sepia, highlight any edges with Ushabti Bone, and move on. I used the same approach on all the piping on the models. There also may be some wood in the stocks of weapons. I painted these Dryad Bark, washed them all over with Agrax Earthshade, then brought them back up to their base color, leaving the recesses shaded. I mixed in a little bit of Gorthor Brown to make a highlight.
They’re not the Brotherhood of Steel for nothing, and they’ve certainly got some bare steel to hit. I want a dirty, grimy, used look for all these, but I’m starting with the relatively bright Ironbreaker. I painted the hands and feet, details on the weapons, some parts of the facemask, a few rivets, and some of the greebles in the back. There’s so many little bits you can hit here, so I do recommend you check the reference material. I then hit all of them with an Agrax Earthshade wash. To differentiate the guns from the rest of the model, I gave them another wash of Nuln Oil. I only did this for part of the Gatling Laser to give it more variation, as otherwise it’s just a big block of the same color. I painted in the big backpack batteries on the Gatling Laser with Averland Sunset and shaded it all over with Seraphim Sepia.

We’re going to add some rust next, using heavily watered down Skrag Brown. It should be almost transluscent by the time you’ve thinned it. Paint it into a few recesses, around rivets, and anywhere you think water would likely settle, and let it dry. These guys take better care of their gear than some, but it’s Fallout – rust is part of the aesthetic. Paint a little in on the weapons and armor. It’s easy to go overboard with this, but I’d save that for a less put together faction, like raiders or settlers.

Next we’re going to sponge some chipping onto the model. Take a torn up piece of foam (I use plucked out inserts from my KR cases), dab it into some silver paint of your choice, and dab most of it off on a paper towel. I used Stormhost Silver for mine. Now, hit the raised edges of the model or anywhere you think they might accumulate wear and tear. Be ginger with it, you can always add more as you go along. You may need to clean up parts of the model after this fact, so if you’re doing bare heads, save those for last.
Speaking of, there’s a million ways to paint skin, and I went with a light skintone on my one unhelmeted guy. I based his skin with Cadian Fleshtone, washed it with Reikland Fleshshade, and brought it back up to Cadian Fleshtone, leaving the shading in the recesses. I gradually mixed in more Kislev Flesh into the Cadian Fleshtone on my wet palette and highlighted all the raised edges, then did so one more time for the very sharpest parts of the face. I painted the eyes black then dotted white in the corners. The hair was just a couple of the browns already on my wet palette mixed together with some of the lighter colors for highlights, I didn’t really plan that out very much. If you wanted a different skintone, you could take any two adjacent skintones in the Citadel range and follow the same technique. Catachan Flesh into Bloodreaver Flesh, Bugman’s Glow into Cadian Flesh, whatever. I’ve got a few recipes further down but you can definitely pick your own here.
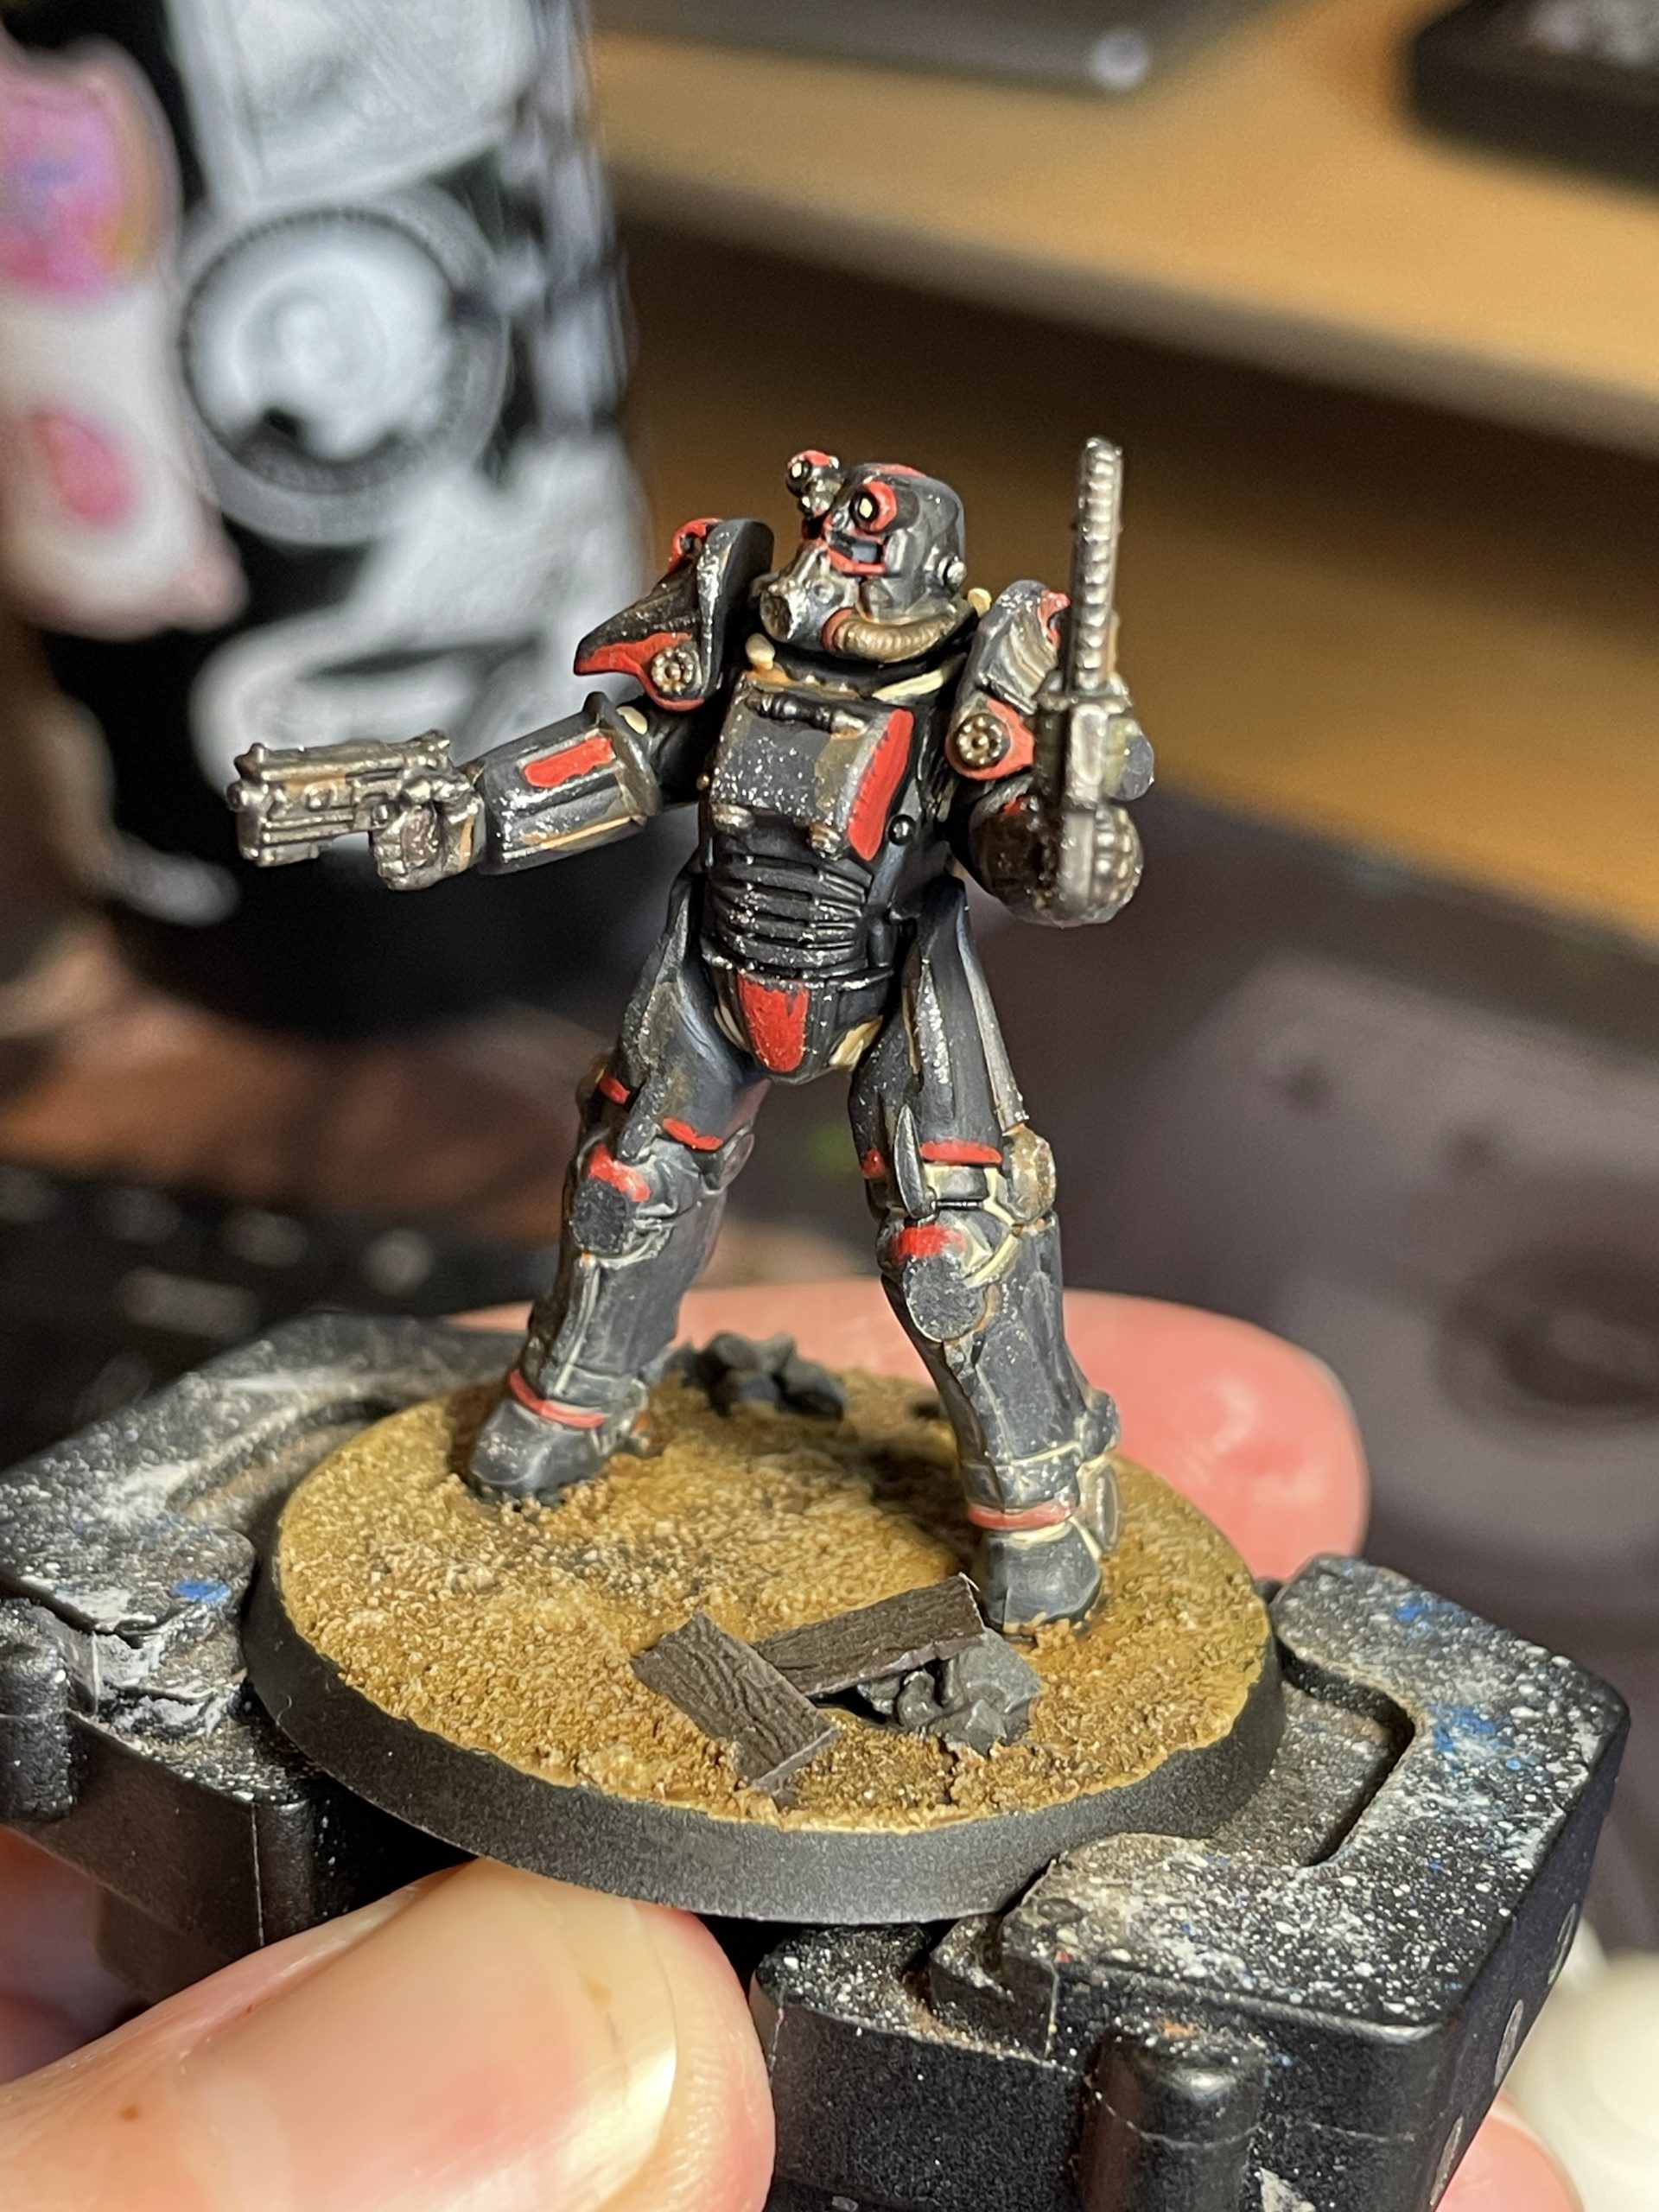
Lastly, we’re going to build up some dust around the feet of these models. You could drybrush them or use weathering powders, but I’m going with a glaze and wipe technique. I’ll take some Karak Stone, water it down heavily, like 4-5 parts water to 1 part paint, and slop that all over their feet up to their knees or so. I’ll then take a paper towel and wipe off the excess off the raised areas, leaving some in the recesses. It’ll look dusty when it dries.
The Finished Product
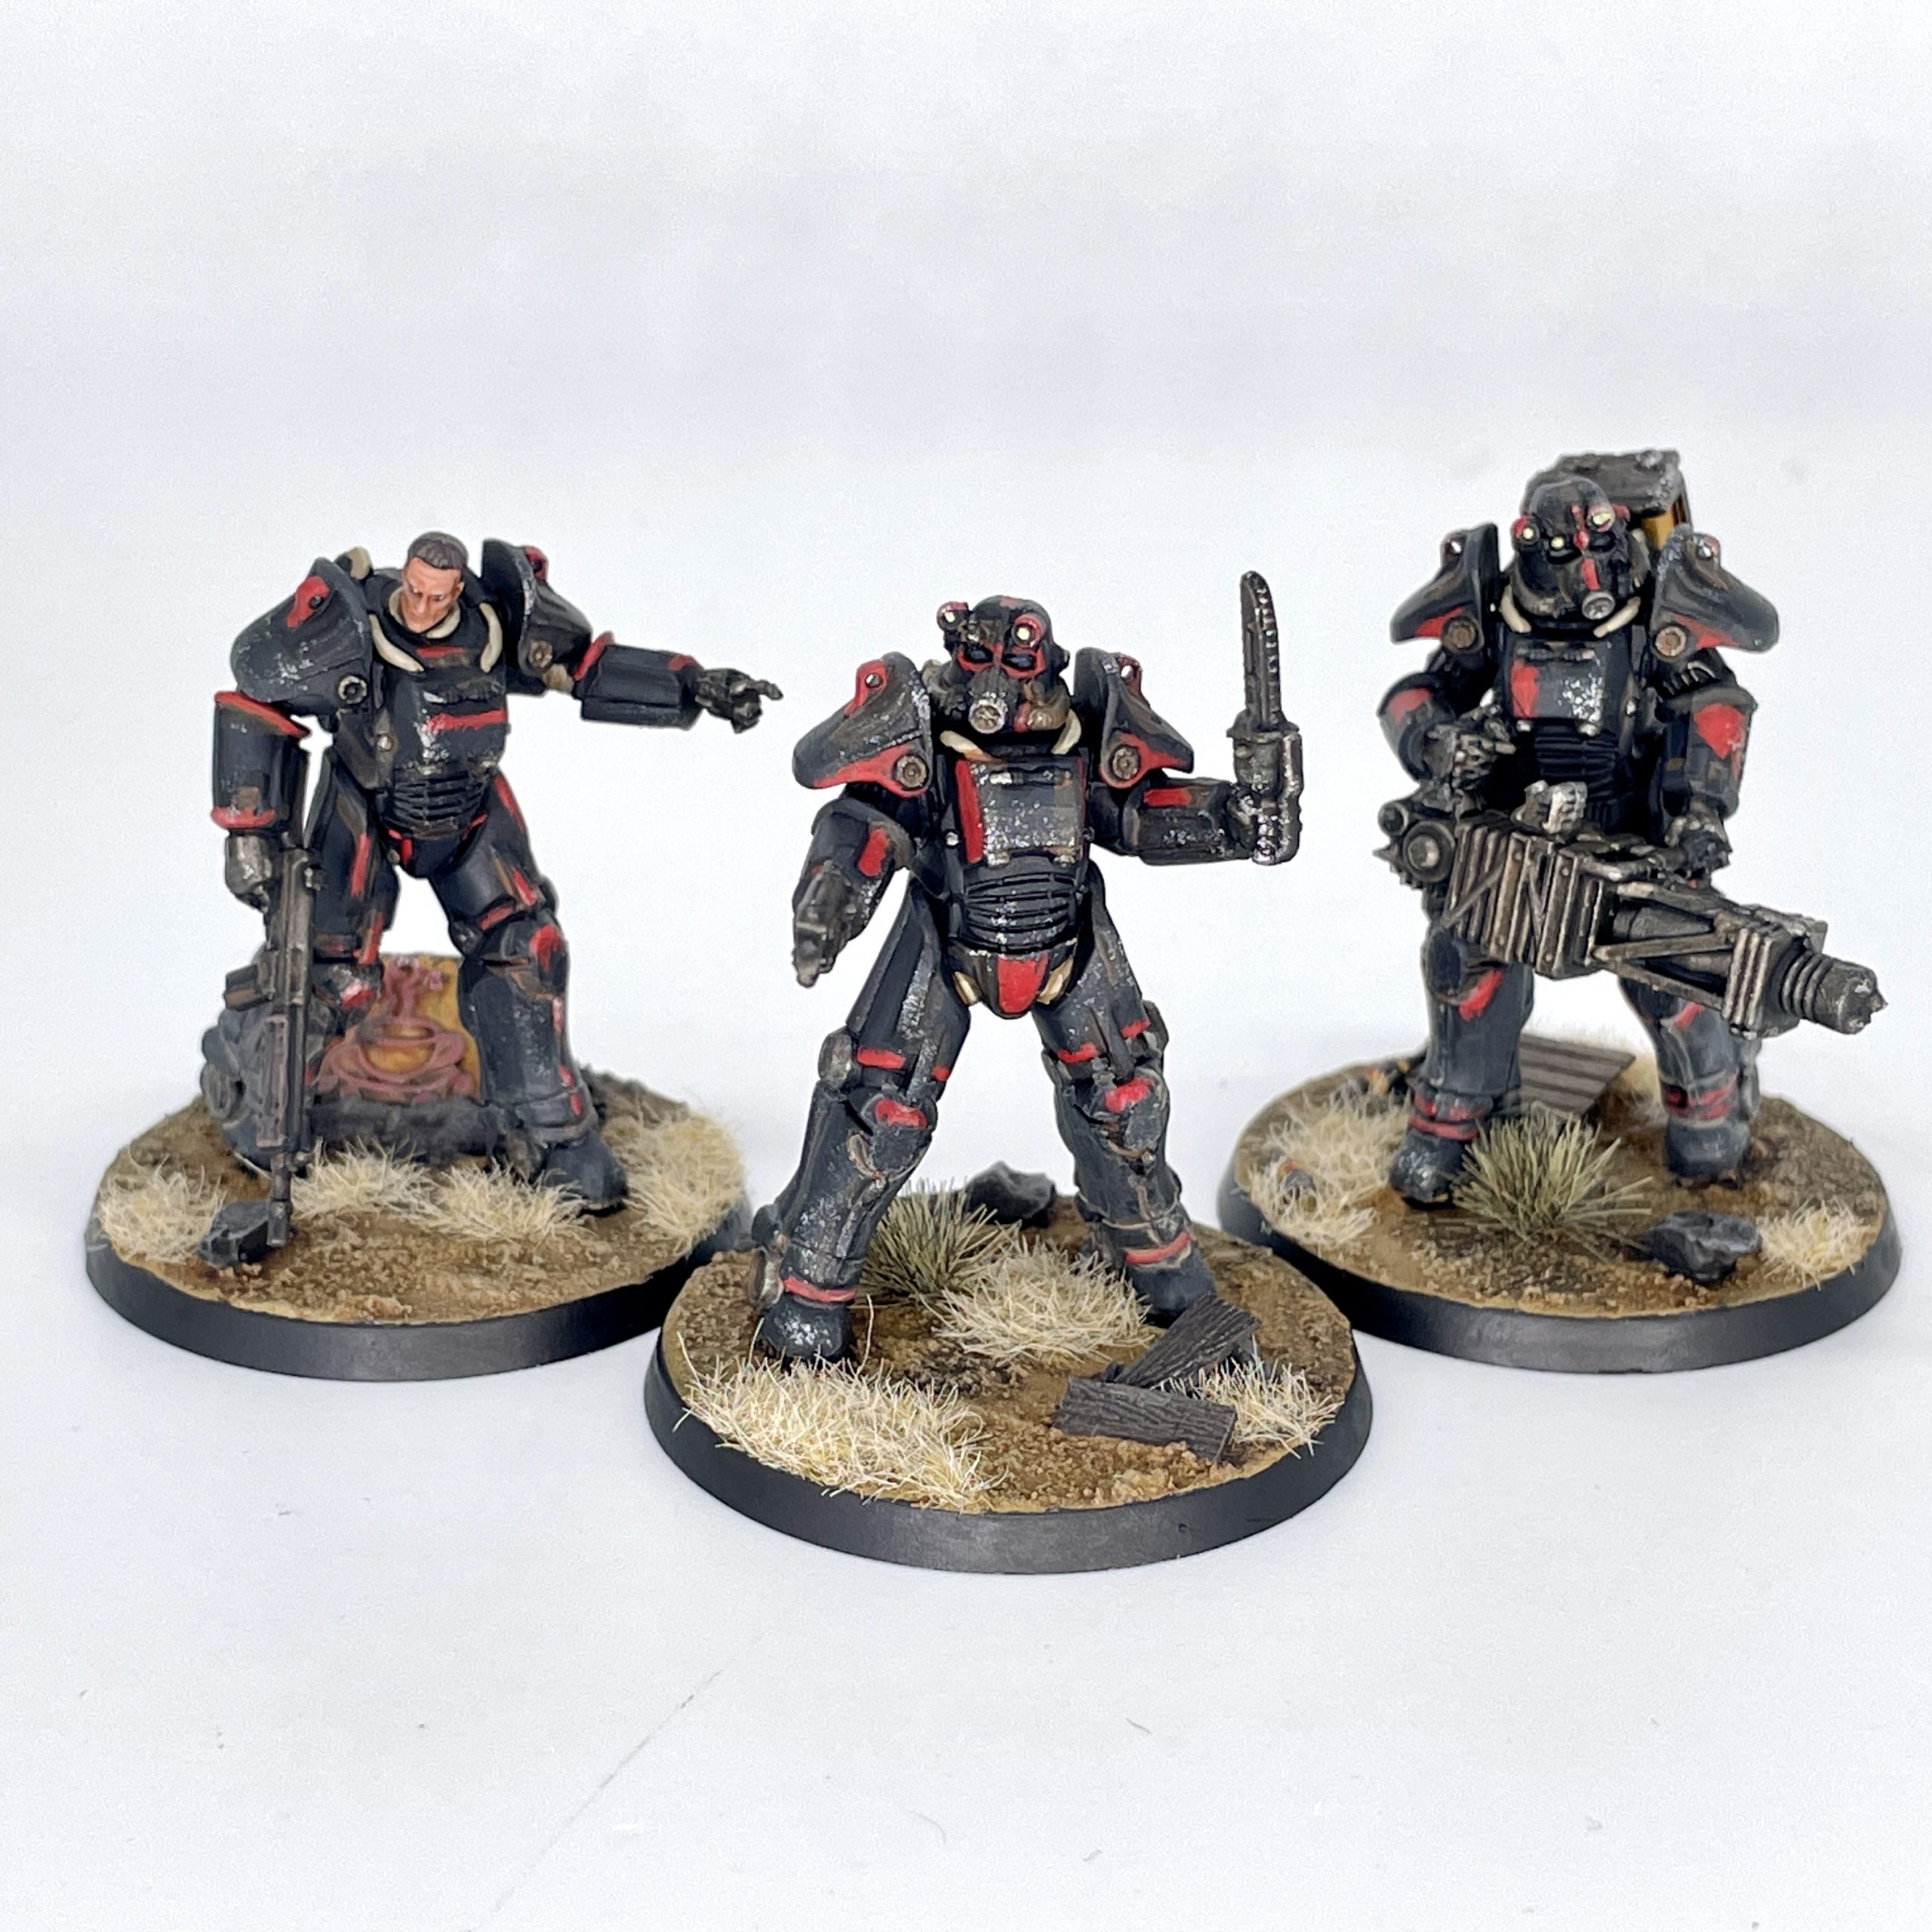
Following this tutorial, you should end up with something like this crew of jobbers pictured. Between the three of them, you should get a good feel for a few of the ways you can paint the Outcast red markings, as well as how the various materials on these models can work together. Recipes are all posted below:
Sand:
- Armageddon Dust
- Wash Seraphim Sepia, applying a little bit of Agrax Earthshade and Athonian Camoshade randomly while it’s still wet
- Drybrush Karak Stone
Outcast Black Power Armor:
- P3 Thamar Black
- Layer up with a 2:1 mix of Black and Corvus Black, leaving pure black in the recesses
- Second layer of pure Corvus Black on the raised areas and centers of armor panels
- Paint the lenses Dark Reaper
- Paint headlamps Dorn Yellow
Outcast Red Power Armor Markings:
- Mephiston Red, feathered for a rough texture
- 1:1 mix of Mephiston Red and Wild Rider Red focused towards the edges and center
Steel:
- Ironbreaker
- Agrax Earthshade/Nuln Oil
- Thinned Skrag Brown (3:1 water to paint) in some recesses for rust
- Stormhost Silver highlight
Power Armor Joints and Piping:
- Zandri Dust
- Wash Seraphim Sepia
- Highlight with Ushabti Bone
Olive Drab Weapon Casings:
- Castellan Green
- Agrax Earthshade
- Loren Forest highlights
- Details in Averland Sunset
Laser Rifle Microfusion Cells:
- Averland Sunset
- Agrax Earthshade
- Yriel Yellow highlight
- Mephiston Red stripe
Light Skin:
- Cadian Fleshtone
- Reikland Fleshshade
- Cadian Fleshtone highlight
- Mix in Kislev Flesh for a highlight
Medium Skin:
- Knight- Questor Flesh
- Reikland Fleshshade
- Knight- Questor Flesh highlight
- Mix in Cadian Fleshtone for a highlight
Dark Skin:
- Catachan Flesh
- Reikland Fleshshade
- Catachan Flesh highlight
- Mix in Bloodreaver Flesh for a highlight
Wood:
- Dryad Bark
- Agrax Earthshade
- Gorthor Brown
Headlamps:
- Dorn Yellow
- Seraphim Sepia
If you have questions, feedback, or your own band of wasteland weirdos you’d like to show off, drop us a note in the comments below or email us at contact@goonhammer.com.
